Need to extract a .xip file? Maybe you’re trying to figure out what a .xip is that you came across on a Mac? The XIP (.xip) file format is an archive that is similar to zip, except that .xip files typically include a digital signature that can be verified on the operating system before the archive is expanded. Thus, the .xip signature serves as a means to verify that the file has not been modified since it was originally packed by the creator of the archive file, which can protect against problems related to file transfers, disk errors, and file tampering.
Most Mac users won’t encounter any .xip file, but advanced Mac users and Mac developers often do, especially since many versions of the Xcode developer suite are available to download from Apple as a verified Xcode .xip file.
This article will demonstrate two different easy ways to open and extract XIP files on the Mac.
How to Open and Extract XIP Files in Mac OS
The simplest way to open and extract a .xip archive file is with Archive Utility, which is bundled with the Mac operating system. This is must like opening a .zip file too.
Assuming you haven’t associated the xip format with any third party archive management tools, you can typically open a .xip file in Archive Utility simply by double-clicking the .xip file within the Finder of Mac OS.
If you have associated all archive file formats with another third party tool, you can still access and use Archive Utility by opening it manually at the following location, or by opening it through Spotlight:
Launching Archive Utility and choosing the .xip file from the app, or by dragging and dropping the .xip file into the apps icon, will extract the .xip file as expected.
Since the XIP is basically a ZIP, it will be extracted just like one, placing the archive contents into whatever directory the original file.xip is contained within.
How to Extract XIP Files from Command Line on Mac
Another method of extracting .xip files is using the command line xip tool.
Open the “Terminal” application found in /Applications/Utilities/ and run the following command:
xip -x file.xip
Hit return to extract the targeted xip archive
For example, if you’re decompressing a XIP file named “Xcode12beta.xip” that is located on your desktop, then the command would be:
xip -x ~/Desktop/Xcode12beta.xip
By the way, the xip command can also be used to create new xip files, though that’s a topic for another article.
According to the man page on xip:
The xip tool archives one or more files or directories into a signed XIP file. A XIP file is an analog to zip(1), but allows for a digital signa- ture to be applied and verified on the receiving system, before the ar- chive is expanded. When a XIP file is opened (by double-clicking), Ar- chive Utility will automatically expand it (but only if the digital sig- nature is intact).
You can learn more about the xip command line tool with ‘man xip’ if interested.
Apple has announced notable updates to the MacBook Air, Mac Mini, and iPad Pro. The new MacBook Air features a Retina display and Touch ID, the Mac Mini features powerfully revamped internals, and the iPad Pro now features slimmer bezels and support for Face ID and a new Apple Pencil.
Aside from new hardware updates discussed below, Apple also released various operating system updates to their product lines as well, including iOS 12.1, tvOS 12.1, watchOS 5.1, and macOS Mojave 10.14.1.
New MacBook Air with Retina Display (late 2018 model)
The revamped MacBook Air with Retina display weighs in at 2.75 lbs and now features a 2560×1600 13.3″ display with greater color support and smaller screen bezels.
The late 2018 MacBook Air has a 1.6Ghz dual-core Core i5 CPU and includes two USB-C ports and a headphone jack, removes MagSafe as a charging mechanism in lieu of one of the USB-C ports, adds a Touch ID fingerprint sensor, and is available in space gray, gold, and silver color options. Users can customize the MacBook Air to have up to 16 GB of RAM and a 1.5 TB SSD.
The keyboard is apparently the same third-generation Apple butterfly keyboard as what is available in the latest MacBook Pro models, though there is no Touch Bar included meaning you will get a hardware escape key and function row instead.
The new Retina MacBook Air starts at $1199 and can be ordered today, becoming available on November 7.
Apple has posted an introductory video of the New MacBook Air with Retina display (late 2018) which you can view below:
New Mac Mini (2018 model)
The revamped Mac Mini has a space gray finish and comes with a quad core Intel i3 CPU, upgradable to up to 6 cores. Users can also customize the new Mac Mini to have up to 64 GB RAM and up to 2 TB SSD.
The new Mac Mini has rich port options compared to other Macs, including gigabit ethernet, 4 Thunderbolt / USB C ports, HDMI output, 2 USB-A ports, a headphone jack.
Mac Mini now starts at $799, with orders available today for availability on November 7.
Apple has provided an introductory video about the new Mac Mini (late 2018), posted below:
New iPad Pro (3rd generation, 2018)
The new iPad Pro slims down the devices bezels, remove the Home button, removes the headphone jack, replaces the Lightning port with a new USB-C connector, includes Face ID as an authentication method, and can now magnetically attach and charge the new Apple Pencil.
iPad Pro is available in 11″ and 12.9″ screen options, features an A12X CPU with 8 cores, and is available with storage sizes available at 64 GB, 256 GB, 512 GB, and 1 TB.
The iPad Pro 11″ model starts at $799 and the 12.9″ model starts at $999. You can order the new iPad Pro today with delivery on November 7.
Apple has posted a video introducing the new iPad Pro, available to watch below:
Tucked away in a press release for the new MacBook Air, Apple also states that the existing MacBook Pro will have an optional Radeon Pro Vega graphics card option starting next month for users requiring additional GPU performance on the MacBook Pro line.
As mentioned earlier, Apple also released software updates to macOS Mojave 10.14.1, iOS 12.1, watchOS 5.1, and tvOS 12.1. Mac users running prior versions of MacOS Sierra and MacOS High Sierra will also find security updates available for their Macs.
Advanced Mac users can boot into Single User Mode, which loads directly into the command line of Mac OS and skips the familiar friendly user interface.
Booting into Single User Mode on a Mac can be helpful for some troubleshooting purposes and administrative tasks, but is generally best reserved for use by advanced Mac users with thorough knowledge of the command line.
This tutorial will show you how to boot into Single User Mode and how to exit Single User Mode on any Mac.
How to Boot Single User Mode on Mac OS
Getting into Single User Mode on a Mac can be done from system start or a system restart, you must act immediately during the boot process. Here is how to enter Single User Mode:
Boot up the Mac or restart the computer
As soon as the boot process begins, hold down COMMAND + S keys together
Keep holding the Command and S keys until you see white text on a black background, indicating that single user mode is loading
Enter the admin password to gain access to the Mac via Single User Mode
If you use FileVault disk encryption (and all Mac users should) then you will need to enter the FileVault password before being able to boot into Single User Mode.
Similarly, if you use a Mac firmware password you will need to enter that firmware password before you can load Single User Mode.
Once you’re authenticated and in Single User Mode you can run tools like fsck to repair a disk or hit the escape key twice to list all available command line commands and tools. Note that you may need to mount the file system to gain access to more familiar options.
Note that while Single User Mode gives you access to a command prompt, it is with root access and is entirely different from the regular command line interface accessed from the Terminal, with less commands, tools, programs, and other data available (without mounting the file system anyway). It’s intended to be lower level than a casual jaunt in the Terminal or using Terminal via Recovery Mode, which is why it’s useful for performing disk maintenance and repair options.
How to Exit Single User Mode on a Mac
So now you’re at the Single User Mode command line and you want to boot back into the regular Mac OS user interface. That’s easy, just initiate a command to reboot the Mac from the command line:
From the Single User Mode command prompt, type the following syntax:
shutdown -r now
Optionally, you can use the simpler:
reboot
Hit return to reboot the Mac, this time don’t hold down any command sequence and Mac OS will load as usual
You can also shut down the Mac from the command line within single user mode if need be, perhaps to adjust hardware or to relocate a machine, or perform some other administrative or troubleshooting task. When you boot back up again, the Mac will boot as usual and not into Single User Mode.
The Dock in MacOS Mojave includes a new feature that displays a trio of recently used applications alongside your regular Dock app icons. The Recent Applications section of the Dock adjusts and updates automatically as you launch and quit apps, and while it offers a convenient way to reopen apps you were using not long ago, some users may prefer to not have the feature enabled for whatever reason.
If you want to disable the Recent Applications section of the Dock in MacOS, perhaps to reduce clutter or to make the Dock footprint smaller, then read on to learn how to make the change in MacOS 10.14 or later.
How to Disable Recent Applications in Dock for MacOS
Go to the Apple menu and choose “System Preferences”
Choose the “Dock” preference panel
Uncheck the box next to “Show recent applications in Dock” to hide the recent apps from the Dock in Mac OS
Once you toggle off the “Show recent applications in Dock” switch, the app icons shown in the Recent Apps section will immediately disappear from the Mac Dock, shrinking the Dock down a bit.
Here’s an example of what the Dock looks like with the Recent Applications feature disabled:
And here’s an example of the same Dock and what it looks like with Recent Applications feature enabled, which is the default in MacOS:
As you can see you’ll find up to three app icons in the Dock that compose the “Recent Apps” section, and by toggling the setting off or on that’s where the recent app icons will be visible or hidden.
Of course you can always re-enable this feature by returning to the System Preferences of Mac OS and toggling the Dock setting for “Show recent applications in Dock” back to the ON position.
If you’re currently running macOS Mojave, you can re-download a macOS High Sierra installer for whatever reason to macOS Mojave. Re-downloading older versions of macOS system software can be desirable for a variety of reasons, and in this case getting the older High Sierra release is most often to create a macOS High Sierra USB installer or for running an older macOS release in a virtual machine or something of that nature.
If you’ve searched the Mac App Store from Mojave, you’ve probably noticed the High Sierra installer is nowhere to be found. But not to worry, we’ll show you how you can download macOS High Sierra 10.13.6 from macOS Mojave 10.14.
How to Download macOS High Sierra from Mojave
Need the macOS High Sierra installer again but you’re running macOS Mojave? Here’s how to get it:
Note that this is not a downgrade process nor is it intended to be, it’s merely downloading the macOS High Sierra installer onto a Mac running the newer macOS Mojave release. You can not install an older macOS release over a newer release. Instead, if you want to downgrade for whatever reason, your best bet would be to downgrade from macOS Mojave to High Sierra (or earlier) by using Time Machine backups made prior to the initial Mojave update. Another option would be to perform a macOS High Sierra clean install, though a clean install completely erases a Mac and removes all data from the computer, making it less practical for most users given that most users want to maintain their personal data.
Interestingly enough, if you try and search the Mac App Store for “macOS High Sierra” from within macOS Mojave, you will not find the installer in the Mac App Store listings. For whatever reason, Apple has hidden the installer, and thus you must click on a direct download link that opens directly to the MacOS High Sierra download page within the App Store.
Users who had previously downloaded other versions of macOS (including High Sierra) using the same Apple ID can also find the prior macOS releases available from the “Purchases” section of the Mac App Store.
If you’re a Mac command line user you may have noticed that many frequently used commands entered into the Terminal (or iTerm) result in an “Operation not permitted” error message since updating to MacOS Mojave 10.14 or later. The “Operation not permitted” error in the Terminal can be seen after issuing even simple commands like using ‘ls’ ‘mv’ and ‘cp’ within the users own directory, but also in many other directory locations on the Mac, and when trying to use many defaults commands. Obviously this type of error message makes navigating and using the command line in MacOS Mojave to be quite difficult if not impossible for many purposes. Don’t worry, the Terminal is not broken in new MacOS versions.
This walkthrough will show you how to fix “Operation not permitted” error messages seen at the command line in Terminal for Mac OS in Mojave 10.14 or later.
How to Fix “Operation not permitted” Error in Terminal for Mac OS
Pull down the Apple menu and choose ‘System Preferences’
Choose “Security & Privacy” control panel
Now select the “Privacy” tab, then from the left-side menu select “Full Disk Access”
Click the lock icon in the lower left corner of the preference panel and authenticate with an admin level login
Now click the [+] plus button to add an application with full disk access
Navigate to the /Applications/Utilities/ folder and choose “Terminal” to grant Terminal with Full Disk Access privileges
Relaunch Terminal, the “Operation not permitted” error messages will be gone
If you have not encountered the “Operation not permitted” error message in the Terminal of MacOS (Mojave 10.14 or later) yet, then it’s likely because you haven’t wandered into a directory or file path that has the additional access restrictions (or that you don’t use Terminal, in which case this entire article is not for you).
While many of the various core System and root directories will throw error messages in macOS Terminal too, you can also find the error message even when trying to work in the users own Home directory, including in many of the user ~/Library/ folders, like ~/Library/Messages (where iMessage attachments and chat logs are stored in Mac OS) and ~/Library/Mail/ (where user-level mail plugins, mailbox data, and other Mail app data is stored), and many others.
You can test this yourself, before and after making the settings adjustment outlined above with a simple command like using ls on one of the protected folders:
ls ~/Library/Messages
If Terminal does not have Full Disk Access granted, you will see the “Operation not permitted” error message.
If Terminal does have Full Disk Access granted, or if SIP is disabled, you will not see that error message in the MacOS Terminal.
In case you were wondering, yes that does mean there are actually two ways to fix the “Operation not permitted” errors you may encounter in MacOS Terminal; the first which we detail here is rather simple that grants additional access privileges to Terminal app, and the other is a bit more dramatic which involves disabling System Integrity Protection on the Mac which is generally not recommended and we won’t specifically cover here, though simply disabling SIP and rebooting is typically enough to make the error go away if you’d rather go that route.
The “Operation not permitted” message is one of a variety of command line errors you may encounter in Mac OS Terminal. Another frequently seen command line error is the the “command not found” error message which can also be encountered in the Terminal for MacOS for a variety of different reasons as well.
If you are (or were) participating in the beta testing program for MacOS Mojave and have since updated to the final version of Mojave, you may wish to no longer receive beta software updates. By opting out of beta updates in MacOS Mojave, you will be sure that a Mac only receives final stable builds of future macOS releases, rather than any of the ongoing beta testing builds.
Halting the beta system software updates is recommended for most Mac users who were participating in the MacOS Mojave beta program at any casual level, particularly public beta users. If you’re a developer running beta system software for testing purposes, this may not apply to you.
Read on to learn exactly how to opt out of beta system software updates and stop receiving them on a Mac.
Note: Apple has changed the way to opt a Mac out of the beta software updates, and while in previous versions of Mac OS X you could opt-out of beta updates through the App Store control panel in a fairly obvious manner, MacOS Mojave now has you visit a different preference panel to then find an obscure small button to un-enroll a Mac from beta updates. If you previously went looking for the setting and missed it, you’re not alone.
How to Stop Receiving Beta Updates in MacOS Mojave
No longer want to get beta system software updates in MacOS Mojave? Here’s how to leave the beta program and instead get final stable builds of future MacOS releases instead:
Go to the Apple menu and choose “System Preferences”
Choose the “Software Update” preference panel
On the left side of the Software Update control panel, look for the small text that says “This Mac is enrolled in the Apple Beta Software Program”
Directly underneath the beta enrollment message, click on the tiny blue text that reads “Details…” (yes it’s a button)
A pop-up message will appear on screen reading “This Mac is enrolled in the Apple Beta Software Program. Do you want to restore default update settings? Any previous updates will not be removed, and this Mac will no longer receive beta updates.”
Choose “Restore Defaults” to opt-out of the MacOS Beta program and stop receiving beta MacOS software updates
Enter the admin password if requested, then close System Preferences when finished
That’s it, now only final public builds of MacOS Mojave and future Mac OS system software updates will be shown in Software Update on that Mac. For example, you would only see MacOS 10.14.1 final rather than any of the various beta versions of that release.
You should not opt out of receiving beta software updates if you are actively running a beta version of MacOS, instead you’d want to first update macOS Mojave beta to the final version of macOS Mojave, and then opt out of the beta updates afterwards.
The beta update opt-out button is a bit obscure and the wording contained within the dialog is a little confusing, particularly compared to opting out of beta updates in prior versions of Mac OS system software, but nonetheless if you choose “Restore Defaults” after clicking the tiny ‘Details’ button then that Mac will stop getting any beta software updates.
A similar tip is available for iPhone and iPad users, and you can easily leave the iOS 12 beta testing program on any enrolled iOS device as well. Once again you’d only want to do that if you’re actively on an iOS final release.
As you may know by now, the list of MacOS Mojave compatible Macs is more strict than previous releases of Mac OS system software, but that doesn’t necessarily mean you can’t install and run macOS Mojave on some unsupported Macs. If you’re an advanced Mac user and you’re reasonably brave (and have adequate backups), then it turns out you might be able to install and run MacOS Mojave on unsupported Mac hardware after all, thanks to a free third party tool from the technical wizard known as “DosDude”.
Essentially the Mojave Patcher Tool creates a modified USB installer drive (similar to the regular Mojave boot installer drive you can make) which you can then use to install not only macOS Mojave on the otherwise unsupported Macs listed below, but also a series of patched macOS Mojave component files that allow it to boot.
Just a quick word of caution: while you may be able to get macOS Mojave running on an unsupported Mac, this is truly only for advanced users who are adventurous. You certainly wouldn’t want to try this on a Mac that you must have performing in an optimal setting at all times, or on your only computer, but if you feel like tinkering around and running macOS Mojave on an unsupported Macintosh computer you can certainly try it out. Because it patches the operating system and installer, not everything is going to work perfectly on all machines – for example, on some machines networking may not work, or an iSight camera may not work, or GPU acceleration may not function – and there could be various bugs, performance quirks, and other theoretical problems with attempting this, but for the truly tech savvy and brave, the Mojave patcher tool and accompanying walkthrough from DosDude can get the job done.
Check out DosDude’s Mojave patcher and walkthrough here to get macOS Mojave running on an unsupported Mac
The DosDude website has both a complete tutorial available at the above link, along with the downloadable patcher tool.
Dosdude also produced a YouTube video demonstrating macOS Mojave on a technically unsupported older MacBook Pro 17″ model from 2009, and Mojave actually appears to run pretty well on the machine:
Thanks to the Dosdude website for the screenshot above of the “About This Mac” screen, which is showing Mojave on an older unsupported Mac.
So while the official list of supported Macs for macOS Mojave is pretty strict in comparison, and you can’t just download Mojave and install it on unsupported hardware without the DosDude utility, the unofficial list of Macs that can run the OS through the tool is much more generous as you can see below, with many perfectly good Macs making the cut.
List of Unsupported Macs That Can Run MacOS Mojave with DosDude Mojave Patcher
Unsupported Macs that apparently can use the Mojave patcher to install macOS Mojave include the following:
– Late-2008 or newer MacBook Air or Aluminum Unibody MacBook: – MacBookAir2,1 – MacBookAir3,x – MacBookAir4,x – MacBook5,1
– Early-2009 or newer Mac Mini or white MacBook: – Macmini3,1 – Macmini4,1 – Macmini5,x – MacBook5,2 – MacBook6,1 – MacBook7,1
– Early-2008 or newer Xserve: – Xserve2,1 – Xserve3,1
As you can see, the potential list of Macs that can run Mojave with the assistance of this process is much more thorough than what Apple officially supports. But caveat emptor, as with all software modifications.
Will everything be perfect? Certainly not. Will performance be better than some other versions of Mac OS or Mac OS X? Probably not, it might even be worse. Will everything work exactly as expected, as if it was an official support from Apple? No, probably not. But that doesn’t mean that it’s not worth pursuing for some Mac users, and perhaps the better features in macOS Mojave are too compelling to not try out by venturing into the waters of
If this sounds appealing to you, then check out the Dosdude tutorial and Mojave patch tool. Just remember this is NOT an official patch or release from Apple, and due to the technical nature of this it isn’t for the faint of heart, you will absolutely need above average technical knowledge, patience, and full backups of the computer, as this is basically a hack that allows Mojave to install and run on hardware that Apple does not support.
There’s obviously no tutorial included here in this post as I haven’t personally tried or tested this yet, but if you do, and you get macOS Mojave running on an older Mac, be sure to let us know in the comments below how well it works, and what your experience was. Personally, my older unsupported Macs are still running Snow Leopard, Mavericks, El Capitan, and Sierra, and only the latest machines will run Mojave for my particular setup, but to each their own, and it’s undoubtedly cool that Dosdude has consistently come up with utilities like this to get various versions of Mac OS system software running on hardware that it wasn’t specifically intended for. It’s your Mac so use it however you like and with whatever operating system software release you like best. Enjoy!
Today’s the day, Mac users: the latest version of macOS, called Mojave (and officially it’s version 10.14), is now available. It’s not a major revamp of the operating system (it’s been a while since the Mac has had one of those), but it does add new features that can help you be more productive with your Mac.
That being said, you may be hesitant to upgrade. After all, what you’re using now works fine, and why risk the potential for problems? We hear you, and if you don’t want to upgrade right away, you’ll be fine. But in case you’re on the fence, here are a few reasons why you should upgrade to macOS Mojave now.
MacOS Mojave Dark Mode is easier on the eyes
The first new feature Apple discussed at the 2018 Worldwide Developers Conference unveiling of Mojave, the first feature that the Mojave website highlights, and the first feature I’m covering here is Dark Mode, which uses darker colors for user interface elements like the toolbar and menus. Being first implies a sense of importance, but to some, Dark Mode may seem like an odd feature to highlight first. “Yeah, so the Mac uses dark stuff. So what?”
Think about how you use your Mac (or computers in general). When you’re looking at a computer screen, you’re basically staring at a light source. And if you’re like me, you do almost all of your work all day long while staring at this light source. With a traditional Mac UI, you’re usually using windows that are predominating bright white, and staring at the light for a while can cause eye fatigue.
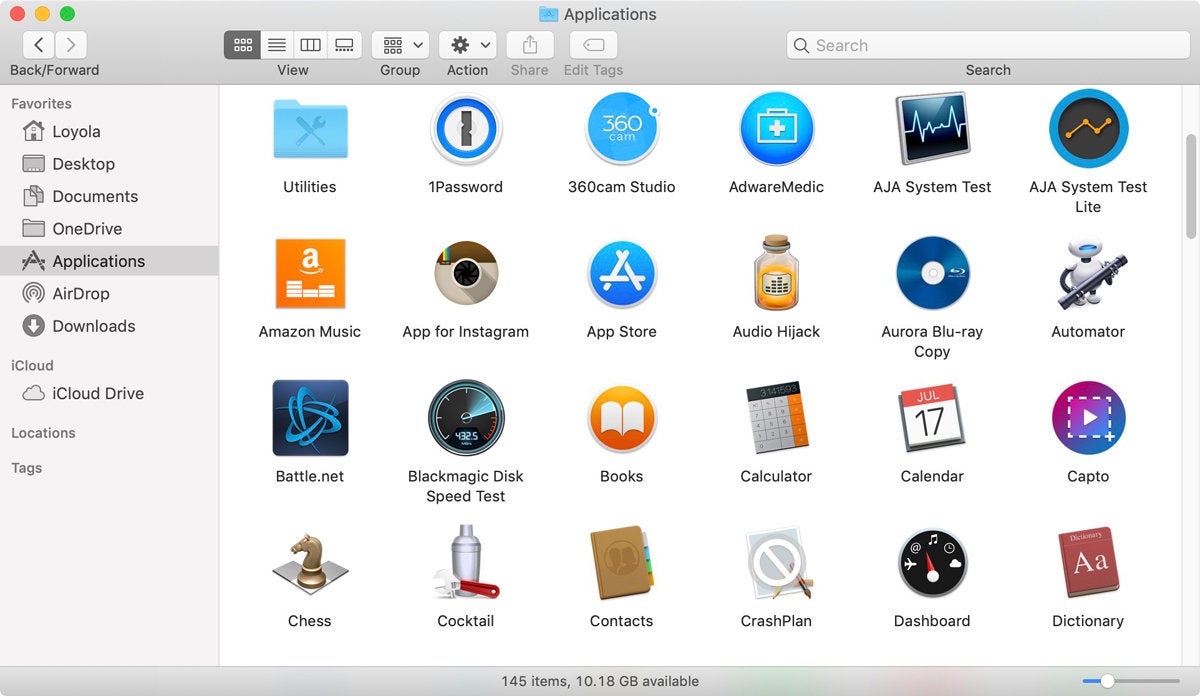
A familiar Light Mode window in. macOS Mojave…
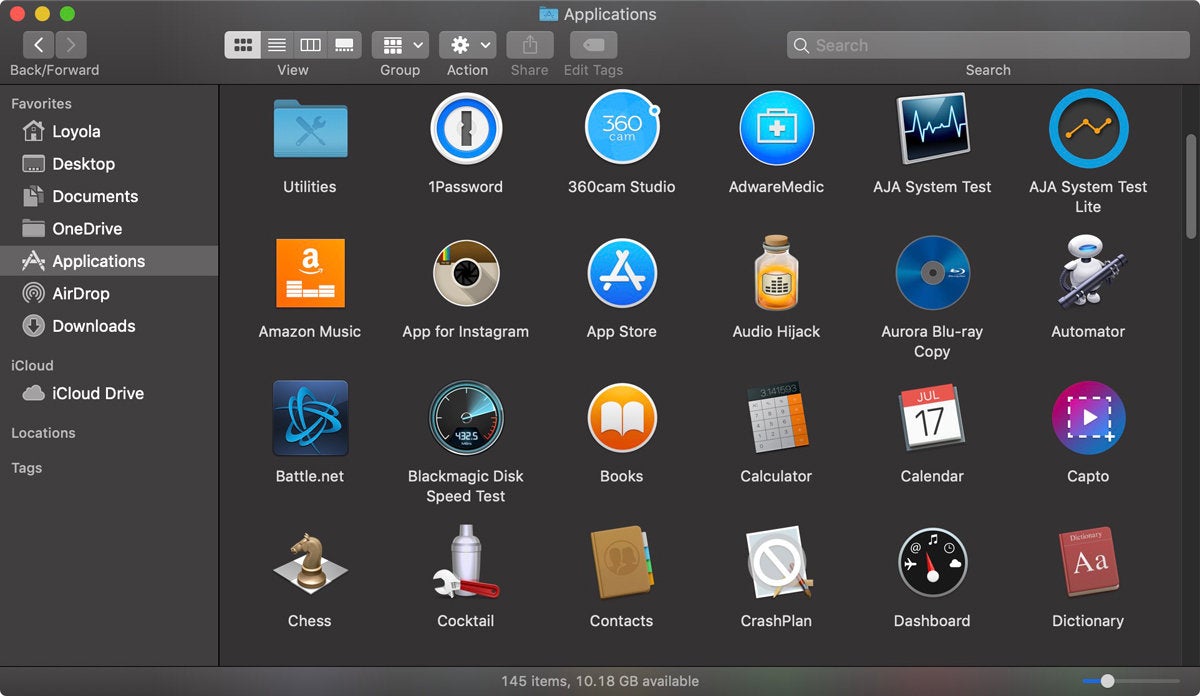
…and a new Dark Mode window.
Dark Mode feels a lot more comfortable to me, though I don’t feel more or less fatigued at the end of the day. (That’s probably due to the fact that I make it a point to take quick “vision” breaks every 30 minutes or so.) Some people think Dark Mode helps you focus on what you’re working on; I can’t say I agree or disagree, I don’t notice a difference in where my attention is at. But while I’m working, being in Dark Mode feels more pleasing, and I now have a preference for it. I’m also looking forward to more apps offering Dark Mode interfaces.
MacOS Mojave Continuity Camera
Before Continuity Camera, it took a bit of effort to get a photo or scan on to your Mac. With Continuity Camera, the process is a lot more efficient.
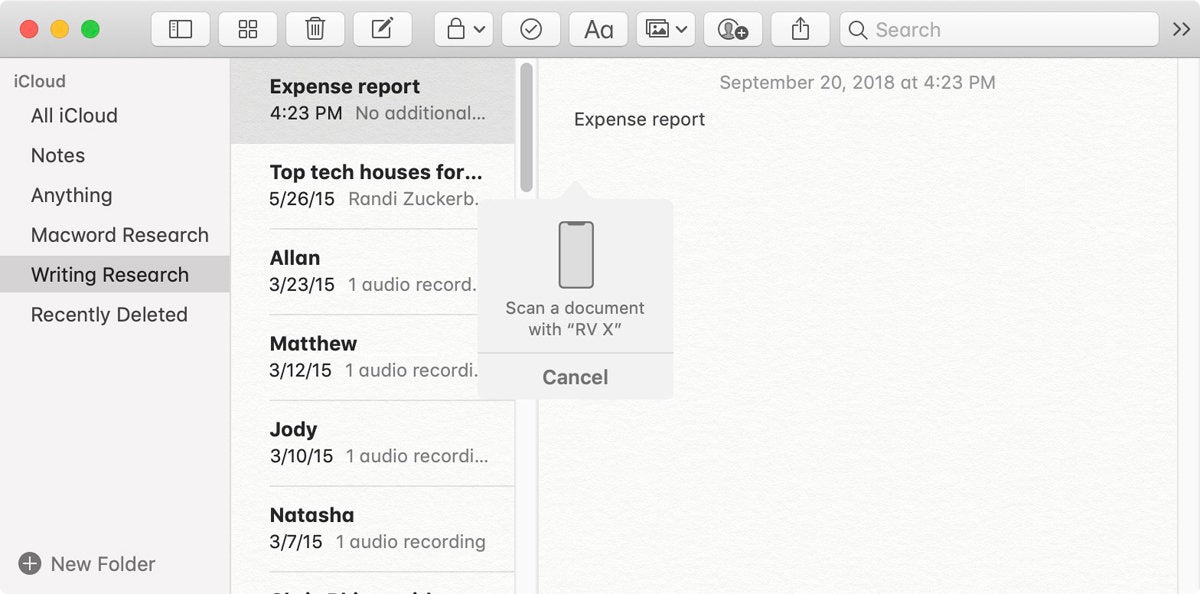
You can scan images directly into Notes.
In apps that support the feature, all you need to do is click in the area where you want your image to appear, and then go to the File menu and look for an option to import a scan or photo from your iPhone or iPad. Select it, and an indicator appear in your Mac app and your iOS device’s camera automatically launches. You can then snap a pic or “scan” your document, and the result is automatically inserted in your document. So easy. Unfortunately, this feature doesn’t allow you to select a pic that’s already on your iOS device for placement in your document, but maybe that’s for a future update.
Continuity Camera works right now with Mojave’s bundled apps, like Notes, Mail, Messages, and in the Finder. It also works with Apple’s Numbers, Pages, and Keynote. Look for third-parties to add this functionality soon.
Using an iPhone X to scan a receipt in Notes for Mac.
MacOS Mojave improved security features
Security isn’t a glamorous topic, but there are a few now security features that make Mojave an attractive upgrade.
Because of what I do for a living, I’m often downloading and trying new software, sometimes from developers with whom I’m not familiar. So I run a few utilities to keep an eye on what’s going on with my Mac. One of the utilities I use is OverSight, which flashes an alert any time an app wants to access the Mac’s FaceTime camera and microphone.
macOS Mojave now lets you know if apps are trying to access your Mac’s microphone, camera, and other items.
An OverSight-like feature is now built into Mojave that can alert you when an app wants to accessalong the camera and mic, as well as iTunes device backups, Time Machine backups, your Mail database, your Message history, your Safari data, and other data.
Even better is that Safari in Mojave has improved Intelligent Tracking Prevention. What this does is that it blocks attempts to track the websites that you visit. If you trigger one of these tracks (often by clicking on a comment button, or when you Like something on Facebook), Safari posts an alert to let you know that you need to allow tracking to continue on.
Mojave also has more features for managing password, such as the ability to create strong passwords, the ability to automatically enter in a security code that you get vis SMS, and password auditing. These are great features, but as a longtime 1Password user, I don’t think I’ll be giving it up for Mojave’s built-in features. I prefer 1Password’s management tools, even though it means I’m not being efficient about my password usage.
MacOS Mojave Quick Look for quick image edits
As the family documentarian, it’s my job to take pictures and videos of family events. But I don’t just shoot and then file away the results; I look at the pics and videos and edit them. Usually, they’re easy edits, but it feels like a hassle to preview a file to see if it needs to be edited, and then open those files that do in an app.
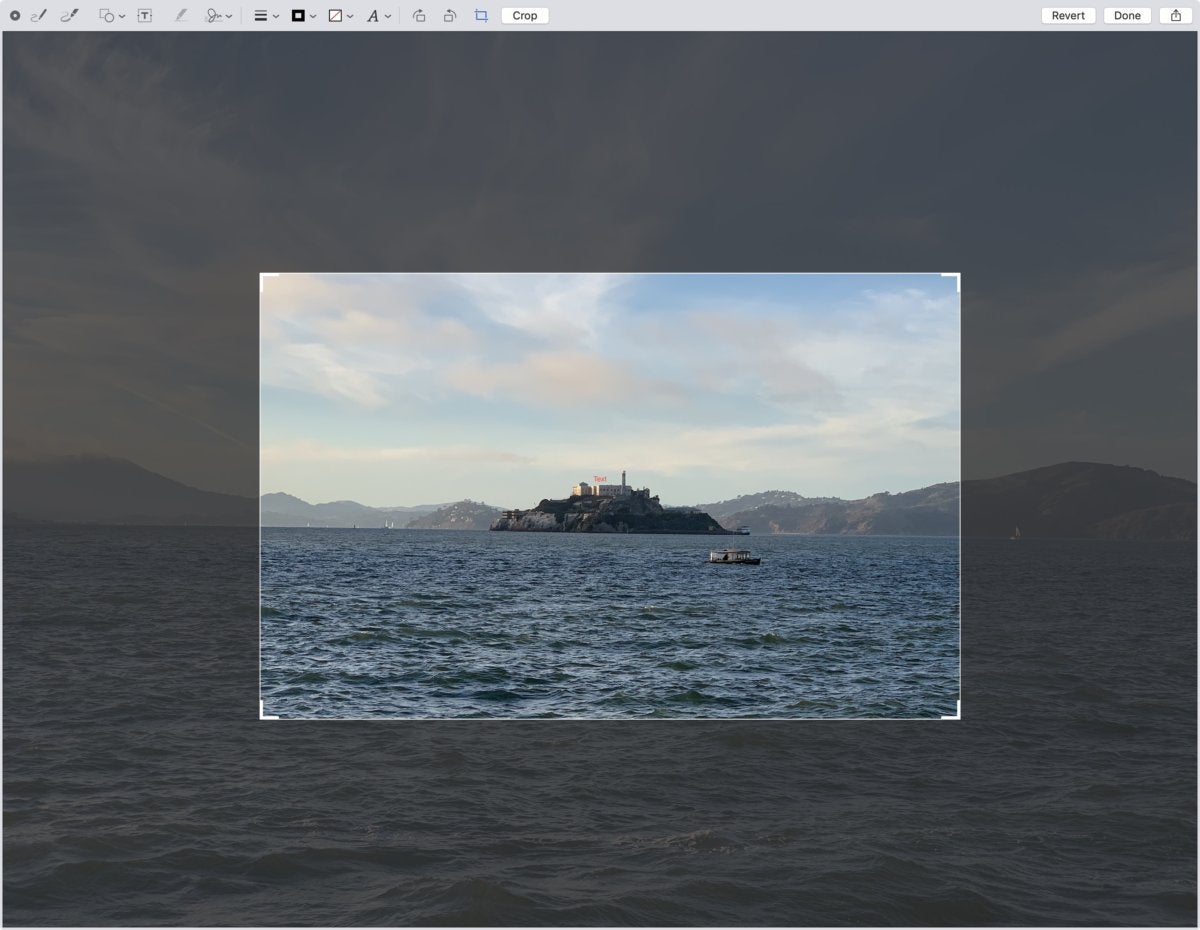
Crop a photo directly in Quick Look. No need to open an app.
Mojave makes Quick Look most robust, providing simple editing tools so you don’t even need to open an app. Now when you preview an image (select it and then press the space bar), you can click on the Quick Actions icon between the Rotate icon and the Open in Preview button, and a set of editing tools appears. You can rotate in 90-degree increments and crop images, and there’s even a set of markup tools you can use to write notations. For audio and video, you can trim clips.
If you are perusing through dozens and dozens of photos and videos, the new Quick Look Quick Actions helps a ton with simple crops and trims. It can be a real time saver.
MacOS Mojave News, Stocks, Voice Memos, and App Store
If you frequently use the News, Stocks, and Voice Memos apps on your iPhone or iPad, then you’ll probably find good use for them on your Mojave Mac. With the News and Stocks apps, your preferences can be saved to iCloud, so your topics, channels, watch list, and more are syncs between all your devices. Voice Memos can save your recording to iCloud so you can access them on any device.
The new News app in macOS Mojave.
Of these apps, I’ll get the most use out of the News app. It seems that people tend to rely on social networks to get their news, but with social networks, the people you follow are the arbiter of what shows up on your feed—and for a lot of people, that’s preferable. I like to have more control over the articles that are fed to me, and that includes topics that may not necessarily jibe with that of the people I follow. The News app allows you to set your sources and subjects, so you can get a feed that’s customized to your interests.
Apple has also redesigned the App Store, so it’s easier to find apps. The company is also putting a more effort into your ability to learn about new software, by featuring App Store editors’ picks and curated app lists.
Group FaceTime: Coming soon to macOS Mojave
If these reasons aren’t compelling enough for you to upgrade to Mojave now, there’s a feature coming soon that will make you want to upgrade: Group FaceTime. When it becomes available—Apple says it’ll be here later this fall—you’ll be able to do a group chat with up to 32 people using a Mac, iPhone, or iPad. If this feature was available now (and it worked well), it’d be the number one reason why you should upgrade to Mojave.
Let’s hope Group FaceTime comes to the Mac sooner than later.
Have you ever wanted a little digital globe you could interact with, spinning the Earth around to see the continents, oceans, and features of our planet? If so, you’ll be happy to discover that the Maps app on the Mac has a hidden globe view that allows you to interact with and spin planet Earth as a virtual globe.
The hidden globe view in Maps can be a great feature for obvious geography reasons, whether it’s for informational, exploration, educational uses, just having a little fun, or any other reason you’d like to reference a globe. Even more interesting is that Maps Globe view uses satellite data to show the Earth surface relative to the sun, making both day time and night time views visible depending on the time of day. The whole Globe view is quite interesting and fun to play with.
Read on to learn how to access Globe view in the Maps application for Mac.
How to Access Globe View on Maps for Mac
Ready to switch the Maps app into Globe view? Here’s how you can do that:
Open the “Maps” application on the Mac
Choose “Satellite” view by clicking the button in the upper right corner
Now zoom out in Maps view, you can zoom out by clicking the minus “[-]” button in the bottom right corner of Maps app or by using a pinch gesture on a tracking surface
Keep zooming out until you see Maps has entered into Globe view
Interact with the Maps app as usual, you can spin the globe, rotate it around in just about any orientation with a click and drag, zoom in and out, etc
You can zoom in and out of globe view quite fast with the pinch and spread gestures on a tracking surface.
One of the more compelling aspects of Globe view in Maps is that it uses updated satellite imagery based on time of day and the Earth position relative to the sun, so you can see where night and day fall on the globe.
The daytime view is brightly lit as you’d expect and makes identifying continents, oceans, and land features pretty easy. The night time view of the world is quite fascinating as well because it uses detailed satellite imagery to show light pollution on the surface of Earth, making it easy to locate cities, developments, and the human behavior on the planet, visible much like the glowing activity of humans is from the International Space Station, NASA imagery, or some other satellite or space craft (maybe this trick could be extra helpful to any aliens out there floating around in space looking down at Earth but haven’t figured out quite where to land yet).
And yes if you’re an iOS user and you were wondering, the Maps app on iPhone and iPad also has globe view that is accessible in basically the same way as this, hidden behind Satellite view and requiring lots of zooming out to see.
Exiting out of Globe view is just a matter of either choosing the “Map” mode of Maps app, or zooming into any surface on the Earth close enough so that the globe is no longer visible.
Some Maps features work in Globe view while others don’t, for example you can drop pins and share a location while in Globe view, but features like scale indicators and saving Maps as a PDF don’t entirely work while in Globe view. You can also use “Show Labels” to toggle off or on the labeling of cities and continents.