Apple on Wednesday began rolling out the second betas of iOS 17.3, macOS Sonoma 14.3 and other software updates to developers. The first betas of these versions were released on December 14, before the holiday break. The company is now resuming the beta program – and we’re about to find out what’s new in today’s updates.
iOS 17.3 beta brings Secure Device Protection and more
iOS 17.3 is a major update. The first beta introduced Secure Device Protection, which is an “additional layer of security” that protects users’ data in case someone steals their phone and gets their password. When Secure Device Protection is enabled, you can only access saved passwords using Face ID or Touch ID, for example.
This feature also makes it harder for crooks to change the Apple ID password of the owner of that device. There’s also a delay in removing Find My from an iPhone with Secure Device Protection enabled. In addition to this feature, iOS 17.3 also re-enables collaborative Apple Music playlists, now with emoji reactions.
Today’s build number is 21D5036c, compared to the number 21D5026f of the first build. Developers can update their devices by going to Settings > General > Software Update.
It’s worth noting that although iPadOS 17.3 is also available for iPads, Secure Device Protection is an exclusive feature for iPhones at this point.
macOS 14.3 and more
In addition to iOS 17.3 beta 2, the second betas of macOS 14.3, watchOS 10.3, and tvOS 17.3 are now available to developers. The first beta of these updates had no significant changes apart from potential bug fixes.
Apple is continuing to push into health care, this time striking a deal with Epic Systems for a Mac-friendly version of its health records app. As reported by Axios,the deal will see Epic Systems create a version of its health records tool that “is easier to run on Apple devices.”
Apple had reportedly pushed for Epic to create a “native version of the service” for Apple devices, but the two companies settled on this compromise of a version that is “easier to run on Apple devices” instead. Apple hasn’t acknowledged this deal, but Axios says it was confirmed by a “source inside Epic.”
The deal comes despite previous disagreements between Epic and Apple over health records and data sharing, Axios explains. Apple has pushed for easing health record sharing requirements, something that Epic is firmly opposed to. Epic argued that rule changes focused on “interoperability” will be “overly burdensome on our health system and will endanger patient privacy.”
Epic Systems is the largest electronic health records vendor in the United States, with “roughly half the population’s medical records” being stored in a system powered by Epic software and technology. The lack of well-developed Mac, iPad, and iPhone software from Epic has put inhibited Apple’s ability to tap further into the health records industry.
Given the pace at which things in the healthcare industry move — especially around medical records technology — it’ll likely be awhile before we see any results of this new deal. None the less, it could end up being good for the industry and consumers, particularly if it improves data integration with other Apple platforms and services.
Microsoft is working to make your and your family’s online experience safer. Today the company is launching its new Defender security dashboard for 365 subscribers. Users on iPhone, Mac, Windows, and Android devices have access to the Microsoft Defender security app that utilizes existing antivirus software or other protections.
Microsoft Defender is simplified online security that meets you and your family where you are by bringing multiple protections together into a single dashboard. It provides online protection across the devices you and your family use. It offers tips and recommendations to strengthen your protection further. And, as you grow your digital footprint by adding family members and devices, Defender grows with you and keeps your defenses up-to-date using trusted technology.
According to The Verge, Microsoft Defender’s features will vary by which platform. For instance, on iPhone and iPad, Microsoft Defender users won’t have antivirus protection. However, they’ll have some phishing protections alongside their dashboard that features alerts for their other devices.
Additionally, the new app includes security alerts for your devices to ensure maximum protection. While not on iPhone, you can also view Microsoft Defender’s cybersecurity tips on your Mac or Windows computer.
This is just the start. As we look forward, we will continue to bring more protections together under a single dashboard, including features like identity theft protection and secure online connection. Microsoft Defender is simplified online security that grows with you and your family to help keep you safe.
With the latest version of macOS, dubbed Monterey, one of the apps that saw a handful of upgrades was Reminders. A once rather basic task and to-do application, Reminders is now a powerhouse application with new features include Smart List, tags, and more. Head below for a deeper look at these new features.
The new features in Reminders
First off, the Reminders app in macOS Monterey is the first version to support tags. As the name implies, tags allow you to organize and categorize your reminders and tasks. This means you can tag tasks with bits of information to help you keep track of categories, groups, and more.
Tags are a fast and flexible way to organize your reminders. Add one or more tags, like #errands, to your reminders to make them easy to search and filter for across your Reminders lists.
In macOS Monterey, you can add tags to your tasks when you create them. Simply look for the “Add Tags” field when creating a new reminder.
But while tags themselves are a notable addition to the Reminders application, they are really powerful when combined with Smart Lists.
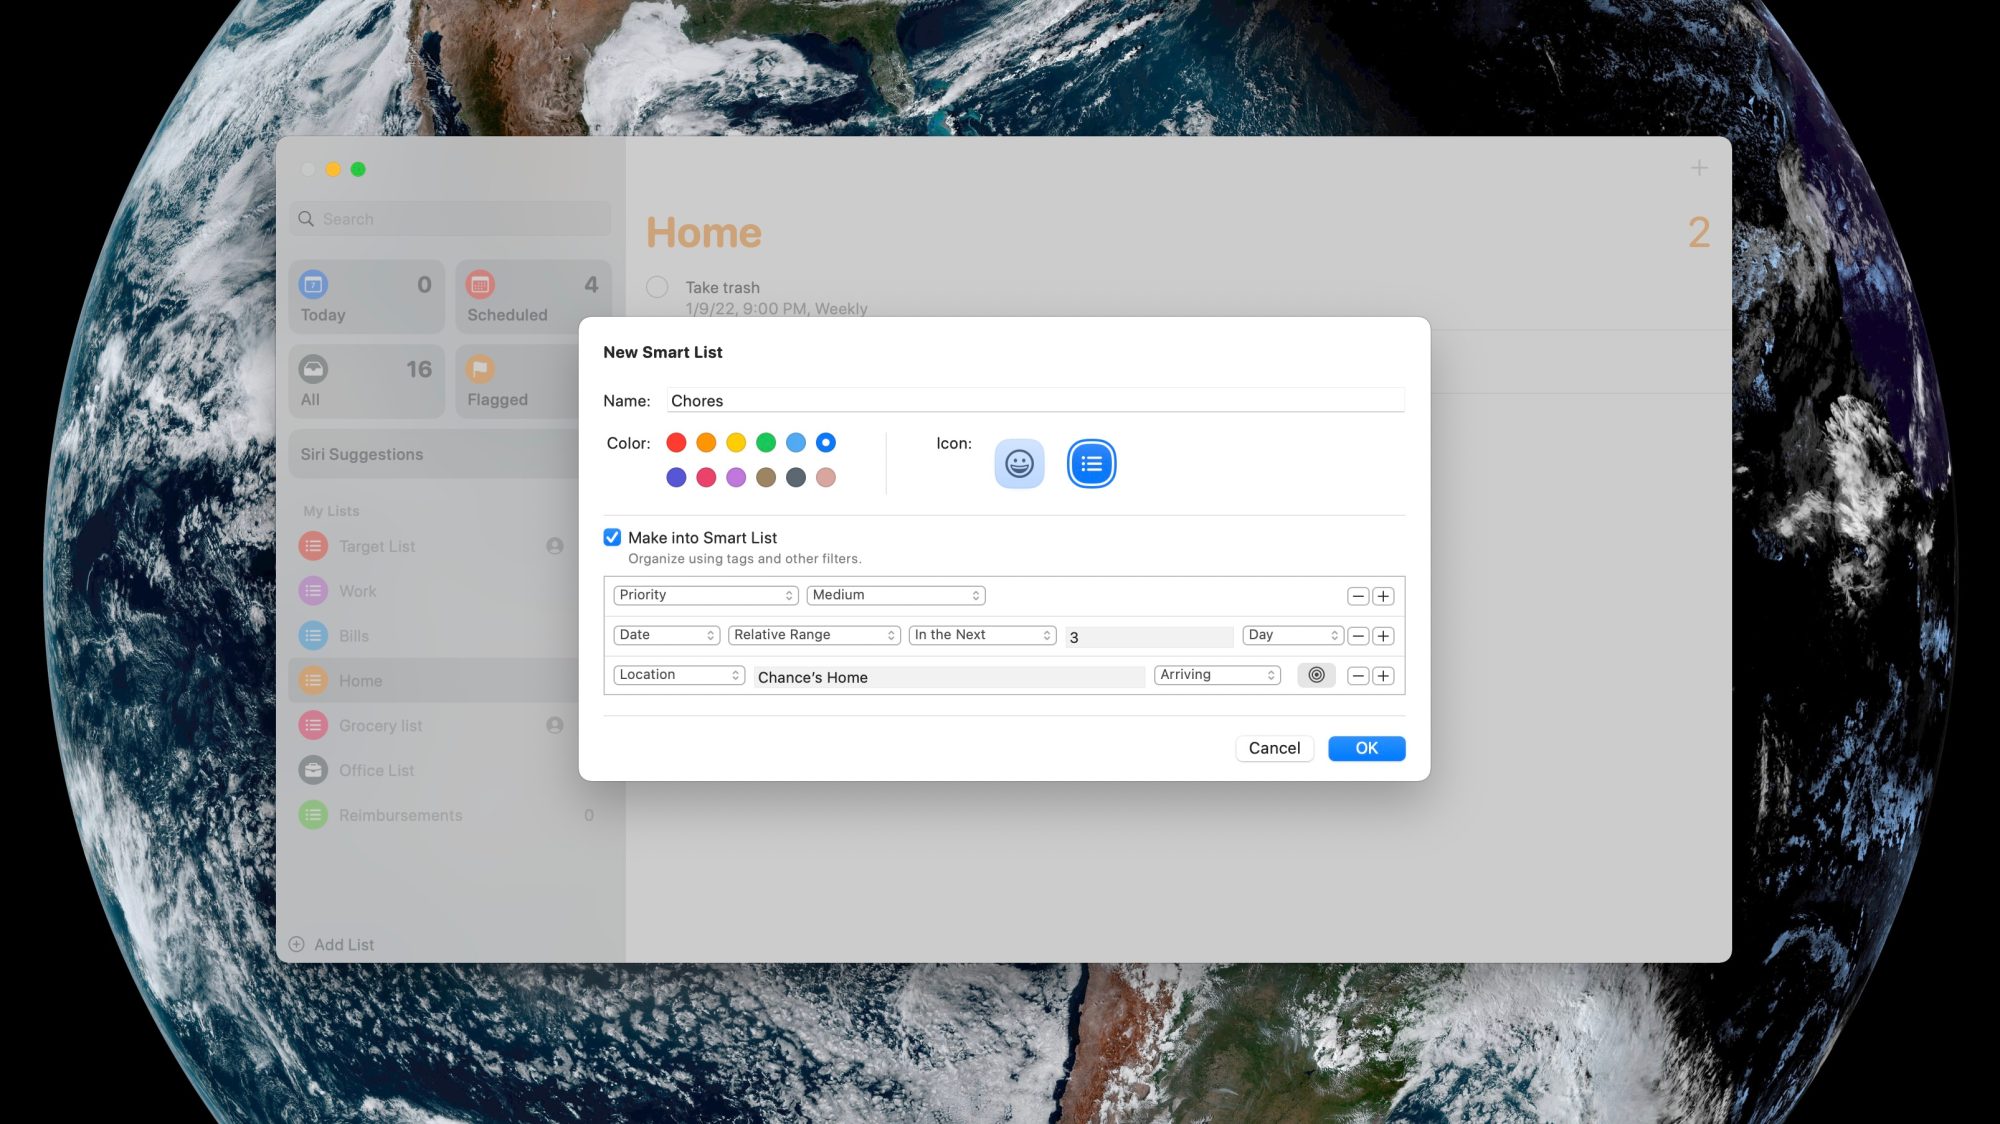
Without a doubt, the biggest new addition to the Reminders app in macOS Monterey is a new feature that Apple is calling Smart Lists. Essentially, Smart Lists are a way to create custom lists that include reminders that meet certain criteria.
Here’s how Apple explains the feature:
Create your own Smart Lists to automatically include reminders that matter most to you by selecting for tags, dates, times, locations, flags, and priority. Choose more than one tag (such as #gardening and #errands) and combine them with other setting filters for more specific lists.
So how does this work in practice? It’s actually not as complex as it might sound. In the Reminders app on your Mac, you can start by clicking the “Add List” button, just like you would for creating any sort of to-do list. While you’re creating your list, look for the “Make into Smart List” checkbox.
Once you select this checkbox, you can select criteria for your Smart List. The criteria can be different tags, the due date for the task, the time, the priority, the location, and whether or not the task is flagged. Once you’ve done this, the Reminders will automatically create a Smart List of the tasks that meet your defined criteria.
Once you’ve created a custom Smart List in the Reminders app, it will sync to your other Apple devices and be added to the app’s sidebar. In the sidebar, it will be denoted with a small gear icon in the bottom-right corner, indicating that it is a Smart List.
And while Smart Lists and tags are the top new features of the Reminders app in macOS Monterey, there’s more to try out:
A Tag Browser in the sidebar lets you click any tag or combination of tags to quickly view tagged reminders.
Access quick options to easily delete your completed reminders.
Choose tags, flags, priority, and people you message with from the Quick Toolbar when creating a reminder.
Type more advanced phrases to create reminder settings. Try something like “Jog every other morning” for a specific, recurring reminder.
Apple has officially unveiled the next-generation Apple Silicon chip. Dubbed the M1 Pro and M1 Max, the Apple says that these chips were created for the next-generation MacBook Pro by scaling up M1’s architecture to create a “far more powerful chip.”
Here are the specs of the M1 Pro, as announced by Apple’s Johnny Srouji during today’s event:
200GB/s memory bandwidth
Up to 32GB of unified memory
ProRes
2x more transistors than M1
70% faster than M1
Up to 10-core CPU
Up to 16-core GPU
Neural Engine
Thunderbolt 4
Support for up to 2 external displays
And for the M1 Max:
400GB/s memory bandwidth
32-core GPU
57 billion transistors
Up to 64GB of unified memory
Up to 70% less power consumption
ProRes
Neural Engine
Thunderbolt 4
Support for up to four external displays
Apple says that these new chips will power the future of the “Pro” lineup among the Mac…still waiting for details on that, though.
Is there an old out-of-date Mac that you desperately miss using? Well, you’re in luck because it’s incredibly easy to install a modern version of Chrome OS on old Intel Macs for free. CloudReady isn’t a new product by any stretch, but I had always been itching to try it out. Just last year, Google acquired Neverware, the company behind CloudReady. This means that Google offers an officially sanctioned way of reviving old computers with Chrome OS. Here’s how to get CloudReady up and running on an old Mac.
I was able to get CloudReady running on a 2014 Mac mini and a 2012 13″ MacBook Pro. Both of these machines have run-of-the-mill specs for their time. Each of these Macs had 4GB of RAM and much older Intel processors. Neither run recent versions of macOS particularly well, and they certainly aren’t good for power-hungry tasks. The MacBook Pro model that I used for this experiment only runs macOS up to Catalina, so it’s already out-of-date. The Mac mini that I used can run Big Sur, but it’s severely underpowered, being seven years old and not physically upgradeable.
You can install CloudReady on virtually any Intel Mac from 2007 on. CloudReady will not work on PowerPC Macs, so sadly, you can’t revive your sunflower iMac G4 or your blueberry iBook. Compatibility with CloudReady technically begins with Macs from 2006, but it’s not recommended. CloudReady has officially only certified 11 Mac models, but it’s likely you’ll be able to get the OS up and running on non-certified Intel machines as well. CloudReady requires at least 2GB of RAM, at least 16GB of storage, and graphics components made during or after 2007. There are a few specific Intel graphics cards that don’t play nicely with CloudReady, including the GMA 500, 600, 3600 and 3650.
MacBook Air 6,1 (13″ Core i5 or Core i7 Mid 2013-Early 2014)
MacBook Pro 5,5 (13″ Core 2 Duo Mid 2009)
MacBook Pro 9,2 (13″ Core i5 or Core i7 Mid 2012)
Macs that should work with CloudReady but aren’t officially certified include:
Any aluminum iMac from mid 2007 with more than 2GB of RAM
Any white or silver Mac mini from mid 2007 with more than 2GB of RAM
Any white or black MacBook from mid 2007 with more than 2GB of RAM
Any non-unibody or unibody MacBook Pro from mid 2007 with more than 2GB of RAM
Any MacBook Air model (all models have at least 2GB of RAM)
Any tower or trash can Mac Pro from mid 2007 with more than 2GB of RAM
What you’ll need
You may need to upgrade the RAM on a particularly old model before installing CloudReady. Luckily that’s quite easy on old Mac models. I upgraded my 2012 MacBook Pro with 8GB of RAM and a new 240GB SSD for around $70. But getting at least 2GB of RAM is quite cheap these days.
Once you’ve got the Mac you want to install CloudReady on, good to go, you’ll need a flash drive with at least 8GB of storage on it. Make sure not to use a Sandisk flash drive; Neverware says that they don’t work properly with the installer.
The application is only around 48MB and will help you turn your flash drive into a CloudReady installer. You can create the physical installer with any computer; it doesn’t have to be the one you plan to put CloudReady on. I built my CloudReady flash drive with a Windows 11 PC, for example.
2. Connect your flash drive to your selected Mac, then press and hold option as you turn it on
Your Mac will ask you which drive you want to boot from. Choose the CloudReady flash drive that you created. It’s likely going to be represented by an orange drive. The name can vary.
3. Boot into CloudReady
Once you select CloudReady, it will boot into the Chrome OS set up system.
4. Install Chrome OS on your Mac
Click on the clock in the lower right corner and select “Install OS” from the menu that pops up. This will launch the installer and allow you to replace your existing system with CloudReady. Keep in mind that if you choose to install CloudReady on your Mac, it will erase macOS and anything else on the drive. If you don’t want to do that, you can run CloudReady off of the flash drive. Just continue through the setup process without installing the operating system.
Once CloudReady is installed on your Mac, you are good to go. You can connect to wifi or ethernet, sign in to your Google account, and you are up and running. Chrome OS runs incredibly well on old Macs and frankly breathes new life into them.
Limitations of Neverware’s version of Chrome OS
Neverware’s variant of Chrome OS has a few limitations that you should keep in mind. It is based on Chromium rather than Chrome. That’s why you’ll see blue icons rather than Googley multi-colored ones. You cannot install Android apps on CloudReady like you can on an official Chrome OS computer. It can only run Chrome apps, progressive web apps, and websites. CloudReady does come with a few other native apps like a simple files app and wallpaper picker, but that’s about it. Another thing to keep in mind is how often you’ll get updates. CloudReady doesn’t get updated in tandem with the shipping version of Chrome OS. However, it does get regular updates and runs a secure version of Chrome OS that supports the modern web.
Using CloudReady
Once you have CloudReady installed, you can use it as you would a Chromebook. You can set a custom wallpaper or choose one from Google’s excellent collection of pre-installed ones. The shelf at the bottom of the screen can be customized with only the apps and sites you use frequently. You can also click on the circle button in the far left corner to see everything installed on your device or search its contents.
You can head over to the Chrome web store to find Chrome apps for your device, although many apps aren’t up-to-date and likely won’t be supported much longer. To get services you want to use installed on your computer, head over to their websites. Let’s say you want to install Slack as an app. Just go to the Slack website, sign in to your workspace, click the three dots in the top right corner of the window, select tools, and then select install or add shortcut. You’ll then get an icon in the launcher that you can add to your shelf. If you right-click the icon, you can change the website to open in a dedicated window rather than a new tab.
Conclusion
There are lots of beloved old Mac models that we’d love to bring back from the dead. CloudReady makes it possible to use old Macs today with modern websites and web apps. It also performs great even on low-powered machines with mediocre specs.
You can ensure your data remains safe through erasure.
One of the most powerful features added years ago to macOS and iOS was Find My iPhone—and iPad and Mac. The iCloud-connected service lets you track an accidentally misplaced item and potentially recover a stolen one. With the service active on a device, you can use Find My for macOS, iOS, or iPadOS or via iCloud.com to erase your computer, phone, or tablet or to queue an erasure signal for the next time the device is on the Internet. iPhones and iPads with a Secure Enclave and Macs with FileVault enabled simply delete the encryption keys for storage. This renders the data irretrievable. (It doesn’t affect your local or iCloud backups, so don’t worry.) On a Mac with a T2 Security Chip or M1 Apple silicon, disk encryption is always enabled even if FileVault isn’t, allowing Secure Enclave to destroy the disk encryption keys instantly even with FileVault disabled. Pre-Secure Enclave iPhones and iPads and Macs that predate the T2 Security chip and have FileVault disabled take longer to delete files, as each byte of data has to be overwritten. If you’re not sure whether your iPhone, iPad, or Intel Mac has a Secure Enclave, consult the list Apple provides here. You can determine if FileVault is enabled by going to the Security & Privacy preference pane’s FileVault tab.
How to erase a device
Apple warns you about the consequences when you’re about to erase your Mac remotely.
Apple’s tweaked the process slightly for its native apps but left iCloud.com virtually untouched for years. In macOS, iOS, or iPadOS, launch the Find My app. Tap the Devices tab and then tap your hardware. (If you have Family Sharing enabled, you can also see the devices of family members.) On an iPhone or iPad, tap Erase This Device and follow the prompts. On a Mac, right-click the device and select Erase This Device.
With iCloud.com, log in to your account and click the Find iPhone link—no “My” in there. Enter your iCloud password again if prompted. Click the All Devices menu and select your hardware:
For a Mac, click Erase Mac and follow prompts; you’ll note the text says it “may take up to a day to complete,” the worst-case example for a hard-drive-equipped Mac without FileVault enabled and neither a T2 nor M1 chip.
For an iPhone or iPad, just click Erase iPhone or Erase iPad.
If the device is connected to the internet via whatever method it has at its disposal—Wi-Fi, cellular, tethering, a…dial-up modem—erasure begins immediately after the Mac receives the signal relayed via Apple’s servers. In the cases noted above, the drive or flash storage almost instantly becomes irretrievable.
The erase command is queued by Apple, so if the device ever is briefly back on the internet, it erases itself. Once your device starts wiping its data, finding its location via Find My is no longer possible.
For devices that ne’er-do-wells have taken offline or put in a metal box, they may never return online to receive an erase command. But for iPhones, iPads, and Macs with a Secure Enclave, the stored data can’t be interacted with unless someone also obtained the password. (For a running Mac, there might be cracks that work, but it’s unlikely; if powered down and FileVault is enabled, effectively impossible.)
Find My lets you see all your devices and select among them for several purposes—including erasure.
It can be wiped, which securely removes your data—and then Activation Lock kicks, a part of Find My. (Macs have a few additional requirements.) Activation Lock prevents an erased device from being set up again without knowing the iCloud password associated with the account that turned on Find My on it.
Criminal groups have apparently figured out ways to bypass Activation Lock in at least some cases, but those methods still require erasing the device, so your data remains inaccessible.
A future of remote erasure?
I can imagine a future in which the Find My Network could be used to trigger erasure, too. Right now, the system is used entirely as a passive relay: an AirTag tracker and most Apple devices can broadcast their position over Bluetooth in a carefully encrypted manner. Nearby Macs, iPhones, and iPads with Find My Network enabled relay this data via Apple so you can get updates about location without the party relaying it knowing who you are or which device is transmitting.
But AirTags point the way to a potential two-way process. If Apple determines an AirTag has been traveling with you and you’re not the owner of it, you’re presented with a dialog on an iPhone or iPad that lets you play a sound. That command is passed via Bluetooth.
An iPhone that spots an unknown AirTag traveling with it over time can send a signal to prompt an action on the AirTag.
that preserves privacy and yet could be turned to device erasure, too. In Apple and Google’s joint notification system, your smartphone recorded all specially formatted Bluetooth signals around you and retained for those a period of time; this is quite similar to the signals emitted for the Find My Network by Apple devices.
If someone who had been near you receives a COVID diagnosis and enters a code into their smartphone provided by their healthcare provider, the encrypted Bluetooth IDs associated would then be uploaded to a database that all devices in your region or country regularly downloaded and compared to stored IDs.
Now, consider this: what if you could report your device as stolen and that you wanted it erased. That signal would then be distributed in encrypted form across all Apple hardware in your area or an expanded region. If any of those devices picked up an encrypted Bluetooth signal that matched, they could transmit a similarly encrypted erasure instruction. Thieves try to disable all the wireless on a device, but Bluetooth is often harder to block than Wi-Fi or cellular.
The safeguards around this would have to be strong, but it’s not far-fetched—just far-reaching!
With Apple’s Worldwidape Developers Conference firmly behind us, we’re taking our sweet time picking our way through everything coming to Apple’s platforms this fall. As usual, there were way more changes than Apple talked about onstage, and between watching the conference sessions, scrolling through long webpages of features, and keeping a gimlet eye on Twitter, even more have come to light.
But with such a preponderance of information, it can sometimes be hard to suss out which changes are likely to make a big impact on the lives of Apple users, and which will end up disappearing into the pond without so much as a ripple. Will we still be talking about iPad widgets a year from now? Will everyone have switched to Apple’s new two-factor authentication generator? Some features will have staying power; others won’t.
With that in my mind, here are my bets on which of Apple’s new features will make the biggest difference for its users.
Surfin’ Safari 15
If there’s a contentious move in Apple’s latest suite of improvements, it’s the redesign to the company’s web browser. While I don’t have metrics on hand, I’d be pretty surprised if Safari weren’t the most commonly used program on at least the iPhone and iPad. This means even a meager change is likely to make waves and, as changes go, Safari 15 is anything but meager.
Amongst its most notable updates, Safari 15 redesigns tabs as little rectangles, subsuming them into the window chrome, which now matches the color of whatever webpage you’re viewing. Apple’s stated goal is to get the browser out of the way, but there’s a reasonable question of whether this is a matter of form over function. Several common features—including the refresh button—are now hidden away beneath a single button in the location bar, necessitating an extra click. (Though you can now reload a page by pulling down from the top.) And titles in tabs are often truncated, making it hard to differentiate them, especially if you have multiple pages from the same site open. On the iPhone, the location bar has moved to the bottom, which can obscure some content and even controls.
Tab groups is one of the major tweaks to Safari coming soon.
Apple’s thought about some of these issues, it’s clear. In the company’s Design for Safari 15 WWDC session, Web Technologies Evangelist Jen Simmons mentions that if Safari detects that the color of your page might negatively affect accessibility, the browser will override and default back to white. And it advises web developers to take the iPhone location bar into account when creating their sites.
But that and other design changes will require a legion of web designers to rework parts of their sites, and with Safari only one browser amongst many—albeit a popular one—that seems like potentially a losing proposition for Apple. It is, of course, possible that further tweaks to the browser may be forthcoming during the beta period that makes these changes more palatable…but it’s just as likely that Apple stands pat.
Never taken a shortcut before?
Automation has long been a part of the Mac, from AppleScript to Automator. But while those technologies have gotten a bit long in the tooth, iOS seems to have somewhat supplanted the automation crown, thanks to Shortcuts. That’s why the addition of Shortcuts to the Mac holds such potential.
It’s not just that automating with Shortcuts is much easier than with Automator, but it’s also potentially much more powerful—thanks to broad support in both Apple’s own apps and third-party programs. Early indications suggest that many iOS shortcuts will easily make the jump to the Mac, and the Shortcuts on the Mac also supports hooking into automation tools like AppleScript and the command line, to the benefit of power users. Interoperability between Apple’s platforms here also makes it likely that future updates to Shortcuts will benefit those who live throughout Apple’s ecosystem.
As someone who has repeatedly tried to automate common tasks on the Mac only to throw up their hands in frustration, Shortcuts’ arrival on the platform lets me hold out hope that I’ll finally be able to create workflows that save me time across all my platforms.
Going splitsies
This year marked Apple’s third crack at multitasking on the iPad, and while it may not have been the ground-up rethink that some had hoped for, there are promising signs that it will still greatly improve the experience for both power users and more casual consumers.
iPadOS 15 has features to make multiasking easier.
A big part of that is simply making multitasking more visible. There’s now an explicit icon for windowing, providing controls akin to the ones you find by hovering over the green icon at the top of a Mac window. iPadOS 15 also removes some of the song-and-dance of getting apps into a Split View, letting you drag them in from a Spotlight search or from your home screen, and even if Slide Over remains a somewhat annoying feature, the addition of a floating and resizable window for the new Quick Note feature is evidence that a more powerful windowing system could work on Apple’s tablet.
Simply put, the more people who use multitasking on the iPad, the better it should get, and improved visibility and ease of use are poised to usher a lot more people into a reality of using multiple apps at once—which is a good thing, because it remains one of the iPad’s weaker qualities when compared to a Mac. As for whether Apple will decide to launch itself into a full-fledged windowing system, well, we could be waiting until iPadOS 16, at least.
Apple Inc. will debut major software updates for the iPhone and iPad at its developers’ conference on June 07,2021 to an audience that has grown increasingly critical of the company’s App Store policies.
The virtual event beginning June 07,2021 will also include software updates for the Mac, Apple Watch and Apple TV as well as tools developers can use to build apps. The company plans to discuss new privacy protections for limiting data collection as well as health-tracking, notifications and messaging features. Executives also will promote significant improvements to iPad software, making the device more capable and appealing to more advanced users.
This year’s conference arrives while Apple is facing criticism from some developers over its App Store policies. The controversy was highlighted by a three-week trial last month of a lawsuit filed by Epic Games Inc., which argued that the iPhone maker’s policies and revenue share of as much as 30% are anticompetitive. Unhappy developers have grown more willing publicly to express discontent, Apple executives have been grilled by U.S. lawmakers and companies such as Microsoft Corp. and Spotify Technology SA have chided Apple.
What to Expect From Apple’s WWDC
The Cupertino, California-based iPhone maker will now try to convince developers that Apple’s platform remains the best place for them to sell software and that it has new features to keep consumers glued to the company’s products. Apple, however, isn’t expected to announce wholesale App Store policy changes next week. The company generated about $22 billion from App Store commission in 2020 alone, according to Sensor Tower estimates.
As part of its continued privacy push, Apple is planning new features to counter overly invasive apps. One major new addition will be a control panel that provides in-depth detail on what data are being collected by each third-party app installed on a user’s device. Earlier this year, Apple rolled out a feature to limit the ability of developers to track users across apps and the web for advertising purposes, irking developers like Facebook Inc.
On the iPhone and iPad software updates, users will now be able to set a status — such as whether you are driving, sleeping, working or don’t want to be disturbed — and have that dictate how incoming notifications are handled. The update will also include a larger focus on auto-replying to messages and a new design for incoming notification banners at the top of the screen.
For the iPad, Apple plans to revamp the home screen and support the placement of widgets — snippets of dynamic information like calendar, weather and stocks — anywhere on the screen. This is a commonly requested feature that will bring the iPad in line with Android rivals. The company also plans an improved multitasking system to make it easier to operate multiple apps at the same time.
The Messages app will receive enhancements on the way toward Apple’s eventual goal to turn it into a more direct competitor to messaging services on social networks like Facebook’s WhatsApp and Messenger, Bloomberg News has previously reported. Apple has also been working on a revamped lock screen for the iPhone and iPad, though some of those changes have been pushed back to a future release and won’t appear this year.
Apple’s planned update to macOS is expected to be somewhat minor after the operating system received an overhaul in 2020, while the Apple Watch is expected to gain some health-tracking and interface improvements. The Apple TV will also get enhanced software after the company released a faster model last month.
WWDC kicks off on Monday June 07,2021 or June 08,2021 3am some part of the world.
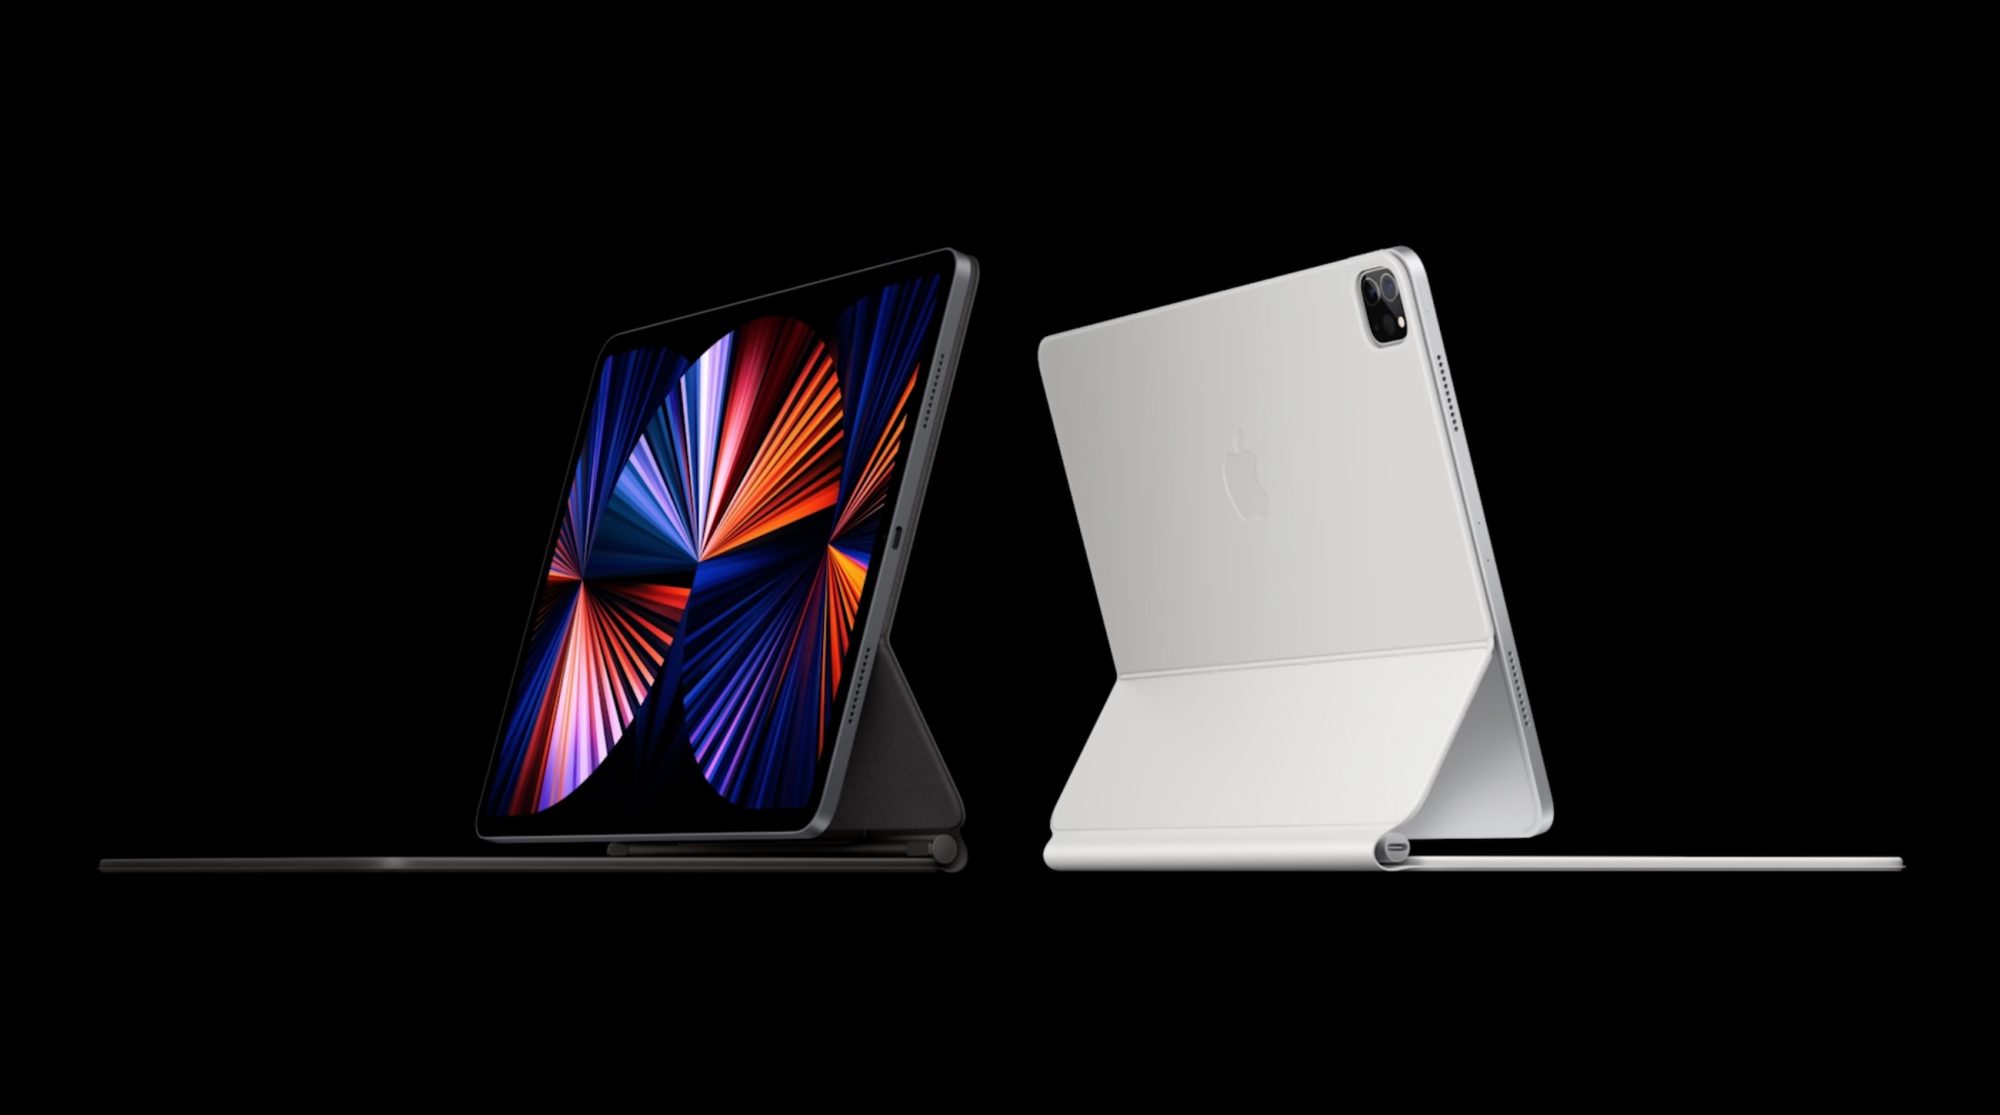
Following the announcement of the new M1 iPad Pro and M1 iMac on Tuesday, Apple executives John Ternus and Greg Joswiak have sat down with the Independent for an in-depth interview. The two Apple executives spoke in the interview about Apple’s plans for the iPad and Mac, the new features of the 2021 iPad Pro, and more.
On merging the iPad and Mac
The most notable comments during the interview came from Joswiak, who serves as Apple’s senior vice president of worldwide marketing. When asked about the future of the iPad and Mac, as the lines start to blur in terms of power, Joswiak explained that Apple has no plans to merge the two platforms.
“There’s two conflicting stories people like to tell about the iPad and Mac,” says Joz, as he starts on a clarification that will lead him at one point to apologise for his passion. “On the one hand, people say that they are in conflict with each other. That somebody has to decide whether they want a Mac, or they want an iPad.
“Or people say that we’re merging them into one: that there’s really this grand conspiracy we have, to eliminate the two categories and make them one.
“And the reality is neither is true. We’re quite proud of the fact that we work really, really hard to create the best products in their respective category.”
(Joz, however, is reluctant to name the category he’s talking about: he jokes that he “can’t even stand using” the word, because the “iPad is better than tablets”. “I hate to diminish it by calling it the category name,” he says.)
Ternus, who is Apple’s senior vice president of hardware engineering, echoed Joswiak’s sentiment. He explained that Apple does not look at things with the lens limiting what one device can do in order to note “step on the toes” of another device.
“But we’re just going to keep making them better. And we’re not going to get all caught up in, you know, theories around merging or anything like that.”
“We don’t think about well, we’re going to limit what this device can do because we don’t want to step on the toes of this [other] one or anything like that,” he says. “We’re pushing to make the best Mac we can make; we’re pushing to make the best iPad we can make. And people choose.
“A lot of people have run both. And they have workflows that span both – some people, for a particular task, prefer one versus the other.
On the new iPad Pro’s M1 chip
When asked about the M1 processor in the new iPad Pro and the software part of that story, Joswiak explained that Apple has “provided that performance even before the need was there.”
“It needs to exist first, right? You can’t have an app that requires more performance than the system’s capable of – then it doesn’t work. So you need to have the system be ahead of the apps.
Joswiak went on to list examples of powerful third-party apps from companies like Adobe and Affinity, but he wouldn’t say whether Apple was working on its own ways to tap into the new power of the M1:
(When asked again, the morning after the reveal, whether Apple is one of those developers that is planning to take advantage of the extra headroom with its professional app, Joz jokes that he’s not going to let something like that slip out.)
Joswiak also explained that this gives users more headroom and ensures their new iPad Pro purchase “isn’t going to be immediately obsolete.”
On mini-LED in the new iPad Pro
Terns also provided some interesting detail on the mini-LED display in the new 12.9-inch iPad Pro. He explained that one of the biggest undertakings in this process was shrinking the display technology — which is also used in the Pro Display XDR — into the 12.9-inch form factor.
“Shrinking it was a huge undertaking,” says Ternus. “If you just look at the two products, obviously the iPad is a lot thinner than a Pro Display XDR, and the way the architecture works – you have the LED backlight behind the display.
As you shrink it down, you necessarily need to add more LEDs; you need to kind of increase the density, because you don’t have as much room for mixing the light and creating zones.
From the very beginning it was: how do we create a backlight with sufficient density? So we had to design a new LED. We had to to design the process for putting down 10,000 LEDs on this backlight in this incredibly precise manner.”
Ternus and Joswiak also noted that one of the reasons Apple is able to make technological leaps like this is because it develops so much of the technology in-house.
On the new Center Stage front-facing camera technology in the iPad
One of the most interesting new features of the 2021 iPad Pro is something called Center Stage. The new iPad Pros pack a 12MP Ultra Wide camera sensor on the front, and Apple is using this to follow users during video chats to ensure that they are always in the frame.
Ternus explained:
“One of the things that I found really cool about it is – spending all this time in these meetings, you sit a lot,” says Ternus. “And it’s so liberating to be able to just stand up and stay framed in the image, and stretch and move around and sit down,” he says, noting that it is a neat way to still be able to close rings on the Apple Watch.
“And one of the things I found sometimes is in group scenarios – you may be FaceTiming with your family and be able to get the family in the frame, or those kind of things, I think are going to be really, really big and powerful. It’s certainly an amazing technology for the times we’re in.”