




Five Costly Mistakes Beginners Make When Fixing Google Pixel 11 Pro Screens

Five Costly Mistakes Beginners Make When Fixing Google Pixel 11 Pro Screens – 5 EXPENSIVE Repair Disasters to AVOID!
Introduction: Why Google Pixel 11 Pro Screen Repairs Require Expert Attention
The Google Pixel 11 Pro is a premium smartphone designed for outstanding display quality, powerful performance, and advanced technology. However, when its screen cracks, develops black spots, or stops responding to touch, repairing it isn’t as simple as removing broken glass and installing a replacement.
A screen replacement involves delicate components, precision connectors, adhesives, sensors, and careful testing. One small mistake can turn an affordable repair into an expensive disaster.
In this comprehensive guide, we’ll explore five costly mistakes beginners make when repairing Google Pixel 11 Pro screens. We’ll explain why these mistakes happen, how they damage the device, and how professional technicians avoid them.
Whether you’re researching DIY repairs or looking for a reliable phone repair specialist, this guide will help you make smarter decisions.
The Google Pixel 11 Pro delivers a premium viewing experience through its 6.3-inch Super Actua LTPO OLED display. It features a 1280 x 2856 resolution, a smooth refresh rate of up to 120Hz, and impressive brightness capabilities.
These features make everyday activities enjoyable, from watching videos and browsing websites to playing games and editing photographs.
However, advanced display technology also means screen repairs require proper knowledge and suitable replacement components.
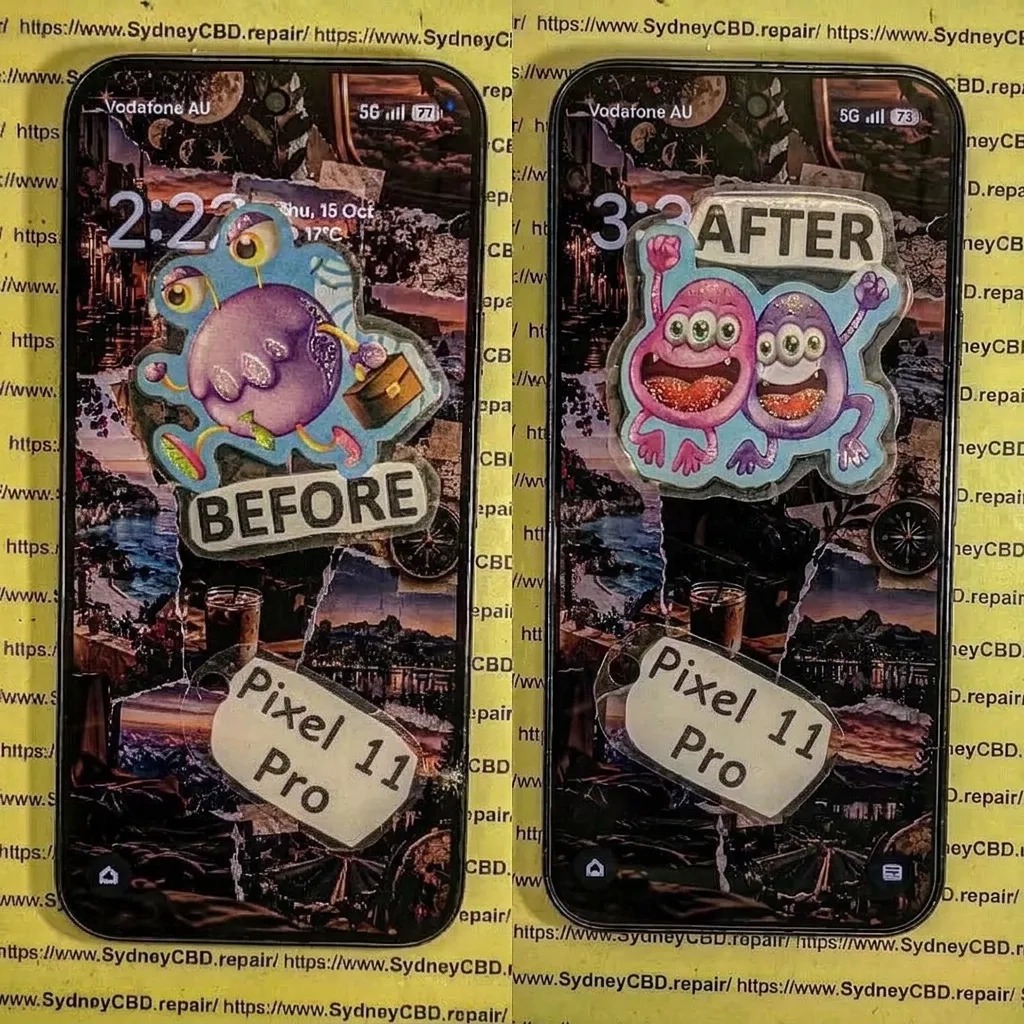
A cracked display doesn’t always mean the entire phone is damaged. Sometimes, the outer glass breaks while the OLED panel continues working. In other situations, the display may develop black patches, coloured lines, flickering, or complete touch failure.
Understanding the difference is important before choosing a repair solution.
Why Screen Damage Shouldn’t Be Ignored
Even a small crack can create bigger problems over time.
For example:
-
Broken glass can cause cuts when handling the phone.
-
Moisture and dust may enter through damaged areas.
-
OLED damage can spread and create additional display problems.
-
Touchscreen performance may become unreliable.
-
A damaged display can affect everyday usability.
Furthermore, continuing to use a phone with serious display damage may increase the risk of further internal problems.
Understanding the Pixel 11 Pro Display
Before attempting any repair, beginners should understand what they’re working with.
| Display feature | Google Pixel 11 Pro |
|---|---|
| Display technology | LTPO OLED |
| Display size | 6.3 inches |
| Resolution | 1280 x 2856 |
| Pixel density | 495 PPI |
| Refresh rate | 1–120Hz |
| Cover glass | Corning Gorilla Glass Victus 2 |
| HDR support | Yes |
| Peak brightness | Up to 3600 nits |
These specifications demonstrate why choosing a compatible replacement display is essential.
A low-quality replacement may not deliver the same brightness, colour accuracy, touch response, or smooth scrolling experience.
For this reason, beginners should avoid treating a premium smartphone screen like an ordinary piece of glass.
Mistake 1: Choosing Cheap Aftermarket Displays Instead of Quality Replacement Screens
One of the biggest mistakes beginners make when repairing Google Pixel 11 Pro screens is purchasing the cheapest replacement display they can find.
At first glance, inexpensive replacement screens may appear identical to original components. They might even come with similar packaging and advertised specifications.
Unfortunately, appearances can be misleading.
Not every replacement screen offers the same quality, compatibility, or reliability.
Why Cheap Replacement Displays Can Become Expensive
The Pixel 11 Pro uses advanced LTPO OLED technology. Its display is designed to deliver excellent contrast, accurate colours, high brightness, and adaptive refresh rates.
A poorly manufactured replacement panel may struggle to reproduce these features.
Some common problems include:
-
Incorrect colour reproduction.
-
Poor outdoor visibility.
-
Uneven brightness.
-
Flickering during normal use.
-
Delayed touchscreen responses.
-
Unreliable refresh-rate performance.
-
Excessive battery consumption.
-
Premature display failure.
Imagine purchasing a replacement display because it costs significantly less than a quality component.
Initially, everything appears fine. However, after several weeks, the screen begins flickering or develops a green line.
Now you may need to pay for another replacement and additional labour.
The original saving quickly disappears.
Understanding Original, Genuine, and Aftermarket Screens
Not all replacement screens are manufactured or supplied through the same channels.
| Screen category | Typical characteristics | Considerations |
|---|---|---|
| Genuine service part | Designed for the specific device | Confirm supplier and part authenticity |
| Refurbished original | Original display assembly that has been restored | Condition and refurbishment quality matter |
| Premium aftermarket | Third-party manufactured replacement | Quality varies by manufacturer |
| Cheap aftermarket | Budget replacement component | Greater risk of performance compromises |
It’s important to understand that the term OEM is sometimes used loosely in online advertisements.
A seller describing a screen as OEM doesn’t automatically prove that it’s an authentic Google service component.
Always ask for clear information about the manufacturer, compatibility, warranty, and testing procedures.
How Professionals Avoid This Mistake
Experienced technicians don’t select replacement screens based on price alone.
Instead, they consider several important factors:
-
Exact Google Pixel 11 Pro model compatibility.
-
Display resolution and brightness.
-
Touchscreen accuracy.
-
Refresh-rate performance.
-
Connector compatibility.
-
Fingerprint sensor compatibility.
-
Warranty and supplier reliability.
They also inspect the replacement panel before installation.
A display should be tested for visible defects, colour inconsistencies, touch problems, and connector damage.
The Importance of Proper Display Testing
A replacement screen should be checked before the phone is completely sealed.
This helps identify manufacturing defects before additional installation work is performed.
Professional testing should include:
-
Full-screen colour checks.
-
Brightness adjustment.
-
Touchscreen responsiveness.
-
Multi-touch performance.
-
Refresh-rate behaviour.
-
Fingerprint recognition where applicable.
Expert Tip: Don’t assume that an expensive screen is automatically genuine or that an inexpensive screen is automatically defective. Verify its origin, specifications, compatibility, and actual performance.
Choosing a quality replacement component is one of the best ways to avoid repeat repairs.
Mistake 2: Applying Excessive Heat During Screen Removal
The second major mistake is using too much heat when removing the damaged display.
Many beginners believe that applying more heat will make the repair faster.
Unfortunately, excessive heat can damage components that are much more expensive than the screen itself.
Modern smartphones use adhesives to secure their displays. These adhesives must be softened carefully before the screen can be separated from the frame.
The challenge is controlling the temperature and applying the correct amount of force.
Why Temperature Control Matters
The Pixel 11 Pro contains delicate electronic components beneath and around its display assembly.
Applying uncontrolled heat can potentially damage:
-
Internal flex cables.
-
Adhesive layers.
-
Nearby sensors.
-
Battery-related components.
-
Plastic insulation.
-
Display connectors.
Heat can also make the separation process unpredictable.
For example, if one section of adhesive remains firmly attached while another section becomes soft, pulling the screen can create uneven pressure.
This may cause the replacement process to become much more difficult.
The Common Beginner Mistake: Using a Household Hair Dryer
A household hair dryer may appear to be an easy solution.
However, it isn’t designed for precision smartphone repairs.
Its temperature and airflow may be difficult to control, and beginners may repeatedly heat the same area without measuring the actual temperature.
Other unsuitable methods include:
-
Applying direct heat from an open flame.
-
Using an uncontrolled heat gun.
-
Heating the phone for unnecessarily long periods.
-
Applying heat unevenly around the frame.
-
Attempting to separate the screen while the adhesive remains firm.
These methods can create unnecessary risks.
Why Professional Technicians Use Controlled Equipment
Professional repair technicians use appropriate heating equipment and specialised opening tools.
Their goal isn’t simply to make the adhesive soft.
They also need to maintain control over the screen, frame, and internal components throughout the removal process.
A professional approach involves:
-
Inspecting the damaged display.
-
Preparing the device for disassembly.
-
Using suitable controlled heating equipment.
-
Softening the adhesive carefully.
-
Separating the display without unnecessary pressure.
-
Inspecting the internal assembly for damage.
The exact procedure should follow reliable model-specific repair documentation.
What Happens When the Frame Gets Damaged?
The display frame plays an important role in supporting the replacement screen.
If the frame becomes bent or damaged during removal, the new display may not sit correctly.
This can lead to:
-
Uneven screen alignment.
-
Visible gaps around the edges.
-
Poor adhesive contact.
-
Increased pressure on the display.
-
Dust entering through poorly sealed areas.
A replacement screen should fit correctly without being forced into position.
Why Patience Saves Money
A professional technician understands that rushing a screen replacement can create additional problems.
Taking time to inspect adhesive, control heat, and separate components properly helps reduce unnecessary damage.
Expert Tip: Heat should never be applied randomly or excessively. Follow a model-specific repair procedure and use suitable equipment. If you don’t have the right tools or experience, professional screen removal is the safer option.
Mistake 3: Damaging Display Flex Cables and Internal Connectors
Another expensive mistake beginners make is damaging the display flex cables or internal connectors.
These small components are essential for communication between the display assembly and the phone’s internal electronics.
Although they may look simple, they require careful handling.
A damaged connector can cause a completely black screen, intermittent display problems, or touchscreen failure.
Understanding Display Flex Cables
Flex cables are thin, flexible electronic connections.
They carry signals and power between different components.
Depending on the assembly, display-related connections can support functions such as:
-
Image transmission.
-
Touchscreen communication.
-
Display power.
-
Sensor connections.
-
Other device-specific functions.
Because these cables are delicate, bending, twisting, stretching, or pulling them incorrectly can cause damage.
Five Ways Beginners Damage Flex Cables
1. Pulling the display too quickly
When removing a damaged screen, beginners may lift it without checking the cable position.
If the cable remains connected, pulling can tear it or damage its connector.
2. Using metal tools carelessly
Sharp metal tools can scratch circuit boards, damage connectors, or create accidental electrical contact.
Suitable non-conductive tools should be used where appropriate.
3. Bending cables sharply
Flex cables are designed to bend within certain limits.
Sharp folds and repeated twisting can damage their internal conductive tracks.
4. Reconnecting cables incorrectly
A connector that isn’t properly aligned may become damaged when pressure is applied.
It should never be forced into position.
5. Working without proper preparation
Failing to follow the correct power-isolation and disconnection procedure increases the risk of accidental electrical damage.
Why Battery Disconnection Is Important
Before working on internal smartphone components, technicians should follow the manufacturer’s model-specific safety procedure.
This includes powering down the phone and isolating the battery as directed by the repair documentation.
Working around live electrical connections can increase the risk of short circuits and component damage.
A professional repair environment also uses appropriate tools and electrostatic discharge precautions.
Signs of a Damaged Display Connector
After a replacement, several symptoms may indicate a connection or component problem.
| Symptom | Possible cause |
|---|---|
| Completely black screen | Display connection or panel problem |
| Intermittent image | Loose or damaged connection |
| Flickering | Panel, connection, or electrical issue |
| No touch response | Touch layer or connection problem |
| Coloured lines | OLED panel or signal-related damage |
| Screen works only sometimes | Connector or component fault |
These symptoms don’t always mean the connector is damaged.
A technician should diagnose the device before replacing additional components.
The Professional Approach to Connector Handling
Experienced technicians use precision tools and controlled movements.
They inspect connectors under suitable lighting and ensure the components are correctly aligned.
Before final assembly, they verify that the replacement display operates consistently.
They also check for signs of damaged pins, contamination, and connector misalignment.
Expert Tip: Never force a display connector into place. If it doesn’t align naturally, stop and inspect it. A few seconds of careful checking can prevent a costly motherboard repair.
Mistake 4: Ignoring Fingerprint Sensors and Biometric Functionality
The fourth mistake is concentrating entirely on restoring the picture while forgetting about fingerprint recognition.
Modern smartphones rely on several connected hardware and software features.
Replacing a screen doesn’t automatically guarantee that every function will continue working correctly.
The Pixel 11 Pro supports Fingerprint Unlock and Face Unlock. Its fingerprint functionality is particularly important when replacing a display assembly.
Why Fingerprint Recognition Matters
Many smartphone users rely on fingerprint authentication throughout the day.
It provides a convenient way to:
-
Unlock the phone.
-
Authorise certain applications.
-
Confirm supported payments.
-
Access protected information.
-
Authenticate supported services.
If fingerprint recognition stops working after a screen replacement, the customer may experience a frustrating repair outcome even when the display looks perfect.
How Screen Replacement Can Affect Fingerprint Performance
Fingerprint recognition may be affected by several factors.
These include:
-
Incorrect replacement screen compatibility.
-
Poor display quality.
-
Incorrect sensor positioning.
-
Damaged sensor-related components.
-
Contamination during installation.
-
Software or calibration requirements.
Not every Pixel display replacement requires the same service procedure.
The technician must identify the correct requirements for the exact device and replacement component.
The Importance of Sensor Alignment
Under-display fingerprint systems depend on the relationship between the display and fingerprint sensing hardware.
If the replacement panel isn’t compatible or correctly installed, recognition performance may suffer.
For example, a phone might recognise a fingerprint occasionally but fail repeatedly when the user’s hands are slightly dry.
This can indicate that additional diagnosis is necessary.
Software Calibration and Verification
Some smartphone repairs require specific software procedures after component replacement.
A technician should check the relevant Google repair documentation to determine whether calibration, diagnostics, or additional setup is required.
Never assume that every replacement screen can be installed and immediately used without further verification.
How Professionals Protect Biometric Features
A professional technician should:
-
Inspect the original display and relevant sensor components.
-
Confirm replacement screen compatibility.
-
Follow the appropriate disassembly procedure.
-
Protect delicate sensor-related components.
-
Complete any required manufacturer-supported calibration.
-
Test fingerprint recognition after installation.
The final test should confirm that the device can consistently recognise an authorised fingerprint.
What About Face Unlock?
Face Unlock should also be checked after the repair.
Although display replacement doesn’t automatically mean the face authentication system has been damaged, the technician should verify that the relevant sensors and front-facing functions remain operational.
Other checks should include:
-
Front camera operation.
-
Proximity sensor behaviour.
-
Ambient light sensor behaviour.
-
Automatic screen wake and sleep functions.
-
Call-related screen behaviour.
Expert Tip: A successful repair isn’t just about making the screen light up. Biometric authentication and other connected functions should work as expected before the device is returned.
Mistake 5: Skipping Final Testing and Rushing the Installation
The fifth mistake is skipping final testing.
This is one of the most frustrating problems because a screen can appear perfectly normal while still having hidden defects.
A beginner may install the display, switch on the phone, see the Google logo, and assume the repair is complete.
However, a working picture doesn’t prove that every function has been restored.
Why Final Testing Is Essential
The display assembly is connected to several important smartphone functions.
A proper inspection helps identify problems before the customer starts using the phone.
Without testing, a technician may overlook:
-
Dead touchscreen areas.
-
Poor brightness adjustment.
-
Flickering.
-
Colour inconsistencies.
-
Unresponsive fingerprint recognition.
-
Display connection problems.
-
Incorrect screen alignment.
-
Adhesive problems.
These issues can result in repeat visits and unnecessary repair expenses.
The Essential Post-Repair Testing Checklist
A professional screen replacement should include a structured inspection.
| Test | What the technician checks |
|---|---|
| Display startup | Screen starts consistently |
| Brightness | Brightness adjustment works |
| Colour reproduction | No unusual lines or patches |
| Touchscreen | Entire display responds correctly |
| Multi-touch | Multiple touch points register |
| Refresh rate | Smooth display behaviour |
| Fingerprint | Fingerprint recognition operates |
| Front camera | Camera image is clear |
| Proximity sensor | Appropriate call behaviour |
| Audio | Earpiece and speaker operation |
| Charging | Charging works normally |
| Physical fit | Display sits evenly in the frame |
The exact test requirements depend on the repair performed and the manufacturer’s procedures.
Testing Touchscreen Accuracy
A particularly important test involves checking the entire touchscreen.
A display may respond perfectly in the centre but fail near the edges.
This can affect:
-
Typing.
-
Scrolling.
-
Gaming.
-
Gesture navigation.
-
App controls.
Technicians should check multiple areas instead of testing only one part of the screen.
Inspecting Brightness and Colours
OLED displays should also be inspected at different brightness levels.
Look for:
-
Unusual colour shifts.
-
Flickering.
-
Uneven illumination.
-
Dark patches.
-
Dead pixels.
-
Abnormal lines.
Testing against different backgrounds can make display defects easier to identify.
Checking Adhesive and Screen Alignment
Once the display is installed, the technician must inspect its physical fit.
The screen should sit evenly without unusual gaps or raised edges.
Poor adhesive application can allow dust or moisture to enter.
It may also place unnecessary pressure on the display assembly.
Water Resistance: A Commonly Overlooked Issue
The Pixel 11 Pro carries an IP68 dust and water resistance rating under specified laboratory conditions.
However, a cracked screen or display replacement can affect the device’s original sealing.
Replacing adhesive doesn’t automatically restore the original factory water resistance.
Where appropriate, professional repair procedures may include suitable sealing and pressure testing.
Even then, a technician should avoid promising that a repaired phone is guaranteed to retain its original water resistance.
Expert Tip: Never return a repaired smartphone without completing the relevant functional checks. A professional-quality repair must be tested, inspected, and documented.
Additional Repair Advice: Professional Screen Replacement vs DIY Repair
Not every smartphone owner has the experience, equipment, or confidence to repair a premium device.
DIY screen replacement videos may make the process look straightforward, but real repairs can be much more complicated.
DIY Screen Replacement
DIY repairs may appeal to people who enjoy electronics and already have experience with smartphone disassembly.
However, beginners should consider the following risks:
-
Purchasing incompatible parts.
-
Damaging internal connectors.
-
Breaking the replacement display.
-
Losing small screws or components.
-
Creating adhesive problems.
-
Affecting device sealing.
-
Missing required calibration procedures.
A low initial repair budget doesn’t always mean a lower final cost.
Professional Screen Replacement
A professional repair centre offers several advantages.
| Repair consideration | DIY repair | Professional repair |
|---|---|---|
| Diagnostic equipment | Depends on owner | Professional equipment |
| Component sourcing | Owner responsibility | Specialist suppliers |
| Technical experience | Varies | Trained technicians |
| Connector handling | Experience-dependent | Precision procedures |
| Functional testing | May be limited | Structured testing |
| Repair warranty | Depends on seller | Depends on repair provider |
| Time required | Can be unpredictable | Often more efficient |
Professional repair is particularly valuable when the phone has multiple symptoms.
For example, a cracked screen combined with charging problems or intermittent shutdowns may indicate additional damage.
How Much Does Google Pixel 11 Pro Screen Repair Cost?
The exact replacement price depends on several factors.
These include:
-
Replacement display quality.
-
Genuine or third-party component availability.
-
Labour requirements.
-
Additional internal damage.
-
Sensor or calibration requirements.
-
Warranty coverage.
It’s best to request a diagnosis and written quotation before authorising the repair.
Be cautious of advertisements offering extremely low prices without explaining the replacement screen’s quality.
What Should You Ask a Repair Centre?
Before choosing a technician, ask:
-
Is the replacement screen compatible with my exact model?
-
What type of display will be installed?
-
Is the part genuine, refurbished, or aftermarket?
-
Does the repair include touchscreen testing?
-
Will fingerprint recognition be checked?
-
Is there a repair warranty?
-
Will the phone be inspected for additional damage?
-
What happens if the replacement display develops a fault?
These questions help you compare repair services more confidently.
How to Protect Your Google Pixel 11 Pro After Screen Replacement
A successful repair is only the beginning.
Taking care of your replacement display can help reduce the risk of future damage.
1. Install a Suitable Screen Protector
A compatible screen protector can help protect the front glass against everyday scratches and minor impacts.
However, make sure it doesn’t interfere with fingerprint recognition or touch sensitivity.
2. Use a Quality Protective Case
Choose a case with suitable raised edges around the display.
This can help reduce direct contact between the screen and flat surfaces.
3. Avoid Carrying Your Phone With Sharp Objects
Keys, coins, and other objects can scratch surfaces or create pressure points.
Use a separate pocket whenever possible.
4. Keep Your Phone Away From Excessive Heat
Avoid leaving your device in direct sunlight or inside a hot vehicle.
Excessive temperatures can affect electronic components and battery performance.
5. Address Small Cracks Early
A small crack may seem harmless, but it can become worse after another impact.
Have the device inspected if the crack spreads or touchscreen performance changes.
6. Back Up Important Data
Screen repairs usually don’t require erasing personal data, but unexpected hardware problems can occur.
Regular backups provide additional protection for photographs, contacts, documents, and other important information.
Frequently Asked Questions About Google Pixel 11 Pro Screen Repairs
1. Is Google Pixel 11 Pro screen replacement difficult for beginners?
Yes. Replacing the display can be challenging for beginners because the phone contains delicate internal components, flexible connectors, and carefully positioned adhesives.
The LTPO OLED panel also requires proper handling to avoid damage during removal and installation.
Without suitable tools and repair experience, it’s easy to damage the replacement screen or other internal components. Professional repair is generally the safer choice.
2. Can I replace only the cracked glass instead of the entire display?
Sometimes, but it depends on the condition of the original display and the availability of suitable specialist equipment.
If the OLED panel and touch functionality remain undamaged, glass-only refurbishment may be possible through a specialist process.
However, if the OLED panel displays black spots, coloured lines, flickering, or touch failure, a complete display assembly replacement may be more appropriate.
A technician should inspect the phone before recommending either option.
3. Why does my replacement Pixel 11 Pro screen have different colours?
Different colours can indicate a low-quality replacement panel, incorrect display settings, a defective component, or a connection problem.
Some aftermarket displays may not reproduce the original colour accuracy and brightness.
A professional technician should compare the replacement display’s specifications and test its performance before completing the installation.
4. Will fingerprint recognition work after replacing the screen?
It should work when compatible components are installed and the required repair and calibration procedures are completed.
However, fingerprint recognition can be affected by an incompatible display, damaged components, incorrect installation, or software-related issues.
Always ask your repair technician to test fingerprint recognition before collecting your phone.
5. Can excessive heat damage my Google Pixel 11 Pro during screen replacement?
Yes. Uncontrolled heat can potentially damage internal components, cables, adhesives, and other sensitive parts.
Professional technicians use suitable equipment and follow model-specific repair procedures to control the removal process.
A household hair dryer or uncontrolled heat gun isn’t a reliable substitute for proper repair equipment.
6. How long does Google Pixel 11 Pro screen replacement take?
Repair time depends on the availability of replacement components, the condition of the phone, and the complexity of the damage.
A straightforward replacement may be completed within the same day when the correct parts and equipment are available.
However, additional damage, diagnostic requirements, or component availability can increase the turnaround time.
Always request an estimated completion time before booking.
7. Will my Pixel 11 Pro remain waterproof after screen replacement?
The Pixel 11 Pro has an IP68 rating under specified laboratory conditions.
However, opening the phone and replacing its display can affect its original protective seals.
A professional technician should follow suitable sealing procedures and perform appropriate testing where available.
Even after repair, the original factory water resistance shouldn’t be assumed or guaranteed.
Avoid deliberately exposing a repaired phone to water.
8. Is it worth repairing a Google Pixel 11 Pro with a completely black screen?
In many cases, yes.
A black screen doesn’t automatically mean the entire phone is beyond repair.
Possible causes include:
-
Damaged OLED display.
-
Faulty display connection.
-
Internal electrical damage.
-
Impact-related motherboard problems.
-
Liquid damage.
A proper diagnosis can identify the actual fault and help determine whether screen replacement is economically worthwhile.
9. How can I identify a poor-quality replacement display?
Watch for several warning signs:
-
Unusually low brightness.
-
Incorrect colours.
-
Uneven display appearance.
-
Touchscreen delays.
-
Flickering.
-
Poor viewing angles.
-
Unreliable fingerprint recognition.
-
Visible gaps around the screen.
However, these symptoms aren’t always caused by a low-quality panel. Incorrect installation and other hardware faults can produce similar problems.
Always have the phone professionally inspected before purchasing another replacement.
10. Should I choose genuine or aftermarket Google Pixel 11 Pro screens?
The best option depends on availability, budget, component quality, and the importance of maintaining the original display experience.
A verified genuine service part is a strong choice when available.
A reputable aftermarket alternative may also be suitable, provided its compatibility, specifications, performance, and warranty are clearly established.
Avoid purchasing components based only on attractive prices or unverified advertising claims.
Conclusion: Avoid These Costly Mistakes and Choose Professional Pixel 11 Pro Screen Repair

The Google Pixel 11 Pro is a sophisticated smartphone with an impressive LTPO OLED display, advanced biometric features, and premium hardware.
Repairing its screen requires more than basic tools and a replacement panel.
As we’ve discussed, five common mistakes can turn a straightforward repair into an expensive problem:
-
Choosing cheap, incompatible replacement displays.
-
Applying excessive heat during screen removal.
-
Damaging delicate flex cables and internal connectors.
-
Ignoring fingerprint sensors and biometric functionality.
-
Skipping final testing and rushing the installation.
Each mistake can affect the phone’s performance, reliability, and long-term usability.
The best way to avoid these problems is to use suitable replacement components, follow proper repair procedures, and ensure every important function is tested before the device is returned.
If your Google Pixel 11 Pro has a cracked screen, black display, flickering OLED panel, or touchscreen problems, don’t risk making the damage worse through an inexperienced repair attempt.
Choose a professional repair centre that understands modern smartphone technology and takes quality control seriously.
Remember: A successful screen replacement isn’t simply about making the display work again. It’s about restoring the phone’s performance, functionality, and reliability.
Additional Professional Repair Considerations
When Should You Replace the Entire Display Assembly?
A full display replacement may be necessary when the OLED panel has suffered internal damage.
Common symptoms include:
-
Black ink-like patches spreading across the display.
-
Green, pink, or white vertical lines.
-
Touchscreen areas that no longer respond.
-
Screen flickering during normal operation.
-
Completely black display despite the phone powering on.
-
Visible internal cracks beneath the outer glass.
These symptoms should be professionally diagnosed because they can sometimes indicate additional hardware faults.
What Makes a Quality Repair Centre Different?
A reliable repair centre should provide:
-
Accurate fault diagnosis before replacement.
-
Suitable replacement display components.
-
Experienced smartphone technicians.
-
Proper handling of delicate internal connectors.
-
Fingerprint and touchscreen verification.
-
Final quality-control testing.
-
Clear repair warranty conditions.
The cheapest repair isn’t always the best value. A dependable repair should restore everyday functionality without introducing unnecessary problems.
Technical specifications referenced from Google’s official Pixel 11 Pro documentation.
David from Sydney CBD Repair Centre – The Best place to fix mobile phones as 7 Years In A Row! Top Mobile Phone Repair In Sydney. More than 2000 Positive Reviews on Google and Same Day Repairs.
We take pride in delivering exceptional repair services for all major phone brands including Apple, Samsung, Google, and more. Our expert technicians use only genuine parts and offer 90days warranty on repairs. Located in the heart of Sydney CBD, we’re your one-stop solution for all mobile device repairs.
Our commitment to excellence has earned us the trust of thousands of satisfied customers. Whether it’s a cracked screen, battery replacement, or water damage repair, we handle it all with professional care and expertise. Walk in today and experience why we’re Sydney’s #1 choice for mobile phone repairs.
Visit us for:
✓ Same Day Express Repairs
✓ Genuine Parts Guarantee
✓ Professional Technicians
✓ Competitive Pricing
✓ 2000+ 5-Star Google Reviews
✓ 7-Time Award Winner for Best Phone Repairs
Sydney CBD Repair Centre – Where Quality Meets Reliability.
Call : +61280114119
Website: https://SydneyCBD.repair/locate-us

