




Google Pixel 11 Screen Replacement Complete Guide For Beginners And DIY Techs

Google Pixel 11 Screen Replacement Complete Guide For Beginners And DIY Techs – 13 Expert Tips For A Flawless Display Repair!
Introduction
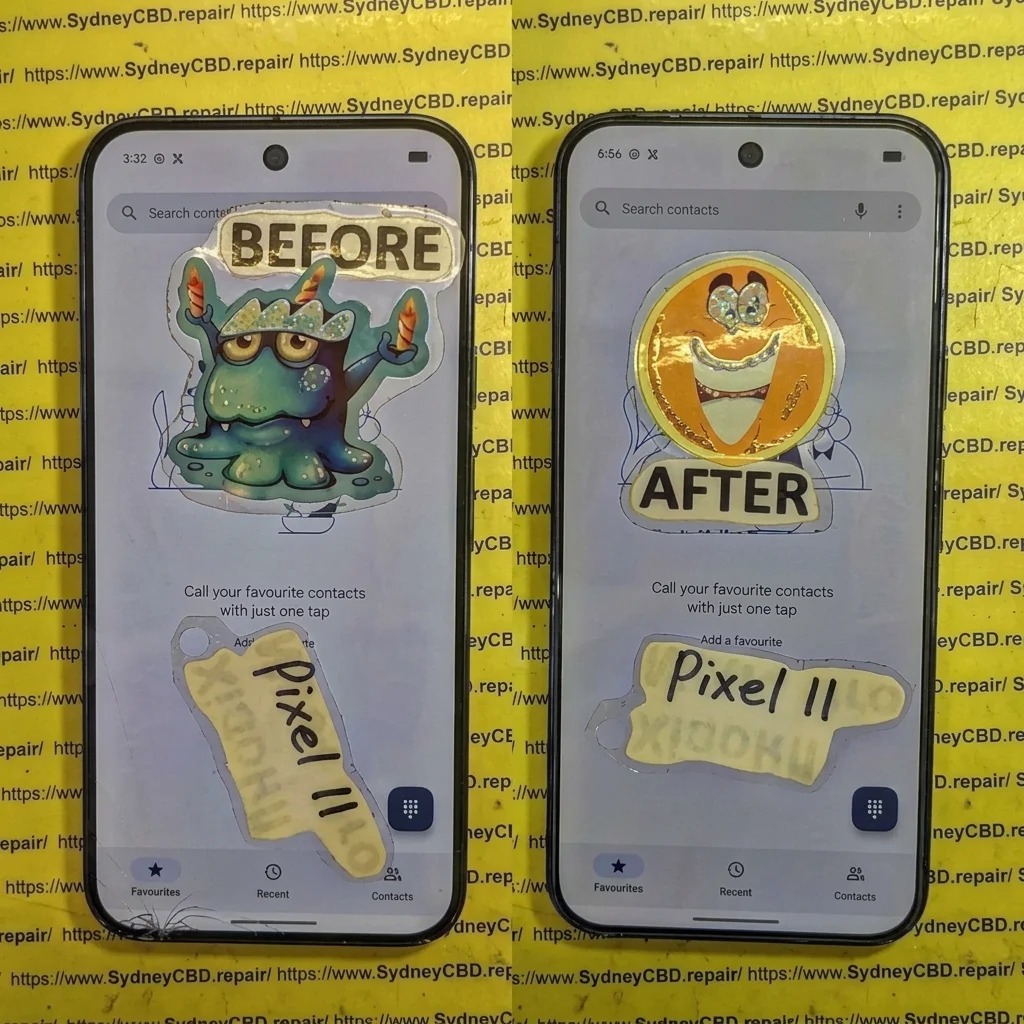
A cracked smartphone screen doesn’t always mean it’s time to purchase a new phone. With the right replacement parts, proper tools, and careful repair techniques, a damaged Google Pixel 11 can potentially be restored to excellent working condition.
The Google Pixel 11 brings a new generation of display technology, improved performance, and enhanced durability. However, accidental drops, pressure damage, and unexpected impacts can still cause screen problems.
This comprehensive guide explores everything beginners, DIY enthusiasts, and professional technicians should understand before attempting a Google Pixel 11 screen replacement. We’ll cover display diagnosis, repair preparation, replacement components, common mistakes, testing procedures, and professional repair options.
Important technical note: The Pixel 11 launched in August 2026. Its published specifications include a 6.3-inch OLED display, 1080 × 2424 resolution, a 60–120Hz refresh rate, and Gorilla Glass Victus 2 protection. However, exact internal repair procedures, adhesive layouts, connector positions, and calibration requirements must be checked against the official model-specific repair documentation rather than assumed from older Pixel models.
1. Understanding the Google Pixel 11 Display Technology
Before starting a screen repair, it’s important to understand what makes the Google Pixel 11 display different from older smartphone screens.
The display is one of the most important components of a modern smartphone. It handles everything from everyday navigation and messaging to photography, gaming, video streaming, and biometric security.
The Pixel 11 uses an advanced OLED display designed to deliver sharp images, rich colours, deep blacks, and smooth animations.
1.1 Google Pixel 11 Display Specifications
Here are the published specifications for the standard Google Pixel 11.
| Display Feature | Specification |
|---|---|
| Display size | 6.3 inches |
| Display technology | OLED |
| Resolution | 1080 × 2424 |
| Pixel density | 422 PPI |
| Refresh rate | 60–120Hz |
| Cover glass | Gorilla Glass Victus 2 |
| HDR | Supported |
| HDR brightness | Up to 2,000 nits |
| Peak brightness | Up to 3,000 nits |
| Aspect ratio | 20:9 |
These specifications make the Pixel 11 suitable for users who want a bright, responsive, and detailed viewing experience.
Pixel Phone Help
1.2 Why OLED Technology Matters During Screen Replacement
OLED stands for Organic Light-Emitting Diode.
Unlike traditional LCD technology, OLED pixels produce their own light. This means the display doesn’t need a separate backlight.
There are several advantages:
-
Better contrast: Individual pixels can switch off to produce deep black colours.
-
Vibrant colours: OLED panels deliver rich colour reproduction.
-
Thin construction: OLED technology allows manufacturers to create slimmer display assemblies.
-
Fast response: OLED panels offer quick pixel response for smooth visual performance.
-
Power efficiency: Dark content can use less power because black pixels are switched off.
However, OLED technology also requires careful handling during repairs.
A replacement display with poor manufacturing quality may produce uneven brightness, colour differences, flickering, or touch sensitivity problems.
That’s why selecting the correct replacement assembly is just as important as installing it correctly.
1.3 Understanding the Difference Between Glass Damage and OLED Damage
Not every cracked screen requires the same repair approach.
Sometimes, the outer glass is damaged while the OLED display underneath continues working normally.
In other situations, the impact damages both the protective glass and the internal display layers.
Consider these examples:
| Damage Type | Common Symptoms | Possible Repair |
|---|---|---|
| Outer glass damage | Visible cracks, normal picture | Specialist glass-only repair if technically supported |
| OLED damage | Black patches or coloured lines | Full display assembly replacement |
| Touch damage | Unresponsive areas | Display assembly diagnosis and replacement |
| Connector damage | Intermittent display | Connector or board-level diagnosis |
| Severe impact | Multiple display problems | Full inspection before replacement |
One important point: a screen that still displays an image isn’t necessarily healthy. Internal OLED damage can develop even when the outer glass appears relatively intact.
1.4 Common Signs That Your Pixel 11 Screen Needs Replacement
Watch out for these symptoms:
-
Black spots spreading across the screen.
-
Green, pink, or white vertical lines.
-
Flickering during normal use.
-
Touchscreen areas that stop responding.
-
Display brightness changing unexpectedly.
-
Screen flashing when opening applications.
-
Completely black display despite the phone appearing operational.
-
Cracked glass with sharp edges.
If the phone still responds to calls, notifications, or vibration but displays nothing, the problem could involve the display assembly, connector, or another internal component.
A professional diagnosis helps identify the actual cause before replacement parts are purchased.
1.5 Why Beginners Should Understand Display Compatibility
A replacement screen must match the exact device model.
Don’t assume that a Pixel 11 Pro screen, Pixel 11 Pro XL screen, or another Pixel generation will fit the standard Pixel 11.
Even displays that look similar may have different dimensions, connectors, mounting points, or electronic characteristics.
Always verify:
-
Exact model identification.
-
Display assembly part number.
-
Connector compatibility.
-
Frame dimensions.
-
Touchscreen functionality.
-
Fingerprint sensor compatibility.
-
Available calibration procedures.
A few minutes spent checking compatibility can prevent an expensive repair mistake.
2. Diagnosing Screen Damage Before Starting the Repair
A successful screen replacement begins with accurate diagnosis.
Many beginners immediately assume that a cracked display is the only problem. Unfortunately, a smartphone can suffer several types of internal damage during a single accident.
For example, dropping the phone onto concrete might damage the display, frame, internal connectors, and other components simultaneously.
Replacing the screen without checking these areas could result in additional problems.
2.1 Perform a Visual Inspection
Start by inspecting the phone carefully.
Look for:
-
Cracks around the corners.
-
Bent or damaged frame sections.
-
Separation between the display and housing.
-
Signs of moisture exposure.
-
Scratches around the camera area.
-
Damage near the USB-C charging port.
Pay special attention to the frame.
A bent frame can prevent a replacement screen from sitting correctly. It may also create pressure points that damage the new OLED panel.
Never force a replacement screen into a distorted housing.
2.2 Test the Touchscreen
If the original screen still works, perform a touchscreen test before disassembly.
Open different applications and move your finger across the entire display.
Check the following:
-
Can you type across the complete keyboard?
-
Does scrolling work smoothly?
-
Are there unresponsive areas?
-
Does the screen register unwanted touches?
-
Does multi-touch work correctly?
These tests help establish a baseline for comparison after the repair.
2.3 Identify OLED Problems
OLED damage doesn’t always appear immediately after an accident.
Some common symptoms include:
Green lines: Vertical green lines can indicate internal display damage.
Black patches: Dark areas may expand after the initial impact.
Flickering: The display may flash or become unstable.
Colour distortion: Certain sections may show unusual colours or brightness.
Complete display failure: The phone may remain operational while the screen stays black.
If these symptoms appear after an impact, replacing the display assembly may be necessary. However, connector and motherboard problems should also be considered.
2.4 Check Whether the Phone Has Additional Internal Damage
Before replacing the screen, examine the phone’s overall condition.
A proper diagnosis should consider:
| Component | What to Check |
|---|---|
| Battery | Swelling, unusual heat or physical damage |
| Charging system | Charging response and port condition |
| Cameras | Focus, image quality and camera operation |
| Speakers | Audio output and distortion |
| Microphones | Voice recording and call quality |
| Frame | Bending and structural damage |
| Display connectors | Damage or contamination |
| Sensors | Proximity and ambient light behaviour |
If the battery is swollen, stop using the device and don’t apply pressure to the screen or battery.
Battery damage requires separate safety precautions.
2.5 When Is a Black Screen Actually a Display Problem?
A completely black screen can be confusing.
The phone may vibrate, receive calls, and produce notification sounds without showing anything.
Possible causes include:
-
Failed OLED panel.
-
Damaged display flex cable.
-
Loose or damaged connector.
-
Motherboard display circuit failure.
-
Liquid damage.
-
Power-related problems.
A technician should inspect the device before ordering a replacement panel.
This is especially important when the phone has suffered water exposure or a major impact.
2.6 Repair or Replace the Entire Phone?
A screen replacement is often worth considering when the device is otherwise in good condition.
However, the decision depends on several factors.
| Condition | Recommendation |
|---|---|
| Cracked display, working phone | Consider screen replacement |
| Damaged OLED, healthy motherboard | Consider screen replacement |
| Bent frame and damaged display | Obtain a full repair assessment |
| Severe liquid damage | Diagnose before deciding |
| Multiple expensive component failures | Compare repair and replacement costs |
The key is to avoid spending money on a screen before understanding the phone’s overall condition.
3. Essential Tools and Equipment for Pixel 11 Screen Replacement
Having the correct tools makes a major difference during smartphone repairs.
Professional technicians don’t rely on excessive force. They use specialised equipment to control heat, separate components, protect delicate connectors, and maintain accurate alignment.
For beginners, investing in suitable tools is more important than purchasing the cheapest repair kit available.
3.1 Essential Screen Replacement Tools
Here are some commonly used tools for modern smartphone display repairs.
| Tool | Purpose |
|---|---|
| Precision screwdriver set | Removing model-specific screws |
| Plastic opening picks | Separating bonded components |
| Suction handle | Assisting controlled screen separation |
| ESD-safe tweezers | Handling small components |
| Plastic spudger | Disconnecting delicate connectors |
| Controlled heating equipment | Softening display adhesive |
| Isopropyl alcohol | Appropriate cleaning applications |
| Microfibre cloth | Removing dust and fingerprints |
| ESD protection | Reducing static electricity risks |
| Display testing equipment | Checking replacement functionality |
The exact tool requirements should be confirmed using the Pixel 11 repair documentation.
3.2 Why Controlled Heating Is Important
Modern smartphone displays are bonded to their housings using strong adhesives.
Controlled heating can soften adhesive and make component separation easier.
However, excessive heat can cause serious damage.
Potential problems include:
-
OLED panel damage.
-
Battery overheating.
-
Adhesive deformation.
-
Damage to nearby components.
-
Frame distortion.
Never assume that a heating temperature or removal angle used on an older Pixel model is suitable for the Pixel 11.
Follow the model-specific repair manual.
3.3 Use Plastic Opening Tools Whenever Appropriate
Metal tools can scratch frames, puncture batteries, or damage internal components.
Plastic opening picks and spudgers are generally safer for delicate separation tasks.
Even so, plastic tools can cause damage if they’re inserted too deeply or used in the wrong location.
Beginners should understand the internal layout before attempting to separate bonded parts.
3.4 ESD Protection Is Essential
ESD stands for Electrostatic Discharge.
Static electricity can damage sensitive electronic components without leaving visible marks.
Professional technicians reduce this risk through:
-
ESD-safe work surfaces.
-
Proper grounding.
-
Anti-static wrist straps.
-
Suitable component handling procedures.
-
Clean and organised workspaces.
A repair bench should also be free from unnecessary metal objects, liquids, and loose debris.
3.5 Create an Organised Repair Workspace
Before opening the phone, organise your work area.
Keep screws separated by location, photograph the original assembly, and place delicate components in labelled trays.
This simple habit prevents confusion during reassembly.
For beginners, taking photographs at each stage can be extremely helpful.
Expert tip: Never rush a smartphone repair. A few extra minutes spent organising tools and components can save hours of troubleshooting later.
4. Choosing the Right Google Pixel 11 Replacement Screen
Choosing a suitable replacement display is one of the most important parts of the entire process.
A screen might look correct but still have poor touch performance, inaccurate colours, or compatibility problems.
The cheapest replacement isn’t automatically the best value.
4.1 Genuine Replacement Screens
Genuine replacement parts are designed for the intended device model.
When available through an authorised supply channel, they offer the strongest basis for maintaining the original display characteristics.
Advantages can include:
-
Correct model compatibility.
-
Appropriate display dimensions.
-
Expected colour reproduction.
-
Suitable touch performance.
-
Better confidence in component quality.
-
Access to supported repair documentation.
However, genuine parts should still be checked for authenticity and correct part numbers.
4.2 Aftermarket Replacement Screens
Aftermarket displays are produced by third-party manufacturers.
Quality can vary considerably between suppliers.
Some may offer acceptable performance, while others may have problems such as:
-
Uneven brightness.
-
Poor colour accuracy.
-
Touchscreen delays.
-
Lower durability.
-
Incorrect frame alignment.
-
Compatibility issues.
Always request clear information about the manufacturer, specifications, warranty, and return policy.
4.3 Refurbished Display Assemblies
Refurbished displays may reuse original display components with a replacement outer glass layer or other restored components.
Their quality depends on the refurbishment process.
A properly refurbished panel can be useful, but technicians should inspect it carefully before installation.
Check for:
-
Dead pixels.
-
OLED burn-in.
-
Touchscreen problems.
-
Scratches.
-
Uneven brightness.
-
Incorrect assembly dimensions.
4.4 Genuine vs Aftermarket vs Refurbished
| Feature | Genuine | Aftermarket | Refurbished |
|---|---|---|---|
| Original manufacturer specification | Designed to match | Varies | Depends on original panel |
| Quality consistency | Generally stronger | Supplier-dependent | Refurbishment-dependent |
| Compatibility confidence | High when verified | Must be checked | Must be checked |
| Price | Often higher | Varies | Varies |
| Warranty | Supplier-dependent | Supplier-dependent | Supplier-dependent |
4.5 Why Fingerprint Compatibility Matters
Modern smartphones use sophisticated biometric systems.
A display replacement can affect under-display fingerprint performance if the replacement assembly, optical characteristics, positioning, or calibration aren’t correct.
Don’t assume that every compatible-looking OLED panel will maintain fingerprint functionality.
Before buying a replacement screen, verify the exact Pixel 11 requirements.
If a calibration procedure is required, follow the official instructions and use supported software tools.
4.6 Avoid Fake and Low-Quality Replacement Parts
Cheap online replacement displays can look attractive, particularly when repair budgets are limited.
However, a poor-quality component can create more problems than it solves.
Look out for:
-
Missing manufacturer information.
-
Incorrect product descriptions.
-
No clear compatibility details.
-
Unusually low prices.
-
No meaningful warranty.
-
Poor supplier reviews.
-
Inconsistent packaging or part identification.
A trustworthy supplier should provide accurate product details and reasonable after-sales support.
For additional guidance, visit Google’s official Pixel self-repair information.
5. Preparing Your Google Pixel 11 for Screen Replacement
Preparation is essential before attempting any smartphone repair.
Even experienced technicians follow a systematic preparation process because small mistakes can lead to expensive component damage or data loss.
5.1 Back Up Your Important Data
Before opening your phone, create a backup.
Your photos, videos, contacts, documents, and application data may be important.
Use Google’s backup options and confirm that your important information is safely stored.
Remember that a screen replacement shouldn’t normally require deleting personal information, but unexpected repair complications can occur.
5.2 Check the Warranty
Check the device warranty before starting a DIY repair.
Accidental damage may not be covered by Google’s standard limited warranty.
Also, unauthorised repair or damage caused during self-repair may affect warranty coverage. The exact conditions depend on your region and applicable consumer rights.
Google provides official repair information through its Pixel repair support page.
5.3 Power Down the Device
Always follow the official shutdown and battery-disconnection instructions.
Working on powered electronic components increases the risk of electrical damage.
Never attempt to disconnect internal components while the phone is operating unless the official procedure specifically requires it.
5.4 Remove External Accessories
Before beginning, remove:
-
Protective phone cases.
-
SIM cards where applicable.
-
Screen protectors.
-
External accessories.
-
Connected charging cables.
Keep the phone on a clean, stable, ESD-safe work surface.
5.5 Understand the Risks of Battery Damage
Smartphone batteries contain lithium-ion cells.
Puncturing, bending, crushing, or overheating a battery can cause dangerous chemical reactions.
If you notice swelling, unusual smells, smoke, or excessive heat, stop the repair immediately.
Don’t attempt to force open a swollen device.
Professional battery handling is essential.
6. Google Pixel 11 Display Removal: Important Repair Principles
Display removal is one of the most delicate stages of a smartphone screen replacement.
The objective is to separate the damaged display without damaging the housing, battery, internal components, or connectors.
Because the exact Pixel 11 disassembly sequence must be verified against its model-specific repair documentation, the following is a safety-focused overview rather than an invented screw-by-screw procedure.
6.1 Inspect the Device Before Separation
Look closely at the display edges and housing.
Check for:
-
Existing frame deformation.
-
Glass fragments.
-
Adhesive separation.
-
Signs of liquid exposure.
-
Previous repair attempts.
If the frame is bent, a replacement display may not fit correctly.
6.2 Understand the Display Adhesive
Modern smartphones use strong adhesive to secure display assemblies.
Removing the display without understanding the adhesive arrangement can result in broken glass, damaged flex cables, and internal component failure.
Follow the manufacturer’s instructions for:
-
Heating equipment.
-
Adhesive softening.
-
Opening locations.
-
Tool insertion depth.
-
Display lifting direction.
Never copy the opening technique of a different Pixel generation without verifying compatibility.
6.3 Avoid Excessive Pressure
A damaged display can be extremely fragile.
Applying too much pressure may spread cracks or damage the underlying OLED layers.
Use the correct tools and controlled procedures.
Avoid twisting the display or forcing an opening pick into unfamiliar areas.
6.4 Protect Internal Flex Cables
Flexible cables connect different components inside modern smartphones.
These cables can be damaged by:
-
Sharp tools.
-
Excessive pulling.
-
Incorrect opening angles.
-
Accidental pinching.
-
Rough handling.
A damaged flex cable may cause display failure or other hardware problems.
6.5 Disconnect Components Carefully
Connector locations and disconnection procedures must be taken from the Pixel 11 repair manual.
Use appropriate non-conductive tools and avoid applying force to small connectors.
If a connector appears damaged, stop and inspect it rather than repeatedly attempting to reconnect it.
6.6 Clean the Housing
After removing the damaged assembly, inspect the frame.
Old adhesive, glass fragments, and dust should be addressed using the approved cleaning procedure.
A clean mounting surface helps the replacement display sit evenly.
Never scrape aggressively or use excessive liquid near sensitive electronics.
6.7 Inspect the Display Area Before Installing the New Screen
Check for:
-
Damaged mounting points.
-
Bent frame sections.
-
Contaminated connectors.
-
Broken glass fragments.
-
Damaged internal cables.
-
Signs of moisture.
This is the right time to identify problems that might otherwise become hidden beneath the new display.
7. Installing the Replacement Pixel 11 Screen
Installing a replacement display requires precision.
Even a high-quality screen can perform poorly if it’s incorrectly aligned, connected, or secured.
7.1 Verify the Replacement Component
Before installation, compare the replacement assembly with the original component.
Check the following:
| Inspection Area | What to Verify |
|---|---|
| Overall dimensions | Correct model size |
| Connector arrangement | Matching connection points |
| Frame compatibility | Correct mounting design |
| Display surface | No scratches or cracks |
| Flex cables | No visible damage |
| Part identification | Correct replacement part |
| Fingerprint support | Compatibility confirmed |
Never force a connector or component that doesn’t appear to match.
7.2 Perform a Supported Preliminary Test
Where the official repair procedure permits testing before final adhesive installation, test the replacement assembly first.
Check:
-
Whether the display powers on.
-
Whether the image appears correctly.
-
Whether the touchscreen responds.
-
Whether brightness behaves normally.
-
Whether there are visible display defects.
Follow the correct connection and battery safety sequence.
Don’t press directly on an unsupported OLED panel.
7.3 Check Screen Alignment
Correct alignment is important for both appearance and structural integrity.
A poorly aligned display can create:
-
Uneven edges.
-
Visible gaps.
-
Pressure points.
-
Adhesive failure.
-
Increased risk of future cracking.
The replacement assembly should sit correctly within the intended mounting area.
7.4 Apply the Correct Replacement Adhesive
Use the specified adhesive material for the Pixel 11.
Don’t rely on generic household glue or unsuitable double-sided tape.
Incorrect adhesive can affect:
-
Display stability.
-
Dust resistance.
-
Moisture resistance.
-
Long-term screen positioning.
Follow the manufacturer’s installation and curing requirements.
7.5 Never Assume Original Water Resistance Is Restored
This is particularly important.
A smartphone’s original water resistance depends on its design, seals, adhesive, assembly quality, and testing.
Opening the device can compromise those protections.
A replacement adhesive seal doesn’t automatically guarantee the phone has regained its original water resistance.
If water resistance is important, have the device inspected and tested using appropriate professional equipment.
7.6 Complete Reassembly Carefully
Before final closure, confirm that all required connectors and components are correctly installed.
Follow the official reassembly sequence.
Avoid trapping cables or applying pressure to internal components.
Once reassembled, allow any specified adhesive setting time before normal use.
8. Post-Repair Testing: 10 Checks Every Technician Should Perform
A replacement screen isn’t ready simply because it turns on.
A professional repair should include a complete functional assessment.
These checks help identify problems before the device is returned to its owner.
8.1 Display Image Quality
Open different applications and inspect the screen.
Look for:
-
Dead pixels.
-
Bright spots.
-
Dark patches.
-
Uneven colours.
-
Flickering.
-
Unusual shadows.
8.2 Touchscreen Responsiveness
Test the entire display surface.
Swipe in different directions and type across the keyboard.
Check for delayed or inaccurate touch responses.
8.3 Multi-Touch Performance
Modern smartphones depend on multi-touch input.
Test supported gestures such as pinch-to-zoom and multi-finger interactions.
8.4 Brightness Adjustment
Increase and decrease screen brightness.
Check whether the display responds smoothly.
Also inspect the screen under different lighting conditions.
8.5 Refresh Rate Behaviour
The Pixel 11 supports a 60–120Hz refresh rate.
Check supported display settings and normal scrolling behaviour.
A replacement display should be evaluated against the specifications and capabilities supported by the device.
8.6 Fingerprint Recognition
Test fingerprint unlocking using the supported setup and calibration procedure.
If fingerprint performance changes after the repair, investigate compatibility and calibration before returning the device.
8.7 Proximity and Ambient Light Sensors
Check the relevant sensor functions.
During phone calls, the proximity sensor should behave as expected.
Automatic brightness should also respond appropriately to changing light conditions.
8.8 Front Camera and Audio
Inspect the front camera and test microphone and speaker operation.
Make sure nothing has been obstructed or incorrectly positioned during reassembly.
8.9 Charging and Connectivity
Check USB-C charging and other basic connectivity functions.
If the device experienced a significant impact, inspect for unrelated hardware problems as well.
8.10 Final Physical Inspection
Finally, examine the entire phone.
Check for:
-
Uneven display gaps.
-
Loose edges.
-
Scratches.
-
Dust beneath the display.
-
Incorrect alignment.
-
Loose buttons.
-
Unusual heating.
A complete quality check improves repair reliability and customer satisfaction.
9. 10 Common Mistakes Beginners Make During Screen Replacement
DIY smartphone repair can save money, but mistakes can quickly make a simple repair more expensive.
Here are ten common problems to avoid.
Mistake 1: Buying the Wrong Replacement Screen
A display designed for a different Pixel model may look similar but still be incompatible.
Solution: Verify the exact model and part number before ordering.
Mistake 2: Using Excessive Heat
Too much heat can damage the OLED panel, battery, and nearby components.
Solution: Follow the model-specific repair instructions and use controlled heating equipment.
Mistake 3: Applying Too Much Pressure
OLED panels are delicate.
Excessive pressure can create new damage during installation.
Solution: Handle the assembly carefully and avoid pressing unsupported areas.
Mistake 4: Ignoring Battery Safety
Damaged lithium-ion batteries can become dangerous.
Solution: Inspect the battery and stop if swelling or physical damage is present.
Mistake 5: Damaging Flex Cables
A tiny cable tear can create major functional problems.
Solution: Understand connector locations and use suitable non-conductive tools.
Mistake 6: Installing Cheap Adhesive
Poor-quality adhesive may allow the display to lift or move.
Solution: Use the correct replacement adhesive specified for the device.
Mistake 7: Skipping Preliminary Testing
Installing a faulty replacement screen wastes time and money.
Solution: Perform the supported initial functionality checks before final sealing.
Mistake 8: Ignoring Fingerprint Calibration
A screen that displays correctly may still have biometric issues.
Solution: Check compatibility and complete the required calibration procedure.
Mistake 9: Forgetting the Final Quality Check
A repair isn’t complete simply because the screen lights up.
Solution: Test touch, brightness, sensors, cameras, audio, and charging.
Mistake 10: Assuming Water Resistance Is Unchanged
Opening a smartphone can affect its seals.
Solution: Never promise restored water resistance without appropriate verification and testing.
10. DIY Repair vs Professional Google Pixel 11 Screen Replacement
Should you replace the screen yourself or visit a professional repair centre?
The answer depends on your technical experience, equipment, budget, and the condition of the phone.
10.1 Advantages of DIY Screen Replacement
DIY repair can offer several benefits.
-
Greater hands-on technical experience.
-
Opportunity to learn smartphone repair.
-
Potential savings on labour.
-
Flexibility to work at your own pace.
-
Understanding of smartphone hardware.
However, these advantages depend on having the right tools, compatible parts, and repair knowledge.
10.2 Disadvantages of DIY Repairs
Beginners should also understand the risks.
-
Accidental battery damage.
-
Broken display connectors.
-
Incorrect adhesive application.
-
Fingerprint functionality problems.
-
Poor display alignment.
-
Reduced moisture protection.
-
Potential warranty implications.
If the device is expensive or contains additional internal damage, professional repair is often the safer choice.
10.3 Benefits of Professional Technicians
An experienced technician can assess the complete device before recommending replacement.
Professional repair centres may have access to:
-
Specialist opening equipment.
-
Genuine or verified replacement components.
-
ESD-safe workstations.
-
Model-specific repair documentation.
-
Display testing equipment.
-
Appropriate calibration tools.
-
Quality-control procedures.
This is particularly valuable when the phone has a black screen, severe OLED damage, or suspected internal connector problems.
10.4 Which Option Is Better?
| Situation | Recommended Approach |
|---|---|
| Experienced repair technician | DIY may be suitable |
| First-time smartphone repair | Professional repair recommended |
| Expensive flagship device | Professional assessment |
| Severe physical damage | Professional diagnosis |
| Damaged battery | Qualified repair professional |
| Uncertain display compatibility | Professional guidance |
The most important thing is to choose a repair method that protects the device rather than simply choosing the cheapest option.
11. Google Pixel 11 Screen Replacement Cost and Value
One of the most common questions smartphone owners ask is how much a replacement screen costs.
Unfortunately, there’s no single price that applies to every repair.
The final amount depends on replacement part availability, labour, location, warranty conditions, and the extent of the damage.
11.1 Factors Affecting Replacement Prices
Several factors influence the total repair cost.
Replacement screen quality: Genuine, refurbished, and aftermarket components can have different prices.
Labour charges: Professional technicians charge for experience, equipment, and repair time.
Frame damage: A bent or damaged frame may require additional work.
Additional component damage: A broken connector or damaged sensor can increase the repair cost.
Parts availability: Newer smartphone models may have limited replacement component availability.
11.2 Is Screen Replacement Worth the Money?
Consider the following factors:
-
Age and condition of the phone.
-
Cost of a compatible replacement display.
-
Remaining software support.
-
Battery condition.
-
Overall performance.
-
Cost of purchasing another device.
The Pixel 11 launched with seven years of OS, security, and Pixel Drop updates according to Google’s announcement, which is an important consideration when evaluating its long-term value.
blog.google
If the phone is otherwise functioning properly, replacing the screen may be a sensible way to extend its useful life.
11.3 Ask for a Complete Repair Quote
Before approving a repair, ask whether the quotation includes:
-
Replacement display.
-
Labour charges.
-
Required adhesive.
-
Fingerprint functionality checks.
-
Post-repair testing.
-
Repair warranty.
-
Additional damage assessment.
A transparent quotation helps you understand exactly what you’re paying for.
12. How to Protect Your New Pixel 11 Screen After Replacement
Once the repair is complete, protecting the new display should become a priority.
A replacement screen can still suffer damage from everyday accidents.
12.1 Use a Quality Screen Protector
A suitable screen protector can help reduce scratches and everyday surface damage.
Choose a product designed specifically for the Pixel 11.
Check that it doesn’t interfere with touchscreen operation or fingerprint recognition.
12.2 Choose a Protective Phone Case
A good case should provide adequate protection around the corners and display edges.
Raised edges can help reduce direct contact between the screen and flat surfaces.
12.3 Avoid Sitting on Your Phone
Keeping a phone in a back pocket creates unnecessary pressure.
Sitting down can bend the housing or place stress on the OLED panel.
12.4 Keep the Device Away From Extreme Temperatures
Excessive heat and cold can affect smartphone components.
Avoid leaving your phone in direct sunlight or inside a hot vehicle for extended periods.
12.5 Clean the Screen Correctly
Use a clean microfibre cloth.
Avoid abrasive cleaning materials and excessive liquid.
Don’t spray cleaning solutions directly into openings or around display edges.
12.6 Handle Your Phone Carefully
Simple habits can prevent expensive repairs.
Avoid dropping the phone onto hard surfaces, placing heavy objects on it, or carrying it alongside sharp metal objects.
A little care can make a big difference.
13. Professional Google Pixel 11 Repair: What to Expect
Choosing a professional repair service doesn’t mean giving up control of your device.
A trustworthy repair centre should explain the diagnosis, replacement options, expected cost, and testing process.
13.1 Initial Device Assessment
The technician should inspect the display and the overall condition of the phone.
They should identify whether the issue involves:
-
Broken outer glass.
-
OLED damage.
-
Touchscreen failure.
-
Display connector problems.
-
Frame deformation.
-
Liquid damage.
13.2 Replacement Part Verification
Before installation, the replacement component should be checked for compatibility and quality.
A reputable repair centre should be able to explain what type of display is being installed.
13.3 Professional Installation
The technician should use appropriate tools, controlled procedures, and the correct replacement adhesive.
The repair should follow available model-specific documentation.
13.4 Functional Testing
The completed device should undergo appropriate display and hardware tests.
This includes touch responsiveness, image quality, brightness, and relevant biometric and sensor functions.
13.5 Warranty and After-Sales Support
Ask about the repair warranty before approving the work.
A professional repair service should clearly explain what is covered and any relevant exclusions.
This gives customers confidence that support is available if a repair-related issue develops.
Frequently Asked Questions About Google Pixel 11 Screen Replacement
FAQ 1: How much does Google Pixel 11 screen replacement cost?
The price depends on the replacement display, component availability, labour charges, and additional damage.
Genuine replacement parts may cost more than third-party alternatives. For an accurate quotation, provide the repair centre with the exact model and a description of the damage.
FAQ 2: Can I replace my Google Pixel 11 screen myself?
Yes, self-repair may be possible if you have the correct replacement component, specialist tools, technical knowledge, and model-specific repair instructions.
However, Google recommends self-repair for people with relevant technical experience. Beginners should consider professional assistance.
FAQ 3: Does the Google Pixel 11 use an OLED screen?
Yes. The standard Google Pixel 11 features a 6.3-inch OLED display with a resolution of 1080 × 2424 pixels and a refresh rate of up to 120Hz.
FAQ 4: Can I replace only the cracked glass?
It depends on the damage and the availability of a suitable glass-only repair process.
If the OLED panel and touch functionality remain healthy, specialist glass refurbishment may be possible. If the internal OLED is damaged, a complete display assembly replacement is generally more appropriate.
FAQ 5: Will fingerprint unlocking work after screen replacement?
It should be checked after the repair.
The replacement assembly must be compatible with the device’s biometric system, and any required calibration must be completed using supported procedures.
Never assume that all aftermarket displays support the original fingerprint functionality.
FAQ 6: How long does a Pixel 11 screen replacement take?
Repair time depends on parts availability, damage severity, and the repair method.
A straightforward display replacement may be completed faster than a device requiring additional frame or connector repairs.
Always request an estimated completion time before approving the repair.
FAQ 7: Will replacing the screen erase my personal data?
A normal display replacement shouldn’t require deleting your personal files.
However, unexpected complications can occur. Always back up important information before repair.
FAQ 8: Does a new screen restore water resistance?
Not automatically.
Opening the phone can compromise the original seals. Correct adhesive and professional testing are important, but no repair should be advertised as restoring factory water resistance without suitable verification.
FAQ 9: Should I buy a cheap aftermarket Pixel 11 screen?
Be careful.
Some third-party displays offer acceptable performance, but quality varies. Poor components may have colour, brightness, touch, or compatibility problems.
Check the supplier, specifications, warranty, and fingerprint compatibility before purchasing.
FAQ 10: Is it worth repairing a Google Pixel 11 with a cracked screen?
In many cases, yes.
If the phone’s battery, motherboard, cameras, and other important components are working correctly, a display replacement may be more economical than purchasing another phone.
Obtain a complete quotation before making the decision.
FAQ 11: What should I do if my Pixel 11 screen is black but the phone still vibrates?
The problem may involve a damaged OLED panel, display connector, or another internal component.
Avoid repeatedly pressing the screen or attempting random disassembly.
A technician should diagnose the phone before replacing any components.
FAQ 12: Where can I find official Google Pixel repair instructions?
Google provides self-repair information, supported genuine replacement parts, and repair manuals for eligible Pixel devices.
Visit the official Google Pixel self-repair page to check the available documentation and regional options.
Conclusion: Make Your Google Pixel 11 Screen Repair Count!

The Google Pixel 11 is an advanced smartphone with an impressive OLED display, smooth refresh rate, and excellent visual performance. However, even modern smartphones aren’t completely protected against accidental drops, cracks, and internal display damage.
A successful Google Pixel 11 screen replacement requires more than simply purchasing a replacement panel. Correct diagnosis, compatible components, suitable tools, careful installation, and comprehensive testing are all essential.
For beginners, understanding the repair process is an excellent starting point. However, attempting a complicated display replacement without the correct technical knowledge can lead to additional damage.
Professional technicians offer an important advantage through experience, specialised equipment, component verification, and post-repair quality checks.
Here are the most important takeaways:
-
Always identify the exact Pixel 11 model.
-
Diagnose the display before purchasing replacement parts.
-
Choose genuine or properly verified compatible components.
-
Use suitable tools and ESD protection.
-
Follow official model-specific repair instructions.
-
Protect the battery and internal connectors.
-
Check fingerprint functionality after replacement.
-
Never assume factory water resistance has been restored.
-
Perform comprehensive post-repair testing.
-
Choose experienced technicians when the repair becomes complicated.
Ultimately, repairing your smartphone can be a smart investment. With the right approach, you can restore its functionality, protect your data, and extend its useful life.
Need professional Google Pixel screen repair in Sydney?
Sydney CBD Repair Centre provides professional smartphone repair services, including screen replacements, battery repairs, and hardware troubleshooting. Our experienced technicians focus on quality components, careful workmanship, and reliable customer service.
Don’t let a cracked screen ruin your smartphone experience. Get your device assessed and discover the right repair solution.
David from Sydney CBD Repair Centre – The Best place to fix mobile phones as 7 Years In A Row! Top Mobile Phone Repair In Sydney. More than 2000 Positive Reviews on Google and Same Day Repairs.
We take pride in delivering exceptional repair services for all major phone brands including Apple, Samsung, Google, and more. Our expert technicians use only genuine parts and offer 90days warranty on repairs. Located in the heart of Sydney CBD, we’re your one-stop solution for all mobile device repairs.
Our commitment to excellence has earned us the trust of thousands of satisfied customers. Whether it’s a cracked screen, battery replacement, or water damage repair, we handle it all with professional care and expertise. Walk in today and experience why we’re Sydney’s #1 choice for mobile phone repairs.
Visit us for:
✓ Same Day Express Repairs
✓ Genuine Parts Guarantee
✓ Professional Technicians
✓ Competitive Pricing
✓ 2000+ 5-Star Google Reviews
✓ 7-Time Award Winner for Best Phone Repairs
Sydney CBD Repair Centre – Where Quality Meets Reliability.
Call: +61280114119
Website: https://SydneyCBD.repair/locate-us

