




Preserving Face ID And True Tone During iPhone 17 Pro Max Screen Swaps

Preserving Face ID and True Tone During iPhone 17 Pro Max Screen Swaps: 10 Critical Expert Techniques
Introduction
Replacing an iPhone 17 Pro Max screen isn’t simply about removing cracked glass and installing a new display. Modern iPhones contain advanced sensors, delicate flex cables, display calibration systems, and security-related components that require careful handling. One small mistake can affect Face ID, True Tone, brightness, or other important features.
In this comprehensive guide, we’ll explore seven essential professional techniques for preserving Face ID and True Tone during iPhone 17 Pro Max screen swaps. Whether you’re a repair technician, an independent repair specialist, or an iPhone owner researching screen replacement, you’ll discover why proper procedures, quality replacement parts, and post-repair testing matter.
Technical accuracy note: Apple provides a model-specific iPhone 17 Pro Max repair manual and Repair Assistant procedures. The following guide uses those resources as a technical foundation and distinguishes between physical component protection and software calibration.
The iPhone 17 Pro Max is an impressive smartphone featuring advanced display technology, sophisticated camera systems, and intelligent security features. Its large OLED display delivers sharp images, rich colours, and smooth visual performance. However, when the screen becomes cracked, damaged, or unresponsive, replacing it requires much more than basic technical skills.
Two features that technicians must protect during a screen replacement are Face ID and True Tone.
Face ID provides secure facial authentication, allowing users to unlock their devices, authorise payments, and access protected applications. True Tone adjusts the display’s colour temperature to match surrounding lighting conditions, helping create a comfortable viewing experience.
Unfortunately, careless screen replacement can interfere with these functions. Damaged flex cables, incorrectly transferred components, unsuitable replacement displays, and incomplete calibration can all create problems.
That’s why preserving Face ID and True Tone during iPhone 17 Pro Max screen swaps should be a major priority for every professional repair technician.
In this guide, we’ll examine seven important techniques, explain common mistakes, and explore how professional repair procedures help restore the original user experience.
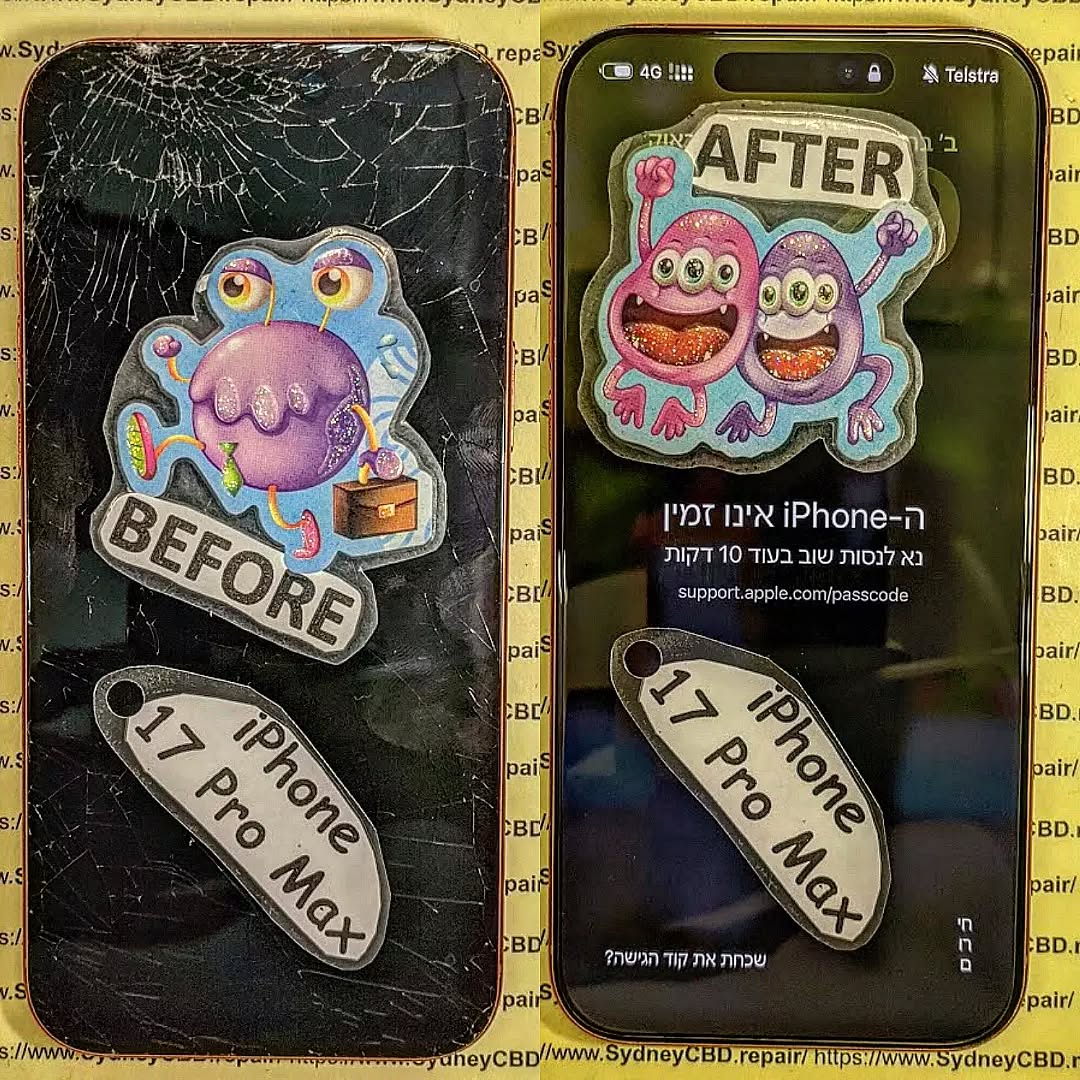
1. Understanding iPhone 17 Pro Max Display Technology
Before beginning any repair, technicians must understand how the iPhone 17 Pro Max display system works.
Modern smartphone displays aren’t independent pieces of glass. They’re complex assemblies containing multiple electronic layers and supporting components.
The iPhone 17 Pro Max uses an advanced OLED display designed to provide excellent contrast, deep blacks, accurate colours, and responsive touch performance.
Unlike traditional LCD panels, OLED technology produces light through individual pixels. This allows the display to control brightness and contrast with excellent precision.
However, this sophisticated construction also makes screen replacement more demanding.
Important Display Components
A typical modern iPhone display assembly involves several important elements:
- OLED display panel.
- Capacitive touch digitiser.
- Display flex cables.
- Front-facing sensor connections.
- Protective display layers.
- Adhesive and sealing materials.
- Supporting connectors and brackets.
Each component plays an important role in maintaining display performance.
A technician must identify which components belong to the replacement display and which original components must be carefully preserved or transferred.
Why Display Architecture Matters
When a screen is damaged, the visible crack doesn’t always reveal the full extent of the problem.
For example, a phone might have:
- Cracked outer glass but a working OLED panel.
- Black patches caused by damaged OLED pixels.
- Green or white lines across the display.
- Touchscreen dead zones.
- Flickering during brightness changes.
- Display failure following liquid exposure.
Each problem requires proper diagnosis before replacement.
A technician who immediately begins removing the screen without inspecting the device risks overlooking other faults.
The Relationship Between Display Hardware and Software
The display doesn’t operate independently of the iPhone’s software.
Apple uses hardware identification and calibration procedures to help supported replacement components work correctly.
This is particularly important when replacing displays with genuine parts or supported used components.
The technician must therefore consider three areas:
- Physical installation.
- Component compatibility.
- Software configuration and calibration.
Ignoring any of these areas can affect the final result.
2. Why Face ID and True Tone Matter During Screen Replacement
Face ID and True Tone are two different technologies, but both contribute significantly to the iPhone experience.
Understanding their functions helps technicians recognise why careful handling is essential.
How Face ID Works
Face ID uses Apple’s TrueDepth camera system to recognise the user’s face.
The system uses several technologies, including infrared imaging and depth information, to create and compare facial data.
Its supporting components include specialised sensors and camera hardware positioned near the top of the display.
These components work together to provide secure authentication.
Face ID isn’t simply a normal front-facing camera feature. It relies on a coordinated system of components and software.
If a technician damages an important sensor cable or connector during screen removal, Face ID may stop working.
Why True Tone Is Important
True Tone helps the display adjust its appearance according to surrounding lighting conditions.
For example, a screen may look slightly warmer under indoor lighting and cooler under daylight.
This adjustment makes colours appear more natural in different environments.
Without properly functioning True Tone, users may notice that their replacement display looks different from the original screen.
However, colour differences aren’t always caused by True Tone alone.
Display quality, calibration, brightness settings, and replacement panel characteristics can also influence the final appearance.
What Happens When These Features Are Affected?
| Feature | Possible Problem | User Experience |
|---|---|---|
| Face ID | Damaged TrueDepth components | Facial unlocking may fail |
| True Tone | Incomplete calibration | Colour temperature adjustment may be unavailable |
| Auto-brightness | Sensor or connection issue | Brightness may not adjust correctly |
| Touchscreen | Display or connector damage | Unresponsive touch areas |
| OLED display | Poor-quality replacement | Uneven colours or brightness |
| Front camera | Damaged camera components | Blurry or unavailable selfies |
The important lesson is simple: a successful screen replacement must restore more than the visible display.
3. The Critical Expert Techniques for Preserving Face ID and True Tone
Professional iPhone repair requires a controlled process. The following seven techniques help reduce unnecessary damage and improve the chances of a successful repair.
Technique 1: Perform a Complete Pre-Repair Diagnostic
The first step is checking the device before opening it.
A technician should establish whether Face ID, True Tone, touch functionality, front cameras, and brightness controls are working before replacement.
This creates a clear reference point.
If Face ID was already malfunctioning before the repair, the technician can identify that issue instead of mistakenly attributing it to the replacement process.
Recommended checks include:
- Unlocking the iPhone using Face ID.
- Testing the front-facing camera.
- Checking True Tone settings.
- Testing automatic brightness.
- Checking touchscreen responsiveness.
- Inspecting OLED colour uniformity.
- Looking for signs of liquid damage.
It’s also important to inspect the phone’s physical condition.
A badly bent frame, damaged housing, or previous poor-quality repair can create additional complications.
Expert tip: Record the initial condition of the device and communicate any existing faults to the customer before beginning work.
Technique 2: Protect the Original TrueDepth Camera Assembly
Protecting the front sensor system is one of the most important parts of an iPhone 17 Pro Max screen swap.
The TrueDepth camera system contains sensitive components that must be handled carefully.
Technicians should never assume that every component near the top of the display is part of the replaceable screen.
Some original components may need to remain with the device or be transferred according to the official repair procedure.
A careless technician can damage these parts through excessive pulling, bending, pressure, or improper tool placement.
Best practices include:
- Identify the front sensor assembly before starting.
- Follow the model-specific repair manual.
- Avoid pulling sensor flex cables.
- Use appropriate precision tools.
- Keep connectors free from dust and debris.
- Avoid unnecessary handling of sensitive components.
Never attempt to force a connector into position.
If a flex cable becomes damaged, replacing the screen alone may not solve the problem.
Technique 3: Use Controlled Heat During Display Removal
Removing a damaged iPhone display requires careful temperature control.
The adhesive surrounding the display helps secure the assembly to the frame. Applying controlled heat can soften this adhesive and make removal easier.
However, excessive heat can create additional risks.
Sensitive electronic components, batteries, flex cables, and nearby sensors can be affected by improper heating.
Technicians should use suitable professional equipment and follow Apple’s recommended procedures.
Important precautions include:
- Use a model-appropriate heating method.
- Monitor temperature carefully.
- Avoid concentrating heat in one location.
- Use suitable opening tools.
- Don’t insert tools too deeply.
- Stop if unexpected resistance occurs.
A common mistake is trying to remove the display too quickly.
When adhesive hasn’t softened sufficiently, excessive force may damage the screen assembly or internal connections.
Patience is essential.
A controlled removal process reduces unnecessary stress on the phone’s internal components.
Technique 4: Select a Compatible, High-Quality Replacement Display
Not every replacement screen offers the same performance.
Low-quality displays may have poor brightness, inconsistent colours, weak touch response, or compatibility problems.
For an expensive flagship smartphone such as the iPhone 17 Pro Max, choosing an appropriate replacement display is especially important.
Technicians should evaluate:
- Exact model compatibility.
- Display technology.
- Colour reproduction.
- Brightness consistency.
- Touch sensitivity.
- Physical fit.
- Connector quality.
- Calibration support.
Genuine Apple parts provide the strongest route to Apple’s intended hardware specifications and supported repair processes.
Apple also provides repair resources for experienced independent repair providers.
However, customers should understand that genuine parts and Apple-authorised service are not the same thing. An independent repair provider may have access to genuine parts without being an Apple Authorised Service Provider.
A cheap aftermarket display may appear attractive because of its lower purchase price, but the overall repair value depends on reliability and functionality.
A screen that looks acceptable initially but develops problems later isn’t necessarily a bargain.
Technique 5: Transfer Original Components Carefully
Some screen replacement procedures require the technician to preserve and transfer specific original components.
This is where experience becomes particularly valuable.
Small brackets, sensor assemblies, connectors, and flex cables must be handled according to the specific model’s repair instructions.
Technicians should never use a generic procedure for every iPhone model.
Even devices that look similar can have different internal layouts.
A careful transfer process should involve:
- Identifying every component that requires removal.
- Photographing or documenting the original arrangement.
- Using appropriate precision screwdrivers.
- Keeping screws organised.
- Avoiding excessive pressure on connectors.
- Inspecting transferred components for damage.
- Confirming that all parts are seated correctly.
Screw management is especially important.
Using an incorrect screw or placing a screw in the wrong position can damage delicate internal components.
The technician must also avoid unnecessary manipulation of the original TrueDepth camera system.
Preserving original components wherever the official procedure requires them is a key part of protecting device functionality.
Technique 6: Complete Display Calibration and Repair Assistant Procedures
Installing a replacement screen doesn’t always mean the repair is finished.
Supported iPhone models use Apple’s Repair Assistant to complete certain repairs and install the necessary calibration data.
For supported display replacements, this process helps ensure that the replacement component is properly configured.
Apple’s current guidance explains that Repair Assistant requires:
- A supported device and replacement part.
- An up-to-date version of iOS.
- A Wi-Fi connection.
- More than 20% battery charge.
The usual procedure is:
- Open Settings.
- Select General.
- Tap About.
- Open Parts & Service History.
- Select Restart & Finish Repair when available.
- Follow the on-screen instructions.
The exact available options depend on the device, component, and repair status.
Technicians should not assume that calibration is unnecessary simply because the display appears to work.
Similarly, they shouldn’t promise that software calibration can repair physically damaged sensors or incompatible hardware.
True Tone performance depends on appropriate display hardware and calibration. Repair Assistant can help complete supported display repairs, but it cannot turn an unsuitable replacement screen into a genuine-quality panel.
Technique 7: Perform Comprehensive Post-Repair Testing
The final technique is testing every important function before returning the device.
A screen that turns on isn’t automatically a successful repair.
Technicians should check the complete display and related functionality.
The final inspection should include:
- Face ID authentication.
- Front camera operation.
- True Tone availability and behaviour.
- Automatic brightness.
- Touchscreen responsiveness.
- OLED colour consistency.
- Screen brightness.
- Display refresh behaviour.
- Proximity sensor operation.
- Earpiece performance.
- General device stability.
If Face ID fails after replacement, technicians should investigate the original sensor assembly, connections, repair status, and any relevant diagnostic messages.
They shouldn’t repeatedly reset the device or attempt random software fixes without understanding the underlying issue.
Apple’s Diagnostics mode can also help assess supported hardware functions, including Face ID.
A proper testing process helps identify problems before the customer receives the phone.
4. Common Mistakes That Can Damage Face ID and True Tone
Even experienced repair technicians can encounter problems when rushing a complicated screen replacement.
Here are seven mistakes worth avoiding.
Mistake 1: Skipping the Initial Diagnostic
Without a pre-repair test, technicians may struggle to determine whether a fault existed before the repair.
Always document the original condition.
Mistake 2: Pulling the Display Too Aggressively
Excessive force can damage internal flex cables and connectors.
Controlled adhesive removal is much safer.
Mistake 3: Applying Excessive Heat
Too much heat can place unnecessary stress on sensitive internal components.
Use appropriate equipment and follow the repair manual.
Mistake 4: Damaging the Original Sensor Assembly
The TrueDepth camera system is particularly sensitive.
Avoid unnecessary movement, bending, or pressure.
Mistake 5: Installing an Incompatible Replacement Screen
A replacement panel may physically fit but still produce unsatisfactory performance.
Verify the exact model and part compatibility.
Mistake 6: Ignoring Calibration
A functioning display doesn’t automatically mean that all repair and calibration steps are complete.
Check Parts & Service History and follow the applicable Repair Assistant procedure.
Mistake 7: Returning the Phone Without Testing
A quick power-on test isn’t enough.
Check Face ID, True Tone, brightness, touch, and the front camera before completing the repair.
5. Genuine vs Aftermarket iPhone 17 Pro Max Replacement Screens
Choosing the right display is one of the most important decisions in the repair process.
Customers often compare genuine displays with cheaper aftermarket alternatives.
However, price shouldn’t be the only consideration.
| Comparison | Genuine Apple Display | Aftermarket Display |
|---|---|---|
| Manufacturer specifications | Designed to Apple’s specifications | Depends on manufacturer |
| Colour performance | Intended original performance | Can vary |
| Brightness | Designed for model specifications | Quality varies |
| Touch response | Original design compatibility | Depends on quality |
| Repair calibration | Supported through applicable procedures | Depends on compatibility |
| Long-term reliability | Established component standards | Varies by supplier |
| Price | Generally higher | Often lower |
Not all aftermarket displays are identical. Some manufacturers produce better-quality replacement panels than others.
Nevertheless, customers should understand the potential trade-offs.
A replacement display should be evaluated based on its actual specifications, compatibility, and performance rather than marketing claims alone.
For a premium device, investing in an appropriate replacement component can help avoid repeat repairs.
6. Understanding True Tone Calibration After a Screen Swap
True Tone is one of the features that customers often notice immediately after a screen replacement.
If the new display appears too cool, too warm, or visually different from the original, calibration and display quality should be investigated.
Why True Tone May Stop Working
Possible causes include:
- Incorrect replacement display.
- Incomplete repair configuration.
- Missing or incorrect calibration data.
- Hardware compatibility issues.
- Damaged connectors.
- Incorrectly installed components.
A technician should identify the actual cause rather than assuming every True Tone issue is caused by software.
How to Check True Tone
After completing the repair:
- Open Settings.
- Select Display & Brightness.
- Locate the True Tone option.
- Confirm that it is available.
- Enable it.
- Compare the display under different lighting conditions.
The display should adjust its appearance naturally when the surrounding lighting changes.
Why Colour Accuracy Matters
Customers use their iPhones for photography, video editing, social media, online shopping, and everyday communication.
Incorrect colour reproduction can make images look different from their original appearance.
That’s why display quality and calibration are important parts of a professional repair.
7. Professional Repair vs DIY Screen Replacement
Some iPhone owners consider replacing their screens themselves.
While Apple offers Self Service Repair resources for experienced individuals, modern smartphone repairs require suitable equipment and technical knowledge.
DIY Repair Advantages
- Potentially lower labour costs.
- Greater control over the repair process.
- Opportunity to learn technical skills.
- Access to model-specific repair information.
DIY Repair Disadvantages
- Risk of damaging delicate components.
- Difficulty handling specialised connectors.
- Potential Face ID complications.
- Incorrect adhesive installation.
- Calibration difficulties.
- Risk of purchasing incompatible parts.
Professional Repair Advantages
A qualified technician can inspect the device, identify additional damage, select suitable replacement components, and perform post-repair testing.
Professional repair also provides access to specialised tools and established procedures.
For an expensive flagship phone, the cost of correcting a failed DIY repair may exceed the original labour savings.
The best choice depends on experience, equipment, component availability, and warranty considerations.
8. How Much Does iPhone 17 Pro Max Screen Replacement Cost?
The cost of an iPhone 17 Pro Max screen replacement depends on several factors.
These include:
- Genuine or aftermarket display selection.
- Extent of screen damage.
- Frame condition.
- Additional internal damage.
- Availability of replacement parts.
- Repair provider and warranty.
- Whether the repair requires additional diagnostics.
A simple cracked display may require only a screen replacement.
However, a phone with severe impact damage could also have damaged connectors, sensors, or internal components.
For this reason, an accurate quotation should follow an inspection.
Is a Cheap Screen Replacement Worth It?
Not always.
A lower-priced replacement can become expensive if it causes poor display performance or requires another repair.
Consider the total value rather than the initial price.
A quality repair should provide:
- Properly fitted components.
- Reliable touchscreen performance.
- Appropriate colour reproduction.
- Functional Face ID.
- Working True Tone where supported.
- Thorough post-repair testing.
- Clear warranty conditions.
Customers should ask what type of display is being installed and what warranty covers the repair.
9. Maintaining Face ID and Display Performance After Repair
Once the screen replacement is complete, a few simple habits can help protect the device.
Use a Suitable Screen Protector
A quality screen protector helps reduce the risk of scratches and everyday impact damage.
Choose one designed specifically for the iPhone 17 Pro Max.
Use a Protective Case
A properly fitted case can help reduce damage from accidental drops.
Look for adequate protection around the screen edges.
Avoid Excessive Pressure
Don’t place heavy objects on the phone or apply unnecessary pressure to the display.
Keep the Front Sensor Area Clean
Dust, dirt, and unsuitable screen protectors can interfere with the front sensor area.
Keep this region clean and unobstructed.
Avoid Unauthorised Hardware Modifications
Unnecessary component replacement can introduce additional problems.
If Face ID or True Tone stops working, seek proper diagnosis instead of attempting random repairs.
10. Why Professional Testing Is Essential for a Successful Repair
A professional repair should finish with a structured quality-control process.
The technician should confirm that the replacement display performs correctly and that all related functions remain operational.
A useful final inspection checklist includes:
| Test | Expected Result |
|---|---|
| Face ID | Successfully recognises the registered user |
| True Tone | Available and adjusts display appearance |
| Touchscreen | Responds across the entire panel |
| OLED colours | No unexpected lines or patches |
| Brightness | Adjusts correctly |
| Front camera | Produces clear images |
| Proximity sensor | Operates correctly |
| Earpiece | Produces clear audio |
| Display fitting | Sits correctly within the frame |
| Repair status | Applicable calibration completed |
Technicians should also explain any limitations discovered during testing.
For example, an existing Face ID fault should be reported clearly rather than concealed behind a screen replacement warranty.
Honest communication builds customer confidence and reduces misunderstandings.
11. Protecting the Original iPhone 17 Pro Max Experience
The purpose of a premium smartphone repair isn’t merely to make a damaged device look new again.
It’s to restore the functionality that customers depend on every day.
Face ID provides convenient security, while True Tone helps maintain a comfortable and natural viewing experience.
When these features are affected, the phone may feel noticeably different even if the new display looks attractive.
A successful repair therefore involves several stages:
- Proper diagnosis.
- Careful disassembly.
- Protection of original components.
- Compatible replacement hardware.
- Correct component installation.
- Appropriate calibration.
- Comprehensive testing.
Each stage contributes to the final result.
Professional technicians understand that small details matter. A poorly handled connector or overlooked calibration step can turn an otherwise straightforward screen replacement into a complicated repair.
By following model-specific procedures and using suitable replacement parts, technicians can significantly reduce avoidable problems.
Frequently Asked Questions
1. Can Face ID stop working after an iPhone 17 Pro Max screen replacement?
Yes. Face ID can stop working if the TrueDepth camera system, its connections, or related components are damaged during the repair. A display replacement doesn’t automatically mean Face ID will fail. Careful handling and proper diagnostics are essential.
2. Does replacing the iPhone 17 Pro Max screen disable True Tone?
Not necessarily. True Tone may be affected by an incompatible replacement display or incomplete calibration. Using a suitable display and completing applicable repair procedures helps restore the intended functionality.
3. Can technicians preserve the original Face ID system?
Yes, provided the relevant original components remain undamaged and the repair follows the correct procedures. However, a physically damaged or malfunctioning TrueDepth component may require separate diagnosis and service.
4. Do I need Apple Repair Assistant after replacing my iPhone 17 Pro Max screen?
Repair Assistant supports applicable display repairs on compatible iPhones, including the iPhone 17 Pro Max. It helps install calibration data and complete supported repairs. Follow the instructions displayed on the device and check Apple’s latest repair guidance.
5. Can a cheap aftermarket screen support True Tone?
It depends on the display’s quality and compatibility. Some replacement displays may not support the same functionality as genuine Apple parts. Customers should confirm True Tone compatibility before agreeing to the repair.
6. Will Face ID work if the original sensor flex cable is damaged?
Not necessarily. Face ID relies on specialised hardware, and damage to critical components can prevent normal operation. The technician must diagnose the affected component and determine the appropriate repair option.
7. How long does an iPhone 17 Pro Max screen replacement take?
Repair time depends on the extent of damage, parts availability, and the repair provider’s workflow. A straightforward display replacement may be completed much faster than a repair involving additional sensor or internal damage. Always request an estimated turnaround time before proceeding.
8. How can I check whether my iPhone screen replacement was completed correctly?
Check Face ID, True Tone, automatic brightness, touch response, front camera performance, and display quality. You can also review Settings > General > About > Parts & Service History for relevant repair information.
9. Does genuine Apple screen replacement guarantee Face ID will work?
Using a genuine replacement display doesn’t automatically guarantee Face ID functionality. The original TrueDepth camera system and associated components must also be working correctly. Proper installation and testing remain essential.
10. Should I replace the entire display or repair only the cracked glass?
It depends on the damage and the repair method available. If the OLED panel and touch functionality remain intact, specialised glass-only restoration may be an option where suitable. However, a damaged OLED panel generally requires a complete display assembly replacement.
Conclusion: Choose Expert Techniques for a Reliable iPhone 17 Pro Max Screen Swap

Preserving Face ID and True Tone during iPhone 17 Pro Max screen swaps requires careful planning, technical knowledge, compatible replacement parts, and proper calibration.
The seven critical techniques discussed in this guide demonstrate why professional screen replacement involves much more than removing damaged glass.
From initial diagnostics and TrueDepth camera protection to controlled display removal, genuine component selection, calibration, and final testing, every stage plays an important role.
Most importantly, technicians must protect the original components responsible for the phone’s advanced security and display functions.
Choosing an experienced repair specialist can help reduce unnecessary risks and restore the device to a dependable working condition.
At Sydney CBD Repair Centre, we understand the importance of professional smartphone repairs. Our technicians take pride in delivering reliable repair solutions for Apple, Samsung, Google, and other major mobile brands.
Whether your iPhone 17 Pro Max has a shattered OLED display, touchscreen problems, or concerns following an unsuccessful screen replacement, a proper diagnosis is the best place to start.
Don’t settle for a screen that simply lights up. Choose a repair that prioritises functionality, quality, and long-term reliability.
David from Sydney CBD Repair Centre – The Best place to fix mobile phones as 7 Years In A Row! Top Mobile Phone Repair In Sydney. More than 2000 Positive Reviews on Google and Same Day Repairs.
We take pride in delivering exceptional repair services for all major phone brands including Apple, Samsung, Google, and more. Our expert technicians use only genuine parts and offer 90days warranty on repairs. Located in the heart of Sydney CBD, we’re your one-stop solution for all mobile device repairs.
Our commitment to excellence has earned us the trust of thousands of satisfied customers. Whether it’s a cracked screen, battery replacement, or water damage repair, we handle it all with professional care and expertise. Walk in today and experience why we’re Sydney’s #1 choice for mobile phone repairs.
Visit us for:
✓ Same Day Express Repairs
✓ Genuine Parts Guarantee
✓ Professional Technicians
✓ Competitive Pricing
✓ 2000+ 5-Star Google Reviews
✓ 7-Time Award Winner for Best Phone Repairs
Sydney CBD Repair Centre – Where Quality Meets Reliability.
Call: +61280114119
Website: https://SydneyCBD.repair/locate-us

