Why Your Face ID Failed After a Cheap Independent Phone Screen Repair – 7 Shocking Reasons You Must Know
Introduction to Face ID Failure After Screen Replacement
If you’ve recently gone for a budget fix and are now wondering why your Face ID failed after a cheap independent screen repair, you’re not alone. This issue has become increasingly common as more users opt for low-cost screen replacements instead of authorized service providers.
At first glance, saving money on a repair seems like a smart move. However, Face ID is not just a simple feature—it’s a highly sophisticated biometric system. When improperly handled, even a minor mistake during a screen replacement can lead to permanent damage.
In this guide, we’ll break down exactly what went wrong, why it happened, and how you can fix—or prevent—it.
Face ID isn’t just a camera scanning your face. It’s a complex system involving multiple components working together with extreme precision.
Key Components Behind Face ID
Infrared camera
Flood illuminator
Dot projector
Proximity sensor
Ambient light sensor
These components are tightly integrated into the display assembly. That means when a technician replaces your screen, they’re working dangerously close to sensitive hardware.
Why Precision Matters
Face ID operates on millimeter-level accuracy. If even one component shifts slightly, the system may fail entirely. That’s why professional repair processes require specialized tools and calibration software.
Understanding why your Face ID failed after a cheap independent screen repair starts with knowing what actually happens during such repairs.
Differences Between Cheap vs Professional Repairs
Cheap Repair
Professional Repair
Uses aftermarket parts
Uses genuine or OEM parts
Limited tools
Specialized calibration tools
Minimal training
Certified technicians
No quality testing
Full diagnostic checks
Common Mistakes Technicians Make
Pulling flex cables too hard
Misplacing Face ID components
Using incompatible screens
Skipping calibration steps
These shortcuts are often the root cause of Face ID failure.
7 Shocking Reasons Your Face ID Failed
Here’s the core of the problem—why your Face ID failed after a cheap independent screen repair boils down to these seven critical issues.
1. Damaged Flex Cables
Flex cables connect Face ID components to the motherboard. These are extremely fragile.
If torn or bent:
Face ID stops working instantly
Repairs become extremely difficult
2. Misaligned Sensors
Even a slight misalignment can:
Prevent face recognition
Cause intermittent failures
3. Non-Genuine Screen Issues
Cheap screens may:
Block infrared signals
Interfere with sensor accuracy
4. Dot Projector Damage
The dot projector is the heart of Face ID.
If damaged:
Face ID becomes permanently disabled
Replacement is often not possible
5. Software Calibration Failure
After screen replacement, calibration is required.
Without it:
Face ID may not initialize
System errors may appear
6. Water or Dust Exposure
Cheap repair shops often lack clean environments.
This can lead to:
Dust blocking sensors
Moisture damage
7. Security Lock by Manufacturer
Modern devices are designed to prevent unauthorized tampering.
If the system detects:
Non-genuine parts
Unauthorized repairs
It may disable Face ID as a security measure.
Signs Your Face ID Is Permanently Damaged
You may notice:
“Face ID Not Available” message
Unable to set up Face ID
Camera working but Face ID failing
Intermittent detection issues
These signs often indicate hardware damage rather than software glitches.
Can Face ID Be Fixed After Screen Repair?
The big question: can it be repaired?
DIY Fixes vs Professional Solutions
DIY Options
Restart device
Reset Face ID
Update software
These may help in minor cases but rarely solve hardware issues.
Professional Repair
Certified technicians can:
Reconnect damaged components
Replace compatible parts
Recalibrate sensors
However, some damages (like dot projector failure) are irreversible.
Cost of Repair vs Replacement
Issue
Estimated Cost
Minor recalibration
Low
Flex cable repair
Medium
Face ID module damage
High
Full device replacement
Very High
Sometimes, investing in a proper repair initially would’ve saved more money.
How to Prevent Face ID Failure in Future
To avoid repeating the same mistake:
Choose reputable repair centers
Ask for genuine parts
Ensure warranty is provided
Avoid ultra-cheap deals
Request calibration after repair
Remember: if the price seems too good to be true, it probably is.
Why Choosing a Trusted Repair Center Matters
A professional repair service:
Uses proper tools
Maintains clean workspace
Has trained technicians
Offers warranty
This ensures your device remains fully functional—even after repair.
FAQs
1. Why did my Face ID stop working after screen replacement?
Because sensitive components were likely damaged or misaligned during the repair process.
2. Can Face ID be repaired without replacing the phone?
Yes, but only if the damage is minor. Severe hardware issues may not be fixable.
3. Does using a cheap screen affect Face ID?
Absolutely. Low-quality screens can block sensors and disrupt functionality.
4. Is Face ID failure common after third-party repairs?
Yes, especially when performed by inexperienced technicians.
5. Can software updates fix Face ID issues?
Only if the issue is software-related. Hardware damage requires physical repair.
6. How can I ensure my Face ID works after repair?
Choose a trusted technician and confirm calibration is performed post-repair.
Conclusion
Understanding why your Face ID failed after a cheap independent screen repair comes down to one key truth: precision matters. Face ID is a delicate system that requires expert handling, proper tools, and high-quality parts.
While saving money upfront might seem appealing, it often leads to higher costs—and frustration—later. The best approach is to invest in quality repairs from the start.
By making informed decisions, you can protect your device, your data, and your overall user experience.
David from Sydney CBD Repair Centre – The Best place to fix mobile phones as 7 Years In A Row! Top Mobile Phone Repair In Sydney. More than 2000 Positive Reviews on Google and Same Day Repairs.
We take pride in delivering exceptional repair services for all major phone brands including Apple, Samsung, Google, and more. Our expert technicians use only genuine parts and offer 90days warranty on repairs. Located in the heart of Sydney CBD, we’re your one-stop solution for all mobile device repairs.
Our commitment to excellence has earned us the trust of thousands of satisfied customers. Whether it’s a cracked screen, battery replacement, or water damage repair, we handle it all with professional care and expertise. Walk in today and experience why we’re Sydney’s #1 choice for mobile phone repairs.
Visit us for:
✓ Same Day Express Repairs
✓ Genuine Parts Guarantee
✓ Professional Technicians
✓ Competitive Pricing
✓ 2000+ 5-Star Google Reviews
✓ 7-Time Award Winner for Best Phone Repairs
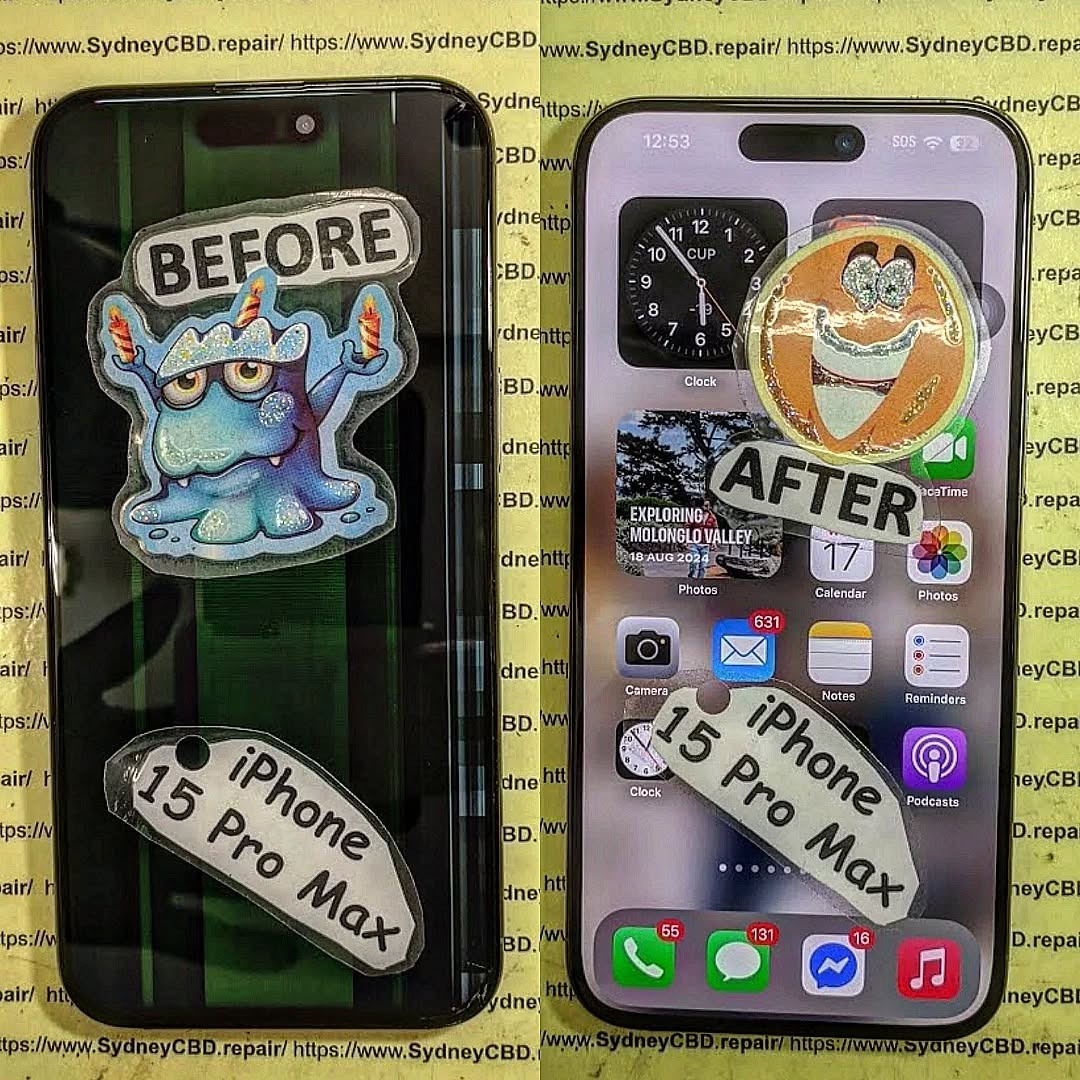
From Scrap to Sparkle: Reviving a Critically Damaged of iPhone 15 Pro Max Screen + 12 Proven Techniques
Introduction:
Your iPhone 15 Pro Max is more than just a phone—it’s a personal assistant, a camera, a gaming device, and a hub for your digital life. So, when its screen suffers a critical crack or shatter, it can feel like your entire day comes to a halt. The good news? Even the most damaged iPhone 15 Pro Max screens can be revived with the right approach, tools, and professional guidance.
In this article, we’ll take you step by step through understanding the screen’s complex structure, diagnosing hidden damage, exploring both DIY and professional repair options, and applying preventive measures to keep your screen looking flawless. Whether you’re a tech enthusiast eager to attempt a self-repair or someone seeking trusted professional services, this guide provides practical, detailed, and reliable solutions to bring your iPhone back to life.
By the end of this guide, you’ll not only understand how to restore your device but also learn how to protect it for the long haul—turning that “scrap” into true “sparkle.”
The iPhone 15 Pro Max is an engineering marvel, but even the toughest phones aren’t immune to damage. A shattered screen can make your smartphone almost unusable—but fear not. Reviving a critically damaged iPhone 15 Pro Max screen isn’t impossible. With the right knowledge, tools, and a touch of expertise, you can restore your device to like-new condition. This guide dives into everything you need to know—from diagnosing damage to professional repairs, DIY strategies, and preventive tips.
Before attempting any repair, it’s vital to understand what makes up your iPhone 15 Pro Max screen. Modern Apple devices use a combination of advanced materials and sensors to deliver exceptional display quality.
Display Panels: OLED vs Super Retina XDR
The iPhone 15 Pro Max uses a Super Retina XDR OLED display, providing vibrant colors, deep blacks, and high contrast ratios. OLED technology allows each pixel to emit its own light, making it more energy-efficient but slightly more delicate compared to older LCDs. Understanding this helps prevent unnecessary errors during repairs.
Touch Sensitivity & Haptic Layer
Underneath the screen lies the touch-sensitive layer, which detects every tap and swipe. The haptic feedback layer gives the tactile response you feel when interacting with your device. Damage to these layers may not always be visible, but it can severely affect the device’s functionality, even if the glass appears intact.
Knowing how your screen can get damaged helps in both repair and prevention.
Accidental Drops and Impacts
Most screen damage happens from drops. Even a small fall on a hard surface can cause cracks or dislodge internal components. According to research, 40% of iPhone repairs are due to accidental drops.
Water and Liquid Exposure
Though the iPhone 15 Pro Max is water-resistant, liquid can still seep in, damaging the OLED layer and sensors. Sticky residues from drinks or saltwater are particularly harmful.
Heat, Pressure, and Environmental Factors
High temperatures, prolonged sun exposure, or excessive pressure (like sitting with your phone in your pocket) can warp or fracture the screen. These factors can cause subtle cracks that worsen over time.
Diagnosing the Extent of Damage
Not all damage is obvious. Proper diagnosis ensures effective repair.
Visual Inspection: Cracks and Shards
Start by checking for visible cracks, chips, or shattered glass. Look for discoloration or dead pixels, which indicate deeper damage.
Functional Tests: Touch, Display, and Sensors
Test the touch responsiveness, brightness levels, and color display. Check Face ID and haptic feedback for any issues.
Professional Diagnostic Tools
Advanced repair shops use microscopes, thermal imaging, and software diagnostics to pinpoint hidden faults. Consulting professionals can save you time and money in the long run.
DIY Screen Repair: Risks and Limitations
DIY repairs are tempting but come with risks.
Necessary Tools and Kits
You’ll need precision screwdrivers, suction tools, anti-static mats, and specialized adhesives. Without these, you risk further damage.
Step-by-Step Replacement Process
Power off your iPhone.
Remove screws near the Lightning port.
Carefully separate the screen from the frame.
Disconnect the battery and display connectors.
Replace the screen assembly and reassemble.
Even with careful steps, minor misalignments can impair performance.
Common Mistakes and How to Avoid Them
Using excessive force on connectors.
Skipping anti-static precautions.
Not testing the new screen before final assembly.
Professional Repair Options
Apple Authorized Service Providers
Offers original parts and warranty coverage. Repairs are often costlier but guarantee quality and compatibility.
Independent Repair Shops
Many independent shops, like Sydney CBD Repair Centre, offer competitive pricing, rapid turnaround, and genuine parts, often with a 90-day warranty. Independent shops can sometimes handle issues that Apple may not cover under warranty.
Sydney CBD Repair Centre Case Study
Our experts have repaired thousands of iPhones, restoring shattered screens efficiently. With 7 years of awards and 2000+ 5-star reviews, we’re the trusted choice for Sydney locals. Learn more here.
Screen Protection Post-Repair
Prevention is key after repair.
Tempered Glass & Film Protectors
High-quality tempered glass reduces the risk of future cracks. Look for ultra-clear, high-durability options.
Cases and Edge Protection
Rugged cases with reinforced edges absorb shock and prevent direct impact on the screen.
Usage Habits to Extend Screen Life
Avoid placing phones in back pockets.
Keep away from heat and liquids.
Clean gently with microfiber cloths.
Cost Analysis: DIY vs Professional Repair
Factor
DIY
Professional
Cost
$80–$200
$250–$450
Time
1–3 hours
30–60 minutes
Risk
High
Low
Warranty
None
90 days+
Skill Required
Advanced
Minimal
Professional repair is generally safer, faster, and more reliable, especially for critical damage.
FAQs
1. Can I repair my iPhone 15 Pro Max screen myself?
Yes, but it carries risks. Professional repair is recommended for severe damage.
2. How long does a screen repair take?
DIY can take 1–3 hours; professional services often complete repairs in under an hour.
3. Will my warranty be voided by DIY repair?
Yes, self-repair may void Apple’s warranty. Always check before attempting.
4. What is the cost difference between Apple and independent repair?
Apple repairs are typically higher due to original parts; independent shops are more affordable but still reliable.
5. Can cracked screens affect Face ID?
Yes, cracks near the TrueDepth sensor can impair Face ID functionality.
6. How can I prevent future screen damage?
Use tempered glass, protective cases, and avoid drops, heat, and pressure.
Conclusion
Reviving a critically damaged iPhone 15 Pro Max screen requires understanding the screen’s structure, accurate damage diagnosis, and selecting the right repair path—DIY or professional. With careful attention and preventive measures, your iPhone can return to pristine condition. Remember, investing in professional repair services and protective accessories ensures both performance and longevity.
David from Sydney CBD Repair Centre – The Best place to fix mobile phones as 7 Years In A Row! Top Mobile Phone Repair In Sydney. More than 2000 Positive Reviews on Google and Same Day Repairs.
Visit us for:
✓ Same Day Express Repairs
✓ Genuine Parts Guarantee
✓ Professional Technicians
✓ Competitive Pricing
✓ 2000+ 5-Star Google Reviews
✓ 7-Time Award Winner for Best Phone Repairs
Inside The Sensors: Fixing the Face ID After A Heavy Impact Screen Shatter – 9 Powerful Repair Insights
Introduction
Modern smartphones have evolved into highly sophisticated devices, and one of the most impressive innovations in recent years is Face ID. This advanced biometric security system allows users to unlock their phones, authorize payments, and access sensitive information with just a glance. However, when a device experiences a serious drop that results in a shattered display, the internal components responsible for Face ID can also suffer damage. In many cases, fixing Face ID after a heavy impact screen shatter becomes a complex repair that requires both technical knowledge and precision tools.
While a cracked screen is often the most visible consequence of a heavy impact, the real trouble can lie beneath the surface. Behind the display sits a delicate network of sensors—including the infrared camera, dot projector, and flood illuminator—that work together to create a secure 3D map of the user’s face. When the screen shatters, the force of the impact can misalign these components, damage fragile flex cables, or obstruct the sensors entirely. As a result, users may suddenly see messages such as “Face ID not available” or notice that their phone can no longer recognize their face.
Fortunately, modern repair techniques make it possible to restore this functionality in many cases. Professional technicians can diagnose the exact cause of the issue, whether it’s a disconnected cable, a misaligned sensor bracket, or debris interfering with the infrared system. Through careful inspection, specialized tools, and precise reassembly, experts can often succeed in fixing Face ID after a heavy impact screen shatter without replacing the entire device.
In this comprehensive guide, we’ll take a closer look inside the technology that powers Face ID, explore what actually happens when a phone suffers a major impact, and explain the professional repair methods used to bring the system back to life. Whether you’re a smartphone user dealing with Face ID failure or simply curious about the intricate engineering behind this technology, understanding the repair process can help you make informed decisions and protect your device in the future.
Face recognition has transformed smartphone security, especially with the introduction of Face ID in modern iPhones. However, when a phone suffers a heavy drop resulting in a shattered display, fixing Face ID after a heavy impact screen shatter becomes a delicate and complex repair process.
Face ID relies on a highly advanced sensor array that sits behind the display near the top notch. This system scans the user’s face in three dimensions and compares it to encrypted data stored securely within the phone.
Unlike fingerprint scanners, Face ID involves multiple optical sensors and projection systems working together. Because of this complexity, even a minor misalignment caused by a heavy impact can interrupt the entire authentication process.
How Face ID Sensors Work
The Face ID system uses a combination of advanced hardware components that operate simultaneously. These include:
Infrared camera
Dot projector
Flood illuminator
Proximity sensor
Ambient light sensor
When you look at your phone, the flood illuminator first detects your face. Then the dot projector sends more than 30,000 invisible infrared dots onto your face. The infrared camera reads the pattern and builds a depth map.
This data is processed through Apple’s Secure Enclave, ensuring that biometric information never leaves the device. According to Apple’s official security documentation available at https://support.apple.com/en-us/HT208108, Face ID data remains encrypted and inaccessible even to Apple itself.
Key Components Inside the Face ID System
Understanding these components helps explain why fixing Face ID after a heavy impact screen shatter is not as simple as replacing the screen.
Component
Function
Vulnerability
Dot Projector
Projects infrared dots for 3D mapping
Sensitive to misalignment
Flood Illuminator
Detects the face in low light
Can disconnect after impact
Infrared Camera
Captures dot pattern
Damage leads to authentication failure
Flex Cables
Connect sensors to motherboard
Often torn during impact
Front Sensor Assembly
Houses multiple sensors
Can be displaced by shattered glass
Even slight damage to one of these elements can disable Face ID entirely.
Dropping a smartphone onto a hard surface can cause far more than cosmetic damage. When the screen shatters due to a strong impact, shockwaves travel through the entire phone frame.
These internal vibrations can dislodge the delicate sensor assembly responsible for Face ID.
Impact Damage and Internal Sensor Misalignment
The Face ID system sits very close to the front glass. When the glass cracks or shatters, the following issues may occur:
Sensor bracket bending
Flex cable tearing
Infrared camera obstruction
Dot projector displacement
Debris interfering with sensors
Even if the display continues functioning normally, the sensors behind it may no longer align properly.
That’s why fixing Face ID after a heavy impact screen shatter often requires internal inspection rather than just replacing the screen.
Common Symptoms of Face ID Failure
Users typically notice Face ID problems immediately after a major drop. Some common signs include:
Face ID not available
Unable to activate Face ID
Face ID disabled message
Face recognition inconsistent
Front camera issues
These symptoms indicate potential sensor damage or communication failure between components.
Diagnosing Face ID Damage After Screen Impact
Before attempting repairs, technicians must carefully diagnose the root cause of the problem. Proper diagnosis ensures the correct component is repaired or replaced.
Initial Inspection Techniques
The first step in diagnosing Face ID failure is visual inspection.
Technicians examine:
Cracked screen severity
Frame bending
Sensor bracket condition
Dust or debris inside the notch
Flex cable integrity
Sometimes, the issue may simply be a loose connector, which can be fixed without replacing components.
Advanced Diagnostic Tools Used by Technicians
Professional repair centers often use specialized diagnostic tools.
Examples include:
Microscope inspection
Infrared sensor testing
Face ID calibration tools
Apple diagnostic software
These tools allow technicians to determine whether fixing Face ID after a heavy impact screen shatter is possible or if a full sensor replacement is required.
Step-by-Step Guide to Fixing Face ID After a Heavy Impact Screen Shatter
Repairing Face ID requires technical skill and careful handling of extremely delicate components. The repair process typically follows several steps.
Screen Removal and Sensor Inspection
The repair begins with removing the damaged screen.
Technicians must:
Heat the display adhesive
Carefully separate the screen
Disconnect battery power
Remove the front sensor assembly
Inspect all connectors
At this stage, they check whether the sensor assembly itself is damaged or simply misaligned.
Repairing or Replacing Damaged Components
If damage is discovered, technicians may perform several micro-repairs.
Possible fixes include:
Reattaching torn flex cables
Replacing sensor brackets
Cleaning obstructed lenses
Repositioning the dot projector
Repairing front sensor flex circuits
However, Apple pairs certain components to the logic board. This means some replacements require specialized programming equipment.
Reassembling and Recalibrating Face ID
After repairing the sensors, the phone must be carefully reassembled.
Steps include:
Reconnecting flex cables
Installing a new display
Securing the sensor assembly
Applying waterproof adhesive
Running Face ID calibration tests
Successful calibration restores full biometric functionality.
Challenges in Face ID Repair
Repairing Face ID is widely considered one of the most challenging smartphone repairs.
Apple Security Restrictions
Apple designs Face ID components with strong security protections. This prevents unauthorized replacements that could compromise biometric security.
As a result:
Dot projectors are paired to the motherboard
Replacement sensors may require programming
Some repairs require micro-soldering
These restrictions make fixing Face ID after a heavy impact screen shatter significantly more complex than standard screen replacements.
Precision Required During Repairs
Face ID components are extremely sensitive.
Even small mistakes during repair can cause:
Permanent Face ID failure
Camera malfunction
Sensor calibration errors
Technicians must work under microscopes and use specialized tools to ensure accuracy.
Professional vs DIY Repairs
Many smartphone users consider attempting repairs themselves. However, Face ID repair is rarely suitable for beginners.
Risks of Attempting DIY Fixes
DIY repairs can introduce additional problems.
Potential risks include:
Damaging sensor cables
Losing calibration
Breaking the dot projector
Causing motherboard damage
Once certain components are damaged, they may no longer be repairable.
Benefits of Professional Repair Services
Professional technicians offer several advantages:
Proper diagnostic equipment
Experience with Face ID components
Access to micro-soldering tools
Accurate calibration procedures
These factors greatly increase the success rate of fixing Face ID after a heavy impact screen shatter.
Preventing Future Face ID Damage
Prevention is always better than repair. Fortunately, there are several ways to protect your phone from severe impact damage.
Protective Accessories
Investing in protective accessories can significantly reduce damage from drops.
Recommended items include:
Shock-absorbing phone cases
Tempered glass screen protectors
Rugged protective frames
These accessories help absorb impact forces before they reach internal sensors.
Safe Phone Handling Practices
Simple habits can also prevent accidents.
Examples include:
Avoid placing phones near edges
Use secure grips while walking
Store phones safely in pockets or bags
Avoid using devices in risky environments
These small precautions can extend the lifespan of your device.
Cost of Fixing Face ID After Screen Damage
Repair costs vary depending on the severity of the damage.
Factors Affecting Repair Price
Several elements influence the cost:
Factor
Impact on Cost
Device Model
Newer iPhones cost more
Sensor Damage
More damage increases cost
Screen Replacement
Often required alongside sensor repair
Calibration
Specialized equipment may add cost
When Replacement is Necessary
Sometimes repair is not possible. In these situations, users may need:
Full sensor assembly replacement
Logic board repair
Device replacement
A professional diagnosis determines the most cost-effective option.
FAQs
1. Can Face ID stop working after dropping a phone?
Yes. A heavy drop can misalign or damage sensors, which may require fixing Face ID after a heavy impact screen shatter.
2. Is Face ID repair possible after screen replacement?
Yes, but only if the original sensor assembly remains intact and properly connected.
3. How long does Face ID repair take?
Professional repair typically takes 1–2 hours, depending on the severity of the damage.
4. Can Face ID be fixed without replacing the screen?
Sometimes. If the screen is intact and only sensors are affected, technicians may repair the internal components.
5. Is Face ID repair expensive?
Costs vary depending on device model and sensor damage. Minor repairs are cheaper than full sensor replacement.
6. Should I repair Face ID or replace the phone?
If the device is relatively new, repairing Face ID is usually the better option.
Conclusion
Modern smartphones rely heavily on biometric authentication, and Face ID plays a critical role in both security and convenience. Unfortunately, a heavy drop that shatters the display can disrupt the delicate sensor array responsible for facial recognition.
Fixing Face ID after a heavy impact screen shatter requires careful inspection, advanced tools, and highly skilled technicians. From diagnosing sensor misalignment to recalibrating the infrared system, every step must be performed with precision.
While some minor issues may be resolved quickly, severe sensor damage often demands specialized micro-repairs. That’s why seeking professional assistance remains the most reliable solution.
By understanding how Face ID works, recognizing the signs of damage, and taking preventive measures, smartphone users can better protect their devices and maintain secure biometric access.
David from Sydney CBD Repair Centre – The Best place to fix mobile phones as 7 Years In A Row! Top Mobile Phone Repair In Sydney. More than 2000 Positive Reviews on Google and Same Day Repairs.
We take pride in delivering exceptional repair services for all major phone brands including Apple, Samsung, Google, and more. Our expert technicians use only genuine parts and offer 90days warranty on repairs. Located in the heart of Sydney CBD, we’re your one-stop solution for all mobile device repairs.
Our commitment to excellence has earned us the trust of thousands of satisfied customers. Whether it’s a cracked screen, battery replacement, or water damage repair, we handle it all with professional care and expertise. Walk in today and experience why we’re Sydney’s #1 choice for mobile phone repairs.
Visit us for:
✓ Same Day Express Repairs
✓ Genuine Parts Guarantee
✓ Professional Technicians
✓ Competitive Pricing
✓ 2000+ 5-Star Google Reviews
✓ 7-Time Award Winner for Best Phone Repairs
Why Cheap Screen DIYs Fail and How Professionals Fix Your iPhone Correctly: 11 Powerful Reasons You Should Know
Introduction
When an iPhone screen cracks, many people immediately search for affordable repair options online. Countless videos promise easy repairs, and inexpensive repair kits appear to offer a quick solution. However, the reality is often very different. Understanding Why Cheap Screen DIYs Fail and How Professionals Fix Your iPhone Correctly can save you time, money, and frustration.
Modern iPhones are sophisticated devices with tightly integrated components. While replacing a screen may seem straightforward, even a small mistake can create bigger problems than the original crack. From damaged Face ID systems to reduced display quality, DIY repairs frequently lead to unexpected costs.
Professional technicians, on the other hand, use specialized tools, tested procedures, and high-quality parts to restore devices properly. In this article, we’ll explore the reasons cheap DIY repairs fail and explain how experts ensure reliable results.
Today’s iPhones use advanced display technology. Models equipped with OLED and Super Retina displays deliver exceptional brightness, color accuracy, and contrast levels. These displays are not simple glass panels. They contain multiple delicate layers that work together to create a premium viewing experience. Separating or replacing them incorrectly can permanently affect image quality.
Touch Layer Integration
The touch sensor layer is integrated directly into the display assembly. This design improves responsiveness but makes repairs more complex. If a technician lacks proper equipment, damage can occur during disassembly or installation.
The internet is filled with repair guides that make screen replacement look simple. Many videos condense an hour-long repair into a few minutes, skipping critical details.
As a result, users often underestimate the difficulty involved.
The Appeal of Saving Money
Cost savings remain the biggest motivation. A cheap repair kit may cost significantly less than a professional repair service.
Unfortunately, many people discover later that the initial savings disappear after:
Purchasing replacement tools
Ordering additional parts
Fixing accidental damage
Paying professionals to correct mistakes
Common Mistakes Made During DIY Repairs
Using Low-Quality Parts
One of the biggest reasons Why Cheap Screen DIYs Fail and How Professionals Fix Your iPhone Correctly becomes apparent is the quality of replacement components.
Low-cost screens frequently suffer from:
Problem
Effect
Poor color accuracy
Washed-out images
Low brightness
Difficult outdoor visibility
Weak glass
Increased cracking risk
Inferior touch sensors
Delayed response
Many aftermarket screens simply do not match original performance standards.
Damaging Internal Components
Inside an iPhone are delicate flex cables and connectors. A slight slip during disassembly can damage:
Display cables
Battery connectors
Front camera modules
Face ID components
Proximity sensors
Such damage can dramatically increase repair costs.
Incorrect Adhesive Installation
Apple devices use specialized adhesives to secure displays and help maintain structural integrity.
Improper adhesive application can cause:
Dust intrusion
Display lifting
Reduced water resistance
Future screen failures
Hidden Costs of Cheap DIY Screen Repairs
Additional Part Replacements
Many DIY enthusiasts discover secondary damage after opening the device.
Common unexpected replacements include:
Batteries
Charging ports
Camera assemblies
Sensor modules
What began as a budget repair can quickly become expensive.
Loss of Device Value
Potential buyers often inspect screen quality carefully. Poor repairs may reduce resale value because buyers notice:
Uneven display brightness
Gaps around the frame
Touchscreen issues
Non-functioning sensors
A professionally repaired device typically retains greater market value.
Why Cheap Replacement Screens Often Disappoint
Display Quality Differences
At first glance, a low-cost screen may seem acceptable. However, daily use reveals major differences.
Common complaints include:
Dull colors
Lower brightness
Increased battery consumption
Reduced viewing angles
Users frequently regret choosing the cheapest available option.
Touch Sensitivity Problems
Touch responsiveness affects every interaction with the device.
Low-quality screens may cause:
Missed taps
Delayed gestures
Ghost touching
Scrolling inconsistencies
These issues create a frustrating user experience.
How Professionals Fix Your iPhone Correctly
Diagnostic Procedures
Professional technicians begin with a thorough diagnosis.
Before replacing the display, they check:
Battery condition
Sensor functionality
Camera performance
Face ID operation
Internal damage
This process identifies hidden issues before repairs begin.
Genuine Quality Components
Professional repair providers prioritize quality components that meet strict standards.
Benefits include:
Better durability
Improved touch performance
Accurate color reproduction
Reliable long-term operation
Many reputable repair centres also provide warranties for additional peace of mind.
Precision Installation Methods
Professional technicians use specialized equipment including:
Precision screwdrivers
Heat separation tools
Microscope inspection systems
Screen calibration tools
These tools help ensure accurate installation and proper functionality.
Benefits of Professional Repair Services
Warranty Protection
One major advantage of professional repair services is warranty coverage.
If a problem develops after repair, customers can return for assistance without additional expense in many cases.
This protection simply doesn’t exist with most DIY repairs.
Time Savings
Repairing an iPhone correctly takes skill and experience.
A professional technician can often complete repairs quickly because they:
Follow established procedures
Have proper tools
Understand common complications
Perform quality control testing
The result is less downtime and greater reliability.
Signs Your DIY Repair Has Gone Wrong
Watch for these warning signs after a DIY repair:
Display Problems
Flickering screen
Dead pixels
Discoloration
Bright spots
Touchscreen Issues
Delayed response
Ghost touches
Unresponsive areas
Physical Problems
Raised display edges
Visible gaps
Loose components
Functional Failures
Face ID not working
Front camera issues
Sensor malfunctions
Any of these symptoms indicate the repair may require professional attention.
Professional Repair Process Step-by-Step
Understanding the professional workflow further explains Why Cheap Screen DIYs Fail and How Professionals Fix Your iPhone Correctly.
Step 1: Initial Assessment
Technicians inspect the device and verify all functions.
Step 2: Safe Disassembly
Specialized tools minimize the risk of internal damage.
Step 3: Component Transfer
Important components are carefully transferred to the new display assembly.
Step 4: Quality Screen Installation
A premium replacement screen is installed precisely.
Step 5: Adhesive Application
Correct adhesives restore structural integrity.
Step 6: Functional Testing
Every feature is tested before returning the device.
Step 7: Final Quality Control
The technician confirms performance standards have been met.
How to Choose a Reliable Repair Centre
Not all repair providers deliver the same quality.
Consider the following factors:
Factor
Why It Matters
Experience
Reduces repair risks
Warranty
Protects your investment
Customer Reviews
Indicates service quality
Quality Parts
Ensures durability
Transparent Pricing
Prevents surprises
For additional consumer information regarding device care and electronics, visit the official website of Apple Support.
Frequently Asked Questions (FAQs)
1. Is replacing an iPhone screen yourself worth it?
In most cases, DIY repairs carry significant risks. While they may appear cheaper initially, mistakes often result in higher overall costs.
2. Why do cheap replacement screens look different?
Low-cost screens frequently use lower-grade materials, resulting in reduced brightness, color accuracy, and touch responsiveness.
3. Can DIY repairs damage Face ID?
Yes. Face ID components are delicate and can be damaged during improper disassembly or installation.
4. Do professional repairs maintain water resistance?
Professional technicians use appropriate adhesives and procedures that help preserve the device’s original sealing characteristics.
5. How long does a professional screen repair take?
Many repair centres can complete screen replacements on the same day, depending on model availability and repair complexity.
6. Will a professional repair improve resale value?
Generally, yes. High-quality repairs using reliable components are more attractive to potential buyers.
7. What should I do if my DIY repair caused new problems?
Stop using the device if significant issues appear and consult an experienced technician for a diagnostic assessment.
8. How can I tell if a screen replacement is high quality?
Look for proper brightness levels, accurate colors, responsive touch performance, and warranty-backed workmanship.
Conclusion
Understanding Why Cheap Screen DIYs Fail and How Professionals Fix Your iPhone Correctly is essential before attempting a repair. While online tutorials and inexpensive kits may seem attractive, they rarely show the full complexity of modern iPhone screen replacement.
From fragile internal components to advanced display technology, numerous factors contribute to successful repairs. Professional technicians bring experience, specialized tools, quality components, and proven procedures that dramatically reduce risks and improve outcomes.
Ultimately, investing in professional repair services can save money, preserve device value, and provide peace of mind. Rather than gambling with an expensive smartphone, choosing experienced experts remains the safest and most reliable solution.
David from Sydney CBD Repair Centre – The Best place to fix mobile phones as 7 Years In A Row! Top Mobile Phone Repair In Sydney. More than 2000 Positive Reviews on Google and Same Day Repairs.
We take pride in delivering exceptional repair services for all major phone brands including Apple, Samsung, Google, and more. Our expert technicians use only genuine parts and offer 90days warranty on repairs. Located in the heart of Sydney CBD, we’re your one-stop solution for all mobile device repairs.
Our commitment to excellence has earned us the trust of thousands of satisfied customers. Whether it’s a cracked screen, battery replacement, or water damage repair, we handle it all with professional care and expertise. Walk in today and experience why we’re Sydney’s #1 choice for mobile phone repairs.
Visit us for:
✓ Same Day Express Repairs
✓ Genuine Parts Guarantee
✓ Professional Technicians
✓ Competitive Pricing
✓ 2000+ 5-Star Google Reviews
✓ 7-Time Award Winner for Best Phone Repairs
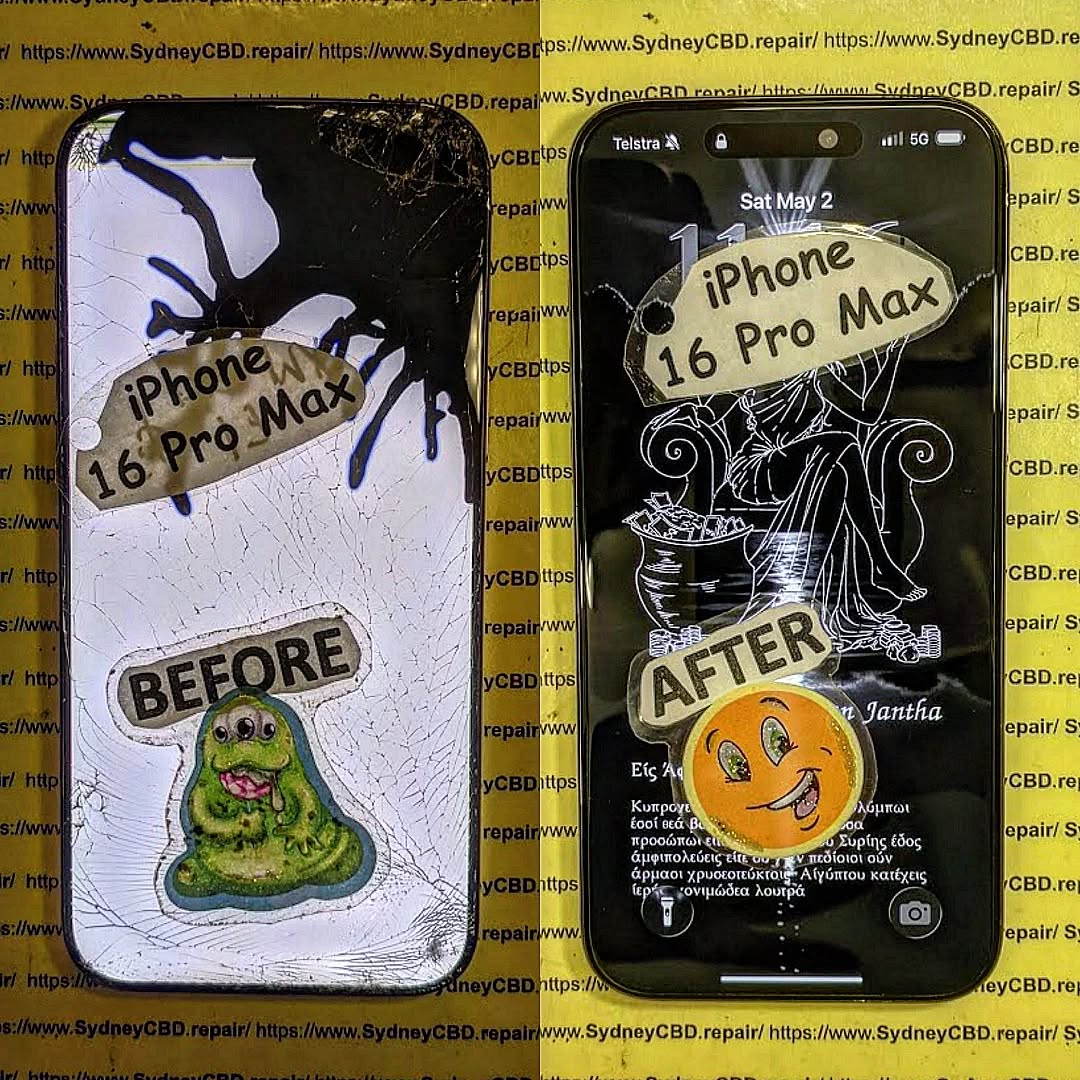
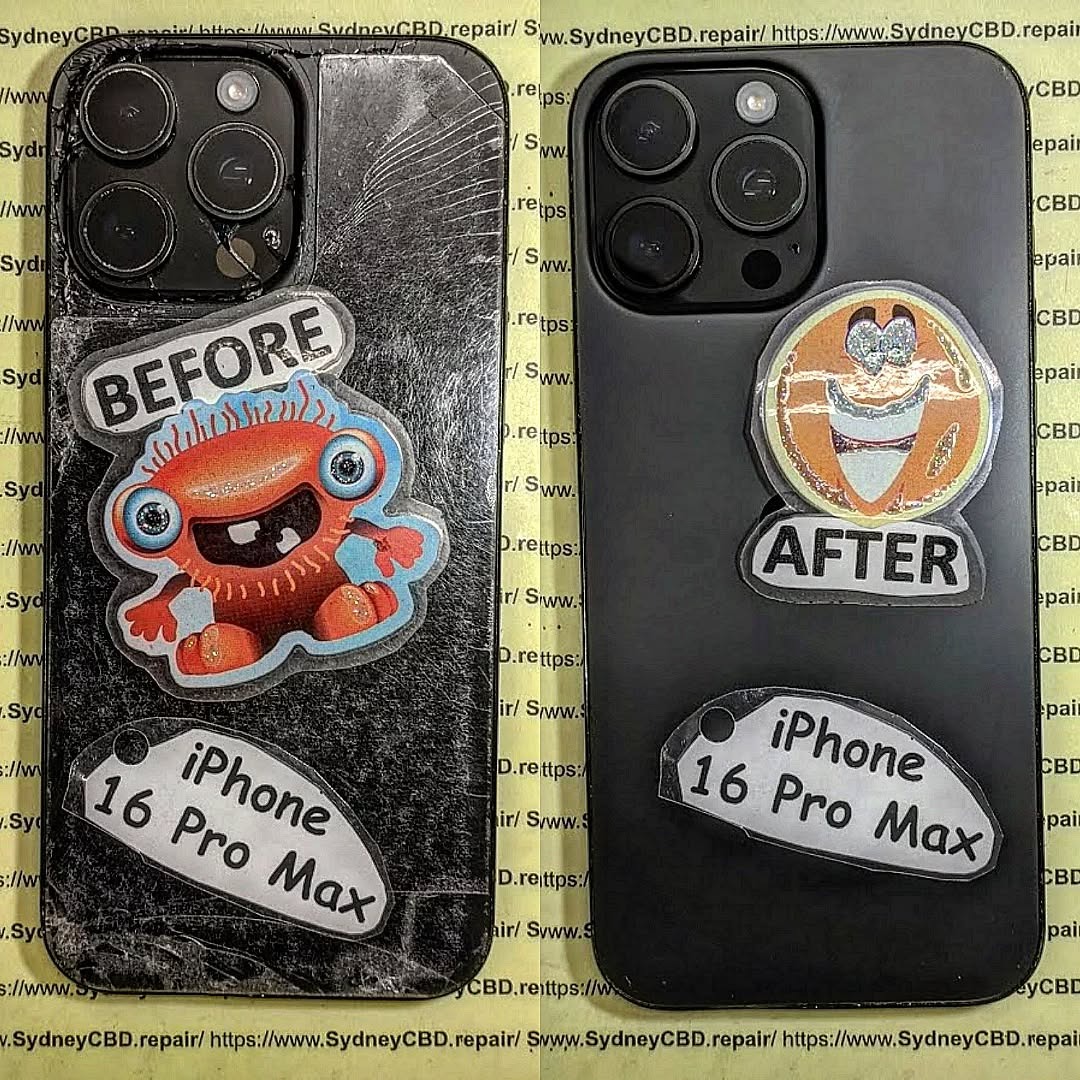
Reviving a Completely Shattered iPhone 16 Pro Max Front and Back: Amazing 12-Step Recovery Guide
Introduction to Severe iPhone Damage
A completely shattered smartphone can feel like a disaster. When an iPhone 16 Pro Max suffers catastrophic damage to both the front display and rear glass, many owners immediately assume the device is beyond repair. Fortunately, that’s rarely the case.
Reviving a Completely Shattered iPhone 16 Pro Max Front and Back is often achievable through professional diagnostics, quality replacement parts, and experienced technicians. Modern smartphones are designed with modular components, allowing specialists to replace damaged sections while preserving essential internal hardware.
Whether the damage occurred from a significant drop, vehicle impact, workplace accident, or repeated stress over time, understanding the repair process can save both money and valuable data.
In this guide, we’ll explore everything you need to know about Reviving a Completely Shattered iPhone 16 Pro Max Front and Back, including repair methods, costs, risks, and practical prevention strategies.
A shattered device isn’t simply a cosmetic problem. Extensive damage can affect functionality, durability, and long-term reliability.
Common Causes of Front and Back Damage
Several situations commonly lead to severe breakage:
Dropping the phone onto concrete
Accidental vehicle run-overs
Falls from significant heights
Heavy object impacts
Workplace accidents
Sports-related incidents
Pressure inside bags or luggage
The front display is particularly vulnerable because it contains sensitive touchscreen technology. Meanwhile, the rear glass can crack extensively due to concentrated impact forces.
Warning Signs Beyond Visible Cracks
While cracks are obvious, hidden issues may include:
Symptom
Possible Cause
Display flickering
OLED damage
Touch issues
Digitizer failure
Rapid battery drain
Internal stress
Camera malfunction
Lens or sensor damage
Overheating
Component displacement
Connectivity problems
Damaged antenna pathways
These symptoms indicate that the repair process should involve more than simply replacing broken glass.
Initial Assessment After the Accident
Before beginning any repair process, a complete evaluation is essential.
Safety Precautions
If your phone is severely shattered:
Avoid handling exposed glass.
Use protective gloves if necessary.
Power off the device.
Do not charge a damaged phone.
Keep moisture away.
Store the phone securely.
Broken glass fragments can be surprisingly sharp and hazardous.
Testing Essential Functions
Before sending the device for repair, check:
Power button functionality
Touch responsiveness
Face ID operation
Camera performance
Speaker quality
Charging capability
Wireless charging
Cellular connectivity
Documenting these functions helps technicians identify pre-existing damage and repair priorities.
Understanding the device’s construction helps explain why professional repairs are often recommended.
Front Display System
The front assembly includes:
OLED display panel
Touch digitizer
Protective glass
Face ID components
Ambient light sensors
A shattered front doesn’t necessarily mean the OLED panel is destroyed. In some cases, only the outer layer requires replacement.
Rear Glass Construction
The rear panel houses:
Wireless charging components
MagSafe alignment system
Camera housing integration
Structural reinforcement
Damage to the rear glass may impact wireless charging efficiency and overall structural stability.
Professional Repair Versus DIY Solutions
Many owners wonder whether they should attempt repairs themselves.
Benefits of Professional Repairs
Professional technicians offer:
Specialized equipment
Accurate diagnostics
Genuine-quality replacement parts
Calibration tools
Warranty protection
Data preservation
Professional repair centers also test all major functions after restoration.
Risks of DIY Repairs
DIY repair attempts may result in:
Face ID failure
Display calibration issues
Waterproofing loss
Internal cable damage
Battery puncture risks
Permanent motherboard damage
For premium devices like the iPhone 16 Pro Max, professional repair is usually the safer investment.
Step-by-Step Recovery Process
The process of Reviving a Completely Shattered iPhone 16 Pro Max Front and Back requires careful attention to detail.
Step 1: Comprehensive Diagnosis
Technicians begin by evaluating:
Motherboard condition
Battery health
Camera modules
Charging systems
Sensor functionality
This diagnostic phase determines whether additional repairs are necessary.
Step 2: Device Disassembly
The damaged components are carefully removed.
Specialized heating equipment softens adhesive without damaging surrounding parts.
Step 3: Front Glass Replacement
The damaged display assembly is replaced or refurbished.
Key tasks include:
OLED inspection
Touchscreen testing
Face ID component transfer
Display calibration
Step 4: Back Glass Restoration
The rear panel is removed using precision laser technology or advanced separation methods.
This process minimizes risk to:
Wireless charging coils
Internal antennas
Camera assemblies
Step 5: Internal Component Inspection
During repair, technicians inspect:
Logic board
Battery
Cameras
Charging ports
Flex cables
Any hidden damage is addressed before reassembly.
Step 6: Cleaning Procedures
Internal debris removal is critical.
Glass fragments can cause:
Short circuits
Connector damage
Thermal issues
Thorough cleaning improves long-term reliability.
Step 7: Component Reinstallation
Replacement components are installed with precise alignment.
This ensures:
Proper display fitment
Accurate camera positioning
Reliable wireless charging
Step 8: Adhesive Application
New waterproof-style adhesive seals are installed.
While no repair can guarantee factory-level water resistance, proper sealing significantly improves protection.
Step 9: Software Verification
Technicians verify:
iOS functionality
Sensor communication
Hardware recognition
System stability
Step 10: Camera Testing
Front and rear cameras undergo extensive testing.
Checks include:
Autofocus
Stabilization
Portrait mode
Video recording
Step 11: Charging System Evaluation
Both wired and wireless charging systems are tested.
This step confirms successful restoration of the rear assembly.
Step 12: Final Quality Control
Before returning the device, technicians perform:
Display testing
Audio testing
Connectivity testing
Cosmetic inspection
This final stage ensures the device operates as expected.
Repair Costs and Value Analysis
The cost of repairing a severely damaged device depends on several factors.
Repair Type
Typical Complexity
Front glass replacement
Moderate
OLED display replacement
High
Rear glass replacement
Moderate to High
Camera repair
Moderate
Motherboard repair
Very High
Factors affecting pricing include:
Extent of damage
Part quality
Labor requirements
Internal component failures
In many situations, repairing a shattered iPhone 16 Pro Max remains significantly more economical than purchasing a replacement device.
How Genuine Parts Affect Performance
Replacement component quality matters.
Benefits of high-quality parts include:
Better display brightness
Accurate color reproduction
Reliable touch response
Improved durability
Enhanced compatibility
Low-quality parts may lead to:
Ghost touch issues
Reduced brightness
Faster degradation
Sensor incompatibility
Investing in quality repairs often delivers better long-term value.
Data Protection During Repairs
One of the biggest concerns for owners is data security.
Fortunately, display and rear glass repairs generally do not affect stored data.
Important recommendations:
Create a backup whenever possible.
Enable cloud synchronization.
Remove sensitive accessories.
Verify account credentials before repair.
Most front and rear glass repairs leave user data untouched.
For additional information about protecting iPhone data, visit Apple’s official support website: Apple Support
Preventing Future Damage
After successfully Reviving a Completely Shattered iPhone 16 Pro Max Front and Back, prevention becomes essential.
Invest in Quality Protection
Consider:
Shock-resistant cases
Tempered glass protectors
Camera lens protectors
MagSafe-compatible rugged cases
Adopt Better Habits
Helpful habits include:
Avoid placing phones on unstable surfaces.
Use secure pockets.
Keep devices away from edges.
Handle phones carefully during travel.
Regular Maintenance
Periodic inspections help identify:
Loose components
Early cracks
Case wear
Screen protector damage
Addressing small issues early prevents costly repairs later.
Frequently Asked Questions
1. Can a completely shattered iPhone 16 Pro Max be repaired?
Yes. In many cases, even extensive front and rear damage can be repaired successfully if the motherboard remains functional.
2. Will I lose my data during repairs?
Most front and back glass repairs do not affect personal data. However, creating a backup is always recommended.
3. How long does the repair process take?
Repair times vary depending on damage severity, but many professional repair centers offer same-day service.
4. Is Face ID affected after repair?
When handled correctly by experienced technicians, Face ID can often remain fully functional.
5. Should I replace or repair my damaged phone?
If the motherboard and major components remain intact, repair is frequently the more cost-effective option.
6. Does rear glass damage affect wireless charging?
Yes. Severe rear glass damage can impact wireless charging performance and should be repaired promptly.
7. Is waterproofing restored after repair?
Professional repairs typically include replacement adhesive seals, improving protection, though factory-level water resistance cannot always be guaranteed.
8. Can hidden damage exist even if the phone powers on?
Absolutely. Internal damage may affect cameras, batteries, charging systems, and connectivity despite normal operation.
Conclusion
Experiencing catastrophic smartphone damage can be frustrating, but it doesn’t have to mean the end of your device. Reviving a Completely Shattered iPhone 16 Pro Max Front and Back is entirely possible when handled by experienced professionals using high-quality parts and proper repair procedures.
From diagnostics and display restoration to rear glass replacement and final quality testing, the repair process can return a severely damaged device to excellent working condition. Acting quickly after an accident also reduces the risk of additional internal damage.
Ultimately, investing in professional repairs can extend your device’s lifespan, preserve valuable data, and save significant money compared to purchasing a replacement phone.
David from Sydney CBD Repair Centre – The Best place to fix mobile phones as 7 Years In A Row! Top Mobile Phone Repair In Sydney. More than 2000 Positive Reviews on Google and Same Day Repairs.
We take pride in delivering exceptional repair services for all major phone brands including Apple, Samsung, Google, and more. Our expert technicians use only genuine parts and offer 90days warranty on repairs. Located in the heart of Sydney CBD, we’re your one-stop solution for all mobile device repairs.
Our commitment to excellence has earned us the trust of thousands of satisfied customers. Whether it’s a cracked screen, battery replacement, or water damage repair, we handle it all with professional care and expertise. Walk in today and experience why we’re Sydney’s #1 choice for mobile phone repairs.
Visit us for:
✓ Same Day Express Repairs
✓ Genuine Parts Guarantee
✓ Professional Technicians
✓ Competitive Pricing
✓ 2000+ 5-Star Google Reviews
✓ 7-Time Award Winner for Best Phone Repairs
iPhone 17 Pro Max: Is This the TOUGHEST Screen to Replace? Shocking Truth + 7 Expert Insights
Introduction to iPhone 17 Pro Max Screen Technology
The iPhone 17 Pro Max is already shaping up to be one of Apple’s most ambitious smartphones yet. While Apple hasn’t officially released every technical detail, industry analysts and repair professionals agree on one thing: the iPhone 17 Pro Max screen replacement process may be the most complex Apple has ever designed.
At first glance, the display looks sleek and familiar. However, beneath the surface lies a highly integrated structure that prioritizes durability, visual clarity, and power efficiency. This is great news for users—but not always for repair technicians.
In fact, within the first 10% of this discussion, it’s important to highlight that iPhone 17 Pro Max screen replacement difficulty is expected to increase due to layered glass composites, tighter internal tolerances, and advanced sensor bonding. Simply put, Apple has doubled down on innovation, even if it makes repairs more challenging.
Apple is rumored to use a next-generation Ceramic Shield Ultra for the iPhone 17 Pro Max. This material reportedly blends nano-ceramic crystals with reinforced glass layers. As a result, it offers improved drop resistance but becomes significantly harder to separate during screen replacement.
Additionally, the OLED panel itself is thinner yet more rigid. This rigidity reduces flex during removal, increasing the risk of cracking if improper tools are used.
Micro-Bezel Engineering
The bezels on the iPhone 17 Pro Max are expected to be the thinnest ever. While visually stunning, micro-bezels mean:
Less margin for error during disassembly
Higher likelihood of damaging the display cable
Increased adhesive density around the edges
These changes alone make iPhone 17 Pro Max screen replacement a precision-based task rather than a routine repair.
Apple designs its devices with longevity and performance in mind. However, repairability often takes a back seat. The iPhone 17 Pro Max continues this trend by integrating components directly into the display assembly.
This includes:
Ambient light sensors
Proximity sensors
Face ID components
Each of these elements must remain perfectly aligned during reassembly.
Increased Component Integration
Unlike older models, the iPhone 17 Pro Max screen isn’t just a display. It’s a hub. The tighter the integration, the higher the risk during replacement. Consequently, even experienced technicians must proceed cautiously.
Tools and Skills Required to Replace iPhone 17 Pro Max Screen
Replacing an iPhone 17 Pro Max screen isn’t something you tackle with household tools. It demands:
Precision heat plates
Anti-static workstations
OEM-grade replacement screens
Advanced calibration software
Professional vs DIY Repairs
DIY repairs may seem tempting. However, without the right experience, the odds of permanent damage skyrocket. Professional repair centers invest in training and equipment specifically for complex models like the iPhone 17 Pro Max.
Common Risks During iPhone 17 Pro Max Screen Replacement
Face ID and Sensor Damage
One of the biggest risks is damaging the Face ID module. Apple pairs this system tightly with the original screen. A minor misalignment can disable Face ID permanently.
Other risks include:
Display cable tearing
Dust contamination
Loss of True Tone functionality
These issues highlight why iPhone 17 Pro Max screen replacement should be handled by experts.
Cost Breakdown of iPhone 17 Pro Max Screen Replacement
Screen replacement costs are expected to rise due to:
Cost Factor
Impact
Advanced OLED
High
Ceramic Shield
Medium
Labor Expertise
High
Calibration
Medium
On average, professional repairs may cost more upfront. However, they often save money long-term by preventing secondary damage.
Professional Repair vs Apple Authorized Service
Apple Authorized Service Providers follow strict protocols. While reliable, they may charge premium prices. Independent professional repair centers, on the other hand, often provide faster turnaround times and competitive pricing—without compromising quality.
The iPhone 17 Pro Max is designed to withstand daily wear. Its improved water and dust resistance means stronger seals, which also make disassembly harder. While durability is a win for users, it adds another layer of complexity to screen replacement.
Future of iPhone Screen Repairs
Looking ahead, Apple may continue moving toward modular repairs—but we’re not there yet. For now, the iPhone 17 Pro Max represents a peak in screen engineering complexity. Repair professionals must evolve alongside Apple’s innovations.
Frequently Asked Questions (FAQs)
1. Is the iPhone 17 Pro Max screen harder to replace than previous models?
Yes, due to advanced materials and tighter internal integration.
2. Can I replace the iPhone 17 Pro Max screen myself?
Technically yes, but it’s strongly discouraged without professional tools and training.
3. Will replacing the screen affect Face ID?
If not done correctly, Face ID can be permanently disabled.
4. How long does professional screen replacement take?
Typically same day, depending on part availability.
5. Are aftermarket screens safe to use?
Quality varies. Genuine or OEM-grade parts are recommended.
6. Does screen replacement void warranty?
Unauthorized repairs may void Apple’s warranty.
Conclusion
So, is the iPhone 17 Pro Max screen replacement the toughest yet? All signs point to yes. Apple’s relentless pursuit of innovation has resulted in a display that’s stronger, sleeker, and smarter—but also far more complex to repair.
The good news? With the right expertise, tools, and genuine parts, screen replacement is still very achievable. Choosing a trusted repair professional ensures your iPhone 17 Pro Max stays as powerful and polished as the day you bought it.
David from Sydney CBD Repair Centre – The Best place to fix mobile phones as 7 Years In A Row! Top Mobile Phone Repair In Sydney. More than 2000 Positive Reviews on Google and Same Day Repairs.
We take pride in delivering exceptional repair services for all major phone brands including Apple, Samsung, Google, and more. Our expert technicians use only genuine parts and offer 90 days warranty on repairs. Located in the heart of Sydney CBD, we’re your one-stop solution for all mobile device repairs.
Our commitment to excellence has earned us the trust of thousands of satisfied customers. Whether it’s a cracked screen, battery replacement, or water damage repair, we handle it all with professional care and expertise. Walk in today and experience why we’re Sydney’s #1 choice for mobile phone repairs.
Visit us for:
✓ Same Day Express Repairs
✓ Genuine Parts Guarantee
✓ Professional Technicians
✓ Competitive Pricing
✓ 2000+ 5-Star Google Reviews
✓ 7-Time Award Winner for Best Phone Repairs
Under the Microscope: Replacing a Shattered iPhone 15 Pro Max Titanium Frame Screen + Power 2026
Introduction to iPhone 15 Pro Max Titanium Frame Damage
The iPhone 15 Pro Max titanium frame screen repair process is one of the most complex smartphone repairs available today. Apple’s flagship device introduced a lightweight yet incredibly strong titanium chassis, providing users with a premium feel and enhanced durability. However, despite its strength, accidents happen. A severe drop can leave the screen shattered, the titanium frame bent, and internal components at risk.
Many users assume that titanium makes the device indestructible. Unfortunately, that’s not the case. While titanium offers excellent resistance against everyday wear and tear, significant impacts can still deform the frame and crack the display assembly.
When a shattered screen is combined with frame damage, the repair becomes much more involved than a simple screen replacement. Technicians often need to transfer nearly every internal component from the damaged housing into a new titanium frame.
Understanding the repair process helps owners make informed decisions. Whether you’re considering a DIY approach or professional service, knowing what’s involved can save both time and money.
The introduction of titanium marked a significant evolution in smartphone engineering. Compared to stainless steel, titanium provides several advantages:
Lighter overall weight
Improved structural strength
Enhanced corrosion resistance
Better thermal properties
Premium aesthetic appearance
The iPhone 15 Pro Max titanium frame screen repair process requires specialized knowledge because titanium behaves differently than aluminum or stainless steel during disassembly and reassembly.
Common Causes of Frame and Screen Damage
Even with advanced engineering, several scenarios commonly lead to severe damage:
Cause
Potential Damage
Corner drops
Bent titanium frame
Face-down impacts
Shattered OLED screen
Vehicle accidents
Structural deformation
Heavy object compression
Internal component damage
Repeated stress
Frame warping
A bent frame can prevent proper screen seating and compromise water resistance, making immediate repair essential.
Not every damaged phone requires a complete frame replacement. However, certain symptoms indicate serious structural issues.
Visible Damage Indicators
Look for these obvious warning signs:
Cracked display glass
Uneven screen alignment
Gaps between frame and display
Bent corners
Scratches exposing bare metal
Distorted chassis shape
These symptoms often suggest that a standard screen replacement won’t solve the underlying problem.
Internal Damage Warning Signs
Some issues aren’t immediately visible:
Random restarts
Charging problems
Speaker malfunction
Camera alignment issues
Reduced battery performance
Cellular signal interruptions
Internal components can shift after a significant impact, creating additional complications.
Essential Tools Required for Repair
A professional-grade iPhone 15 Pro Max titanium frame screen repair requires specialized equipment.
Professional Equipment Checklist
Technicians commonly use:
Precision screwdrivers
Heat separation tools
OLED-safe suction equipment
Plastic opening picks
Tweezers
Display adhesive strips
Anti-static workstation
Microscope inspection tools
Without proper tools, component damage becomes much more likely.
Safety Precautions
Before beginning any repair:
Power off the device completely.
Disconnect the battery immediately.
Use anti-static protection.
Organize screws carefully.
Maintain a clean workspace.
Modern smartphones contain numerous delicate flex cables that can be damaged by careless handling.
Step-by-Step Screen and Titanium Frame Replacement
Replacing both the screen and titanium frame is effectively a complete device rebuild.
Device Preparation
The repair begins with careful preparation.
First, technicians inspect the device thoroughly to identify hidden damage. Diagnostic testing helps determine whether components such as cameras, speakers, Face ID sensors, and charging ports remain functional.
Next, the display adhesive is softened using controlled heat. Excessive heat can damage internal components, so temperature management is critical.
After heating, technicians gently separate the display from the frame while avoiding damage to delicate display cables.
Removing the Damaged Display
The shattered screen is disconnected carefully.
Several flex cables connect the display assembly to the logic board. These include:
Display data cable
Touch digitizer cable
Sensor assembly cable
Extreme caution is necessary because damage to these connectors can create additional repair expenses.
Frame Disassembly Process
This stage is the most labor-intensive portion of the repair.
Virtually every component must be transferred:
Battery
Logic board
Rear camera assembly
Front sensor array
Speakers
Taptic Engine
Charging port
Antennas
Buttons
The technician systematically removes each component while documenting placement and orientation.
Because the iPhone 15 Pro Max titanium frame screen repair involves complete internal transfer, attention to detail becomes essential.
Installing the New Titanium Frame
Once components are removed, they are installed into the replacement titanium housing.
Technicians verify:
Proper alignment
Secure mounting
Connector integrity
Antenna placement
Thermal pad positioning
Small mistakes at this stage can cause performance issues later.
Reassembling Components
After transferring all hardware, the phone is reassembled.
Key tasks include:
Reconnecting flex cables
Applying fresh adhesive
Installing display assembly
Testing all functions
Verifying waterproof seals
Comprehensive testing ensures the repair meets professional standards.
Common Challenges During Repair
Several obstacles make this repair particularly challenging.
Face ID Risks
Face ID components are uniquely paired to the device.
Damage to:
Dot projector
Infrared camera
Flood illuminator
can permanently disable facial recognition.
Because of this, professional technicians exercise extreme care when handling front sensor assemblies.
Adhesive and Waterproofing Concerns
Modern smartphones rely heavily on adhesive sealing.
Improper adhesive installation may result in:
Dust intrusion
Moisture penetration
Reduced structural integrity
Screen lifting
Maintaining water resistance requires precision and experience.
Benefits of Professional Repair Services
Professional repair offers significant advantages over DIY attempts.
Genuine Parts Advantages
Using quality replacement components helps preserve:
Display brightness
Touch sensitivity
Color accuracy
Battery efficiency
Long-term reliability
Low-quality aftermarket parts often introduce new problems.
For additional information regarding official device specifications, visit the official Apple website: Apple
Warranty Protection
Professional repair centers commonly provide warranties covering:
Parts
Labor
Installation defects
Component failures
Warranty coverage provides peace of mind and long-term value.
Cost Analysis and Value Considerations
Repair costs vary based on damage severity.
Factors affecting pricing include:
Factor
Impact on Cost
Screen damage
Moderate
Titanium frame damage
High
Face ID repairs
Very High
Camera replacement
High
Water damage
Variable
While complete frame replacement may appear expensive, it remains significantly more affordable than purchasing a new flagship device.
The iPhone 15 Pro Max titanium frame screen repair process often restores the device to near-original condition, extending its lifespan by several years.
When evaluating repair versus replacement, consider:
Device age
Overall condition
Remaining warranty
Data preservation
Upgrade requirements
For many owners, repair delivers exceptional value.
Maintenance Tips After Repair
Proper care can help prevent future damage.
Consider these recommendations:
Use a Quality Protective Case
A durable case absorbs impact energy and protects frame corners.
Install Tempered Glass Protection
Screen protectors provide an additional defense layer against scratches and cracks.
Avoid Extreme Temperatures
Excessive heat or cold can affect adhesives and battery performance.
Regular Cleaning
Dust and debris can accumulate around ports and buttons. Gentle cleaning helps maintain functionality.
Handle With Care
Even premium titanium construction has limits. Conscious handling significantly reduces accident risk.
Frequently Asked Questions
1. Can a bent titanium frame be repaired instead of replaced?
Minor bends may sometimes be corrected, but severe deformation typically requires full frame replacement to restore structural integrity and water resistance.
2. How long does an iPhone 15 Pro Max titanium frame screen repair take?
Professional repairs generally take several hours to a full day, depending on damage severity and component availability.
3. Will Face ID continue working after repair?
Yes, provided the original Face ID components remain undamaged and are transferred correctly.
4. Is water resistance fully restored after repair?
Professional technicians can restore sealing to a high standard, although factory-level certification cannot always be guaranteed.
5. Should I attempt the repair myself?
Due to the complexity of complete frame replacement, professional repair is strongly recommended for most users.
6. What happens if internal components are damaged?
Additional parts such as cameras, speakers, charging ports, or batteries may require replacement during the repair process.
7. Is repairing better than replacing the phone?
In many cases, yes. Repairing often costs significantly less than purchasing a new flagship device while preserving your data and device familiarity.
8. How can I prevent future frame damage?
Use a protective case, tempered glass screen protector, and avoid placing the device in situations where it may experience heavy impacts.
Conclusion
The iPhone 15 Pro Max titanium frame screen repair process represents one of the most advanced smartphone repairs available today. While titanium provides outstanding strength and durability, severe impacts can still result in shattered displays and structural frame damage. Repairing such damage requires specialized tools, technical expertise, and meticulous attention to detail.
A successful repair restores both functionality and appearance, allowing users to continue enjoying their premium device without the expense of a full replacement. Whether dealing with a cracked screen, bent frame, or comprehensive structural damage, choosing experienced professionals significantly increases the likelihood of a reliable, long-lasting outcome.
By understanding the repair process, recognizing warning signs early, and following proper maintenance practices afterward, owners can maximize the lifespan and value of their iPhone 15 Pro Max.
David from Sydney CBD Repair Centre – The Best place to fix mobile phones as 7 Years In A Row! Top Mobile Phone Repair In Sydney. More than 2000 Positive Reviews on Google and Same Day Repairs.
We take pride in delivering exceptional repair services for all major phone brands including Apple, Samsung, Google, and more. Our expert technicians use only genuine parts and offer 90days warranty on repairs. Located in the heart of Sydney CBD, we’re your one-stop solution for all mobile device repairs.
Our commitment to excellence has earned us the trust of thousands of satisfied customers. Whether it’s a cracked screen, battery replacement, or water damage repair, we handle it all with professional care and expertise. Walk in today and experience why we’re Sydney’s #1 choice for mobile phone repairs.
Visit us for:
✓ Same Day Express Repairs
✓ Genuine Parts Guarantee
✓ Professional Technicians
✓ Competitive Pricing
✓ 2000+ 5-Star Google Reviews
✓ 7-Time Award Winner for Best Phone Repairs
Step By Step iPhone 17 Pro Screen Replacement for Advanced DIY Enthusiasts: 17 Powerful Expert Techniques
Introduction
The iPhone 17 Pro screen replacement process has become one of the most searched repair topics among advanced DIY enthusiasts. Modern smartphones are more powerful than ever, but they’re also more fragile. A single drop onto concrete can crack the expensive OLED panel instantly.
Fortunately, experienced DIY repairers can replace the display successfully with the right tools, patience, and technical understanding. While the process isn’t easy, it’s definitely achievable for skilled enthusiasts who understand electronics repair fundamentals.
In recent years, smartphone manufacturers have improved repairability slightly, yet premium devices like the iPhone 17 Pro still require careful handling. Tiny screws, delicate flex cables, and waterproof seals demand attention to detail at every stage.
This comprehensive guide walks you through the entire iPhone 17 Pro screen replacement procedure step by step. You’ll also discover advanced repair techniques used by professionals to avoid common failures and maintain display performance after installation.
For official repair information and Apple repair policies, visit Apple Support.
DIY smartphone repair has exploded in popularity. Rising repair costs and improved access to replacement parts have encouraged many enthusiasts to learn advanced repair techniques.
Several factors contribute to this trend:
Repair videos are easier to access
Premium phones cost more than ever
Consumers want longer device lifespans
Environmental awareness is increasing
Repair communities share valuable knowledge
An iPhone 17 Pro screen replacement performed correctly can save hundreds of dollars compared to buying a new device. Moreover, many repair enthusiasts enjoy the technical challenge itself.
Still, DIY repair isn’t risk-free. A mistake can damage:
Before beginning your iPhone 17 Pro screen replacement, gather all necessary tools. Missing even one item can slow down the process or increase damage risk.
Recommended Tool Kit
Tool
Purpose
Pentalobe screwdriver
Removes bottom screws
Tri-point screwdriver
Internal bracket removal
Precision tweezers
Handling tiny components
Plastic opening picks
Separating adhesive safely
Heat pad or heat gun
Softening display adhesive
Suction cup
Lifting display assembly
Magnetic project mat
Organizing screws
Isopropyl alcohol
Cleaning adhesive residue
Replacement adhesive
Restoring water resistance
Anti-static wrist strap
Preventing ESD damage
Professional technicians also recommend using:
OLED-safe pry tools
Microscope lighting
Battery disconnect picks
Display testing equipment
Cheap tools often create problems. Stripped screws and damaged connectors frequently result from low-quality screwdriver sets.
Understanding the iPhone 17 Pro Display Technology
The iPhone 17 Pro features a sophisticated OLED display with advanced touch and brightness technologies.
Key Display Features
High refresh rate OLED panel
Ceramic Shield protection
Integrated touch digitizer
Adaptive brightness system
Dynamic Island integration
Because modern OLED displays are extremely thin, excessive bending can permanently damage them.
Additionally, the screen assembly contains:
Ambient light sensors
Proximity sensors
Front-facing camera components
Earpiece speaker connections
During your iPhone 17 Pro screen replacement, preserving these components is critical.
Safety Precautions Before Starting
Repairing smartphones requires proper safety procedures. Skipping these precautions can lead to injury or device destruction.
Important Safety Tips
1. Power Off Completely
Never attempt an iPhone 17 Pro screen replacement while the device is powered on.
2. Discharge the Battery
Reduce battery charge below 25% to minimize thermal runaway risk.
3. Avoid Metal Pry Tools Near the Battery
Lithium-ion batteries can puncture easily.
4. Use Eye Protection
Tiny glass shards may fly during removal.
5. Work Slowly
Rushing is the number one cause of repair failure.
A clean workspace also reduces contamination risks inside the device.
Preparing Your Workspace Properly
Professional-level repairs begin with proper organization.
Ideal Workspace Conditions
Workspace Feature
Benefit
Bright LED lighting
Better visibility
Anti-static surface
Reduces ESD damage
Magnetic screw tray
Prevents lost screws
Dust-free environment
Cleaner installation
Comfortable seating
Reduces fatigue
Many advanced DIY enthusiasts underestimate workspace preparation. However, organization dramatically improves repair accuracy.
Backing Up Your iPhone Before Repair
Before any iPhone 17 Pro screen replacement, create a complete backup.
You can back up using:
iCloud
Finder on Mac
iTunes on Windows
A backup protects your:
Photos
Contacts
App data
Passwords
Settings
Hardware repairs always carry some risk, even for professionals.
How to Power Down and Open the Device
Opening the device is one of the most delicate stages.
Step-by-Step Opening Procedure
Step 1: Remove Bottom Screws
Use a precision pentalobe screwdriver to remove the two charging-port screws.
Step 2: Apply Controlled Heat
Warm the display edges for 1-2 minutes.
Avoid overheating because OLED panels are heat-sensitive.
Step 3: Use a Suction Cup
Lift gently near the bottom edge.
Step 4: Insert Plastic Picks
Slide carefully around the perimeter.
Step 5: Open Like a Book
Do not pull the display completely away.
Internal flex cables remain attached.
This stage of the iPhone 17 Pro screen replacement requires patience more than force.
Removing the Damaged Display Carefully
Once opened, disconnect the battery immediately.
Internal Disconnection Process
Remove protective brackets
Disconnect battery flex
Disconnect display cables
Disconnect sensor assemblies
Professional technicians always disconnect power first.
Failing to disconnect the battery can short sensitive components instantly.
Inspect for Hidden Damage
Look carefully for:
Bent pins
Torn flex cables
Corrosion
Loose shielding
Missing screws
If the phone suffered a hard impact, internal frame damage may also exist.
Disconnecting Internal Components Safely
The front sensor assembly is one of the most sensitive parts during an iPhone 17 Pro screen replacement.
Components Requiring Extra Care
Component
Risk Level
Face ID sensors
Very high
Proximity sensor
High
OLED connector
High
Front camera flex
High
Earpiece speaker
Medium
Face ID damage can permanently disable biometric authentication.
Always use plastic tools when disconnecting flex cables.
Inspecting the Internal Frame and Connectors
Before installing the new display, inspect the housing thoroughly.
Important Inspection Areas
Frame Alignment
Bent frames create pressure points on OLED panels.
Connector Integrity
Use magnification if available.
Adhesive Residue
Old adhesive prevents proper sealing.
Water Damage Indicators
Check for red liquid contact markers.
A professional-quality iPhone 17 Pro screen replacement depends heavily on proper inspection.
Installing the New OLED Screen
Now comes the most exciting part: installing the replacement display.
Installation Steps
Step 1: Dry Test the Screen
Connect the display temporarily before sealing.
Step 2: Check Touch Functionality
Test all corners thoroughly.
Step 3: Verify Brightness
Ensure OLED output looks even.
Step 4: Confirm Sensor Operation
Test Face ID and proximity sensors.
Step 5: Install Fresh Adhesive
Apply evenly around the frame.
Step 6: Reassemble Carefully
Avoid pinching flex cables.
A high-quality OLED replacement significantly affects final results. Cheap aftermarket screens often suffer from:
Poor brightness
Weak touch sensitivity
Battery drain
Color inaccuracies
Premature failure
Reconnecting Flex Cables Correctly
Connector alignment is critical.
Never force connectors into place.
Proper Connector Technique
Align carefully
Press gently from center
Listen for soft clicking
Avoid side pressure
Many failed iPhone 17 Pro screen replacement attempts occur because connectors were partially seated.
Improper connections may cause:
Ghost touch
Green screen issues
Flickering
No display output
Sensor failures
Replacing Adhesive and Waterproof Seals
Modern smartphones rely heavily on adhesive sealing.
Why Waterproofing Matters
The iPhone 17 Pro includes strong water resistance protections, but opening the device compromises factory sealing.
Professional repairers replace:
Perimeter adhesive
Dust barriers
Mesh protection seals
Adhesive Application Tips
Tip
Benefit
Clean thoroughly first
Better adhesion
Use OEM-grade adhesive
Stronger seal
Apply evenly
Consistent pressure
Avoid stretching strips
Better alignment
Even after careful repair, water resistance may not fully match factory specifications.
Testing the Screen Before Final Assembly
Testing before complete sealing saves enormous frustration later.
Complete Functional Checklist
Display Tests
Brightness consistency
Dead pixels
Color uniformity
Refresh smoothness
Touch Tests
Edge responsiveness
Multi-touch support
Gesture operation
Sensor Tests
Face ID
Ambient light sensor
Proximity sensor
Audio Tests
Earpiece sound
Speaker clarity
A complete iPhone 17 Pro screen replacement should include comprehensive testing before final closure.
Common Mistakes During iPhone 17 Pro Screen Replacement
Even experienced enthusiasts sometimes make errors.
Most Common DIY Repair Mistakes
Using Excessive Heat
Too much heat damages OLED layers.
Mixing Screws
Incorrect screw placement can puncture the motherboard.
Skipping Battery Disconnect
This can cause catastrophic shorts.
Poor Adhesive Cleaning
Old residue weakens waterproof sealing.
Buying Cheap Displays
Low-grade parts create long-term reliability issues.
Avoiding these mistakes dramatically improves success rates.
Professional Tips for Better Repair Results
Professional repair shops follow strict procedures for consistency.
Expert Techniques
Use Screw Maps
Organize screws by location.
Photograph Every Stage
Reference photos help during reassembly.
Test Before Sealing
Never skip dry testing.
Use OEM-Quality Parts
Higher-quality components reduce callbacks.
Maintain Cleanliness
Dust under OLED panels is extremely noticeable.
These habits separate average repairs from truly professional-quality work.
DIY Repair vs Professional Repair Services
DIY repair offers advantages, but professional repair still has major benefits.
DIY Advantages
Lower cost
Learning experience
Personal satisfaction
Flexible timing
Professional Repair Advantages
Warranty coverage
Specialized tools
Faster turnaround
Reduced risk
Water resistance testing
If you’re uncertain about performing an iPhone 17 Pro screen replacement, professional repair may ultimately save money and stress.
Frequently Asked Questions
Is iPhone 17 Pro screen replacement difficult?
Yes, it’s considered an advanced repair because modern iPhones contain delicate flex cables, strong adhesive, and complex sensor systems.
Can Face ID stop working after screen replacement?
Absolutely. Damaging the sensor assembly during repair can permanently disable Face ID functionality.
How long does an iPhone 17 Pro screen replacement take?
Advanced DIY enthusiasts usually need between 1-3 hours depending on experience level.
Is waterproofing maintained after repair?
Not perfectly. New adhesive helps restore resistance, but factory-level sealing is difficult to replicate completely.
Should I use aftermarket OLED displays?
High-quality aftermarket displays can work well, but premium OEM-quality parts generally offer better brightness and durability.
Can replacing the screen damage the motherboard?
Yes. Improper tool usage, screw placement, or connector handling can damage motherboard components.
Do I need special software calibration?
Some advanced display features may require calibration tools used by professional repair technicians.
Conclusion
Performing an iPhone 17 Pro screen replacement is a challenging but rewarding project for advanced DIY enthusiasts. With the correct tools, organized preparation, and professional-level patience, you can successfully restore a damaged device to excellent working condition.
The key to success lies in careful handling, proper adhesive replacement, thorough testing, and using high-quality components. While modern smartphones are more complex than ever, skilled repair enthusiasts can still achieve impressive results at home.
Whether you choose DIY repair or professional service, understanding the repair process gives you greater confidence and appreciation for modern smartphone engineering.
David from Sydney CBD Repair Centre – The Best place to fix mobile phones as 7 Years In A Row! Top Mobile Phone Repair In Sydney. More than 2000 Positive Reviews on Google and Same Day Repairs.
We take pride in delivering exceptional repair services for all major phone brands including Apple, Samsung, Google, and more. Our expert technicians use only genuine parts and offer 90days warranty on repairs. Located in the heart of Sydney CBD, we’re your one-stop solution for all mobile device repairs.
Our commitment to excellence has earned us the trust of thousands of satisfied customers. Whether it’s a cracked screen, battery replacement, or water damage repair, we handle it all with professional care and expertise. Walk in today and experience why we’re Sydney’s #1 choice for mobile phone repairs.
Visit us for:
✓ Same Day Express Repairs
✓ Genuine Parts Guarantee
✓ Professional Technicians
✓ Competitive Pricing
✓ 2000+ 5-Star Google Reviews
✓ 7-Time Award Winner for Best Phone Repairs
iPhone 17 Pro Max Complete Disassembly: 17 Powerful Insights Into Apple’s Newest Internal Security Screws
Introduction
The iPhone 17 Pro Max complete disassembly has become one of the most talked-about topics in the repair industry. Apple continues to refine its internal engineering, and this year’s flagship device introduces a fresh layer of security hardware designed to make unauthorized repairs more difficult. At the same time, these changes also improve durability, structural integrity, and long-term reliability.
For repair technicians and tech enthusiasts alike, understanding the internal structure of the iPhone 17 Pro Max is essential. Apple has packed the phone with upgraded thermal systems, advanced camera modules, tighter waterproofing seals, and a new generation of proprietary internal security screws.
Interestingly, Apple’s latest approach balances repairability with security. While some components are easier to access, other areas are heavily protected with layered shielding and hidden fasteners. Consequently, technicians now need specialized tools and more patience than ever before.
In this guide, we’ll walk through the entire iPhone 17 Pro Max complete disassembly process, explain the purpose behind Apple’s newest screws, and discuss how professionals safely repair this premium smartphone.
Apple has always used proprietary screws in its devices. From pentalobe screws to tri-point fasteners, the company continuously evolves its internal hardware.
This time around, the iPhone 17 Pro Max introduces reinforced micro-security screws inside critical repair zones. Apple appears focused on three key goals:
Improving structural rigidity
Preventing accidental component damage
Enhancing repair authentication security
These screws are strategically placed around the logic board, battery connectors, and camera assemblies.
Benefits of Apple’s New Screw Design
Feature
Benefit
Smaller screw heads
More internal space
Hardened alloy materials
Increased durability
Deep recessed mounting
Improved tamper resistance
Multi-layer threading
Stronger hold during drops
Because of these modifications, repair shops now require updated screwdriver sets specifically designed for the iPhone 17 series.
Repairing modern smartphones isn’t just about opening screws anymore. The iPhone 17 Pro Max contains sensitive lithium-ion batteries and delicate flex cables that can tear easily.
Important Safety Steps
1. Power Down the Device
Always turn the phone off completely before starting.
2. Remove the SIM Tray
The SIM tray must be removed to avoid damaging the frame during opening.
3. Discharge Battery Below 25%
A lower battery charge reduces fire risks.
4. Use ESD Protection
Electrostatic discharge can permanently damage logic board components.
Furthermore, excessive heat during opening may weaken OLED layers, so controlled heating is essential.
Step-by-Step Opening Procedure
Opening the iPhone 17 Pro Max requires patience because Apple’s adhesive system is stronger than previous generations.
Heating the Display Adhesive
Apply moderate heat around the perimeter for approximately two minutes. This softens the waterproof adhesive.
Removing the Bottom Screws
Apple still uses external pentalobe screws near the USB-C port. However, internal screws now vary in shape and depth.
Lifting the Display
Use a suction cup carefully near the bottom edge. Slowly insert an opening pick to separate the display.
Important Warning
The display opens from the side because multiple flex cables remain attached on the opposite edge.
Rushing this process can permanently damage the OLED panel.
Understanding Apple’s New Screw Architecture
One of the most fascinating aspects of the iPhone 17 Pro Max complete disassembly is Apple’s internal screw layering strategy.
Apple now combines:
Tri-point screws
Micro Torx screws
Hybrid security screws
Shield-mounted recessed screws
These screws are positioned to isolate high-risk repair zones.
Why This Matters
This structure helps:
Reduce accidental punctures
Maintain board compression
Improve water sealing
Limit unauthorized part swapping
Repair technicians now spend more time organizing screws because even tiny placement errors can damage the motherboard.
Display Assembly Removal Process
The display assembly is incredibly thin yet highly durable.
Disconnecting the Battery First
Before touching any display cables, disconnect the battery connector.
This prevents electrical short circuits.
Removing Display Shields
Several layered metal shields cover the display connectors. These shields use Apple’s newest internal security screws.
Technicians must remember exact screw placement because lengths vary dramatically.
Flex Cable Risks
The display contains:
OLED flex
Touch digitizer cable
Face ID cable
Ambient light sensor cable
Even slight tearing can disable critical functions permanently.
Battery Adhesive and Battery Extraction
Apple continues using stretch-release adhesive tabs for the battery.
However, the adhesive is now stronger and more heat-resistant.
Battery Removal Steps
Remove lower speaker assembly
Access adhesive pull tabs
Pull slowly at low angles
Apply alcohol if adhesive snaps
If tabs break, technicians must carefully pry the battery without puncturing it.
Why Apple Changed the Battery Layout
The redesigned battery compartment improves:
Heat dissipation
Drop protection
Structural balance
As a result, the device feels sturdier during daily use.
Logic Board Layout and Shielding
The logic board inside the iPhone 17 Pro Max is one of Apple’s most compact designs ever.
Multi-Layer Board Engineering
Apple uses stacked board technology to maximize space efficiency.
Internal Components Include
Component
Function
A19 Pro chip
Main processor
RAM modules
Multitasking
NAND storage
File storage
Power IC
Voltage regulation
RF modules
Cellular communication
The board is protected with thick EMI shielding plates.
Advanced Shield Removal
Removing these shields requires extreme precision because nearby solder points are vulnerable.
Additionally, Apple added thermal transfer pads beneath major chips to improve cooling.
Camera System Teardown
The camera module is massive compared to earlier iPhone generations.
Triple-Lens Camera System
The iPhone 17 Pro Max features:
Wide sensor
Ultra-wide sensor
Tetraprism telephoto lens
Each camera is individually stabilized.
Internal Protection Features
Apple surrounds the camera housing with reinforced brackets and foam dampeners.
This reduces vibration damage during drops.
LiDAR Scanner Placement
The LiDAR system now integrates deeper into the frame structure for better alignment accuracy.
Consequently, replacing rear camera components requires more recalibration steps.
Thermal Management Improvements
Heat control is one of Apple’s biggest upgrades this year.
Vapor Chamber Cooling
Reports from the iPhone 17 Pro Max complete disassembly indicate Apple improved thermal performance dramatically.
The cooling system includes:
Graphite sheets
Copper transfer layers
Vapor chamber elements
Thermal gel interfaces
These features help maintain gaming performance and camera processing stability.
Benefits for Daily Users
Improved thermals lead to:
Better sustained performance
Longer battery lifespan
Reduced overheating
More stable charging speeds
This engineering upgrade is particularly important for intensive AI-powered tasks.
USB-C Port and Charging Assembly
Apple continues refining its USB-C implementation.
Port Construction
The charging assembly includes:
USB-C connector
Microphone modules
Waterproof gaskets
Antenna routing brackets
The port itself is reinforced with thicker anchor points.
Repair Challenges
USB-C repairs are still delicate because nearby board traces are extremely small.
Improper soldering can destroy charging functionality permanently.
Speaker and Haptic Engine Analysis
The speaker system inside the iPhone 17 Pro Max delivers richer sound due to redesigned acoustic chambers.
Speaker Assembly Features
Apple enlarged:
Resonance chambers
Bass channels
Vibration dampeners
As a result, audio quality feels fuller and clearer.
Taptic Engine Improvements
The Taptic Engine is slightly larger and mounted with reinforced brackets.
This design minimizes movement during drops and improves long-term reliability.
Face ID and Sensor Flex Considerations
Face ID repairs remain among the most difficult smartphone repairs in the industry.
Fragile Sensor Arrays
The sensor flex includes:
Infrared camera
Dot projector
Flood illuminator
Damaging any component may permanently disable Face ID.
Why Apple Locks Face ID Components
Apple uses hardware pairing for security and biometric protection.
Therefore, many Face ID repairs require advanced microsoldering expertise.
Repairability Score and Technician Challenges
The iPhone 17 Pro Max complete disassembly reveals a mixed repairability experience.
Areas That Improved
Easier display access
Better battery compartment organization
Improved modular speakers
Areas That Became Harder
New internal security screws
Stronger adhesives
Increased software pairing
Professional repair shops now rely heavily on specialized equipment and repair databases.
Genuine Parts vs Aftermarket Components
Choosing replacement parts significantly affects repair quality.
Genuine Parts Advantages
Genuine Parts
Aftermarket Parts
Better OLED quality
Lower brightness
Accurate colors
Inconsistent calibration
Improved durability
Variable lifespan
Better waterproof fit
Possible sealing gaps
Using authentic components also reduces compatibility issues.
Water Resistance Restoration After Repair
One major concern after disassembly is restoring water resistance.
Adhesive Replacement
Technicians must install new waterproof adhesive seals after every opening.
Important Reality Check
Even with proper sealing, repaired devices may not fully match factory waterproof ratings.
Therefore, users should still avoid exposing repaired phones to excessive moisture.
Common Mistakes During iPhone 17 Pro Max Complete Disassembly
Many DIY repairs fail because of avoidable mistakes.
Frequent Errors
Incorrect Screw Placement
Using the wrong screw can puncture the motherboard.
Excessive Pry Force
This often damages OLED panels or flex cables.
Battery Punctures
Lithium-ion batteries can ignite if bent or pierced.
Improper Adhesive Removal
Poor adhesive cleanup prevents proper resealing.
Patience and organization are absolutely essential during any repair.
Professional Repair Recommendations
Although online teardown videos make repairs look easy, professional repair work requires training and experience.
Why Professionals Matter
Certified technicians offer:
Proper diagnostics
Safe battery handling
Correct waterproof resealing
Advanced microsoldering
Genuine-quality replacement parts
Additionally, professional repair centers maintain specialized tools designed specifically for modern Apple devices.
Frequently Asked Questions
Is the iPhone 17 Pro Max difficult to repair?
Yes. The device uses advanced adhesives, security screws, and paired components that increase repair complexity.
Can I replace the battery myself?
Technically yes, but battery replacement requires careful adhesive removal and proper safety procedures.
What are Apple’s new internal security screws?
They are proprietary fasteners designed to improve structural rigidity and limit unauthorized repairs.
Does opening the iPhone 17 Pro Max remove waterproofing?
Yes. Opening the device breaks the factory waterproof seal, which must be replaced carefully.
Can Face ID be repaired after damage?
Some Face ID repairs are possible, but many require advanced microsoldering and specialized calibration tools.
Are aftermarket screens safe to use?
Some aftermarket screens work adequately, but genuine-quality displays usually provide better brightness, color accuracy, and durability.
Why are screw placements so important?
Different screw lengths can damage sensitive internal layers if installed incorrectly.
Conclusion
The iPhone 17 Pro Max complete disassembly showcases Apple’s relentless focus on engineering refinement, durability, and internal security. From its sophisticated cooling system to its reinforced camera structures and proprietary internal screws, the device reflects a growing trend toward tightly integrated smartphone design.
While certain repair areas have improved, the newest internal security screws and advanced component pairing systems create fresh challenges for technicians. Consequently, successful repairs now depend heavily on proper tools, technical expertise, and careful organization.
For users, the takeaway is simple: modern flagship smartphones are marvels of engineering, but repairing them safely requires skill and experience. Whether you’re a repair enthusiast or a professional technician, understanding Apple’s newest internal architecture is essential for navigating the future of smartphone repair.
Thanks for reading this comprehensive guide on the iPhone 17 Pro Max complete disassembly and Apple’s newest internal security screws. Staying informed about modern smartphone engineering helps users make smarter repair decisions and protect their devices for the long term.
David from Sydney CBD Repair Centre – The Best place to fix mobile phones as 7 Years In A Row! Top Mobile Phone Repair In Sydney. More than 2000 Positive Reviews on Google and Same Day Repairs.
We take pride in delivering exceptional repair services for all major phone brands including Apple, Samsung, Google, and more. Our expert technicians use only genuine parts and offer 90days warranty on repairs. Located in the heart of Sydney CBD, we’re your one-stop solution for all mobile device repairs.
Our commitment to excellence has earned us the trust of thousands of satisfied customers. Whether it’s a cracked screen, battery replacement, or water damage repair, we handle it all with professional care and expertise. Walk in today and experience why we’re Sydney’s #1 choice for mobile phone repairs.
Visit us for:
✓ Same Day Express Repairs
✓ Genuine Parts Guarantee
✓ Professional Technicians
✓ Competitive Pricing
✓ 2000+ 5-Star Google Reviews
✓ 7-Time Award Winner for Best Phone Repairs
Why Your Face ID Stops Working After A Simple DIY Screen Replacement: 9 Shocking Reasons Every iPhone Owner Must Know
Introduction
Many iPhone users try fixing cracked screens at home to save money. At first glance, replacing a screen looks easy. You watch a few videos online, order a replacement display kit, and begin the repair yourself. However, many people quickly discover a frustrating surprise: Face ID suddenly stops working after the repair.
This issue is more common than most people realize. In fact, one small mistake during a DIY screen replacement can disable Face ID permanently. Since Apple designed Face ID with advanced security hardware, every tiny component must stay perfectly connected and calibrated.
When people search for why your Face ID stops working after a simple DIY screen replacement, they often assume the screen itself caused the problem. Yet the real issue usually comes from damaged sensors, torn cables, poor-quality parts, or improper installation techniques.
The good news is that understanding the causes can help you avoid expensive mistakes. More importantly, professional repair shops can often diagnose and fix the issue before it becomes irreversible.
In this guide, you’ll learn exactly why Face ID fails after screen repairs, how the technology works, what warning signs to watch for, and why expert repair matters more than ever.
Before discussing repair mistakes, it’s important to understand how Face ID operates.
Face ID isn’t just a simple front camera. Instead, it’s a highly advanced biometric security system made up of several delicate components working together.
These include:
Infrared camera
Flood illuminator
Dot projector
Ambient light sensor
Proximity sensor
Front camera module
Together, these parts create a detailed 3D map of your face. Unlike traditional fingerprint systems, Face ID constantly analyzes depth and facial geometry for security.
Apple also pairs many of these components to the phone’s logic board. That means replacing or damaging certain parts can break communication between the hardware and software.
As a result, even a “simple” screen replacement can become risky if proper procedures aren’t followed.
DIY repairs have become increasingly popular for several reasons.
First, replacement kits are widely available online. Second, tutorial videos make repairs appear fast and easy. Finally, many users want to avoid expensive repair costs from official service centers.
Still, DIY repairs often overlook one important fact: modern smartphones are incredibly delicate.
Unlike older phones with modular designs, newer iPhones contain tightly integrated systems. Components are layered closely together, and even minor force can damage hidden cables or sensors.
Additionally, aftermarket repair kits may include:
Low-quality screens
Weak adhesives
Incorrect screws
Cheap tools
Poor flex cable alignment
Consequently, people attempting repairs without professional experience often encounter problems immediately afterward.
One of the most frustrating outcomes is discovering that Face ID no longer functions properly.
The Fragile Components Connected to Face ID
The Face ID system sits near the top portion of the iPhone display assembly. During a screen replacement, technicians must carefully transfer these components from the old screen to the new one.
Unfortunately, these parts are extremely sensitive.
A tiny tear in a cable or slight misalignment can trigger errors such as:
“Face ID Not Available”
“Unable to Activate Face ID”
Face recognition failure
Camera malfunction messages
What makes matters worse is that some Face ID components are cryptographically paired to the motherboard. Once damaged, they cannot simply be replaced with generic parts.
This is why professional technicians use specialized microscopes, calibration tools, and anti-static equipment during repairs.
#1 Damaged Flex Cables
One of the most common causes of Face ID failure is torn flex cables.
The flex cable connecting the front sensor assembly is extremely thin. During DIY repairs, people may accidentally:
Pull the screen too hard
Pry at the wrong angle
Bend the cable sharply
Disconnect connectors improperly
Even microscopic tears can interrupt communication between sensors and the motherboard.
Unfortunately, these cables are fragile enough that damage may not even be visible to the naked eye.
Professional repair technicians inspect these cables under magnification to detect tiny breaks or stress points.
#2 Incorrect Screen Installation
Improper installation can also stop Face ID from working.
When a replacement screen isn’t seated correctly, the sensor assembly may become slightly misaligned. Since Face ID relies on precision positioning, even a tiny shift can interfere with depth mapping.
Common installation mistakes include:
Uneven screw pressure
Missing brackets
Incorrect screw placement
Misaligned sensor brackets
Interestingly, using the wrong screw length can even damage internal motherboard layers. This issue is known in repair circles as “long screw damage.”
Therefore, attention to detail is critical during every repair step.
#3 Dot Projector Misalignment
The dot projector is arguably the most important Face ID component.
It projects thousands of invisible infrared dots onto your face to create a 3D map.
However, this module is extremely delicate.
If the dot projector becomes damaged or misaligned during screen replacement, Face ID may stop working permanently.
Unlike ordinary camera modules, dot projectors require factory-level precision. In many cases, replacing the projector alone won’t restore functionality because the system is uniquely paired to the motherboard.
This is why expert handling matters so much during repairs.
#4 Water Resistance Seal Problems
Modern iPhones use adhesive seals to maintain water resistance.
During DIY screen replacement, these seals are often damaged or discarded entirely.
While this may not immediately affect Face ID, moisture exposure afterward can cause corrosion around sensitive front sensor components.
Over time, corrosion may damage:
Infrared sensors
Camera connectors
Dot projector circuitry
Ambient light sensors
As a result, Face ID may fail days or weeks after the repair.
Professional repair centers typically replace waterproof seals properly using precision adhesives and controlled installation methods.
#5 Non-Genuine Screen Compatibility Issues
Cheap aftermarket screens are another major problem.
Although many third-party displays appear similar to genuine Apple screens, they often lack proper compatibility with Face ID systems.
Common issues include:
Sensor interference
Poor proximity sensor alignment
Excessive display thickness
Weak flex cable shielding
In some cases, aftermarket displays trigger random touchscreen problems alongside Face ID errors.
That’s why reputable repair centers usually recommend premium-quality or genuine replacement parts whenever possible.
#6 Static Electricity Damage
Static electricity can silently destroy sensitive electronics.
Without proper anti-static protection, touching internal iPhone components may discharge electricity into delicate circuits.
The scary part is that static damage often leaves no visible signs.
A repair may appear successful initially, only for Face ID problems to appear later.
Professional technicians use:
ESD-safe workstations
Anti-static mats
Grounded wrist straps
Controlled environments
These precautions dramatically reduce the risk of hidden electrical damage.
#7 Software Calibration Errors
Face ID depends on both hardware and software communication.
Sometimes, after screen replacement, calibration issues occur.
This can happen when:
Connectors are not fully seated
Sensors initialize incorrectly
Software detects hardware mismatch
The repair interrupts TrueDepth calibration
In some situations, software updates or advanced calibration tools may help restore normal operation.
However, severe hardware damage usually requires board-level repair expertise.
#8 Front Camera Damage During Repair
The front camera assembly sits extremely close to the Face ID sensors.
During DIY repairs, users may accidentally damage:
Camera lenses
Sensor brackets
Camera connectors
Infrared filters
When this happens, Face ID often fails simultaneously because the system relies on multiple interconnected modules.
Typical symptoms include:
Symptom
Possible Cause
Blurry selfies
Front camera damage
Black camera screen
Connector issue
Face ID unavailable
Sensor communication failure
Auto-brightness failure
Ambient sensor damage
Therefore, even if the screen replacement seems successful, hidden camera damage may still exist internally.
#9 Improper Tools and Repair Techniques
Many DIY kits include low-quality tools that increase repair risks.
Using metal prying tools incorrectly can scratch circuits, damage connectors, or puncture cables.
Likewise, excessive heat from cheap heat guns may damage nearby components.
Professional repair centers use specialized equipment such as:
Precision screwdrivers
Controlled heating systems
Microsoldering stations
Screen separation machines
Calibration software
These tools help ensure safe, accurate repairs.
Signs Your Face ID Is Failing
After a DIY repair, watch for warning signs immediately.
Common symptoms include:
Face ID setup fails
Unlocking becomes inconsistent
Face recognition slows down
Front camera issues appear
Auto-brightness stops working
Portrait mode fails on selfies
These signs usually indicate sensor communication problems or physical damage.
The sooner the phone is inspected, the better the chances of successful repair.
Can Face ID Be Repaired After DIY Damage?
In many situations, yes — but not always.
The outcome depends on which component failed.
Minor issues like:
Loose connectors
Poor installation
Misaligned brackets
can often be repaired successfully.
However, severe damage to paired components like the dot projector may require advanced microsoldering or specialized data transfer procedures.
In worst-case scenarios, Face ID may become permanently disabled.
That’s why early diagnosis from experienced technicians is extremely important.
Why Professional Repair Matters
Professional repair isn’t only about replacing parts. It’s about protecting delicate systems throughout the repair process.
Experienced technicians understand:
Safe disassembly methods
Component sensitivity
Calibration procedures
Static protection
Screw mapping
Adhesive sealing
Moreover, professional shops often test all sensors before and after repair to confirm everything functions correctly.
This dramatically lowers the risk of accidental Face ID failure.
How Technicians Restore Face ID Properly
Professional repair specialists follow strict procedures when handling Face ID systems.
Typical steps include:
Diagnostic testing
Sensor inspection
Connector verification
Microscope examination
Flex cable testing
Software calibration
Waterproof resealing
Final quality testing
Some advanced repair centers even perform board-level microsoldering repairs to recover damaged Face ID systems.
This expertise can save customers from replacing their entire device.
For official repair information, users can also visit Apple Support.
Tips To Prevent Face ID Problems
If you’re considering screen replacement, these tips can help protect your device.
Always Use Quality Parts
Cheap screens may create compatibility issues.
Avoid Excessive Force
Never pull the display aggressively during opening.
Disconnect Battery First
This reduces electrical damage risks.
Use Proper Tools
Precision tools lower the chance of connector damage.
Consider Professional Repair
Complex devices deserve experienced handling.
Preventive care is usually far cheaper than repairing Face ID damage afterward.
DIY Repair vs Professional Repair Comparison
Feature
DIY Repair
Professional Repair
Lower upfront cost
Yes
No
Risk of Face ID failure
High
Low
Waterproof sealing
Often missing
Professionally restored
Warranty protection
Usually none
Often included
Calibration tools
Limited
Advanced
Microsoldering capability
Rare
Available
Genuine parts access
Limited
Better availability
Although DIY repairs may seem cheaper initially, failed repairs can ultimately become far more expensive.
Frequently Asked Questions
Does replacing an iPhone screen automatically disable Face ID?
No. Proper repairs usually preserve Face ID functionality. Problems happen when components become damaged or improperly installed.
Why does Face ID say “Unavailable” after screen replacement?
This message often appears due to damaged flex cables, sensor misalignment, or communication errors between the TrueDepth system and motherboard.
Can aftermarket screens break Face ID?
Yes. Some low-quality screens interfere with sensor alignment and proximity systems, leading to Face ID issues.
Is Face ID repair expensive?
Costs vary depending on the damage severity. Simple connector fixes may be affordable, while microsoldering repairs are more advanced and costly.
Can Apple repair Face ID damage caused by DIY repair?
In many cases, Apple may recommend full device replacement if paired Face ID components are damaged.
Should I attempt DIY repair again after Face ID failure?
Usually no. Reopening the phone without proper tools or expertise may worsen the damage.
How can I protect Face ID during repair?
Use professional repair services, quality parts, anti-static precautions, and proper installation techniques.
Conclusion
Understanding why your Face ID stops working after a simple DIY screen replacement can help you avoid one of the most frustrating iPhone repair mistakes.
Although DIY repairs may appear simple online, modern iPhones contain incredibly delicate hardware systems. Tiny errors involving flex cables, dot projectors, sensors, or calibration can permanently disable Face ID functionality.
The reality is that Face ID technology requires precision, experience, and specialized tools. While some repair issues are recoverable, severe damage may become irreversible.
That’s why choosing professional repair services remains the safest option for protecting both your device and your data security.
When it comes to modern smartphone repairs, expertise truly matters.
David from Sydney CBD Repair Centre – The Best place to fix mobile phones as 7 Years In A Row! Top Mobile Phone Repair In Sydney. More than 2000 Positive Reviews on Google and Same Day Repairs.
We take pride in delivering exceptional repair services for all major phone brands including Apple, Samsung, Google, and more. Our expert technicians use only genuine parts and offer 90days warranty on repairs. Located in the heart of Sydney CBD, we’re your one-stop solution for all mobile device repairs.
Our commitment to excellence has earned us the trust of thousands of satisfied customers. Whether it’s a cracked screen, battery replacement, or water damage repair, we handle it all with professional care and expertise. Walk in today and experience why we’re Sydney’s #1 choice for mobile phone repairs.
Visit us for:
✓ Same Day Express Repairs
✓ Genuine Parts Guarantee
✓ Professional Technicians
✓ Competitive Pricing
✓ 2000+ 5-Star Google Reviews
✓ 7-Time Award Winner for Best Phone Repairs