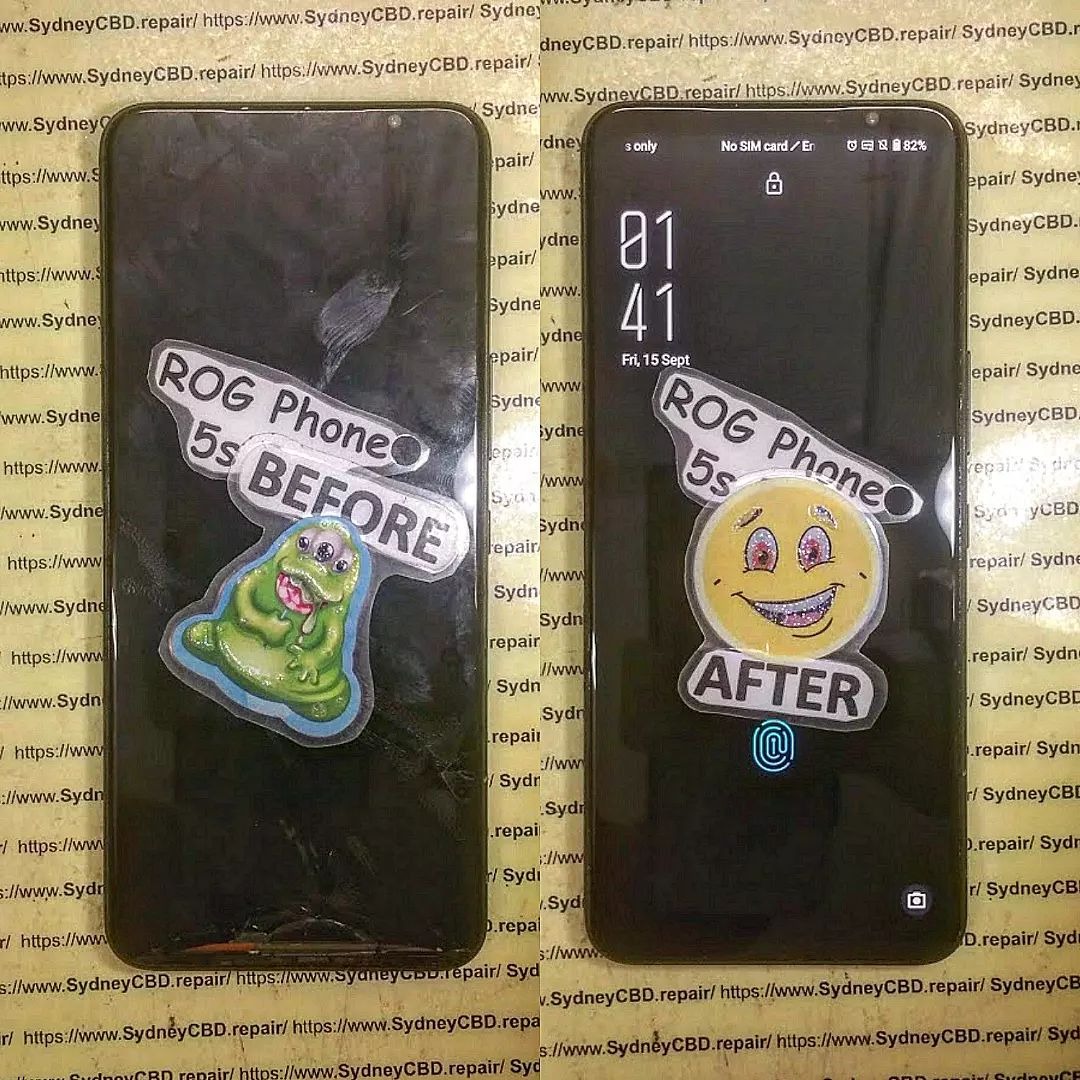
INSIDE LOOK: ASUS ROG PHONE 5S FULL DISASSEMBLY!Ultimate Step-by-Step Guide for Tech Enthusiasts
Introduction: Why the ROG 5S Stands Out
The ASUS ROG Phone 5S has earned its place as one of the most powerful gaming smartphones in the world. Packed with the Snapdragon 888+ processor, 144Hz AMOLED display, and dual front-facing speakers, it’s a beast built for performance. But when repairs become necessary—like screen replacements, battery issues, or charging port malfunctions—knowing how to disassemble the ROG 5S properly becomes essential.
Before grabbing your screwdriver, remember: this phone’s design is compact, layered, and delicate. Disassembling it requires patience, the right tools, and a steady hand.
To safely open your ROG 5S, gather the following tools:
Precision screwdriver set (Torx and Phillips)
Plastic prying tools and picks
Suction cup
ESD-safe tweezers
SIM ejector pin
Heat gun or hairdryer
Anti-static mat and gloves
Safety Tips and Workstation Setup
Work on a clean, static-free surface.
Disconnect all power sources before opening the device.
Use a magnetic screw mat to track different screw sizes.
Keep the phone components in order for easy reassembly.
Step 1: Removing the SIM Tray and Back Panel
Begin by ejecting the SIM card tray using a pin tool. Then, heat the edges of the back panel gently with a hairdryer for 1–2 minutes to loosen the adhesive.
Handling Adhesive and Heat Application
Use a suction cup to lift the glass slightly, then insert a plastic pick to cut through the adhesive. Work slowly around the frame to avoid cracking the back glass. Do not use metal tools—they can scratch or shatter the surface.
Step 2: Disconnecting the Battery and Motherboard Shields
Once the back panel is off, remove the screws securing the black plastic shields. These protect the motherboard, battery, and connectors underneath.
ESD Safety and Screw Management
Always use an ESD-safe tool when handling connectors. Static electricity can easily damage internal components. Keep screws labeled—ROG 5S uses multiple sizes, and misplacing them can cause reassembly issues.
Step 3: Camera Module and Flash Removal
The ROG 5S features a 64MP Sony IMX686 main sensor, ultra-wide lens, and macro lens. Carefully disconnect their ribbon connectors and lift the camera modules out.
Identifying Camera Components
Main Camera: Large rectangular sensor in the top-left corner.
Ultra-wide Lens: Positioned beside the main camera.
Macro Lens: Small, near the flash module.
Avoid touching the lens surfaces—fingerprints can degrade image quality.
Step 4: Accessing the Motherboard and Daughterboard
Next, detach the ribbon cables connecting the motherboard to the daughterboard (bottom section). These include the charging port flex, antenna cable, and battery connector.
Ribbon Cables and Connectors Explained
Each ribbon cable carries signals between key modules—display, charging, battery, and camera. Handle them gently to avoid tearing the flex.
Step 5: Removing the Cooling System and Fan Assembly
The ROG 5S’s gaming edge comes from its advanced cooling system—a vapor chamber, graphite sheets, and external AeroActive fan support.
Understanding ROG 5S Thermal Design
The cooling design keeps temperatures low during extended gaming. When disassembling, remove thermal paste carefully and store the vapor chamber away from dust and moisture.
Step 6: Speaker and Vibration Motor Extraction
Unscrew and disconnect the loudspeaker assembly from the bottom frame. The ROG 5S features dual front-facing speakers that deliver a surround sound experience.
Audio Module Insights
The vibration motor sits near the bottom, giving tactile feedback during gameplay. Use a plastic spudger to lift it gently from its housing.
Step 7: Display and Frame Separation
If you’re replacing the screen, this is the final step. Warm the display edges, use a suction cup, and carefully separate the AMOLED panel from the frame.
Avoiding Damage to AMOLED Panel
AMOLED displays are thin and fragile—avoid bending or applying pressure. Once separated, clean the frame before installing a replacement screen.
Applying too much heat, which can warp components.
Using metal tools near the battery or display.
Mixing screws from different modules.
Forgetting to disconnect the battery before handling cables.
Best Practices for Reassembly
Follow your disassembly steps in reverse. Reapply adhesive strips where necessary, ensure all connectors are properly aligned, and test before sealing the back panel.
How Sydney CBD Repair Centre Can Help
If you’re not confident in disassembling your ROG Phone 5S, visit Sydney CBD Repair Centre, the #1 mobile repair shop in Sydney—six years in a row!
Our expert technicians specialize in ASUS ROG, Samsung, iPhone, and Google Pixel repairs. We use only genuine parts, offer same-day service, and provide a 90-day warranty on all repairs.
1. Can I open my ROG 5S without professional help?
Yes, but it’s risky. Without the proper tools or knowledge, you may damage sensitive parts like the display or motherboard.
2. What should I do if my ROG 5S won’t power on after reassembly?
Double-check the battery and motherboard connections—loose flex cables are often the culprit.
3. Is the ROG 5S waterproof after disassembly?
No. Once the seal is broken, water resistance is compromised unless resealed professionally.
4. How much does a screen replacement cost in Sydney?
At Sydney CBD Repair Centre, prices are competitive and depend on model and part availability.
5. How long does a professional repair take?
Most ROG 5S repairs are completed same day, thanks to our express service.
6. Are all replacement parts original?
Yes, Sydney CBD Repair Centre uses genuine parts to maintain device integrity and performance.
Conclusion: Is DIY Worth It?
Disassembling your ROG 5S offers great insight into its engineering but requires skill, patience, and precision. For most users, professional repair services—like those from Sydney CBD Repair Centre—ensure a safer, faster, and warranty-backed solution.
Whether it’s a cracked screen, battery issue, or port damage, entrust your phone to the experts who’ve earned over 2000 5-star Google reviews for their reliability and craftsmanship.
David from Sydney CBD Repair Centre – The Best place to fix mobile phones as 6 Years In A Row! Top Mobile Phone Repair In Sydney. More than 2000 Positive Reviews on Google and Same Day Repairs.
📍 Visit us today for:
✓ Same Day Express Repairs
✓ Genuine Parts Guarantee
✓ Professional Technicians
✓ Competitive Pricing
✓ 2000+ 5-Star Google Reviews
✓ 6-Time Award Winner for Best Phone Repairs
Complete Teardown of the Samsung Galaxy Z Flip 7 Internal Hinge and Display Layers – Ultimate Deep Dive Guide (2026)
Introduction to the Galaxy Z Flip 7 Teardown
The complete teardown of the Galaxy Z Flip 7 internal hinge and display layers reveals just how far foldable smartphone technology has come. At first glance, this device looks sleek and compact. However, beneath its stylish exterior lies a highly complex system of moving parts, layered displays, and precision engineering.
Foldable phones aren’t just regular smartphones that bend. They’re mechanical marvels. When you open and close the device, dozens of components move in perfect harmony. That’s why understanding the internal hinge and display layers is crucial—not just for technicians, but also for everyday users who want to know what they’re paying for.
In this guide, we’ll break everything down step-by-step. From removing the outer panels to exposing the hinge system and analyzing the delicate display layers, you’ll get a full picture of how the device works. Along the way, we’ll also highlight common failure points and repair considerations.
Foldable phones have evolved rapidly over the past few years. Early models were fragile, prone to damage, and expensive to repair. But with each generation, improvements have been made in hinge durability, display flexibility, and overall reliability.
The Galaxy Z Flip 7 represents a major leap forward. It combines stronger materials, better folding mechanics, and improved display layering to deliver a smoother user experience.
Why the Hinge Matters Most
If there’s one component that defines a foldable phone, it’s the hinge. Without a reliable hinge, the entire device becomes unusable. The hinge:
Before performing a complete teardown of the Galaxy Z Flip 7 internal hinge and display layers, you’ll need the right tools.
Essential Tools
Precision screwdriver set
Plastic pry tools
Heat gun or heating pad
Tweezers
Suction cup
Isopropyl alcohol (for adhesive removal)
Safety Precautions Before Starting
Teardowns can be risky if done incorrectly. Here’s what you should keep in mind:
Always power off the device
Avoid overheating the display
Handle the flex cables with care
Use anti-static protection
Skipping these steps could lead to permanent damage.
Step-by-Step Teardown Process
Removing the Outer Glass Panels
The teardown begins with removing the rear glass panels. These are held in place with strong adhesive, so heat must be applied evenly.
Once heated:
Use a suction cup to lift the panel
Insert a plastic pry tool
Slowly separate the adhesive
Take your time here—rushing can crack the glass.
Disconnecting Internal Components
After removing the back panel, you’ll see protective covers over the motherboard and connectors.
Steps include:
Unscrewing shielding plates
Disconnecting battery connectors
Removing flex cables
Each connection is delicate, so precision is key.
Accessing the Battery Modules
Unlike traditional phones, the Galaxy Z Flip 7 uses dual batteries—one in each half of the device.
These are connected via flex cables that run through the hinge. Removing them requires careful handling to avoid tearing the cable.
Deep Dive: Galaxy Z Flip 7 Internal Hinge Mechanism
Structure of the Hinge
The hinge system is the most fascinating part of the teardown. It consists of:
Multiple interlocking gears
Support brackets
Sliding plates
Flexible cable routing channels
These components work together to create a smooth folding motion.
Materials Used
The hinge is built using:
Reinforced aluminum
Stainless steel components
High-strength polymers
These materials are chosen for durability and flexibility.
Durability Improvements
Compared to earlier models, the Galaxy Z Flip 7 hinge offers:
Better dust resistance
Reduced wobble
Increased fold cycles
This means longer lifespan and improved reliability.
Display Layers Explained
Ultra-Thin Glass (UTG)
At the core of the display is ultra-thin glass. This layer provides:
Scratch resistance
Structural integrity
Improved touch sensitivity
Despite being glass, it’s flexible enough to bend.
Protective Polymer Layers
Above the UTG, there are polymer layers that:
Absorb stress during folding
Prevent cracking
Enhance durability
These layers are essential for long-term performance.
OLED Panel Structure
The OLED panel sits beneath the protective layers and includes:
Organic light-emitting diodes
Pixel matrix
Flexible substrate
This is what produces the vibrant display.
Common Issues Found During Teardown
Hinge Failures
Even with improvements, hinge issues can still occur:
Dust buildup
Misalignment
Wear and tear
These problems can affect folding performance.
Display Creasing Problems
Over time, users may notice:
Visible crease lines
Reduced touch sensitivity
Pixel distortion
These are common in foldable displays.
Repairability and Replacement Insights
Repairing a foldable phone is more complex than a standard device. The complete teardown of the Galaxy Z Flip 7 internal hinge and display layers shows that:
Parts are tightly integrated
Repairs require specialized tools
Costs can be higher
However, modular improvements in newer models make repairs slightly easier.
Pros and Cons of Foldable Design
Pros
Compact form factor
Innovative design
Large screen in small body
Cons
Higher repair costs
More fragile components
Limited repairability
Future of Foldable Technology
Foldable phones are here to stay. Future advancements may include:
Self-healing displays
Dust-proof hinges
Lower repair costs
As technology evolves, these devices will become more durable and accessible.
FAQs
1. Is the Galaxy Z Flip 7 hinge durable?
Yes, it’s designed for thousands of folds, but like any mechanical part, it can wear out over time.
2. Can the display be replaced easily?
No, the display is complex and requires professional tools and expertise.
3. Why does the screen crease?
Creasing happens due to repeated folding stress on the display layers.
4. Is the hinge repairable?
In most cases, yes—but it’s often expensive and requires skilled technicians.
5. Are foldable phones worth it?
They offer unique benefits, but users should consider durability and repair costs.
6. How long does a foldable phone last?
With proper care, it can last several years, though hinge and display wear are factors.
Conclusion
The complete teardown of the Galaxy Z Flip 7 internal hinge and display layers highlights just how advanced modern smartphones have become. From the intricate hinge mechanism to the multi-layered display, every component is engineered with precision.
While foldable devices still have some limitations, they represent the future of mobile technology. With continued innovation, we can expect even more durable, reliable, and affordable foldable phones in the years ahead.
For now, understanding how they work gives you a deeper appreciation—and helps you make smarter decisions when it comes to repair and maintenance.
David from Sydney CBD Repair Centre – The Best place to fix mobile phones as 7 Years In A Row! Top Mobile Phone Repair In Sydney. More than 2000 Positive Reviews on Google and Same Day Repairs.
We take pride in delivering exceptional repair services for all major phone brands including Apple, Samsung, Google, and more. Our expert technicians use only genuine parts and offer 90days warranty on repairs. Located in the heart of Sydney CBD, we’re your one-stop solution for all mobile device repairs.
Our commitment to excellence has earned us the trust of thousands of satisfied customers. Whether it’s a cracked screen, battery replacement, or water damage repair, we handle it all with professional care and expertise. Walk in today and experience why we’re Sydney’s #1 choice for mobile phone repairs.
Visit us for:
✓ Same Day Express Repairs
✓ Genuine Parts Guarantee
✓ Professional Technicians
✓ Competitive Pricing
✓ 2000+ 5-Star Google Reviews
✓ 7-Time Award Winner for Best Phone Repairs
Step By Step iPhone 17 Pro Screen Replacement for Advanced DIY Enthusiasts: 17 Powerful Expert Techniques
Introduction
The iPhone 17 Pro screen replacement process has become one of the most searched repair topics among advanced DIY enthusiasts. Modern smartphones are more powerful than ever, but they’re also more fragile. A single drop onto concrete can crack the expensive OLED panel instantly.
Fortunately, experienced DIY repairers can replace the display successfully with the right tools, patience, and technical understanding. While the process isn’t easy, it’s definitely achievable for skilled enthusiasts who understand electronics repair fundamentals.
In recent years, smartphone manufacturers have improved repairability slightly, yet premium devices like the iPhone 17 Pro still require careful handling. Tiny screws, delicate flex cables, and waterproof seals demand attention to detail at every stage.
This comprehensive guide walks you through the entire iPhone 17 Pro screen replacement procedure step by step. You’ll also discover advanced repair techniques used by professionals to avoid common failures and maintain display performance after installation.
For official repair information and Apple repair policies, visit Apple Support.
DIY smartphone repair has exploded in popularity. Rising repair costs and improved access to replacement parts have encouraged many enthusiasts to learn advanced repair techniques.
Several factors contribute to this trend:
Repair videos are easier to access
Premium phones cost more than ever
Consumers want longer device lifespans
Environmental awareness is increasing
Repair communities share valuable knowledge
An iPhone 17 Pro screen replacement performed correctly can save hundreds of dollars compared to buying a new device. Moreover, many repair enthusiasts enjoy the technical challenge itself.
Still, DIY repair isn’t risk-free. A mistake can damage:
Before beginning your iPhone 17 Pro screen replacement, gather all necessary tools. Missing even one item can slow down the process or increase damage risk.
Recommended Tool Kit
Tool
Purpose
Pentalobe screwdriver
Removes bottom screws
Tri-point screwdriver
Internal bracket removal
Precision tweezers
Handling tiny components
Plastic opening picks
Separating adhesive safely
Heat pad or heat gun
Softening display adhesive
Suction cup
Lifting display assembly
Magnetic project mat
Organizing screws
Isopropyl alcohol
Cleaning adhesive residue
Replacement adhesive
Restoring water resistance
Anti-static wrist strap
Preventing ESD damage
Professional technicians also recommend using:
OLED-safe pry tools
Microscope lighting
Battery disconnect picks
Display testing equipment
Cheap tools often create problems. Stripped screws and damaged connectors frequently result from low-quality screwdriver sets.
Understanding the iPhone 17 Pro Display Technology
The iPhone 17 Pro features a sophisticated OLED display with advanced touch and brightness technologies.
Key Display Features
High refresh rate OLED panel
Ceramic Shield protection
Integrated touch digitizer
Adaptive brightness system
Dynamic Island integration
Because modern OLED displays are extremely thin, excessive bending can permanently damage them.
Additionally, the screen assembly contains:
Ambient light sensors
Proximity sensors
Front-facing camera components
Earpiece speaker connections
During your iPhone 17 Pro screen replacement, preserving these components is critical.
Safety Precautions Before Starting
Repairing smartphones requires proper safety procedures. Skipping these precautions can lead to injury or device destruction.
Important Safety Tips
1. Power Off Completely
Never attempt an iPhone 17 Pro screen replacement while the device is powered on.
2. Discharge the Battery
Reduce battery charge below 25% to minimize thermal runaway risk.
3. Avoid Metal Pry Tools Near the Battery
Lithium-ion batteries can puncture easily.
4. Use Eye Protection
Tiny glass shards may fly during removal.
5. Work Slowly
Rushing is the number one cause of repair failure.
A clean workspace also reduces contamination risks inside the device.
Preparing Your Workspace Properly
Professional-level repairs begin with proper organization.
Ideal Workspace Conditions
Workspace Feature
Benefit
Bright LED lighting
Better visibility
Anti-static surface
Reduces ESD damage
Magnetic screw tray
Prevents lost screws
Dust-free environment
Cleaner installation
Comfortable seating
Reduces fatigue
Many advanced DIY enthusiasts underestimate workspace preparation. However, organization dramatically improves repair accuracy.
Backing Up Your iPhone Before Repair
Before any iPhone 17 Pro screen replacement, create a complete backup.
You can back up using:
iCloud
Finder on Mac
iTunes on Windows
A backup protects your:
Photos
Contacts
App data
Passwords
Settings
Hardware repairs always carry some risk, even for professionals.
How to Power Down and Open the Device
Opening the device is one of the most delicate stages.
Step-by-Step Opening Procedure
Step 1: Remove Bottom Screws
Use a precision pentalobe screwdriver to remove the two charging-port screws.
Step 2: Apply Controlled Heat
Warm the display edges for 1-2 minutes.
Avoid overheating because OLED panels are heat-sensitive.
Step 3: Use a Suction Cup
Lift gently near the bottom edge.
Step 4: Insert Plastic Picks
Slide carefully around the perimeter.
Step 5: Open Like a Book
Do not pull the display completely away.
Internal flex cables remain attached.
This stage of the iPhone 17 Pro screen replacement requires patience more than force.
Removing the Damaged Display Carefully
Once opened, disconnect the battery immediately.
Internal Disconnection Process
Remove protective brackets
Disconnect battery flex
Disconnect display cables
Disconnect sensor assemblies
Professional technicians always disconnect power first.
Failing to disconnect the battery can short sensitive components instantly.
Inspect for Hidden Damage
Look carefully for:
Bent pins
Torn flex cables
Corrosion
Loose shielding
Missing screws
If the phone suffered a hard impact, internal frame damage may also exist.
Disconnecting Internal Components Safely
The front sensor assembly is one of the most sensitive parts during an iPhone 17 Pro screen replacement.
Components Requiring Extra Care
Component
Risk Level
Face ID sensors
Very high
Proximity sensor
High
OLED connector
High
Front camera flex
High
Earpiece speaker
Medium
Face ID damage can permanently disable biometric authentication.
Always use plastic tools when disconnecting flex cables.
Inspecting the Internal Frame and Connectors
Before installing the new display, inspect the housing thoroughly.
Important Inspection Areas
Frame Alignment
Bent frames create pressure points on OLED panels.
Connector Integrity
Use magnification if available.
Adhesive Residue
Old adhesive prevents proper sealing.
Water Damage Indicators
Check for red liquid contact markers.
A professional-quality iPhone 17 Pro screen replacement depends heavily on proper inspection.
Installing the New OLED Screen
Now comes the most exciting part: installing the replacement display.
Installation Steps
Step 1: Dry Test the Screen
Connect the display temporarily before sealing.
Step 2: Check Touch Functionality
Test all corners thoroughly.
Step 3: Verify Brightness
Ensure OLED output looks even.
Step 4: Confirm Sensor Operation
Test Face ID and proximity sensors.
Step 5: Install Fresh Adhesive
Apply evenly around the frame.
Step 6: Reassemble Carefully
Avoid pinching flex cables.
A high-quality OLED replacement significantly affects final results. Cheap aftermarket screens often suffer from:
Poor brightness
Weak touch sensitivity
Battery drain
Color inaccuracies
Premature failure
Reconnecting Flex Cables Correctly
Connector alignment is critical.
Never force connectors into place.
Proper Connector Technique
Align carefully
Press gently from center
Listen for soft clicking
Avoid side pressure
Many failed iPhone 17 Pro screen replacement attempts occur because connectors were partially seated.
Improper connections may cause:
Ghost touch
Green screen issues
Flickering
No display output
Sensor failures
Replacing Adhesive and Waterproof Seals
Modern smartphones rely heavily on adhesive sealing.
Why Waterproofing Matters
The iPhone 17 Pro includes strong water resistance protections, but opening the device compromises factory sealing.
Professional repairers replace:
Perimeter adhesive
Dust barriers
Mesh protection seals
Adhesive Application Tips
Tip
Benefit
Clean thoroughly first
Better adhesion
Use OEM-grade adhesive
Stronger seal
Apply evenly
Consistent pressure
Avoid stretching strips
Better alignment
Even after careful repair, water resistance may not fully match factory specifications.
Testing the Screen Before Final Assembly
Testing before complete sealing saves enormous frustration later.
Complete Functional Checklist
Display Tests
Brightness consistency
Dead pixels
Color uniformity
Refresh smoothness
Touch Tests
Edge responsiveness
Multi-touch support
Gesture operation
Sensor Tests
Face ID
Ambient light sensor
Proximity sensor
Audio Tests
Earpiece sound
Speaker clarity
A complete iPhone 17 Pro screen replacement should include comprehensive testing before final closure.
Common Mistakes During iPhone 17 Pro Screen Replacement
Even experienced enthusiasts sometimes make errors.
Most Common DIY Repair Mistakes
Using Excessive Heat
Too much heat damages OLED layers.
Mixing Screws
Incorrect screw placement can puncture the motherboard.
Skipping Battery Disconnect
This can cause catastrophic shorts.
Poor Adhesive Cleaning
Old residue weakens waterproof sealing.
Buying Cheap Displays
Low-grade parts create long-term reliability issues.
Avoiding these mistakes dramatically improves success rates.
Professional Tips for Better Repair Results
Professional repair shops follow strict procedures for consistency.
Expert Techniques
Use Screw Maps
Organize screws by location.
Photograph Every Stage
Reference photos help during reassembly.
Test Before Sealing
Never skip dry testing.
Use OEM-Quality Parts
Higher-quality components reduce callbacks.
Maintain Cleanliness
Dust under OLED panels is extremely noticeable.
These habits separate average repairs from truly professional-quality work.
DIY Repair vs Professional Repair Services
DIY repair offers advantages, but professional repair still has major benefits.
DIY Advantages
Lower cost
Learning experience
Personal satisfaction
Flexible timing
Professional Repair Advantages
Warranty coverage
Specialized tools
Faster turnaround
Reduced risk
Water resistance testing
If you’re uncertain about performing an iPhone 17 Pro screen replacement, professional repair may ultimately save money and stress.
Frequently Asked Questions
Is iPhone 17 Pro screen replacement difficult?
Yes, it’s considered an advanced repair because modern iPhones contain delicate flex cables, strong adhesive, and complex sensor systems.
Can Face ID stop working after screen replacement?
Absolutely. Damaging the sensor assembly during repair can permanently disable Face ID functionality.
How long does an iPhone 17 Pro screen replacement take?
Advanced DIY enthusiasts usually need between 1-3 hours depending on experience level.
Is waterproofing maintained after repair?
Not perfectly. New adhesive helps restore resistance, but factory-level sealing is difficult to replicate completely.
Should I use aftermarket OLED displays?
High-quality aftermarket displays can work well, but premium OEM-quality parts generally offer better brightness and durability.
Can replacing the screen damage the motherboard?
Yes. Improper tool usage, screw placement, or connector handling can damage motherboard components.
Do I need special software calibration?
Some advanced display features may require calibration tools used by professional repair technicians.
Conclusion
Performing an iPhone 17 Pro screen replacement is a challenging but rewarding project for advanced DIY enthusiasts. With the correct tools, organized preparation, and professional-level patience, you can successfully restore a damaged device to excellent working condition.
The key to success lies in careful handling, proper adhesive replacement, thorough testing, and using high-quality components. While modern smartphones are more complex than ever, skilled repair enthusiasts can still achieve impressive results at home.
Whether you choose DIY repair or professional service, understanding the repair process gives you greater confidence and appreciation for modern smartphone engineering.
David from Sydney CBD Repair Centre – The Best place to fix mobile phones as 7 Years In A Row! Top Mobile Phone Repair In Sydney. More than 2000 Positive Reviews on Google and Same Day Repairs.
We take pride in delivering exceptional repair services for all major phone brands including Apple, Samsung, Google, and more. Our expert technicians use only genuine parts and offer 90days warranty on repairs. Located in the heart of Sydney CBD, we’re your one-stop solution for all mobile device repairs.
Our commitment to excellence has earned us the trust of thousands of satisfied customers. Whether it’s a cracked screen, battery replacement, or water damage repair, we handle it all with professional care and expertise. Walk in today and experience why we’re Sydney’s #1 choice for mobile phone repairs.
Visit us for:
✓ Same Day Express Repairs
✓ Genuine Parts Guarantee
✓ Professional Technicians
✓ Competitive Pricing
✓ 2000+ 5-Star Google Reviews
✓ 7-Time Award Winner for Best Phone Repairs
iPhone 17 Pro Max Complete Disassembly: 17 Powerful Insights Into Apple’s Newest Internal Security Screws
Introduction
The iPhone 17 Pro Max complete disassembly has become one of the most talked-about topics in the repair industry. Apple continues to refine its internal engineering, and this year’s flagship device introduces a fresh layer of security hardware designed to make unauthorized repairs more difficult. At the same time, these changes also improve durability, structural integrity, and long-term reliability.
For repair technicians and tech enthusiasts alike, understanding the internal structure of the iPhone 17 Pro Max is essential. Apple has packed the phone with upgraded thermal systems, advanced camera modules, tighter waterproofing seals, and a new generation of proprietary internal security screws.
Interestingly, Apple’s latest approach balances repairability with security. While some components are easier to access, other areas are heavily protected with layered shielding and hidden fasteners. Consequently, technicians now need specialized tools and more patience than ever before.
In this guide, we’ll walk through the entire iPhone 17 Pro Max complete disassembly process, explain the purpose behind Apple’s newest screws, and discuss how professionals safely repair this premium smartphone.
Apple has always used proprietary screws in its devices. From pentalobe screws to tri-point fasteners, the company continuously evolves its internal hardware.
This time around, the iPhone 17 Pro Max introduces reinforced micro-security screws inside critical repair zones. Apple appears focused on three key goals:
Improving structural rigidity
Preventing accidental component damage
Enhancing repair authentication security
These screws are strategically placed around the logic board, battery connectors, and camera assemblies.
Benefits of Apple’s New Screw Design
Feature
Benefit
Smaller screw heads
More internal space
Hardened alloy materials
Increased durability
Deep recessed mounting
Improved tamper resistance
Multi-layer threading
Stronger hold during drops
Because of these modifications, repair shops now require updated screwdriver sets specifically designed for the iPhone 17 series.
Repairing modern smartphones isn’t just about opening screws anymore. The iPhone 17 Pro Max contains sensitive lithium-ion batteries and delicate flex cables that can tear easily.
Important Safety Steps
1. Power Down the Device
Always turn the phone off completely before starting.
2. Remove the SIM Tray
The SIM tray must be removed to avoid damaging the frame during opening.
3. Discharge Battery Below 25%
A lower battery charge reduces fire risks.
4. Use ESD Protection
Electrostatic discharge can permanently damage logic board components.
Furthermore, excessive heat during opening may weaken OLED layers, so controlled heating is essential.
Step-by-Step Opening Procedure
Opening the iPhone 17 Pro Max requires patience because Apple’s adhesive system is stronger than previous generations.
Heating the Display Adhesive
Apply moderate heat around the perimeter for approximately two minutes. This softens the waterproof adhesive.
Removing the Bottom Screws
Apple still uses external pentalobe screws near the USB-C port. However, internal screws now vary in shape and depth.
Lifting the Display
Use a suction cup carefully near the bottom edge. Slowly insert an opening pick to separate the display.
Important Warning
The display opens from the side because multiple flex cables remain attached on the opposite edge.
Rushing this process can permanently damage the OLED panel.
Understanding Apple’s New Screw Architecture
One of the most fascinating aspects of the iPhone 17 Pro Max complete disassembly is Apple’s internal screw layering strategy.
Apple now combines:
Tri-point screws
Micro Torx screws
Hybrid security screws
Shield-mounted recessed screws
These screws are positioned to isolate high-risk repair zones.
Why This Matters
This structure helps:
Reduce accidental punctures
Maintain board compression
Improve water sealing
Limit unauthorized part swapping
Repair technicians now spend more time organizing screws because even tiny placement errors can damage the motherboard.
Display Assembly Removal Process
The display assembly is incredibly thin yet highly durable.
Disconnecting the Battery First
Before touching any display cables, disconnect the battery connector.
This prevents electrical short circuits.
Removing Display Shields
Several layered metal shields cover the display connectors. These shields use Apple’s newest internal security screws.
Technicians must remember exact screw placement because lengths vary dramatically.
Flex Cable Risks
The display contains:
OLED flex
Touch digitizer cable
Face ID cable
Ambient light sensor cable
Even slight tearing can disable critical functions permanently.
Battery Adhesive and Battery Extraction
Apple continues using stretch-release adhesive tabs for the battery.
However, the adhesive is now stronger and more heat-resistant.
Battery Removal Steps
Remove lower speaker assembly
Access adhesive pull tabs
Pull slowly at low angles
Apply alcohol if adhesive snaps
If tabs break, technicians must carefully pry the battery without puncturing it.
Why Apple Changed the Battery Layout
The redesigned battery compartment improves:
Heat dissipation
Drop protection
Structural balance
As a result, the device feels sturdier during daily use.
Logic Board Layout and Shielding
The logic board inside the iPhone 17 Pro Max is one of Apple’s most compact designs ever.
Multi-Layer Board Engineering
Apple uses stacked board technology to maximize space efficiency.
Internal Components Include
Component
Function
A19 Pro chip
Main processor
RAM modules
Multitasking
NAND storage
File storage
Power IC
Voltage regulation
RF modules
Cellular communication
The board is protected with thick EMI shielding plates.
Advanced Shield Removal
Removing these shields requires extreme precision because nearby solder points are vulnerable.
Additionally, Apple added thermal transfer pads beneath major chips to improve cooling.
Camera System Teardown
The camera module is massive compared to earlier iPhone generations.
Triple-Lens Camera System
The iPhone 17 Pro Max features:
Wide sensor
Ultra-wide sensor
Tetraprism telephoto lens
Each camera is individually stabilized.
Internal Protection Features
Apple surrounds the camera housing with reinforced brackets and foam dampeners.
This reduces vibration damage during drops.
LiDAR Scanner Placement
The LiDAR system now integrates deeper into the frame structure for better alignment accuracy.
Consequently, replacing rear camera components requires more recalibration steps.
Thermal Management Improvements
Heat control is one of Apple’s biggest upgrades this year.
Vapor Chamber Cooling
Reports from the iPhone 17 Pro Max complete disassembly indicate Apple improved thermal performance dramatically.
The cooling system includes:
Graphite sheets
Copper transfer layers
Vapor chamber elements
Thermal gel interfaces
These features help maintain gaming performance and camera processing stability.
Benefits for Daily Users
Improved thermals lead to:
Better sustained performance
Longer battery lifespan
Reduced overheating
More stable charging speeds
This engineering upgrade is particularly important for intensive AI-powered tasks.
USB-C Port and Charging Assembly
Apple continues refining its USB-C implementation.
Port Construction
The charging assembly includes:
USB-C connector
Microphone modules
Waterproof gaskets
Antenna routing brackets
The port itself is reinforced with thicker anchor points.
Repair Challenges
USB-C repairs are still delicate because nearby board traces are extremely small.
Improper soldering can destroy charging functionality permanently.
Speaker and Haptic Engine Analysis
The speaker system inside the iPhone 17 Pro Max delivers richer sound due to redesigned acoustic chambers.
Speaker Assembly Features
Apple enlarged:
Resonance chambers
Bass channels
Vibration dampeners
As a result, audio quality feels fuller and clearer.
Taptic Engine Improvements
The Taptic Engine is slightly larger and mounted with reinforced brackets.
This design minimizes movement during drops and improves long-term reliability.
Face ID and Sensor Flex Considerations
Face ID repairs remain among the most difficult smartphone repairs in the industry.
Fragile Sensor Arrays
The sensor flex includes:
Infrared camera
Dot projector
Flood illuminator
Damaging any component may permanently disable Face ID.
Why Apple Locks Face ID Components
Apple uses hardware pairing for security and biometric protection.
Therefore, many Face ID repairs require advanced microsoldering expertise.
Repairability Score and Technician Challenges
The iPhone 17 Pro Max complete disassembly reveals a mixed repairability experience.
Areas That Improved
Easier display access
Better battery compartment organization
Improved modular speakers
Areas That Became Harder
New internal security screws
Stronger adhesives
Increased software pairing
Professional repair shops now rely heavily on specialized equipment and repair databases.
Genuine Parts vs Aftermarket Components
Choosing replacement parts significantly affects repair quality.
Genuine Parts Advantages
Genuine Parts
Aftermarket Parts
Better OLED quality
Lower brightness
Accurate colors
Inconsistent calibration
Improved durability
Variable lifespan
Better waterproof fit
Possible sealing gaps
Using authentic components also reduces compatibility issues.
Water Resistance Restoration After Repair
One major concern after disassembly is restoring water resistance.
Adhesive Replacement
Technicians must install new waterproof adhesive seals after every opening.
Important Reality Check
Even with proper sealing, repaired devices may not fully match factory waterproof ratings.
Therefore, users should still avoid exposing repaired phones to excessive moisture.
Common Mistakes During iPhone 17 Pro Max Complete Disassembly
Many DIY repairs fail because of avoidable mistakes.
Frequent Errors
Incorrect Screw Placement
Using the wrong screw can puncture the motherboard.
Excessive Pry Force
This often damages OLED panels or flex cables.
Battery Punctures
Lithium-ion batteries can ignite if bent or pierced.
Improper Adhesive Removal
Poor adhesive cleanup prevents proper resealing.
Patience and organization are absolutely essential during any repair.
Professional Repair Recommendations
Although online teardown videos make repairs look easy, professional repair work requires training and experience.
Why Professionals Matter
Certified technicians offer:
Proper diagnostics
Safe battery handling
Correct waterproof resealing
Advanced microsoldering
Genuine-quality replacement parts
Additionally, professional repair centers maintain specialized tools designed specifically for modern Apple devices.
Frequently Asked Questions
Is the iPhone 17 Pro Max difficult to repair?
Yes. The device uses advanced adhesives, security screws, and paired components that increase repair complexity.
Can I replace the battery myself?
Technically yes, but battery replacement requires careful adhesive removal and proper safety procedures.
What are Apple’s new internal security screws?
They are proprietary fasteners designed to improve structural rigidity and limit unauthorized repairs.
Does opening the iPhone 17 Pro Max remove waterproofing?
Yes. Opening the device breaks the factory waterproof seal, which must be replaced carefully.
Can Face ID be repaired after damage?
Some Face ID repairs are possible, but many require advanced microsoldering and specialized calibration tools.
Are aftermarket screens safe to use?
Some aftermarket screens work adequately, but genuine-quality displays usually provide better brightness, color accuracy, and durability.
Why are screw placements so important?
Different screw lengths can damage sensitive internal layers if installed incorrectly.
Conclusion
The iPhone 17 Pro Max complete disassembly showcases Apple’s relentless focus on engineering refinement, durability, and internal security. From its sophisticated cooling system to its reinforced camera structures and proprietary internal screws, the device reflects a growing trend toward tightly integrated smartphone design.
While certain repair areas have improved, the newest internal security screws and advanced component pairing systems create fresh challenges for technicians. Consequently, successful repairs now depend heavily on proper tools, technical expertise, and careful organization.
For users, the takeaway is simple: modern flagship smartphones are marvels of engineering, but repairing them safely requires skill and experience. Whether you’re a repair enthusiast or a professional technician, understanding Apple’s newest internal architecture is essential for navigating the future of smartphone repair.
Thanks for reading this comprehensive guide on the iPhone 17 Pro Max complete disassembly and Apple’s newest internal security screws. Staying informed about modern smartphone engineering helps users make smarter repair decisions and protect their devices for the long term.
David from Sydney CBD Repair Centre – The Best place to fix mobile phones as 7 Years In A Row! Top Mobile Phone Repair In Sydney. More than 2000 Positive Reviews on Google and Same Day Repairs.
We take pride in delivering exceptional repair services for all major phone brands including Apple, Samsung, Google, and more. Our expert technicians use only genuine parts and offer 90days warranty on repairs. Located in the heart of Sydney CBD, we’re your one-stop solution for all mobile device repairs.
Our commitment to excellence has earned us the trust of thousands of satisfied customers. Whether it’s a cracked screen, battery replacement, or water damage repair, we handle it all with professional care and expertise. Walk in today and experience why we’re Sydney’s #1 choice for mobile phone repairs.
Visit us for:
✓ Same Day Express Repairs
✓ Genuine Parts Guarantee
✓ Professional Technicians
✓ Competitive Pricing
✓ 2000+ 5-Star Google Reviews
✓ 7-Time Award Winner for Best Phone Repairs
DIY PHONE BUILD: Can I Rebuild a Working Flagship? + Ultimate Guide + 12 Steps
Rebuilding a flagship smartphone from scratch might sound like a daunting task, but with the right guidance, tools, and patience, it’s achievable—even for tech enthusiasts. In this comprehensive guide, we’ll explore every detail you need to know to rebuild a working flagship phone yourself. From understanding internal components to performing precise assembly, this article walks you through each step while keeping safety, efficiency, and cost-effectiveness in mind.
Whether you’re motivated by curiosity, cost-saving, or learning, this guide is designed for DIYers who are ready to roll up their sleeves and rebuild a premium smartphone successfully.
Introduction: Why Rebuild a Phone Yourself?
Smartphones have become central to our daily lives, yet repairing or rebuilding them often feels intimidating. Rebuilding a flagship phone offers several benefits:
Cost Savings: Professional repairs or replacements can be expensive. DIY rebuilds can save hundreds of dollars.
Learning Experience: Understanding internal hardware deepens your tech knowledge.
Customization: Replace or upgrade components to suit personal preferences.
Sustainability: Rebuilding prevents electronic waste and extends device lifespan.
However, DIY rebuilding requires attention to detail, patience, and proper tools. With careful preparation, even complex devices like iPhones or Samsung Galaxy flagships can be rebuilt successfully.
Before diving into assembly, it’s essential to understand what goes inside a modern flagship phone. Knowing each component’s function helps avoid mistakes during reassembly.
Display Assembly
The display assembly includes:
LCD or OLED panel: Responsible for visual output.
Touch digitizer: Detects touch inputs.
Glass panel: Protects underlying layers.
Damaging the display is a common mistake during rebuilds, so handling it with care is crucial.
Motherboard and CPU
The motherboard houses:
CPU and GPU: The brain and graphics processor of your device.
RAM and storage modules: Memory and data storage.
Chipsets for communication and power management.
The motherboard is the most sensitive component. Static discharge or mishandling can permanently damage it.
Battery and Power Management
Flagship phones use lithium-ion batteries with complex power management:
Battery types: Li-ion, Li-polymer
Battery health monitoring: Prevents overheating or swelling
Safety precautions: Avoid punctures and short circuits
Cameras and Sensors
Modern devices may have:
Multiple cameras: Wide-angle, telephoto, macro
Depth sensors and LiDAR: For AR and advanced photography
Proximity and light sensors: Enhance functionality
Replacing cameras requires precise alignment and calibration.
Verify sensors, fingerprint scanner, and face recognition
Document results to compare with specifications.
Common Challenges and How to Overcome Them
Screen doesn’t turn on: Check display connectors and motherboard
Phone won’t charge: Inspect battery connection and charging IC
Camera issues: Recalibrate cameras using manufacturer software
Connectivity problems: Ensure antenna alignment and replace faulty modules
Patience and meticulous inspection solve most issues.
Safety Tips During DIY Phone Rebuild
Always discharge static electricity before touching components
Handle lithium-ion batteries with extreme care
Avoid applying excessive force when disconnecting connectors
Keep small parts away from children and pets
Safety ensures you avoid personal injury and component damage.
Cost Analysis: DIY vs Professional Repair
Factor
DIY Rebuild
Professional Repair
Parts Cost
$150–$400 (depending on model)
$250–$700
Labor
Free (your time)
$80–$200
Warranty
Usually none
90 days–1 year
Learning
High
Low
Risk
High if inexperienced
Low
DIY rebuild is cheaper and educational but requires skill and patience.
FAQs
1. Can anyone rebuild a flagship phone?
Yes, but prior knowledge of electronics and experience with small components is highly recommended.
2. How long does a DIY rebuild take?
It typically takes 4–10 hours depending on complexity and familiarity with the device.
3. Are DIY rebuilds safe?
Yes, with proper tools, anti-static precautions, and safe battery handling.
4. Can I reuse old components?
Yes, if they are functional and undamaged, but replace critical parts like batteries for safety.
5. Will my phone be as reliable as a factory device?
If done correctly, a rebuilt phone can perform nearly identically to a factory device.
6. Where can I find reliable replacement parts?
Trusted sources include manufacturer-approved vendors or certified suppliers like iFixit.
Conclusion
Rebuilding a flagship phone yourself is a challenging but rewarding process. With patience, proper tools, and attention to detail, you can transform a broken or outdated phone into a fully functional device. Not only does this save money, but it also equips you with invaluable technical skills and knowledge. Start small, follow each step carefully, and enjoy the satisfaction of creating a working smartphone from scratch.
For professional repair services or spare parts, you can always visit Sydney CBD Repair Centre for expert assistance.
David from Sydney CBD Repair Centre – The Best place to fix mobile phones as 6 Years In A Row! Top Mobile Phone Repair In Sydney. More than 2000 Positive Reviews on Google and Same Day Repairs.
We take pride in delivering exceptional repair services for all major phone brands including Apple, Samsung, Google, and more. Our expert technicians use only genuine parts and offer 90 days warranty on repairs. Walk in today and experience why we’re Sydney’s #1 choice for mobile phone repairs.
Thank you for using
Themify Popup
This is a sample pop up. Themify Builder or Builder Lite (free) plugin is recommended to design the pop up layouts.