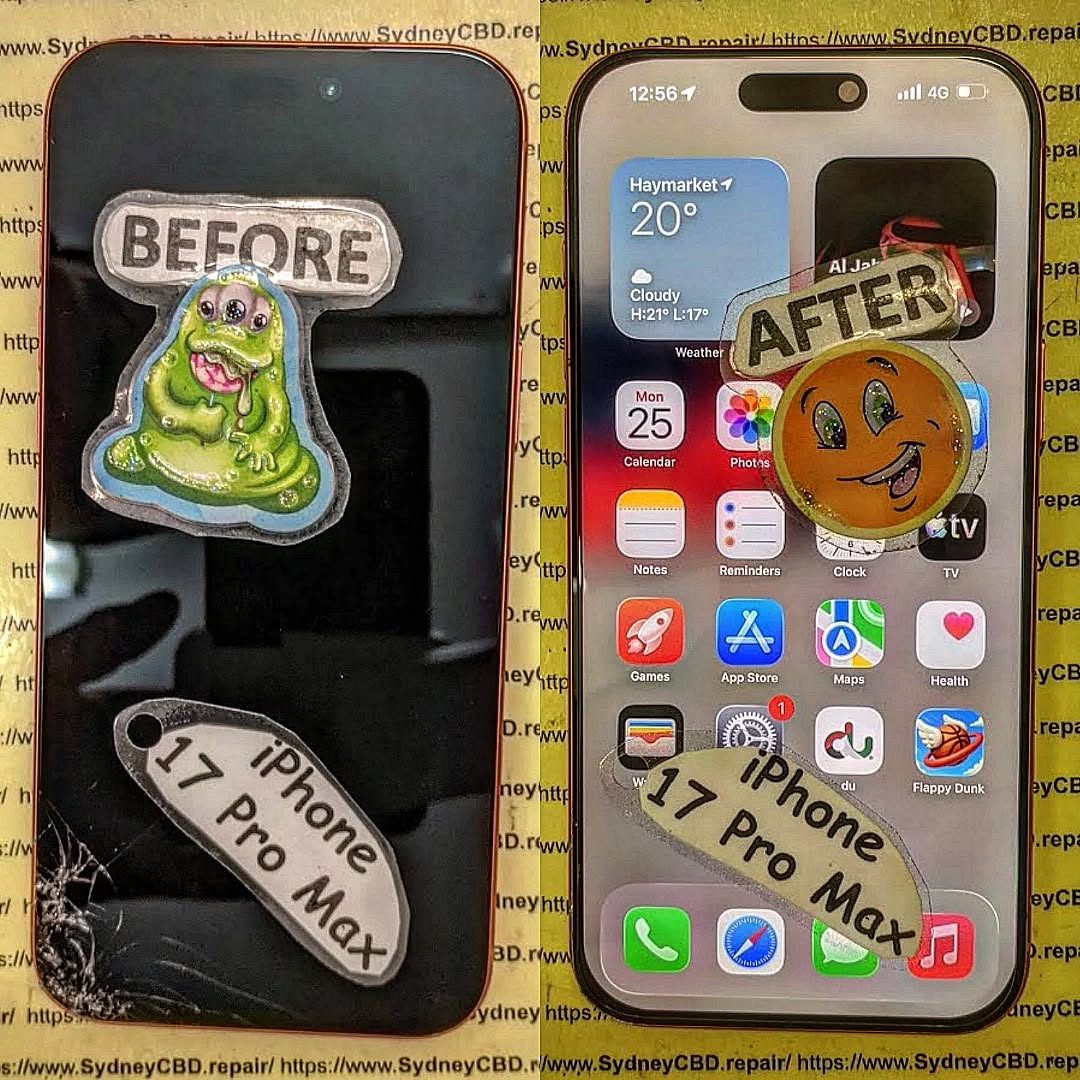
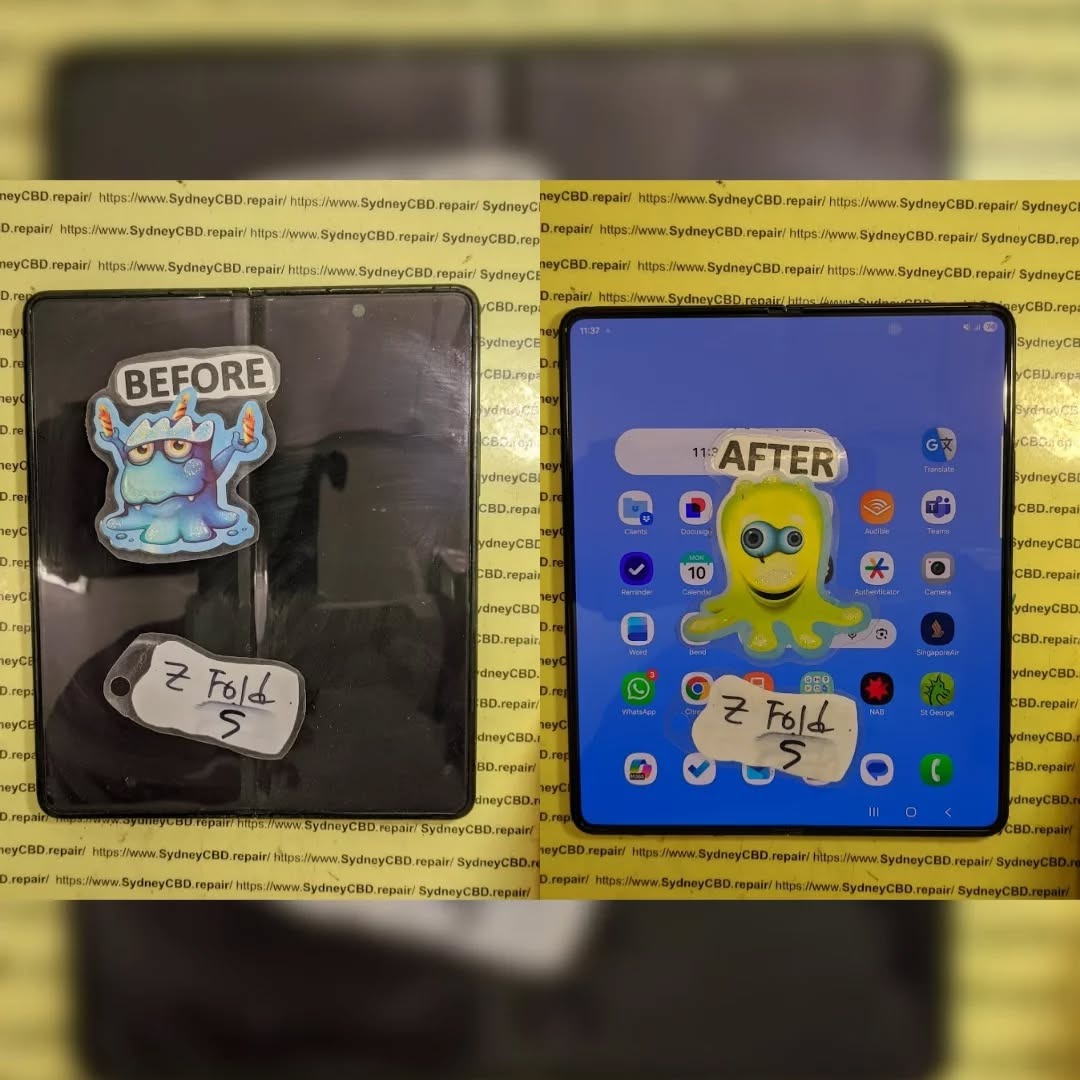
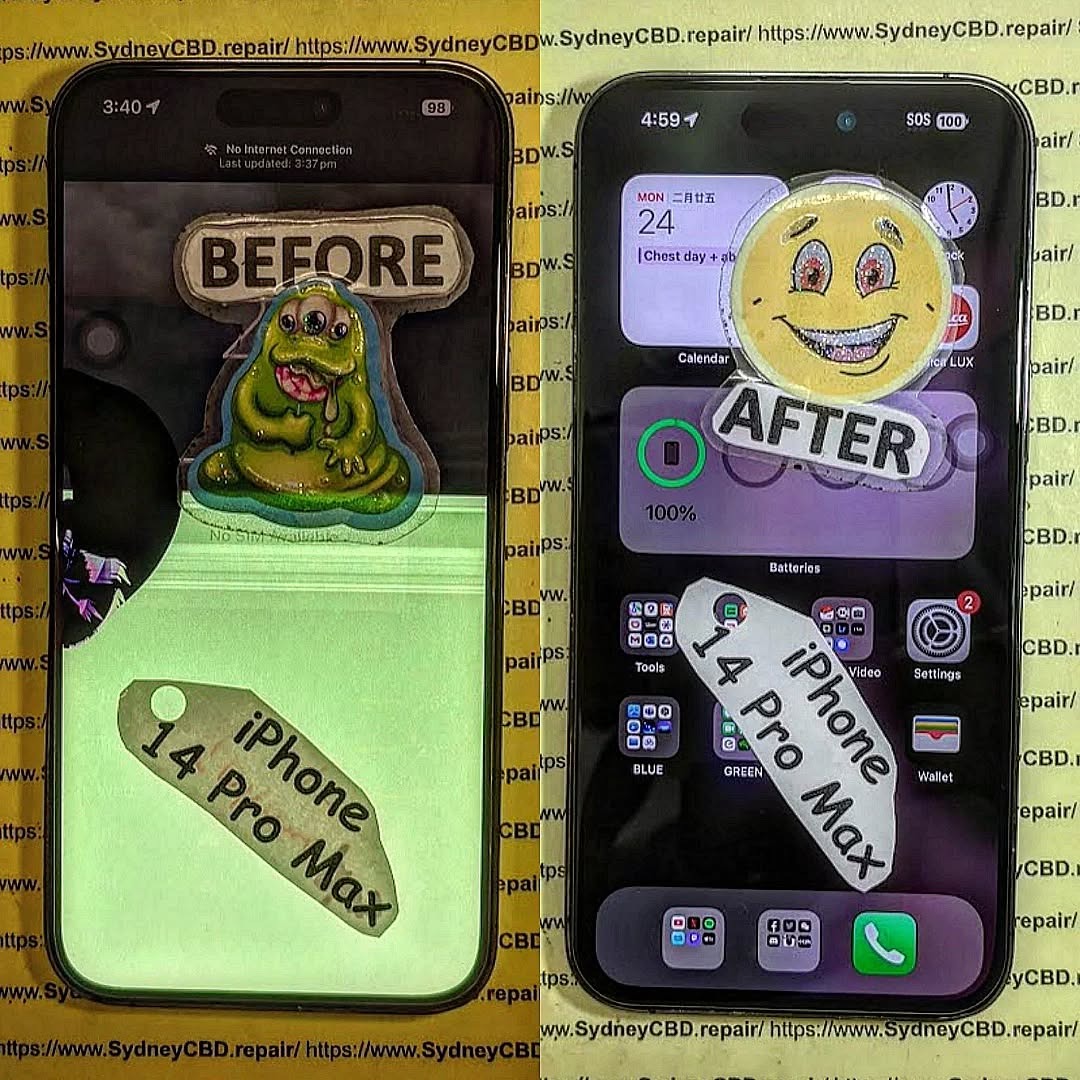
Look Inside a Phone Repair Shop: A Day in the Life + Expert Insights + 10 Tasks Uncovered
Inside a Phone Repair Shop: A Day in the Life
Ever wondered what really happens inside a phone repair shop? It’s not just screwdrivers and shattered screens—it’s a mix of precision, customer service, troubleshooting, and time-sensitive challenges.
At Sydney CBD Repair Centre, we open our doors every morning with one mission: to get our customers back online as quickly and reliably as possible. With over 2,000 glowing Google reviews and 6 years of award-winning service, our team knows a thing or two about what goes into a day’s work.
Here’s what life looks like inside one of Sydney’s busiest phone repair centres.
No two days are the same—but cracked screens and dead batteries are always at the top of the list.
Initial Diagnostics: The First Step
Every repair starts with a thorough check-up, which includes:
Visual inspection
Touchscreen and display testing
Battery health check
Port and speaker functionality
Internal component diagnostics
This process ensures we diagnose the real issue—not just what appears broken.
Tools of the Trade: What We Use
Our repair bench is packed with industry-grade tools like:
Anti-static mats and wristbands
Precision screwdrivers
Laser machines (for glass-only replacements)
Soldering stations
Thermal imaging tools
Ultrasonic cleaning tanks (for water damage)
High-quality tools = high-quality repairs.
Meet the Technicians
Behind every repair is a trained professional technician who understands the delicate nature of mobile device hardware. At Sydney CBD Repair Centre, our team includes:
Certified iPhone and Samsung repair experts
Technicians skilled in micro-soldering
Experienced staff for Android repairs
Customer support specialists trained in tech troubleshooting
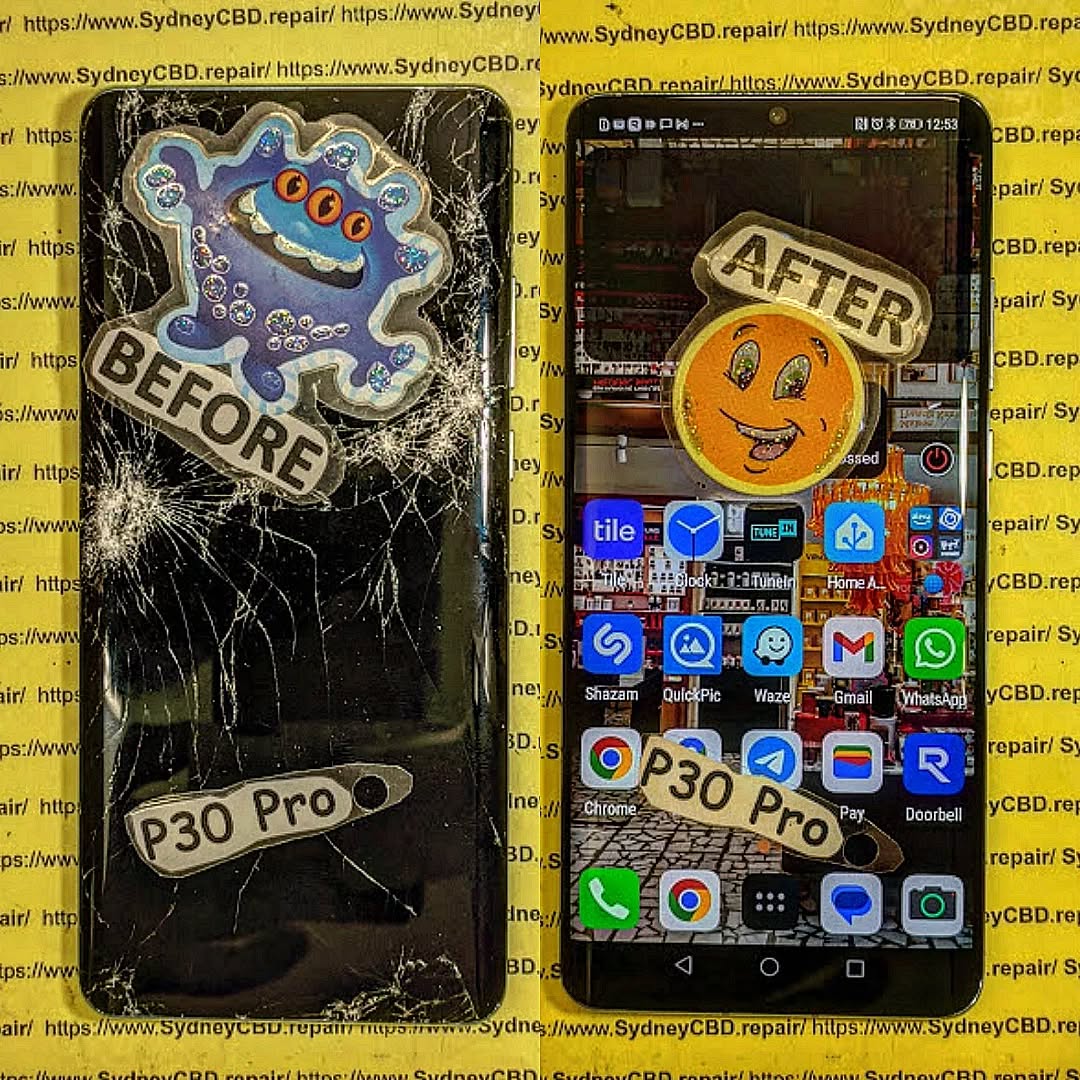
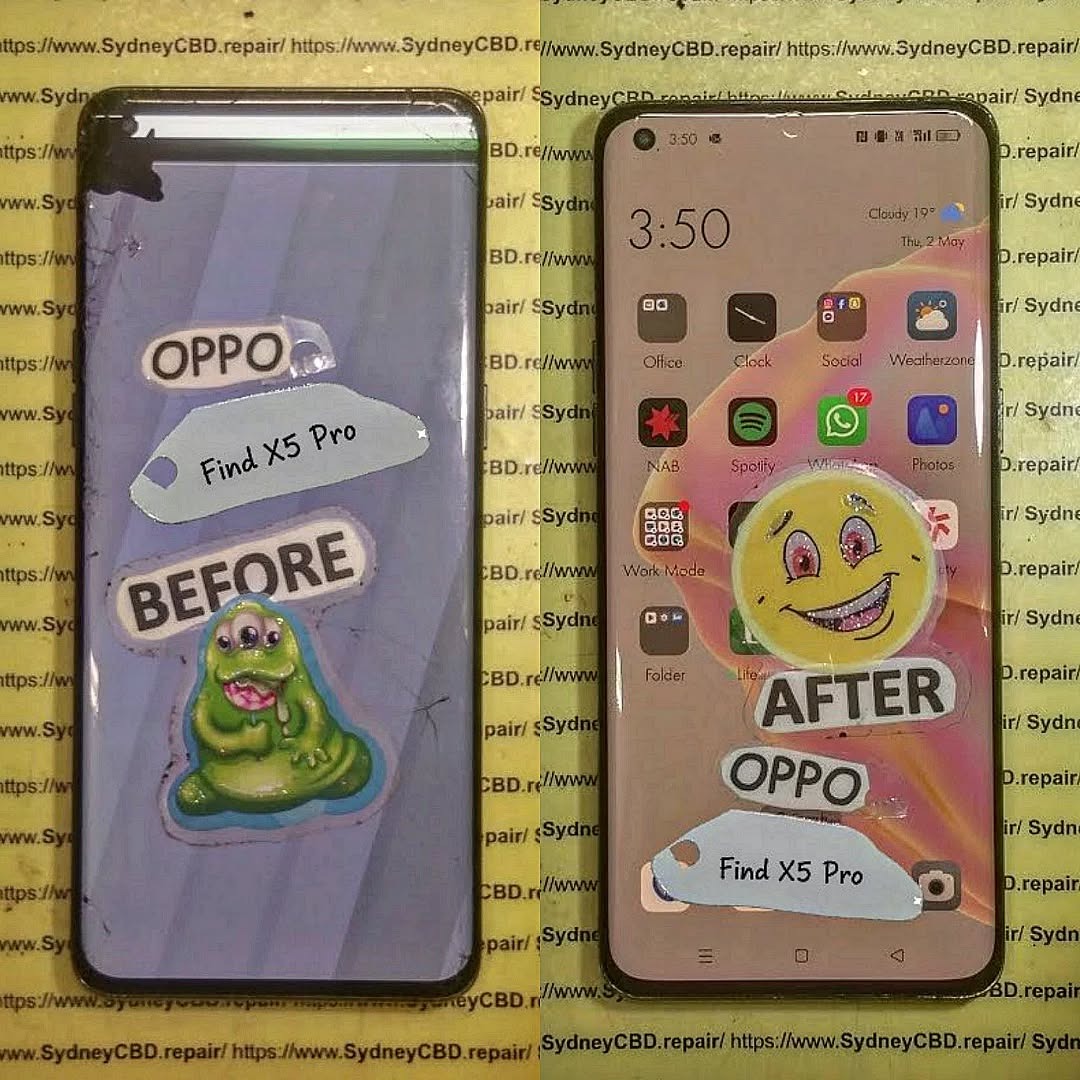
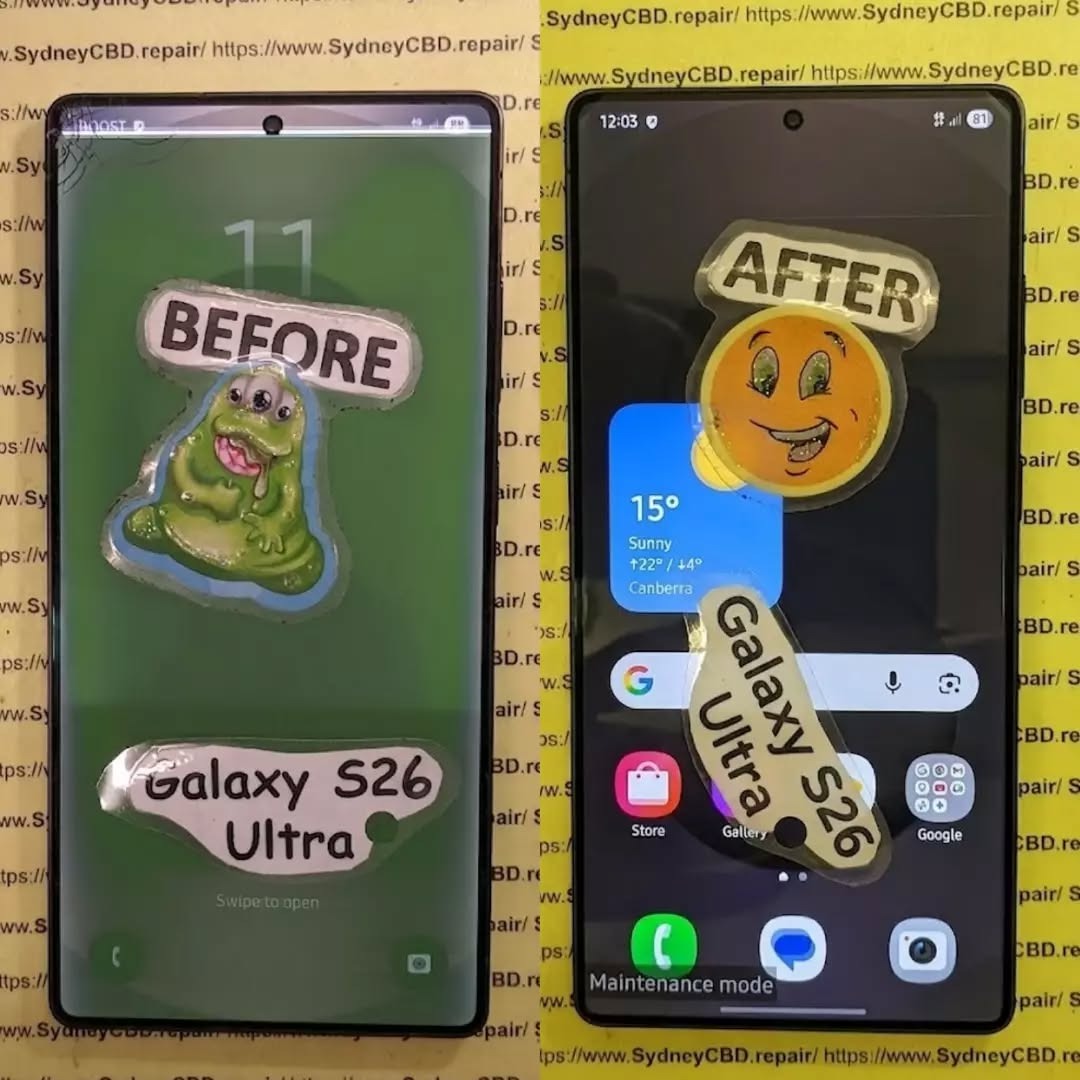
Handling Screen Repairs
Screen replacements are one of the most delicate tasks we do. The process includes:
Disassembling the phone carefully
Detaching the cracked screen
Installing a genuine replacement screen
Recalibrating display settings
Testing touch sensitivity and brightness
Cleaning and reassembling the device
Some brands, like Samsung and Google, require frame-based replacements for better structural integrity.
Battery Replacements & Quick Fixes
Modern lithium-ion batteries degrade with time. Our technicians:
Measure battery health
Replace with genuine batteries
Ensure the battery sits flush (no swelling)
Run charging cycle tests before handover
Battery replacements are often completed in under 45 minutes.
Water Damage Repairs: Behind the Scenes
Water-damaged phones go through:
Complete disassembly
Board-level diagnostics
Cleaning in an ultrasonic bath
Corrosion removal
Component-level testing
Moisture removal in a heated vacuum chamber
Success depends on how quickly you bring in the device after exposure.
Dealing with Software & Boot Issues
Sometimes it’s not the hardware—it’s the software. We handle:
Boot loops
App crashes
OS reinstallation
Data recovery
Factory resets
Unlocks and updates
We always back up data (if accessible) before making changes.
Real-Time Customer Interactions
Our front desk team plays a crucial role:
Explaining repair options
Providing transparent quotes
Educating on care tips
Offering honest recommendations
We believe in clear, jargon-free communication—every customer deserves to understand what’s happening with their device.
Quality Control: Post-Repair Testing
No repair leaves our hands without rigorous testing. This includes:
Visual inspection
Battery charging test
Display calibration
Button and port functionality
Camera check
Face ID/Touch ID functionality
Only after passing all tests do we hand the phone back to the customer.
Managing Urgent Repairs
Many customers rely on their phones for work or emergencies. For urgent jobs:
We fast-track the diagnostics
Assign senior technicians
Offer same-day turnaround (often under 2 hours)
Prioritise genuine parts availability
Express service is always available—especially for screen and battery replacements.
The Role of Genuine Parts
Using genuine parts ensures:
Optimal compatibility
Full feature retention (like Face ID)
Longevity
Manufacturer-level performance
Peace of mind under warranty
All repairs at Sydney CBD Repair Centre come with a 90-day warranty when using genuine components.
Customer Education & Repair Advice
We don’t just fix phones—we empower customers by:
Explaining the cause of the issue
Sharing tips to prevent repeat damage
Advising on accessories (like screen protectors)
Offering upgrade vs. repair comparisons
Helping with software tips and battery care
Wrapping Up: End-of-Day Tasks
By 6 PM, we:
Update inventory
Clean workstations
Confirm next-day appointments
Review quality assurance logs
Back up diagnostics data
Shut down machinery
Then we get ready to do it all again tomorrow—with the same commitment to quality, speed, and customer care.
FAQs
1. How long does a typical phone repair take?
Most screen and battery replacements are done within 1–2 hours. Water damage and complex jobs may take longer.
2. Can I walk in without an appointment?
Absolutely! We accept walk-ins every day at Sydney CBD Repair Centre.
3. Are your parts genuine?
Yes. We use only genuine parts unless otherwise requested—and all come with a 90-day warranty.
4. Do you repair all phone brands?
We service Apple, Samsung, Google, Oppo, Huawei, and more.
5. Will my data be safe during repair?
Yes. We take extreme care to avoid data loss and always inform you before any reset.
6. Do you fix tablets and smartwatches too?
Yes! We handle tablets, smartwatches, and other smart devices.
Conclusion
Working in a phone repair shop isn’t just about swapping parts—it’s about precision, patience, and people. At Sydney CBD Repair Centre, every day brings new challenges, new devices, and new opportunities to help someone reconnect with their world.
If you’ve got a phone problem—we’ve got the solution. From screen repairs and battery replacements to water damage and data recovery, trust the pros who’ve been doing it right for over 6 years.
David from Sydney CBD Repair Centre
📍 Find us: SydneyCBD.repair/locate-us
📞 Call: +61280114119
✓ Same Day Express Repairs
✓ Trusted Technicians
✓ 2000+ 5-Star Reviews
✓ Genuine Parts. Fast Fixes. Zero Fuss.
WHAT HAPPENS NEXT? Unseen Damage From Phone Screen Repair + 7 Critical Mistakes You Must Avoid
Introduction: The Hidden Side of Screen Repairs
Screen damage can happen to anyone. A sudden drop, an accidental bump, or even sitting on your phone can lead to a cracked screen that demands immediate attention. But what most users don’t realize is that screen repair is more than just replacing the glass—it involves delicate electronic systems that require precision and expertise.
At first glance, your phone might look and function perfectly after a repair. However, beneath the surface, unseen damage can develop over time—affecting your phone’s responsiveness, display brightness, and even battery life.
When done incorrectly, even minor missteps during a screen replacement can cause long-term harm. Let’s explore the unseen damage that can happen during or after screen repairs and how to avoid it.
Replacing a screen isn’t just a matter of swapping out parts. Modern smartphones are built with integrated circuits, touch sensors, proximity detectors, and other intricate components that work in harmony.
The Role of Micro-Connections and Internal Components
Every tap, swipe, and gesture depends on micro-connections between the digitizer (the touch layer) and your phone’s logic board. When a repair technician mishandles these components, even slightly, it can lead to problems like:
Ghost touches or unresponsive screens
Dimming or color inconsistency
Delayed touch feedback
This is why proper disassembly tools and expertise are crucial during screen repair.
Common Issues After Screen Replacement
Unseen damage often manifests gradually. Users may experience:
Battery draining faster than usual
Front camera malfunction or misalignment
Face ID or fingerprint sensor issues
Display flickering under sunlight
These problems often stem from cheap replacement parts or improper installation, both of which can compromise your device’s performance.
After a repair, your phone must undergo a full diagnostic check. Skipping this step is one of the most common yet dangerous mistakes.
How Skipping Testing Can Cause Long-Term Issues
Without diagnostics, small problems like sensor misalignment, loose connectors, or temperature irregularities go unnoticed. Over time, these can lead to:
Display freezing or lag
Accelerated battery wear
Internal corrosion from unnoticed microdamage
Professional repair centers like Sydney CBD Repair Centre perform a 20-point diagnostic test after every repair to ensure every component functions perfectly before handing the device back.
Mistake #2: Using Non-Genuine Parts
Many repair shops cut corners by using aftermarket or counterfeit screens that mimic OEM quality. While they may look the same initially, the differences become obvious after a few days of use.
The Difference Between OEM and Aftermarket Screens
Feature
OEM Screen
Aftermarket Screen
Brightness
True-to-original
Dull or tinted
Touch Sensitivity
Perfectly responsive
Laggy or inconsistent
Durability
Tempered and tested
Prone to cracks
Compatibility
100% match
May cause software conflicts
At Sydney CBD Repair Centre, only genuine parts are used—backed by a 90-day warranty for complete peace of mind.
Mistake #3: DIY Screen Repairs Without Expertise
You might think you’re saving money by fixing your phone yourself, but DIY repairs often lead to hidden internal damage that costs more to fix later.
The Hidden Costs of Attempting It Yourself
Cable tears during disassembly
Overheating due to improper adhesive removal
Waterproofing seals broken permanently
Battery punctures, which can cause dangerous short circuits
Without proper training and tools, even a small mistake can destroy a device worth hundreds of dollars.
Mistake #4: Overlooking Battery and Sensor Calibration
When your screen is replaced, battery and sensor calibration must be redone to ensure optimal performance.
How Improper Calibration Impacts Device Performance
Without proper calibration, your device might:
Show incorrect battery percentages
Have auto-brightness issues
Experience inaccurate proximity detection (like the screen staying on during calls)
Professional repair centers use specialized diagnostic software to recalibrate these systems—something DIY kits or unqualified shops can’t do.
Mistake #5: Failing to Address Water and Dust Resistance
Most modern smartphones come with IP67 or IP68 water resistance ratings, which can be compromised after screen replacement.
How Repairs Affect Your Device’s IP Rating
Improper resealing after repair allows microscopic water or dust particles to enter the device, causing corrosion, speaker damage, and short circuits over time.
Expert technicians reapply factory-grade waterproof seals, ensuring your device maintains its protection standards.
Mistake #6: Not Choosing a Certified Repair Centre
Your choice of repair shop determines whether your phone lasts or fails prematurely.
Why Expertise and Experience Matter
Certified technicians understand manufacturer repair guidelines, use anti-static environments, and follow strict part-handling protocols.
At Sydney CBD Repair Centre, over 2000 customers have rated their experience 5-stars for quality, speed, and reliability.
Mistake #7: Ignoring Early Warning Signs Post-Repair
Even after a seemingly successful repair, subtle issues can indicate hidden damage.
Common Symptoms That Indicate Deeper Damage
Screen flickers under dim light
Face ID or fingerprint not registering
Battery drains unusually fast
Phone heats up during idle
If you notice any of these, return to your repair centre immediately for inspection.
FAQs: Everything You Need to Know About Screen Repairs
1. How long does a professional screen repair take?
Most high-quality screen repairs take 30–60 minutes at trusted centres like Sydney CBD Repair Centre.
2. Does screen repair affect water resistance?
Yes, if not done properly. Always ensure resealing is done with factory-grade adhesives.
3. Are aftermarket screens really that bad?
They often compromise brightness, responsiveness, and longevity. OEM parts ensure the best results.
4. Can a bad screen repair affect my battery life?
Yes, poor installation or calibration can cause increased battery drain.
5. Will my warranty be voided after third-party repair?
Only if the repairer is unlicensed or uses non-genuine parts.
6. How do I know if my phone has unseen damage?
Look for performance changes—like slow touch response, camera blur, or sudden restarts.
Conclusion: Protect Your Investment with Expert Repairs
Your smartphone is more than a device—it’s your connection to work, family, and daily life. Don’t risk it with unqualified repairs. Unseen damage from screen repair can cost more in the long run than the repair itself. Always choose certified professionals who use genuine parts, perform full diagnostics, and provide post-repair support.
Why Sydney CBD Repair Centre Is the Trusted Name in Screen Repairs
🏆 6 Years in a Row – Sydney’s Best Phone Repair Service
📍 Located in the heart of Sydney CBD
📱 Genuine parts, expert technicians, and same-day service
⭐ 2000+ Google 5-Star Reviews
🛠️ 90-Day Warranty on All Repairs
Inside Sydney CBD Repair Centre: A Day In The Life Of Master Techs – 7 Powerful Secrets Behind Expert Repairs
Introduction: What Really Happens Inside a Phone Repair Centre?
A cracked smartphone screen may look like a simple repair job. However, professional mobile phone repair involves much more than removing a damaged component and installing a replacement.
At Sydney CBD Repair Centre, every device presents a different challenge. One customer may arrive with a shattered iPhone display, while another needs a Samsung battery replacement or help with a phone that suddenly refuses to charge. Some problems are obvious. Others require careful testing before the real fault becomes clear.
That’s why the work of experienced technicians matters.
A professional repair technician combines technical knowledge, hands-on experience, specialist tools, careful inspection, and attention to detail. The goal isn’t simply to make a phone turn on again. It’s to identify the problem, complete the repair correctly, test the device, and return it to the customer in reliable working condition.
This behind-the-scenes look at Sydney CBD Repair Centre explores what a typical day can involve and why professional repair techniques can make such a difference.
From early-morning preparation to final quality checks, there’s plenty happening behind the repair counter.
Before the first customer walks through the door, professional technicians have plenty to do.
A repair centre needs to be organised because mobile phones aren’t all built the same way. Different models require different tools, components, procedures, and testing methods.
The day typically begins by preparing the work area.
Technicians need a clean and organised workspace where small components can be handled safely. Precision screwdrivers, pry tools, inspection equipment, cleaning materials, testing devices, and other specialist tools need to be readily available.
Organisation might sound like a small detail, but it can have a major effect on repair quality.
A cluttered workspace can increase the chance of misplaced screws, damaged components, or unnecessary delays. A well-prepared workstation, on the other hand, allows technicians to focus on the device in front of them.
Checking Tools and Equipment
Professional repairs require more than a screwdriver.
Depending on the repair, technicians may work with:
Precision screwdrivers
Opening and separation tools
Magnification equipment
Diagnostic software
Battery testing equipment
Cleaning tools
Heat-control equipment
Replacement components
Device testing accessories
Each tool has a specific purpose.
The technician’s experience also matters. Having the right equipment doesn’t automatically make someone a skilled repairer. Knowing how and when to use each tool is equally important.
Reviewing the Repair Queue
Once the workspace is ready, technicians can review the day’s expected repairs.
These may include:
Screen replacement
Battery replacement
Charging-port issues
Camera problems
Speaker faults
Microphone problems
Back-glass damage
Water-damaged devices
Software-related issues
General diagnostic requests
Every repair is different, even when two customers have the same phone model.
For example, two phones with cracked screens may require completely different approaches if one has suffered additional internal damage.
That’s why experienced technicians don’t simply rush into the repair.
They inspect first.
2. The First Customer: Understanding the Problem
When a customer brings in a phone, the first step isn’t always opening the device.
It’s listening.
Customers often know exactly what happened. Perhaps the phone was dropped on concrete, exposed to water, left charging overnight, or suddenly stopped responding.
That information can provide valuable clues.
A technician may ask questions such as:
When did the problem begin?
Was the phone recently dropped?
Has it been exposed to water?
Does the device still turn on?
Is the screen responsive?
Does it charge?
Has the phone been repaired previously?
Did another component stop working at the same time?
These questions help establish a useful repair history.
Why Customer Information Matters
A phone’s visible problem isn’t always the root problem.
Imagine a customer arrives because the display is black. It would be easy to assume that the screen needs replacement. But the actual issue could involve the battery, charging system, internal connection, or another component.
Likewise, a phone that won’t charge may have a damaged charging port, but it could also have debris inside the port, a faulty cable, a battery problem, or another internal issue.
Professional diagnostics help separate symptoms from causes.
Creating a Repair Plan
After gathering information, the technician can explain the next step.
This is where transparency becomes important.
Customers deserve to understand what is being inspected and what the likely repair involves. If additional damage is discovered, the technician should explain the situation rather than simply proceeding without discussion.
A clear repair process builds trust.
And when your phone contains your photos, contacts, work information, banking apps, messages, and personal files, trust isn’t something to take lightly.
Diagnostics are one of the most important parts of mobile phone repair.
A skilled technician doesn’t simply replace parts until something works.
Instead, the device is assessed systematically.
The technician may inspect the external condition first. They can then check the display, buttons, cameras, speakers, microphones, charging system, battery performance, connectivity, and other relevant functions.
This process can reveal additional damage that isn’t immediately visible.
Visual Inspection
The first inspection may identify:
Cracks
Bent frames
Missing components
Damaged buttons
Signs of liquid exposure
Gaps around the display
Broken camera glass
Damage around charging ports
Physical damage can provide clues about what happened internally.
Functional Testing
The technician may then test the device’s major functions.
Depending on the problem, this can include:
Power and startup
Touchscreen response
Display brightness
Camera operation
Speaker output
Microphone recording
Charging behaviour
Wi-Fi and Bluetooth
Mobile network functions
Buttons and biometric features
Not every repair requires every test, but comprehensive testing can be useful when the device has suffered significant damage.
Why Diagnosis Saves Time
Correct diagnosis can prevent unnecessary repairs.
For example, replacing a charging port when the real problem is simply debris inside the port would be unnecessary. Similarly, replacing a screen without checking for additional internal damage could leave the customer with an unresolved problem.
That’s why professional technicians take the time to investigate.
The golden rule is simple: diagnose first, repair second.
4. Screen Repairs: Precision Matters
Cracked screens are among the most common smartphone problems.
A phone can slip from a pocket, fall from a desk, or land awkwardly on a hard surface. Even a short drop can create a spiderweb of cracks across the display.
However, replacing a modern smartphone screen isn’t simply a matter of removing glass and putting on a new panel.
The technician must carefully separate the damaged component, protect internal parts, transfer relevant components where necessary, install the replacement correctly, and test the finished device.
Inspecting Damage Before Replacement
A cracked screen can sometimes hide other problems.
Technicians may check whether:
The frame is bent
Touch functionality still works
The display has dead areas
The front camera functions correctly
Sensors operate normally
Internal components show signs of impact
If the frame is severely damaged, installing a new display may require additional consideration.
Precision During Installation
Modern smartphones contain tightly packed components.
A technician must work carefully around:
Flexible cables
Cameras
Sensors
Batteries
Connectors
Speakers
Internal boards
A rushed repair can create new problems.
That’s why professional experience and appropriate tools are so important.
Final Screen Testing
After installation, the technician should test the display.
This can include checking:
Touch response
Brightness
Colour and image quality
Front camera
Sensors
Face or biometric functions where applicable
Screen alignment
A repair isn’t finished simply because the screen lights up.
The device needs to be checked as a complete unit.
5. Battery Replacement: More Than Just a New Battery
Battery problems can be frustrating.
A phone might drain rapidly, shut down unexpectedly, struggle to hold a charge, or become unreliable during normal daily use.
Battery replacement can restore practical usability, but safety is a major consideration.
Smartphone batteries are compact lithium-based power sources. They need to be handled carefully during removal and installation.
Identifying Battery Problems
Technicians may look for symptoms such as:
Rapid battery drain
Unexpected shutdowns
Poor battery life
Charging inconsistencies
Performance issues associated with an ageing battery
Physical swelling
A swollen battery deserves particular attention because continuing to use a physically damaged battery can create additional risks.
Safe Removal
Removing a battery from a modern smartphone requires care.
The battery may be secured inside the device, and other components can be located nearby. Excessive force or incorrect tools can damage internal parts.
Experienced technicians understand that patience is often faster than rushing.
Testing the Replacement
After a battery replacement, the technician can check charging behaviour, startup, battery recognition, and general operation.
The customer should receive a device that has been tested rather than simply reassembled.
6. Water Damage: Acting Carefully
Water damage is one of the repair problems where time can matter.
A phone that has been dropped into water, exposed to heavy rain, or affected by another liquid may continue operating initially. That doesn’t necessarily mean the internal components are unaffected.
Liquid can reach areas that aren’t visible from the outside.
What Technicians Look For
A professional inspection may involve checking for:
Corrosion
Liquid indicators
Moisture around connectors
Contamination
Damaged components
Charging problems
Display issues
Battery concerns
Water-damaged devices can be unpredictable because corrosion may continue affecting components over time.
What Customers Should Avoid
If a phone becomes wet, avoid repeatedly turning it on just to see whether it works.
Also avoid relying on household fixes as a substitute for professional inspection.
If the device contains important information, prompt professional assessment may help determine whether the phone can be safely restored.
The key lesson is simple: don’t assume that a working phone is an undamaged phone.
7. Charging Problems: Looking Beyond the Port
A phone that won’t charge can cause plenty of frustration.
Many people immediately blame the charging port. Sometimes that’s correct. Sometimes it isn’t.
Technicians can investigate several possible causes.
These may include:
Damaged charging ports
Dirt or debris
Faulty charging accessories
Battery problems
Software-related issues
Internal connection problems
Board-level faults
Careful Inspection
Charging ports are exposed to pockets, bags, dust, lint, and everyday debris.
A small amount of compacted material can sometimes interfere with proper charging.
However, attempting aggressive cleaning with inappropriate objects can cause damage.
A professional technician can inspect the port and determine whether cleaning, component replacement, or further diagnosis is appropriate.
Testing After Repair
Once the issue has been addressed, charging should be tested.
Depending on the device, technicians may check charging consistency and other related functions.
The goal isn’t just to make the charging symbol appear. It’s to establish whether the device is behaving normally.
8. Brand-Specific Expertise: Apple, Samsung, Google and More
Modern smartphones vary considerably between brands and models.
Apple, Samsung, Google, and other manufacturers use different designs, components, software systems, and repair procedures.
This means a technician needs broad knowledge.
Apple Repairs
Apple devices can require careful handling because internal components are tightly integrated.
Screen, battery, charging, camera, and other repairs each have their own considerations.
For official information about Apple devices and service, customers can consult Apple Support.
Samsung Repairs
Samsung produces a wide range of devices, from entry-level smartphones to premium Galaxy models.
Repair procedures can vary significantly between models.
Technicians therefore need to identify the exact model before selecting components or beginning a repair.
Google and Other Android Devices
Google Pixel and other Android smartphones also have model-specific construction and repair requirements.
The same principle applies across the industry:
Know the device before opening it.
Professional experience helps technicians adapt their approach instead of relying on a one-size-fits-all method.
9. Quality Control: The Repair Isn’t Finished Yet
One of the most important parts of a professional repair happens after the replacement itself.
It’s called quality control.
A technician should verify that the repair has solved the original problem and hasn’t introduced another one.
A Typical Post-Repair Check
Depending on the repair, technicians may test:
Component
Possible Test
Display
Touch, brightness, image quality
Battery
Charging and power behaviour
Camera
Front and rear camera operation
Speaker
Audio output
Microphone
Voice recording
Charging port
Charging connection
Buttons
Physical response
Connectivity
Wi-Fi, Bluetooth, network functions
Sensors
Relevant sensor operation
This extra step may take a few minutes, but it can make a major difference.
Why Quality Control Builds Confidence
Imagine collecting your phone after a screen replacement and discovering later that the microphone doesn’t work.
That’s exactly the sort of issue final testing is designed to catch.
Professional repair isn’t only about replacing a damaged part. It’s about returning a functioning device.
10. Same-Day Repairs: Speed Without Cutting Corners
Customers often need their phones quickly.
For many people, a smartphone isn’t simply a gadget. It’s a communication tool, navigation device, work accessory, camera, payment tool, and connection to everyday life.
That’s why same-day repair services can be valuable.
However, speed shouldn’t mean rushing.
The real challenge is balancing efficiency with accuracy.
How Experienced Technicians Work Efficiently
Experienced technicians can often work efficiently because they understand common repair procedures.
They know:
Which tools are needed
Which components require special care
Where common faults occur
Which tests should be performed
How to organise the repair process
This experience can reduce unnecessary delays.
A Simple Principle
A fast repair is useful.
A fast repair that has to be redone isn’t.
The best workflow aims to complete the job efficiently while maintaining careful workmanship and appropriate testing.
11. Genuine Parts and Component Quality
The quality of replacement components can influence the repair experience.
A replacement part needs to be appropriate for the specific device and repair.
At Sydney CBD Repair Centre, customers are informed that the centre uses genuine parts for its repairs.
Component quality matters because smartphones depend on tightly integrated hardware.
For example, a replacement display isn’t simply a piece of glass. It can involve touch functionality, brightness, colour reproduction, sensors, cameras, and other connected features.
Likewise, a replacement battery needs to be suitable for the particular device.
Why Compatibility Matters
Using the wrong component can result in:
Poor performance
Compatibility problems
Reduced reliability
Additional faults
The need for another repair
That’s why professional technicians identify the exact phone model before beginning work.
12. Common Repair Mistakes and Why Experience Matters
DIY repair videos can make smartphone repairs look surprisingly easy.
The reality can be different.
Modern phones are compact and delicate. A mistake made during disassembly can cause damage that wasn’t present before the repair began.
Common problems can include:
Using excessive force
Damaging flexible cables
Puncturing batteries
Losing tiny screws
Damaging connectors
Installing incompatible parts
Forgetting to test components
Closing the device before checking all functions
Experience Makes a Difference
An experienced technician has seen many different failure patterns.
They can recognise signs that might not be obvious to someone performing their first repair.
This is one of the strongest reasons people choose professional repair services.
You aren’t only paying for a replacement component.
You’re also paying for knowledge, tools, experience, testing, and accountability.
13. Customer Experience: Communication Builds Trust
Technical skill is only one part of a successful repair service.
Communication matters, too.
Customers want to know what’s wrong with their device, what can be repaired, how long the process may take, and what to expect.
A professional repair centre should aim to make that information easy to understand.
Clear Communication Includes
Explaining the diagnosed issue
Discussing repair options
Providing relevant pricing information
Explaining unexpected findings
Setting realistic expectations
Answering customer questions
Explaining the repair after completion
Good communication helps remove uncertainty.
And when your phone contains valuable personal information, knowing that it’s being handled professionally can provide peace of mind.
14. What Makes a Professional Repair Different?
There are plenty of places where people can find phone repair advice.
The difference between professional repair and an improvised fix often comes down to process.
A professional approach includes:
Listening to the customer’s description
Inspecting the device
Diagnosing the problem
Selecting appropriate components
Using suitable tools
Performing the repair carefully
Testing the device
Communicating the result
Providing relevant warranty information
This structured approach reduces guesswork.
It also creates accountability.
At Sydney CBD Repair Centre, the stated repair service includes a 90-day warranty on repairs, giving customers an additional point of confidence when choosing a repair service.
15. FAQs About Professional Mobile Phone Repairs
How long does a phone repair take?
Repair times depend on the device, the type of damage, parts availability, and the complexity of the repair. Common repairs such as certain screen or battery replacements may be completed the same day when the required components are available.
Can a cracked phone screen be repaired?
In many cases, a damaged screen can be replaced. The technician should first inspect the device for additional damage, including frame problems, touch issues, camera problems, and internal impact.
Is battery replacement worth considering?
If a battery has significantly degraded or is causing charging and power problems, replacement may restore more reliable everyday use. A technician can inspect the device and explain whether battery replacement is appropriate.
What should I do if my phone gets wet?
Avoid repeatedly powering the phone on and seek professional assessment as soon as practical. Liquid damage can affect internal components even when the device initially appears to work normally.
Can you repair charging problems?
Charging faults can have several causes. A technician can inspect the charging port, check for debris or physical damage, test the battery and charging behaviour, and determine whether further repair is required.
Do professional technicians repair Apple and Samsung phones?
Professional mobile phone repair centres can service a range of brands and models. The exact repair options depend on the device, its condition, available components, and the nature of the fault.
Why is professional diagnosis important?
Diagnosis helps identify the actual cause of a problem rather than simply replacing components based on symptoms. This can reduce unnecessary repairs and help ensure the correct solution is applied.
Does Sydney CBD Repair Centre offer same-day repairs?
Sydney CBD Repair Centre promotes same-day express repairs for supported devices and repair types. Actual completion time can depend on the phone model, damage, parts availability, and repair complexity.
Are repairs covered by a warranty?
Sydney CBD Repair Centre states that its repairs include a 90-day warranty. Customers should confirm the specific warranty terms applicable to their individual repair.
Should I repair or replace my phone?
That depends on several factors, including the phone’s age, condition, repair cost, performance, battery health, and replacement price. A professional technician can assess the device and explain the available repair option without requiring you to make an immediate decision.
Conclusion: Behind Every Good Repair Is Careful Work
A professional phone repair may look simple from the outside.
Behind the counter, however, there’s a structured process involving diagnosis, precision, experience, suitable components, specialist tools, testing, and customer communication.
That’s the real story behind a day in the life of master techs at Sydney CBD Repair Centre.
From the first inspection in the morning to the final quality check before a customer collects their phone, every stage matters.
Whether it’s a cracked screen, weak battery, charging fault, water damage, camera problem, or another device issue, careful diagnosis should come before repair.
After all, your smartphone isn’t just another electronic device. It’s often where your work, photos, conversations, contacts, documents, and everyday life come together.
When something goes wrong, professional workmanship can make the repair process far less stressful.
If you’re looking for mobile phone repair in Sydney CBD, a careful inspection is a sensible place to start.
David from Sydney CBD Repair Centre – The Best place to fix mobile phones as 7 Years In A Row! Top Mobile Phone Repair In Sydney. More than 2000 Positive Reviews on Google and Same Day Repairs.
We take pride in delivering exceptional repair services for all major phone brands including Apple, Samsung, Google, and more. Our expert technicians use only genuine parts and offer 90days warranty on repairs. Located in the heart of Sydney CBD, we’re your one-stop solution for all mobile device repairs.
Our commitment to excellence has earned us the trust of thousands of satisfied customers. Whether it’s a cracked screen, battery replacement, or water damage repair, we handle it all with professional care and expertise. Walk in today and experience why we’re Sydney’s #1 choice for mobile phone repairs.
Visit us for:
✓ Same Day Express Repairs
✓ Genuine Parts Guarantee
✓ Professional Technicians
✓ Competitive Pricing
✓ 2000+ 5-Star Google Reviews
✓ 7-Time Award Winner for Best Phone Repairs
Sydney CBD Repair Centre – Where Quality Meets Reliability.
Call : +61280114119
Website: Sydney CBD Repair Centre
Beyond the Phone Screen Repairing the Unseen Damage on a Dropped Phone – 10 Essential Insights
Introduction: More Than Just a Cracked Screen
When your phone slips from your hand and hits the ground, the first thing you probably notice is a cracked screen. But what if the damage isn’t just skin-deep? Many phone owners overlook the invisible damages that can significantly affect device performance over time. Beyond the screen, a drop can compromise your battery, motherboard, sensors, or connectivity components.
Understanding these unseen damages is critical for ensuring long-term functionality and safety. This article will explore the types of hidden damage, signs to watch for, repair options, preventive measures, and why trusting professionals can save you time, money, and frustration.
Even if the exterior looks fine, internal components often absorb the brunt of a fall. Recognizing these issues early can prevent catastrophic failures.
Internal Screen Components
A dropped phone can damage the LCD, OLED panel, or digitizer. Cracks might not be immediately visible, but your screen might display dead pixels, ghost touches, or discoloration. The digitizer, responsible for touch response, can malfunction without showing visible damage.
Battery and Power Circuit Damage
Batteries are sensitive to impacts. Even a minor drop can lead to micro-tears inside the cell, which may cause swelling, overheating, or faster battery drain. The power circuits connecting your battery to the motherboard are equally fragile. If these circuits are damaged, your phone may fail to charge properly or shut down unexpectedly.
Motherboard and Microchips
The motherboard is the brain of your phone. Tiny soldered connections and microchips can loosen or crack from impact, causing erratic behavior, app crashes, or total device failure. These issues are rarely visible but can manifest gradually over days or weeks.
Knowing how internal damage occurs helps in prevention.
Drop Impact Zones
The corners and edges of a phone usually absorb the most shock. Internal components near these zones, like cameras and flex cables, are at high risk. Even if the screen is protected by Gorilla Glass or tempered glass, internal circuits can be compromised.
Material Fatigue
Repeated micro-drops, pressure from tight pockets, or carrying your phone in the same orientation for years can weaken the chassis and internal components. Material fatigue often goes unnoticed until it triggers noticeable performance issues.
Signs Your Phone Is Damaged Internally
Even without visible cracks, your device may exhibit warning signs.
Unexpected Reboots or Freezes
A damaged motherboard or loose microchip can cause your phone to reboot randomly or freeze during normal usage. This indicates that internal circuitry has been disrupted.
Overheating and Battery Drain
If your battery is swelling or the power circuit is damaged, your phone may overheat or discharge rapidly. These are serious signs that repair is needed.
Connectivity and Sound Issues
Dropped phones can damage antennas, microphones, or speakers. If calls sound distorted or Wi-Fi connectivity is inconsistent, hidden damage is likely.
Diagnostic Tools Used by Professionals
Detecting hidden damage often requires specialized tools.
Software Diagnostics
Technicians use apps and built-in diagnostic software to monitor performance, battery health, and thermal behavior. Logs can reveal errors invisible to the user.
Hardware Inspection Tools
Physical inspections include magnification tools, X-ray imaging, and thermal cameras. These methods help locate micro-cracks, dislodged chips, or battery issues before they become catastrophic.
Repair Options for Hidden Damage
Repairing unseen damage often requires professional expertise.
Screen and Component Replacement
If the screen’s internal components are damaged, replacing the entire module with genuine parts ensures touch accuracy and display quality. Avoid aftermarket parts unless verified for compatibility.
Motherboard Repairs
Minor cracks or faulty microchips can be repaired using micro-soldering techniques. Professional technicians have the skills to replace components without compromising the entire board.
Battery Replacement
Damaged batteries should be replaced immediately. Swollen or punctured batteries pose safety risks, including fire hazards. Using certified batteries ensures longevity and performance.
DIY vs Professional Repair
While DIY repair kits are available online, attempting to fix hidden damage without experience can worsen the problem. Professionals have specialized tools, knowledge of microcomponents, and access to genuine parts, reducing the risk of permanent damage.
Pros of Professional Repair:
Genuine parts guarantee
Expert diagnostics
Warranty on repairs
Cons of DIY Repair:
Risk of further damage
No warranty
Limited tool availability
Preventing Hidden Damage in the Future
Taking preventive measures can save you from hidden damage.
Use a sturdy protective case: Shock-absorbing cases reduce impact force.
Apply a screen protector: Minimizes scratches and distributes impact.
Avoid risky environments: Keep phones away from edges or high-traffic areas.
Insurance & warranty plans: Many insurers cover accidental damage.
Cost Considerations
Repairing hidden damage varies depending on the component.
Component
Average Cost (USD)
Notes
Screen & Digitizer
$150–$400
Depends on brand and size
Battery
$50–$120
Genuine replacement recommended
Motherboard
$200–$500+
Micro-soldering or chip replacement
Sensors/Antennas
$80–$200
Connectivity and camera repairs
Considering the potential for escalation, early diagnosis often saves significant money and preserves device longevity.
FAQs
1. Can a phone appear fine but still be internally damaged?
Yes. Internal components can absorb impact without visible signs. Only diagnostic tests can reveal micro-damage.
2. How long does hidden damage take to show symptoms?
It varies. Some devices fail immediately, while others may show issues weeks later, such as random shutdowns or battery swelling.
3. Is professional repair really necessary for internal damage?
Absolutely. DIY repairs risk worsening the damage and void warranties. Professionals use specialized tools and genuine parts.
4. Can hidden damage affect phone safety?
Yes. Damaged batteries or motherboards can overheat or short-circuit, posing fire hazards.
5. Are insurance plans worth it for dropped phones?
Yes, particularly if your phone is high-end. Insurance often covers unseen internal damages that are costly to repair.
6. How can I prevent hidden damage from drops?
Use high-quality protective cases, tempered glass, avoid risky drops, and consider insurance or extended warranties.
Conclusion
Dropping a phone may seem like a minor incident when the screen is intact. Yet, beneath the surface, unseen damages can compromise battery life, connectivity, and overall performance. Early recognition, professional diagnostics, and repair using genuine parts are essential for maintaining device safety and longevity. By combining careful handling, preventive measures, and expert care, you can extend your phone’s lifespan and avoid costly repairs.
For expert phone repairs in Sydney, trust Sydney CBD Repair Centre — six-time award-winning, same-day service with over 2000 positive reviews.
David from Sydney CBD Repair Centre – The Best place to fix mobile phones as 6 Years In A Row! Top Mobile Phone Repair In Sydney. More than 2000 Positive Reviews on Google and Same Day Repairs.
We take pride in delivering exceptional repair services for all major phone brands including Apple, Samsung, Google, and more. Our expert technicians use only genuine parts and offer 90 days warranty on repairs. Located in the heart of Sydney CBD, we’re your one-stop solution for all mobile device repairs.
Visit us for:
✓ Same Day Express Repairs
✓ Genuine Parts Guarantee
✓ Professional Technicians
✓ Competitive Pricing
✓ 2000+ 5-Star Google Reviews
✓ 6-Time Award Winner for Best Phone Repairs
Fixing The Black Screen of Death: Why Your Modern Smartphone’s Won’t Turn On – 11 Powerful Solutions That Actually Work
Introduction
Modern smartphones are incredibly powerful. They’ve replaced cameras, laptops, gaming systems, wallets, and even TVs for many people. However, despite their advanced technology, one issue still terrifies smartphone owners everywhere: the Black Screen of Death.
You press the power button, but nothing happens. No vibration. No logo. No charging symbol. Just a cold, lifeless black screen.
It’s frustrating, stressful, and sometimes expensive.
Thankfully, not every black screen problem means your phone is permanently dead. In many cases, there are practical solutions that can bring your device back to life. Understanding the real reasons behind the issue can also help you avoid future failures.
In this detailed guide, we’ll explore why your smartphone won’t turn on, what causes the black screen of death, how to troubleshoot the issue safely, and when it’s time to seek professional repair services.
The Black Screen of Death refers to a smartphone that appears completely unresponsive. The display remains black even though the phone may still have internal power.
Sometimes the device vibrates, rings, or receives notifications while the screen stays dark. Other times, the entire phone becomes non-functional.
This problem affects almost every major smartphone brand, including:
Before diagnosing the problem, it’s important to identify the warning signs associated with the black screen of death.
Typical Symptoms Include
Symptom
Possible Cause
Black display with vibration
OLED/display failure
Phone won’t charge
Battery or charging IC issue
Boot loop
Software corruption
Overheating before shutdown
Motherboard failure
Flickering display
Damaged flex cable
Random shutdowns
Battery degradation
Green or purple lines
OLED damage
No response to buttons
Power IC malfunction
These symptoms often appear gradually before total failure occurs.
Why Modern Smartphones Suddenly Stop Turning On
Today’s smartphones are thinner, more powerful, and more fragile than ever before. Several internal components work together perfectly until one critical failure disrupts the entire system.
Battery-Related Failures
The battery is one of the most common reasons behind the black screen of death.
Lithium-ion batteries naturally degrade over time. After hundreds of charging cycles, the battery may fail to provide stable voltage to the motherboard.
Common battery-related causes include:
Swollen batteries
Deep discharge
Charging IC failure
Low-quality chargers
Extreme heat exposure
A severely drained battery may also prevent the phone from booting entirely.
Display and OLED Damage
Modern OLED displays are stunning, but they’re delicate.
Sometimes the phone is still functioning normally internally, but the display itself has failed. This creates the illusion of a dead device.
Signs of OLED failure include:
Green flashes
Purple lines
Flickering brightness
Partial image display
Touch still working while screen stays black
Foldable smartphones are especially vulnerable because flexible OLED panels experience repeated stress over time.
Software Corruption
Software bugs can also trigger the black screen of death.
Failed updates, corrupted apps, or operating system crashes may prevent the device from booting correctly.
Common software triggers include:
Interrupted firmware updates
Malware infections
Rooting or jailbreaking
Storage corruption
Incompatible applications
Fortunately, software-related black screen problems are often repairable without hardware replacement.
Water and Moisture Damage
Even water-resistant smartphones aren’t fully waterproof.
Moisture can enter through:
Cracked screens
Damaged seals
SIM tray gaps
Charging ports
Once liquid reaches the motherboard, corrosion may begin almost immediately.
Interestingly, many phones continue working temporarily before suddenly developing the black screen of death days later.
Motherboard and Power IC Issues
The motherboard acts as the brain of the smartphone.
When key components fail, the device may stop powering on completely.
Common motherboard issues include:
Burned capacitors
CPU separation
Power management IC failure
NAND storage damage
Short circuits
Unfortunately, motherboard repairs are among the most complex smartphone repair procedures.
First Things to Do Before Panicking
Seeing a black screen can feel alarming, but don’t rush to assume the worst.
Before visiting a repair center, try these simple steps:
Leave the phone charging for 30 minutes
Use an original charging cable
Remove phone cases or accessories
Try a force restart
Inspect for physical damage
Check if the phone vibrates
Sometimes the solution is surprisingly simple.
Step-by-Step Troubleshooting Guide
Now let’s go deeper into practical troubleshooting methods.
Force Restart Your Device
A force restart can clear temporary software crashes.
iPhone Force Restart
For newer iPhones:
Press Volume Up
Press Volume Down
Hold the Side Button
Samsung Force Restart
Hold Power + Volume Down
Wait 10–15 seconds
This method often restores frozen devices instantly.
Check the Charging Port
Pocket lint and debris can block charging connections.
Use:
A flashlight
Soft brush
Wooden toothpick
Avoid using metal objects because they can damage the charging pins.
Try Another Charger
Cheap or damaged chargers frequently cause power issues.
Use:
Certified cables
Original adapters
Wireless charging (if supported)
If the phone responds to wireless charging but not USB charging, the charging port may require repair.
Use Recovery Mode
Recovery mode can restore corrupted operating systems.
For Android devices:
Power off device
Hold Power + Volume Up
Select Recovery Mode
For iPhones:
Connect to a computer and enter recovery mode through iTunes or Finder.
Connect to a Computer
A computer may still detect a phone with a black screen.
If detected, immediately:
Back up data
Update firmware
Restore operating system
This step can save important files before further failure occurs.
iPhone Black Screen Problems Explained
iPhones commonly experience black screen problems after:
iOS updates
Hard drops
Battery degradation
Water exposure
On OLED iPhones, display connector damage is especially common after impact.
In some cases, the device still powers on normally, but the display backlight or OLED panel no longer functions.
Popular affected models include:
iPhone 13 Pro Max
iPhone 14 Pro
iPhone 15 series
Older iPhone X models
Apple’s tightly integrated hardware design improves performance but also increases repair complexity.
Samsung and Android Black Screen Problems
Samsung and Android phones experience black screen issues for different reasons.
Common Android-specific causes include:
AMOLED burn-in
System crashes
Faulty firmware
Third-party launcher conflicts
Overheating
Samsung foldable devices also experience stress damage near hinge areas.
Meanwhile, gaming phones can suffer overheating-related motherboard failure due to heavy processing loads.
Android phones vary greatly in repairability depending on manufacturer design.
Can Water Damage Cause the Black Screen of Death?
Absolutely.
Water damage remains one of the biggest causes of smartphone failure worldwide.
Even a few drops of liquid can create serious electrical shorts inside modern smartphones.
Common Liquids That Cause Damage
Liquid
Damage Severity
Fresh water
Moderate
Salt water
Severe
Coffee
Severe
Soft drinks
Severe
Alcohol
Moderate
Humid air
Mild but dangerous
The biggest mistake users make is trying to charge a wet phone.
Electricity combined with moisture accelerates corrosion dramatically.
Instead:
Turn off the device immediately
Do not charge it
Seek professional cleaning quickly
Time matters enormously after liquid exposure.
Professional Repair vs DIY Repair
DIY repair videos are everywhere online. However, modern smartphone repairs require specialized tools and experience.
DIY Repair Risks
Face ID damage
Fingerprint sensor failure
Battery puncture
Waterproof seal loss
Flex cable tearing
Professional technicians use:
Thermal cameras
Microsoldering stations
Diagnostic power supplies
Microscope inspection tools
These tools help identify precise failures without unnecessary part replacement.
How Repair Technicians Diagnose Dead Phones
Professional diagnosis follows a systematic process.
Step 1: External Inspection
Technicians check for:
Cracks
Water indicators
Burn marks
Bent frames
Step 2: Power Consumption Testing
Special equipment measures current draw behavior.
Different current patterns indicate different faults.
Step 3: Display Testing
Technicians connect test screens to verify OLED functionality.
Step 4: Board-Level Diagnosis
Microscope inspection identifies:
Corrosion
Short circuits
Damaged IC chips
Step 5: Functional Testing
After repair, the device undergoes:
Charging tests
Camera tests
Signal tests
Thermal monitoring
This ensures long-term reliability.
Preventing the Black Screen of Death
Prevention is always cheaper than repair.
Best Practices for Smartphone Health
Avoid Cheap Chargers
Low-quality chargers can damage charging IC components.
Keep Your Phone Cool
Heat is one of the biggest enemies of smartphone longevity.
Even tiny cracks allow moisture intrusion over time.
The Future of Smartphone Reliability
Smartphones continue evolving rapidly.
Manufacturers are introducing:
Stronger glass
Better thermal management
Improved waterproofing
Advanced battery technology
However, ultra-thin designs still create repair challenges.
Consumers increasingly expect devices that are:
Durable
Repairable
Sustainable
The growing “Right to Repair” movement is also pushing manufacturers toward easier repair access.
Learn more about repairability advocacy through iFixit.
Frequently Asked Questions
Why is my phone screen black but still vibrating?
This usually indicates display failure rather than total phone failure. The motherboard may still be functioning normally.
Can a dead phone be repaired?
Yes. Many black screen issues are repairable depending on the damaged component.
Does water damage always destroy phones?
Not always. Fast professional cleaning can prevent permanent motherboard corrosion.
Why won’t my phone charge after getting wet?
Moisture may trigger charging port protection or create internal short circuits.
Is replacing the motherboard worth it?
It depends on the phone’s value and data importance. High-end devices are often worth repairing.
Can software updates cause the black screen of death?
Yes. Corrupted firmware installations can prevent proper booting.
How long should I charge a completely dead phone?
Leave it charging for at least 30 minutes using a certified charger before troubleshooting further.
Conclusion
The black screen of death can feel catastrophic, but many smartphones are repairable with proper diagnosis and professional care.
Modern devices are incredibly complex, combining fragile OLED displays, high-density batteries, and advanced motherboards into ultra-thin designs. As a result, failures can occur from drops, water exposure, software corruption, or simple wear and tear.
The key is acting quickly and avoiding common mistakes like forcing the device to charge after water exposure or attempting risky DIY repairs without experience.
By understanding the warning signs, troubleshooting carefully, and seeking expert repair when necessary, you can often restore your smartphone and protect your valuable data.
Most importantly, preventative care goes a long way. Quality chargers, protective cases, regular backups, and prompt repairs can significantly extend your device’s lifespan.
Your smartphone may seem dead today, but with the right approach, there’s a very good chance it can be brought back to life.
David from Sydney CBD Repair Centre – The Best place to fix mobile phones as 7 Years In A Row! Top Mobile Phone Repair In Sydney. More than 2000 Positive Reviews on Google and Same Day Repairs.
We take pride in delivering exceptional repair services for all major phone brands including Apple, Samsung, Google, and more. Our expert technicians use only genuine parts and offer 90days warranty on repairs. Located in the heart of Sydney CBD, we’re your one-stop solution for all mobile device repairs.
Our commitment to excellence has earned us the trust of thousands of satisfied customers. Whether it’s a cracked screen, battery replacement, or water damage repair, we handle it all with professional care and expertise. Walk in today and experience why we’re Sydney’s #1 choice for mobile phone repairs.
Visit us for:
✓ Same Day Express Repairs
✓ Genuine Parts Guarantee
✓ Professional Technicians
✓ Competitive Pricing
✓ 2000+ 5-Star Google Reviews
✓ 7-Time Award Winner for Best Phone Repairs
Why Your ROG Phone 6 Is Bootlooping After a Professional Screen Repair: 9 Powerful Reasons You Need to Know
Introduction
The ROG Phone 6 bootloop after screen repair issue can be frustrating, especially when you expected your device to return in perfect working condition. For gamers and power users, the ASUS ROG Phone 6 is more than just a smartphone—it is a high-performance gaming machine designed for speed, reliability, and immersive experiences.
However, some users notice that their phone becomes stuck on the ASUS logo, repeatedly restarts, or fails to complete the startup sequence after a screen replacement. While it may seem like the repair itself caused the problem, the reality can be more complex.
This article explores the most common reasons behind a ROG Phone 6 bootloop after screen repair, how professionals diagnose the issue, and what steps you can take to get your device back to normal.
A bootloop occurs when a smartphone repeatedly attempts to start but never reaches the home screen. Instead, the device cycles through the startup logo continuously.
Common symptoms include:
ASUS logo appearing repeatedly
Device restarting every few seconds
Inability to access Android
Excessive heat during startup
Battery drain while rebooting
When a ROG Phone 6 bootloop after screen repair happens, many users assume the replacement display is defective. In reality, several hardware and software factors may contribute to the problem.
What Happens During a Professional Screen Repair
Modern smartphones are incredibly compact. Replacing a screen on a ROG Phone 6 involves:
Opening the device carefully
Disconnecting the battery
Removing display connectors
Installing the replacement screen
Reconnecting internal components
Testing all functions
Reassembling the phone
Because so many sensitive parts are involved, even a minor issue can potentially trigger startup problems.
A ROG Phone 6 bootloop after screen repair may present several warning signs:
Symptom
Possible Cause
Endless ASUS logo
Hardware connection issue
Vibrates repeatedly
Power circuit problem
Screen flashes then restarts
Display communication failure
Device enters recovery mode
Software corruption
Random shutdowns
Battery connection fault
Recognizing these symptoms can help technicians identify the root cause faster.
1. Loose Internal Connectors
One of the most common causes of a ROG Phone 6 bootloop after screen repair is a loose connector.
Inside the device are multiple flex cable connections that link components to the motherboard. If even one connector isn’t seated correctly, communication between critical hardware components may fail.
Affected connectors may include:
Display flex cable
Battery connector
Charging board cable
Side-button flex cable
Fortunately, this issue is often repairable without replacing additional parts.
Why It Happens
During reassembly, connectors may appear attached while not fully locked into position. Slight movement after repair can eventually cause intermittent contact.
2. Damaged Display Flex Cable
The display flex cable is extremely delicate.
Even experienced technicians can encounter challenges when removing broken screens because adhesive and glass fragments may place stress on the cable assembly.
A damaged flex cable can cause:
Bootlooping
Blank display
Flickering
Touch malfunction
When the motherboard cannot properly communicate with the display subsystem, startup issues may occur.
Symptoms of Cable Damage
Phone powers on but screen remains black
Logo appears briefly then disappears
Touchscreen fails completely
Professional testing equipment helps verify whether the display assembly is functioning correctly.
3. Battery Connector Issues
The battery must be disconnected before screen replacement.
If the battery connector isn’t properly seated afterward, power delivery becomes unstable.
The result may be:
Random restarts
Startup failures
Charging abnormalities
Continuous reboot cycles
A ROG Phone 6 bootloop after screen repair can often be traced back to inconsistent power reaching the motherboard.
Why Stable Power Matters
Modern smartphones require precise voltage regulation. Even a slight interruption can trigger system resets.
Technicians typically inspect:
Battery health
Connector integrity
Voltage output
Charging circuitry
4. Motherboard Damage During Repair
Although uncommon, motherboard damage remains a possibility during any smartphone repair.
The ROG Phone 6 contains densely packed components, including:
Power management ICs
Memory chips
CPU
Storage modules
Accidental pressure, tool slips, or excessive heat may affect these components.
Potential Motherboard Issues
Physical Damage
Tiny surface-mounted components may become dislodged.
Trace Damage
Circuit pathways can become compromised.
Solder Joint Problems
Existing weak solder joints may fail during disassembly.
Motherboard-level faults often require advanced microsoldering expertise.
5. Software Corruption Coincidentally Appearing After Repair
Sometimes a ROG Phone 6 bootloop after screen repair isn’t caused by the repair at all.
Software corruption may already exist and simply become apparent when the device is powered down and restarted.
Examples include:
Failed Android updates
Corrupted system files
Rooting modifications
Firmware conflicts
Diagnosing Software Problems
Technicians may attempt:
Safe Mode boot
Recovery Mode access
Firmware reinstallation
System diagnostics
If software corruption is the culprit, data recovery may still be possible.
6. Incompatible Replacement Screen Components
Not all replacement screens are equal.
Using low-quality or incompatible parts may cause communication issues between the display and motherboard.
Problems may include:
Display initialization failures
Touch controller errors
Excessive power draw
Device instability
This is one reason reputable repair centers prioritize premium-quality replacement parts.
Risks of Cheap Components
Reduced durability
Poor display quality
Inconsistent performance
Increased chance of future failures
Investing in quality components often saves money in the long run.
7. Static Electricity Damage
Electrostatic discharge (ESD) is a hidden threat during electronics repair.
A tiny static shock invisible to humans can damage sensitive smartphone components.
Affected areas may include:
Display controller
Memory chips
Power ICs
Sensors
Professional workshops use ESD-safe equipment to minimize this risk.
Preventing ESD Damage
Best practices include:
Anti-static mats
Grounding straps
Controlled work environments
Proper handling procedures
While rare, static damage can contribute to a ROG Phone 6 bootloop after screen repair.
8. Improper Reassembly Procedures
Modern gaming smartphones contain numerous screws, brackets, and protective shields.
Improper reassembly can lead to:
Grounding issues
Pressure damage
Connector movement
Thermal management problems
Common Assembly Mistakes
Missing screws
Incorrect screw placement
Misaligned brackets
Pinched flex cables
Incomplete adhesive installation
Even small mistakes can have significant consequences.
9. Hidden Liquid Damage Discovered During Repair
Many smartphones arrive for screen replacement after accidental drops.
What users don’t always realize is that liquid damage may already exist internally.
When technicians open the phone, they sometimes discover:
Corrosion
Moisture residue
Oxidized connectors
Damaged circuits
These issues may worsen over time and eventually trigger bootloop symptoms.
Why Timing Can Be Misleading
A device may seem functional before repair but fail shortly afterward because pre-existing corrosion continues to spread.
This can create the impression that the repair caused the issue when underlying damage was already present.
How Professional Technicians Diagnose Bootloop Issues
Professional diagnosis follows a structured process.
Visual Inspection
Technicians inspect:
Connectors
Flex cables
Motherboard components
Electrical Testing
Measurements include:
Battery voltage
Power rail stability
Charging performance
Component Isolation
Parts are tested individually to identify faults.
Software Diagnostics
Firmware and operating system integrity are verified.
This systematic approach reduces guesswork and speeds up repair.
Attempting repeated DIY repairs may worsen the situation.
Professional diagnostics can quickly determine whether the issue is hardware-related, software-related, or both.
Frequently Asked Questions
1. Can a screen replacement directly cause a bootloop?
Yes. Loose connectors, damaged flex cables, or assembly issues can trigger a bootloop.
2. Is a bootloop always caused by the repair technician?
No. Software corruption, battery faults, and pre-existing motherboard damage can also cause startup failures.
3. Can data be recovered from a bootlooping ROG Phone 6?
In many cases, yes. Recovery success depends on the condition of the motherboard and storage chip.
4. How long does diagnosis typically take?
Most professional repair centers can perform an initial diagnosis within a few hours.
5. Will factory resetting fix the problem?
Only if software corruption is responsible. Hardware-related bootloops usually require physical repair.
6. Can liquid damage cause a delayed bootloop?
Absolutely. Corrosion often worsens gradually and may trigger issues weeks or months later.
7. Should I continue trying to restart the phone?
Repeated restart attempts generally won’t help and may increase battery stress. Professional diagnosis is recommended.
8. Is motherboard repair possible?
Yes. Many motherboard issues can be repaired using advanced microsoldering techniques.
Conclusion
Experiencing a ROG Phone 6 bootloop after screen repair can be alarming, but it doesn’t automatically mean the repair was performed incorrectly. Loose connectors, battery issues, display cable damage, software corruption, incompatible parts, motherboard faults, and hidden liquid damage can all contribute to the problem.
The key is accurate diagnosis. A qualified repair technician can systematically identify the underlying cause and recommend the most effective solution. With proper testing, quality replacement parts, and expert workmanship, many bootlooping devices can be restored successfully.
By understanding the causes and warning signs discussed in this guide, you’ll be better prepared to protect your device and make informed repair decisions in the future.
David from Sydney CBD Repair Centre – The Best place to fix mobile phones as 7 Years In A Row! Top Mobile Phone Repair In Sydney. More than 2000 Positive Reviews on Google and Same Day Repairs.
We take pride in delivering exceptional repair services for all major phone brands including Apple, Samsung, Google, and more. Our expert technicians use only genuine parts and offer 90days warranty on repairs. Located in the heart of Sydney CBD, we’re your one-stop solution for all mobile device repairs.
Our commitment to excellence has earned us the trust of thousands of satisfied customers. Whether it’s a cracked screen, battery replacement, or water damage repair, we handle it all with professional care and expertise. Walk in today and experience why we’re Sydney’s #1 choice for mobile phone repairs.
Visit us for:
✓ Same Day Express Repairs
✓ Genuine Parts Guarantee
✓ Professional Technicians
✓ Competitive Pricing
✓ 2000+ 5-Star Google Reviews
✓ 7-Time Award Winner for Best Phone Repairs
Deconstructing One UI 8.5’s Impact on Android Phone Repair: 10 Key Insights You Need
Introduction to One UI 8.5
Samsung’s One UI 8.5 represents a significant step forward in Android customization, blending aesthetics, performance, and user-centric design. This latest iteration focuses on smoother interactions, enhanced multitasking, and intelligent device management. But beyond its user-friendly appeal, One UI 8.5 also carries implications for Android phone repair, both for technicians and end-users.
In particular, the update brings changes to adaptive battery management, touch sensitivity adjustments, and security layers that influence hardware repair strategies. For repair centres like Sydney CBD Repair Centre, understanding these nuances ensures timely fixes, accurate diagnostics, and reduced risk of post-repair complications.
Evolution from Previous Versions
Compared to One UI 8.0 and earlier versions, 8.5 introduces subtle but meaningful enhancements:
Smoother animations and gestures: Reduces UI lag but introduces new calibration challenges for touchscreens.
Advanced multitasking features: Split-screen and pop-up windows are more seamless but add stress to processor-intensive tasks, occasionally affecting diagnostics.
Improved security protocols: Stronger encryption and tighter bootloader restrictions make firmware repair more intricate.
These features collectively impact repair workflows, especially for software-dependent diagnostics or hardware swaps.
Key Features Affecting Hardware
One UI 8.5’s innovations extend to hardware behavior. For instance:
Adaptive refresh rates: 120Hz or variable refresh modes can strain screen drivers.
Battery optimization AI: Modifies charging cycles, affecting battery health and replacement intervals.
Repairing Android devices requires a mix of technical expertise, proper tools, and an understanding of both hardware and software dynamics. One UI 8.5, while primarily software-focused, intersects with hardware performance in ways that repair centres must consider.
Common Repair Types
The most frequent Android repairs impacted by One UI 8.5 include:
Screen replacements: Especially for devices using variable refresh rate AMOLED displays.
Battery swaps: Adaptive charging may affect longevity, altering replacement schedules.
Software-related issues: Update-induced slowdowns, boot loops, or app crashes.
Camera repairs: UI changes can affect sensor calibration.
Tools and Techniques
Repair tools need recalibration in some cases:
Diagnostic software: Must support One UI 8.5 firmware.
Touchscreen calibrators: To account for gesture and sensitivity changes.
Battery testers: Adaptive charging AI requires different assessment metrics.
Understanding these changes is critical for delivering accurate repairs without inadvertently causing new problems.
While many repairs are hardware-focused, One UI 8.5 introduces software complexities that directly impact repair strategies.
Security Updates and Unlocking Devices
Samsung’s security protocols have strengthened in 8.5, making certain tasks more challenging:
Unlocking bootloaders or accessing service menus may require updated credentials or specialized tools.
Device encryption and Knox security limit unauthorized repairs or custom firmware installations.
Technicians need updated certifications and tools to navigate these protections safely.
Firmware Compatibility Issues
Firmware mismatches can result in:
Malfunctioning touchscreen gestures
Inaccurate battery calibration
Performance slowdowns or random reboots
Repair centres must maintain the latest software libraries to avoid introducing complications post-repair.
One UI 8.5 and Battery Performance
Battery health is a critical aspect affected by One UI 8.5. The update optimizes power management, but this also affects repair timelines and diagnostic procedures.
Power Management Features
Key features impacting repairs include:
Adaptive Battery AI: Adjusts app energy usage based on usage patterns.
These examples highlight how One UI 8.5 features intersect with hardware repairs.
FAQs
Q1: Does One UI 8.5 make screen repairs harder?
A1: Yes, due to adaptive refresh rates and gesture sensitivity, screen replacements require recalibration for optimal functionality.
Q2: Will battery replacement schedules change with One UI 8.5?
A2: Adaptive AI charging may extend battery life, but replacements must consider AI recalibration to avoid false readings.
Q3: Can all repair centres handle One UI 8.5 devices?
A3: Only centres with updated diagnostic tools and trained technicians can efficiently repair these devices.
Q4: Are there new security challenges for repairs?
A4: Yes, Knox and firmware encryption may limit unauthorized access, requiring certified tools.
Q5: How can users prevent post-update issues?
A5: Regularly update apps, monitor battery health, and avoid heavy multitasking immediately after installing the update.
Q6: Do repairs cost more with One UI 8.5?
A6: Slightly, due to additional calibration, software diagnostics, and updated tools required.
Conclusion
One UI 8.5 enhances the Android experience with smarter AI, smoother gestures, and optimized performance. However, these improvements come with a ripple effect on phone repair, necessitating updated tools, technician training, and careful diagnostic procedures.
Repair centres like Sydney CBD Repair Centre stay ahead of these challenges by leveraging expertise, certified tools, and detailed knowledge of software-hardware interplay. For users, understanding the implications of One UI 8.5 ensures smoother device maintenance, longer battery life, and reduced repair surprises.
For detailed repair assistance and certified One UI 8.5 support, visit Sydney CBD Repair Centre.
David from Sydney CBD Repair Centre – The Best place to fix mobile phones as 6 Years In A Row! Top Mobile Phone Repair In Sydney. More than 2000 Positive Reviews on Google and Same Day Repairs.
We take pride in delivering exceptional repair services for all major phone brands including Apple, Samsung, Google, and more. Our expert technicians use only genuine parts and offer 90days warranty on repairs. Located in the heart of Sydney CBD, we’re your one-stop solution for all mobile device repairs.
Our commitment to excellence has earned us the trust of thousands of satisfied customers. Whether it’s a cracked screen, battery replacement, or water damage repair, we handle it all with professional care and expertise. Walk in today and experience why we’re Sydney’s #1 choice for mobile phone repairs.
Visit us for:
✓ Same Day Express Repairs
✓ Genuine Parts Guarantee
✓ Professional Technicians
✓ Competitive Pricing
✓ 2000+ 5-Star Google Reviews
✓ 6-Time Award Winner for Best Phone Repairs
DIY Fix for Common Smartphone Screen Discoloration: Ultimate Repair Guide + Proven Methods + 10 Solutions
Smartphone screen discoloration is one of those annoying problems that can creep up slowly or suddenly shock you when you unlock your phone. Whether it’s a yellow tint, green patches, purple smudges, or uneven brightness, the issue can be alarming. The good news? Many cases can be fixed at home—safely and without spending hundreds of dollars.
This guide covers everything you need to know: causes, symptoms, DIY fixes, pro repair methods, and prevention strategies—all written in a simple Grade 7 reading level with clear, optimistic steps.
Introduction
Smartphone screen discoloration is one of the most common display issues faced by users today, showing up as yellow tints, purple smudges, green patches, or uneven brightness across the screen. While it may look alarming at first glance, the good news is that many discoloration problems can be fixed at home with safe, simple, and effective DIY methods. Understanding what causes this issue—and knowing the right steps to diagnose and repair it—can save you time, stress, and money.
In this comprehensive guide, you’ll learn how smartphone screens develop discoloration, the early signs to watch out for, and the easiest DIY techniques you can try before turning to professional repair services. We’ll walk you through proven troubleshooting methods, prevention tips, and expert recommendations written in a clear, Grade 7 reading level for effortless understanding. Whether you’re dealing with mild tinting or stubborn display patches, this introduction sets the stage for a complete, actionable repair roadmap that empowers you to restore your screen’s clarity and color accuracy.
Smartphone screen discoloration can be subtle at first—just a faint tint on one side of the display. Eventually, though, it can spread or worsen as you continue using the device. Understanding what’s happening under the glass helps you diagnose and choose the right fix.
What Causes Screen Discoloration?
Several factors can trigger screen discoloration, including:
A small patch today can become a large blotch tomorrow. Early detection saves money.
Mild vs Severe Discoloration
Mild:
Tint appears only at low brightness
Small patches that disappear briefly after reboot
Discoloration shifts with temperature
Severe:
Permanent purple/green blobs
Expanding color distortion
Severe gradient shifts covering half the screen
When It’s Still Fixable
DIY fixes usually work if:
Tint is software-related
The screen has no cracks
You recently installed new apps
Discoloration appeared after overheating
If cracks are visible or the discoloration spreads quickly, skip DIY and go straight to professional repair.
Safety Precautions Before Any DIY Fix
Before attempting anything, protect both yourself and your phone.
Tools You May Need
Lint-free cloth
Isopropyl alcohol (optional)
Wireless charger (for testing charging heat)
Computer (for cache clear or system refresh)
Damage You Must Avoid
Pressing hard on discolored areas
Using hair dryers or heaters
Putting phone in the freezer
Prying open the phone without training
Top 10 DIY Fixes for Smartphone Screen Discoloration
Here are the most trusted, safe, and effective DIY remedies you can try at home.
1. Soft Reset
A simple restart can recalibrate software-based color issues.
2. Forced Restart
Useful when the OS itself glitches and causes false color rendering.
3. Safe Mode Testing
Safe mode disables third-party apps that may interfere with display settings.
4. Pixel Refresh Apps
These rapidly cycle colors to unstick AMOLED pixels.
5. Clearing System Cache
Android system cache corruption can cause screen rendering issues.
6. Adjusting Color Correction Settings
Built-in accessibility tools can override damaged color profiles.
7. Remove Magnetic Phone Cases
Some cases interfere with sensors and display elements.
8. Fix Overheating
Turn off background apps, remove the case, and stop heavy gaming.
9. Battery Calibration
Low or unstable voltage from old batteries can distort AMOLED displays.
10. Dry Moisture-Affected Screens
Put your phone in a cool, dry place—not rice—for 24–48 hours.
When DIY Fixes Won’t Work
Some screen issues are purely hardware-related.
Signs It’s a Hardware Problem
Purple blobs expanding outward
Display flickers and discolors at the same time
Physical dents or pressure marks
Water damage indicators triggered
Why Only Professionals Should Proceed
Modern smartphones are sealed with adhesives, sensitive cables, and fragile AMOLED layers that can shatter with minimal force.
How Professionals Fix Screen Discoloration
If DIY doesn’t help, here’s what pros do:
Digitizer Replacement
For pressure damage affecting touch and color.
AMOLED Panel Replacement
The only way to fix purple, green, or black smudges.
Connector Cleaning / Reseating
Especially after minor shocks or moisture exposure.
Prevention Tips to Avoid Future Discoloration
Temperature Protection
Never leave your phone in hot cars or under direct sun.
Good Charging Habits
Avoid overnight charging and let your phone cool between sessions.
Physical Care Tips
Use shock-absorbing cases and avoid tight pockets.
FAQs
1. Can screen discoloration fix itself?
Sometimes, yes. Software-caused tinting may disappear after a reset or cooling.
2. Is purple screen discoloration always serious?
Yes. On AMOLED screens, purple marks indicate internal pressure cracks.
3. Can overheating permanently damage OLED screens?
Absolutely. Excess heat can cause pixel burn or adhesive yellowing.
4. Are discoloration apps safe?
Yes, as long as they’re from the Play Store or App Store.
5. Does replacing the screen remove all discoloration?
Yes, since discoloration is within the screen layers.
6. Is moisture always visible from the outside?
No. Even tiny droplets inside can cause color distortion.
Conclusion
Screen discoloration can be frustrating, but many issues can be fixed with simple, safe DIY steps. Whether it’s overheating, software miscalibration, or minor moisture exposure, knowing the root cause helps you choose the right solution. When DIY stops working, professional repair ensures your phone returns to perfect condition without risking further damage.
David from Sydney CBD Repair Centre – The Best place to fix mobile phones as 6 Years In A Row! Top Mobile Phone Repair In Sydney. More than 2000 Positive Reviews on Google and Same Day Repairs.
We take pride in delivering exceptional repair services for all major phone brands including Apple, Samsung, Google, and more. Our expert technicians use only genuine parts and offer 90 days warranty on repairs. Located in the heart of Sydney CBD, we’re your one-stop solution for all mobile device repairs.
Visit us for:
✓ Same Day Express Repairs
✓ Genuine Parts Guarantee
✓ Professional Technicians
✓ Competitive Pricing
✓ 2000+ 5-Star Google Reviews
✓ 6-Time Award Winner for Best Phone Repairs
Beyond the Screen: Unseen Phone Damage Fixes That Transform Your Device (10 Hidden Issues Solved)
Introduction
Smartphones have become indispensable tools in our daily lives, keeping us connected, entertained, and productive. Most of us notice obvious damage, like a cracked screen or a chipped corner, and rush to get it fixed. But what many users fail to realize is that phones can suffer from hidden, unseen damage that silently impacts performance, longevity, and overall reliability.
From tiny micro-cracks in the logic board to battery expansion and subtle liquid exposure, these hidden issues often go unnoticed until they cause major problems—sometimes resulting in data loss or expensive repairs. Understanding these invisible threats and learning how to prevent or fix them is essential for every smartphone owner.
In this guide, we’ll explore 10 common hidden phone issues, their causes, early warning signs, and professional solutions that can save your device. Whether you’re a casual user or a tech enthusiast, this article will equip you with the knowledge to keep your phone performing at its best.
When we think about phone damage, most of us immediately picture cracked screens or shattered glass. But the truth is, there’s a vast spectrum of unseen damage that silently affects your device’s performance and longevity. These hidden issues are often overlooked by users and even some repair shops. Knowing how to spot them—and addressing them promptly—can save you hundreds of dollars and countless hours of frustration.
Smartphones today are marvels of technology, yet their thin designs, high-density components, and fragile internal parts make them vulnerable to subtle failures. While a device may appear perfect externally, it could be suffering from micro-cracks in the logic board, internal liquid exposure, battery degradation, or other hidden problems.
Why focus on unseen damage? Because if ignored, these issues can escalate into catastrophic failures, such as complete device shutdowns, data loss, or even irreparable hardware damage. By understanding the signs and preventive measures, users can extend the life of their phones and ensure smooth performance.
Modern phones are thinner, lighter, and packed with more features than ever. However, these advancements come with trade-offs that increase the risk of hidden damage.
How Thin Designs Increase Damage Risk
Manufacturers are in a constant race to produce sleeker devices. While the aesthetics are impressive, ultra-thin frames leave little margin for internal shocks. Even minor drops or pressure can cause micro-cracks in internal components or misalign sensors and chips. Unlike a visible screen crack, these damages are often invisible to the naked eye but can severely impact functionality.
Internal Weak Points Most Users Never Notice
Some of the most vulnerable parts inside a smartphone include the logic board, battery connector, camera module, and charging ICs. These components endure significant stress during normal use—charging cycles, temperature fluctuations, and vibrations from handling. Tiny fractures, corrosion, or stress damage in these areas often go unnoticed until a sudden failure occurs.
Micro-Cracks: The Invisible Threat
Micro-cracks are small fissures in components such as the logic board or connectors. They’re not visible without professional tools, but their impact is profound.
Causes of Micro-Cracks in Today’s Phones
Minor drops or impacts that seem harmless
Pressure from sitting on the phone or tight pockets
Thermal expansion due to overheating
Manufacturing tolerances in ultra-thin phones
How Technicians Detect Cracks You Can’t See
Professional repair centers, like Sydney CBD Repair Centre, use specialized equipment such as high-powered microscopes and diagnostic software to detect micro-cracks. Early detection allows technicians to repair or reinforce components before failure occurs, saving users from expensive replacements.
Logic Board Stress Damage
The logic board is the heart of your smartphone. Unfortunately, it’s also highly susceptible to stress-related failures.
Overheating and Processor Stress
Excessive heat from prolonged gaming, video streaming, or poor ventilation can cause the solder joints on the logic board to expand and contract repeatedly. Over time, this leads to tiny fractures and intermittent failures that are hard to diagnose.
Power IC and Charging Path Failures
The power IC (Integrated Circuit) regulates voltage for critical components. Stress or overheating can lead to power instability, rapid battery drain, or charging issues. Without intervention, this can result in a phone that won’t power on or experiences random shutdowns.
Liquid Exposure Without Visible Indicators
Many users assume that a phone is safe as long as it hasn’t been submerged in water. However, tiny liquid exposures, such as spills or humidity, can corrode components internally.
Common Liquid Contact Points
Charging port
SIM card tray
Speaker and microphone openings
Even a small amount of moisture entering these areas can cause corrosion that slowly damages circuitry. Visual inspection often misses early-stage corrosion.
Diagnosing Corrosion Before It Spreads
Repair specialists use moisture detection tools and board inspection techniques to identify corrosion early. Preventive cleaning and protective coatings can stop the spread, maintaining device functionality.
Battery Expansion: The Silent Destroyer
Batteries are the most critical yet vulnerable components. Expansion occurs due to chemical degradation over time, overheating, or improper charging.
Early Warning Signs Users Overlook
Slight screen lift at the edges
Increased device thickness
Rapid battery drain or sudden shutdowns
Ignoring battery expansion can cause permanent damage to the screen, logic board, or internal connectors.
Camera Module Misalignment
Dropping your phone or even applying slight pressure can misalign the camera module. Users may notice blurry photos, inconsistent focus, or camera errors that seem random.
How Minor Drops Cause Serious Focus Issues
The camera’s tiny lens assembly is sensitive. Even subtle misalignment affects autofocus performance, low-light capabilities, and image stabilization. Professional repair can realign the module precisely, restoring original quality.
Speaker and Microphone Micro-Blockages
Dust, debris, or minor internal cracks can affect audio quality. Users may experience muffled sound, weak volume, or intermittent microphone failure.
Dust, Debris & Structural Acoustic Damage
Microfiber cloth and gentle air cleaning can sometimes help externally
Internal cleaning and acoustic seal repairs require professional handling
Ignoring these issues reduces call clarity, music fidelity, and speaker performance
Preventing Unseen Phone Damage
Prevention is always better than repair. Here are expert tips:
Use quality protective cases and screen guards
Avoid exposing phones to high heat
Keep liquids away from ports and openings
Monitor battery health regularly
Perform periodic professional checkups
By adopting these habits, users can significantly reduce the risk of hidden damage.
Professional Repair vs DIY for Hidden Issues
DIY repair may be tempting, but unseen damage requires professional expertise. Technicians use advanced tools, replacement parts, and diagnostic procedures unavailable to the average user. Attempting to fix micro-cracks, battery expansion, or internal corrosion at home can worsen the problem.
Professional Advantages:
High-precision tools for logic board inspection
Genuine replacement parts
Warranty on repairs
Expert diagnosis of subtle failures
Sydney CBD Repair Centre exemplifies professional care, offering same-day repairs and using genuine parts for all devices.
FAQs
Q1: How can I tell if my phone has unseen damage?
A1: Signs include rapid battery drain, random shutdowns, blurry camera photos, unusual heating, or audio issues. Professional diagnostics can confirm hidden problems.
Q2: Can a phone survive minor drops without damage?
A2: Visible damage isn’t the only concern. Micro-cracks and internal misalignments often occur even when the phone looks intact.
Q3: How often should I check my phone for hidden damage?
A3: Annual professional checkups are recommended, or sooner if you notice unusual behavior.
Q4: Are DIY kits safe for internal repairs?
A4: Only for very basic fixes. Advanced issues like logic board micro-cracks or battery swelling require professional tools.
Q5: Can liquid exposure cause immediate failure?
A5: Not always. Tiny exposures often cause gradual corrosion, but if ignored, they can eventually disable the device.
Q6: Does insurance cover unseen damage?
A6: Policies vary. Most cover accidental drops or water damage but may exclude internal micro-damage without visible signs.
Conclusion
Hidden phone damage is far more common than most users realize. From micro-cracks to battery expansion and internal corrosion, unseen issues can dramatically shorten device life. Preventive care, professional inspections, and timely repairs are crucial for maintaining optimal performance.
For users in Sydney, Sydney CBD Repair Centre offers expert repair services, genuine parts, and same-day solutions for all major phone brands. Protect your investment by addressing both visible and invisible damage before it escalates.
David from Sydney CBD Repair Centre – The Best place to fix mobile phones as 6 Years In A Row! Top Mobile Phone Repair In Sydney. More than 2000 Positive Reviews on Google and Same Day Repairs.
We take pride in delivering exceptional repair services for all major phone brands including Apple, Samsung, Google, and more. Our expert technicians use only genuine parts and offer 90days warranty on repairs. Located in the heart of Sydney CBD, we’re your one-stop solution for all mobile device repairs.
Our commitment to excellence has earned us the trust of thousands of satisfied customers. Whether it’s a cracked screen, battery replacement, or water damage repair, we handle it all with professional care and expertise. Walk in today and experience why we’re Sydney’s #1 choice for mobile phone repairs.
Visit us for:
✓ Same Day Express Repairs
✓ Genuine Parts Guarantee
✓ Professional Technicians
✓ Competitive Pricing
✓ 2000+ 5-Star Google Reviews
✓ 6-Time Award Winner for Best Phone Repairs
Fingerprint Sensor Fix After Screen Replacement: The Ultimate 2025 Repair Guide (Power Tips + 15 Must-Know Steps)
Introduction
Replacing a smartphone screen might seem straightforward, but one of the most common issues that follows is a malfunctioning fingerprint sensor. Because modern devices rely heavily on biometric authentication for security, payments, and app access, a fingerprint sensor failure becomes more than a minor inconvenience — it disrupts your entire workflow. That’s why this 2025 ultimate guide explains everything you need to know about achieving a successful fingerprint sensor fix after screen replacement, whether you’re a technician, DIY repair enthusiast, or a phone owner curious about the process.
This article aims to simplify the complex world of biometric calibration, hardware testing, cable inspections, and system-level fixes. You’ll also learn why certain devices — especially iPhones, Samsung Galaxy, and Google Pixel — require special handling when repairing display assemblies intertwined with biometric systems. With the tech landscape evolving faster than ever, being aware of how fingerprint sensors interact with new display technologies is essential.
When your fingerprint sensor stops working after a screen replacement, it’s usually due to one of three reasons: hardware damage, calibration loss, or compatibility issues.
The Role of OEM vs Aftermarket Screens in Sensor Failures
Smartphone manufacturers such as Apple, Samsung, and Google design their fingerprint sensors to synchronize with very specific display parameters. This means:
Thickness of the display cover glass
Light reflectivity
Sensor alignment tolerance
Micro-layer sensitivity
OEM screens match these parameters exactly. However, aftermarket screens — even high-quality refurbished ones — can differ slightly. These inconsistencies can cause:
Slow fingerprint registration
Authentication failure
Permanent calibration error
Using aftermarket displays is common, but it’s important to understand their limitations in supporting fingerprint sensor accuracy.
Typical Symptoms of a Faulty Fingerprint Sensor
When attempting a fingerprint sensor fix after screen replacement, look out for:
Fingerprint option missing from settings
“Fingerprint sensor unavailable” error
Slow fingerprint setup
Failure to detect any finger
In-display sensor lighting but not responding
Home button touch not recognized (older iPhones)
Overheating in the lower screen area
Some devices even display a warning message stating the biometric hardware can’t be verified.
Before diving into repairs, you need proper tools and safe working conditions. Fingerprint sensors are extremely sensitive, and one wrong move can cause permanent damage.
Important Tools and Software You’ll Need
Precision screwdrivers
Plastic pry tools
Isopropyl alcohol (99%)
ESD-safe gloves
Thermal pressure mat
Microscope (recommended)
Brand-specific software (Samsung Odin, Apple Configurator, Google Repair Tool)
OEM-grade display replacements
UV light for under-display calibration (for optical sensors)
Safety Precautions You Shouldn’t Skip
Disconnect the battery before touching sensor flex cables.
Avoid applying pressure directly on under-display fingerprint areas.
Do not mix different adhesives — it disrupts light transmission.
Keep the workspace dust-free.
Always remove tempered glass before testing biometric systems.
15-Step Guide to Fingerprint Sensor Fix After Screen Replacement
Below are the most complete steps to restore full functionality. These methods apply to iPhone Touch ID, Samsung ultrasonic sensors, and Pixel under-display sensors.
Step 1: Inspect Flex Cables for Pressure Damage
Fingerprint sensors depend on delicate flex cables. Even a slight bend or crease can break microscopic circuits. Use a magnifier to inspect for:
Cracks
Tears
Burn marks
If damaged — replace.
Step 2: Examine the Home Button or Under-Display Sensor Hardware
For iPhones, the home button must match the logic board or Touch ID is permanently disabled.
For newer Android phones, ensure:
Sensor bracket alignment
Proper adhesive layer thickness
No trapped air bubbles
Step 3: Verify Proper Seating of Display Connectors
Loose connectors are the top cause of failed fingerprint sensors. Re-seat gently and secure the latch.
Step 4: Clean the Sensor Contact Area
Even microscopic dust or oil can prevent accurate readings. Clean with IPA and a microfiber cloth.
Step 5: Update or Reinstall Device Firmware
Firmware mismatches occur when replacing screens. Brands often patch biometric software in updates.
Step 6: Calibrate the Fingerprint Sensor
Some devices require post-repair calibration using:
Samsung’s ADB calibration suite
Pixel’s repair mode
Apple’s proprietary calibration (only at authorized centers)
Step 7: Run Diagnostics Mode
Most modern smartphones have built-in tests:
Samsung: *#0*#
Pixel: Settings > Support > Tests
iPhone: Apple internal diagnostics only
Step 8: Check for Glue Obstruction
If LOCA glue or adhesive blocks the sensor’s optical path, remove and re-apply properly.
Step 9: Replace the Fingerprint Sensor Module (If Allowed)
Some devices allow replacement; iPhones do not (due to Touch ID pairing restrictions).
Step 10: Re-seat Relevant Connectors
Recheck every connector related to:
Display
Battery
Sensor
Motherboard ports
Step 11: Measure Power Flow to the Sensor
Use a multimeter to check:
Voltage output
Continuity
Ground stability
Step 12: Restore Factory Settings (Last Resort)
Backup first. This resets all biometric trust settings.
Step 13: Use Authorized Brand-Specific Software Tools
This ensures the screen and fingerprint sensor are correctly validated.
Step 14: Test Without Tempered Glass
Some ultrasonic sensors fail with low-quality screen protectors.
Step 15: Seek Professional Repair Centre Assistance
When DIY methods fail, consult expert technicians like Sydney CBD Repair Centre for professional diagnostics and OEM-grade repairs.
Avoiding Fingerprint Sensor Issues in Future Repairs
Why Skilled Technicians Matter
Biometric systems require precision and brand-approved repair workflows. Attempting a DIY repair increases risks such as:
Sensor misalignment
Damage to flex cables
Permanent loss of biometrics
Best Practices When Repairing Modern Biometric Devices
Always use OEM screens.
Calibrate before reassembling.
Keep sensor area free of dust.
Avoid bending display panels.
Use professional-grade adhesive.
FAQs
1. Why does my fingerprint sensor stop working after a screen replacement?
Because the sensor is tightly integrated with the screen assembly, even minor changes in thickness, alignment, or flex cable tension can disrupt functionality.
2. Is it possible to fix a fingerprint sensor without replacing the screen again?
Yes, many issues can be fixed through calibration, cleaning, or cable re-seating.
3. Will Apple Touch ID work after a home button replacement?
No. Touch ID is digitally paired to the motherboard. Only Apple-authorized repair centers can restore functionality.
4. Why does my Samsung ultrasonic fingerprint sensor fail after repair?
It’s often caused by adhesive thickness, aftermarket screens, or misalignment in the sensor cavity.
5. Can I fix fingerprint issues using software only?
Software can fix calibration or firmware issues, but cannot resolve hardware faults such as damaged flex cables.
6. Does tempered glass affect fingerprint performance?
Yes. Low-quality or thick protectors can block under-display sensors entirely.
Conclusion
Fixing a fingerprint sensor after a screen replacement requires a careful balance of hardware assessment, calibration accuracy, and understanding how biometric technologies interact with modern display systems. While many issues can be corrected using the 15-step process above, some devices may require expert intervention, especially models with strict security pairing like Apple’s Touch ID.
If you want guaranteed results, it’s best to rely on a trusted and award-winning repair provider such as Sydney CBD Repair Centre, where professional technicians use genuine parts and advanced calibration tools.
David from Sydney CBD Repair Centre – The Best place to fix mobile phones as 6 Years In A Row! Top Mobile Phone Repair In Sydney. More than 2000 Positive Reviews on Google and Same Day Repairs.
📍 Visit us today for:
✓ Same Day Express Repairs
✓ Genuine Parts Guarantee
✓ Professional Technicians
✓ Competitive Pricing
✓ 2000+ 5-Star Google Reviews
✓ 6-Time Award Winner for Best Phone Repairs