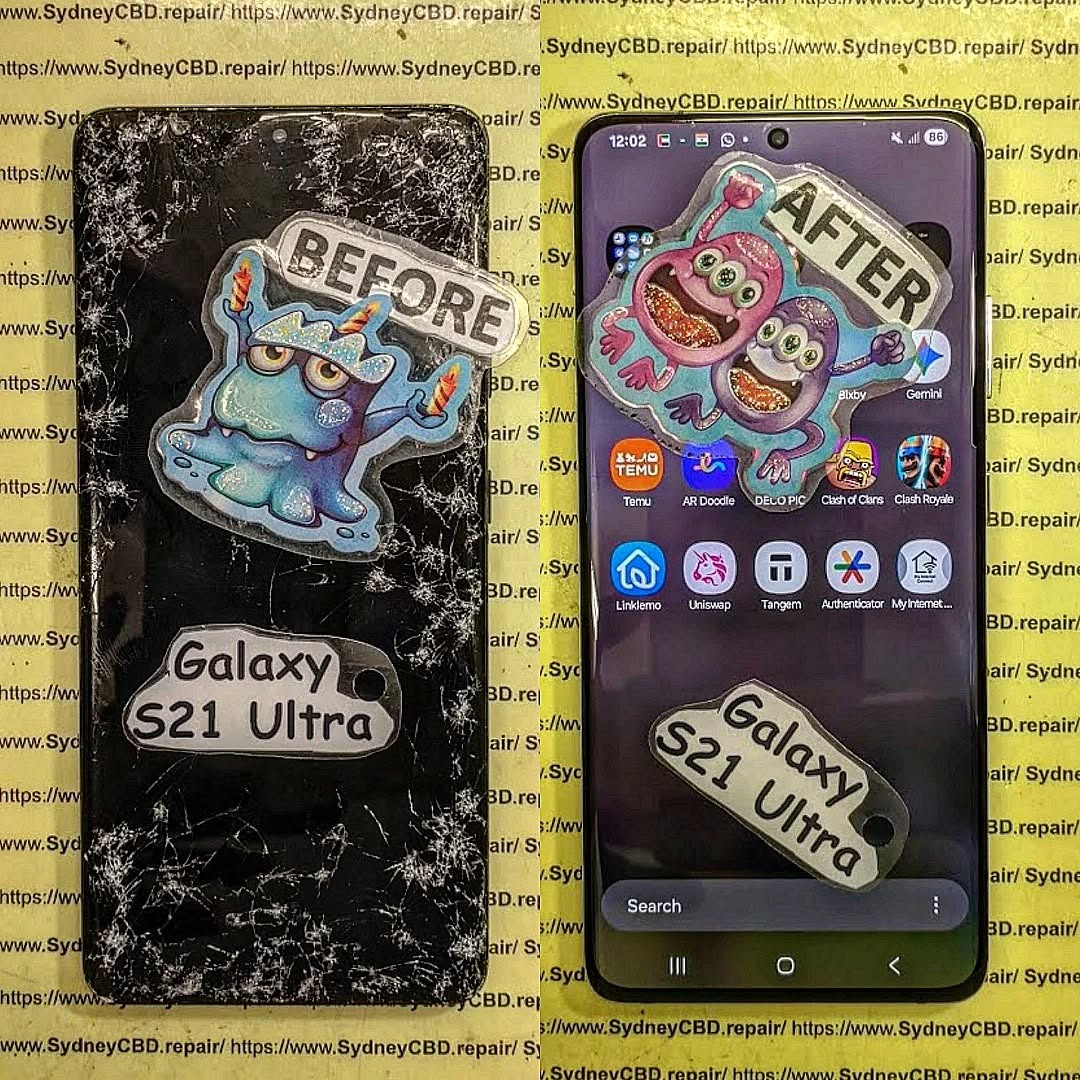
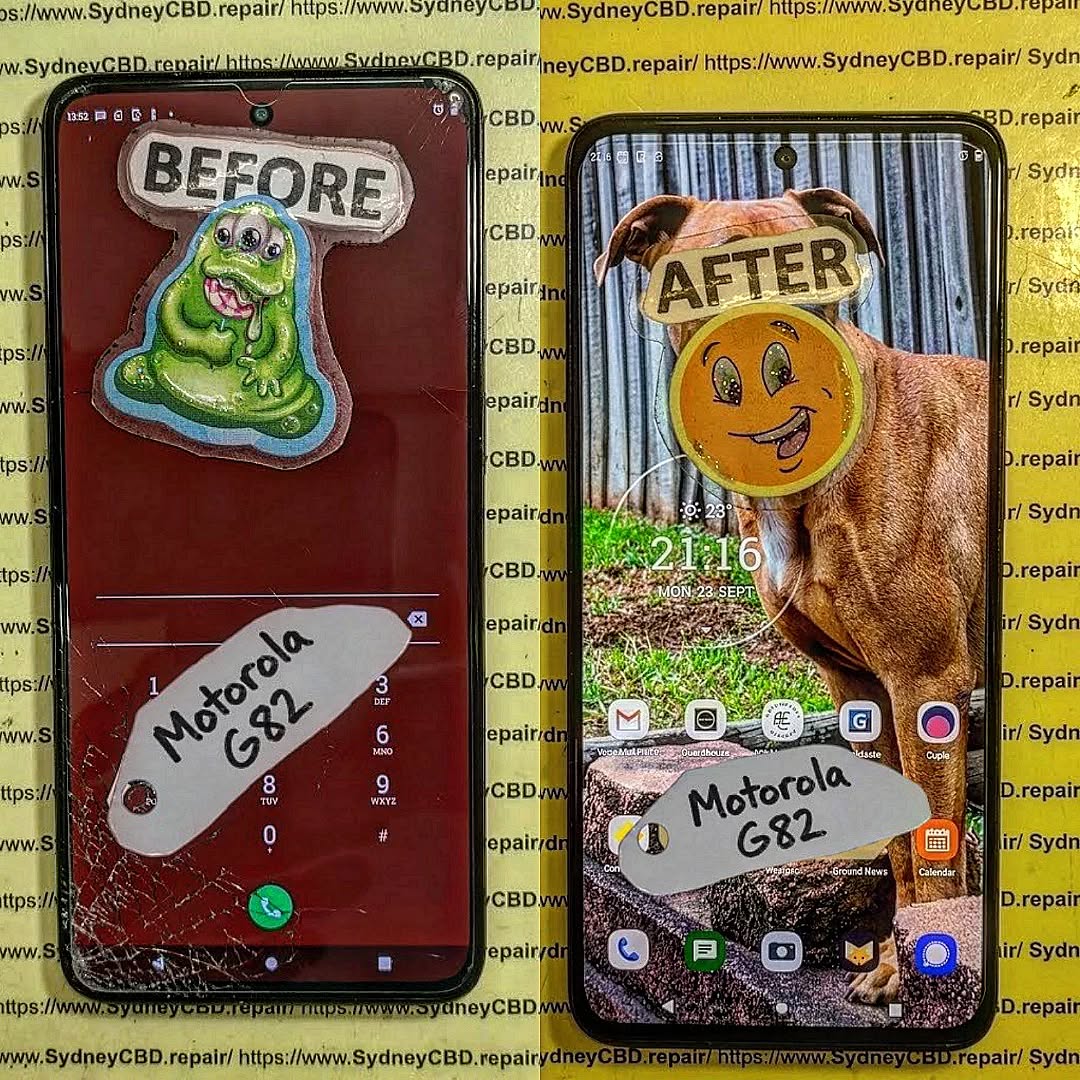
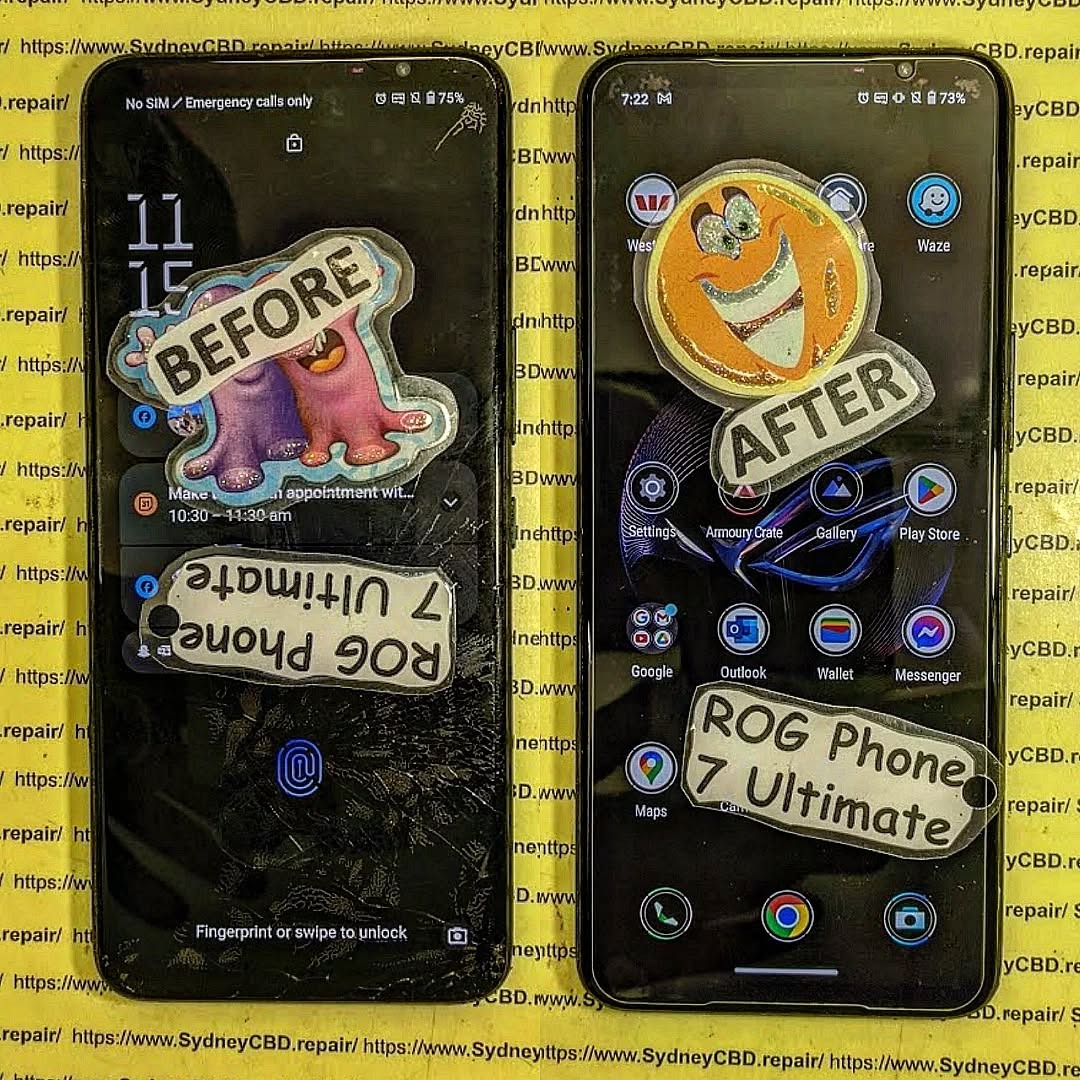
Repair or Replace? The Samsung Galaxy S21 Ultra Signal and Display Striping Dilemma Explained – 9 Critical Insights You Must Know
📱 Introduction to the S21 Ultra Signal and Display Striping Issue
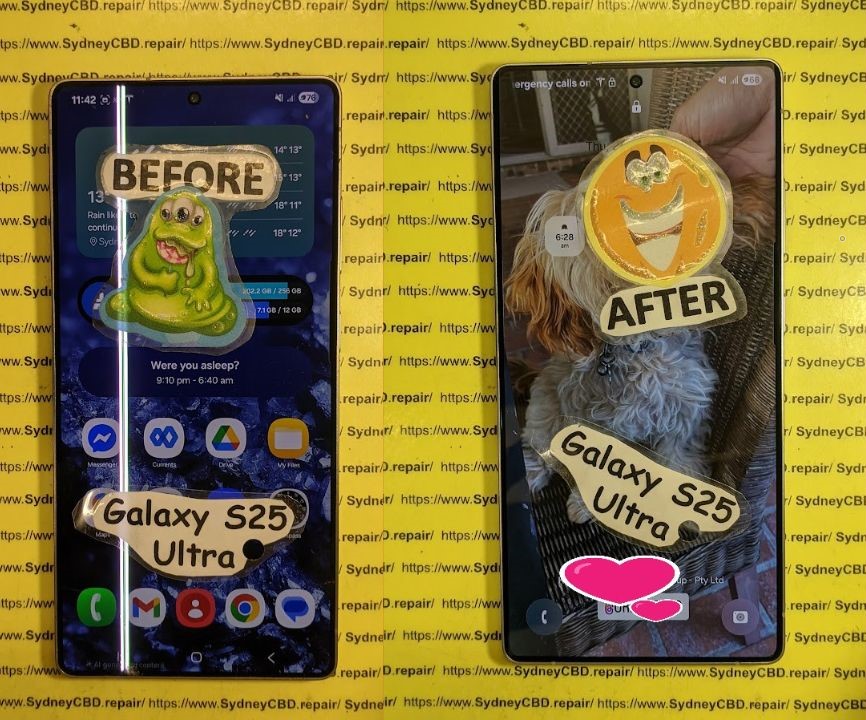
The Samsung Galaxy S21 Ultra remains one of Samsung’s most powerful flagship devices. However, even premium smartphones aren’t immune to faults. One growing concern among users is the S21 Ultra signal and display striping issue—a frustrating combination of weak reception and unusual lines across the screen.
These problems can appear suddenly, often after a drop, software update, or prolonged use. Naturally, the big question arises: Should you repair or replace the device?
Let’s break it down in a practical, no-nonsense way.
Display striping refers to vertical or horizontal lines appearing on the screen. These may flicker, stay constant, or worsen over time.
🎨 Types of Display Striping
Green or pink vertical lines
Horizontal flickering bands
Full-screen distortion
⚠️ Root Causes Behind Screen Issues
AMOLED panel damage
Loose display connectors
Faulty display IC
Water or moisture exposure
Sometimes, the display striping appears alongside signal issues, suggesting a deeper motherboard-level fault.
🛠️ Diagnosing the Problem Accurately
Before jumping to conclusions, proper diagnosis is key.
🔎 DIY Diagnostic Steps
Restart your phone
Reset network settings
Test with another SIM card
Check for visible screen damage
🧪 Professional Diagnostic Methods
Technicians use:
Signal testing tools
Thermal cameras
Microscope board inspections
Accurate diagnosis ensures you don’t waste money fixing the wrong problem.
🔧 Repair Options for Signal Issues
📡 Antenna Repairs
If the antenna is damaged or disconnected, technicians can:
Re-seat connectors
Replace antenna modules
🧠 Baseband IC Fixes
This is more complex. It involves:
Micro-soldering
Reballing or replacing chips
This type of repair requires high-level expertise but is often cheaper than replacement.
🖥️ Repair Options for Display Striping
📱 Screen Replacement
The most common solution:
Full AMOLED display replacement
Restores visual clarity instantly
🔌 Flex Cable Repairs
If the issue is minor:
Reconnecting or replacing display flex cables
Cleaning internal connectors
💰 Cost Comparison: Repair vs Replace
💵 Average Repair Costs
Issue
Estimated Cost
Antenna Repair
$50 – $120
Baseband Repair
$120 – $250
Screen Replacement
$200 – $350
📦 Replacement Cost Analysis
Buying a new flagship phone can cost:
$800 – $1200+
Clearly, repairs are often more economical.
✅ When Repair Is the Better Choice
Choose repair if:
The phone is less than 2–3 years old
Damage is isolated (screen or antenna only)
Repair cost is under 50% of device value
The S21 Ultra signal and display striping issue is usually repairable—especially when caught early.
🔄 When Replacement Makes More Sense
Replacement might be smarter if:
Multiple components are failing
The motherboard is severely damaged
Repair costs exceed half the phone’s value
Sometimes, it’s simply not worth throwing money at a failing device.
🛡️ Preventing Future Signal and Display Issues
🔧 Maintenance Tips
Keep software updated
Avoid overheating
Use certified chargers
📦 Protective Measures
Use shockproof cases
Apply screen protectors
Avoid moisture exposure
A little care goes a long way.
👨🔧 Expert Tips from Repair Technicians
Professionals agree on a few things:
Early diagnosis saves money
Cheap repairs often lead to bigger issues
Always choose experienced technicians
In fact, improper repair attempts are one of the biggest causes of worsening damage.
❓ FAQs
1. Can signal issues and display striping be related?
Yes, especially if the motherboard is affected. A single drop can impact multiple components.
2. Is screen striping always a hardware issue?
Mostly yes, though rare software bugs can mimic it.
3. How long does repair take?
Typically 1–3 hours for standard repairs.
4. Will repairs affect water resistance?
Yes, most repairs reduce original waterproofing unless resealed professionally.
5. Is it safe to keep using a striped display?
It’s not dangerous, but it may worsen and affect usability.
6. Can I fix signal issues at home?
Basic troubleshooting is fine, but hardware fixes require professional tools.
🏁 Conclusion
The S21 Ultra signal and display striping issue might seem like a deal-breaker at first glance—but in reality, it’s often manageable. With proper diagnosis and skilled repair, your device can return to peak performance without the hefty cost of replacement.
Still, the decision ultimately comes down to cost, severity, and long-term value. If repairs are affordable and effective, they’re usually the smarter choice. But if problems pile up, replacing the device may save you time, money, and frustration.
David from Sydney CBD Repair Centre – The Best place to fix mobile phones as 7 Years In A Row! Top Mobile Phone Repair In Sydney. More than 2000 Positive Reviews on Google and Same Day Repairs.
We take pride in delivering exceptional repair services for all major phone brands including Apple, Samsung, Google, and more. Our expert technicians use only genuine parts and offer 90days warranty on repairs. Located in the heart of Sydney CBD, we’re your one-stop solution for all mobile device repairs.
Our commitment to excellence has earned us the trust of thousands of satisfied customers. Whether it’s a cracked screen, battery replacement, or water damage repair, we handle it all with professional care and expertise. Walk in today and experience why we’re Sydney’s #1 choice for mobile phone repairs.
Visit us for:
✓ Same Day Express Repairs
✓ Genuine Parts Guarantee
✓ Professional Technicians
✓ Competitive Pricing
✓ 2000+ 5-Star Google Reviews
✓ 7-Time Award Winner for Best Phone Repairs
Is Fixing A Smashed Screen Worth It Or Should You Upgrade? + 7 Powerful Money-Saving Secrets
Introduction
Have you ever dropped your smartphone, looked at the cracked display, and wondered whether it’s worth repairing or simply time to upgrade? A smashed screen can be frustrating, especially when your phone is still working perfectly apart from the damage. Before spending money on a brand-new device, it’s worth exploring your repair options and comparing the costs.
In this guide, Is Fixing a Smashed Screen Worth It or Should You Upgrade? we’ll reveal 7 powerful money-saving secrets to help you make the right decision. You’ll learn how screen repair costs compare with buying a new phone, why display quality matters, how to identify hidden damage, and when upgrading makes more financial sense. We’ll also explain the benefits of choosing professional repairs and reliable replacement parts.
Whether you own an iPhone, Samsung Galaxy, Google Pixel, or another smartphone, understanding your options can help you avoid unnecessary expenses. With practical advice from the mobile repair industry, you’ll be better prepared to protect your budget, extend your phone’s lifespan, and choose the solution that offers the best value for money.
Now you’re facing a difficult question: Is fixing a smashed screen worth it or should you upgrade?
The answer depends on several factors, including the phone’s age, the cost of a replacement display, its overall condition, and whether it still meets your everyday needs. In many cases, repairing your existing phone is cheaper and more convenient than purchasing a new device. However, upgrading may make more sense when your phone has multiple serious problems or no longer receives important software updates.
The good news is that you don’t need to make this decision blindly. By understanding your options, you can protect your budget, avoid unnecessary spending, and get the best value from your smartphone.
In this comprehensive guide, we’ll explore seven money-saving secrets, compare repair and upgrade costs, explain the risks of damaged screens, and help you decide which option makes the most sense.
Not every cracked smartphone screen needs the same repair. A phone may have a few harmless-looking surface cracks, while another may suffer severe display damage that affects touch controls and internal components.
Understanding the difference is the first step toward making the right decision.
Glass Damage vs Display Damage
Most modern smartphones use several layers to create a working screen. These may include protective glass, touch-sensitive components, adhesive layers, and an LCD or OLED display panel.
A fall can damage one or several of these layers.
Glass-only damage occurs when the outer glass cracks but the image remains clear and the touchscreen works normally. Depending on the phone’s construction and the repair provider’s capabilities, glass-only refurbishment may be possible.
Display panel damage occurs when the LCD or OLED panel beneath the glass is damaged. You might notice black patches, coloured lines, flickering, distorted images, or a completely black display.
Touchscreen damage happens when touch input becomes unreliable. Some areas may stop responding, or the phone may register touches you didn’t make.
These problems can overlap. A phone with a badly cracked screen may still display images correctly, while a device with only a small visible crack could have significant internal display damage.
Common Signs Your Screen Needs Professional Attention
Look for these warning signs:
Black spots or spreading dark patches.
Green, pink, white, or purple lines.
Flickering or flashing brightness.
Touchscreen areas that no longer respond.
Ghost touches that open apps or type without your input.
A display that remains black while the phone still vibrates.
Sharp glass fragments that could injure your fingers.
A screen separating from the frame.
If the screen is lifting because the battery may be swollen, stop using and charging the phone. Don’t press the display back into place. A swollen lithium-ion battery can be dangerous and needs professional assessment.
Can You Continue Using a Cracked Phone?
Sometimes, but it’s not always wise.
Small cracks may not immediately affect the display. However, damaged glass can weaken the screen’s structure and allow moisture or dust to enter more easily. A later impact may also turn a minor crack into a much larger failure.
A cracked screen can interfere with everyday tasks, from answering messages to using banking apps. If the display becomes unreliable, accessing important information may become difficult.
Expert tip: Back up your photos, contacts, messages, and other important files as soon as possible. If the display is unstable, avoid unnecessary handling and arrange an assessment.
The decision isn’t simply about whether a repair is possible. It’s about whether repairing the phone provides better value than replacing it.
A relatively recent smartphone with a healthy battery and reliable performance is often a strong repair candidate. An older device with several failing components may be a better candidate for replacement.
When Screen Repair Is Usually Worth It
Repair is often the sensible choice when:
Your phone is relatively new.
The battery still lasts through most of your day.
The processor and storage meet your needs.
The camera, charging port, and speakers work properly.
The phone receives security updates.
A quality screen replacement costs much less than buying an equivalent phone.
You want to preserve your apps, settings, and familiar workflow.
For example, imagine you own a two-year-old premium smartphone. Its display is smashed, but the camera, battery, and internal components work well.
If a reliable screen replacement costs $300 and a comparable replacement phone costs $1,000, repairing the device could save you a substantial amount.
The exact savings depend on the quoted repair price, the replacement phone you choose, and any additional expenses.
When Upgrading May Be the Better Choice
Upgrading becomes more attractive when your phone has several problems at once.
Consider replacement if:
The battery needs replacement as well as the screen.
The charging port or motherboard has serious damage.
The phone frequently crashes or overheats.
Storage is consistently insufficient.
Security updates have ended and no supported alternative is available.
The repair cost approaches the cost of a suitable replacement device.
Essential apps no longer support your operating system.
An old phone with a broken display, weak battery, and damaged charging port may require several repairs. Paying for each component separately could be poor value.
However, don’t assume an old phone is automatically beyond repair. Some older premium devices remain fast and useful for years.
The Three Questions That Matter Most
Before choosing, ask yourself:
How much will the repair cost? Get a clear quote that identifies the screen type, parts, labour, and warranty.
How long will the phone remain useful? Consider performance, battery health, software support, and your needs.
What would replacing it really cost? Compare equivalent devices, not just the newest flagship.
The cheapest immediate option isn’t always the cheapest long-term option. A reliable repair that gives you another two years of use may be better value than replacing a perfectly capable phone.
3. Money-Saving Secret #1: Compare the Total Cost, Not Just the Repair Quote
The first money-saving secret is simple: compare the full cost of repairing your current phone with the full cost of replacing it.
Don’t base your decision on the screen repair price alone.
Calculate the Real Cost of Repair
Your repair budget may include:
Screen replacement.
Additional repairs for hidden damage.
Battery replacement, if necessary.
Post-repair testing.
Shipping or collection fees.
Any accessories required after repair.
A trustworthy technician should explain which items are necessary and which are optional.
Compare Repair and Upgrade Costs
The following figures are illustrative examples, not current market quotations.
Expense
Repair Existing Phone
Buy Replacement Phone
Screen repair or device purchase
$300
$1,000
Additional battery expense
$0
$0
Accessories
$0
$50
Data transfer or setup
$0
$0
Total estimated cost
$300
$1,050
In this example, repairing the phone saves $750 compared with purchasing the replacement.
Now imagine the repair costs $650 because the display and battery both need attention. If the replacement device costs $800, upgrading may be more attractive, especially if the current phone has other problems.
The numbers change from one device to another, so always obtain an actual quote.
Use the Cost-per-Month Method
Another useful approach is to estimate how long you’ll continue using the phone after repair.
Suppose a repair costs $300 and you expect the device to remain useful for another 18 months.
The repair cost works out to approximately $16.67 per month.
If you buy a $1,000 phone and use it for 36 months, the purchase price works out to approximately $27.78 per month, before considering resale value or other expenses.
This method isn’t a perfect financial comparison, but it helps you think beyond the initial payment.
Don’t Forget Resale Value
A repaired phone may be easier to sell than one with a smashed display. However, the repair cost doesn’t always translate into an equal increase in resale value.
Before paying for a premium screen, check the phone’s likely resale price and the cost of comparable used devices.
The key lesson: Choose the option that provides the best combination of reliability, useful lifespan, and total cost.
4. Money-Saving Secret #2: Check the Phone’s Overall Condition Before Spending Money
A screen replacement won’t fix every smartphone problem. That’s why an assessment of the entire device matters.
Check the Battery
Battery condition can make a big difference to your decision.
Warning signs of a worn battery include:
Rapid battery drain.
Unexpected shutdowns.
Slow charging.
Poor performance under heavy use.
Excessive heat during normal tasks.
If your phone has a healthy battery, replacing the display may restore its usefulness at a reasonable cost.
If the battery is near the end of its life, ask for a combined quote. This lets you compare the total repair cost against the price of a replacement phone.
Never ignore a swollen battery. It requires safe handling, not ordinary screen repair alone.
Test the Camera, Speakers, and Charging Port
Before approving a repair, tell the technician about any existing problems.
Check the following if the phone is safe to operate:
Front and rear cameras.
Microphones and speakers.
Charging and data connections.
Wi-Fi and mobile connectivity.
Physical buttons.
Fingerprint recognition or other biometric functions.
Some damage from a drop may affect components beyond the display.
For example, a hard impact could damage the screen and loosen an internal connector. Replacing the display without identifying the second problem could leave you with a phone that still doesn’t work properly.
Consider Water or Liquid Exposure
A smashed screen can leave a device more vulnerable to moisture, but a cracked display doesn’t automatically mean water has entered.
If the phone has also been exposed to rain, seawater, or another liquid, explain this during the assessment.
Liquid damage can affect connectors, circuits, and sensors. Symptoms may appear hours or days later.
Don’t charge a wet phone or use a hairdryer to speed up drying. Seek appropriate professional advice, especially if the device heats up or behaves unusually.
Make an Informed Decision
A technician’s assessment should help you understand the phone’s overall condition rather than focusing only on the visible crack.
If the rest of the device is healthy, repair may be worthwhile. If several costly components are failing, upgrading could be the smarter investment.
One reason smartphone screen repairs vary so much in price is that not all displays are made the same way.
Your replacement screen affects image quality, touch performance, brightness, power consumption, and sometimes biometric features.
What Is an LCD Screen?
LCD stands for liquid crystal display.
LCD panels use a backlight to illuminate the screen. They’re common in many budget and older smartphones.
Advantages may include:
Affordable replacement options.
Good performance for everyday tasks.
Reliable image quality when a suitable panel is installed.
However, an LCD replacement won’t necessarily match the performance of an OLED screen if your phone was designed for OLED technology.
What Is OLED or AMOLED?
OLED screens use pixels that produce their own light. AMOLED is a type of active-matrix OLED technology widely used in modern smartphones.
Depending on the device, OLED displays can offer:
Deep blacks.
High contrast.
Rich colours.
Fast response times.
Potential power savings when displaying darker content.
Premium OLED assemblies may cost more than basic LCD panels because of their construction and specifications.
Foldable phones and flagship devices can be especially expensive to repair because their displays are more complex.
Compare Screen Types Before Approving a Repair
Feature
LCD
OLED/AMOLED
Backlight
Uses a backlight
Pixels produce their own light
Black levels
Usually less deep
Can produce true black
Contrast
Depends on panel quality
Often very high
Repair cost
Often lower
Can be higher
Typical applications
Budget and some older phones
Many modern and premium phones
Compatibility
Device-dependent
Device-dependent
This is a general comparison. Actual performance depends on the panel and phone design.
Why a Cheap Replacement Can Become Expensive
A very inexpensive replacement screen may appear attractive. However, a poor-quality panel can introduce new problems, such as weak brightness, inaccurate colours, touch delays, uneven illumination, or higher power consumption.
Compatibility also matters. Certain devices use display-linked fingerprint readers, proximity sensors, or other components that require careful installation and testing.
Ask your repair provider to explain the replacement part’s specifications and whether it matches the original display technology.
The goal isn’t necessarily to buy the most expensive screen. It’s to choose a reliable, compatible component that meets your expectations.
6. Money-Saving Secret #4: Check Software Support and Long-Term Performance
A phone can have a beautiful new screen and still be a poor long-term investment if it no longer receives security updates or struggles with everyday tasks.
Software support is an important part of the repair-versus-upgrade decision.
Why Security Updates Matter
Security updates help address vulnerabilities that could put your data at risk.
If your phone has reached the end of its supported software lifecycle, check whether the manufacturer offers further updates for that particular model and region.
You can consult the official support pages for your device manufacturer:
Support periods differ by model, launch date, region, and software version. Don’t assume every phone from the same brand receives updates for the same length of time.
Is Your Phone Still Fast Enough?
Think about how you use your phone every day.
Do you mainly browse websites, send messages, use maps, and take photographs? An older phone may still handle these tasks comfortably.
Do you use demanding games, professional camera features, advanced editing tools, or large work applications? A newer phone might offer meaningful benefits.
Also consider storage. A device with limited storage may become frustrating even after a successful screen repair.
Compare the Benefits of Upgrading
A newer phone may offer:
A faster processor.
Better cameras.
Longer remaining software support.
Improved battery efficiency.
A brighter or more efficient display.
New connectivity features.
But these improvements aren’t equally valuable to everyone.
If your current device already meets your needs, paying for a new phone just because the screen broke may not be the best use of your money.
Smart approach: Repair a capable, supported device. Consider upgrading when the damaged screen is only one part of a broader decline in performance or usefulness.
7. Money-Saving Secret #5: Choose Quality Replacement Parts and a Reliable Technician
The quality of the replacement screen and the skill of the technician can determine whether your repair is a good investment.
A low quote may look appealing, but it’s important to understand what’s included.
Genuine, Original, Compatible, and Aftermarket Parts
Repair businesses may describe screens using terms such as genuine, original, refurbished, compatible, or aftermarket.
These labels aren’t always used consistently. Ask the provider to explain the exact part being supplied.
A genuine service part, a refurbished original assembly, and a third-party replacement are not necessarily equivalent.
Likewise, a high-quality aftermarket display may perform better than a low-quality alternative. The label alone doesn’t tell the entire story.
Questions to Ask Before Repair
Use these questions to compare repair providers:
What type and specification of display will be installed?
Is the part genuine, refurbished, or third-party?
Does the quote include labour and testing?
Is there a written repair warranty?
Will touch response, brightness, and display functions be tested?
Will fingerprint recognition or other relevant sensors be checked?
Could the repair affect water resistance?
What happens if the replacement screen develops a fault?
A professional provider should be willing to explain the repair clearly.
Why Installation Quality Matters
Modern smartphones often contain delicate flex cables, compact connectors, adhesive seals, and tightly fitted components.
Poor installation can damage these parts or leave the device vulnerable to dust and moisture.
A skilled technician should follow a suitable procedure for the specific model, protect internal components, and test the device after assembly.
For phones with advanced biometric features, additional checks or calibration may be necessary, depending on the model and replacement part.
Understand the Warranty
Ask what the warranty covers and what it excludes.
For example, a repair warranty may cover faults in the supplied screen but exclude new impact damage or liquid exposure. The exact terms depend on the provider.
Get the terms in writing before proceeding.
A good repair isn’t just about fitting a new display. It’s about restoring the phone’s functionality as reliably as possible.
8. Money-Saving Secret #6: Don’t Delay a Necessary Repair
Putting off a screen repair can seem like an easy way to save money. However, continuing to use a damaged phone may increase the inconvenience and risk.
Cracks Can Spread
A screen may remain usable after a minor impact, but further pressure or another drop can extend the cracks.
A display that initially works normally may develop black spots, lines, flickering, or touch problems later.
Although not every crack becomes worse, it’s wise to avoid bending, squeezing, or putting heavy objects on a damaged phone.
Broken Glass Can Cause Injuries
Sharp glass edges can cut your fingers or catch on clothing.
If you use a temporary screen protector, ensure it doesn’t put pressure on a damaged display or conceal a dangerous condition. A protector is not a substitute for repairing a badly broken screen.
Moisture Protection May Be Compromised
Many phones are designed with water-resistance features, but a damaged display or frame can affect their protective seals.
Even after a professional repair, water resistance should not be assumed unless the repair process and device testing support that claim.
Avoid exposing a cracked phone to water, steam, or high humidity.
Protect Your Data
If the screen still works, back up your data before the damage gets worse.
If touch input is unreliable, a technician may be able to advise on safe ways to access or preserve your information. Options depend on the phone model, security settings, and extent of the damage.
Don’t share your password unnecessarily. Use secure methods to protect sensitive information during service.
When to Stop Using the Phone
Stop using the device and seek professional assistance if you notice:
A swollen battery.
Unusual heat.
Smoke, a chemical smell, or hissing.
A screen lifting away from the frame.
Signs of liquid entering the phone.
If a battery appears damaged, don’t puncture, compress, or attempt to remove it yourself.
Timely repair can reduce inconvenience and help prevent a minor problem from becoming a more complicated one.
9. Money-Saving Secret #7: Consider Resale Value and the Environmental Impact
A smashed screen can affect more than your daily phone use. It can also affect resale value, trade-in offers, and the environmental cost of replacing a device.
Will Repairing Your Phone Increase Its Resale Value?
A phone with a cracked display may receive a lower trade-in offer or be harder to sell privately.
Repairing it can improve its appearance and functionality. However, you shouldn’t assume the repair cost will be recovered in full when you sell it.
Before paying for a repair, compare:
The estimated resale value with the broken screen.
The estimated resale value after repair.
The cost of the screen replacement.
The trade-in value of a newer phone.
Any fees or conditions attached to the trade-in.
If a repair costs $350 but increases the likely selling price by only $200, repairing solely to sell the phone may not make financial sense.
On the other hand, if you intend to use the phone for another two years, the value comes from continued use rather than resale alone.
Repairing Can Reduce Electronic Waste
Smartphones contain valuable materials and complex components. Replacing a device unnecessarily can contribute to electronic waste.
Repairing a phone that remains useful can extend its lifespan and delay the need for a replacement.
The environmental benefit depends on several factors, including the parts required, the repair process, and how long you continue using the device.
If you eventually replace the phone, consider an appropriate electronics recycling program rather than placing it in ordinary household rubbish.
A Practical Sustainability Decision
Repair may be a good option when:
The phone is otherwise reliable.
Suitable replacement parts are available.
The repair can restore normal operation.
You expect to keep using the device.
Replacement may be more appropriate when the phone is unsafe, extensively damaged, or no longer suitable for your needs.
The aim is to avoid unnecessary waste without sacrificing safety, reliability, or value.
10. What Determines the Cost of a Smartphone Screen Repair?
Screen repair prices vary considerably. The model, display technology, availability of parts, and complexity of installation all affect the final quote.
Factors That Affect the Price
Factor
Why It Matters
Phone model
Premium and newer models may have expensive displays
Display technology
OLED and specialised panels can cost more
Screen assembly
Some repairs require replacing a complete assembly
Frame damage
A bent or damaged frame may require additional work
Additional faults
Cameras, connectors, or other components may be affected
Part availability
Limited supply can increase cost or waiting time
Labour
Complex devices may require more time and skill
Warranty and testing
The quote may include additional quality checks
Foldable phones deserve particular attention. Their inner displays, hinges, and flexible components can make repairs more complicated than those of conventional smartphones.
Ask for an Itemised Quote
An itemised quote helps you understand exactly what you’re paying for.
It should identify the screen replacement, labour, additional parts, and any relevant warranty conditions.
Ask whether the technician has inspected the phone or whether the quote is only an estimate based on the symptoms you described.
If the repair reveals additional damage, the provider should explain the options before performing work that changes the agreed price.
Is a More Expensive Repair Always Better?
No. Price alone doesn’t guarantee quality.
Compare the part specifications, repair experience, warranty, testing procedure, and clarity of communication.
A slightly higher quote may provide better value if it includes a suitable display, careful installation, and reliable after-service support. However, you should still understand what makes the offer different.
The best option is the one that meets your needs at a fair, clearly explained price.
11. DIY Screen Repair vs Professional Repair
Some people enjoy repairing electronics themselves. Others prefer to have a trained technician handle delicate components.
Both approaches have advantages, but the right choice depends on your experience, tools, and phone model.
Advantages of DIY Repair
DIY repair may appeal to people who:
Have electronics repair experience.
Own the appropriate tools.
Can obtain a compatible replacement screen.
Understand the risks of handling batteries and fragile components.
Are comfortable following model-specific repair instructions.
It may reduce labour costs, but the total expense can still include specialised tools, replacement adhesive, parts, and the risk of mistakes.
Risks of DIY Screen Replacement
Modern phones can be difficult to open without damaging the frame, display cables, battery, or other components.
Potential problems include:
Torn flex cables.
Damaged connectors.
Punctured batteries.
Poor adhesive installation.
Dust trapped beneath the screen.
Faulty fingerprint or sensor functions.
Lost water-resistance protection.
A replacement panel that doesn’t fit or work correctly.
A cheap part and an online tutorial don’t guarantee a successful repair.
Why Professional Repair Can Be Worthwhile
Professional technicians have experience with model-specific procedures and may have access to specialised tools and suitable parts.
They can also inspect the phone for related damage and test important functions after installation.
This can be especially helpful for premium devices, foldable phones, and models with complex biometric systems.
Which Option Should You Choose?
Consideration
DIY Repair
Professional Repair
Labour expense
May be lower
Included in the quote
Tool requirements
Must be sourced or owned
Supplied by the technician
Technical experience
Essential for complex repairs
Technician provides expertise
Risk of accidental damage
Depends on skill and preparation
Reduced with competent service
Warranty
Depends on parts and supplier
May include a repair warranty
Convenience
Requires your time
Often more convenient
If you have limited repair experience, a professional assessment is generally the safer starting point.
12. Warning Signs That a Smashed Screen Has Caused Internal Damage
Sometimes, the broken screen is only the most visible part of the problem.
A strong impact can affect the frame, connectors, cameras, battery, or motherboard. Knowing the warning signs can help you avoid spending money on a repair that won’t fully restore your phone.
The Phone Vibrates but the Screen Is Black
This may indicate a damaged display, a loose connection, or another hardware fault.
A black screen doesn’t automatically mean the motherboard has failed. A proper diagnosis is needed to identify the cause.
Coloured Lines or Flickering Appear
Green, pink, or white lines may indicate display panel damage.
If the lines appear after a drop, the display assembly may need replacement. However, a technician should also inspect the connectors and surrounding components when appropriate.
Touch Controls Work Only in Some Areas
Partial touch failure can make the phone difficult to use.
Avoid repeatedly pressing hard on the damaged area. Excess pressure may worsen the damage.
The Frame Is Bent
A bent frame can prevent a new screen from sitting correctly.
Forcing a replacement display into a distorted frame may create uneven pressure, poor adhesion, or further damage.
The frame should be inspected before the replacement screen is installed.
The Phone Becomes Hot or Restarts Unexpectedly
Heat and random restarts can have several causes, including battery issues, software faults, or internal damage.
If the phone becomes unusually hot after an impact, stop using it and seek assistance. Don’t continue charging a device that may have battery damage.
Why Diagnosis Matters
Replacing the screen without identifying related problems can lead to disappointment.
A proper assessment helps establish whether the display alone needs replacement or whether additional work is necessary. It also gives you a better basis for comparing repair costs with the price of a replacement phone.
13. The Environmental Benefits of Repairing Instead of Replacing
Smartphone production requires raw materials, manufacturing energy, transportation, and packaging.
Keeping a device in use for longer can help reduce the need to manufacture a replacement, particularly when the existing phone remains functional and supported.
Repair Helps Extend Product Life
A cracked screen doesn’t necessarily mean a phone has reached the end of its useful life.
If the processor, battery, cameras, and other components remain in good condition, replacing the display may allow you to continue using the device for years.
This can also delay the cost and inconvenience of setting up a new phone.
Recycle Responsibly When Repair Isn’t Practical
Sometimes, replacement really is the better choice.
If the phone has extensive internal damage or repair costs are unreasonable, look for an approved electronics recycling service or a manufacturer take-back program.
Before recycling or trading in a device, protect your personal information. Back up important files, sign out of accounts where appropriate, and follow the manufacturer’s instructions for securely erasing your data.
If the phone has a damaged or swollen battery, tell the recycling provider before handing it over and follow its safety instructions.
14. A Simple Checklist to Decide Whether to Repair or Upgrade
Still unsure? Use this practical checklist before making a decision.
Your repair decision checklist
Select each statement that applies to your phone.
The phone is still fast enough for my needs
Everyday apps and important features work well.
The battery is in good condition
There are no signs of swelling or serious battery problems.
The phone still receives security updates
The manufacturer continues to support this model.
The repair quote is reasonable
The full cost is comfortably below a suitable replacement option.
The rest of the phone works properly
Cameras, charging, audio, and connectivity are functioning.
The replacement screen is suitable
The provider explains the part, testing, and warranty.
0 of 6 conditions met
Investigate before committing. Check the battery, software support, other faults, and total repair cost before deciding.
This checklist is a guide, not a technical diagnosis. Safety concerns or extensive internal damage take priority.
How to Use the Results
If most statements apply, repair may be the most practical option.
If several statements don’t apply, compare the total repair cost with the price of a suitable replacement device.
You should also consider how much you value your existing phone. A familiar device with important data, preferred features, and a comfortable size may be worth keeping even if a newer model offers better specifications.
On the other hand, if the current phone no longer meets your needs, upgrading could provide better long-term value.
The final decision should balance cost, reliability, security, convenience, and expected lifespan.
15. Frequently Asked Questions About Smashed Screen Repair
1. Is fixing a smashed screen worth it?
Yes, in many cases. Repair is often worthwhile when the phone is relatively new, the battery is healthy, and the rest of the device works properly. Compare the repair quote with the cost of a suitable replacement before deciding.
2. How much should I spend repairing a broken phone screen?
There isn’t one price that applies to every phone. Costs depend on the model, display technology, part availability, labour, and additional damage. Obtain an itemised quote and compare it with the price of an equivalent replacement device.
3. Should I repair my screen or buy a new phone?
Repair the screen if the phone still performs well, receives security updates, and can be restored at a reasonable cost. Consider upgrading if the device has several expensive faults, poor battery health, or limited remaining software support.
4. Can I use my phone with a cracked screen?
Possibly, if the damage is minor and the device remains safe and functional. However, cracks may spread, sharp glass can cause injuries, and moisture protection may be compromised. Back up your data and arrange a repair if the damage affects safe or reliable use.
5. Is a cheap aftermarket screen worth buying?
It depends on the screen’s quality, compatibility, and performance. A low-cost panel may offer poor brightness, colour accuracy, or touch response. Ask about the exact part, its specifications, and the repair warranty rather than choosing based on price alone.
6. Will replacing my screen erase my data?
A standard screen replacement doesn’t usually require erasing the phone’s data, but no repair process is entirely risk-free. Back up your information before service whenever possible. Ask the provider whether any reset or software procedure is expected.
7. Does a screen replacement restore water resistance?
Not automatically. A replacement may involve new adhesive and seals, but the result depends on the phone, repair procedure, and testing. Don’t assume the device has regained its original water resistance unless this has been appropriately verified.
8. Is it better to repair an old iPhone or Samsung phone?
The brand alone doesn’t determine the answer. Consider the specific model, screen cost, battery health, software support, and remaining performance. An older flagship can still be worth repairing, while a heavily damaged device nearing the end of its supported life may be better replaced.
9. Can a smashed screen damage other phone components?
Yes. A hard impact can affect the frame, display connectors, cameras, battery, or other internal components. A technician should inspect the phone if it has additional symptoms, such as overheating, unexpected restarts, or charging problems.
10. How long does a smartphone screen replacement take?
Some repairs can be completed on the same day, while others require additional time for part availability, complex disassembly, testing, or related damage. Foldable devices and phones with specialised components may take longer. Ask the repair provider for an estimate based on your model.
11. Should I repair my phone before selling it?
Not always. Compare the repair cost with the likely increase in resale or trade-in value. If the repair costs more than the value it adds, selling the phone as damaged or trading it in under the applicable conditions may make more financial sense.
12. What should I do immediately after smashing my phone screen?
Check for battery swelling, unusual heat, and other safety concerns. If the phone appears safe to use, back up your data and avoid putting pressure on the damaged screen. If the battery may be damaged, the phone is unusually hot, or liquid has entered the device, stop using it and seek professional assistance.
Conclusion: Make the Smart Choice for Your Phone and Your Budget
So, is fixing a smashed screen worth it or should you upgrade?
For many smartphone owners, repairing the existing device is a practical way to save money and extend its useful life. If the phone is fast enough, has a healthy battery, receives security updates, and works properly apart from the display, a quality screen replacement may be the smartest option.
However, upgrading can make more sense when the phone has several failing components, serious internal damage, poor performance, or limited remaining software support.
Before making your decision, compare the total repair cost with the price of a suitable replacement. Ask about the display quality, installation procedure, warranty, and any additional faults that may affect the final bill.
Most importantly, don’t choose based on price alone. A reliable repair can offer excellent value, while an unsuitable replacement screen may create more problems than it solves.
If you’re in Sydney and your phone has a smashed display, Sydney CBD Repair Centre can help you explore your repair options. Professional assessment, suitable replacement parts, and careful testing can help you decide whether restoring your current device is the right move.
A broken screen doesn’t automatically mean it’s time for a new phone. Get the facts, compare your options, and make a decision that works for your budget.
David from Sydney CBD Repair Centre – The Best place to fix mobile phones as 7 Years In A Row! Top Mobile Phone Repair In Sydney. More than 2000 Positive Reviews on Google and Same Day Repairs.
We take pride in delivering exceptional repair services for all major phone brands including Apple, Samsung, Google, and more. Our expert technicians use only genuine parts and offer 90days warranty on repairs. Located in the heart of Sydney CBD, we’re your one-stop solution for all mobile device repairs.
Our commitment to excellence has earned us the trust of thousands of satisfied customers. Whether it’s a cracked screen, battery replacement, or water damage repair, we handle it all with professional care and expertise. Walk in today and experience why we’re Sydney’s #1 choice for mobile phone repairs.
Visit us for:
✓ Same Day Express Repairs
✓ Genuine Parts Guarantee
✓ Professional Technicians
✓ Competitive Pricing
✓ 2000+ 5-Star Google Reviews
✓ 7-Time Award Winner for Best Phone Repairs
Sydney CBD Repair Centre – Where Quality Meets Reliability.
Common Screen Replacement Mistakes That Ruin Sensors And Wi-Fi Antennas: 11 Costly Errors to Avoid
Introduction: Why Screen Replacement Requires More Than a New Display
A cracked smartphone screen can make everyday tasks frustrating. Touch controls might stop responding, display lines can appear, and broken glass can make a phone uncomfortable to use. Replacing the damaged display seems like a simple solution. However, modern smartphones contain delicate sensors, antenna connections, flex cables, and tiny components that can be damaged during an inexperienced repair.
The common screen replacement mistakes that ruin sensors and Wi-Fi antennas aren’t always obvious at first. A phone might look perfect after a screen replacement but struggle to connect to Wi-Fi, switch off its display during calls, or fail to adjust screen brightness automatically. These problems can develop when technicians overlook small components, use too much heat, install incompatible replacement parts, or fail to test the phone properly.
Fortunately, many of these problems are preventable. With the right tools, suitable replacement parts, careful handling, and a structured testing process, technicians can replace a damaged display while protecting the phone’s essential functions.
This guide explains 11 common repair mistakes, shows how they affect different smartphone components, and outlines practical ways to avoid unnecessary damage. Whether you’re researching a DIY repair or choosing a professional phone repair service, understanding these risks can help you make a better decision.
Modern smartphones are carefully designed electronic systems. The display is only one part of a much larger assembly. Behind and around it, manufacturers position components that support calls, wireless communication, automatic brightness, biometric security, and other everyday features.
Understanding how these parts work together is the first step toward avoiding repair damage.
What sensors do inside a smartphone
Sensors help a phone respond to its surroundings and to the user’s actions. Depending on the model, these components may include:
Proximity sensor: Detects when the phone is close to your face, helping switch off the display during calls.
Ambient light sensor: Measures surrounding light so the phone can adjust screen brightness.
Fingerprint sensor: Reads a fingerprint to unlock the device or authorise certain actions.
Gyroscope and accelerometer: Detect movement, rotation, and orientation.
Front camera and related sensors: Support selfies, video calls, facial recognition, and other features.
Some smartphones use dedicated sensors, while others rely on integrated modules or virtual sensing systems. Their locations and repair requirements vary by manufacturer and model.
Why Wi-Fi antennas matter
A Wi-Fi antenna receives and transmits radio signals between your smartphone and a wireless router. Depending on the design, a phone may use multiple antenna elements and connections for Wi-Fi, Bluetooth, cellular service, or other wireless functions.
These components can be positioned around the frame, near the top or bottom of the device, or in other areas of the internal assembly.
A display replacement can affect wireless performance if a technician accidentally damages an antenna cable, bends an antenna contact, loses a grounding screw, or fails to reconnect a component properly.
A screen replacement often involves heating adhesive, opening the housing, disconnecting the battery, removing screws and brackets, and transferring selected components to the replacement display.
Each step introduces potential risks.
For example, a tool inserted too deeply can cut a flex cable. Excessive heat may damage nearby adhesives or delicate assemblies. A replacement screen with an incorrect sensor bracket can prevent a sensor from working as intended.
The important point is that a successful screen replacement must restore the phone’s functions, not merely its appearance.
11 Common Screen Replacement Mistakes That Ruin Sensors And Wi-Fi Antennas
The following mistakes can lead to expensive repairs, unreliable connectivity, or features that stop working after a display has been replaced.
Mistake 1: Using excessive heat during screen removal
Heat softens the adhesive that holds a screen to the phone’s frame. When applied correctly, it makes the display easier to separate.
However, excessive heat can damage nearby components, weaken adhesives, affect display layers, or harm sensitive flex cables and plastic parts.
The risk increases when someone uses a heat gun without controlling the temperature or concentrates heat on one small area for too long.
How to avoid it:
Use a suitable heating method and follow the model-specific repair procedure.
Never force the screen when the adhesive hasn’t released.
Heat requirements vary between devices. A procedure suitable for one phone shouldn’t automatically be used on another.
Mistake 2: Damaging proximity and ambient light sensors
Proximity and ambient light sensors are easy to overlook because they’re small and often sit close to the earpiece or front camera.
During screen removal, a technician may accidentally pull on a sensor flex cable, scratch a sensor window, damage a mounting bracket, or transfer the sensor incorrectly to the replacement assembly.
A poorly aligned sensor window can also interfere with operation, even when the sensor itself remains undamaged.
Possible symptoms include:
The screen stays on against your face during calls.
The display turns off unexpectedly.
Automatic brightness becomes unreliable.
Call controls respond poorly because the screen activates at the wrong time.
How to avoid it:
Inspect the original display before removing components. Identify which sensors must be transferred, follow the correct disassembly instructions, and ensure that each sensor sits in its intended position.
After assembly, test the phone during a call and check automatic brightness in different lighting conditions.
Mistake 3: Tearing delicate flex cables
Flex cables are thin, flexible circuits that connect the display, touch layer, sensors, buttons, cameras, and other components to the phone’s mainboard.
They may look like ordinary ribbons, but their conductive tracks can be damaged by a small tear, sharp fold, or excessive pulling force.
A common error is lifting a display without checking where its cables run. Another is pulling a connector upward before releasing its locking mechanism.
Prevention tips:
Identify the cable locations before opening the device.
Follow the correct opening direction for the particular model.
Disconnect the battery before handling display connectors whenever the service procedure permits.
Use a suitable plastic tool to release connectors carefully.
Never pull a cable to remove a connector.
Inspect cables and sockets under magnification when necessary.
If a flex cable is torn, simply reconnecting it won’t repair the damaged circuit. Depending on the component, replacement or specialist board-level repair may be required.
Mistake 4: Misplacing or damaging Wi-Fi antenna contacts
Wi-Fi problems following screen repair can be confusing. The display might work perfectly, while wireless connections become weak or unstable.
One possible cause is damage to an antenna connection during disassembly or reassembly.
Depending on the phone, antenna connections may use coaxial cables, spring contacts, conductive brackets, or other arrangements. A missing screw or incorrectly positioned contact can affect electrical continuity or the antenna’s intended grounding.
Warning signs include:
Wi-Fi reception becomes noticeably weaker.
The phone disconnects frequently from the same router.
Bluetooth performance also deteriorates.
Wireless connectivity changes after the device is moved or handled.
These symptoms don’t automatically prove antenna damage. Router problems, software faults, interference, and existing hardware defects can produce similar results.
How to avoid the mistake:
Photograph the original internal layout before disassembly. Keep screws and brackets organised, inspect antenna cables for damage, and reconnect each contact according to the manufacturer’s design.
Never assume that a spare screw or metal bracket is unimportant. Its location may be essential to the device’s electrical and radio-frequency design.
Mistake 5: Installing an incompatible replacement screen
Not every screen that fits physically is suitable for a particular smartphone.
Replacement displays can differ in connector layout, panel technology, frame dimensions, sensor openings, flex cable position, and compatibility with the phone’s software.
A low-quality or incompatible assembly may introduce touch problems, unusual brightness, inaccurate colours, or difficulties with features that depend on integrated sensors.
Some models also require configuration, calibration, or manufacturer-supported procedures after certain component replacements.
Before installing a display, check:
The exact device model and regional variant.
Connector type and position.
Display technology and supported functions.
Sensor brackets and openings.
Frame dimensions and adhesive arrangement.
Whether calibration or configuration is required.
A reputable repairer should explain the replacement part’s compatibility and the limitations of any non-original component before starting the repair.
Mistake 6: Applying too much adhesive
Adhesive secures the replacement screen and helps maintain the intended fit between the display and frame.
However, excess adhesive can spread into openings, interfere with sensor windows, cover contacts, or prevent the screen from sitting correctly.
An uneven adhesive layer may also cause gaps or pressure points that place stress on the display.
Safer approach:
Remove old adhesive carefully, clean the bonding surfaces using an appropriate method, and apply the correct adhesive in the designated areas. Avoid covering microphones, speakers, sensor windows, and other openings.
Use the recommended clamping method and curing time where applicable. Don’t force the display into place to compensate for excess adhesive or a poorly fitted replacement part.
Mistake 7: Puncturing or bending internal components
A phone’s interior is tightly packed. The battery, display cables, antenna components, cameras, and circuit boards may sit close together.
Inserting a metal tool too deeply can scratch a circuit board, cut a cable, damage an antenna element, or puncture the battery.
Bending the frame to force a screen out can create additional problems. Even a small change in frame shape may prevent the new display from seating properly.
To reduce the risk:
Follow a repair guide for the exact device.
Use opening picks with suitable depth and thickness.
Avoid sliding tools blindly beneath the screen.
Keep metal tools away from exposed battery connections.
Stop if the display resists removal.
Inspect the frame for bends before fitting the new panel.
If a battery becomes swollen, punctured, unusually hot, or starts producing smoke, stop the repair and move away from the device. Don’t continue heating, pressing, or charging it.
Mistake 8: Ignoring grounding and connector alignment
Smartphones use carefully designed electrical connections. Grounding contacts, shielding brackets, screws, and connector positions all play a role in reliable operation.
If a technician forgets a bracket, uses the wrong screw, or forces a connector into place at an angle, the device may develop intermittent faults.
A connector that looks attached may still be misaligned. Forcing it can damage the socket or its delicate contacts.
Best practices include:
Sort screws by their original locations.
Inspect connectors before reconnecting them.
Align plugs correctly and press gently.
Reinstall shielding and grounding parts as specified.
Never substitute a longer screw without verifying its suitability.
Some phones use screws of different lengths in closely spaced locations. A screw installed in the wrong position can damage the board or nearby components.
Mistake 9: Failing to protect fingerprint sensors
Fingerprint systems vary widely across smartphone models. Some use a sensor mounted in a button, others place it under the display, and some integrate biometric functions into a broader assembly.
Screen replacement may involve transferring a sensor, preserving its flex cable, maintaining the correct sensor alignment, or completing a supported calibration process.
A damaged cable or incompatible screen assembly can prevent reliable fingerprint recognition.
To prevent fingerprint sensor problems:
Identify the sensor design before disassembly.
Follow the manufacturer’s instructions for any required transfer.
Avoid scratching or bending sensor components.
Check that the replacement display supports the device’s fingerprint system.
Complete any supported calibration or setup process.
Test fingerprint recognition after the repair.
Don’t assume that a fingerprint problem always means the sensor is broken. Incorrect assembly, incompatible parts, software settings, or a calibration requirement may also be responsible.
Mistake 10: Neglecting waterproofing and sealing
Many smartphones are designed with resistance to water and dust, but their seals can be disturbed during a screen replacement.
Removing the display usually breaks or compromises some part of the original adhesive seal. If the technician doesn’t restore the appropriate sealing materials, the phone may be more vulnerable to moisture and dust.
Water resistance depends on the model, the condition of the housing, and the quality of the repair. A phone shouldn’t be considered waterproof simply because the new screen fits tightly.
How to reduce the risk:
Remove old adhesive residue properly.
Install compatible replacement seals.
Inspect the frame for damage or deformation.
Follow the manufacturer’s assembly procedure.
Perform appropriate sealing or pressure tests when supported.
Even when a phone passes a test, that doesn’t guarantee permanent water resistance under every real-world condition. Avoid deliberately immersing a recently repaired device unless its resistance has been properly verified and the manufacturer supports that use.
Mistake 11: Skipping post-repair testing
This is one of the most preventable mistakes.
A phone can turn on and display an image while other functions remain faulty. If the repairer doesn’t test sensors, Wi-Fi, touch response, and related features, the customer may discover problems hours or days later.
A proper final inspection should include:
Touchscreen response across the full panel.
Display brightness and colour consistency.
Proximity sensor operation during calls.
Ambient light sensor response, where applicable.
Fingerprint or other supported biometric functions.
Wi-Fi connectivity and signal stability.
Bluetooth and cellular connectivity.
Front camera, earpiece, and microphone.
Charging, buttons, and other relevant functions.
Testing should also compare any suspected fault with the phone’s condition before repair.
The golden rule: Don’t consider a screen replacement complete until the essential functions have been checked and any limitations have been explained to the customer.
Recognising Sensor and Wi-Fi Problems After a Screen Replacement
Even a careful repair can reveal a pre-existing fault or an unexpected compatibility issue. The key is to identify the symptoms early rather than assuming that the new screen is working correctly.
Common warning signs to watch for
Symptom
Possible cause
Recommended next step
Screen stays on during calls
Proximity sensor alignment or connection issue
Test the sensor and inspect its assembly
Automatic brightness stops working
Sensor obstruction, damage, or software issue
Check the sensor window and settings
Wi-Fi signal becomes weak
Antenna connection, grounding, or unrelated network issue
Compare signal performance and inspect connections
Bluetooth disconnects frequently
Antenna or software issue
Test other devices and inspect relevant connections
Fingerprint unlock fails
Sensor damage, incompatibility, or calibration issue
Check compatibility and supported calibration
Touchscreen has dead zones
Display defect, connector issue, or installation pressure
Test the panel and inspect the connector
Display flickers after repair
Connector, display, or power-related issue
Stop forcing the display and arrange diagnosis
Phone overheats unexpectedly
Electrical fault, battery problem, or another hardware issue
Stop using or charging it if overheating persists
These are diagnostic clues, not definitive diagnoses. Different faults can produce similar symptoms, so proper testing is essential.
What to do if Wi-Fi becomes unreliable
First, check whether other devices connect normally to the same router. Test the phone near the router and compare performance on another reliable network if possible.
If the problem started immediately after the screen replacement, contact the repair provider and explain when the issue began. Ask for the antenna connections, grounding contacts, and internal assembly to be inspected.
Avoid repeatedly opening the phone yourself if you’re unfamiliar with its internal design. Additional disassembly may create new damage or make it harder to identify the original fault.
What to do if sensors stop working
Check the phone’s settings and restart the device if appropriate. For a proximity sensor, make sure the screen protector or case isn’t covering the relevant area. For automatic brightness, confirm that the feature is enabled.
If the problem remains, a technician should inspect the sensor assembly, connector, replacement screen compatibility, and any model-specific calibration requirements.
If a sensor was functioning before the repair but fails immediately afterward, tell the repairer. That timing is useful diagnostic information, although it doesn’t by itself establish the cause.
DIY Screen Replacement Versus Professional Repair
DIY screen replacement can be rewarding for people with suitable skills, tools, and experience. However, modern smartphones are often more difficult to repair than older devices because they use tightly packed assemblies, strong adhesives, delicate connectors, and integrated components.
The right choice depends on your experience, the value of the device, the replacement part, and your willingness to accept the risk of additional damage.
Comparing the two approaches
Factor
DIY repair
Professional repair
Initial cost
May be lower if you already own suitable tools
Includes labour and parts
Tools
Must be purchased or sourced
Usually supplied by the repairer
Technical knowledge
Essential for safe disassembly
Should be provided by an experienced technician
Sensor handling
Depends on individual skill
Should follow model-specific procedures
Antenna inspection
May be overlooked without experience
Can be included in diagnostic testing
Part selection
Quality and compatibility must be verified
A reputable provider can explain available options
Testing
Depends on your tools and knowledge
Can include a structured functional check
Repair warranty
Depends on the part supplier and circumstances
Depends on the provider’s written terms
Professional repair isn’t automatically perfect, and DIY work isn’t automatically unsuccessful. What matters is the quality of the procedure, the suitability of the parts, and the testing performed afterward.
When DIY repair may be reasonable
A DIY repair may be suitable if you have previous electronics repair experience, access to model-specific instructions, appropriate tools, and a reliable replacement assembly.
Before starting, review a trusted repair guide and check whether the model requires special tools, sensor transfers, calibration, or other procedures.
The iFixit repair guide library is a useful starting point for researching device-specific disassembly procedures and repair considerations.
When professional repair is the safer option
Consider a professional service if the phone has an under-display fingerprint reader, a complex folding display, a damaged frame, previous liquid exposure, or a history of unexplained connectivity problems.
Professional diagnosis is also sensible when you need to preserve valuable data, when the replacement display is expensive, or when a previous repair has already caused additional faults.
Ask the repairer which parts will be used, whether any original components need transferring, what testing is included, and what warranty applies.
A Practical Checklist for Protecting Sensors and Wi-Fi Antennas
Prevention starts before the first tool touches the device. A structured checklist helps reduce avoidable errors and makes it easier to identify problems if something goes wrong.
Before opening the phone
Record the exact device model and variant.
Check the screen assembly’s compatibility.
Test the existing sensors and connectivity.
Document existing damage and reported symptoms.
Back up important data.
Obtain the correct repair instructions and tools.
Check the battery for swelling or other signs of damage.
During the replacement
Follow the correct opening procedure.
Control heat and avoid prolonged exposure.
Keep track of screws, brackets, and shielding.
Disconnect and reconnect flex cables carefully.
Protect antenna contacts and sensor assemblies.
Avoid forcing connectors or bending the frame.
Keep adhesive away from sensor windows and electrical contacts.
Follow the model-specific battery isolation procedure.
After the replacement
Inspect the screen fit and frame alignment.
Check touch response across the entire display.
Test proximity and ambient light sensors where applicable.
Verify fingerprint recognition and other supported biometric features.
Test Wi-Fi and Bluetooth connectivity.
Check cameras, speakers, microphones, and charging.
Confirm that the phone operates normally under everyday conditions.
Explain any limitations or outstanding issues before returning the device.
Why documentation matters
Before-and-after test results can help distinguish a new repair-related problem from an existing fault.
For example, recording that Wi-Fi worked normally before the repair but became unreliable afterward gives the technician a useful starting point. Similarly, documenting a pre-existing proximity sensor fault helps prevent confusion during diagnosis.
Clear records also help repair businesses communicate with customers and investigate warranty claims fairly.
Frequently Asked Questions
1. Can replacing a phone screen damage the Wi-Fi antenna?
Yes. The antenna or its connections can be damaged if a technician tears a cable, bends a contact, loses a grounding screw, or incorrectly reassembles the phone. However, weak Wi-Fi can also result from software, router, interference, or unrelated hardware problems.
2. Why does my proximity sensor stop working after a screen replacement?
Possible causes include incorrect sensor alignment, a damaged flex cable, an obstructed sensor window, an incompatible display assembly, or a calibration requirement. A technician should inspect the specific phone model rather than immediately assuming that the sensor needs replacing.
3. Can a cheap replacement screen cause sensor problems?
It can. An incompatible or poorly manufactured display may have incorrect openings, unsuitable brackets, or components that don’t work correctly with the device. However, a low price alone doesn’t prove that a screen is defective. Compatibility, manufacturing quality, and installation are all important.
4. Will replacing the screen affect Wi-Fi signal strength?
A correctly performed screen replacement shouldn’t normally reduce Wi-Fi performance. If reception deteriorates after the repair, possible causes include disturbed antenna connections, damaged cables, missing grounding hardware, or an unrelated fault that happened around the same time.
5. How can I tell whether a sensor is damaged or simply misaligned?
Symptoms alone may not provide a clear answer. A sensor that works intermittently might have an alignment or connection problem, while a damaged cable or component may fail completely. Model-specific diagnostics, visual inspection, and appropriate testing can help identify the cause.
6. Does a professional screen replacement guarantee that water resistance is preserved?
No. Water resistance depends on the phone’s original design, condition, replacement seals, and assembly quality. Even when suitable seals are installed and testing is performed, permanent water resistance can’t be guaranteed under every condition. Ask the repair provider what sealing procedures and limitations apply.
7. Should I continue using my phone if Wi-Fi stops working after repair?
You may be able to use other functions, but arrange an inspection if the problem started immediately after the repair. If the device also becomes unusually hot, smells burnt, shows battery swelling, or behaves erratically, stop using and charging it until it has been assessed safely.
8. What should I ask a repair shop before replacing my screen?
Ask whether the replacement display is compatible with your exact model, whether sensors or other components need transferring, whether calibration is required, and which functions will be tested. You should also ask about the repair warranty, adhesive and sealing procedures, and what happens if a problem appears after the repair.
Conclusion: Protect Your Phone Beyond the Screen
A smartphone screen replacement involves much more than removing cracked glass and fitting a new display. Sensors, Wi-Fi antennas, flex cables, grounding contacts, and other internal components must be handled with care throughout the repair.
The most common mistakes include excessive heat, careless cable handling, incorrect sensor alignment, incompatible screens, misplaced antenna contacts, poor adhesive application, and inadequate post-repair testing. Fortunately, these risks can be reduced through proper preparation, model-specific repair procedures, suitable replacement parts, and careful quality checks.
If you’re considering a DIY repair, make sure you have the necessary tools and technical knowledge before starting. If you want to reduce the risk of further damage, choose an experienced repair provider that understands your phone’s internal design and tests its essential functions after the repair.
At Sydney CBD Repair Centre, our goal is to help customers restore their devices with quality parts, professional care, and dependable service. Whether you’re dealing with a cracked display, sensor issues, or connectivity problems after a repair, getting the right diagnosis is the first step toward a reliable solution.
A great screen repair doesn’t just make your phone look new. It helps restore the performance and functionality you depend on every day.
David from Sydney CBD Repair Centre – The Best place to fix mobile phones as 7 Years In A Row! Top Mobile Phone Repair In Sydney. More than 2000 Positive Reviews on Google and Same Day Repairs.
We take pride in delivering exceptional repair services for all major phone brands including Apple, Samsung, Google, and more. Our expert technicians use only genuine parts and offer 90days warranty on repairs. Located in the heart of Sydney CBD, we’re your one-stop solution for all mobile device repairs.
Our commitment to excellence has earned us the trust of thousands of satisfied customers. Whether it’s a cracked screen, battery replacement, or water damage repair, we handle it all with professional care and expertise. Walk in today and experience why we’re Sydney’s #1 choice for mobile phone repairs.
Visit us for:
✓ Same Day Express Repairs
✓ Genuine Parts Guarantee
✓ Professional Technicians
✓ Competitive Pricing
✓ 2000+ 5-Star Google Reviews
✓ 7-Time Award Winner for Best Phone Repairs
Sydney CBD Repair Centre – Where Quality Meets Reliability.
The Smartphone Repair Tips For Beginners: 15 Essential Steps You Can’t Miss
📱 Introduction
Smartphones are essential tools in modern life, and when they break, it can feel like everything comes to a halt. The good news? With the right guidance, even beginners can handle basic smartphone repairs. This guide will walk you through 15 essential steps to repair your phone safely and effectively.
Whether it’s a cracked screen, fading battery, or speaker issue, knowing how to troubleshoot and fix common problems will save you money and extend your phone’s life. So grab your toolkit and let’s get into the essentials.
💡 Always cross-check part numbers and ensure warranty terms are provided.
❌ 14. Common Mistakes to Avoid
Rushing the process
Using the wrong tools
Not disconnecting the battery first
Skipping screen tests before final assembly
Forgetting screws or mixing them up
Take your time and double-check each step.
🧑🔧 15. Benefits of Professional Repair Services
Sometimes, DIY isn’t the best option. Professional repair services offer:
Genuine parts with warranties
Trained technicians with specialized tools
Faster turnaround times
Better diagnostics for deep hardware issues
📍 If you’re in Sydney, visit David at Sydney CBD Repair Centre—trusted by over 2000 customers and 6-time award winner for best phone repair!
❓ FAQs
1. Is it safe to repair my phone at home?
Yes, if you follow safety procedures and use proper tools. Avoid complex motherboard repairs unless you’re trained.
2. What’s the hardest part of smartphone repair?
Handling delicate parts like flex cables and reassembling the phone without damaging components.
3. Will DIY repair void my warranty?
Yes. Once the device is opened, most manufacturers void the warranty.
4. Can I repair a water-damaged phone myself?
Minor water damage can sometimes be fixed, but extensive corrosion requires professional care.
5. How do I know if my battery needs replacement?
If your phone shuts off randomly, charges slowly, or the battery swells, it’s time to replace it.
6. Where can I get quality phone parts in Sydney?
Sydney CBD Repair Centre sources genuine parts and offers 90-day warranties on repairs.
✅ Conclusion
Smartphone repairs may seem intimidating, but with the right knowledge and tools, you can handle many common issues yourself. Whether you’re replacing a screen, fixing a charging port, or recovering from water damage, always proceed with care.
However, for more complex problems, trusting professionals like Sydney CBD Repair Centre ensures your device gets the expert attention it needs.
Beyond Phone Screens: Replacing Dead Batteries and Malfunctioning Charge Ports – The Ultimate Power Guide 7
Introduction: Why Power Issues Matter More Than Screens
When people think about phone repairs, cracked screens usually steal the spotlight. However, beyond screens, replacing dead batteries and malfunctioning charge ports is often far more important for long-term usability. A phone with a flawless display is useless if it won’t turn on or charge reliably.
Dead batteries and faulty charging ports are among the most common smartphone issues worldwide. They creep up gradually, then suddenly your phone shuts down at 40% or only charges at a strange angle. These problems affect productivity, safety, and even data security. That’s why understanding battery replacement and charging port repair is critical for every smartphone owner.
In this guide, we go beyond screens to explore how power systems work, how to diagnose issues correctly, and when professional repair is the smartest move.
Modern smartphones rely on lithium-ion or lithium-polymer batteries. These batteries store energy chemically and release it when needed. Each full charge cycle slightly degrades the battery. Over time, capacity drops, and the phone can no longer hold enough charge to last the day.
Key facts:
Average battery lifespan: 2–3 years
Typical charge cycles: 300–500
Degradation is normal and unavoidable
Once capacity falls below 80%, performance issues become noticeable.
The Role of the Charging Port
The charging port acts as the gateway between external power and the internal battery. It handles:
Power input
Data transfer
Fast-charging communication
Because it’s exposed, the charging port is vulnerable to dust, moisture, and physical stress. Even minor damage can disrupt charging consistency.
A failing battery doesn’t always die suddenly. Common signs include:
Rapid battery drain
Phone shutting down unexpectedly
Slower performance during low charge
Overheating during normal use
These symptoms often appear gradually, making them easy to ignore.
Physical Warning Signs
Some issues are visible:
Battery swelling causing screen lift
Phone feeling unusually warm
Back panel separating slightly
If you notice swelling, stop using the device immediately. It’s a safety hazard.
Common Causes of Battery Failure
Age and Charge Cycles
Every charge cycle reduces battery health. Even with perfect care, batteries wear out. Heavy users reach this point faster, especially gamers and streamers.
Heat, Software, and User Habits
Heat is the enemy of battery health. Causes include:
Leaving phones in hot cars
Heavy multitasking
Poorly optimized apps
Software bugs can also drain batteries faster, but hardware degradation remains the leading cause.
Diagnosing Charging Port Problems
Dirt, Damage, and Internal Faults
Most charging port issues start with lint and debris. Pocket dust compacts over time, blocking proper cable contact. However, repeated forceful plugging can loosen internal pins.
Port vs Cable vs Adapter Issues
Before assuming port failure:
Try a different cable
Test another adapter
Use a different power outlet
If problems persist, the port itself may need repair or replacement.
Dead Battery vs Faulty Charging Port
Distinguishing between the two saves money. Here’s a quick comparison:
Symptom
Likely Cause
Charges only at certain angles
Charging port
Drains extremely fast
Battery
Won’t power on but shows charging icon
Battery
No response when plugged in
Port or motherboard
Professional diagnostics are often the safest way to be sure.
Battery Replacement: What to Expect
Professional Replacement Process
A professional battery replacement involves:
Full device inspection
Safe removal of adhesive-sealed components
Installation of a compatible, high-quality battery
Calibration and testing
This process minimizes risk and ensures optimal performance.
Time, Cost, and Warranty
Most battery replacements take 30–60 minutes. Costs are significantly lower than buying a new phone. Reputable repair centers offer warranties, giving peace of mind.
According to consumer repair data from iFixit, battery replacement is one of the highest-value repairs for extending phone lifespan.
Charging Port Repair and Replacement
Cleaning vs Replacement
Not all ports need replacement. Professional ultrasonic cleaning can restore connectivity if debris is the issue. However, bent or broken pins require full port replacement.
Soldering and Micro-Component Risks
Charging ports are often soldered to the motherboard. Improper handling can damage surrounding components. That’s why expert technicians and proper tools matter.
DIY Repairs: Are They Worth It?
DIY repair kits are tempting, but risks include:
Damaging flex cables
Breaking screens
Voiding warranties
While DIY may work for older phones, modern devices are tightly sealed. Professional repair usually costs less than fixing DIY mistakes.
Cost Comparison: Repair vs Replacement Phone
Option
Average Cost
Lifespan
Battery replacement
Low
1–2 years
Charging port repair
Moderate
1–3 years
New phone
High
3–5 years
Repairing power issues is often the most cost-effective choice.
How to Extend Battery and Port Lifespan
Practical tips:
Avoid overnight charging
Use certified chargers
Keep ports clean
Avoid extreme heat
Update software regularly
Small habits go a long way.
Environmental and Safety Considerations
Repairing instead of replacing reduces e-waste. Batteries contain harmful chemicals that require proper disposal. Professional repair centers recycle responsibly, helping the environment while saving money.
FAQs
1. How long does a phone battery replacement last?
A quality replacement battery typically lasts 1–2 years with normal use.
2. Can a charging port be repaired without replacement?
Yes, if debris is the issue. Cleaning often solves minor problems.
3. Is it safe to use a phone with a swollen battery?
No. Stop using it immediately and seek professional repair.
4. Does fast charging damage batteries faster?
Slightly, but modern phones manage heat efficiently. Quality chargers matter.
5. How do I know if my phone needs a new battery or port?
Professional diagnostics are the most accurate method.
6. Is repairing older phones worth it?
If performance meets your needs, repair is often cheaper than replacement.
Conclusion: Power Restored, Device Revived
Going beyond screens, replacing dead batteries and malfunctioning charge ports can dramatically extend your phone’s life. These repairs restore reliability, save money, and reduce environmental impact. With professional service, your device can feel new again—without the cost of replacement.
David from Sydney CBD Repair Centre – The Best place to fix mobile phones as 6 Years In A Row! Top Mobile Phone Repair In Sydney. More than 2000 Positive Reviews on Google and Same Day Repairs.
We take pride in delivering exceptional repair services for all major phone brands including Apple, Samsung, Google, and more. Our expert technicians use only genuine parts and offer 90days warranty on repairs. Located in the heart of Sydney CBD, we’re your one-stop solution for all mobile device repairs.
Our commitment to excellence has earned us the trust of thousands of satisfied customers. Whether it’s a cracked screen, battery replacement, or water damage repair, we handle it all with professional care and expertise. Walk in today and experience why we’re Sydney’s #1 choice for mobile phone repairs.
Visit us for:
✓ Same Day Express Repairs
✓ Genuine Parts Guarantee
✓ Professional Technicians
✓ Competitive Pricing
✓ 2000+ 5-Star Google Reviews
✓ 6-Time Award Winner for Best Phone Repairs
Reasons Why 2026 Foldable Screens Fail and How We Professionaly Fix Them – 9 Powerful Insights
🔍 Introduction to Foldable Screen Technology
Foldable smartphones have become one of the most exciting innovations in the mobile industry. By 2026, they’re no longer just luxury gadgets—they’re practical, powerful tools used by everyday people. Still, despite all the progress, one issue remains persistent: why 2026 foldable screens fail and how we professionally fix them is a question many users are asking.
📈 Evolution of Foldable Devices
Foldable phones started as experimental concepts. Early versions had fragile displays, bulky hinges, and limited durability. Fast forward to 2026, and manufacturers have significantly improved design, flexibility, and performance.
However, even with ultra-thin glass and refined hinges, foldable screens still face challenges that traditional smartphones don’t. These complexities make them more vulnerable to damage over time.
🌟 Why Foldables Are Popular in 2026
People love foldables because they combine portability with productivity. You get a compact phone that unfolds into a tablet-like experience—perfect for multitasking, gaming, and streaming.
But here’s the catch: the same flexibility that makes these devices appealing also introduces structural weaknesses. That’s where understanding why 2026 foldable screens fail and how we professionally fix them becomes essential.
Recognizing early warning signs can save you money and prevent complete failure.
👁️ Visual Defects and Flickering
If you notice:
Dead pixels
Flickering lines
Black spots
Your screen may already be compromised.
✋ Touch Sensitivity Problems
Delayed or unresponsive touch input is another red flag. This could indicate damage beneath the display surface.
🔊 Unusual Sounds from the Hinge
Hear clicking or grinding noises? That’s not normal.
It often means internal hinge components are worn or obstructed.
❌ Why DIY Repairs Often Make It Worse
Trying to fix a foldable screen yourself might seem like a good idea—but it rarely ends well.
🛠️ Lack of Specialized Tools
Foldable devices require precision tools and controlled environments. Without them, even opening the device can cause damage.
⚡ Risk of Further Damage
One wrong move can:
Tear flexible display cables
Crack the screen further
Damage internal circuits
📉 Warranty Voids
Most manufacturers void warranties if the device is opened by unauthorized personnel.
So instead of saving money, DIY repairs often lead to higher costs.
🛠️ How We Professionally Fix Foldable Screens
Now let’s dive into the real solution: how we professionally fix foldable screens.
🔍 Diagnostic Procedures
We start with a full diagnostic check:
Hardware testing
Software analysis
Structural inspection
This ensures we identify the root cause—not just the symptoms.
🔬 Advanced Repair Techniques
Professional repair involves:
Controlled disassembly
Precision hinge adjustments
Micro-soldering when needed
These techniques require expertise and experience.
✅ Genuine Parts Replacement
We only use high-quality or genuine replacement parts to ensure durability and performance.
This is critical for maintaining the integrity of foldable displays.
🔄 Step-by-Step Professional Repair Process
Here’s how a professional repair typically works:
🔎 Device Inspection
We assess:
Screen condition
Hinge functionality
Internal damage
🧹 Disassembly and Cleaning
The device is carefully opened and cleaned to remove dust and debris.
📱 Screen Replacement
If necessary, the damaged screen is replaced with a new one using specialized tools.
🧪 Testing and Calibration
Finally, we:
Test touch sensitivity
Calibrate display settings
Ensure smooth folding operation
🛡️ Preventing Foldable Screen Failures
Prevention is always better than repair.
🤲 Proper Handling Techniques
Avoid pressing on the screen
Fold gently
Keep sharp objects away
🧽 Maintenance Tips
Clean regularly
Keep the hinge area dust-free
Avoid extreme temperatures
📦 Protective Accessories
Use:
Protective cases
Screen protectors designed for foldables
💰 Cost of Foldable Screen Repairs in 2026
📊 Factors Affecting Pricing
Repair costs depend on:
Device model
Severity of damage
Availability of parts
⚖️ Repair vs Replacement
Sometimes, replacing the entire screen is more cost-effective than partial repairs.
A professional technician can guide you on the best option.
🔮 Future of Foldable Technology
🧬 Innovations in Materials
Manufacturers are exploring:
Self-healing materials
Stronger flexible glass
Improved hinge designs
🚀 Improved Durability Expectations
Future foldables will likely be more durable—but for now, proper care and professional repair remain essential.
❓ FAQs
1. Why do foldable screens fail more than regular screens?
Foldable screens are more complex and flexible, making them more prone to wear, stress, and environmental damage.
2. Can a foldable screen be fully repaired?
Yes, most foldable screens can be repaired or replaced professionally, depending on the extent of the damage.
3. How long does a foldable screen repair take?
Typically, repairs take a few hours to a full day, depending on the issue.
4. Is it worth repairing a foldable phone?
In most cases, yes—especially if the device is high-end and relatively new.
5. How can I prevent my foldable screen from failing?
Handle it gently, keep it clean, and avoid exposing it to dust and pressure.
6. Are foldable phones getting more durable?
Yes, newer models are improving, but they still require careful handling.
🏁 Conclusion
Understanding why 2026 foldable screens fail and how we professionally fix them empowers you to make smarter decisions. While these devices offer cutting-edge functionality, they demand proper care and expert repair when issues arise.
Instead of risking costly mistakes with DIY fixes, trusting professionals ensures your device gets the precision care it needs. With the right approach, your foldable phone can continue delivering top-tier performance for years to come.
David from Sydney CBD Repair Centre – The Best place to fix mobile phones as 7 Years In A Row! Top Mobile Phone Repair In Sydney. More than 2000 Positive Reviews on Google and Same Day Repairs.
We take pride in delivering exceptional repair services for all major phone brands including Apple, Samsung, Google, and more. Our expert technicians use only genuine parts and offer 90days warranty on repairs. Located in the heart of Sydney CBD, we’re your one-stop solution for all mobile device repairs.
Our commitment to excellence has earned us the trust of thousands of satisfied customers. Whether it’s a cracked screen, battery replacement, or water damage repair, we handle it all with professional care and expertise. Walk in today and experience why we’re Sydney’s #1 choice for mobile phone repairs.
Visit us for:
✓ Same Day Express Repairs
✓ Genuine Parts Guarantee
✓ Professional Technicians
✓ Competitive Pricing
✓ 2000+ 5-Star Google Reviews
✓ 7-Time Award Winner for Best Phone Repairs
Why Your ROG Phone 6 Is Bootlooping After a Professional Screen Repair: 9 Powerful Reasons You Need to Know
Introduction
The ROG Phone 6 bootloop after screen repair issue can be frustrating, especially when you expected your device to return in perfect working condition. For gamers and power users, the ASUS ROG Phone 6 is more than just a smartphone—it is a high-performance gaming machine designed for speed, reliability, and immersive experiences.
However, some users notice that their phone becomes stuck on the ASUS logo, repeatedly restarts, or fails to complete the startup sequence after a screen replacement. While it may seem like the repair itself caused the problem, the reality can be more complex.
This article explores the most common reasons behind a ROG Phone 6 bootloop after screen repair, how professionals diagnose the issue, and what steps you can take to get your device back to normal.
A bootloop occurs when a smartphone repeatedly attempts to start but never reaches the home screen. Instead, the device cycles through the startup logo continuously.
Common symptoms include:
ASUS logo appearing repeatedly
Device restarting every few seconds
Inability to access Android
Excessive heat during startup
Battery drain while rebooting
When a ROG Phone 6 bootloop after screen repair happens, many users assume the replacement display is defective. In reality, several hardware and software factors may contribute to the problem.
What Happens During a Professional Screen Repair
Modern smartphones are incredibly compact. Replacing a screen on a ROG Phone 6 involves:
Opening the device carefully
Disconnecting the battery
Removing display connectors
Installing the replacement screen
Reconnecting internal components
Testing all functions
Reassembling the phone
Because so many sensitive parts are involved, even a minor issue can potentially trigger startup problems.
A ROG Phone 6 bootloop after screen repair may present several warning signs:
Symptom
Possible Cause
Endless ASUS logo
Hardware connection issue
Vibrates repeatedly
Power circuit problem
Screen flashes then restarts
Display communication failure
Device enters recovery mode
Software corruption
Random shutdowns
Battery connection fault
Recognizing these symptoms can help technicians identify the root cause faster.
1. Loose Internal Connectors
One of the most common causes of a ROG Phone 6 bootloop after screen repair is a loose connector.
Inside the device are multiple flex cable connections that link components to the motherboard. If even one connector isn’t seated correctly, communication between critical hardware components may fail.
Affected connectors may include:
Display flex cable
Battery connector
Charging board cable
Side-button flex cable
Fortunately, this issue is often repairable without replacing additional parts.
Why It Happens
During reassembly, connectors may appear attached while not fully locked into position. Slight movement after repair can eventually cause intermittent contact.
2. Damaged Display Flex Cable
The display flex cable is extremely delicate.
Even experienced technicians can encounter challenges when removing broken screens because adhesive and glass fragments may place stress on the cable assembly.
A damaged flex cable can cause:
Bootlooping
Blank display
Flickering
Touch malfunction
When the motherboard cannot properly communicate with the display subsystem, startup issues may occur.
Symptoms of Cable Damage
Phone powers on but screen remains black
Logo appears briefly then disappears
Touchscreen fails completely
Professional testing equipment helps verify whether the display assembly is functioning correctly.
3. Battery Connector Issues
The battery must be disconnected before screen replacement.
If the battery connector isn’t properly seated afterward, power delivery becomes unstable.
The result may be:
Random restarts
Startup failures
Charging abnormalities
Continuous reboot cycles
A ROG Phone 6 bootloop after screen repair can often be traced back to inconsistent power reaching the motherboard.
Why Stable Power Matters
Modern smartphones require precise voltage regulation. Even a slight interruption can trigger system resets.
Technicians typically inspect:
Battery health
Connector integrity
Voltage output
Charging circuitry
4. Motherboard Damage During Repair
Although uncommon, motherboard damage remains a possibility during any smartphone repair.
The ROG Phone 6 contains densely packed components, including:
Power management ICs
Memory chips
CPU
Storage modules
Accidental pressure, tool slips, or excessive heat may affect these components.
Potential Motherboard Issues
Physical Damage
Tiny surface-mounted components may become dislodged.
Trace Damage
Circuit pathways can become compromised.
Solder Joint Problems
Existing weak solder joints may fail during disassembly.
Motherboard-level faults often require advanced microsoldering expertise.
5. Software Corruption Coincidentally Appearing After Repair
Sometimes a ROG Phone 6 bootloop after screen repair isn’t caused by the repair at all.
Software corruption may already exist and simply become apparent when the device is powered down and restarted.
Examples include:
Failed Android updates
Corrupted system files
Rooting modifications
Firmware conflicts
Diagnosing Software Problems
Technicians may attempt:
Safe Mode boot
Recovery Mode access
Firmware reinstallation
System diagnostics
If software corruption is the culprit, data recovery may still be possible.
6. Incompatible Replacement Screen Components
Not all replacement screens are equal.
Using low-quality or incompatible parts may cause communication issues between the display and motherboard.
Problems may include:
Display initialization failures
Touch controller errors
Excessive power draw
Device instability
This is one reason reputable repair centers prioritize premium-quality replacement parts.
Risks of Cheap Components
Reduced durability
Poor display quality
Inconsistent performance
Increased chance of future failures
Investing in quality components often saves money in the long run.
7. Static Electricity Damage
Electrostatic discharge (ESD) is a hidden threat during electronics repair.
A tiny static shock invisible to humans can damage sensitive smartphone components.
Affected areas may include:
Display controller
Memory chips
Power ICs
Sensors
Professional workshops use ESD-safe equipment to minimize this risk.
Preventing ESD Damage
Best practices include:
Anti-static mats
Grounding straps
Controlled work environments
Proper handling procedures
While rare, static damage can contribute to a ROG Phone 6 bootloop after screen repair.
8. Improper Reassembly Procedures
Modern gaming smartphones contain numerous screws, brackets, and protective shields.
Improper reassembly can lead to:
Grounding issues
Pressure damage
Connector movement
Thermal management problems
Common Assembly Mistakes
Missing screws
Incorrect screw placement
Misaligned brackets
Pinched flex cables
Incomplete adhesive installation
Even small mistakes can have significant consequences.
9. Hidden Liquid Damage Discovered During Repair
Many smartphones arrive for screen replacement after accidental drops.
What users don’t always realize is that liquid damage may already exist internally.
When technicians open the phone, they sometimes discover:
Corrosion
Moisture residue
Oxidized connectors
Damaged circuits
These issues may worsen over time and eventually trigger bootloop symptoms.
Why Timing Can Be Misleading
A device may seem functional before repair but fail shortly afterward because pre-existing corrosion continues to spread.
This can create the impression that the repair caused the issue when underlying damage was already present.
How Professional Technicians Diagnose Bootloop Issues
Professional diagnosis follows a structured process.
Visual Inspection
Technicians inspect:
Connectors
Flex cables
Motherboard components
Electrical Testing
Measurements include:
Battery voltage
Power rail stability
Charging performance
Component Isolation
Parts are tested individually to identify faults.
Software Diagnostics
Firmware and operating system integrity are verified.
This systematic approach reduces guesswork and speeds up repair.
Attempting repeated DIY repairs may worsen the situation.
Professional diagnostics can quickly determine whether the issue is hardware-related, software-related, or both.
Frequently Asked Questions
1. Can a screen replacement directly cause a bootloop?
Yes. Loose connectors, damaged flex cables, or assembly issues can trigger a bootloop.
2. Is a bootloop always caused by the repair technician?
No. Software corruption, battery faults, and pre-existing motherboard damage can also cause startup failures.
3. Can data be recovered from a bootlooping ROG Phone 6?
In many cases, yes. Recovery success depends on the condition of the motherboard and storage chip.
4. How long does diagnosis typically take?
Most professional repair centers can perform an initial diagnosis within a few hours.
5. Will factory resetting fix the problem?
Only if software corruption is responsible. Hardware-related bootloops usually require physical repair.
6. Can liquid damage cause a delayed bootloop?
Absolutely. Corrosion often worsens gradually and may trigger issues weeks or months later.
7. Should I continue trying to restart the phone?
Repeated restart attempts generally won’t help and may increase battery stress. Professional diagnosis is recommended.
8. Is motherboard repair possible?
Yes. Many motherboard issues can be repaired using advanced microsoldering techniques.
Conclusion
Experiencing a ROG Phone 6 bootloop after screen repair can be alarming, but it doesn’t automatically mean the repair was performed incorrectly. Loose connectors, battery issues, display cable damage, software corruption, incompatible parts, motherboard faults, and hidden liquid damage can all contribute to the problem.
The key is accurate diagnosis. A qualified repair technician can systematically identify the underlying cause and recommend the most effective solution. With proper testing, quality replacement parts, and expert workmanship, many bootlooping devices can be restored successfully.
By understanding the causes and warning signs discussed in this guide, you’ll be better prepared to protect your device and make informed repair decisions in the future.
David from Sydney CBD Repair Centre – The Best place to fix mobile phones as 7 Years In A Row! Top Mobile Phone Repair In Sydney. More than 2000 Positive Reviews on Google and Same Day Repairs.
We take pride in delivering exceptional repair services for all major phone brands including Apple, Samsung, Google, and more. Our expert technicians use only genuine parts and offer 90days warranty on repairs. Located in the heart of Sydney CBD, we’re your one-stop solution for all mobile device repairs.
Our commitment to excellence has earned us the trust of thousands of satisfied customers. Whether it’s a cracked screen, battery replacement, or water damage repair, we handle it all with professional care and expertise. Walk in today and experience why we’re Sydney’s #1 choice for mobile phone repairs.
Visit us for:
✓ Same Day Express Repairs
✓ Genuine Parts Guarantee
✓ Professional Technicians
✓ Competitive Pricing
✓ 2000+ 5-Star Google Reviews
✓ 7-Time Award Winner for Best Phone Repairs
Battery Swelling and Screen Lines: Why Replacing One Might Not Fix Both – 9 Powerful Facts Every Phone Owner Should Know
Introduction
Modern smartphones are powerful, sleek, and packed with advanced technology. However, they’re also delicate devices that can suffer from multiple hardware problems at once. Two of the most frustrating issues users face are battery swelling and screen lines. While these problems may appear connected, replacing one damaged component doesn’t always fix the other.
Many phone owners assume that a swollen battery is the direct cause of display lines or flickering screens. In some cases, that’s true. Yet the reality is often more complicated. A damaged display can remain faulty even after installing a new battery, while screen replacement alone may leave dangerous battery problems unresolved.
Understanding how these issues develop can save time, money, and stress. More importantly, it can help prevent further damage to your smartphone and protect your safety.
Battery swelling occurs when gases build up inside a lithium-ion battery. These gases create pressure that expands the battery pack, causing it to bulge inside the phone.
Smartphones today rely heavily on lithium-ion technology because it’s lightweight and efficient. However, these batteries degrade over time. Once damaged, they can become unstable and dangerous.
What Causes a Battery to Swell?
Several factors contribute to battery swelling:
Overcharging
Excessive heat exposure
Physical damage
Manufacturing defects
Aging batteries
Cheap replacement chargers
Power surges
Heat is one of the biggest culprits. Leaving a phone inside a hot car or constantly gaming while charging increases internal temperatures significantly. Over time, this stress damages the battery’s chemical structure.
Using low-quality charging accessories can also accelerate deterioration. Cheap cables and adapters may deliver unstable voltage, which harms battery cells.
Early Warning Signs of Battery Swelling
Spotting battery swelling early can prevent major damage. Common warning signs include:
Warning Sign
What It Means
Screen lifting from frame
Battery pushing against display
Phone overheating
Battery instability
Reduced battery life
Internal cell degradation
Random shutdowns
Power delivery issues
Thick or bulging back cover
Expanding battery pack
If you notice any of these symptoms, stop using the phone immediately and seek professional assistance.
That’s why reputable technicians replace swollen batteries immediately rather than attempting temporary fixes.
How Technicians Diagnose Both Problems
Professional repair technicians follow a detailed inspection process to identify the true source of the issue.
Accurate diagnosis prevents unnecessary repairs and saves customers money.
Professional Inspection Process
A complete diagnostic typically includes:
Visual inspection
Battery health testing
Display functionality checks
Internal connector examination
Thermal analysis
Charging circuit testing
Technicians may disassemble the device to inspect internal pressure damage.
Testing Internal Components
Specialized tools help determine whether the screen or motherboard has suffered permanent damage.
Technicians often test:
Component
Purpose
OLED panel
Detect pixel damage
Battery voltage
Measure battery stability
Display flex cable
Check signal transmission
Motherboard circuits
Identify shorts
Charging IC
Verify power management
Without these tests, replacing parts becomes guesswork.
Repair vs Replacement: Which Option Is Better?
Deciding whether to repair or replace a phone depends on several factors.
Sometimes repairing both the battery swelling and screen lines makes financial sense. Other times, replacement is the smarter choice.
When Repair Is Worth It
Repairing the device may be worthwhile if:
The phone is relatively new
Damage is limited
Genuine parts are available
The motherboard is intact
Repair costs remain reasonable
Flagship devices often justify repair because replacement phones cost significantly more.
When It’s Time for a New Phone
Replacement may be the better option when:
Repair costs exceed device value
The motherboard is damaged
Multiple components have failed
Water damage is severe
Battery swelling caused extensive internal stress
Older devices sometimes become unreliable even after repair.
Preventing Battery Swelling and Screen Lines
Preventative care dramatically reduces the risk of both battery swelling and screen damage.
Good habits extend smartphone lifespan and improve performance.
Charging Habits That Matter
Healthy charging practices include:
Avoid overnight charging constantly
Use genuine chargers
Keep battery levels between 20% and 80%
Avoid heavy gaming while charging
Disconnect chargers during overheating
These simple habits reduce battery stress significantly.
Environmental Factors to Avoid
External conditions also play a major role.
Avoid:
Direct sunlight exposure
Hot vehicles
Humid environments
Cheap charging accessories
Excessive phone pressure inside pockets
Protective cases can help minimize physical damage, but they won’t stop internal battery deterioration entirely.
Importance of Professional Repairs
DIY repairs may seem tempting, especially with online tutorials everywhere. However, modern smartphones are extremely delicate.
Improper handling can worsen both battery swelling and screen lines.
Professional repair centers offer:
Genuine replacement parts
Safe battery disposal
Proper adhesive sealing
Water resistance restoration
Warranty-backed repairs
Experienced technicians also identify hidden issues that casual users may miss.
For official safety guidance regarding lithium-ion batteries, visit Battery University.
Frequently Asked Questions
Can battery swelling cause green lines on a phone screen?
Yes. Battery swelling can place pressure on OLED displays, damaging delicate layers and causing green or white vertical lines.
Will replacing the battery remove screen lines?
Not always. If the display has already suffered permanent damage, screen lines may remain even after battery replacement.
Is a swollen phone battery dangerous?
Yes. Swollen lithium-ion batteries can leak, overheat, catch fire, or explode if ignored.
Why does my screen still flicker after replacing the battery?
The display connector, OLED panel, or motherboard may already be damaged from heat or internal pressure.
Can screen lines disappear on their own?
Temporary lines caused by loose connectors may disappear briefly. However, permanent OLED damage usually worsens over time.
Should I stop using my phone if the battery swells?
Absolutely. Continued use increases safety risks and may cause further internal damage.
Is it cheaper to repair or replace a phone with both issues?
It depends on the phone model and damage severity. High-end phones are often worth repairing, while older devices may be better replaced.
Conclusion
Battery swelling and screen lines are serious smartphone problems that frequently appear together. However, replacing one component doesn’t always solve the other issue.
A swollen battery can permanently damage a display, while a faulty screen repair may overlook dangerous battery instability. That’s why proper diagnostics matter so much.
Understanding the relationship between battery swelling and screen lines helps users make smarter repair decisions. More importantly, it protects both device performance and personal safety.
Professional technicians can accurately identify whether the battery, screen, motherboard, or multiple components require attention. Acting quickly often prevents further damage and reduces repair costs.
If your phone shows signs of swelling, overheating, or screen distortion, don’t ignore it. Early intervention can make all the difference.
David from Sydney CBD Repair Centre – The Best place to fix mobile phones as 7 Years In A Row! Top Mobile Phone Repair In Sydney. More than 2000 Positive Reviews on Google and Same Day Repairs.
We take pride in delivering exceptional repair services for all major phone brands including Apple, Samsung, Google, and more. Our expert technicians use only genuine parts and offer 90days warranty on repairs. Located in the heart of Sydney CBD, we’re your one-stop solution for all mobile device repairs.
Our commitment to excellence has earned us the trust of thousands of satisfied customers. Whether it’s a cracked screen, battery replacement, or water damage repair, we handle it all with professional care and expertise. Walk in today and experience why we’re Sydney’s #1 choice for mobile phone repairs.
Visit us for:
✓ Same Day Express Repairs
✓ Genuine Parts Guarantee
✓ Professional Technicians
✓ Competitive Pricing
✓ 2000+ 5-Star Google Reviews
✓ 7-Time Award Winner for Best Phone Repairs
Sydney CBD Repair Centre – Where Quality Meets Reliability.
Call : +61280114119
Website: Sydney CBD Repair Centre
📱 Why Your Phone Feels Slow After a Screen Repair: The Truth About Parts + Hidden Performance Issues + 7 Critical Factors
🔍 Introduction to Post-Repair Performance Issues
If you’ve recently had your phone repaired and noticed a lag, you’re not alone. Many users complain that their device feels sluggish or unresponsive after a screen replacement. Naturally, this raises concerns about whether something went wrong.
Here’s the truth: a screen repair shouldn’t slow down your phone—but in many cases, it does.
So what’s going on?
This article dives deep into why your phone feels slow after a screen repair, uncovering the real causes behind performance issues and how to fix them effectively.
At first glance, your phone’s screen may seem like a purely visual component. However, modern smartphones integrate the display deeply with system performance. The touchscreen digitizer communicates directly with the processor, meaning any fault here can impact responsiveness.
A poorly functioning display can:
Delay touch response
Cause ghost touches
Increase CPU workload
⚖️ Hardware vs Software Bottlenecks
When diagnosing why your phone feels slow after a screen repair, it’s crucial to distinguish between:
Type
Cause
Impact
Hardware
Poor parts, bad installation
Lag, overheating
Software
Bugs, corrupted files
Freezing, crashes
Understanding this difference helps you apply the right fix.
As a result, your phone may feel delayed—even if the internal components are fine.
🛠️ 2. Improper Installation
Even with a high-quality screen, poor installation can cause issues such as:
Loose connectors
Misaligned components
Pressure on internal hardware
These mistakes can affect performance immediately after repair.
🔋 3. Battery Damage During Repair
Screen replacements require opening the phone, which exposes delicate components like the battery.
If damaged, your battery may:
Drain faster
Throttle CPU performance
Cause lag spikes
This is a hidden reason why your phone feels slow after a screen repair.
💻 4. Software Glitches After Repair
Sometimes, the issue isn’t hardware at all.
Repairs can trigger:
System bugs
App conflicts
Cache corruption
This can slow down your phone significantly.
📲 5. Touch Digitizer Issues
The digitizer translates touch into commands. If it’s faulty:
Touch becomes inconsistent
Input lag increases
Apps feel slow
Even small delays can make your phone feel sluggish.
🌡️ 6. Overheating Due to Poor Sealing
After repair, improper sealing can lead to:
Dust intrusion
Poor heat dissipation
When your phone overheats, it automatically reduces performance to cool down.
🔄 7. Background Processes Triggered After Repair
Repairs sometimes reset certain system functions, triggering:
App re-indexing
Cloud syncing
Updates
These processes consume resources, slowing your phone temporarily.
🧩 The Role of Genuine vs Aftermarket Parts
🏭 OEM vs Copy Screens
Type
Quality
Performance
OEM (Original)
High
Smooth
Aftermarket
Varies
Often slower
Genuine parts are designed to work seamlessly with your device, while aftermarket screens may not meet the same standards.
⚡ Performance Differences Explained
Using non-genuine parts can result in:
Lower brightness
Reduced touch sensitivity
Slower response times
This directly contributes to why your phone feels slow after a screen repair.
🚩 Signs Your Phone Was Poorly Repaired
Watch out for these warning signs:
Screen flickering
Touch delay
Fast battery drain
Phone overheating
Gaps around screen edges
If you notice any of these, it’s time to get your phone checked.
🛠️ How to Fix a Slow Phone After Screen Repair
💡 Software Fixes
Start with simple solutions:
Restart your phone
Clear cache
Update software
Factory reset (last resort)
🔍 Hardware Checks
If software fixes don’t help:
Inspect screen quality
Check battery health
Visit a professional technician
🛡️ Preventing Slow Performance in Future Repairs
Avoid future issues by:
Choosing reputable repair shops
Asking for genuine parts
Checking warranty options
A little caution goes a long way.
👨🔧 Expert Tips from Repair Professionals
Experienced technicians recommend:
Always disconnect battery before repair
Use calibrated tools
Test device thoroughly post-repair
These steps ensure optimal performance.
❓ FAQs
1. Why does my phone lag after a screen replacement?
Because of low-quality parts, installation errors, or software glitches.
2. Can a screen affect phone speed?
Yes, especially if the digitizer or display quality is poor.
3. Will resetting my phone fix the issue?
Sometimes—if the problem is software-related.
4. Are aftermarket screens bad?
Not always, but cheaper ones often cause performance issues.
5. How do I know if my repair was done properly?
Check for responsiveness, battery health, and screen alignment.
6. Should I go back to the repair shop?
Yes, especially if your phone feels slow after a screen repair.
✅ Conclusion
Experiencing lag after a repair can be frustrating. However, understanding why your phone feels slow after a screen repair empowers you to take action.
Whether it’s poor parts, installation mistakes, or software issues, the solution is often within reach. By choosing quality repairs and staying informed, you can ensure your device runs smoothly—just like it should.
David from Sydney CBD Repair Centre – The Best place to fix mobile phones as 7 Years In A Row! Top Mobile Phone Repair In Sydney. More than 2000 Positive Reviews on Google and Same Day Repairs.
We take pride in delivering exceptional repair services for all major phone brands including Apple, Samsung, Google, and more. Our expert technicians use only genuine parts and offer 90days warranty on repairs. Located in the heart of Sydney CBD, we’re your one-stop solution for all mobile device repairs.
Our commitment to excellence has earned us the trust of thousands of satisfied customers. Whether it’s a cracked screen, battery replacement, or water damage repair, we handle it all with professional care and expertise. Walk in today and experience why we’re Sydney’s #1 choice for mobile phone repairs.
Visit us for:
✓ Same Day Express Repairs
✓ Genuine Parts Guarantee
✓ Professional Technicians
✓ Competitive Pricing
✓ 2000+ 5-Star Google Reviews
✓ 7-Time Award Winner for Best Phone Repairs
Samsung Green Line Mystery: Does a Screen Replacement Actually Fix the Glitch? + Proven Fixes + 7 Expert Insights
Introduction
The Samsung green line issue has quickly become one of the most puzzling and frustrating display problems faced by smartphone users today. One moment your screen looks perfectly fine, and the next, a bright vertical green line appears out of nowhere—cutting across your display and refusing to disappear. What makes this glitch even more confusing is that it often shows up without any physical damage, leaving users wondering what went wrong.
Naturally, this raises an important question: Is a screen replacement really the solution, or is there something deeper causing the problem? Many users rush to repair shops expecting a quick fix, only to discover that the answer isn’t always straightforward. Sometimes, replacing the screen works like magic. Other times, the issue lingers, pointing to a more complex underlying fault.
In this article, we’ll break down the mystery behind the Samsung green line, explore why it happens, and most importantly, determine whether a screen replacement is truly the ultimate fix. By the end, you’ll have a clear understanding of your options and the smartest way to deal with this increasingly common issue.
The Samsung green line issue has become one of the most talked-about smartphone problems in recent years. If you’ve noticed a vertical green line suddenly appearing on your display, you’re not alone. Thousands of users worldwide have reported this glitch, often without any visible damage to their phones. Naturally, the big question arises: Does a screen replacement actually fix the Samsung green line problem?
In this comprehensive guide, we’ll break down everything you need to know—from causes and fixes to expert insights and real-world results. Let’s dive in.
The Samsung green line problem refers to a vertical line—usually bright green—running from the top to the bottom of the screen. It often appears suddenly, sometimes after a software update or minor drop.
Common Symptoms of the Green Line Problem
A thin vertical green line on the display
Line remains visible across apps and home screen
No touchscreen issues in most cases
Appears even without physical damage
Devices Commonly Affected
While the issue isn’t limited to specific models, it’s more frequently reported in:
Samsung Galaxy S series
Samsung Galaxy Note series
Samsung Galaxy Z Fold and Flip devices
Interestingly, AMOLED displays seem more prone to this issue due to their pixel structure.
Understanding the root cause of the Samsung green line is crucial before deciding on a repair.
Hardware Causes
Most commonly, the issue stems from:
Damaged OLED panel
Loose or faulty display connectors
Manufacturing defects
Wear and tear over time
Even a minor internal fault can cause a single pixel column to malfunction, resulting in the green line.
Software Causes
Although less common, software can also trigger the problem:
System bugs
Corrupted display drivers
GPU glitches
Impact of Updates
Many users report the Samsung green line appearing after a software update. This suggests that firmware changes can sometimes disrupt display calibration or reveal hidden hardware weaknesses.
Does Screen Replacement Fix the Samsung Green Line?
This is the million-dollar question—and the answer is: Yes, but not always.
When Replacement Works
A screen replacement is highly effective if:
The issue is caused by a faulty OLED panel
There’s internal display damage
The line persists in safe mode or recovery mode
In these cases, replacing the display completely removes the Samsung green line.
When It Doesn’t
However, screen replacement may fail if:
The issue is software-related
The motherboard or GPU is damaged
There’s a connector issue not addressed during repair
So, while screen replacement is often the go-to solution, it’s not a guaranteed fix in every scenario.
Cost vs Benefit of Screen Replacement
Before jumping into repairs, it’s important to weigh the costs.
Price Breakdown
Repair Type
Estimated Cost
AMOLED Screen Replacement
$150 – $400
Labor Costs
$50 – $100
Total
$200 – $500
Prices vary depending on the model and region.
Is It Worth It?
Consider replacing the screen if:
Your phone is high-end or relatively new
The repair cost is less than 50% of device value
Otherwise, upgrading might be a smarter move.
Alternative Fixes Before Replacing the Screen
Before spending money, try these alternatives.
Software Troubleshooting
Restart your phone
Boot into safe mode
Perform a factory reset
Update or roll back software
Temporary Workarounds
Adjust display brightness
Use screen filter apps
Apply slight pressure (not recommended long-term)
These solutions might not permanently fix the Samsung green line, but they can help diagnose the issue.
Professional Repair vs DIY Fix
Risks of DIY
Trying to fix the problem yourself can backfire:
Risk of further damage
Loss of warranty
Poor-quality replacement parts
Advantages of Professional Repair
Expert diagnosis
Genuine parts
Warranty on repairs
Higher success rate
Professional technicians can determine whether the Samsung green line is truly a screen issue or something deeper.
Preventing the Green Line Issue
While not always avoidable, you can reduce the risk.
Best Practices
Avoid dropping your phone
Use protective cases
Keep software updated
Avoid overheating
Maintenance Tips
Don’t overcharge your device
Avoid extreme temperatures
Handle with care
Prevention is always better than repair.
Real-World Case Studies
Success Stories
Many users report that a simple screen replacement completely resolved the Samsung green line issue—especially when caused by display defects.
Failed Repairs
In some cases, users replaced the screen only to see the line persist. These cases were later linked to motherboard issues.
Expert Opinions on the Samsung Green Line Issue
Experts agree that:
80–90% of cases are hardware-related
Screen replacement is the most reliable fix
Proper diagnosis is key before repair
A trusted technician can save you time, money, and frustration.
FAQs
1. What causes the Samsung green line to appear suddenly?
It’s usually due to a faulty OLED panel or internal hardware issue, though software bugs can sometimes trigger it.
2. Will a factory reset fix the green line?
Only if the issue is software-related. Hardware issues won’t be resolved by resetting.
3. Is the green line covered under warranty?
In some cases, yes—especially if it’s a manufacturing defect.
4. Can the green line spread or worsen?
Yes, additional lines may appear if the underlying issue worsens.
5. How long does screen replacement take?
Typically 1–3 hours with a professional technician.
6. Is it safe to keep using a phone with a green line?
Yes, but it may worsen over time and affect usability.
Conclusion
So, does a screen replacement fix the Samsung green line issue? In most cases—yes, it does. However, it’s not a one-size-fits-all solution. The root cause matters, and proper diagnosis is essential before committing to a repair.
If you’re dealing with this frustrating glitch, start with basic troubleshooting. If that doesn’t work, consult a professional repair service. A well-executed screen replacement can bring your device back to life—no green line in sight.
For further technical insights, you can also explore detailed display technology explanations on reputable sources like https://www.displaymate.com/
David from Sydney CBD Repair Centre – The Best place to fix mobile phones as 7 Years In A Row! Top Mobile Phone Repair In Sydney. More than 2000 Positive Reviews on Google and Same Day Repairs.
We take pride in delivering exceptional repair services for all major phone brands including Apple, Samsung, Google, and more. Our expert technicians use only genuine parts and offer 90days warranty on repairs. Located in the heart of Sydney CBD, we’re your one-stop solution for all mobile device repairs.
Our commitment to excellence has earned us the trust of thousands of satisfied customers. Whether it’s a cracked screen, battery replacement, or water damage repair, we handle it all with professional care and expertise. Walk in today and experience why we’re Sydney’s #1 choice for mobile phone repairs.
Visit us for:
✓ Same Day Express Repairs
✓ Genuine Parts Guarantee
✓ Professional Technicians
✓ Competitive Pricing
✓ 2000+ 5-Star Google Reviews
✓ 7-Time Award Winner for Best Phone Repairs