How to Identify Authentic Samsung Phone Parts During a Professional Screen Replacement Process: Ultimate 9-Step Expert Guide
Introduction to Samsung Screen Authenticity
Understanding How to identify authentic Samsung parts during a professional screen replacement process is critical for anyone repairing modern smartphones. Samsung devices, especially flagship models like Galaxy S and Z series, rely heavily on precision-engineered OLED displays. A counterfeit or low-quality replacement screen can affect touch response, color accuracy, brightness, and even battery life.
In today’s repair market, counterfeit components have become more sophisticated. That’s why both technicians and customers must know how to distinguish genuine Samsung parts from imitation ones. This guide will walk you through expert-level verification steps used in professional repair environments.
When you follow How to identify authentic Samsung parts during a professional screen replacement process, you’re not just protecting your phone—you’re preserving its resale value and performance integrity.
Fake screens often fail within months, show poor brightness calibration, or even cause motherboard strain due to voltage inconsistencies.
Counterfeit Samsung displays may look similar externally but differ internally. Common risks include:
Flickering brightness
Green or yellow tint issues
Dead touch zones
Fast battery drain
Incompatibility with software updates
Many users unknowingly accept refurbished screens labeled as “original pull” parts. While refurbished parts can sometimes be functional, they are not equal to factory-new OEM components.
Step-by-Step Guide to Identifying Genuine Samsung Parts
This section is the core of How to identify authentic Samsung parts during a professional screen replacement process.
Step 1: Checking OEM Packaging
Authentic Samsung parts come in sealed, branded packaging with:
QR codes
Samsung part numbers
Anti-tamper seals
If packaging looks generic or unbranded, it’s a red flag.
Step 2: Verifying Serial Numbers
Every genuine Samsung screen has a unique serial identifier. Professionals cross-check this number with Samsung’s internal database or authorized distributors.
Step 3: Using Samsung Service Mode
Technicians often activate service diagnostics mode to verify:
Display calibration data
Factory color settings
Touch matrix integrity
Fake screens usually fail these checks or show inconsistent readings.
Step 4: Inspecting Display Quality
A key step in How to identify authentic Samsung parts during a professional screen replacement process is visual inspection:
True blacks (no backlight bleed)
Uniform brightness
Accurate HDR response
No pixel distortion at angles
Step 5: Examining Flex Cables and Connectors
OEM Samsung parts use precision-engineered flex cables. Look for:
Clean laser markings
Smooth connector edges
No glue residue
Step 6: Confirming Supplier Certification
Always ensure the supplier is:
Samsung authorized
OEM-certified distributor
Registered repair partner
Tools Used by Professionals for Authentication
Technicians use advanced tools such as:
Optical microscopes
Multimeter testers
OLED calibration devices
Samsung diagnostic software
These tools help verify whether a screen meets OEM specifications.
Role of Authorized Samsung Service Centers
Authorized centers are the safest option when dealing with How to identify authentic Samsung parts during a professional screen replacement process.
These ensure the replacement meets Samsung factory standards.
Keyword Integration Guide Section
To fully understand How to identify authentic Samsung parts during a professional screen replacement process, always remember:
Check packaging first
Verify serial numbers
Inspect display quality
Use diagnostic tools
Rely on certified technicians
Repeating this process ensures consistent authenticity verification.
Expert Tips to Avoid Counterfeit Parts
Avoid unverified online sellers
Always request warranty proof
Ask for part origin documentation
Compare display brightness with original device
Prefer walk-in professional repair centers
Real-World Case Study Example
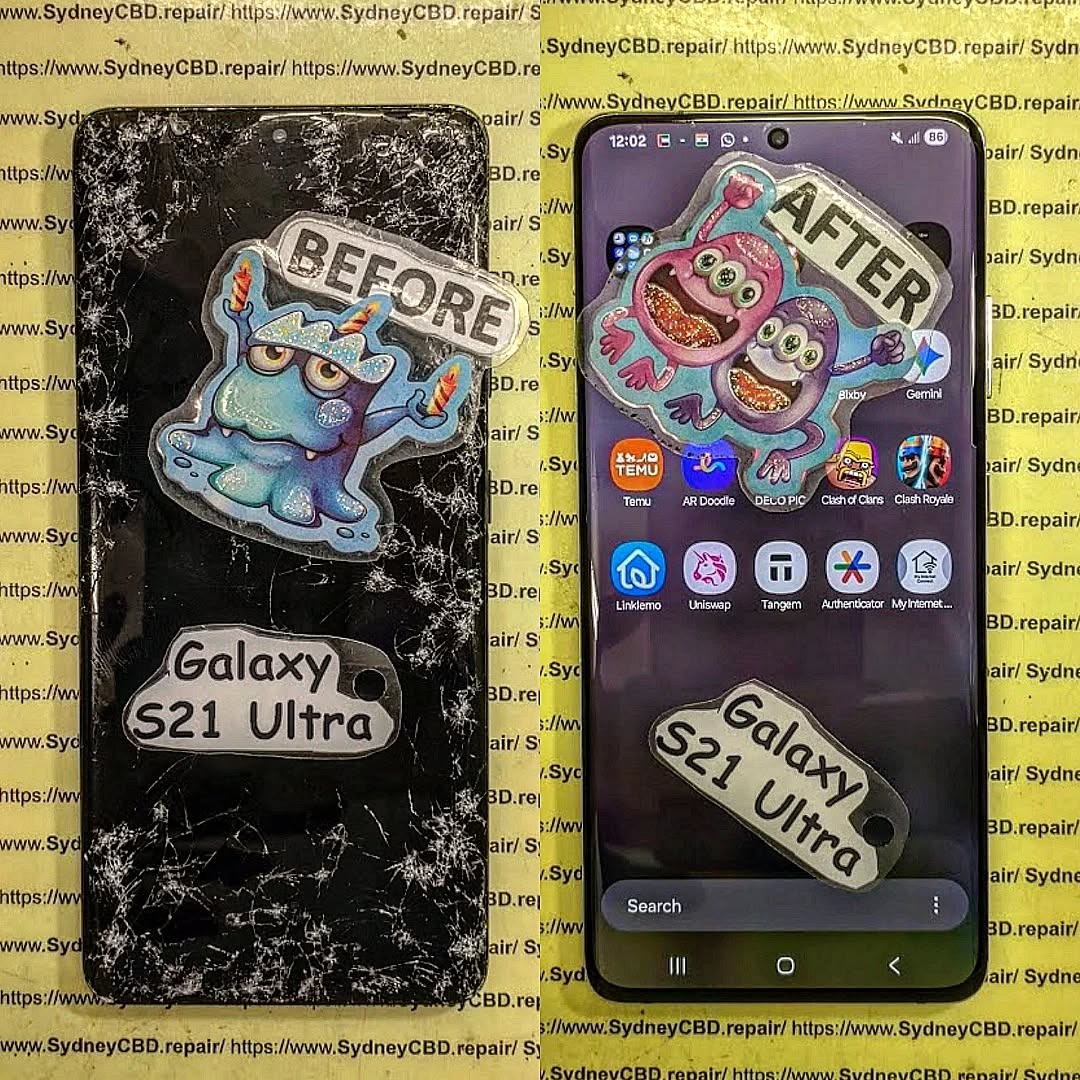
A Galaxy S21 Ultra user replaced a broken screen with a cheap aftermarket part. Within 3 months:
Touch lag developed
Battery drained faster
Screen flickering occurred
After switching to an OEM Samsung screen, all issues were resolved instantly. This highlights why How to identify authentic Samsung parts during a professional screen replacement process is essential knowledge.
FAQs
1. How can I quickly check if a Samsung screen is original?
Look for OEM packaging, serial numbers, and display quality consistency.
2. Are refurbished Samsung screens safe?
They can work but are not as reliable as factory-new OEM parts.
3. What is the biggest sign of a fake Samsung screen?
Poor color accuracy and inconsistent brightness are major indicators.
4. Do all repair shops use genuine parts?
No, only authorized or reputable shops guarantee OEM components.
5. Can software detect fake Samsung screens?
In some cases, diagnostic tools can identify mismatches.
6. Is it worth paying more for OEM screens?
Yes, because they ensure long-term performance and durability.
Conclusion
Mastering How to identify authentic Samsung parts during a professional screen replacement process protects your smartphone investment and ensures long-term performance. With counterfeit parts becoming more advanced, awareness is your strongest defense. Always verify packaging, serial numbers, supplier credentials, and use professional diagnostics when possible.
Choosing authenticity today saves you from costly repairs tomorrow.
David from Sydney CBD Repair Centre – The Best place to fix mobile phones as 7 Years In A Row! Top Mobile Phone Repair In Sydney. More than 2000 Positive Reviews on Google and Same Day Repairs.
We take pride in delivering exceptional repair services for all major phone brands including Apple, Samsung, Google, and more. Our expert technicians use only genuine parts and offer 90days warranty on repairs. Located in the heart of Sydney CBD, we’re your one-stop solution for all mobile device repairs.
Our commitment to excellence has earned us the trust of thousands of satisfied customers. Whether it’s a cracked screen, battery replacement, or water damage repair, we handle it all with professional care and expertise. Walk in today and experience why we’re Sydney’s #1 choice for mobile phone repairs.
Visit us for:
✓ Same Day Express Repairs
✓ Genuine Parts Guarantee
✓ Professional Technicians
✓ Competitive Pricing
✓ 2000+ 5-Star Google Reviews
✓ 7-Time Award Winner for Best Phone Repairs
Realme phone vs. Vivo phone Battle of the Budget Phone Screen Replacements – Ultimate 2026 Guide
Introduction: Why Screen Replacements Matter for Budget Phones
In today’s smartphone-driven world, a cracked or malfunctioning screen can quickly turn your device from useful to frustrating. Budget smartphones, such as Realme and Vivo models, are particularly vulnerable due to their thinner glass and lighter build. Understanding the screen replacement landscape for these devices can save you money, stress, and time. In this guide, we dive into costs, repair options, durability, and everything in between for Realme and Vivo budget phones.
Common Screen Issues in Budget Smartphones
Budget phones often face issues like:
Cracks and shattering: Dropping the phone even from low heights can crack the screen.
Touch sensitivity problems: Unresponsive touch areas are common after impact.
Color distortion and dead pixels: Display quality may degrade over time or after minor damage.
Screen bleeding or flickering: Usually caused by internal damage or defective screens.
These problems highlight why knowing your replacement options early is crucial.
Realme phones, known for their sleek design and affordability, often see screen damage from regular usage. The replacement process, cost, and quality can vary significantly.
Types of Realme Screens and Costs
Realme devices primarily use LCD and AMOLED displays:
Screen Type
Cost Estimate (USD)
Notes
LCD
$40–$70
Affordable, durable but colors may be less vibrant
AMOLED
$60–$120
Richer colors, more responsive touch, higher cost
Prices can fluctuate depending on model and availability of genuine parts.
DIY vs Professional Repair for Realme
DIY Repairs:
Pros: Cheaper upfront, immediate solution
Cons: Risk of further damage, void warranty, requires skill and tools
Professional Repairs:
Pros: Warranty-backed, safer, uses genuine parts
Cons: Slightly higher cost, may require appointment
Pro Tip: Realme’s official service centers offer a 90-day warranty for screen replacements, providing peace of mind.
Quality and Longevity of Replaced Screens
Genuine Realme screens maintain touch sensitivity, brightness, and color accuracy similar to new phones. Third-party replacements can vary, often with slightly lower durability or minor color differences. Lifespan is typically 2–3 years depending on usage and protective measures.
Vivo smartphones are known for trendy designs and vibrant displays, but like Realme, they face screen vulnerability in budget models.
Types of Vivo Screens and Costs
Vivo devices primarily feature IPS LCD and AMOLED displays:
Screen Type
Cost Estimate (USD)
Notes
IPS LCD
$35–$65
Affordable, decent display quality
AMOLED
$70–$130
Premium look, higher durability, smoother touch
Vivo’s official stores sometimes offer seasonal discounts, so it’s worth checking their website before replacement.
DIY vs Professional Repair for Vivo
DIY Repairs:
May be tempting for lower-cost models
Risk of voiding warranty and damaging fragile AMOLED screens
Professional Repairs:
Technicians ensure correct calibration and color accuracy
Use of genuine parts guarantees better longevity
Quality and Longevity of Replaced Screens
Vivo’s replacement screens are known for maintaining brightness, contrast, and touch accuracy. With careful handling, replacement screens last 2–3 years. Non-genuine screens may experience color fading or touch unresponsiveness over time.
Realme vs Vivo: Side-by-Side Comparison
Cost Comparison
Feature
Realme
Vivo
LCD Replacement
$40–$70
$35–$65
AMOLED Replacement
$60–$120
$70–$130
Average Repair Time
1–2 hours
1–3 hours
Warranty
90 days
90 days
Repair Time and Accessibility
Both brands have authorized centers in major cities, but Realme often has faster turnaround due to wider service network. Vivo may require advance booking in smaller towns.
Screen Durability After Replacement
Realme: Slightly more prone to scratches, but strong touch response
Vivo: Slightly more scratch-resistant with AMOLED, vibrant display
Warranty Considerations
Both brands provide official warranty for replacement screens, generally 90 days, covering defective parts or installation issues.
Tips for Choosing the Right Repair Option
Authorized vs Third-Party Repairs
Authorized centers offer genuine parts and warranty, while third-party shops may be cheaper but can risk quality and longevity.
Identifying Genuine Parts
Look for brand markings on connectors
Compare with official specs
Avoid suspiciously cheap replacements
Cost-Saving Strategies Without Compromising Quality
Check for seasonal promotions at official centers
Use screen protectors and cases to prolong lifespan
Avoid DIY unless confident with tools and instructions
FAQs About Realme and Vivo Screen Replacements
Q1: How long does a screen replacement take?
A: Usually 1–3 hours at an authorized center; DIY can vary widely.
Q2: Can I use a third-party screen for Realme or Vivo?
A: Yes, but quality and touch sensitivity may differ from the original.
Q3: Do replacement screens come with a warranty?
A: Official replacements typically come with 90 days warranty.
Q4: How can I prevent my budget phone screen from cracking?
A: Use a tempered glass protector, sturdy case, and avoid drops.
Q5: Are AMOLED replacements worth the extra cost?
A: AMOLED offers brighter colors and better touch responsiveness; worth it if display quality matters.
Q6: Can DIY repairs damage my phone further?
A: Yes, improper handling can break internal components, void warranty, and reduce longevity.
Conclusion: Making the Best Choice for Your Budget Phone
When choosing between Realme and Vivo screen replacements, consider cost, durability, and repair accessibility. Realme offers slightly faster service and affordable options, while Vivo focuses on vibrant AMOLED displays. Always prioritize genuine parts and professional installation to maximize the lifespan of your budget phone. By following these tips, you can ensure your device remains functional and visually appealing for years to come.
For more information on authorized service centers, visit Realme Service.
David from Sydney CBD Repair Centre – The Best place to fix mobile phones as 7 Years In A Row! Top Mobile Phone Repair In Sydney. More than 2000 Positive Reviews on Google and Same Day Repairs.
We take pride in delivering exceptional repair services for all major phone brands including Apple, Samsung, Google, and more. Our expert technicians use only genuine parts and offer 90days warranty on repairs. Located in the heart of Sydney CBD, we’re your one-stop solution for all mobile device repairs.
Visit us for:
✓ Same Day Express Repairs
✓ Genuine Parts Guarantee
✓ Professional Technicians
✓ Competitive Pricing
✓ 2000+ 5-Star Google Reviews
✓ 7-Time Award Winner for Best Phone Repairs
INNER SCREEN SURGERY: Samsung Galaxy Z Fold 6 Folding Display Restoration Process – Ultimate 12-Step Professional Guide
Introduction
Samsung’s latest foldable smartphones are engineering masterpieces. The Samsung Galaxy Z Fold 6 combines a powerful flagship experience with an advanced flexible AMOLED display that folds hundreds of thousands of times throughout its lifetime.
However, when the inner display becomes cracked, develops black spots, stops responding, or suffers hinge-related damage, repairing it requires far more than replacing a conventional smartphone screen.
This guide explains the INNER SCREEN SURGERY: Samsung Galaxy Z Fold 6 Folding Display Restoration Process from the perspective of experienced repair professionals. We’ll explore the technology, repair workflow, required equipment, quality testing, and best practices that help restore one of Samsung’s most sophisticated displays.
The INNER SCREEN SURGERY: Samsung Galaxy Z Fold 6 Folding Display Restoration Process is one of the most technically demanding smartphone repairs available today.
Unlike a traditional smartphone screen replacement, restoring the Galaxy Z Fold 6 requires extensive knowledge of flexible OLED technology, precision adhesives, delicate ribbon cables, and sophisticated hinge engineering.
Samsung designed the Fold 6 to provide users with a seamless transition between smartphone and tablet modes. Achieving this experience involves an incredibly thin display stack that includes:
Flexible OLED panel
Ultra Thin Glass (UTG)
Protective polymer layer
Precision hinge support
Multiple flex cables
Under-display components
Each layer must work perfectly together.
A minor mistake during repair can permanently damage:
the OLED panel,
touch digitizer,
fingerprint calibration,
hinge mechanism,
display flex cables,
or motherboard.
That’s why professional technicians follow carefully developed repair procedures instead of rushing through the process.
Throughout this guide, you’ll discover exactly how professionals restore these remarkable devices while minimizing risk and maximizing long-term reliability.
The Galaxy Z Fold 6 represents years of engineering innovation.
Unlike ordinary smartphones that use rigid display assemblies, the Fold 6 incorporates a flexible AMOLED display capable of bending repeatedly while maintaining exceptional image quality.
Components of the Folding Display
The display assembly consists of several highly engineered layers.
Component
Purpose
Flexible OLED Panel
Produces vibrant colors and deep blacks
Ultra Thin Glass
Adds rigidity while remaining flexible
Protective Film
Protects against scratches
Digitizer
Detects touch input
Polarizer
Improves visibility
Flexible Ribbon Cables
Carry display signals
Adhesive Layers
Secure the display assembly
Each layer is measured in fractions of a millimeter.
Even tiny amounts of dust trapped between these layers can affect performance.
Why Foldable Displays Are Different
Traditional displays remain flat throughout their lifespan.
Foldable displays must continuously:
bend,
unfold,
compress,
expand,
withstand pressure,
resist temperature fluctuations.
The hinge distributes mechanical stress across the display every time the phone opens or closes.
This repeated movement makes foldable display repairs considerably more complex than repairing standard smartphones.
Ultra Thin Glass Technology
One of Samsung’s most remarkable achievements is the Ultra Thin Glass layer.
Although called “glass,” it’s incredibly thin and flexible.
Benefits include:
smoother folding
improved durability
reduced crease visibility
better touch accuracy
enhanced display clarity
However, once damaged, UTG cannot simply be repaired independently.
Professional restoration usually requires replacing the complete inner display assembly.
Display Flex Cable Design
Hidden beneath the display are delicate flex cables.
These carry:
display signals
touch input
refresh rate data
brightness information
power delivery
Improper handling during repair can tear these cables instantly.
Unlike conventional smartphones, replacement requires careful routing through the hinge assembly.
Hinge Integration
The hinge isn’t merely a mechanical component.
It directly supports the flexible display.
If the hinge becomes:
bent,
contaminated,
loose,
or partially seized,
the replacement display may fail prematurely.
For this reason, technicians inspect hinge operation before installing a new screen.
Although Samsung has significantly improved durability with each Fold generation, no flexible display is immune to damage.
Impact Damage
The most common reason for repair is accidental drops.
Even if the outer frame appears undamaged, impact forces can travel through the chassis and crack the fragile internal OLED layers.
Common symptoms include:
black ink spots
vertical colored lines
flashing display
complete display failure
Sometimes the phone still powers on while the internal screen remains unusable.
Excessive Pressure
Unlike traditional phones, foldable displays don’t tolerate concentrated pressure well.
Examples include:
sitting on the phone
storing it beneath heavy objects
closing the phone with debris inside
pressing sharply with fingernails
accidental impacts from hard objects
Pressure damage often begins beneath the surface before becoming visible.
Hinge Wear
Although Samsung rates the Fold 6 hinge for hundreds of thousands of folds, prolonged use eventually introduces wear.
Potential issues include:
increased resistance
uneven folding
debris accumulation
misalignment
abnormal noises
When ignored, hinge wear may place uneven stress on the display and contribute to premature failure.
Foreign Object Intrusion
Tiny particles are one of the biggest threats to foldable devices.
Dust, sand, or small debris entering the hinge can create pressure points beneath the display.
These particles may:
scratch internal layers
damage the protective film
stress the OLED
interfere with hinge movement
Keeping the hinge clean significantly reduces long-term risk.
Manufacturing Defects
Although uncommon, manufacturing defects occasionally occur.
Possible examples include:
premature pixel failure
adhesive separation
flex cable fatigue
OLED layer defects
Professional diagnostics help distinguish accidental damage from potential component-related issues.
Water and Liquid Exposure
While the Galaxy Z Fold 6 offers improved water resistance, prolonged exposure to moisture can still affect internal components.
Liquid intrusion may result in:
corrosion
touch failure
display flickering
intermittent operation
connector oxidation
Early intervention improves the likelihood of successful restoration.
Early Warning Signs
Owners should seek professional assessment if they notice:
A growing black spot
Green or pink display lines
Touch becoming inconsistent
Flickering near the fold
Unusual hinge resistance
Display lifting
Random screen shutdowns
Visible crease abnormalities
Addressing these symptoms promptly can prevent further internal damage and reduce the complexity of the repair.
Professional Diagnostic Process Before Repair
Every successful INNER SCREEN SURGERY: Samsung Galaxy Z Fold 6 Folding Display Restoration Process begins with a detailed inspection. Experienced technicians never assume the inner display is the only damaged component. Instead, they perform a systematic diagnosis to identify hidden issues that could affect the repair.
A thorough diagnostic helps determine whether the phone only needs an inner display replacement or if additional components—such as the hinge, frame, battery, or flex cables—also require attention.
Initial Visual Inspection
The repair process starts with a careful examination of the device’s exterior.
Technicians look for:
Cracks around the frame
Signs of impact damage
Hinge alignment
Scratches near the folding area
Damage to the outer display
Missing screws or frame separation
Even small dents can indicate significant internal stress.
Functional Testing
If the phone still powers on, technicians test every major function before opening the device.
Typical tests include:
Component
Test Performed
Inner Display
Brightness, dead pixels, flickering
Outer Display
Image quality and responsiveness
Touchscreen
Multi-touch accuracy
Cameras
Front and rear camera operation
Speakers
Audio clarity
Microphones
Recording quality
Charging Port
Charging and data transfer
Wireless Charging
Charging performance
Wi-Fi & Bluetooth
Connectivity
Fingerprint Reader
Authentication speed
Recording these results protects both the customer and the repair technician by documenting the phone’s condition before work begins.
Foldable phones require a controlled work environment. Dust, static electricity, and improper tools can all lead to repair failure.
Professional workshops maintain clean benches, anti-static protection, and specialized equipment.
Essential Professional Tools
Common tools include:
Precision screwdrivers
Plastic opening picks
Thin metal separation tools
Suction cups
Heat-controlled hot plate
Precision tweezers
Anti-static wrist strap
Adhesive remover
Cleaning alcohol
Lint-free cloths
Replacement adhesive
Professional display press
Unlike standard smartphones, foldable devices also require specialized fixtures to support the flexible display during installation.
Powering Down the Device
Before disassembly begins, the phone is completely powered off.
This simple step helps reduce the risk of:
Short circuits
Electrical damage
Component failure
Static discharge
Although obvious, skipping this step can have expensive consequences.
Removing the Rear Panel
The rear glass is secured using industrial-strength adhesive.
Professionals soften the adhesive using carefully controlled heat.
Too little heat makes removal difficult.
Too much heat may damage:
Internal plastics
Battery
Wireless charging coil
Waterproof seals
The panel is lifted slowly to avoid cracking the glass.
Battery Isolation: The Most Important Safety Step
Many inexperienced repair attempts fail because technicians skip battery disconnection.
With foldable devices, battery isolation is absolutely essential.
The Galaxy Z Fold 6 contains multiple battery cells connected through delicate circuitry.
Disconnecting power protects:
OLED panel
Motherboard
Display connectors
Touch controller
Charging IC
Cameras
Attempting to disconnect display cables while power remains connected can permanently damage sensitive integrated circuits.
Professional technicians always disconnect the battery before touching any display connector.
Internal Component Inspection
With the rear panel removed, the technician performs another inspection.
They examine:
Battery condition
Water damage indicators
Internal screws
Flex cable routing
Dust accumulation
Signs of corrosion
If corrosion is discovered, cleaning may be required before installing new components.
Removing the Damaged Folding Display
This is the stage where experience matters most.
The flexible AMOLED assembly cannot simply be pulled away from the frame.
Instead, technicians carefully weaken the factory adhesive while protecting nearby components.
Controlled Heating
Professional heating equipment evenly warms the adhesive.
Even heating prevents:
OLED warping
Plastic deformation
Display cracking
Frame damage
Temperature control is critical because flexible OLED panels are far more heat-sensitive than conventional smartphone screens.
Separating the Display
Once the adhesive softens, technicians slowly separate the display assembly.
Special care is taken around:
Display edges
Folding crease
Ribbon cable channels
Hinge area
Any sudden movement could tear fragile flex cables.
Patience is one of the most valuable tools during this stage.
Cleaning the Frame
After the damaged display is removed, the frame must be perfectly clean.
Old adhesive is removed completely.
Technicians also inspect for:
Bent frame edges
Loose brackets
Dust particles
Adhesive residue
A perfectly prepared frame ensures the replacement display sits flat and folds correctly.
Installing the Replacement Inner Display
Installing the new screen is even more demanding than removing the damaged one.
Every millimeter matters.
Professional technicians dry-fit the display before applying adhesive.
This confirms:
Proper alignment
Cable routing
Hinge clearance
Frame compatibility
Only after verifying the fit is permanent adhesive applied.
Applying New Adhesive
Manufacturers use precision-cut adhesive that provides:
Strong bonding
Flexibility
Heat resistance
Long-term durability
Applying too much adhesive may interfere with folding.
Applying too little may allow the display to lift over time.
Professionals use factory-style adhesive templates to achieve consistent results.
Routing the Display Flex Cables
The replacement display’s ribbon cables must follow the original routing path.
Improper routing may lead to:
Cable pinching
Display flickering
Touch failure
Premature cable wear
Technicians double-check every connector before reassembly.
Hinge Inspection and Adjustment
The hinge is the heart of every foldable smartphone.
Replacing the display without inspecting the hinge can shorten the lifespan of the new screen.
Technicians evaluate:
Folding resistance
Opening angle
Smoothness
Mechanical noise
Alignment
If debris is present, it is carefully removed using appropriate cleaning techniques.
Damaged hinges may require replacement before a new display can be safely installed.
Reconnecting Internal Components
After the new display is installed, every connector is reattached in the proper sequence.
Technicians reconnect:
Display connectors
Touch digitizer
Battery
Wireless charging assembly
Cameras
Antennas
Each connector is checked for secure engagement before the phone is powered on.
Initial Power-On Test
Before sealing the phone, the replacement display undergoes an initial functional check.
The technician verifies:
Samsung logo appears correctly
No display flickering
Uniform brightness
Accurate touch response
Proper folding animation
Stable refresh rate
If any abnormal behavior is detected, the phone is powered down and inspected again before final assembly.
Precision Calibration Procedures
Modern foldable smartphones require more than physical installation. Calibration ensures that hardware and software communicate correctly.
Professional calibration includes:
Touchscreen sensitivity checks
Display brightness verification
Adaptive refresh rate confirmation
Orientation sensor testing
Fingerprint sensor validation (where applicable)
Software diagnostics
These procedures help restore the Galaxy Z Fold 6 to factory-like performance after the INNER SCREEN SURGERY: Samsung Galaxy Z Fold 6 Folding Display Restoration Process.
Quality Control Testing After the Repair
Completing the INNER SCREEN SURGERY: Samsung Galaxy Z Fold 6 Folding Display Restoration Process doesn’t end when the new display is installed. A professional repair shop performs extensive quality control testing to ensure the phone functions as intended before returning it to the customer.
Every major feature should be verified to ensure the repair meets high standards of reliability and performance.
Display Quality Inspection
Technicians carefully inspect the new folding display for:
Uniform brightness
Accurate color reproduction
Dead or stuck pixels
Flickering
Display artifacts
Crease appearance
Proper contrast
Refresh rate performance
A flawless display should deliver the premium viewing experience expected from Samsung’s flagship foldable smartphone.
Touchscreen Testing
The touchscreen is tested across the entire display.
This includes checking:
Edge responsiveness
Multi-touch gestures
Drag accuracy
Pinch-to-zoom
Stylus compatibility (where supported)
Any missed touch inputs or inconsistent sensitivity must be corrected before final assembly.
Folding Mechanism Test
The hinge undergoes repeated opening and closing cycles to verify:
Smooth movement
Consistent resistance
Proper alignment
No unusual noises
Full opening angle
A properly restored Galaxy Z Fold 6 should fold naturally without excessive force.
Connectivity Testing
Professional technicians also verify:
Feature
Test
Wi-Fi
Stable connection
Bluetooth
Device pairing
NFC
Communication test
Mobile Network
Signal reception
USB-C Port
Charging and data
Wireless Charging
Charging speed
Cameras
Image and video quality
Speakers
Stereo output
Microphones
Voice recording
Vibration Motor
Haptic feedback
Every function is checked to ensure no connectors were disturbed during the repair.
Common Mistakes to Avoid During Foldable Display Repairs
Repairing a foldable smartphone requires precision, patience, and specialized knowledge. Attempting shortcuts can lead to costly damage.
Some of the most common mistakes include:
Skipping Battery Disconnection
Failing to disconnect the battery before removing display connectors can permanently damage sensitive electronic components.
Applying Excessive Heat
Too much heat may:
Warp plastic components
Damage the OLED panel
Soften internal adhesives excessively
Reduce waterproof sealing effectiveness
Using Incorrect Adhesive
Generic adhesives may fail after repeated folding cycles.
Professionals use high-quality, precision-cut adhesive designed specifically for foldable devices.
Touching the Flexible OLED
The flexible OLED panel is extremely delicate.
Even light pressure from a fingernail or metal tool can permanently damage the display.
Ignoring Hinge Problems
Installing a new display without addressing a worn or damaged hinge can cause the replacement screen to fail prematurely.
Poor Dust Control
Tiny dust particles trapped beneath the display may become visible after installation.
Clean-room practices and careful cleaning significantly improve repair quality.
Tips to Extend the Life of Your Galaxy Z Fold 6 Display
After a successful repair, proper care helps maximize the lifespan of the new inner screen.
Here are some practical recommendations:
Open and close the phone gently.
Avoid pressing directly on the crease.
Never close the phone with objects inside.
Use a quality protective case.
Keep the hinge clean.
Avoid exposure to sand and fine dust.
Protect the phone from extreme temperatures.
Do not remove the factory-installed screen protector unless advised by a professional.
Have the device inspected if you notice unusual hinge resistance or display flickering.
Preventive care can significantly reduce the likelihood of future repairs.
Why Professional Repair Is Worth It
Foldable smartphones represent a significant investment, and their repair demands expertise that goes beyond conventional phone servicing.
Professional technicians offer several advantages:
Specialized tools designed for foldable devices
Genuine or premium-quality replacement parts
Experience with delicate flexible OLED assemblies
Accurate diagnostics before and after repair
Proper adhesive application techniques
Comprehensive quality assurance testing
Warranty coverage on eligible repairs
Choosing a reputable repair center helps protect your investment and restore your device to dependable working condition.
For additional information about Samsung Galaxy devices, visit Samsung’s official support website: https://www.samsung.com/support/
Frequently Asked Questions
1. Can the Samsung Galaxy Z Fold 6 inner screen be repaired?
Yes. In most cases, a damaged inner display can be restored by replacing the complete folding display assembly. The exact repair depends on the extent of the damage.
2. How long does a professional inner screen replacement take?
Repair times vary depending on parts availability and the condition of the device. Many professional repair centers can complete the repair on the same day when replacement parts are in stock.
3. Will the crease disappear after replacing the display?
A slight crease is a normal characteristic of Samsung foldable displays. A new display will restore normal appearance, but the fold line will still be visible under certain lighting conditions.
4. Does replacing the inner display affect the outer screen?
No. The inner and outer displays are separate components. However, both are tested during the repair to ensure the device functions correctly.
5. Is the repaired phone still water resistant?
Opening the device breaks the original factory seal. Professional technicians replace adhesive seals during reassembly, but the phone may not retain the exact factory-rated level of water resistance. It’s best to avoid unnecessary exposure to water after any major repair.
6. Should I repair or replace my Galaxy Z Fold 6?
If the motherboard, cameras, and other major components remain in good condition, repairing the inner display is often a cost-effective solution compared to purchasing a new flagship device.
Conclusion
The INNER SCREEN SURGERY: Samsung Galaxy Z Fold 6 Folding Display Restoration Process demonstrates just how advanced modern smartphone technology has become. From its flexible AMOLED panel and Ultra Thin Glass to its precision-engineered hinge, every component must work together flawlessly to deliver the seamless folding experience users expect.
Restoring this sophisticated device requires careful diagnostics, specialized equipment, expert handling, and rigorous quality control. Every stage—from battery isolation and safe disassembly to display installation, calibration, and final testing—plays an essential role in ensuring long-lasting performance.
Attempting such a repair without the proper experience can lead to additional damage, making professional service the safest and most reliable choice. By trusting skilled technicians and following good maintenance practices, Galaxy Z Fold 6 owners can enjoy a fully restored folding display and continue using one of Samsung’s most innovative smartphones with confidence.
David from Sydney CBD Repair Centre – The Best place to fix mobile phones as 7 Years In A Row! Top Mobile Phone Repair In Sydney. More than 2000 Positive Reviews on Google and Same Day Repairs.
We take pride in delivering exceptional repair services for all major phone brands including Apple, Samsung, Google, and more. Our expert technicians use only genuine parts and offer 90 days warranty on repairs. Located in the heart of Sydney CBD, we’re your one-stop solution for all mobile device repairs.
Our commitment to excellence has earned us the trust of thousands of satisfied customers. Whether it’s a cracked screen, battery replacement, or water damage repair, we handle it all with professional care and expertise. Walk in today and experience why we’re Sydney’s #1 choice for mobile phone repairs.
Visit us for:
✓ Same Day Express Repairs
✓ Genuine Parts Guarantee
✓ Professional Technicians
✓ Competitive Pricing
✓ 2000+ 5-Star Google Reviews
✓ 7-Time Award Winner for Best Phone Repairs
Sydney CBD Repair Centre – Where Quality Meets Reliability.
Cracked but NOT Crushed: Resurrecting a OnePlus 13’s Shattered Screen – Ultimate Recovery Guide + 7 Proven Fixes
Introduction:
A cracked OnePlus 13 screen can feel like a total disaster. One moment you’re enjoying flawless AMOLED visuals, and the next, your display looks like a spider web. However, here’s the good news: a cracked OnePlus 13 screen doesn’t mean your phone is finished. In fact, modern screen repair techniques make full restoration not only possible but practical.
The OnePlus 13 is a premium device with advanced display technology. Because of this, screen damage can look worse than it actually is. With the right approach, your OnePlus 13 screen repair can bring your device back to life without compromising performance. Let’s break it all down in plain English.
The OnePlus 13 features an advanced AMOLED display that delivers deep blacks, vibrant colors, and energy efficiency. This screen consists of multiple layers including protective glass, digitizer, and the AMOLED panel itself. When a cracked OnePlus 13 screen occurs, often only the top glass layer is damaged.
This layered design is why professional OnePlus 13 screen repair is so effective. Technicians can replace the damaged layers while preserving the internal display components.
Why the OnePlus 13 Screen Is Fragile
Despite Gorilla Glass protection, the OnePlus 13 screen remains vulnerable. Thin bezels, curved edges, and a large surface area increase the risk of cracking. Even minor drops can lead to significant visual damage.
Let’s be honest—drops happen. A single fall onto concrete can crack a OnePlus 13 screen instantly. Gravity doesn’t play favorites.
Pressure Damage
Sitting on your phone or keeping it in a tight pocket can cause internal stress fractures. These often start small but spread quickly.
Thermal Stress
Sudden temperature changes can weaken the glass, making the OnePlus 13 screen more susceptible to cracking.
Signs Your OnePlus 13 Screen Needs Immediate Repair
Visual Damage Indicators
Spiderweb cracks
Black spots or lines
Flickering display
These signs clearly indicate a cracked OnePlus 13 screen that requires attention.
Touch Sensitivity Issues
If your screen responds inconsistently or stops responding altogether, the digitizer may be damaged. Immediate OnePlus 13 screen repair prevents further complications.
DIY vs Professional OnePlus 13 Screen Repair
Pros and Cons of DIY Screen Repair
DIY repair kits are widely available and cheaper upfront. However, they require technical skill, patience, and proper tools.
Pros:
Lower cost
Immediate access
Cons:
High risk of further damage
No warranty
Reduced resale value
Risks of Home Repairs
Attempting a OnePlus 13 screen repair at home can damage internal components like the fingerprint sensor or AMOLED panel. One mistake and the cost doubles.
Professional OnePlus 13 Screen Repair: What to Expect
Repair Process Overview
Professional technicians follow a structured process:
Diagnostic testing
Safe disassembly
Screen replacement
Quality assurance
This ensures your cracked OnePlus 13 screen is restored to factory standards.
Repair Timeframes
Most professional repairs are completed the same day. In many cases, the OnePlus 13 screen repair takes less than two hours.
Cost Breakdown for OnePlus 13 Screen Repair
Repair Type
Estimated Cost
Glass Only Repair
Moderate
Full Display Replacement
Higher
DIY Kit
Low upfront, high risk
While DIY appears cheaper, professional OnePlus 13 screen repair often saves money long-term.
How to Protect Your OnePlus 13 After Repair
Use a tempered glass protector
Invest in a shockproof case
Avoid extreme temperatures
Handle with care
Prevention is always cheaper than another cracked OnePlus 13 screen.
Environmental Impact of Screen Repairs
Repairing instead of replacing your OnePlus 13 reduces electronic waste. According to environmental studies, extending device lifespan significantly lowers carbon footprint. Learn more about e-waste reduction from Apple’s environmental initiatives: https://www.apple.com/environment/
Frequently Asked Questions (FAQs)
1. Can I use my phone with a cracked OnePlus 13 screen?
Yes, but it’s risky. Cracks can worsen and cause internal damage.
2. Is OnePlus 13 screen repair worth it?
Absolutely. Repairs cost far less than replacing the device.
3. How long does professional OnePlus 13 screen repair take?
Typically 1–2 hours depending on damage severity.
4. Will my data be safe during repair?
Yes, reputable repair centers protect your data.
5. Does screen repair affect waterproofing?
Professional repairs restore seals, but water resistance may slightly reduce.
6. Can a cracked OnePlus 13 screen cause battery drain?
Yes, display damage can increase power consumption.
Conclusion: Restore, Don’t Replace
A cracked OnePlus 13 screen may look devastating, but it’s far from the end. With professional OnePlus 13 screen repair, your device can be restored quickly, safely, and affordably. Instead of replacing your phone, choose repair—it’s smarter, greener, and more cost-effective.
David from Sydney CBD Repair Centre – The Best place to fix mobile phones as 7 Years In A Row! Top Mobile Phone Repair In Sydney. More than 2000 Positive Reviews on Google and Same Day Repairs.
We take pride in delivering exceptional repair services for all major phone brands including Apple, Samsung, Google, and more. Our expert technicians use only genuine parts and offer 90days warranty on repairs. Located in the heart of Sydney CBD, we’re your one-stop solution for all mobile device repairs.
Our commitment to excellence has earned us the trust of thousands of satisfied customers. Whether it’s a cracked screen, battery replacement, or water damage repair, we handle it all with professional care and expertise. Walk in today and experience why we’re Sydney’s #1 choice for mobile phone repairs.
Visit us for:
✓ Same Day Express Repairs
✓ Genuine Parts Guarantee
✓ Professional Technicians
✓ Competitive Pricing
✓ 2000+ 5-Star Google Reviews
✓ 7-Time Award Winner for Best Phone Repairs
Repair or Replace? The S21 Ultra Signal and Display Striping Dilemma Explained – 9 Critical Insights You Must Know
📱 Introduction to the S21 Ultra Signal and Display Striping Issue
The Samsung Galaxy S21 Ultra remains one of Samsung’s most powerful flagship devices. However, even premium smartphones aren’t immune to faults. One growing concern among users is the S21 Ultra signal and display striping issue—a frustrating combination of weak reception and unusual lines across the screen.
These problems can appear suddenly, often after a drop, software update, or prolonged use. Naturally, the big question arises: Should you repair or replace the device?
Let’s break it down in a practical, no-nonsense way.
Display striping refers to vertical or horizontal lines appearing on the screen. These may flicker, stay constant, or worsen over time.
🎨 Types of Display Striping
Green or pink vertical lines
Horizontal flickering bands
Full-screen distortion
⚠️ Root Causes Behind Screen Issues
AMOLED panel damage
Loose display connectors
Faulty display IC
Water or moisture exposure
Sometimes, the display striping appears alongside signal issues, suggesting a deeper motherboard-level fault.
🛠️ Diagnosing the Problem Accurately
Before jumping to conclusions, proper diagnosis is key.
🔎 DIY Diagnostic Steps
Restart your phone
Reset network settings
Test with another SIM card
Check for visible screen damage
🧪 Professional Diagnostic Methods
Technicians use:
Signal testing tools
Thermal cameras
Microscope board inspections
Accurate diagnosis ensures you don’t waste money fixing the wrong problem.
🔧 Repair Options for Signal Issues
📡 Antenna Repairs
If the antenna is damaged or disconnected, technicians can:
Re-seat connectors
Replace antenna modules
🧠 Baseband IC Fixes
This is more complex. It involves:
Micro-soldering
Reballing or replacing chips
This type of repair requires high-level expertise but is often cheaper than replacement.
🖥️ Repair Options for Display Striping
📱 Screen Replacement
The most common solution:
Full AMOLED display replacement
Restores visual clarity instantly
🔌 Flex Cable Repairs
If the issue is minor:
Reconnecting or replacing display flex cables
Cleaning internal connectors
💰 Cost Comparison: Repair vs Replace
💵 Average Repair Costs
Issue
Estimated Cost
Antenna Repair
$50 – $120
Baseband Repair
$120 – $250
Screen Replacement
$200 – $350
📦 Replacement Cost Analysis
Buying a new flagship phone can cost:
$800 – $1200+
Clearly, repairs are often more economical.
✅ When Repair Is the Better Choice
Choose repair if:
The phone is less than 2–3 years old
Damage is isolated (screen or antenna only)
Repair cost is under 50% of device value
The S21 Ultra signal and display striping issue is usually repairable—especially when caught early.
🔄 When Replacement Makes More Sense
Replacement might be smarter if:
Multiple components are failing
The motherboard is severely damaged
Repair costs exceed half the phone’s value
Sometimes, it’s simply not worth throwing money at a failing device.
🛡️ Preventing Future Signal and Display Issues
🔧 Maintenance Tips
Keep software updated
Avoid overheating
Use certified chargers
📦 Protective Measures
Use shockproof cases
Apply screen protectors
Avoid moisture exposure
A little care goes a long way.
👨🔧 Expert Tips from Repair Technicians
Professionals agree on a few things:
Early diagnosis saves money
Cheap repairs often lead to bigger issues
Always choose experienced technicians
In fact, improper repair attempts are one of the biggest causes of worsening damage.
❓ FAQs
1. Can signal issues and display striping be related?
Yes, especially if the motherboard is affected. A single drop can impact multiple components.
2. Is screen striping always a hardware issue?
Mostly yes, though rare software bugs can mimic it.
3. How long does repair take?
Typically 1–3 hours for standard repairs.
4. Will repairs affect water resistance?
Yes, most repairs reduce original waterproofing unless resealed professionally.
5. Is it safe to keep using a striped display?
It’s not dangerous, but it may worsen and affect usability.
6. Can I fix signal issues at home?
Basic troubleshooting is fine, but hardware fixes require professional tools.
🏁 Conclusion
The S21 Ultra signal and display striping issue might seem like a deal-breaker at first glance—but in reality, it’s often manageable. With proper diagnosis and skilled repair, your device can return to peak performance without the hefty cost of replacement.
Still, the decision ultimately comes down to cost, severity, and long-term value. If repairs are affordable and effective, they’re usually the smarter choice. But if problems pile up, replacing the device may save you time, money, and frustration.
David from Sydney CBD Repair Centre – The Best place to fix mobile phones as 7 Years In A Row! Top Mobile Phone Repair In Sydney. More than 2000 Positive Reviews on Google and Same Day Repairs.

We take pride in delivering exceptional repair services for all major phone brands including Apple, Samsung, Google, and more. Our expert technicians use only genuine parts and offer 90days warranty on repairs. Located in the heart of Sydney CBD, we’re your one-stop solution for all mobile device repairs.
Our commitment to excellence has earned us the trust of thousands of satisfied customers. Whether it’s a cracked screen, battery replacement, or water damage repair, we handle it all with professional care and expertise. Walk in today and experience why we’re Sydney’s #1 choice for mobile phone repairs.
Visit us for:
✓ Same Day Express Repairs
✓ Genuine Parts Guarantee
✓ Professional Technicians
✓ Competitive Pricing
✓ 2000+ 5-Star Google Reviews
✓ 7-Time Award Winner for Best Phone Repairs
Samsung Galaxy Note 20 Ultra is an iconic flagship phone known for its dynamic AMOLED 2X display, high refresh rate, and immersive viewing experience. But even premium screens aren’t immune to cracks, scratches, or malfunctioning touch sensitivity. Understanding the Samsung Galaxy Note 20 Ultra screen replacement cost is essential for budgeting repairs and avoiding further damage.
Whether your device suffered accidental drops, water exposure, or long-term wear, a damaged screen can compromise both usability and resale value. In this guide, we’ll break down the costs, explain repair options, share tips to save money, and answer frequently asked questions to help you make the best decision.
The Note 20 Ultra boasts a 6.9-inch Dynamic AMOLED 2X display. This screen offers vivid colors, deep blacks, and an adaptive refresh rate up to 120Hz, delivering a smooth scrolling experience. AMOLED technology, while visually stunning, is more delicate than traditional LCDs, making professional care vital for repairs.
Screen Durability and Common Issues
Despite its Gorilla Glass Victus protection, the Note 20 Ultra screen is susceptible to:
Cracks and shattering from drops or impacts
Dead pixels or discoloration over time
Touch screen malfunctions caused by internal damage
Screen burn-in with prolonged static image use
These problems often necessitate a full screen replacement rather than partial repairs.
Understanding the components that influence repair costs can help you plan effectively.
OEM vs Aftermarket Parts
OEM (Original Equipment Manufacturer) parts ensure full compatibility and performance. Prices are higher but guarantee longevity.
Aftermarket screens are cheaper but may have lower color accuracy, touch sensitivity issues, or faster wear.
Labor Costs and Repair Complexity
Replacing the Note 20 Ultra screen requires careful disassembly, removal of the curved glass, and proper installation of a new panel. Labor fees vary depending on location and technician expertise.
Warranty and Service Charges
Authorized service centers may charge more, but repairs often come with warranty coverage. Third-party shops may offer competitive rates but with limited guarantees.
Average Price Range for Screen Replacement
Retail and Authorized Service Centers
Samsung official repair services typically charge $350–$450 for a Note 20 Ultra screen replacement. This includes OEM parts and warranty coverage, ensuring original quality.
Independent Repair Shops
Independent or local repair centers often charge $200–$300, offering a balance between affordability and reliability. Ensure they use high-quality parts and provide at least a 90-day warranty.
DIY Repair Cost Considerations
DIY replacements can cost $150–$250, depending on parts and tools. While cheaper, risks include voiding warranties, damaging internal components, and poor screen alignment.
Step-by-Step Guide to Samsung Galaxy Note 20 Ultra Screen Replacement
Preparing for the Repair
Backup your data to prevent accidental loss.
Power off the device and remove the SIM card tray.
Use a suction cup and plastic opening tools to lift the back panel.
Disconnect battery and display connectors carefully.
Replacing the Screen
Remove the damaged screen gently, avoiding damage to the frame or internal components.
Install the new screen, ensuring connectors are properly seated.
Apply new adhesive for secure attachment.
Reassembling and Testing
Reconnect battery and close the device.
Test display, touch functionality, and sensors before sealing completely.
Ensure no dust or bubbles are trapped under the new screen.
DIY vs Professional Repair: Pros and Cons
Option
Pros
Cons
DIY
Lower cost, flexible timing
Risk of damage, no warranty, technical skill required
Professional
Warranty coverage, high success rate, no risk to internals
Higher cost, scheduling required
Tips to Minimize Repair Costs
Use of Insurance and Warranty
Check if your device insurance or Samsung Care+ covers screen damage.
Some plans reduce the out-of-pocket cost significantly.
Choosing Reliable Repair Centers
Look for certified technicians with genuine parts.
Check online reviews and ask for written guarantees.
Signs Your Screen Needs Immediate Replacement
Cracked glass or shattered panels
Unresponsive touch or ghost touches
Dark spots, lines, or discoloration
Flickering or dead pixels
Ignoring these signs can lead to further internal damage and higher costs.
How to Protect Your Samsung Galaxy Note 20 Ultra Screen
Screen Protectors and Cases
Tempered glass or high-quality film protectors prevent scratches and minor cracks.
Protective cases with raised edges minimize direct impact on the screen.
Proper Handling Practices
Avoid placing the phone face-down on rough surfaces.
Keep it away from extreme heat or direct sunlight for long periods.
Handle with clean, dry hands to prevent moisture damage.
FAQs About Samsung Galaxy Note 20 Ultra Screen Replacement
Q1: How long does a screen replacement take?
A1: Professional repairs usually take 30 minutes to 2 hours depending on shop workload. DIY repairs can take longer due to careful handling.
Q2: Is it safe to use an aftermarket screen?
A2: Aftermarket screens are generally safe but may have lower brightness, color accuracy, or touch sensitivity. OEM parts are recommended for optimal performance.
Q3: Will a cracked screen affect my warranty?
A3: Yes, using a DIY or unauthorized repair can void your warranty. Official repairs maintain coverage.
Q4: Can water damage occur during screen replacement?
A4: If not properly sealed after repair, water damage is possible. Ensure professional technicians apply appropriate adhesive and seals.
Q5: Is Samsung Care+ worth it?
A5: Absolutely. It reduces repair costs and ensures genuine parts, especially for expensive screens like the Note 20 Ultra.
Q6: Can I repair the screen myself without special tools?
A6: It’s risky. Proper tools and knowledge are required to avoid damaging fragile internal components. DIY should only be attempted if confident.
Conclusion: Making the Right Choice for Screen Repair
Replacing a Samsung Galaxy Note 20 Ultra screen can be costly, but making an informed choice ensures device longevity and functionality. Consider OEM parts for long-term reliability, weigh professional repair benefits against DIY cost savings, and always use protective accessories to prevent future damage. By understanding the screen replacement costs, repair steps, and tips to reduce expenses, you’ll protect your investment while enjoying a flawless display.
For professional and reliable repairs in Sydney, visit Sydney CBD Repair Centre – experts in Samsung phone repairs with genuine parts and same-day service.
David from Sydney CBD Repair Centre – The Best place to fix mobile phones as 7 Years In A Row! Top Mobile Phone Repair In Sydney. More than 2000 Positive Reviews on Google and Same Day Repairs.
We take pride in delivering exceptional repair services for all major phone brands including Apple, Samsung, Google, and more. Our expert technicians use only genuine parts and offer 90days warranty on repairs. Located in the heart of Sydney CBD, we’re your one-stop solution for all mobile device repairs.
Visit us for:
✓ Same Day Express Repairs
✓ Genuine Parts Guarantee
✓ Professional Technicians
✓ Competitive Pricing
✓ 2000+ 5-Star Google Reviews
✓ 7-Time Award Winner for Best Phone Repairs
OLED vs. AMOLED: Which Screen Replacement Is Best for Your Phone? 🚀 7 Critical Facts You Must Know
Introduction to OLED vs. AMOLED Screen Replacement
When it comes to phone repairs, few decisions are as important as choosing the right screen replacement. OLED vs. AMOLED screen replacement debates are everywhere, and for good reason. Your screen isn’t just glass—it’s the heart of how you interact with your device.
Nowadays, most premium smartphones rely on OLED-based displays. However, not all OLEDs are created equal. AMOLED, a specific type of OLED, promises better efficiency and performance. But does that mean it’s always the best option for repairs? Not necessarily.
In this guide, we’ll break everything down in plain English. We’ll compare OLED vs. AMOLED in terms of performance, cost, durability, and repair suitability. By the end, you’ll know exactly which screen replacement makes sense for your phone and your budget.
Before comparing OLED vs. AMOLED screen replacement options, it helps to understand how these technologies work.
What Is OLED Technology?
OLED stands for Organic Light-Emitting Diode. Unlike older LCD screens, OLED panels don’t require a backlight. Each pixel lights up independently. That’s why OLED screens can turn pixels completely off, creating true blacks.
Key OLED characteristics:
Self-emissive pixels
Excellent contrast ratios
Thinner and lighter design
Flexible panel possibilities
OLED technology is widely used across many brands, including Apple, LG, and Google. For repairs, standard OLED panels are often more affordable and widely available.
What Is AMOLED Technology?
AMOLED stands for Active Matrix Organic Light-Emitting Diode. It’s essentially an advanced version of OLED. The “active matrix” means each pixel is controlled by thin-film transistors (TFTs), allowing faster response times and better power efficiency.
Key AMOLED advantages:
Faster refresh rates
Improved battery efficiency
Higher brightness levels
Better performance in large displays
Samsung pioneered AMOLED and continues to dominate this space.
Although AMOLED is technically a type of OLED, the differences matter a lot during screen replacement.
Display Structure and Layers
Standard OLED screens use a simpler matrix. AMOLED panels, on the other hand, have an active matrix that manages each pixel individually.
What this means for repairs:
AMOLED screens are more complex to manufacture
Repairs require higher precision
AMOLED replacements usually cost more
Power Consumption Comparison
AMOLED displays are more energy-efficient, especially when displaying dark content. Since each pixel draws power independently, black pixels consume almost no energy.
In OLED vs. AMOLED screen replacement scenarios, AMOLED can help extend battery life slightly—but only if the phone supports it natively.
Visual Performance Breakdown
Let’s talk about what users actually see.
Brightness, Contrast, and Color Accuracy
Both OLED and AMOLED offer stunning visuals. However, AMOLED generally pushes brightness levels higher and delivers more saturated colors.
OLED:
Natural color reproduction
Excellent blacks
Slightly lower peak brightness
AMOLED:
Vivid, punchy colors
Higher brightness
Better contrast in sunlight
Outdoor Visibility and HDR
AMOLED screens usually perform better outdoors. HDR content also looks more impressive due to higher peak brightness.
That said, a high-quality OLED replacement can still deliver an excellent viewing experience for most users.
Durability and Lifespan in Real-World Use
Durability is crucial when choosing between OLED vs. AMOLED screen replacement options.
Burn-In Risks Explained
Burn-in happens when static images remain on the screen for too long. Both OLED and AMOLED are susceptible, but AMOLED panels—due to higher brightness—may show burn-in sooner if misused.
Tips to reduce burn-in:
Use dark mode
Lower screen brightness
Avoid static images
Repair Longevity After Replacement
A professionally installed OLED or AMOLED screen can last years. However, AMOLED replacements require higher-quality parts to avoid issues like touch lag or uneven brightness.
OLED vs. AMOLED for Phone Screen Replacement
This is where things get practical.
Cost Comparison for Repairs
In most repair shops:
OLED replacements are more budget-friendly
AMOLED replacements cost 20–40% more
For older phones, OLED replacements often make more financial sense.
Availability of Replacement Parts
OLED parts are easier to source globally. AMOLED replacements, especially genuine ones, may have limited availability depending on the model.
Which Brands Use OLED vs. AMOLED?
Samsung: AMOLED
Apple: OLED (Samsung-manufactured panels)
Google Pixel: OLED / AMOLED (model-dependent)
OnePlus: AMOLED
Understanding your phone’s original display helps ensure compatibility during repairs.
User Experience and Daily Usage
In day-to-day use, most people won’t notice a dramatic difference. Social media, videos, and browsing look fantastic on both.
However, gamers and heavy users may appreciate AMOLED’s faster response times and smoother visuals.
Environmental and Energy Considerations
AMOLED displays are more energy-efficient, which slightly reduces environmental impact over time. OLED panels, however, are simpler to recycle due to fewer layers.
Common Myths About OLED and AMOLED
Myth: AMOLED is always better Truth: It depends on usage and budget.
Myth: OLED screens are outdated Truth: OLED is still premium technology.
Myth: Screen replacement quality is the same everywhere Truth: Installation quality matters more than the screen type.
Frequently Asked Questions (FAQs)
1. Is AMOLED better than OLED for screen replacement?
Not always. AMOLED offers better performance, but OLED replacements are often more affordable and reliable for repairs.
2. Will an OLED replacement affect my phone’s performance?
No, as long as it’s compatible and professionally installed.
3. Are AMOLED replacements worth the extra cost?
For flagship phones and power users, yes. For older devices, OLED is usually sufficient.
4. Can AMOLED screens drain battery faster?
Actually, AMOLED screens are more efficient, especially with dark mode.
5. Do OLED screens last longer than AMOLED?
Lifespan is similar. Usage habits matter more than the technology itself.
6. Should I always choose genuine parts?
Absolutely. Genuine or high-quality OEM parts ensure better durability and display quality.
For more technical background, you can explore display fundamentals on sites like Wikipedia’s OLED overview.
Conclusion: Which Screen Replacement Should You Choose?
Choosing between OLED vs. AMOLED screen replacement isn’t about picking the “best” technology—it’s about choosing what’s best for your phone. AMOLED offers top-tier visuals and efficiency, while OLED provides excellent quality at a more accessible price point.
If you want performance and don’t mind the cost, AMOLED is a solid choice. If value and reliability matter more, OLED won’t disappoint. Either way, professional installation is key to long-term satisfaction.
David from Sydney CBD Repair Centre – The Best place to fix mobile phones as 6 Years In A Row! Top Mobile Phone Repair In Sydney. More than 2000 Positive Reviews on Google and Same Day Repairs.
We take pride in delivering exceptional repair services for all major phone brands including Apple, Samsung, Google, and more. Our expert technicians use only genuine parts and offer 90 days warranty on repairs. Located in the heart of Sydney CBD, we’re your one-stop solution for all mobile device repairs.
Our commitment to excellence has earned us the trust of thousands of satisfied customers. Whether it’s a cracked screen, battery replacement, or water damage repair, we handle it all with professional care and expertise. Walk in today and experience why we’re Sydney’s #1 choice for mobile phone repairs.
Visit us for:
✓ Same Day Express Repairs
✓ Genuine Parts Guarantee
✓ Professional Technicians
✓ Competitive Pricing
✓ 2000+ 5-Star Google Reviews
✓ 6-Time Award Winner for Best Phone Repairs
S24 Ultra Screen Troubleshooting: White Screen Fix – 7 Expert Tips to Restore Display Function
📱 Introduction: The White Screen Dilemma on S24 Ultra
The Samsung Galaxy S24 Ultra boasts a stunning Dynamic AMOLED 2X display, yet like all smartphones, it’s not immune to faults. One of the more frustrating issues users face is the white screen problem — where the device powers on, but only a blank white screen appears. No touch response. No visible interface. Just… white.
Whether caused by a hardware issue or a software glitch, the white screen of death is a common problem reported by users — especially after accidental drops, liquid exposure, or DIY repair attempts.
At Sydney CBD Repair Centre, we’ve restored countless S24 Ultra devices with this exact issue using our 7-step troubleshooting process. Read on to learn what causes the white screen and what you can do about it — both at home and with expert help.
Before jumping to conclusions, try these at-home troubleshooting steps:
Soft Reset and Safe Mode
Press and hold the Power + Volume Down buttons for 10 seconds until the phone restarts.
Once restarted, immediately press and hold the Volume Down key until the lock screen appears — this boots into Safe Mode.
If the white screen disappears in Safe Mode, it’s likely a third-party app is causing the issue.
Booting into Recovery or Download Mode
Recovery Mode:
Hold Power + Volume Up to enter recovery.
From here, you can wipe cache partition or perform a factory reset.
Download Mode:
Hold Power + Volume Down + Bixby (if available) to enter download mode.
This can be used for firmware flashing via Odin (best done by professionals).
♻️ 3. When a Factory Reset Might Work (And When It Won’t)
If you can access recovery mode, a factory reset might help — especially if the white screen is caused by corrupted software. However, this will erase all data, so proceed cautiously.
It won’t help if:
The screen remains white even in recovery mode
The issue began after a drop or liquid exposure
Touchscreen is completely unresponsive
In those cases, it’s almost certainly a hardware issue that needs repair.
Inside every phone is a network of flex cables connecting the screen to the logic board. If the phone was dropped or poorly repaired, these can:
Dislodge slightly, breaking the signal
Tear, especially near the connector
Burn out from short circuits
A simple re-seat might fix it — but only trained technicians should attempt this, as it involves opening the device.
Screen Assembly Not Aligned Properly
Low-quality third-party repairs may not install the screen assembly with the correct bezel or adhesive, causing:
Pressure misdistribution
Display flickering or full failure
White or blank screen symptoms
That’s why we always recommend genuine screen assemblies with bezel at Sydney CBD Repair Centre.
💡 5. Display Replacement: When the Screen is Truly Damaged
Using Genuine AMOLED Panels
Samsung S24 Ultra uses a high-resolution, curved-edge AMOLED screen. Aftermarket panels often fail to match brightness, color accuracy, and touch responsiveness — and some don’t even support the in-display fingerprint sensor.
At Sydney CBD Repair Centre, we only use OEM or premium-quality AMOLED screens that are 100% compatible with your device.
Why Bezel Matters in Reassembly
A properly aligned bezel ensures that the screen is seated evenly. When missing, screens are more likely to:
Lift from corners
Detach over time
Misalign with sensors
Always ensure your replacement includes a bezel, or your repair may not last.
🧠 6. Logic Board Problems: The Hardest Diagnosis
Backlight Circuit Failure
If the phone is on, but the screen is white or extremely dim, the backlight circuit may have failed. This tiny system of micro-components powers your display’s lighting layer. A single burnt capacitor or IC can knock it out.
GPU Signal Malfunction
The graphics processing unit (GPU) on your motherboard is responsible for sending visual data to the screen. If it’s damaged, the screen may:
Show a solid white image
Flicker or ghost
Freeze entirely
Our team at Sydney CBD Repair Centre is trained in micro-soldering repairs, capable of replacing faulty components on the motherboard — a level of repair very few shops offer.
🧰 7. How Sydney CBD Repair Centre Fixes the White Screen Issue
Our Diagnostic Process
Initial inspection – visual and functional tests
Connector check – we open the device and inspect internal connections
Screen test – we plug in a known working screen
Board diagnostics – we measure voltage at key points to check for logic board failure
Component-level repair – if needed, we replace chips and reflow solder joints
Every repair ends with a multi-point quality test, ensuring your phone is safe, functional, and aligned with OEM specs.
Real Customer Repair Story
A client brought in a Galaxy S24 Ultra with a pure white screen after a fall. Other shops said it was a lost cause. Our team diagnosed a damaged display flex and minor board burn — and repaired it the same day using OEM parts.
The customer walked out with their original data intact, a new display, and peace of mind.
❓ FAQs
1. Why is my S24 Ultra screen white but the phone is still on?
This is likely due to either a screen failure or a logic board issue affecting the display signal. A professional diagnosis is needed.
2. Can I fix the white screen myself?
You can try a soft reset or boot into recovery, but if that doesn’t work, internal hardware is likely damaged — and DIY attempts may worsen the problem.
3. How much does it cost to fix a white screen on a Galaxy S24 Ultra?
At Sydney CBD Repair Centre, we offer competitive pricing with genuine parts. The cost depends on whether it’s a display replacement or board repair. Contact us for a free quote.
4. How long does the repair take?
Most screen-related repairs are done same-day, and logic board issues may take 1–3 days depending on complexity.
5. Is my data safe during the repair?
Yes. We take data protection seriously. Unless a factory reset is required (you’ll be informed), your data will be preserved.
6. Do you offer a warranty?
Absolutely. All our repairs come with a 90-day warranty covering parts and workmanship.
✅ Conclusion: Get Your Display Working Again
The white screen issue on the S24 Ultra may seem like a dead end — but with the right expertise, it’s often fully repairable. Whether it’s a loose flex, a faulty AMOLED, or a board-level failure, our technicians at Sydney CBD Repair Centre are ready to bring your phone back to life.
Don’t gamble with DIY solutions or budget repairs that skip the bezel or use low-quality screens. Trust the shop with over 2000 five-star Google reviews and a reputation for same-day, expert-level repairs.
The Ultimate Guide to Replacing a Fingerprint Display Screen: 15 Expert Steps + Pro Tips
🔍 What is a Fingerprint Display Screen?
A fingerprint display screen integrates a biometric scanner beneath the screen glass, allowing users to unlock their phones by placing a finger on the display itself. This advanced technology is commonly found in modern Samsung, Huawei, OnePlus, and Xiaomi smartphones.
These displays are typically OLED or AMOLED, enabling light to pass through the screen and detect fingerprint patterns. While sleek and secure, these screens are delicate and challenging to replace without damaging the sensor or affecting display quality.
Technically yes, but it’s not recommended unless you’re experienced. These screens are:
Fragile – and easy to damage during removal
Expensive – especially if genuine parts are used
Sensitive – improper installation can render the fingerprint sensor useless
A small mistake could cost you more than the initial repair. That’s why many users in Sydney trust Sydney CBD Repair Centre for professional repairs with same-day service and warranty.
🧰 Tools You’ll Need for a Screen Replacement
To replace a fingerprint display screen safely, you’ll need the following tools:
Heat gun or screen separator
Suction cup and plastic pry tools
Phillips and Pentalobe screwdrivers
ESD-safe tweezers
Isopropyl alcohol (90%+)
Adhesive remover
Anti-static gloves
Genuine screen replacement (OEM quality)
Make sure to work in a dust-free, well-lit environment to avoid damaging internal components.
🛠️ Step-by-Step Guide to Replace a Fingerprint Display Screen
✅ Step 1: Power Off and Prepare Your Workspace
Power down your device completely.
Place the phone on a clean, flat surface.
Wear anti-static gloves to protect sensitive components.
🧯 Step 2: Open the Device Carefully
Use a heat gun around the edges to soften adhesive.
Gently apply suction and insert a plastic pry tool.
Slowly separate the screen from the frame—don’t rush.
🔌 Step 3: Disconnect the Battery and Components
Unscrew internal covers.
Disconnect the battery and any display or fingerprint cables.
Handle flex cables with care to prevent tearing.
💥 Step 4: Remove the Broken Display
Gently peel away the damaged screen using adhesive remover if needed.
Clean the surface thoroughly to prepare for the new screen.
📲 Step 5: Install the New Fingerprint Display
Align the new screen carefully.
Connect the fingerprint sensor cable exactly as the original.
Apply appropriate adhesive for waterproof sealing.
🔄 Step 6: Reconnect and Test
Reconnect the battery and internal components.
Boot up the phone and test the display and fingerprint functionality.
Reassemble the phone carefully, ensuring everything fits snugly.
⚠️ Common Mistakes to Avoid During Replacement
Using cheap aftermarket screens—they may not support fingerprint recognition
Applying too much pressure—can damage the OLED panel
Not cleaning adhesive residue—can affect screen alignment
Forgetting to test before sealing—results in repeat teardown
🧑🔧 Why Professional Replacement is Recommended
Replacing a fingerprint display screen is not just about swapping glass. It involves:
Re-calibration of the fingerprint sensor
Careful adhesive management for waterproofing
Ensuring zero damage to OLED layers or logic board
At Sydney CBD Repair Centre, we use genuine parts and follow a refined process to restore your phone to factory standards, backed by a 90-day warranty.
🛠️ How We Replace Fingerprint Displays at Sydney CBD Repair Centre
Diagnosis: We inspect display and fingerprint sensor responsiveness
Disassembly: Using professional tools in a dust-free zone
Installation: OEM screen replacement with fingerprint alignment
Final QC: Ensure everything works before sealing the device
Same day service is available for most models. And if we don’t have the part in stock, we can order it for next-day installation.
💰 Cost of Replacing a Fingerprint Display Screen
Prices vary by model and screen type. Here’s a general estimate:
Phone Model
Estimated Cost (AUD)
Samsung Galaxy S22 Ultra
$380 – $500
Huawei Mate 40 Pro
$400 – $550
OnePlus 9 Pro
$320 – $450
Xiaomi Mi 12
$280 – $400
Google Pixel 7 Pro
$350 – $480
Always choose genuine replacements to avoid display issues and fingerprint failure.
❓ FAQs About Fingerprint Display Screen Replacement
Q1: Will my fingerprint sensor still work after screen replacement?
Yes, as long as the screen is OEM quality and installed properly.
Q2: Can I replace only the glass without affecting the fingerprint sensor?
Not usually. Most under-display fingerprint sensors are fused to the screen and require full display replacement.
Q3: How long does the replacement take?
Usually 1–3 hours depending on the device and part availability.
Q4: Do you use genuine parts at Sydney CBD Repair Centre?
Absolutely. We use manufacturer-authorised displays for accurate fingerprint functionality.
Q5: Can third-party screens support fingerprint sensors?
Some do, but performance and reliability are often significantly reduced.
Q6: Will my water resistance be preserved?
If your phone originally had water resistance, our process restores it with OEM-grade adhesives—though we always recommend avoiding water after any repair.
✅ Conclusion: Ensure Accuracy with Expert Help
Replacing a fingerprint display screen is not a basic DIY task—it’s a job for professionals who understand the intricate connection between screen performance and biometric functionality.
For genuine repairs, expert technicians, and same-day service, Sydney CBD Repair Centre is the trusted name in Sydney. With over 2000 five-star reviews, we guarantee quality, transparency, and peace of mind.
📞 Call us today at +61280114119 or visit our store for fast, reliable screen replacements.
Samsung Galaxy Z Flip 5 Screen Replacement Cost Comparison – Find the Best Value Repair in 2025
📱 Introduction
The Samsung Galaxy Z Flip 5 is a beautiful piece of foldable engineering—but its unique dual-screen design means it’s more expensive to repair than standard smartphones. If you’ve damaged your screen, you’re likely wondering: How much will it cost? Is it worth fixing? Where’s the best value in Sydney?
This guide compares Z Flip 5 screen replacement costs across different providers so you can make an informed decision—without compromising on quality or safety.
Broken-Galaxy-Z-Flip-5-Screen.png
🧩 How the Z Flip 5 Screen Design Affects Repair Costs
Inner Foldable Display vs Cover Screen
The Galaxy Z Flip 5 features two displays:
Cover Screen: 3.4-inch Super AMOLED
Inner Main Display: 6.7-inch Foldable Dynamic AMOLED 2X
Each has different replacement costs. The inner screen is complex, requires precision, and is significantly more expensive to replace.
UTG Technology and Cost Factors
The inner screen uses Ultra Thin Glass (UTG)—flexible, yet delicate. Replacing it requires:
Specialised tools
Trained technicians
OEM components to retain folding functionality
All of this increases repair costs compared to traditional phone displays.
🆚 Is It Cheaper to Replace the Inner Screen or Cover Display?
Yes, the cover display is simpler and cheaper. If only the outer screen is damaged, you’re looking at less than half the cost of the inner foldable screen.
📝 Can You Claim Repairs Under Warranty or Samsung Care+?
Repair Type
Standard Warranty
Samsung Care+
Accidental Damage
❌ Not Covered
✅ Partially Covered
Manufacturing Defect
✅ Covered
✅ Covered
Screen Crack (User Error)
❌ Not Covered
✅ Discounted Replacement
You can check your eligibility via Samsung Members app or bring it to Sydney CBD Repair Centre, and we’ll assist with warranty claims.
🌟 Why Choose Sydney CBD Repair Centre for Z Flip 5 Repairs
6-Time Award-Winning Repair Centre
2000+ 5-Star Google Reviews
Located in the heart of Sydney CBD
Only genuine or premium OEM parts used
Same-day express repairs (in most cases)
90-day warranty on all screen repairs
Expert technicians with foldable screen experience
1. Can you replace just the glass on the Z Flip 5?
No. The glass and display are fused. You must replace the entire display assembly.
2. Does repair affect the hinge?
It shouldn’t—if done properly. At Sydney CBD Repair Centre, we inspect and preserve hinge integrity during the process.
3. Is the repair water-resistant afterward?
We reseal the phone using OEM-grade adhesives, but water resistance may be reduced. Avoid submerging the phone post-repair.
4. Will my Samsung Care+ still be valid after third-party repair?
No. Using unofficial repair shops may void Care+ coverage. We recommend coming to us after warranty ends or if you’re out of coverage.
5. How long does the repair take?
Usually 1 to 3 hours, depending on the part and queue. Same-day service is available.
6. Do I need to back up my data before the repair?
Yes. While data loss is rare, it’s always best to back up your phone before any repair work.
✅ Conclusion
Replacing your Galaxy Z Flip 5 screen doesn’t have to break the bank—or your phone. By understanding the costs, screen types, and repair options, you can make the right decision for your device.
At Sydney CBD Repair Centre, we offer affordable, professional screen replacements with a focus on quality, speed, and service. Whether it’s your inner foldable display or cover screen, we’re here to help—fast, safe, and guaranteed.
Thank you for using
Themify Popup
This is a sample pop up. Themify Builder or Builder Lite (free) plugin is recommended to design the pop up layouts.