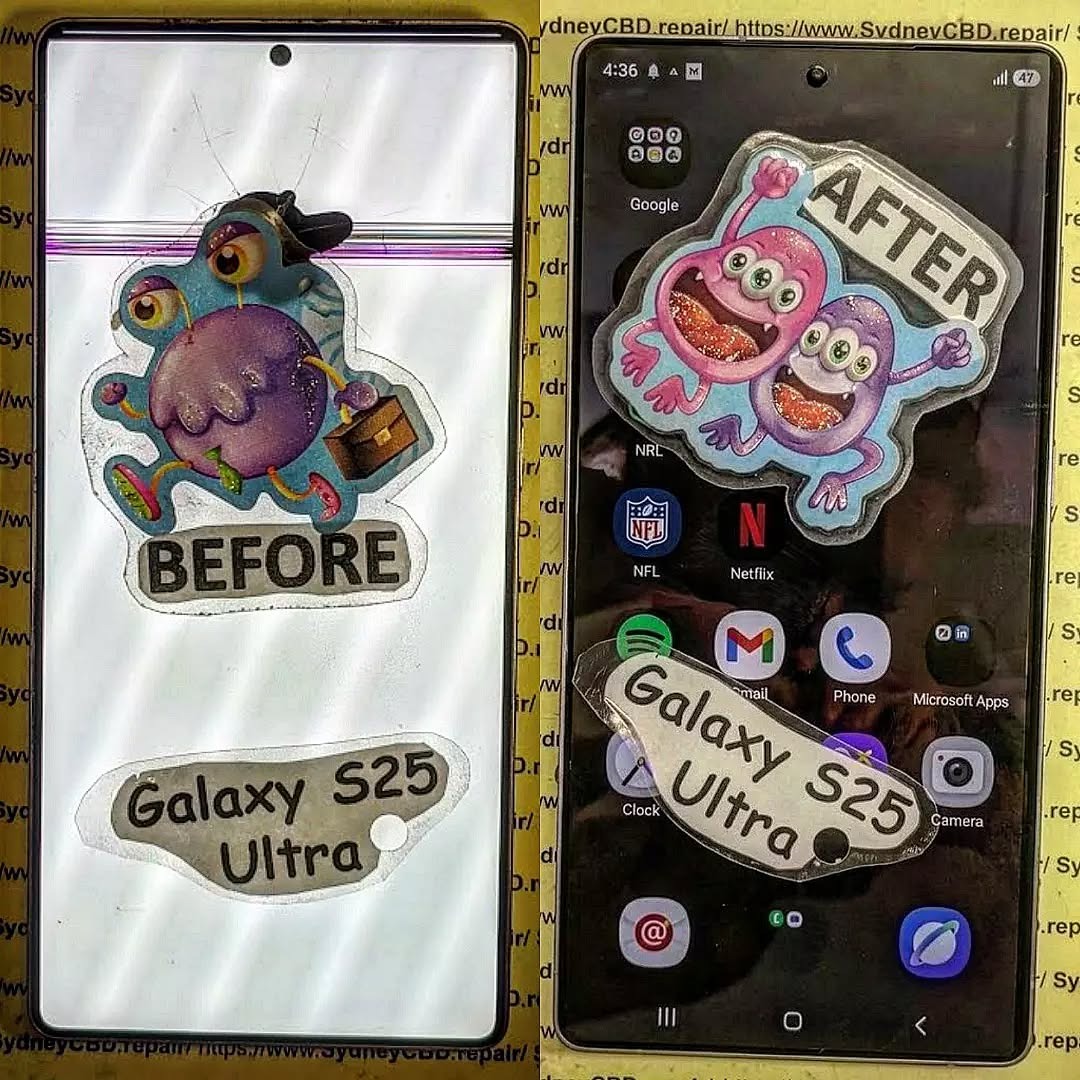
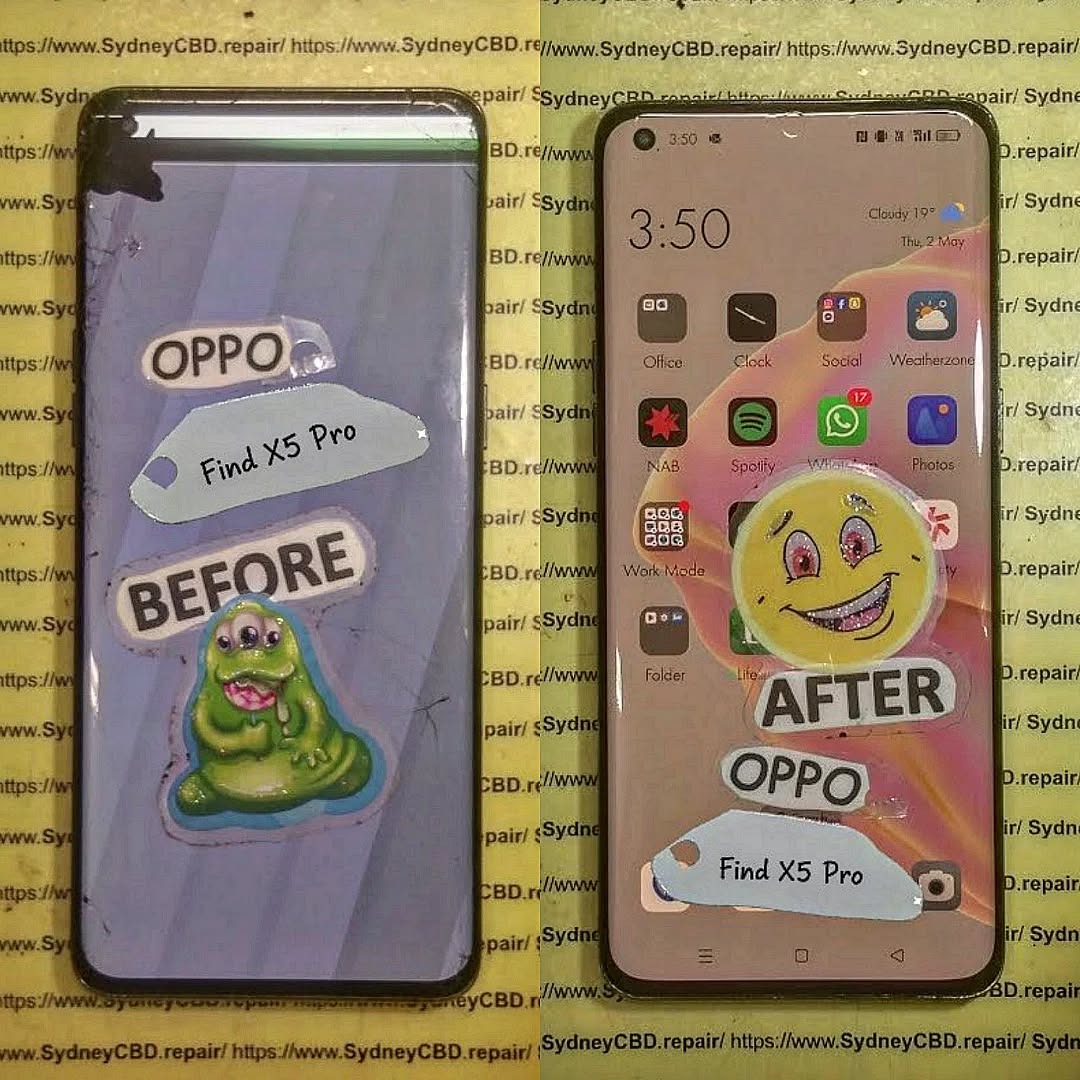
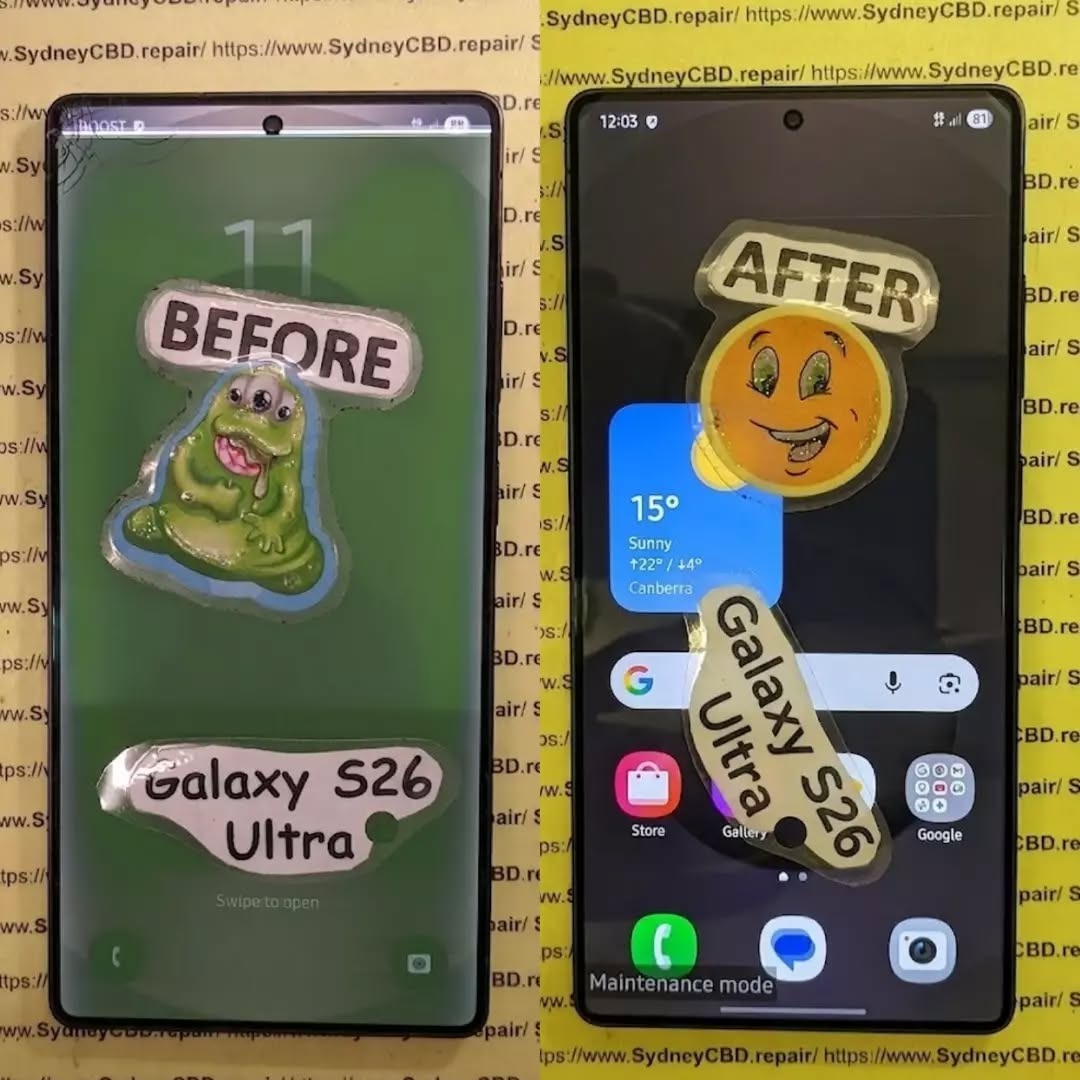
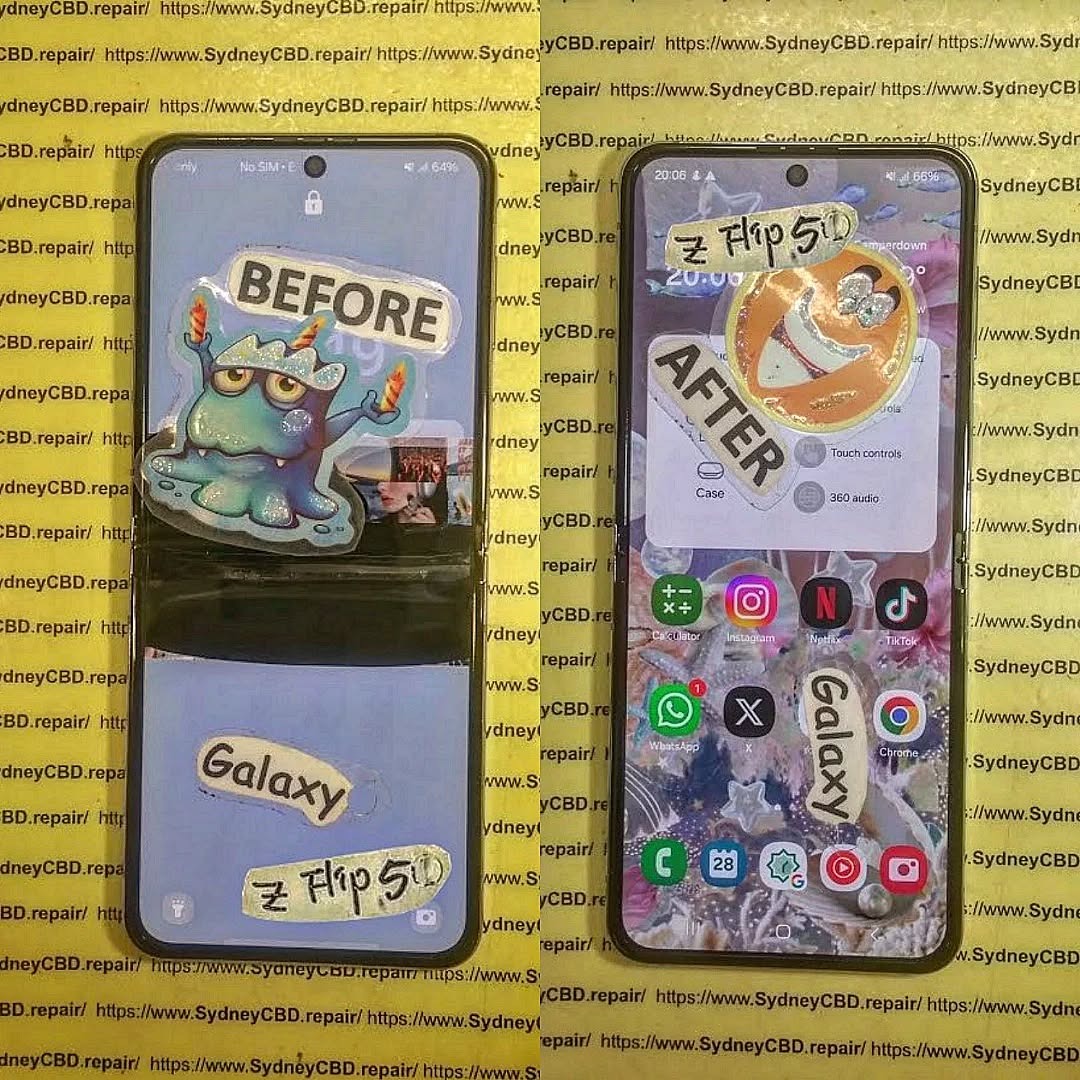
The Unseen water damage fix: Samsung Galaxy S25 Ultra! 7 Expert Secrets to Save Your Device
Introduction
Water and smartphones have never been the best of friends — even when it comes to the most advanced flagship like the Samsung Galaxy S25 Ultra. While Samsung promotes its premium device with an impressive IP68 water-resistance rating, the truth is that unseen moisture can still find its way into delicate internal circuits. Over time, this hidden water damage can quietly corrode connectors, weaken the battery, and cause unpredictable malfunctions.
At Sydney CBD Repair Centre, we’ve seen it all — phones that look perfectly fine on the outside but are silently deteriorating within. This article reveals the unseen side of water damage and how you can identify, fix, and prevent it before it’s too late. Whether your Galaxy S25 Ultra took an unexpected dip or simply absorbed moisture from the air, understanding the signs and solutions could save you hundreds in repair costs — and possibly your data.
Let’s dive deep into the expert-approved ways to restore your Samsung Galaxy S25 Ultra to its peak condition and ensure it stays safe from the hidden dangers of water exposure.
Water damage remains one of the most deceptive phone issues — especially with modern flagships like the Samsung Galaxy S25 Ultra. Despite its premium IP68 waterproof rating, your device can still suffer from unseen moisture intrusion, slowly degrading components over time.
In this guide, we’ll uncover 7 expert secrets for identifying and fixing hidden water damage, straight from the professionals at Sydney CBD Repair Centre, Sydney’s most trusted name in phone repairs for over six consecutive years.
Even with its cutting-edge design and water-resistant features, the Galaxy S25 Ultra isn’t immune to the physics of moisture. Water damage often sneaks in through charging ports, speaker grills, SIM trays, or micro-cracks invisible to the naked eye.
Common Causes of Hidden Moisture Damage
Using your device in the rain or bathroom
Exposure to steam or humidity (e.g., kitchens or saunas)
Quick temperature shifts causing internal condensation
Improper sealing after third-party repairs
While your phone might appear dry, internal circuits could already be corroding.
How Samsung’s IP68 Rating Really Works
Samsung’s IP68 certification guarantees water resistance — not waterproofing. It protects the phone for up to 30 minutes in 1.5 meters of freshwater, but saltwater, soap, or chlorinated water can easily compromise seals. Once damaged, these seals lose effectiveness permanently.
Early Signs of Unseen Water Damage
Recognizing water damage early can be the difference between a quick fix and a costly replacement.
Software Glitches Caused by Moisture
Water can short internal connections, triggering:
Random restarts
Screen flickering
Ghost touches or unresponsive gestures
System lag and erratic battery readings
Corrosion and Battery Problems
Internal corrosion silently eats away at battery terminals and charging ICs. Common symptoms include:
Slow or failed charging
Overheating during use
Battery drain even on standby
Ignoring these warning signs could lead to permanent motherboard damage.
DIY Steps Before Visiting a Repair Centre
Before rushing to a technician, follow these safe, data-preserving steps.
What Not to Do After Water Exposure
❌ Don’t power on your device immediately.
❌ Don’t plug it in or attempt wireless charging.
❌ Don’t use a hair dryer — it spreads moisture internally.
❌ Avoid rice — it’s ineffective and can leave debris.
Drying Techniques That Actually Work
✅ Turn off your phone and remove the SIM card.
✅ Pat dry gently with a lint-free cloth.
✅ Place the device in a silica gel pack (or desiccant bag).
✅ Leave it for at least 24–48 hours.
✅ If available, use isopropyl alcohol to displace residual moisture on circuit boards (by professionals only).
Professional Repair: Inside Sydney CBD Repair Centre’s Process
When at-home fixes fail, expert intervention becomes essential. Here’s how the Sydney CBD Repair Centre restores your Galaxy S25 Ultra to full working order.
Expert Diagnostic Techniques
Technicians use thermal imaging cameras and microscopic inspections to detect corrosion points and trapped humidity. They assess:
Logic board damage
Battery health
Camera lens fogging
Charging port integrity
Genuine Parts & Advanced Equipment
Unlike generic repair shops, Sydney CBD Repair Centre uses Samsung-authorized components and precision reflow tools. This ensures:
Reliable, lasting repairs
No data loss during diagnostics
Restored waterproof sealing
Cost of Water Damage Repairs in 2025
Pricing varies depending on the damage level, but here’s a breakdown of average repair costs in Sydney for 2025:
Repair Type
Estimated Cost (AUD)
Turnaround Time
Water Damage Diagnostic
$89
1–2 hours
Cleaning & Drying
$149–$199
Same day
Board-Level Repair
$250–$400
1–3 days
Component Replacement
$150–$350
Same day
What Affects the Price
Type of water (fresh, salt, chlorinated)
Duration of exposure
Parts requiring replacement
Warranty and After-Service Benefits
All repairs come with a 90-day warranty covering workmanship and parts — another reason customers rate Sydney CBD Repair Centre 5 stars across 2,000+ Google reviews.
How to Prevent Future Water Damage
A few proactive measures can save you hundreds in future repairs.
Protective Gear & Habits
Use IP68-rated waterproof cases during beach or pool trips
Avoid using phones in high-humidity environments
Keep charging ports clean and dry
Regular Checkups & Professional Cleaning
Schedule bi-annual cleanings at professional centers like Sydney CBD Repair Centre. Regular diagnostics ensure seals remain tight and corrosion-free.
FAQs
1. Can the Galaxy S25 Ultra survive water exposure?
It’s water-resistant, not waterproof. Short-term freshwater exposure may be fine, but long-term or saltwater contact causes internal damage.
2. How can I tell if my Samsung phone has water damage?
Check for fogged cameras, unresponsive buttons, or charging issues. You can also look at the Liquid Damage Indicator (LDI) near the SIM tray — it turns red when wet.
3. Will Samsung warranty cover water damage?
No. Water damage is considered user-induced, even with an IP68 rating.
4. Is water damage repair worth it?
Absolutely — if done by a professional. At Sydney CBD Repair Centre, most water-damaged phones are fully recoverable when brought in early.
5. How long does it take to repair water damage?
Same-day service is possible for minor corrosion. Severe damage may take up to 3 days for full recovery.
6. Can rice really dry out my phone?
No. Rice only absorbs surface moisture. It cannot remove internal humidity or prevent corrosion.
Conclusion
Even the mighty Samsung Galaxy S25 Ultra isn’t invincible to unseen water damage. But with quick action and expert help from Sydney CBD Repair Centre, your device can be restored safely and effectively.
Whether you’ve dropped your phone in water or suspect slow corrosion, don’t wait. Visit Sydney CBD Repair Centre, where quality meets reliability — and your Galaxy S25 Ultra gets the professional care it deserves.
Data Recovery: The Broken Phone, All Files Safe! | Proven Solutions & Expert Tips (2025)
Understanding Data Loss from a Broken Phone
When your smartphone suddenly slips from your hands, crashes onto the pavement, or refuses to turn on after getting wet — panic sets in. Your first thought? “Are my photos and files gone forever?” Fortunately, data recovery for broken phones has advanced dramatically, and most of your information can still be retrieved.
Common Causes of Data Loss
Physical Damage – Cracked screens, broken ports, or damaged motherboards.
Water Damage – Corrosion can interrupt power and data access.
Software Errors – System crashes, failed updates, or malware infections.
Battery or Power Failure – When a phone won’t turn on but the data remains intact.
Factory Reset or Accidental Deletion – User error leading to wiped data.
Why Immediate Action Matters
The longer you wait, the more likely it is for your data to become irretrievable due to continued damage or automatic overwriting. Always power off a damaged phone and avoid DIY repairs that can worsen internal issues.
Modern smartphones have sophisticated storage systems. Even if the device doesn’t power on, data often remains safe within its memory chip.
Internal vs External Storage Explained
Your phone’s internal storage holds essential system files, contacts, messages, and app data, while the external SD card stores images, videos, and documents. Professional repair centres can access both safely using specialized tools.
How Recovery Software Extracts Data
Recovery software works by scanning memory sectors for recoverable fragments. Advanced programs like Dr.Fone, Tenorshare UltData, and iMobie PhoneRescue can reconstruct missing files even from damaged partitions.
Step-by-Step: Recovering Data from a Broken Android Phone
If your Android device has a cracked screen or doesn’t respond, there are still options before you lose hope.
Using Google Backup & Sync
Log into your Google Account on another device.
Visit Google Photos, Drive, or Contacts.
Restore all synced data with a single click.
If syncing was enabled before damage occurred, your data is already safe in the cloud.
Using Android Recovery Tools
Software like Dr.Fone for Android, Tenorshare UltData, or iMobie DroidKit allows USB connection to access files even from an unresponsive phone. These programs can extract:
Photos and videos
WhatsApp messages
Contacts and call logs
App data and documents
When to Visit a Professional Repair Centre
If your phone suffers from hardware failure, DIY software might not help. At this point, it’s best to visit a trusted service provider such as Sydney CBD Repair Centre — where certified technicians safely extract your data without risking further damage.
Apple’s ecosystem simplifies recovery. Log in to iCloud.com or connect your iPhone to iTunes/Finder on your computer to retrieve your:
Photos
Contacts
Messages
App Data
Using Third-Party iPhone Data Recovery Tools
Programs like iMobie PhoneRescue, Dr.Fone iOS, and Tenorshare UltData for iPhone can recover data even if backups are incomplete or the device is unresponsive.
Professional Data Recovery Services in Sydney
When software isn’t enough, professional help is the safest path forward.
Why Choose Sydney CBD Repair Centre
🧰 Same Day Express Repairs
🔋 Genuine Parts with Warranty
💼 Expert Technicians with years of experience
⭐ 2000+ 5-Star Google Reviews
🏆 6-Time Award Winner for Best Phone Repairs
Sydney CBD Repair Centre specializes in data recovery for Apple, Samsung, Google, and other major brands. Whether your device has a shattered display, water exposure, or a faulty motherboard — they can help retrieve your valuable files safely.
Avoid using phones during charging to prevent overheating.
Regularly transfer data to your PC or external drive.
Top Data Recovery Tools in 2025
Tool Name
Supported Devices
Free Trial
Key Features
Dr.Fone
Android/iOS
✅
Deep scan, full backup restore
Tenorshare UltData
Android/iOS
✅
WhatsApp & file recovery
iMobie PhoneRescue
Android/iOS
✅
Data extraction from dead phones
DiskDigger
Android only
✅
Lightweight photo recovery
EaseUS MobiSaver
Android/iOS
✅
Full file recovery with UI wizard
FAQs – Broken Phone Data Recovery
1. Can I recover data from a phone that won’t turn on?
Yes, as long as the internal storage is intact, professionals can recover your data using specialized tools.
2. Is data recovery expensive?
Prices vary by damage type, but Sydney CBD Repair Centre offers affordable rates and free assessments.
3. How long does recovery take?
Most recoveries are completed within the same day, depending on damage severity.
4. Can I recover WhatsApp messages from a broken phone?
Yes. Recovery tools and cloud backups can restore WhatsApp chats easily.
5. Is DIY recovery safe?
Only for minor issues. For physical or motherboard damage, always consult experts.
6. What if my screen is black but the phone vibrates?
That means it’s still powered. Technicians can connect to your phone and retrieve files safely.
Conclusion – Get Your Files Back Safely Today!
A broken phone doesn’t mean your memories, photos, and documents are lost forever. With advanced tools and professional repair services like Sydney CBD Repair Centre, you can recover your data quickly, securely, and affordably. Don’t let panic take over — take the right steps today to get your files back and your phone working again.
David from Sydney CBD Repair Centre – The Best place to fix mobile phones as 6 Years In A Row! Top Mobile Phone Repair In Sydney. More than 2000 Positive Reviews on Google and Same Day Repairs.
📍 Visit us today for:
✓ Same Day Express Repairs
✓ Genuine Parts Guarantee
✓ Professional Technicians
✓ Competitive Pricing
✓ 2000+ 5-Star Google Reviews
✓ 6-Time Award Winner for Best Phone Repairs
The Screen Quality Deep Dive: What’s Worth Repairing? (+5 Essential Tips to Save Money and Extend Your Phone’s Life)
Understanding Modern Smartphone Screen Technology
Smartphone displays are more advanced than ever, blending artistry with cutting-edge engineering. Today’s screens deliver crisp visuals, vibrant colors, and smooth performance that elevate everyday digital experiences. But not all screens are created equal—some are more durable, responsive, and repairable than others.
Let’s start by understanding the two dominant display technologies shaping the smartphone industry: OLED and LCD.
OLED (Organic Light-Emitting Diode) screens are famous for their deep blacks and energy efficiency. Each pixel emits its own light, resulting in stunning contrast and vibrant color reproduction. You’ll find OLED displays in flagship models like the iPhone 15 Pro and Samsung Galaxy S24 Ultra.
LCD (Liquid Crystal Display) screens, on the other hand, rely on backlighting. They are cost-effective and durable, often found in mid-range and budget smartphones. Although they may lack the deep contrast of OLED, LCDs are easier—and cheaper—to repair.
Verdict:
If you own an OLED device, screen repair costs are higher, but image quality is exceptional. For LCD users, repairs are more affordable, making replacement a practical choice.
Beyond brightness and clarity, modern displays also rely on touch responsiveness and refresh rate—two critical factors that shape your user experience.
Touch Sensitivity: Determines how accurately your screen registers taps and gestures. A damaged digitizer can lead to unresponsive touch zones or “ghost touches.”
Refresh Rate: Measured in Hz, it dictates how smoothly your screen updates visuals. A 120Hz display feels fluid, while a 60Hz screen can appear slightly laggy in comparison.
When these components get damaged, even a small crack can degrade your screen’s overall feel and responsiveness.
Common Types of Screen Damage Explained
No matter how careful you are, screen damage can happen to anyone. Understanding the type of damage helps you decide whether it’s repairable—or time for a replacement.
Cracked Glass vs. Broken Display – Knowing the Difference
A cracked glass usually looks bad but doesn’t always affect performance. If your screen still displays images clearly and the touch functions remain responsive, you likely just need glass replacement.
A broken display, however, shows black spots, lines, or color bleeding. This means the internal LCD or OLED layer is damaged—requiring a full screen replacement.
Dead Pixels and Ghost Touches: Hidden Issues That Matter
Dead Pixels: Small, non-responsive dots on the screen can ruin visual quality.
Ghost Touches: Your phone seems to move or type on its own. This is often caused by a faulty digitizer or poor-quality replacement screen.
Both issues are fixable, but only by professional technicians using diagnostic tools and genuine parts.
Water Damage and Its Effect on Screen Quality
Water exposure can short-circuit display connectors and cause discoloration, flickering, or permanent damage. Even “water-resistant” phones aren’t immune—over time, seals degrade, allowing moisture to creep in.
If your phone has been wet and the screen behaves erratically, turn it off immediately and take it to a certified repair center.
When Is It Worth Repairing Your Screen?
Many users face this dilemma: Is my screen worth fixing, or should I just buy a new phone? The answer depends on several factors.
Cost vs. Value: The Repair Economics
Here’s a quick reference:
Device Type
Average Screen Repair Cost (AUD)
Typical Replacement Value (AUD)
Worth Repairing?
iPhone 14 Pro (OLED)
$450–$600
$1,600+
✅ Yes
Samsung Galaxy S23
$350–$500
$1,400
✅ Yes
Google Pixel 8
$300–$450
$1,300
✅ Yes
Mid-Range Android (LCD)
$150–$250
$600–$800
✅ Yes
Older Models
$100–$200
<$400
⚠️ Maybe
Rule of Thumb:
If the repair costs less than 40% of your phone’s current value, it’s worth repairing—especially if the device still performs well.
Signs Your Screen Is Beyond Repair
Severe internal burn marks or bleeding
Unresponsive display even after replacement attempts
Frame warping that prevents proper screen fitment
In these cases, a replacement device may be the better option.
How Professional Screen Repair Ensures Longevity
Professional repair is not just about replacing glass—it’s about restoring performance and durability.
Importance of Using Genuine Replacement Parts
Using genuine parts ensures color accuracy, touch precision, and brightness consistency. Fake or low-grade parts can cause:
Faster wear and tear
Poor battery life (due to inefficient displays)
Malfunctioning touch features
That’s why Sydney CBD Repair Centre exclusively uses OEM-quality components, ensuring every repair meets factory standards.
Why Expertise and Tools Matter in Screen Repair
A true repair professional combines skill with precision tools. At Sydney CBD Repair Centre, technicians use microscopic calibration tools and anti-static workstations, minimizing risks during the delicate replacement process.
This level of care translates to longer-lasting repairs and better device reliability.
5 Essential Tips to Save Money on Screen Repairs
Tip #1: Repair Early Before Damage Spreads
Tiny cracks expand over time, increasing repair costs. Fix your screen as soon as you notice visible damage.
Tip #2: Choose Certified Technicians Only
Avoid unverified repair shops that may use counterfeit parts. Always ask for certification and previous client feedback.
Tip #3: Avoid DIY Fixes on Fragile Screens
DIY kits might seem cheaper, but improper handling can cause more damage—costing you more in the long run.
Tip #4: Protect Your Screen with Quality Accessories
Invest in tempered glass protectors and shockproof cases. They can save you hundreds in potential repairs.
Tip #5: Always Ask for a Warranty
Reputable repair centers, like Sydney CBD Repair Centre, provide 90-day warranties for all screen repairs.
Why Sydney CBD Repair Centre Leads in Screen Quality Repairs
Award-Winning Service and Expert Technicians
Recognized as Sydney’s Best Phone Repair Shop for six consecutive years, our team combines skill, experience, and integrity.
Genuine Parts, Fair Pricing, and Same-Day Repairs
We use only genuine parts, offer transparent quotes, and complete most repairs within an hour.
Trusted by Thousands of Happy Customers
With 2000+ five-star Google reviews, we’re Sydney’s go-to repair center for Apple, Samsung, Google, and more.
1. Can I still use my phone with a cracked screen?
You can, but it’s risky. Cracks can worsen and damage internal layers, making future repairs more expensive.
2. How long does a screen repair take?
Most professional repairs are completed within 60–90 minutes, depending on model and part availability.
3. Are third-party screens as good as original ones?
Not always. Only OEM-quality replacements ensure original color accuracy and touch performance.
4. Does screen repair affect waterproofing?
Yes, waterproofing seals are compromised after screen replacement. Professional shops can reseal it effectively.
5. What if my phone still works fine after water damage?
Turn it off immediately—moisture corrosion can appear days later. Get it inspected promptly.
6. Why choose Sydney CBD Repair Centre?
We’re Sydney’s most trusted and top-rated phone repair center with over six years of award-winning service.
Conclusion: Choose Smart, Repair Right
Screen repairs don’t have to be stressful or costly. By understanding your screen’s quality, knowing when to repair, and choosing certified professionals, you’ll extend your phone’s life—and save money in the long run.
At Sydney CBD Repair Centre, we combine expert craftsmanship, genuine parts, and affordable pricing to deliver unmatched value. Whether it’s an iPhone, Samsung, or Pixel device—your screen deserves the best.
Sydney CBD Repair Centre – Where Quality Meets Reliability.
David from Sydney CBD Repair Centre – The Best place to fix mobile phones as 6 Years In A Row! Top Mobile Phone Repair In Sydney. More than 2000 Positive Reviews on Google and Same Day Repairs.
📍 Visit us today for:
✓ Same Day Express Repairs
✓ Genuine Parts Guarantee
✓ Professional Technicians
✓ Competitive Pricing
✓ 2000+ 5-Star Google Reviews
✓ 6-Time Award Winner for Best Phone Repairs
WHAT HAPPENS NEXT? Unseen Damage From Phone Screen Repair + 7 Critical Mistakes You Must Avoid
Introduction: The Hidden Side of Screen Repairs
Screen damage can happen to anyone. A sudden drop, an accidental bump, or even sitting on your phone can lead to a cracked screen that demands immediate attention. But what most users don’t realize is that screen repair is more than just replacing the glass—it involves delicate electronic systems that require precision and expertise.
At first glance, your phone might look and function perfectly after a repair. However, beneath the surface, unseen damage can develop over time—affecting your phone’s responsiveness, display brightness, and even battery life.
When done incorrectly, even minor missteps during a screen replacement can cause long-term harm. Let’s explore the unseen damage that can happen during or after screen repairs and how to avoid it.
Replacing a screen isn’t just a matter of swapping out parts. Modern smartphones are built with integrated circuits, touch sensors, proximity detectors, and other intricate components that work in harmony.
The Role of Micro-Connections and Internal Components
Every tap, swipe, and gesture depends on micro-connections between the digitizer (the touch layer) and your phone’s logic board. When a repair technician mishandles these components, even slightly, it can lead to problems like:
Ghost touches or unresponsive screens
Dimming or color inconsistency
Delayed touch feedback
This is why proper disassembly tools and expertise are crucial during screen repair.
Common Issues After Screen Replacement
Unseen damage often manifests gradually. Users may experience:
Battery draining faster than usual
Front camera malfunction or misalignment
Face ID or fingerprint sensor issues
Display flickering under sunlight
These problems often stem from cheap replacement parts or improper installation, both of which can compromise your device’s performance.
After a repair, your phone must undergo a full diagnostic check. Skipping this step is one of the most common yet dangerous mistakes.
How Skipping Testing Can Cause Long-Term Issues
Without diagnostics, small problems like sensor misalignment, loose connectors, or temperature irregularities go unnoticed. Over time, these can lead to:
Display freezing or lag
Accelerated battery wear
Internal corrosion from unnoticed microdamage
Professional repair centers like Sydney CBD Repair Centre perform a 20-point diagnostic test after every repair to ensure every component functions perfectly before handing the device back.
Mistake #2: Using Non-Genuine Parts
Many repair shops cut corners by using aftermarket or counterfeit screens that mimic OEM quality. While they may look the same initially, the differences become obvious after a few days of use.
The Difference Between OEM and Aftermarket Screens
Feature
OEM Screen
Aftermarket Screen
Brightness
True-to-original
Dull or tinted
Touch Sensitivity
Perfectly responsive
Laggy or inconsistent
Durability
Tempered and tested
Prone to cracks
Compatibility
100% match
May cause software conflicts
At Sydney CBD Repair Centre, only genuine parts are used—backed by a 90-day warranty for complete peace of mind.
Mistake #3: DIY Screen Repairs Without Expertise
You might think you’re saving money by fixing your phone yourself, but DIY repairs often lead to hidden internal damage that costs more to fix later.
The Hidden Costs of Attempting It Yourself
Cable tears during disassembly
Overheating due to improper adhesive removal
Waterproofing seals broken permanently
Battery punctures, which can cause dangerous short circuits
Without proper training and tools, even a small mistake can destroy a device worth hundreds of dollars.
Mistake #4: Overlooking Battery and Sensor Calibration
When your screen is replaced, battery and sensor calibration must be redone to ensure optimal performance.
How Improper Calibration Impacts Device Performance
Without proper calibration, your device might:
Show incorrect battery percentages
Have auto-brightness issues
Experience inaccurate proximity detection (like the screen staying on during calls)
Professional repair centers use specialized diagnostic software to recalibrate these systems—something DIY kits or unqualified shops can’t do.
Mistake #5: Failing to Address Water and Dust Resistance
Most modern smartphones come with IP67 or IP68 water resistance ratings, which can be compromised after screen replacement.
How Repairs Affect Your Device’s IP Rating
Improper resealing after repair allows microscopic water or dust particles to enter the device, causing corrosion, speaker damage, and short circuits over time.
Expert technicians reapply factory-grade waterproof seals, ensuring your device maintains its protection standards.
Mistake #6: Not Choosing a Certified Repair Centre
Your choice of repair shop determines whether your phone lasts or fails prematurely.
Why Expertise and Experience Matter
Certified technicians understand manufacturer repair guidelines, use anti-static environments, and follow strict part-handling protocols.
At Sydney CBD Repair Centre, over 2000 customers have rated their experience 5-stars for quality, speed, and reliability.
Mistake #7: Ignoring Early Warning Signs Post-Repair
Even after a seemingly successful repair, subtle issues can indicate hidden damage.
Common Symptoms That Indicate Deeper Damage
Screen flickers under dim light
Face ID or fingerprint not registering
Battery drains unusually fast
Phone heats up during idle
If you notice any of these, return to your repair centre immediately for inspection.
FAQs: Everything You Need to Know About Screen Repairs
1. How long does a professional screen repair take?
Most high-quality screen repairs take 30–60 minutes at trusted centres like Sydney CBD Repair Centre.
2. Does screen repair affect water resistance?
Yes, if not done properly. Always ensure resealing is done with factory-grade adhesives.
3. Are aftermarket screens really that bad?
They often compromise brightness, responsiveness, and longevity. OEM parts ensure the best results.
4. Can a bad screen repair affect my battery life?
Yes, poor installation or calibration can cause increased battery drain.
5. Will my warranty be voided after third-party repair?
Only if the repairer is unlicensed or uses non-genuine parts.
6. How do I know if my phone has unseen damage?
Look for performance changes—like slow touch response, camera blur, or sudden restarts.
Conclusion: Protect Your Investment with Expert Repairs
Your smartphone is more than a device—it’s your connection to work, family, and daily life. Don’t risk it with unqualified repairs. Unseen damage from screen repair can cost more in the long run than the repair itself. Always choose certified professionals who use genuine parts, perform full diagnostics, and provide post-repair support.
Why Sydney CBD Repair Centre Is the Trusted Name in Screen Repairs
🏆 6 Years in a Row – Sydney’s Best Phone Repair Service
📍 Located in the heart of Sydney CBD
📱 Genuine parts, expert technicians, and same-day service
⭐ 2000+ Google 5-Star Reviews
🛠️ 90-Day Warranty on All Repairs
Inside Sydney CBD Repair Centre: A Day In The Life Of Master Techs – 7 Powerful Secrets Behind Expert Repairs
Introduction: What Really Happens Inside a Phone Repair Centre?
A cracked smartphone screen may look like a simple repair job. However, professional mobile phone repair involves much more than removing a damaged component and installing a replacement.
At Sydney CBD Repair Centre, every device presents a different challenge. One customer may arrive with a shattered iPhone display, while another needs a Samsung battery replacement or help with a phone that suddenly refuses to charge. Some problems are obvious. Others require careful testing before the real fault becomes clear.
That’s why the work of experienced technicians matters.
A professional repair technician combines technical knowledge, hands-on experience, specialist tools, careful inspection, and attention to detail. The goal isn’t simply to make a phone turn on again. It’s to identify the problem, complete the repair correctly, test the device, and return it to the customer in reliable working condition.
This behind-the-scenes look at Sydney CBD Repair Centre explores what a typical day can involve and why professional repair techniques can make such a difference.
From early-morning preparation to final quality checks, there’s plenty happening behind the repair counter.
Before the first customer walks through the door, professional technicians have plenty to do.
A repair centre needs to be organised because mobile phones aren’t all built the same way. Different models require different tools, components, procedures, and testing methods.
The day typically begins by preparing the work area.
Technicians need a clean and organised workspace where small components can be handled safely. Precision screwdrivers, pry tools, inspection equipment, cleaning materials, testing devices, and other specialist tools need to be readily available.
Organisation might sound like a small detail, but it can have a major effect on repair quality.
A cluttered workspace can increase the chance of misplaced screws, damaged components, or unnecessary delays. A well-prepared workstation, on the other hand, allows technicians to focus on the device in front of them.
Checking Tools and Equipment
Professional repairs require more than a screwdriver.
Depending on the repair, technicians may work with:
Precision screwdrivers
Opening and separation tools
Magnification equipment
Diagnostic software
Battery testing equipment
Cleaning tools
Heat-control equipment
Replacement components
Device testing accessories
Each tool has a specific purpose.
The technician’s experience also matters. Having the right equipment doesn’t automatically make someone a skilled repairer. Knowing how and when to use each tool is equally important.
Reviewing the Repair Queue
Once the workspace is ready, technicians can review the day’s expected repairs.
These may include:
Screen replacement
Battery replacement
Charging-port issues
Camera problems
Speaker faults
Microphone problems
Back-glass damage
Water-damaged devices
Software-related issues
General diagnostic requests
Every repair is different, even when two customers have the same phone model.
For example, two phones with cracked screens may require completely different approaches if one has suffered additional internal damage.
That’s why experienced technicians don’t simply rush into the repair.
They inspect first.
2. The First Customer: Understanding the Problem
When a customer brings in a phone, the first step isn’t always opening the device.
It’s listening.
Customers often know exactly what happened. Perhaps the phone was dropped on concrete, exposed to water, left charging overnight, or suddenly stopped responding.
That information can provide valuable clues.
A technician may ask questions such as:
When did the problem begin?
Was the phone recently dropped?
Has it been exposed to water?
Does the device still turn on?
Is the screen responsive?
Does it charge?
Has the phone been repaired previously?
Did another component stop working at the same time?
These questions help establish a useful repair history.
Why Customer Information Matters
A phone’s visible problem isn’t always the root problem.
Imagine a customer arrives because the display is black. It would be easy to assume that the screen needs replacement. But the actual issue could involve the battery, charging system, internal connection, or another component.
Likewise, a phone that won’t charge may have a damaged charging port, but it could also have debris inside the port, a faulty cable, a battery problem, or another internal issue.
Professional diagnostics help separate symptoms from causes.
Creating a Repair Plan
After gathering information, the technician can explain the next step.
This is where transparency becomes important.
Customers deserve to understand what is being inspected and what the likely repair involves. If additional damage is discovered, the technician should explain the situation rather than simply proceeding without discussion.
A clear repair process builds trust.
And when your phone contains your photos, contacts, work information, banking apps, messages, and personal files, trust isn’t something to take lightly.
Diagnostics are one of the most important parts of mobile phone repair.
A skilled technician doesn’t simply replace parts until something works.
Instead, the device is assessed systematically.
The technician may inspect the external condition first. They can then check the display, buttons, cameras, speakers, microphones, charging system, battery performance, connectivity, and other relevant functions.
This process can reveal additional damage that isn’t immediately visible.
Visual Inspection
The first inspection may identify:
Cracks
Bent frames
Missing components
Damaged buttons
Signs of liquid exposure
Gaps around the display
Broken camera glass
Damage around charging ports
Physical damage can provide clues about what happened internally.
Functional Testing
The technician may then test the device’s major functions.
Depending on the problem, this can include:
Power and startup
Touchscreen response
Display brightness
Camera operation
Speaker output
Microphone recording
Charging behaviour
Wi-Fi and Bluetooth
Mobile network functions
Buttons and biometric features
Not every repair requires every test, but comprehensive testing can be useful when the device has suffered significant damage.
Why Diagnosis Saves Time
Correct diagnosis can prevent unnecessary repairs.
For example, replacing a charging port when the real problem is simply debris inside the port would be unnecessary. Similarly, replacing a screen without checking for additional internal damage could leave the customer with an unresolved problem.
That’s why professional technicians take the time to investigate.
The golden rule is simple: diagnose first, repair second.
4. Screen Repairs: Precision Matters
Cracked screens are among the most common smartphone problems.
A phone can slip from a pocket, fall from a desk, or land awkwardly on a hard surface. Even a short drop can create a spiderweb of cracks across the display.
However, replacing a modern smartphone screen isn’t simply a matter of removing glass and putting on a new panel.
The technician must carefully separate the damaged component, protect internal parts, transfer relevant components where necessary, install the replacement correctly, and test the finished device.
Inspecting Damage Before Replacement
A cracked screen can sometimes hide other problems.
Technicians may check whether:
The frame is bent
Touch functionality still works
The display has dead areas
The front camera functions correctly
Sensors operate normally
Internal components show signs of impact
If the frame is severely damaged, installing a new display may require additional consideration.
Precision During Installation
Modern smartphones contain tightly packed components.
A technician must work carefully around:
Flexible cables
Cameras
Sensors
Batteries
Connectors
Speakers
Internal boards
A rushed repair can create new problems.
That’s why professional experience and appropriate tools are so important.
Final Screen Testing
After installation, the technician should test the display.
This can include checking:
Touch response
Brightness
Colour and image quality
Front camera
Sensors
Face or biometric functions where applicable
Screen alignment
A repair isn’t finished simply because the screen lights up.
The device needs to be checked as a complete unit.
5. Battery Replacement: More Than Just a New Battery
Battery problems can be frustrating.
A phone might drain rapidly, shut down unexpectedly, struggle to hold a charge, or become unreliable during normal daily use.
Battery replacement can restore practical usability, but safety is a major consideration.
Smartphone batteries are compact lithium-based power sources. They need to be handled carefully during removal and installation.
Identifying Battery Problems
Technicians may look for symptoms such as:
Rapid battery drain
Unexpected shutdowns
Poor battery life
Charging inconsistencies
Performance issues associated with an ageing battery
Physical swelling
A swollen battery deserves particular attention because continuing to use a physically damaged battery can create additional risks.
Safe Removal
Removing a battery from a modern smartphone requires care.
The battery may be secured inside the device, and other components can be located nearby. Excessive force or incorrect tools can damage internal parts.
Experienced technicians understand that patience is often faster than rushing.
Testing the Replacement
After a battery replacement, the technician can check charging behaviour, startup, battery recognition, and general operation.
The customer should receive a device that has been tested rather than simply reassembled.
6. Water Damage: Acting Carefully
Water damage is one of the repair problems where time can matter.
A phone that has been dropped into water, exposed to heavy rain, or affected by another liquid may continue operating initially. That doesn’t necessarily mean the internal components are unaffected.
Liquid can reach areas that aren’t visible from the outside.
What Technicians Look For
A professional inspection may involve checking for:
Corrosion
Liquid indicators
Moisture around connectors
Contamination
Damaged components
Charging problems
Display issues
Battery concerns
Water-damaged devices can be unpredictable because corrosion may continue affecting components over time.
What Customers Should Avoid
If a phone becomes wet, avoid repeatedly turning it on just to see whether it works.
Also avoid relying on household fixes as a substitute for professional inspection.
If the device contains important information, prompt professional assessment may help determine whether the phone can be safely restored.
The key lesson is simple: don’t assume that a working phone is an undamaged phone.
7. Charging Problems: Looking Beyond the Port
A phone that won’t charge can cause plenty of frustration.
Many people immediately blame the charging port. Sometimes that’s correct. Sometimes it isn’t.
Technicians can investigate several possible causes.
These may include:
Damaged charging ports
Dirt or debris
Faulty charging accessories
Battery problems
Software-related issues
Internal connection problems
Board-level faults
Careful Inspection
Charging ports are exposed to pockets, bags, dust, lint, and everyday debris.
A small amount of compacted material can sometimes interfere with proper charging.
However, attempting aggressive cleaning with inappropriate objects can cause damage.
A professional technician can inspect the port and determine whether cleaning, component replacement, or further diagnosis is appropriate.
Testing After Repair
Once the issue has been addressed, charging should be tested.
Depending on the device, technicians may check charging consistency and other related functions.
The goal isn’t just to make the charging symbol appear. It’s to establish whether the device is behaving normally.
8. Brand-Specific Expertise: Apple, Samsung, Google and More
Modern smartphones vary considerably between brands and models.
Apple, Samsung, Google, and other manufacturers use different designs, components, software systems, and repair procedures.
This means a technician needs broad knowledge.
Apple Repairs
Apple devices can require careful handling because internal components are tightly integrated.
Screen, battery, charging, camera, and other repairs each have their own considerations.
For official information about Apple devices and service, customers can consult Apple Support.
Samsung Repairs
Samsung produces a wide range of devices, from entry-level smartphones to premium Galaxy models.
Repair procedures can vary significantly between models.
Technicians therefore need to identify the exact model before selecting components or beginning a repair.
Google and Other Android Devices
Google Pixel and other Android smartphones also have model-specific construction and repair requirements.
The same principle applies across the industry:
Know the device before opening it.
Professional experience helps technicians adapt their approach instead of relying on a one-size-fits-all method.
9. Quality Control: The Repair Isn’t Finished Yet
One of the most important parts of a professional repair happens after the replacement itself.
It’s called quality control.
A technician should verify that the repair has solved the original problem and hasn’t introduced another one.
A Typical Post-Repair Check
Depending on the repair, technicians may test:
Component
Possible Test
Display
Touch, brightness, image quality
Battery
Charging and power behaviour
Camera
Front and rear camera operation
Speaker
Audio output
Microphone
Voice recording
Charging port
Charging connection
Buttons
Physical response
Connectivity
Wi-Fi, Bluetooth, network functions
Sensors
Relevant sensor operation
This extra step may take a few minutes, but it can make a major difference.
Why Quality Control Builds Confidence
Imagine collecting your phone after a screen replacement and discovering later that the microphone doesn’t work.
That’s exactly the sort of issue final testing is designed to catch.
Professional repair isn’t only about replacing a damaged part. It’s about returning a functioning device.
10. Same-Day Repairs: Speed Without Cutting Corners
Customers often need their phones quickly.
For many people, a smartphone isn’t simply a gadget. It’s a communication tool, navigation device, work accessory, camera, payment tool, and connection to everyday life.
That’s why same-day repair services can be valuable.
However, speed shouldn’t mean rushing.
The real challenge is balancing efficiency with accuracy.
How Experienced Technicians Work Efficiently
Experienced technicians can often work efficiently because they understand common repair procedures.
They know:
Which tools are needed
Which components require special care
Where common faults occur
Which tests should be performed
How to organise the repair process
This experience can reduce unnecessary delays.
A Simple Principle
A fast repair is useful.
A fast repair that has to be redone isn’t.
The best workflow aims to complete the job efficiently while maintaining careful workmanship and appropriate testing.
11. Genuine Parts and Component Quality
The quality of replacement components can influence the repair experience.
A replacement part needs to be appropriate for the specific device and repair.
At Sydney CBD Repair Centre, customers are informed that the centre uses genuine parts for its repairs.
Component quality matters because smartphones depend on tightly integrated hardware.
For example, a replacement display isn’t simply a piece of glass. It can involve touch functionality, brightness, colour reproduction, sensors, cameras, and other connected features.
Likewise, a replacement battery needs to be suitable for the particular device.
Why Compatibility Matters
Using the wrong component can result in:
Poor performance
Compatibility problems
Reduced reliability
Additional faults
The need for another repair
That’s why professional technicians identify the exact phone model before beginning work.
12. Common Repair Mistakes and Why Experience Matters
DIY repair videos can make smartphone repairs look surprisingly easy.
The reality can be different.
Modern phones are compact and delicate. A mistake made during disassembly can cause damage that wasn’t present before the repair began.
Common problems can include:
Using excessive force
Damaging flexible cables
Puncturing batteries
Losing tiny screws
Damaging connectors
Installing incompatible parts
Forgetting to test components
Closing the device before checking all functions
Experience Makes a Difference
An experienced technician has seen many different failure patterns.
They can recognise signs that might not be obvious to someone performing their first repair.
This is one of the strongest reasons people choose professional repair services.
You aren’t only paying for a replacement component.
You’re also paying for knowledge, tools, experience, testing, and accountability.
13. Customer Experience: Communication Builds Trust
Technical skill is only one part of a successful repair service.
Communication matters, too.
Customers want to know what’s wrong with their device, what can be repaired, how long the process may take, and what to expect.
A professional repair centre should aim to make that information easy to understand.
Clear Communication Includes
Explaining the diagnosed issue
Discussing repair options
Providing relevant pricing information
Explaining unexpected findings
Setting realistic expectations
Answering customer questions
Explaining the repair after completion
Good communication helps remove uncertainty.
And when your phone contains valuable personal information, knowing that it’s being handled professionally can provide peace of mind.
14. What Makes a Professional Repair Different?
There are plenty of places where people can find phone repair advice.
The difference between professional repair and an improvised fix often comes down to process.
A professional approach includes:
Listening to the customer’s description
Inspecting the device
Diagnosing the problem
Selecting appropriate components
Using suitable tools
Performing the repair carefully
Testing the device
Communicating the result
Providing relevant warranty information
This structured approach reduces guesswork.
It also creates accountability.
At Sydney CBD Repair Centre, the stated repair service includes a 90-day warranty on repairs, giving customers an additional point of confidence when choosing a repair service.
15. FAQs About Professional Mobile Phone Repairs
How long does a phone repair take?
Repair times depend on the device, the type of damage, parts availability, and the complexity of the repair. Common repairs such as certain screen or battery replacements may be completed the same day when the required components are available.
Can a cracked phone screen be repaired?
In many cases, a damaged screen can be replaced. The technician should first inspect the device for additional damage, including frame problems, touch issues, camera problems, and internal impact.
Is battery replacement worth considering?
If a battery has significantly degraded or is causing charging and power problems, replacement may restore more reliable everyday use. A technician can inspect the device and explain whether battery replacement is appropriate.
What should I do if my phone gets wet?
Avoid repeatedly powering the phone on and seek professional assessment as soon as practical. Liquid damage can affect internal components even when the device initially appears to work normally.
Can you repair charging problems?
Charging faults can have several causes. A technician can inspect the charging port, check for debris or physical damage, test the battery and charging behaviour, and determine whether further repair is required.
Do professional technicians repair Apple and Samsung phones?
Professional mobile phone repair centres can service a range of brands and models. The exact repair options depend on the device, its condition, available components, and the nature of the fault.
Why is professional diagnosis important?
Diagnosis helps identify the actual cause of a problem rather than simply replacing components based on symptoms. This can reduce unnecessary repairs and help ensure the correct solution is applied.
Does Sydney CBD Repair Centre offer same-day repairs?
Sydney CBD Repair Centre promotes same-day express repairs for supported devices and repair types. Actual completion time can depend on the phone model, damage, parts availability, and repair complexity.
Are repairs covered by a warranty?
Sydney CBD Repair Centre states that its repairs include a 90-day warranty. Customers should confirm the specific warranty terms applicable to their individual repair.
Should I repair or replace my phone?
That depends on several factors, including the phone’s age, condition, repair cost, performance, battery health, and replacement price. A professional technician can assess the device and explain the available repair option without requiring you to make an immediate decision.
Conclusion: Behind Every Good Repair Is Careful Work
A professional phone repair may look simple from the outside.
Behind the counter, however, there’s a structured process involving diagnosis, precision, experience, suitable components, specialist tools, testing, and customer communication.
That’s the real story behind a day in the life of master techs at Sydney CBD Repair Centre.
From the first inspection in the morning to the final quality check before a customer collects their phone, every stage matters.
Whether it’s a cracked screen, weak battery, charging fault, water damage, camera problem, or another device issue, careful diagnosis should come before repair.
After all, your smartphone isn’t just another electronic device. It’s often where your work, photos, conversations, contacts, documents, and everyday life come together.
When something goes wrong, professional workmanship can make the repair process far less stressful.
If you’re looking for mobile phone repair in Sydney CBD, a careful inspection is a sensible place to start.
David from Sydney CBD Repair Centre – The Best place to fix mobile phones as 7 Years In A Row! Top Mobile Phone Repair In Sydney. More than 2000 Positive Reviews on Google and Same Day Repairs.
We take pride in delivering exceptional repair services for all major phone brands including Apple, Samsung, Google, and more. Our expert technicians use only genuine parts and offer 90days warranty on repairs. Located in the heart of Sydney CBD, we’re your one-stop solution for all mobile device repairs.
Our commitment to excellence has earned us the trust of thousands of satisfied customers. Whether it’s a cracked screen, battery replacement, or water damage repair, we handle it all with professional care and expertise. Walk in today and experience why we’re Sydney’s #1 choice for mobile phone repairs.
Visit us for:
✓ Same Day Express Repairs
✓ Genuine Parts Guarantee
✓ Professional Technicians
✓ Competitive Pricing
✓ 2000+ 5-Star Google Reviews
✓ 7-Time Award Winner for Best Phone Repairs
Sydney CBD Repair Centre – Where Quality Meets Reliability.
Call : +61280114119
Website: Sydney CBD Repair Centre
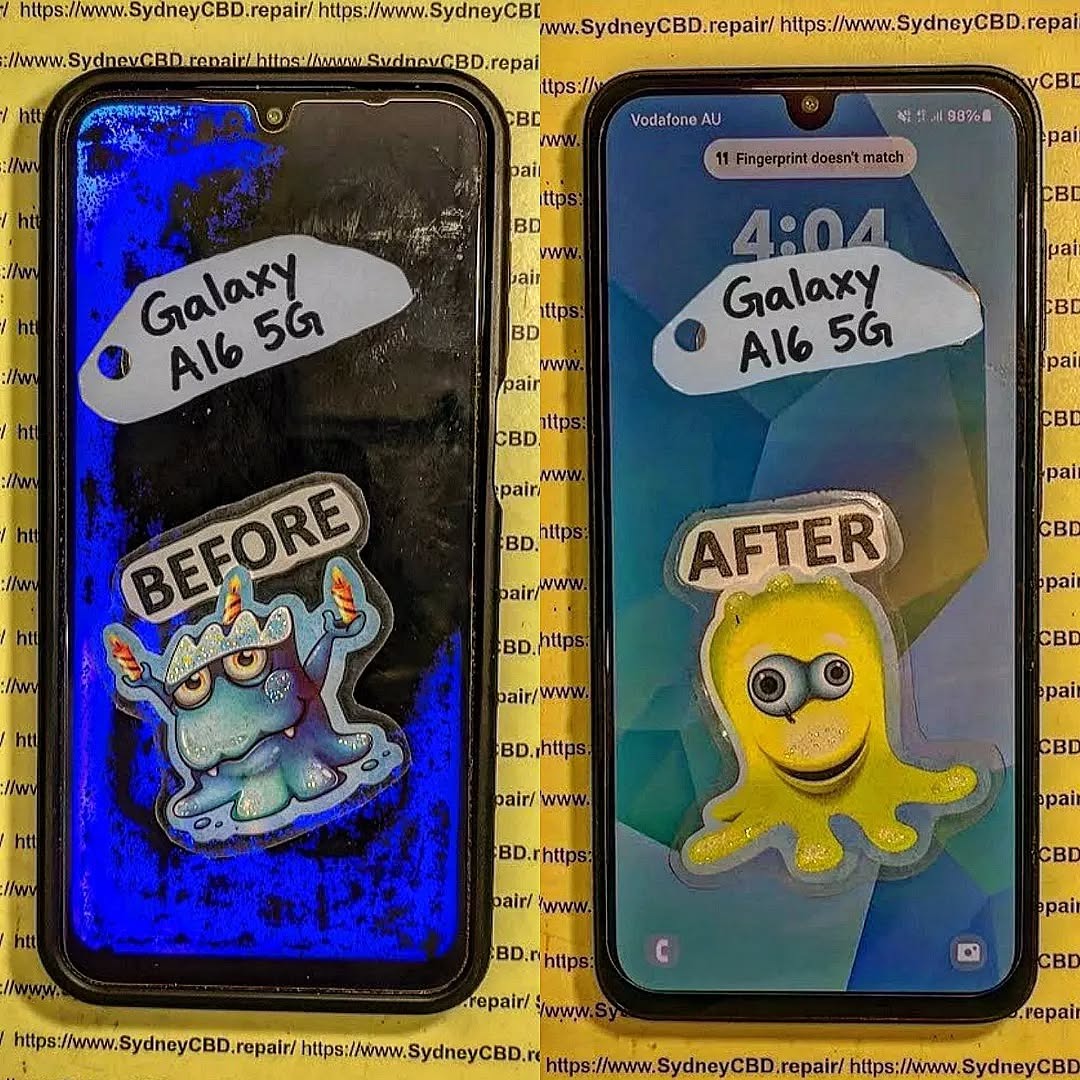
Five Critical Mistakes That Can Ruin Your Samsung Galaxy A16 5G Screen Replacement + 5 Expert Fixes
Introduction
A cracked phone screen is more than an annoying cosmetic problem. It can make everyday tasks difficult, expose the display to additional damage, and eventually affect the way the device responds to touch. When it comes to a Samsung Galaxy A16 5G screen replacement, the quality of the part and the repair process both matter.
The Galaxy A16 5G uses a 6.7-inch FHD+ Super AMOLED display with a resolution of 1080 × 2340 and a refresh rate of up to 90Hz. Samsung also lists the device as IP54-rated for dust and water resistance.
That means replacing its screen isn’t simply a matter of removing broken glass and sticking another panel into place. The technician needs to select a compatible display, handle internal components carefully, align the new assembly correctly, and thoroughly test the phone before handing it back.
Unfortunately, several common mistakes can turn a straightforward repair into a much bigger problem.
Below are five critical mistakes to watch for, along with practical ways to avoid them.
1. Choosing the Wrong Replacement Screen
One of the biggest mistakes during a Samsung Galaxy A16 5G screen replacement is choosing a replacement part based solely on price.
A screen can physically resemble the original and still differ in important ways. Compatibility involves much more than screen size. The display technology, connector, frame design, touch layer, resolution, refresh rate, and software compatibility can all affect the finished repair.
Samsung’s specifications identify the Galaxy A16 5G display as a 6.7-inch FHD+ Super AMOLED panel with a 90Hz maximum refresh rate.
A replacement that doesn’t properly match the original specifications may result in problems such as:
Poor colour reproduction
Reduced brightness
Unresponsive areas of the touchscreen
Inconsistent touch sensitivity
Display flickering
Incorrect screen fit
Lower refresh-rate performance
Uneven bezels
Premature screen failure
In other words, a cheap screen isn’t necessarily a bargain.
1.1 Why Screen Specifications Matter
The Galaxy A16 5G’s Super AMOLED display is an important part of its viewing experience. OLED-based screens produce their own light at the pixel level, which contributes to strong contrast and deep blacks.
A replacement screen using a different technology may technically work while providing a noticeably different experience.
This is why a reputable technician should identify the exact device variant before ordering or installing the part.
Don’t rely solely on the phrase “Galaxy A16.” Samsung sells both LTE and 5G versions, and regional model variations can also exist.
1.2 Genuine vs Low-Quality Replacement Parts
Not every aftermarket display is automatically bad. However, quality can vary considerably between suppliers and grades.
A reliable repair business should be able to explain what type of replacement screen is being installed and what warranty applies to the part.
Ask questions such as:
Is this part specifically compatible with the Galaxy A16 5G?
What display technology does it use?
Does the touchscreen support normal multi-touch operation?
What warranty is provided?
Is the replacement tested before installation?
A transparent answer is a good sign.
1.3 How to Verify the Correct Part
Before a repair begins, confirm the exact model number where possible. Samsung’s Philippines listing, for example, identifies a Galaxy A16 5G model as SM-A166P.
However, model numbers can vary by market and configuration.
Therefore, don’t simply order a screen because an online listing says “A16 5G.” Verify the model number printed on the device, packaging, software information, or other reliable documentation.
1.4 Expert Fix: Match the Part Before the Repair
The simple solution is to verify compatibility before removing the damaged screen.
A professional repair workflow should include:
Confirming the exact phone model
Checking the screen specifications
Inspecting the replacement part
Testing the replacement when practical
Confirming warranty terms
Using appropriate installation materials
It might take a few extra minutes, but that small investment can prevent hours of troubleshooting later.
2. Ignoring the Phone’s Existing Damage
A broken screen doesn’t always mean the screen is the only damaged component.
A phone may have been dropped hard enough to damage its frame, internal connectors, battery, cameras, or other components. Installing a new display without checking those areas can produce disappointing results.
Imagine replacing the screen on a phone whose frame is slightly bent. The new panel may initially appear perfect. However, the uneven frame can place stress on the display assembly or prevent it from sitting correctly.
That’s a recipe for trouble.
2.1 Inspecting the Frame
The frame provides the physical structure that supports the screen assembly.
Before installation, the technician should check for:
Bends
Dents
Cracks
Severe impact marks
Warping around the display opening
Debris or old adhesive
If the frame is badly distorted, simply installing a new screen may not provide a durable repair.
A professional should explain the problem before proceeding rather than quietly installing a replacement that may fail because of underlying structural damage.
2.2 Checking the Display Connector
The display connector and flex cable are critical to the repair.
A connector that is dirty, damaged, misaligned, or incompletely seated can create symptoms that look like a faulty replacement screen.
Possible symptoms include:
No image
Intermittent display
Flickering
Touch problems
Random screen shutdown
Display artefacts
This is why experienced technicians don’t immediately blame the replacement part when something doesn’t work.
They inspect the connection and surrounding components first.
2.3 Battery and Internal Safety
Opening a smartphone requires careful handling of internal components.
The Galaxy A16 5G has a 5,000mAh battery and a non-removable battery design.
A technician should therefore use appropriate tools and procedures when working around the battery and other internal components.
Customers should also avoid attempting a repair using improvised tools or excessive force. A screen replacement isn’t the ideal project for a kitchen knife, metal pry tool, or hairdryer.
When the wrong tool is used, damage can extend beyond the original cracked screen.
2.4 Expert Fix: Diagnose Before Replacing
A good repair starts with diagnosis.
Before installing the new screen, inspect:
The frame
Display connector
Flex cables
Battery area
Cameras
Sensors
Charging port
Signs of liquid or corrosion
This approach helps distinguish screen damage from other faults and gives the customer a clearer understanding of the repair.
3. Using Poor Installation Technique
Even the correct replacement screen can fail if it’s installed poorly.
This is one of the most overlooked parts of a Samsung Galaxy A16 5G screen replacement. People often focus on the quality of the replacement part while forgetting that installation technique is equally important.
A screen must sit correctly, connect securely, remain free of dust, and receive appropriate adhesive support.
3.1 The Danger of Excessive Heat
Heat can be useful during smartphone repairs because it can soften certain adhesives.
But more heat isn’t automatically better.
Excessive or poorly controlled heat can create unnecessary risk for components, adhesives, batteries, and other parts inside the phone.
A professional technician should use suitable equipment and controlled procedures rather than applying extreme heat simply to make the job quicker.
The goal isn’t to rush the repair.
The goal is to separate and install components safely.
3.2 Dust and Debris
Tiny particles can cause surprisingly noticeable problems.
A speck of dust trapped between layers of a display assembly can create a visible spot that remains after the phone is reassembled.
Dust can also interfere with adhesive bonding and create uneven areas.
Before final assembly, the workspace and phone should therefore be clean and carefully inspected.
This is one of those little details that separates a rushed repair from a professional one.
3.3 Incorrect Adhesive
Adhesive plays an important role in keeping the display assembly securely positioned.
Too much adhesive can create mess, interfere with components, or make future repairs unnecessarily difficult.
Too little can allow the screen to lift or move.
Using an inappropriate adhesive can also create problems with alignment and long-term durability.
The technician should use materials appropriate for the phone and the repair method.
3.4 Poor Alignment
A screen that’s slightly misaligned may look acceptable at first glance, but small positioning errors can affect:
Bezel symmetry
Touch operation
Button clearance
Camera alignment
Proximity sensor performance
Overall structural fit
The display should be positioned carefully before the final bonding process.
3.5 Expert Fix: Follow a Controlled Installation Process
A reliable workflow generally involves:
Preparing a clean workspace
Disconnecting components safely
Removing damaged parts carefully
Cleaning old adhesive appropriately
Inspecting the frame
Checking the replacement display
Testing functionality
Aligning the replacement precisely
Applying suitable adhesive
Allowing appropriate bonding time
Performing a final inspection
The details matter.
A phone isn’t properly repaired just because the new screen lights up.
4. Skipping Post-Repair Testing
Another critical mistake is handing the phone back immediately after the new screen turns on.
A display that produces an image isn’t necessarily a fully functional display.
Post-repair testing should cover multiple functions.
The Galaxy A16 5G includes a range of sensors and features that can be affected by repair work, so testing should go beyond simply checking whether the screen displays the home screen. Samsung lists features including a fingerprint sensor, gyroscope, accelerometer, geomagnetic sensor, light sensor, and proximity sensing among the device’s hardware features.
4.1 Touchscreen Testing
The touchscreen should be tested across the entire display.
A technician can check:
Top edge
Bottom edge
Left edge
Right edge
Centre
Corners
Multi-touch response
This can reveal dead zones or areas with inconsistent sensitivity.
If a repair shop doesn’t test the screen thoroughly, you might discover a problem only after returning home.
That’s not ideal.
4.2 Display Testing
The new panel should also be inspected for:
Dead pixels
Bright spots
Dark spots
Uneven brightness
Colour abnormalities
Flickering
Lines
Image retention or other visible defects
Testing against different backgrounds can make defects easier to spot.
A black screen can reveal certain bright-pixel problems, while white or solid-colour backgrounds can make other imperfections more obvious.
4.3 Checking Display Refresh Performance
Samsung lists the Galaxy A16 5G with a maximum display refresh rate of 90Hz.
After replacement, appropriate settings and supported functionality should be checked.
If scrolling feels noticeably different, the technician should investigate rather than simply assuming the difference is normal.
4.4 Sensor and Camera Testing
The front-facing camera, proximity sensing, fingerprint functionality, and other relevant features should be checked after the repair.
For example, if a sensor area is blocked, incorrectly positioned, or affected by installation, the phone may behave differently during calls or other everyday tasks.
Testing these functions before returning the phone helps identify problems while the repair is still on the workbench.
4.5 Expert Fix: Use a Post-Repair Checklist
A professional checklist can include:
Test
What to Check
Display
Brightness, colours, pixels and image quality
Touch
Full-screen response and multi-touch
Refresh
Expected supported refresh behaviour
Front camera
Image quality and operation
Proximity
Behaviour during calls
Fingerprint
Unlock and recognition
Charging
USB-C charging operation
Speakers
Audio output
Buttons
Power and volume operation
Wi-Fi/mobile network
Connectivity after reassembly
The exact tests can vary depending on the repair and the phone’s condition.
The important point is simple: test before you return the device.
5. Forgetting About Water and Dust Resistance
The fifth mistake is assuming that a repaired phone automatically retains exactly the same resistance to environmental exposure as it had before repair.
Samsung states that the Galaxy A16 5G has an IP54 rating for dust and water resistance.
However, opening a smartphone for repair changes the original factory assembly.
That’s why customers shouldn’t assume that a repaired device can be treated exactly like a brand-new, unopened phone.
5.1 Why Sealing Matters
The screen assembly and adhesive contribute to the physical construction of the device.
During replacement, the original bonding materials may be removed or disturbed.
If the new screen isn’t installed and sealed correctly, gaps can potentially develop.
That doesn’t mean every screen replacement automatically destroys all resistance. It means the repair process should account for the phone’s original construction rather than ignoring it.
5.2 Don’t Assume the Original Rating Remains
This is particularly important for customers who regularly use their phone around:
Rain
Kitchens
Swimming pools
Beaches
Bathrooms
Humid environments
Even if the phone worked perfectly before the repair, the repaired device shouldn’t be treated as invulnerable to moisture.
A careful repair business should explain any limitations associated with the repair and avoid making unrealistic promises.
5.3 Aftercare Following Repair
Once the screen replacement is complete, protect the phone while the repair settles according to the technician’s instructions.
Practical precautions include:
Avoid unnecessary moisture exposure
Use a protective case
Add a quality screen protector where appropriate
Don’t place the phone under heavy pressure
Avoid extreme temperatures
Watch for screen lifting or unusual gaps
If the display starts separating from the frame, return to the repair provider promptly.
5.4 Expert Fix: Ask About the Repair Warranty
Before approving a repair, ask what warranty covers the replacement.
Important questions include:
How long is the warranty?
Does it cover display defects?
Does it cover touch problems?
What damage is excluded?
Is accidental damage excluded?
What should I do if the screen develops a fault?
Clear warranty terms give you a better understanding of what happens if a genuine repair-related issue appears later.
The Galaxy A16 5G is designed around a relatively large 6.7-inch Super AMOLED display, making the screen a major part of the device experience. Samsung also specifies FHD+ resolution and up to 90Hz refresh capability for the display.
Because of that, replacing the screen shouldn’t be treated as a purely cosmetic repair.
The replacement needs to preserve as much of the phone’s intended functionality as possible.
Professional repair is particularly useful when:
The screen is completely black
Touch doesn’t work
The glass is badly shattered
The frame is damaged
The display has lines or dark areas
The phone has suffered a major impact
You don’t have suitable repair tools
You want warranty-backed workmanship
Samsung’s official product information is also useful when confirming the specifications of your particular device before repair.
Before taking your phone to a repair shop, make a quick note of its condition.
Back Up Important Data
Although a screen replacement doesn’t normally require erasing your data, backing up important information is always sensible before hardware repair.
Record Existing Problems
If possible, note whether the phone currently has:
Working touch
Working cameras
Working speakers
Working charging
Working fingerprint recognition
Visible display lines
Random shutdowns
This makes it easier to compare the phone before and after repair.
Photograph the Device
Taking photographs of the phone before handing it over can document its pre-repair physical condition.
It’s a simple step that can prevent misunderstandings.
What Makes a Quality Screen Repair?
A quality repair isn’t determined by one factor.
Instead, look for a combination of:
Correct part identification
Experienced workmanship
Proper tools
Clean installation
Careful alignment
Comprehensive testing
Clear warranty terms
Honest communication
A repair shop that explains the process and identifies possible risks is generally easier to work with than one that promises an instant fix without asking questions.
Samsung Galaxy A16 5G Screen Replacement Cost: What Affects the Price?
Repair pricing can vary depending on several factors.
The major considerations include:
Replacement screen quality
Part availability
Local labour costs
Device condition
Frame damage
Additional component damage
Warranty coverage
Repair turnaround time
A very low quote deserves a few questions.
Ask what part is being used and whether the quoted price includes installation and warranty.
The cheapest repair and the lowest total cost aren’t necessarily the same thing. A poor-quality replacement that fails shortly afterward can result in paying for the repair twice.
Frequently Asked Questions
1. How long does a Samsung Galaxy A16 5G screen replacement take?
The exact time depends on the repair shop, parts availability, damage level, and workload. A straightforward screen replacement may be completed relatively quickly, while additional frame or internal damage can increase the repair time.
Always ask the repair provider for an estimated turnaround before authorising the work.
2. Does the Galaxy A16 5G use an AMOLED screen?
Yes. Samsung specifies a 6.7-inch FHD+ Super AMOLED display for the Galaxy A16 5G. Samsung also lists a maximum refresh rate of 90Hz for the model.
3. Should I replace only the cracked glass?
It depends on the type of damage and the repair method available.
If the display and touch layer remain fully functional, some specialised repair processes may address glass damage. However, many repairs involve replacing the complete display assembly.
A technician should inspect the phone before recommending the appropriate approach.
4. Will my data be deleted during a screen replacement?
A normal display replacement doesn’t inherently require deleting the phone’s data. However, hardware repairs always carry some risk, so you should back up important photos, documents, contacts, and other data beforehand.
5. Can I replace the Galaxy A16 5G screen myself?
Technically, smartphone screens can be replaced by experienced DIY technicians. However, the process involves opening the phone and working around delicate internal components.
Without appropriate tools, parts, and experience, a DIY attempt can cause additional damage.
For most users, professional repair is the more straightforward approach.
6. Is every Galaxy A16 screen compatible with the 5G version?
No. You shouldn’t assume that every screen advertised for “Galaxy A16” is compatible with every variant.
The Galaxy A16 family includes different models, including LTE and 5G versions. Samsung’s product listings provide model-specific specifications, so verify the exact model before purchasing a replacement.
7. Will the phone remain water resistant after screen replacement?
You shouldn’t automatically assume that the phone retains its original factory-level resistance after being opened and repaired.
Samsung lists the Galaxy A16 5G as IP54-rated, but repair involves disturbing the device’s original assembly. Ask your technician about sealing and post-repair limitations.
8. What should I do if the replacement screen has a problem?
Contact the repair provider as soon as possible and describe the issue clearly.
Avoid attempting another repair yourself, especially if the phone is still covered by the repairer’s warranty. The provider should inspect the device and determine whether the problem relates to the replacement part, installation, or another component.
Conclusion: Avoiding the Five Critical Screen Replacement Mistakes
A Samsung Galaxy A16 5G screen replacement can restore a damaged phone and make it feel like new again, but the quality of the repair depends on more than simply fitting a new display.
The five major mistakes to avoid are:
Choosing the wrong replacement screen
Ignoring existing frame or internal damage
Using poor installation techniques
Skipping comprehensive post-repair testing
Assuming original water and dust resistance is automatically unchanged
The good news is that these problems are largely avoidable.
Start with the correct model and a suitable replacement part. Inspect the phone before installation. Use appropriate tools and materials. Test every important function after the repair. Finally, understand the limitations and warranty associated with the finished repair.
Samsung’s official specifications confirm that the Galaxy A16 5G features a 6.7-inch FHD+ Super AMOLED display and 90Hz refresh capability, making proper display selection especially important.
When in doubt, don’t gamble with a valuable device. Have the phone inspected by an experienced technician who can identify the correct replacement and complete the job carefully.
A cracked screen is frustrating, but with the right part, the right process, and proper testing, it doesn’t have to mean the end of your Galaxy A16 5G.
David from Sydney CBD Repair Centre – The Best place to fix mobile phones as 7 Years In A Row! Top Mobile Phone Repair In Sydney. More than 2000 Positive Reviews on Google.
We take pride in delivering exceptional repair services for all major phone brands including Apple, Samsung, Google, and more. Our expert technicians use only genuine parts and offer 90days warranty on repairs. Located in the heart of Sydney CBD, we’re your one-stop solution for all mobile device repairs.
Our commitment to excellence has earned us the trust of thousands of satisfied customers. Whether it’s a cracked screen, battery replacement, or water damage repair, we handle it all with professional care and expertise. Walk in today and experience why we’re Sydney’s #1 choice for mobile phone repairs.
Visit us for:
✓ Same Day Express Repairs
✓ Genuine Parts Guarantee
✓ Professional Technicians
✓ Competitive Pricing
✓ 2000+ 5-Star Google Reviews
✓ 7-Time Award Winner for Best Phone Repairs
Sydney CBD Repair Centre – Where Quality Meets Reliability.
Call : +61280114119
Website: Sydney CBD Repair Centre
Premium Foldable Cost Breakdown: Why Samsung Galaxy Z Flip 6 Internal Screen Repairs Are Unique – 9 Powerful Facts You Must Know
Introduction to Z Flip 6 Internal Screen Repairs
Foldable smartphones have changed the game. The sleek design of the Samsung Galaxy Z Flip 6 brings together innovation, portability, and premium appeal. However, when something goes wrong, especially with the internal display, repairs become more complicated than standard smartphones.
Z Flip 6 internal screen repairs are unlike typical screen replacements. They involve advanced materials, delicate folding mechanisms, and specialized tools. That’s why understanding the cost breakdown matters.
In this article, we’ll unpack why Z Flip 6 internal screen repairs are unique, what drives their pricing, and how you can make the smartest decision if your device needs attention.
Foldable phones are engineering marvels. To understand why repairs are costly, we must first understand what makes them special.
Ultra-Thin Glass (UTG) Explained
Unlike traditional glass panels, foldable displays use Ultra-Thin Glass (UTG). This material is incredibly thin—sometimes less than 30 microns. It bends without breaking, but it’s also more sensitive to impact.
If the UTG layer cracks, it often requires a full display assembly replacement rather than a simple glass swap.
Flexible OLED Layer Complexity
Beneath the UTG lies a flexible OLED panel. OLED screens are already expensive, but flexible versions cost significantly more due to:
Advanced manufacturing processes
Lower production yields
High precision layering
When internal damage occurs, the OLED layer may also be compromised, increasing repair expenses.
Hinge and Display Integration
The hinge isn’t just a mechanical component—it’s integrated with the display system. The folding motion depends on precise alignment.
A misaligned hinge can:
Stress the display
Create creases
Cause dead pixels
That’s why Z Flip 6 internal screen repairs often involve inspecting both display and hinge components together.
Foldable screens are not mass-produced like standard flat screens. Because of limited production volumes:
Parts cost more
Availability fluctuates
Shipping delays can increase service time
Premium parts mean premium pricing. There’s no way around it.
Labor and Technical Skill
Repairing a foldable phone isn’t beginner-level work. It requires:
Specialized heating equipment
Precision tools
Anti-static environments
Experience with foldable design
Technicians must carefully disassemble without damaging flexible components. That level of expertise adds to labor costs—but ensures safety and reliability.
Risk Factors in Foldable Repairs
Foldable repairs carry higher risks:
Damage to hinge during removal
Screen crease misalignment
Dust intrusion between layers
Because risk is higher, repair centers often invest more time and quality checks. That’s another reason Z Flip 6 internal screen repairs aren’t cheap.
Breakdown of Z Flip 6 Internal Screen Repair Costs
Let’s look at the numbers.
Parts Cost Analysis
Component
Estimated Cost Range
Internal Foldable Display Assembly
High
Hinge Mechanism (if needed)
Moderate to High
Adhesive & Protective Layers
Moderate
The display assembly alone can account for the majority of the total repair cost.
Labor Cost Analysis
Labor typically includes:
Device inspection
Full disassembly
Display replacement
Hinge recalibration
Quality testing
Because the process is delicate and time-intensive, labor can represent a significant percentage of the total bill.
Warranty and Quality Assurance
Reputable repair centers offer warranties. This means:
Genuine parts
Post-repair testing
Coverage against defects
Warranty protection increases peace of mind, which is worth every dollar.
For official pricing references and product specifications, you may visit Samsung’s official page: https://www.samsung.com
Comparing Z Flip 6 Repairs with Traditional Smartphone Screens
Traditional screen replacements are straightforward:
Remove cracked glass
Replace LCD or OLED
Reseal
Foldable repairs? Not so simple.
Feature
Traditional Phone
Z Flip 6
Screen Type
Flat OLED/LCD
Flexible OLED
Glass Type
Standard Gorilla Glass
Ultra-Thin Glass
Hinge Involvement
None
Integrated
Repair Difficulty
Moderate
High
That’s why Z Flip 6 internal screen repairs stand apart from regular repairs.
Common Causes of Internal Screen Damage
Even though foldables are durable, they’re not indestructible.
Main causes include:
Pressure at fold point
Accidental drops
Dust entering hinge
Sharp objects pressing against display
Over time, repeated folding may also contribute to wear—especially if protective layers are compromised.
Signs You Need Z Flip 6 Internal Screen Repairs
Watch for these symptoms:
Black spots or dead pixels
Flickering display
Visible crease cracks
Touchscreen unresponsiveness
Screen bleeding
If you notice these issues, don’t delay. Early diagnosis can prevent further internal damage.
Can You Fix It Yourself? Risks of DIY Repairs
Short answer: It’s risky.
DIY repair attempts often result in:
Permanent OLED damage
Hinge misalignment
Loss of water resistance
Voided warranty
Foldables are not typical smartphones. Attempting self-repair may increase total costs later.
Importance of Certified Technicians
Experienced technicians:
Use genuine components
Follow manufacturer guidelines
Perform hinge recalibration
Conduct multi-point testing
Choosing skilled professionals ensures your investment is protected.
How Long Does a Repair Take?
Most professional centers complete repairs within:
Same day (if parts in stock)
1–3 business days (if ordered)
Time depends on availability and damage severity.
Protecting Your Foldable After Repair
After completing Z Flip 6 internal screen repairs, protect your device:
Avoid excessive pressure
Keep away from dust
Use a protective case
Avoid sharp objects inside pocket
Don’t peel protective layers
Small habits make a big difference.
Is Repair Worth It or Should You Replace?
Consider these factors:
Cost of repair vs new device
Age of phone
Insurance coverage
Trade-in value
Often, repairing is more affordable than replacement—especially for premium foldables.
FAQs About Z Flip 6 Internal Screen Repairs
1. Why are foldable screen repairs more expensive?
Because of flexible OLED panels, UTG materials, and hinge integration.
2. Can a cracked crease worsen over time?
Yes. It can spread and damage the OLED layer.
3. Does warranty cover accidental damage?
Usually not, unless you have additional protection.
4. Is data lost during screen repair?
Typically no, but backups are always recommended.
5. How can I prevent hinge damage?
Keep it clean and avoid folding under pressure.
6. Are genuine parts important?
Absolutely. Non-genuine parts may affect durability and display quality.
Conclusion
Foldable technology is impressive—but it comes at a cost. Z Flip 6 internal screen repairs are unique because of flexible OLED construction, Ultra-Thin Glass, and hinge integration.
Understanding the cost breakdown empowers you to make informed decisions. With professional expertise and genuine parts, your foldable can return to peak performance.
Invest wisely. Protect your device. And choose quality repairs when it matters most.
David from Sydney CBD Repair Centre – The Best place to fix mobile phones as 7 Years In A Row! Top Mobile Phone Repair In Sydney. More than 2000 Positive Reviews on Google and Same Day Repairs.
We take pride in delivering exceptional repair services for all major phone brands including Apple, Samsung, Google, and more. Our expert technicians use only genuine parts and offer 90days warranty on repairs. Located in the heart of Sydney CBD, we’re your one-stop solution for all mobile device repairs.
Our commitment to excellence has earned us the trust of thousands of satisfied customers. Whether it’s a cracked screen, battery replacement, or water damage repair, we handle it all with professional care and expertise. Walk in today and experience why we’re Sydney’s #1 choice for mobile phone repairs.
Visit us for:
✓ Same Day Express Repairs
✓ Genuine Parts Guarantee
✓ Professional Technicians
✓ Competitive Pricing
✓ 2000+ 5-Star Google Reviews
✓ 7-Time Award Winner for Best Phone Repairs
The Cost Calculator: Is Repairing Your Phone Cheaper Than Buying A New One? + 7 Smart Savings Secrets
Introduction
Your smartphone isn’t just a device — it’s your camera, wallet, calendar, office, and connection to the world. So when it breaks, the big question hits fast: Is repairing your phone cheaper than buying a new one?
With flagship phones now costing over $2,000, replacing a damaged device can feel like a serious financial setback. On the other hand, repair costs vary widely, and many people aren’t sure whether fixing a cracked screen, worn-out battery, or water-damaged device is truly worth it. That’s where a smart cost calculator approach becomes essential.
Instead of making an emotional decision, this guide breaks down the real numbers behind phone repair vs replacement. We’ll explore hidden costs, depreciation, warranty factors, environmental impact, and long-term value. More importantly, we’ll help you understand when repairing your phone is the financially smarter choice — and when upgrading actually makes sense.
If you’ve ever stood in a repair shop wondering whether to fix it or replace it, you’re in the right place. Let’s take a clear, practical, and optimistic look at your options so you can make a confident decision that protects both your wallet and your technology investment.
Let’s be honest — when your phone breaks, panic sets in. You drop it. The screen shatters. The battery dies before lunch. Or worse, it takes a swim in the sink.
Suddenly, you’re asking the big question:
Is repairing your phone cheaper than buying a new one?
This is where a proper cost calculator mindset comes into play. Instead of reacting emotionally, you need to weigh the numbers carefully. In many cases, repairing your phone is significantly cheaper than replacing it — but not always.
In this detailed guide, we’ll break down real-world numbers, explore hidden costs, and uncover 7 smart savings secrets that can save you hundreds — sometimes even thousands — of dollars.
In most scenarios, repairing your phone is cheaper than buying a new one.
When Repairing Your Phone Is the Smarter Choice
Repair makes sense when:
Damage is cosmetic
Battery health is poor
Device is under 4 years old
Repair cost < 50% of replacement
You’re satisfied with performance
Professionally repaired phones can last years longer.
When Buying a New Phone Makes Sense
Replacement is better if:
Motherboard is irreparable
Repair cost exceeds 60%
Device no longer receives updates
Multiple major components failed
Even then, consider trade-in value.
FAQs About Repairing Your Phone vs Buying New
1. Is repairing your phone cheaper than buying a new one?
In most cases, yes. Repairs typically cost 10–40% of a new device price.
2. How long does a phone last after repair?
With quality parts, 1–3 additional years is common.
3. Is it worth replacing a phone battery?
Absolutely. Battery replacement is one of the most cost-effective repairs available.
4. Does repairing reduce resale value?
Professional repairs using genuine parts often maintain strong resale value.
5. Is data safe during repair?
Reputable centres prioritise data safety and privacy protocols.
6. Are third-party repairs reliable?
Certified, well-reviewed repair centres offer warranties and professional-grade components.
Conclusion
When you apply a real cost calculator approach, the answer becomes clear.
In most everyday damage scenarios, repairing your phone is cheaper than buying a new one.
It saves money.
It reduces waste.
It preserves value.
It’s practical.
However, if repair costs approach replacement pricing, upgrading may be justified.
The smartest move? Get a professional diagnosis before deciding.
If you’re in Sydney, trusted experts like Sydney CBD Repair Centre provide same-day diagnostics and transparent pricing, helping you make the financially sound choice.
David from Sydney CBD Repair Centre – The Best place to fix mobile phones 7 Years In A Row! Top Mobile Phone Repair In Sydney. More than 2000 Positive Reviews on Google and Same Day Repairs.
We take pride in delivering exceptional repair services for all major phone brands including Apple, Samsung, Google, and more. Our expert technicians use only genuine parts and offer 90 days warranty on repairs. Located in the heart of Sydney CBD, we’re your one-stop solution for all mobile device repairs.
✓ Same Day Express Repairs
✓ Genuine Parts Guarantee
✓ Professional Technicians
✓ Competitive Pricing
✓ 2000+ 5-Star Google Reviews
✓ 7-Time Award Winner for Best Phone Repairs
Foldable Phone Screen Failure: Repairing a Samsung Galaxy Z Flip 5 That Shuts Down Suddenly – Ultimate Guide with 9 Proven Fixes
Introduction
Foldable Screen Failure begins with understanding what actually goes wrong inside a foldable device. Foldable screen failure refers to damage or malfunction in the flexible OLED display system, hinge mechanism, or internal flex cables that connect the screen to the motherboard. Unlike traditional smartphones, foldable devices bend hundreds of times per week. Over time, that motion creates stress.
Foldable Screen Failure: Repairing a Z Flip 5 That Shuts Down Suddenly is becoming one of the most common concerns among Samsung foldable users. While the Galaxy Z Flip 5 represents cutting-edge engineering, its innovative foldable OLED display introduces unique vulnerabilities. When your phone shuts down suddenly while folding or unfolding, it’s more than frustrating—it’s alarming.
So what exactly is happening?
Foldable screen failure typically involves damage to the flexible AMOLED panel, internal display cable, hinge mechanism, or even the power management circuitry. Because the Z Flip 5 folds hundreds of times per week, the internal flex cable endures constant stress. Over time, this repetitive motion can lead to microscopic fractures.
Why the Z Flip 5 Is Unique
Unlike traditional smartphones, the Z Flip 5 features:
Ultra-Thin Glass (UTG)
Flexible AMOLED panel
Dual battery configuration
Precision hinge assembly
Internal ribbon flex connectors
These components allow the phone to bend smoothly. However, they also increase repair complexity. Even a minor misalignment can interrupt the power supply to the display, causing random shutdowns.
According to Samsung’s official foldable technology overview, foldables rely on layered structural engineering to distribute bending stress evenly. You can read more about Samsung’s display technology here: https://www.samsung.com/global/galaxy/what-is/foldable-display/
Early Warning Signs
Before complete failure, you may notice:
Screen flickering when folding
Black line along the crease
Touch not responding in the center
Phone shutting down at specific fold angles
Overheating during use
If ignored, these symptoms often escalate. The device may stop powering on entirely.
The good news? Most cases of Foldable Screen Failure: Repairing a Z Flip 5 That Shuts Down Suddenly can be resolved professionally—often the same day.
Understanding the cause is half the solution. When diagnosing Foldable Screen Failure: Repairing a Z Flip 5 That Shuts Down Suddenly, technicians look at both hardware and software triggers.
1. Display Flex Cable Damage
This is the #1 culprit.
Each time you fold the phone, the internal ribbon cable bends. Over time, the copper traces weaken. Eventually, connection loss causes:
Instant black screen
Sudden power cut
Reboot loop
Because the cable is integrated into the screen assembly, replacement typically involves full display replacement.
2. Battery and Power IC Issues
The Z Flip 5 uses dual batteries connected by a power distribution board. If voltage drops unexpectedly:
Device shuts down at 20–40% battery
Phone dies while folding
Random reboots occur
Sometimes it’s not the battery itself—it’s the Power Management IC (PMIC) on the motherboard.
3. Software Corruption
Though less common, firmware glitches can mimic hardware failure. Signs include:
Shutdown during updates
Boot loop after system crash
Device freezing before power off
A professional diagnostic always rules out software before recommending hardware repair.
4. Hinge Pressure Damage
Debris inside the hinge can place pressure on the display from behind. This causes:
Pressure spots
Internal OLED crack
Short circuit triggering shutdown
Because foldables are precision devices, even tiny dust particles matter.
Step-by-Step Diagnosis Process
Professional repair centers follow a structured approach when handling Foldable Screen Failure: Repairing a Z Flip 5 That Shuts Down Suddenly.
Step 1: External Inspection
Technicians check:
Crease integrity
Dead pixels
Frame separation
Impact marks near hinge
Step 2: Angle Testing
The device is opened and closed at multiple angles to identify if shutdown occurs at specific positions. This confirms flex cable damage.
Step 3: Internal Teardown
The Z Flip 5 requires careful heating and panel removal. Inside, experts test:
Display flex continuity
Battery voltage stability
Motherboard integrity
Short circuits
Step 4: Software Scan
Before replacing parts, technicians:
Reflash firmware
Check boot logs
Perform safe mode test
This ensures the correct repair path.
Professional diagnosis prevents unnecessary replacement costs. That’s why experience matters.
Repair Options Explained
When addressing Foldable Screen Failure: Repairing a Z Flip 5 That Shuts Down Suddenly, repair options depend on diagnosis.
Option 1: Genuine OLED Screen Replacement
Most common solution.
Includes:
New AMOLED foldable panel
Integrated flex cable
Fresh adhesive sealing
Benefits:
Restores original brightness
Fixes shutdown issue
Preserves folding mechanism
Maintains durability
Using genuine parts ensures compatibility and longevity.
Option 2: Battery Replacement
If shutdown occurs at random percentages, replacing one or both batteries may solve the issue.
Option 3: Motherboard Micro-Soldering
For advanced cases involving power IC damage, micro-soldering repairs can:
Restore voltage stability
Prevent data loss
Avoid full board replacement
This requires specialized equipment and certified technicians.
Cost of Repairing a Z Flip 5
Repair pricing depends on the fault.
Repair Type
Estimated Cost Range
Screen Replacement
Premium-tier pricing
Battery Replacement
Moderate
Motherboard Repair
Variable
Software Repair
Lower cost
Foldable screens are more expensive than standard displays due to:
Ultra-Thin Glass layer
Integrated flex assembly
Complex installation process
However, professional repair is often significantly cheaper than replacing the entire device.
Preventing Future Foldable Screen Failure
While no foldable lasts forever, you can extend its life.
Maintenance Tips
Avoid snapping the phone shut
Keep hinge clean
Don’t press the crease
Use official screen protector
Avoid extreme temperatures
Smart Charging Habits
Avoid 0% battery drains
Use certified chargers
Don’t overheat device while charging
Handle with Care
Foldables aren’t fragile—but they require mindful use. Think of them like precision laptops rather than rugged bricks.
Why Professional Repair Matters
Repairing a foldable device isn’t DIY territory.
At Sydney CBD Repair Centre, technicians:
Use genuine parts
Offer 90-day warranty
Provide same-day service
Conduct full device diagnostics
With 2000+ 5-star Google reviews and 7 consecutive awards, expertise makes all the difference.
Attempting unofficial repairs may:
Void warranty
Damage hinge alignment
Cause permanent data loss
Professional service ensures safety, reliability, and peace of mind.
Frequently Asked Questions (FAQs)
1. Why does my Z Flip 5 shut down when I fold it?
This usually indicates flex cable damage linked to foldable screen failure.
2. Can software updates fix sudden shutdown?
Only if the issue is firmware-related. Hardware issues require repair.
3. Is it safe to keep using the phone?
Not recommended. Continued folding may worsen damage.
4. How long does repair take?
Most professional repairs are completed same day.
5. Will my data be safe?
Screen replacements do not affect stored data.
6. Is foldable screen failure common?
With heavy use, yes—but professional repair restores full function.
Conclusion
Foldable Screen Failure: Repairing a Z Flip 5 That Shuts Down Suddenly may sound intimidating, but it’s completely manageable with the right expertise. Foldable devices represent the future of smartphones. And like any advanced technology, they require specialized care.
If your Z Flip 5 shuts down unexpectedly, don’t panic. Early diagnosis and professional repair can restore your device to like-new performance.
David from Sydney CBD Repair Centre – The Best place to fix mobile phones as 7 Years In A Row! Top Mobile Phone Repair In Sydney. More than 2000 Positive Reviews on Google and Same Day Repairs.
We take pride in delivering exceptional repair services for all major phone brands including Apple, Samsung, Google, and more. Our expert technicians use only genuine parts and offer 90days warranty on repairs. Located in the heart of Sydney CBD, we’re your one-stop solution for all mobile device repairs.
Our commitment to excellence has earned us the trust of thousands of satisfied customers. Whether it’s a cracked screen, battery replacement, or water damage repair, we handle it all with professional care and expertise. Walk in today and experience why we’re Sydney’s #1 choice for mobile phone repairs.
Visit us for:
✓ Same Day Express Repairs
✓ Genuine Parts Guarantee
✓ Professional Technicians
✓ Competitive Pricing
✓ 2000+ 5-Star Google Reviews
✓ 7-Time Award Winner for Best Phone Repairs
Before and After: Extreme Phone Screen Damage Transformations by Our Technicians + 10 Stunning Cases
Introduction:
A shattered phone screen can feel like a disaster. From accidental drops to heavy impacts, extreme screen damage not only ruins the appearance of your device but can also affect its functionality, making it difficult—or even impossible—to use. Many people underestimate just how complex a repair can be until they attempt a DIY fix or visit a repair service without the right expertise.
At Sydney CBD Repair Centre, we specialize in transforming even the most damaged devices. Our skilled technicians restore shattered screens to like-new condition, using genuine parts, precision tools, and advanced techniques. In this article, we’ll take you through the causes of extreme screen damage, the meticulous repair process, real-life transformations, and tips to prevent future damage—all backed by the experience that has earned us thousands of satisfied customers and 7 consecutive years as Sydney’s top mobile repair center.
Whether you’re dealing with a cracked iPhone, a water-damaged Samsung, or a foldable device in pieces, this guide shows how professional care turns disaster into perfection.
Few things are as frustrating as a severely cracked or shattered phone screen. Whether it’s a devastating drop, accidental impact, or water exposure, extreme screen damage can disrupt your day, compromise device functionality, and create costly repair bills. At Sydney CBD Repair Centre, we specialize in restoring even the most damaged devices to like-new condition. This article explores the full spectrum of extreme screen transformations carried out by our expert technicians, highlighting the care, skill, and technology involved.
Screen damage is not just about a cracked surface. It can involve layers of the display, touch sensitivity, and even internal components. Understanding the type of damage is key to ensuring a proper repair.
Minor vs. Major Screen Damage
Minor Damage: Surface scratches, small cracks, or minor dead pixels.
Major Damage: Shattered glass, malfunctioning touch, black spots, or complete LCD failure. Extreme damage often renders the device unusable.
Causes of Extreme Damage
Drops and Impacts: Accidental drops from height are the leading cause of screen shattering.
Pressure Damage: Sitting on a phone, heavy objects pressing on the screen.
Water and Liquid Exposure: Moisture can warp screens and affect internal components.
Thermal or Chemical Exposure: Extreme heat or corrosive substances may compromise the screen.
Extreme screen damage doesn’t have to mean the end of your device. With Sydney CBD Repair Centre’s professional repairs, shattered screens are transformed back to pristine condition. Our expert technicians, genuine parts, and state-of-the-art equipment ensure your device not only looks amazing but works flawlessly. Walk in today and witness the transformation for yourself!
David from Sydney CBD Repair Centre – The Best place to fix mobile phones as 7 Years In A Row! Top Mobile Phone Repair In Sydney. More than 2000 Positive Reviews on Google and Same Day Repairs.
We take pride in delivering exceptional repair services for all major phone brands including Apple, Samsung, Google, and more. Our expert technicians use only genuine parts and offer 90days warranty on repairs. Located in the heart of Sydney CBD, we’re your one-stop solution for all mobile device repairs.
Our commitment to excellence has earned us the trust of thousands of satisfied customers. Whether it’s a cracked screen, battery replacement, or water damage repair, we handle it all with professional care and expertise. Walk in today and experience why we’re Sydney’s #1 choice for mobile phone repairs.
Visit us for:
✓ Same Day Express Repairs
✓ Genuine Parts Guarantee
✓ Professional Technicians
✓ Competitive Pricing
✓ 2000+ 5-Star Google Reviews
✓ 7-Time Award Winner for Best Phone Repairs