THE ULTIMATE Phone Makeover: The Rebuilding a Battered Flagship in 12 Steps
Introduction
A smartphone is more than just a device—it’s a lifeline. Over time, even the most durable flagships can suffer cracks, battery issues, or water damage. Whether it’s accidental drops or wear and tear, the frustration of a malfunctioning phone is universal. That’s where a ULTIMATE phone makeover comes in. This guide covers a step-by-step rebuild process, from assessment to restoration, using genuine parts and expert techniques. By following these methods, you can bring your battered flagship back to life while maintaining optimal performance and safety.
Modern flagship smartphones are marvels of engineering. They combine powerful processors, high-resolution displays, advanced cameras, and long-lasting batteries in sleek designs. Understanding your device’s components and vulnerabilities is the first step in any repair process.
Common Damage Types
Cracked Screens – Most common; affects touch functionality and display clarity.
Battery Issues – Swelling, rapid discharge, or inability to charge.
Water Damage – Corrosion and internal short circuits can cause irreparable damage if untreated.
Button or Port Malfunctions – Power button, volume buttons, or charging ports often wear out.
Assessing the Extent of Damage
Visual Inspection: Check for cracks, scratches, or signs of water ingress.
Diagnostics: Use apps or software tools to test battery health, display performance, and sensors.
Component Testing: Isolate damaged components to prevent further harm during repair.
Professional-quality repairs demand proper tools. Here’s a recommended list:
Precision screwdriver set
Plastic opening tools and spudgers
Tweezers and anti-static wrist strap
Replacement screens, batteries, or connectors
Cleaning solutions and microfiber cloths
Heat gun or iOpener for adhesive removal
Safety Precautions
Work on a clean, well-lit surface.
Wear an anti-static wrist strap to prevent component damage.
Avoid using excessive force on delicate components.
Step 1: Backing Up Your Data
Before disassembly, back up your device to avoid permanent data loss. Options include:
Cloud Backup: iCloud, Google Drive
Local Backup: Computer or external storage
App-Specific Backup: Messages, contacts, and photos
Step 2: Disassembling the Device
Careful disassembly reduces the risk of further damage:
Power off the device.
Remove SIM and SD cards.
Loosen screws in the correct order.
Use opening tools to separate the screen from the frame carefully.
Step 3: Replacing the Screen
Disconnect battery and display connectors.
Remove the broken screen, ensuring no debris enters the device.
Install the new screen, reconnect, and test before final assembly.
Step 4: Battery Replacement
Identify signs of battery damage such as swelling.
Disconnect the battery safely.
Insert the replacement battery and test charging functionality.
Step 5: Repairing Water Damage
Power off immediately if water exposure occurs.
Dry the device with a heat gun or specialized drying chamber.
Clean corrosion with isopropyl alcohol.
Test functionality before reassembly.
Step 6: Motherboard and Component Check
Inspect motherboard for corrosion or physical damage.
Test cameras, speakers, and sensors individually.
Replace irreparable components with genuine parts.
Step 7: Reassembling Your Phone
Carefully reconnect all components in reverse disassembly order.
Use proper torque on screws.
Ensure adhesives are applied correctly for water resistance.
Step 8: Testing and Quality Assurance
Power on the device.
Test display, touch responsiveness, battery, cameras, and connectivity.
Run stress tests to ensure stability.
Step 9: Software Updates and Optimization
Update firmware and apps.
Clear cache and perform system optimization for smoother performance.
Check security updates.
Step 10: Protective Measures Post-Rebuild
Install screen protector and sturdy case.
Avoid exposure to water and extreme temperatures.
Consider insurance or extended warranty for added protection.
Step 11: Common Mistakes to Avoid
Rushing the disassembly process.
Using non-genuine replacement parts.
Ignoring small screws or connectors.
Failing to back up data beforehand.
Step 12: When to Seek Professional Help
If motherboard or complex components are damaged.
For water damage beyond initial cleaning.
When tools or experience are insufficient.
Professional Option:Sydney CBD Repair Centre offers expert phone repairs with genuine parts and 90-day warranty.
FAQs
1. Can I rebuild my phone at home safely?
Yes, if you have the right tools, patience, and guidance. However, professional assistance is recommended for complex repairs.
2. How long does a full rebuild take?
It can take anywhere from 2–6 hours depending on damage complexity.
3. Are replacement parts guaranteed?
Using genuine parts ensures quality, and most professionals provide warranty coverage.
4. Will my data be safe during repair?
Backing up beforehand is crucial. Professionals also follow protocols to protect your data.
5. Can water damage be fully reversed?
Partial recovery is possible if addressed promptly, but severe corrosion may require component replacement.
6. How much does a professional rebuild cost?
Costs vary based on the phone model and damage, ranging from $150 to $600 for flagship devices.
Conclusion
Rebuilding a battered flagship is both an art and science. From careful assessment to precise component replacement, following expert guidelines can restore your phone to near-original condition. While DIY repairs are possible, trusted professionals like Sydney CBD Repair Centre ensure safety, genuine parts, and long-lasting performance. With patience, the right tools, and professional support, your phone can regain its ultimate functionality and aesthetic appeal.
David from Sydney CBD Repair Centre – The Best place to fix mobile phones as 6 Years In A Row! Top Mobile Phone Repair In Sydney. More than 2000 Positive Reviews on Google and Same Day Repairs.
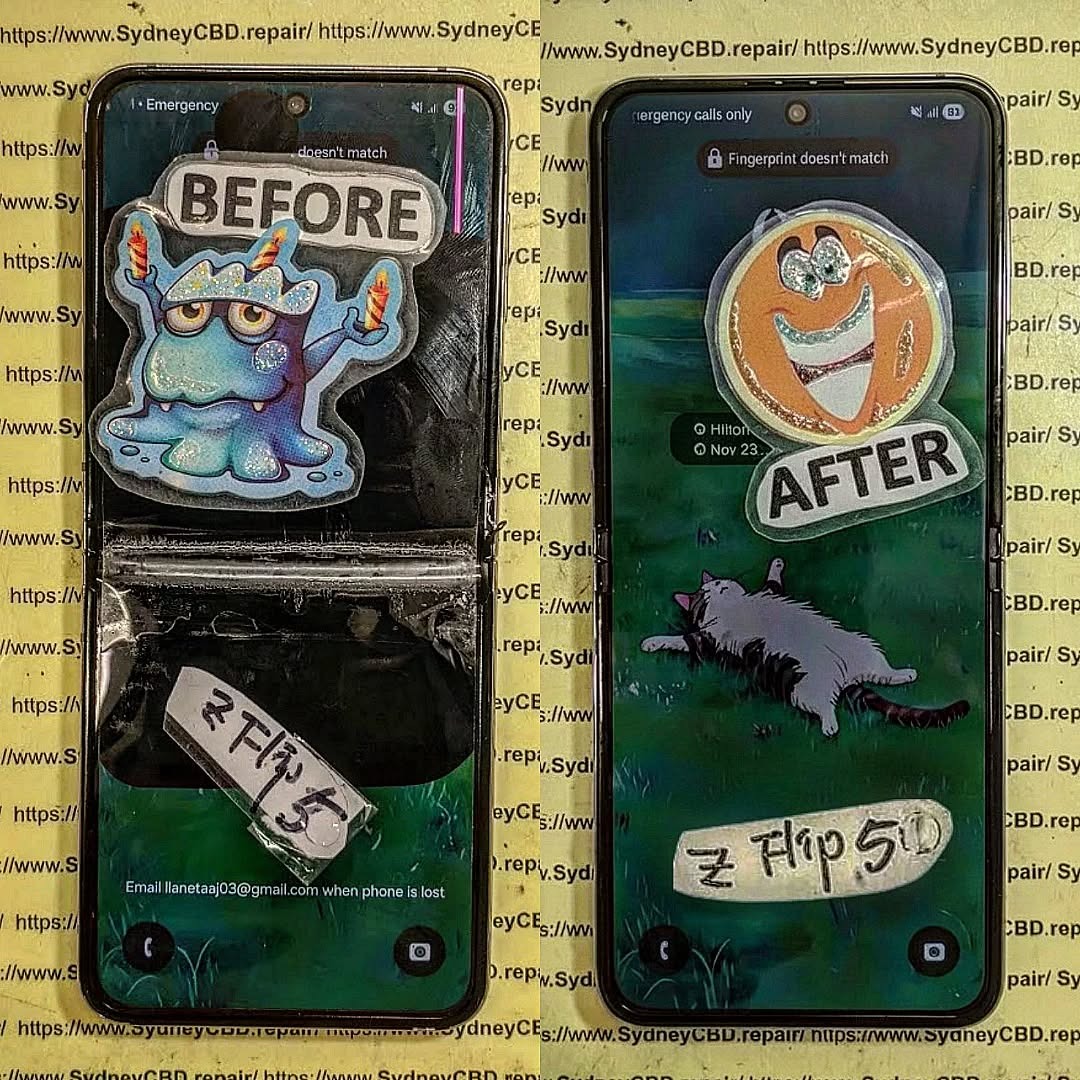
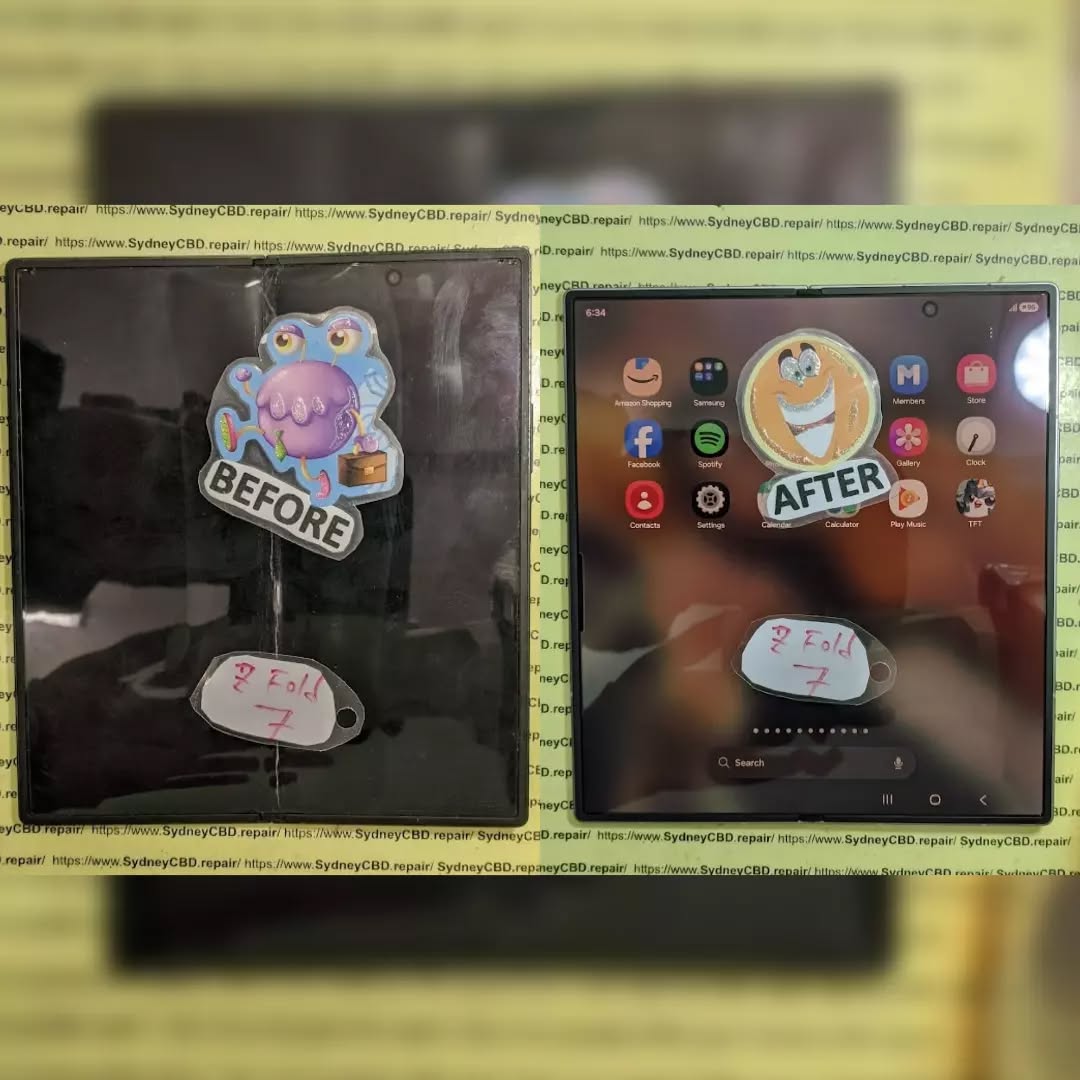
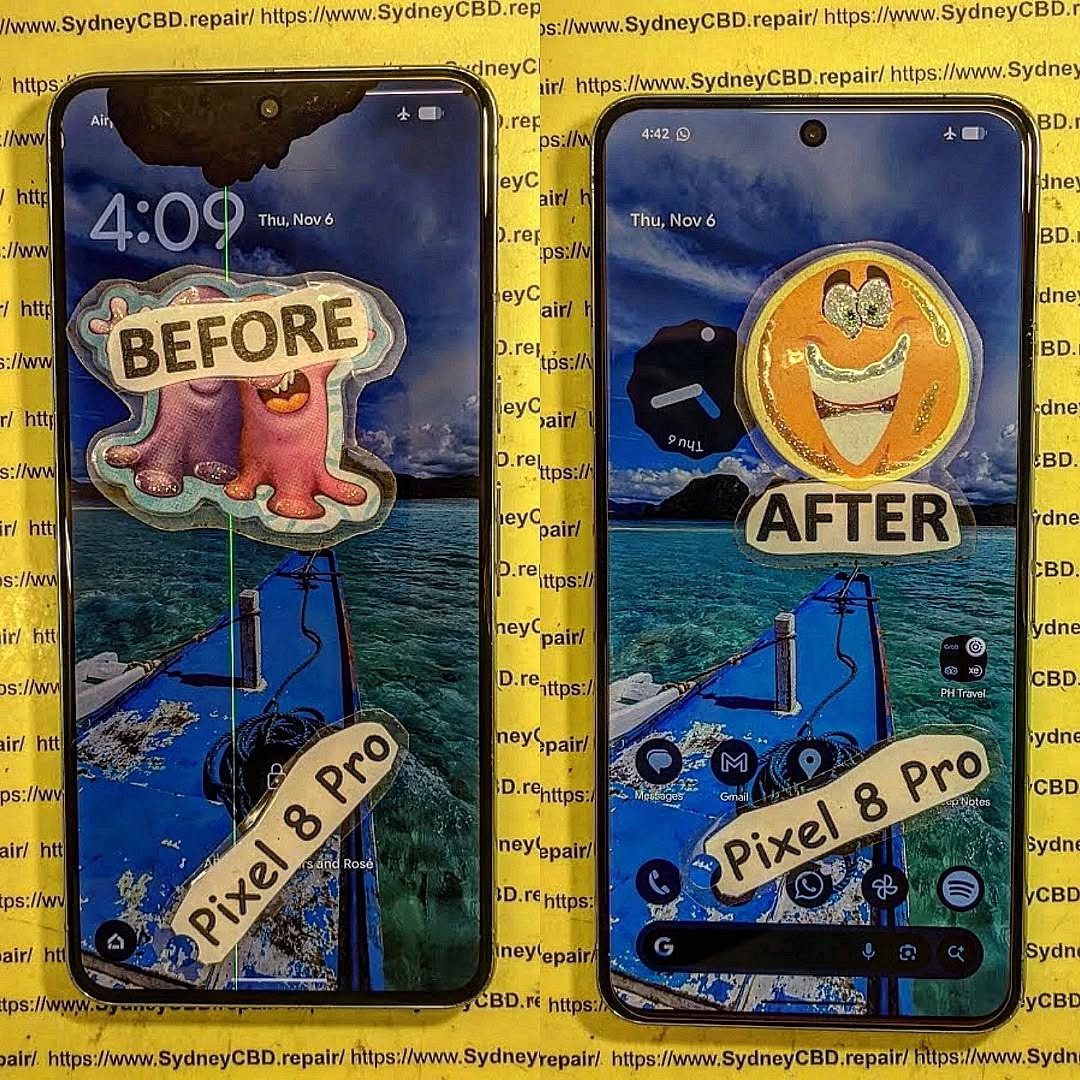
Before and After: Extreme Phone Screen Damage Transformations by Our Technicians + 10 Stunning Cases
Introduction:
A shattered phone screen can feel like a disaster. From accidental drops to heavy impacts, extreme screen damage not only ruins the appearance of your device but can also affect its functionality, making it difficult—or even impossible—to use. Many people underestimate just how complex a repair can be until they attempt a DIY fix or visit a repair service without the right expertise.
At Sydney CBD Repair Centre, we specialize in transforming even the most damaged devices. Our skilled technicians restore shattered screens to like-new condition, using genuine parts, precision tools, and advanced techniques. In this article, we’ll take you through the causes of extreme screen damage, the meticulous repair process, real-life transformations, and tips to prevent future damage—all backed by the experience that has earned us thousands of satisfied customers and 7 consecutive years as Sydney’s top mobile repair center.
Whether you’re dealing with a cracked iPhone, a water-damaged Samsung, or a foldable device in pieces, this guide shows how professional care turns disaster into perfection.
Few things are as frustrating as a severely cracked or shattered phone screen. Whether it’s a devastating drop, accidental impact, or water exposure, extreme screen damage can disrupt your day, compromise device functionality, and create costly repair bills. At Sydney CBD Repair Centre, we specialize in restoring even the most damaged devices to like-new condition. This article explores the full spectrum of extreme screen transformations carried out by our expert technicians, highlighting the care, skill, and technology involved.
Screen damage is not just about a cracked surface. It can involve layers of the display, touch sensitivity, and even internal components. Understanding the type of damage is key to ensuring a proper repair.
Minor vs. Major Screen Damage
Minor Damage: Surface scratches, small cracks, or minor dead pixels.
Major Damage: Shattered glass, malfunctioning touch, black spots, or complete LCD failure. Extreme damage often renders the device unusable.
Causes of Extreme Damage
Drops and Impacts: Accidental drops from height are the leading cause of screen shattering.
Pressure Damage: Sitting on a phone, heavy objects pressing on the screen.
Water and Liquid Exposure: Moisture can warp screens and affect internal components.
Thermal or Chemical Exposure: Extreme heat or corrosive substances may compromise the screen.
Extreme screen damage doesn’t have to mean the end of your device. With Sydney CBD Repair Centre’s professional repairs, shattered screens are transformed back to pristine condition. Our expert technicians, genuine parts, and state-of-the-art equipment ensure your device not only looks amazing but works flawlessly. Walk in today and witness the transformation for yourself!
David from Sydney CBD Repair Centre – The Best place to fix mobile phones as 7 Years In A Row! Top Mobile Phone Repair In Sydney. More than 2000 Positive Reviews on Google and Same Day Repairs.
We take pride in delivering exceptional repair services for all major phone brands including Apple, Samsung, Google, and more. Our expert technicians use only genuine parts and offer 90days warranty on repairs. Located in the heart of Sydney CBD, we’re your one-stop solution for all mobile device repairs.
Our commitment to excellence has earned us the trust of thousands of satisfied customers. Whether it’s a cracked screen, battery replacement, or water damage repair, we handle it all with professional care and expertise. Walk in today and experience why we’re Sydney’s #1 choice for mobile phone repairs.
Visit us for:
✓ Same Day Express Repairs
✓ Genuine Parts Guarantee
✓ Professional Technicians
✓ Competitive Pricing
✓ 2000+ 5-Star Google Reviews
✓ 7-Time Award Winner for Best Phone Repairs
Folding Phone Nightmare: Restoring a Catastrophic Samsung Galaxy Z Flip 5 – 10 Proven Fixes
Introduction
Foldable smartphones have redefined mobile technology, offering sleek designs and innovative features that make everyday tasks more convenient and stylish. Among these cutting-edge devices, the Samsung Z Flip 5 stands out as a marvel of engineering, combining a full-sized smartphone experience with the portability of a compact, foldable form factor. However, with its revolutionary design comes a unique set of challenges. One accidental drop, an exposed hinge to dust, or minor water exposure can transform your high-tech device into a folding phone nightmare.
For many users, facing a damaged Z Flip 5 can feel overwhelming. The delicate foldable screen, hinge mechanisms, and internal components require careful handling, and improper repairs may lead to permanent damage. That’s why understanding the proper steps for diagnosis, repair, and maintenance is crucial.
In this guide, we’ll take you through everything you need to know to restore a catastrophic Samsung Z Flip 5. From immediate troubleshooting and DIY repair options to professional services and long-term maintenance strategies, you’ll discover 10 proven fixes that can bring your foldable phone back to life. Whether you’re a tech enthusiast attempting a careful repair at home or a user seeking trusted professional assistance, this article will provide the knowledge, tips, and confidence needed to tackle even the most severe Z Flip 5 issues.
By the end, you’ll understand not only how to fix your device but also how to maintain it, ensuring that your Samsung Z Flip 5 continues to perform flawlessly for years to come.
Foldable smartphones have revolutionized mobile technology, and the Samsung Z Flip 5 is a prime example of engineering brilliance. Its sleek design and flexible screen make it both futuristic and functional. However, this sophistication comes with fragility. One misstep—a drop, a spill, or an excessive bend—can turn your high-end phone into a folding phone nightmare.
In this comprehensive guide, we’ll explore how to restore a catastrophic Samsung Z Flip 5, covering everything from diagnosing damage to DIY repair tips, professional fixes, and long-term maintenance. With 10 proven fixes, you can regain full functionality while protecting your device for the future.
The Samsung Z Flip 5 is more than just a phone; it’s a technological statement. Its foldable OLED display allows a full-sized smartphone to collapse into a compact form, blending portability with power. But the very features that make it remarkable also make it delicate.
The Anatomy of the Foldable Screen
The Z Flip 5’s screen is a marvel of flexible engineering:
Ultra-thin glass layer: Provides a smooth touch experience but is prone to cracking if stressed.
Plastic protective layer: Guards the OLED, but scratches easily.
Flexible OLED panel: The core display that bends along the hinge.
Hinge mechanism: Allows folding but is susceptible to dust and misalignment.
Understanding these components is crucial for any repair strategy.
Why Foldable Phones Fail: Common Issues
Foldable phones, especially the Z Flip 5, face unique challenges:
Screen crease or crack: Frequent folding may cause permanent lines or breaks.
Hinge malfunction: Misalignment or stiffness can affect folding and cause internal damage.
Water or dust ingress: Even with IPX8 water resistance, particles can penetrate the hinge.
Battery or connector damage: A drop may disconnect or puncture internal components.
Reacting quickly is essential. A wrong move can worsen damage or void warranties.
Diagnosing Physical vs. Software Damage
Not all issues are obvious. For instance, a phone that refuses to boot might have:
Software glitches: Corrupted apps, failed updates, or system crashes.
Hardware damage: Broken display, damaged connectors, or hinge issues.
Check for:
Visible screen cracks
Unusual sounds from the hinge
Overheating
Error messages
Power Cycling and Safe Reboot Methods
To prevent further harm:
Hold the power and volume down buttons for 10 seconds to force reboot.
If the screen is unresponsive, connect the phone to a charger or a PC to see if it powers up.
Avoid attempting to fold or unfold the device forcefully.
Repair Options: DIY vs Professional
Essential Tools for DIY Foldable Phone Repair
For those daring to repair at home, you’ll need:
Precision screwdrivers
Plastic pry tools
ESD-safe tweezers
Suction cups
Heat gun (for adhesive loosening)
Caution: DIY repairs are risky; a single misstep can damage the OLED beyond repair.
When to Seek Expert Technicians
Professional repair is recommended when:
The screen is shattered
The hinge is misaligned or jammed
Water damage is suspected
Internal components appear damaged
Sydney CBD Repair Centre, for instance, provides same-day express repairs and uses genuine parts with 90-day warranty—ideal for foldable phone emergencies.
Step-by-Step Guide to Restoring a Damaged Z Flip 5
Screen Replacement Techniques
Screen replacement is delicate due to the foldable OLED:
Heat the frame gently to soften the adhesive.
Use a suction cup and plastic pry tool to lift the screen.
Disconnect the ribbon cables carefully.
Align and install the new screen, then test before sealing.
Tip: Only use genuine Samsung replacement screens to avoid touch sensitivity issues.
Hinge Adjustment and Lubrication
Hinges can get stiff or loose over time:
Inspect for dust or debris.
Apply a small amount of precision hinge lubricant.
Align screws and test folding movement.
Misaligned hinges can damage the OLED if ignored.
Battery and Internal Component Checks
After physical repair:
Inspect battery connectors and ribbon cables.
Check for bulges or liquid damage.
Replace damaged components to prevent future failures.
Software Troubleshooting After Hardware Repair
Even after physical repairs, software issues may persist.
Factory Reset and Data Backup
Always backup your data to Samsung Cloud or a PC.
Perform a factory reset if apps misbehave or the system crashes.
Firmware Updates and Calibration
Update to the latest software to fix bugs.
Calibrate foldable sensors for smooth folding animations and battery optimization.
Maintaining Your Samsung Z Flip 5 to Prevent Future Damage
Protective Cases and Screen Guards
Use a custom-fit flip case to prevent drops.
Apply a screen protector designed for foldable displays.
Regular Maintenance and Cleaning
Remove dust from the hinge every few weeks.
Clean screen with a microfiber cloth.
Avoid extreme heat or moisture exposure.
Cost Analysis: Repair vs Replacement
Issue
DIY Cost
Professional Cost
Replacement Cost
Screen Replacement
$250-$350
$400-$500
$1200+
Hinge Repair
$50-$100
$150-$250
N/A
Battery Replacement
$30-$50
$80-$120
N/A
Full Replacement
N/A
N/A
$1200+
Professional repair often saves money long-term, as it ensures genuine parts and avoids repeated damage.
FAQs About Samsung Z Flip 5 Repair
Q1: Can a foldable phone fully recover after a screen crease?
A: Minor creases may fade over time, but deep creases typically require a screen replacement.
Q2: Is DIY screen replacement safe?
A: Only if you have experience. Otherwise, professional repair is strongly recommended.
Q3: How long does Samsung Z Flip 5 repair take?
A: Simple fixes like battery or hinge adjustment may take 1–2 hours, full screen replacement 2–4 hours.
Q4: Does repair void the warranty?
A: Yes, unauthorized repairs can void warranty. Use certified centers like Sydney CBD Repair Centre.
Q5: Can water damage be repaired?
A: Yes, if addressed quickly. Components must be cleaned, dried, and replaced if needed.
Q6: How can I prevent hinge damage in the future?
A: Clean regularly, avoid forceful folding, and use protective cases designed for foldables.
Conclusion: Restoring Confidence in Your Foldable Phone
A catastrophic Samsung Z Flip 5 doesn’t have to spell disaster. With the right diagnosis, repair strategy, and maintenance, you can restore your foldable phone to near-original condition. Whether you choose DIY repair or professional service, following these 10 proven fixes ensures longevity, performance, and peace of mind.
Invest in protective accessories, maintain the hinge, and update software regularly. Foldable phones are marvels of technology—but even marvels need care.
David from Sydney CBD Repair Centre – The Best place to fix mobile phones as 6 Years In A Row! Top Mobile Phone Repair In Sydney. More than 2000 Positive Reviews on Google and Same Day Repairs.
We take pride in delivering exceptional repair services for all major phone brands including Apple, Samsung, Google, and more. Our expert technicians use only genuine parts and offer 90days warranty on repairs. Located in the heart of Sydney CBD, we’re your one-stop solution for all mobile device repairs.
Our commitment to excellence has earned us the trust of thousands of satisfied customers. Whether it’s a cracked screen, battery replacement, or water damage repair, we handle it all with professional care and expertise. Walk in today and experience why we’re Sydney’s #1 choice for mobile phone repairs.
Visit us for:
✓ Same Day Express Repairs
✓ Genuine Parts Guarantee
✓ Professional Technicians
✓ Competitive Pricing
✓ 2000+ 5-Star Google Reviews
✓ 6-Time Award Winner for Best Phone Repairs
Shipping Repairs to Sydney CBD: How Our International Mail-In Service Saves Dead Devices – 7 Proven Ways
Introduction
In today’s fast-paced, technology-driven world, a malfunctioning smartphone, tablet, or laptop can bring your day to a standstill. Whether it’s a cracked screen, a dead battery, or water damage, finding a reliable repair service while living abroad or far from Sydney can feel overwhelming. That’s where Sydney CBD Repair Centre’s international mail-in service comes to the rescue.
Our service allows customers from anywhere in the world to ship their dead or damaged devices directly to Sydney, where our expert technicians provide fast, professional, and secure repairs. From precise diagnostics to genuine part replacements, we ensure every device is treated with the highest level of care. By bridging the gap between distance and expertise, we make sure your devices are up and running again—without the hassle of hunting for local repair options or risking substandard service.
This article will explore how our international mail-in repairs work, the types of devices and issues we handle, and why choosing a trusted repair service like Sydney CBD Repair Centre is a smart decision. Whether you’re a traveler, expat, or remote professional, we’ll show you how shipping repairs to Sydney can save your dead devices efficiently and securely.
In today’s fast-paced world, being without your phone, tablet, or laptop can be more than just inconvenient—it can be disruptive. Sydney CBD Repair Centre offers an international mail-in service that revives dead devices quickly, securely, and professionally. Whether your device suffered water damage, a cracked screen, or battery failure, shipping it to Sydney might be the smartest decision you make this year.
When devices fail, owners often panic, especially if they are far from home or live in areas with limited repair options. International mail-in repairs solve this problem, bridging the gap between remote customers and professional services.
Common Scenarios Requiring Mail-In Repairs
Travelers & Expats – Devices fail while abroad or away from home country.
Limited Local Service – Some regions lack certified repair centers.
Specialized Repairs – Certain issues, like motherboard repairs, require advanced tools.
Why Local Repairs May Not Be an Option
Lack of genuine parts in local markets.
Untrained technicians risking further damage.
Longer repair times due to limited diagnostic equipment.
Our process is designed to ensure your device is handled safely from pickup to return. Each step incorporates transparency and accountability.
Step 1: Secure Shipping Instructions
We provide detailed instructions to ensure devices are safely packaged and labeled. Our guidelines help prevent damage during transit and ensure proper customs handling.
Step 2: Tracking and Notification
Every shipped device receives a tracking number. Customers are notified upon arrival, during repair, and when dispatched back, keeping you informed at every stage.
Step 3: Expert Assessment and Diagnostics
Our certified technicians perform a comprehensive assessment, identifying hidden issues. This step ensures that your device receives precise repairs, avoiding unnecessary replacements.
Types of Devices We Repair via Mail
We cater to a wide range of electronic devices, ensuring that no device is left behind.
Smartphones
All major brands including Apple, Samsung, Google, and Huawei are accepted. Issues such as unresponsive screens, battery drainage, or system failures are quickly resolved.
Tablets and iPads
From iPads to Android tablets, our mail-in service restores functionality, whether it’s a cracked display or software malfunction.
Laptops and Other Electronics
We handle laptops, Chromebooks, and even gaming consoles. Our experts diagnose both hardware and software issues efficiently.
Common Repairs Offered Through Mail-In Service
The most frequent repairs we manage cover both hardware and software issues.
Screen Replacements
Broken displays, dead pixels, and unresponsive touchscreens are replaced with high-quality, genuine parts.
Battery Replacements
Old or failing batteries are swapped with manufacturer-certified replacements, extending device life and performance.
Water Damage Restoration
Our advanced cleaning and drying techniques revive devices that have suffered water exposure, minimizing corrosion and data loss.
Charging Port & Connectivity Issues
Devices failing to charge or connect to networks are diagnosed and repaired, restoring full operational capacity.
Security and Warranty Assurance for International Repairs
Ensuring the safety of your data and device is paramount.
Data Privacy and Device Security
Our technicians adhere to strict privacy protocols. We never access personal data beyond what is necessary for repair.
Warranty Coverage and Genuine Parts
All repairs come with a 90-day warranty, guaranteeing genuine parts and professional workmanship.
Cost-Effectiveness of Mail-In Repairs
Mail-in repairs are often more economical than local alternatives.
Comparing International Mail-In vs Local Repairs
Lower costs due to centralized operations.
No need to purchase tools or parts yourself.
Faster resolution for complex repairs.
Hidden Costs to Avoid
International shipping insurance.
Customs duties (varies by country).
Premium services that aren’t necessary.
Tips to Prepare Your Device for International Shipping
Proper preparation minimizes risk and ensures faster turnaround.
Backup and Data Protection
Always back up data. Remove sensitive info if possible and encrypt the device to protect privacy.
Proper Packaging Techniques
Use bubble wrap, protective cases, and original boxes if available. Label packages clearly with return address and contact info.
Insurance Options for Shipping
Insure devices to cover loss or damage during transit. We can advise on recommended carriers.
FAQs About Shipping Repairs to Sydney
How long does international shipping take?
Transit times vary by country, typically 5–15 business days, plus repair time.
Is my device safe during transit?
Yes, using proper packaging and shipping insurance ensures maximum safety.
Do you repair devices from all countries?
We accept devices from virtually any country, provided international shipping is available.
Are the parts used genuine?
Absolutely. We use only manufacturer-certified or original parts for all repairs.
How is payment processed for mail-in repairs?
Payments can be made via secure online transfer or credit card before shipping or after diagnostics.
What if my repair isn’t successful?
We offer alternative solutions including part replacement or full refund if the device cannot be repaired.
Conclusion: Why Mail-In Repairs Are a Smart Choice
Choosing an international mail-in repair service with Sydney CBD Repair Centre ensures your device gets expert attention without geographical limitations. With secure shipping, transparent communication, genuine parts, and competitive pricing, you can have your device restored as if you never left home. It’s fast, safe, and effective—a true solution for today’s mobile lifestyle.
For more information, you can visit Sydney CBD Repair Centre to explore our services and detailed shipping instructions.
David from Sydney CBD Repair Centre – The Best place to fix mobile phones as 7 Years In A Row! Top Mobile Phone Repair In Sydney. More than 2000 Positive Reviews on Google and Same Day Repairs.
We take pride in delivering exceptional repair services for all major phone brands including Apple, Samsung, Google, and more. Our expert technicians use only genuine parts and offer 90days warranty on repairs. Located in the heart of Sydney CBD, we’re your one-stop solution for all mobile device repairs.
Our commitment to excellence has earned us the trust of thousands of satisfied customers. Whether it’s a cracked screen, battery replacement, or water damage repair, we handle it all with professional care and expertise. Walk in today and experience why we’re Sydney’s #1 choice for mobile phone repairs.
Visit us for:
✓ Same Day Express Repairs
✓ Genuine Parts Guarantee
✓ Professional Technicians
✓ Competitive Pricing
✓ 2000+ 5-Star Google Reviews
✓ 7-Time Award Winner for Best Phone Repairs
Fixing a Google Pixel 8 Pro Damaged by High Pressure From Sea Water: 9 Powerful Recovery Steps That Actually Work
Introduction
Accidents involving water are among the most common causes of smartphone failure, and saltwater exposure is particularly destructive. When a premium device like the Google Pixel 8 Pro encounters high pressure sea water, the consequences can be far more serious than typical water damage. Salt particles, minerals, and pressure-driven moisture can quickly penetrate tiny openings in the phone, reaching sensitive internal components such as the motherboard, charging port, and camera modules. As a result, fixing a Google Pixel 8 Pro damaged by high pressure sea water requires more than simply drying the device—it demands careful diagnostics, corrosion removal, and professional repair techniques.
Modern smartphones are often marketed as water-resistant, but it’s important to understand the limitations of these protections. While the Pixel 8 Pro carries an IP68 rating designed to resist fresh water under controlled conditions, seawater introduces additional risks including salt corrosion and electrical conductivity. These factors can trigger short circuits, degrade internal connections, and cause gradual component failure if not addressed quickly.
Fortunately, a sea water–damaged phone does not always mean the end of the device. With prompt action and proper repair procedures, many smartphones can be restored to full functionality. Professional technicians use specialized tools such as ultrasonic cleaners, microscopic board inspections, and precision micro-soldering to remove corrosion and repair damaged circuits. These advanced methods significantly improve the chances of recovery, even after severe saltwater exposure.
This guide explains everything you need to know about fixing a Google Pixel 8 Pro damaged by high pressure sea water. From the science behind saltwater corrosion to emergency steps you should take immediately after exposure, we’ll walk through the full repair process used by professionals. Whether your phone fell into the ocean during a beach trip or was exposed to powerful sea spray, understanding the right recovery steps can make the difference between saving your device and losing it permanently.
Understanding How High Pressure Sea Water Damages Smartphones
When it comes to fixing a Google Pixel 8 Pro damaged by high pressure sea water, understanding the underlying damage mechanisms is critical. While modern smartphones such as the Google Pixel 8 Pro include water-resistance features, they are not designed to withstand high pressure sea water exposure.
The device carries an IP68 rating, meaning it can survive limited freshwater immersion. However, saltwater introduces two major risks:
Salt corrosion
Electrical conductivity
Let’s break these down.
Saltwater Corrosion
Sea water contains sodium chloride and minerals that rapidly corrode metal components. Once salt enters the phone’s interior, it begins oxidizing:
motherboard solder joints
charging contacts
battery connectors
camera modules
This corrosion continues even after the phone dries.
In fact, corrosion can spread for weeks, slowly damaging circuits.
Electrical Short Circuits
Saltwater is highly conductive. If the phone remains powered on after exposure, electrical current flows through unintended paths.
This can cause:
blown power IC chips
damaged display drivers
motherboard short circuits
Consequently, immediate shutdown is crucial.
High Pressure Makes Things Worse
Regular water exposure is one thing. But high pressure sea water, such as waves crashing or dropping a phone underwater, forces liquid past seals.
Even the IP68 protection fails under pressure, allowing saltwater to penetrate:
SIM tray seals
speaker mesh
microphone openings
USB-C charging port
That’s why fixing a Google Pixel 8 Pro damaged by high pressure sea water often requires deep internal repair, not just drying.
Compared to buying a new flagship phone, repairing can save hundreds of dollars.
Preventing Future Water Damage
While accidents happen, there are ways to reduce risk.
Use Waterproof Cases
A quality waterproof case adds an extra layer of protection.
This is especially helpful when:
boating
beach trips
water sports
Avoid Charging Near Water
Many water damage incidents occur near pools or beaches while charging.
Keep devices away from moisture when plugged in.
Rinse After Salt Exposure
Even if the phone survives ocean exposure, rinse it with fresh water to remove salt.
When to Seek Professional Repair Services
You should seek professional help if your Google Pixel 8 Pro shows:
charging problems
overheating
camera fogging
touchscreen issues
random shutdowns
These are clear signs that internal corrosion may be present.
Professional repair services have tools unavailable to most consumers.
For example, technicians may use advanced diagnostic equipment recommended by industry resources
Frequently Asked Questions
1. Can a Google Pixel 8 Pro survive sea water exposure?
It might survive brief exposure, but saltwater often causes corrosion. Immediate action and professional cleaning greatly improve recovery chances.
2. Is rice effective for drying water-damaged phones?
No. Rice does not remove salt or corrosion. Professional cleaning is far more effective.
3. How long does saltwater damage take to appear?
Symptoms can appear immediately or even days to weeks later, depending on corrosion spread.
4. Should I rinse my phone after ocean exposure?
Yes, rinsing with fresh water helps remove salt. However, the phone should remain powered off afterward.
5. Can water damage be repaired permanently?
Many devices can be restored, especially if treatment occurs quickly. However, severe corrosion may require component replacement.
6. How long does water damage repair take?
Most professional repairs take 24–72 hours, depending on the extent of damage.
Conclusion
Saltwater exposure is one of the most damaging incidents a smartphone can experience. However, fixing a Google Pixel 8 Pro damaged by high pressure sea water is often possible with the right approach.
Immediate shutdown, proper cleaning, and professional diagnostics are critical steps in preventing permanent failure. While some devices may require component replacements, modern repair techniques—including ultrasonic cleaning and micro-soldering—have dramatically improved recovery success rates.
If your Pixel 8 Pro encounters the ocean, acting quickly and seeking expert repair services can make the difference between a fully restored device and a total loss.
David from Sydney CBD Repair Centre – The Best place to fix mobile phones as 7 Years In A Row! Top Mobile Phone Repair In Sydney. More than 2000 Positive Reviews on Google and Same Day Repairs.
We take pride in delivering exceptional repair services for all major phone brands including Apple, Samsung, Google, and more. Our expert technicians use only genuine parts and offer 90days warranty on repairs. Located in the heart of Sydney CBD, we’re your one-stop solution for all mobile device repairs.
Our commitment to excellence has earned us the trust of thousands of satisfied customers. Whether it’s a cracked screen, battery replacement, or water damage repair, we handle it all with professional care and expertise. Walk in today and experience why we’re Sydney’s #1 choice for mobile phone repairs.
Visit us for:
✓ Same Day Express Repairs
✓ Genuine Parts Guarantee
✓ Professional Technicians
✓ Competitive Pricing
✓ 2000+ 5-Star Google Reviews
✓ 7-Time Award Winner for Best Phone Repairs
Rescuing a Google Pixel 10 Pro Crushed by a Sydney Light Rail Tram: 11 Remarkable Lessons from an Extreme Phone Recovery
Introduction to the Incident
Few smartphone accidents are as dramatic as watching a premium device disappear beneath the wheels of a moving tram. Yet that was exactly the situation involving a Google Pixel 10 Pro in Sydney. What began as a routine commute quickly transformed into a major recovery challenge when the device slipped onto the tracks and was subsequently crushed by a Sydney light rail tram.
At first glance, the phone appeared beyond saving. The display was shattered, the frame was twisted, and several internal components had suffered severe impact damage. However, modern smartphones are more resilient than many people realize. Through careful handling, advanced diagnostic procedures, and professional repair techniques, even a severely damaged device can sometimes be restored.
This article explores the complete journey of rescuing a Google Pixel 10 Pro crushed by a Sydney light rail tram, highlighting the repair process, lessons learned, and the importance of expert intervention.
Urban transportation systems move thousands of people every day. Busy stations, crowded platforms, and rushed commuters create countless opportunities for accidents involving personal devices.
The Moment Everything Went Wrong
The incident occurred during a typical weekday rush. While boarding the light rail, the owner attempted to place the phone into a pocket. Unfortunately, the device slipped free and landed near the platform edge.
Before retrieval was possible, the tram began moving. Within seconds, the Google Pixel 10 Pro found itself directly beneath several tonnes of moving rail equipment.
The result was catastrophic physical damage.
Initial Assessment of the Damage
Upon recovery, technicians observed:
Completely shattered front glass
Cracked rear panel
Bent aluminum frame
Damaged camera housing
Screen separation from chassis
Potential motherboard stress
Battery deformation concerns
Despite the destruction, there remained hope for recovering both functionality and valuable data.
Battery assessment remains one of the most important steps.
A damaged battery can:
Swell unexpectedly
Lose capacity
Overheat
Present safety hazards
Replacement is usually recommended after severe crush events.
Data Recovery from a Crushed Smartphone
One of the most encouraging aspects of a Google Pixel 10 Pro crushed by a Sydney light rail tram is that data often survives even when the phone appears destroyed.
Photos, videos, contacts, documents, and application data are frequently stored on memory chips that remain intact despite extensive physical damage.
Professional recovery methods include:
Logic Board Restoration
Technicians may repair:
Broken traces
Damaged connectors
Cracked solder joints
This temporary restoration can allow data extraction.
Temporary Screen Installation
In some situations, technicians install:
Test displays
Diagnostic batteries
Temporary charging assemblies
This enables phone access long enough to create a complete backup.
Chip-Level Techniques
Advanced recovery sometimes involves:
Microsoldering
Board reconstruction
Data extraction procedures
These methods require specialized equipment and extensive experience.
Fortunately, modern Google cloud synchronization also provides an additional layer of protection.
Why Professional Repair Matters
When facing severe smartphone damage, DIY repairs rarely succeed.
Professional repair centers provide:
Specialized Equipment
Experts use:
Thermal cameras
Microscopes
Precision soldering stations
Diagnostic software
Professional calibration tools
These resources significantly improve repair outcomes.
Experience with Complex Cases
Repair specialists have encountered:
Vehicle-crushed phones
Water-damaged devices
Fire-damaged electronics
Extreme impact failures
This experience helps identify practical recovery options.
Cost Savings
Replacing a flagship smartphone is expensive.
Repairing a Google Pixel 10 Pro crushed by a Sydney light rail tram can often cost substantially less than purchasing a new device while preserving important personal data.
Preventing Similar Accidents
Although accidents happen, several precautions can reduce risk.
Use Secure Storage
Avoid placing phones loosely in shallow pockets.
Better options include:
Zippered compartments
Secure bags
Dedicated phone sleeves
Install Protective Cases
A quality case offers:
Improved grip
Shock absorption
Reduced slipping risk
While a case won’t stop tram damage, it can prevent the drop that causes the accident.
Enable Automatic Backups
Regular backups are essential.
Consider:
Google Drive synchronization
Cloud photo backup
Automatic contacts syncing
Data protection should never depend solely on physical device survival.
Stay Aware During Commuting
Busy transport environments demand extra attention.
Simple habits can prevent costly accidents:
Hold devices securely
Avoid multitasking near platform edges
Use both hands when boarding
Small precautions often make a big difference.
Frequently Asked Questions
1. Can a Google Pixel 10 Pro survive being crushed by a tram?
While severe damage is expected, internal components and stored data may survive. Professional assessment is necessary to determine repairability.
2. Is data recovery possible after tram damage?
Yes. In many cases, technicians can recover photos, contacts, and documents even when the phone itself appears destroyed.
3. Should I try charging a crushed phone?
No. Charging a physically damaged smartphone may create safety risks, especially if the battery has been compromised.
4. How long does the repair process take?
Repair times vary depending on parts availability and damage severity. Simple repairs may take hours, while complex recoveries can require several days.
5. Is repairing a tram-crushed Google Pixel 10 Pro worth it?
If valuable data can be recovered or the motherboard remains functional, repair may be considerably more economical than replacement.
6. Can a bent frame be repaired?
Minor bends may be corrected. Severe deformation often requires complete housing replacement.
7. Will waterproofing remain intact after repairs?
Professional technicians can install new seals, although original factory water resistance may not always be fully restored.
8. What is the most important step after recovering the phone?
Avoid using or charging the device and seek professional diagnostic assessment immediately.
Conclusion
The story of rescuing a Google Pixel 10 Pro crushed by a Sydney light rail tram demonstrates both the vulnerability and resilience of modern smartphones. While tram-related accidents can inflict devastating physical damage, professional repair techniques continue to advance, allowing many devices to be restored or at least yield their valuable data.
The key lessons are straightforward: act quickly, prioritize safety, avoid DIY experimentation, and consult experienced technicians. Even when a phone appears beyond hope, expert diagnostics may reveal surprising recovery possibilities.
Most importantly, maintaining regular backups ensures that no accident—no matter how dramatic—results in the permanent loss of important memories, documents, or personal information.
For additional information about smartphone safety and device protection, visit the official Android support resources at Android Help Center.
David from Sydney CBD Repair Centre – The Best place to fix mobile phones as 7 Years In A Row! Top Mobile Phone Repair In Sydney. More than 2000 Positive Reviews on Google and Same Day Repairs.
We take pride in delivering exceptional repair services for all major phone brands including Apple, Samsung, Google, and more. Our expert technicians use only genuine parts and offer 90days warranty on repairs. Located in the heart of Sydney CBD, we’re your one-stop solution for all mobile device repairs.
Our commitment to excellence has earned us the trust of thousands of satisfied customers. Whether it’s a cracked screen, battery replacement, or water damage repair, we handle it all with professional care and expertise. Walk in today and experience why we’re Sydney’s #1 choice for mobile phone repairs.
Visit us for:
✓ Same Day Express Repairs
✓ Genuine Parts Guarantee
✓ Professional Technicians
✓ Competitive Pricing
✓ 2000+ 5-Star Google Reviews
✓ 7-Time Award Winner for Best Phone Repairs
Restoring a Crushed Oppo Find N3: Advanced Hinge and Internal Screen Calibration – 15 Powerful Expert Techniques
Introduction to Oppo Find N3 Structural Damage
Foldable smartphones have transformed mobile technology, and the Oppo Find N3 stands among the most sophisticated devices in this category. However, when severe impact damage occurs, restoring a crushed Oppo Find N3 becomes one of the most technically demanding repair procedures in the industry.
Unlike conventional smartphones, the Oppo Find N3 integrates a precision-engineered folding hinge, flexible OLED display, advanced sensors, and complex structural components. A single crushing event can affect multiple systems simultaneously, making professional diagnosis and repair essential.
This guide explores the complete process of restoring a crushed Oppo Find N3, with a focus on advanced hinge restoration and internal screen calibration techniques used by experienced repair specialists.
The Oppo Find N3 is designed around a foldable form factor that combines tablet-sized functionality with smartphone portability. While this innovation delivers remarkable user experiences, it also introduces additional mechanical complexity.
When a device experiences crushing forces, damage may include:
Bent hinge assemblies
Broken flexible OLED screens
Misaligned frame structures
Damaged fold sensors
Internal cable strain
Display calibration errors
Touch responsiveness issues
Restoring a crushed Oppo Find N3 requires much more than replacing visible components. Every subsystem must be inspected and calibrated to restore original functionality.
Professional technicians often follow a structured repair workflow that begins with diagnostics and ends with extensive quality assurance testing.
Understanding how damage occurs helps determine repair priorities.
Impact Compression
Heavy impacts remain one of the most common causes of catastrophic foldable phone damage.
Examples include:
Vehicle accidents
Heavy objects falling onto the device
Sitting on the phone
Industrial workplace incidents
Compression forces often transfer directly into the hinge assembly.
Accidental Folding Pressure
Foldables are engineered to fold naturally but can suffer damage if excessive force is applied.
Potential risks include:
Forced closure with foreign objects inside
Twisting while folding
Uneven pressure during transport
These incidents can bend internal structural components.
Liquid and Debris Intrusion
Small particles can become trapped inside hinge channels.
Over time, contaminants may:
Restrict movement
Damage internal gears
Create friction points
Accelerate wear
Professional cleaning is often required during restoration.
Initial Diagnostic Procedures
A successful repair begins with a comprehensive diagnostic process.
External Assessment
Technicians first inspect visible damage.
Areas examined include:
Front display glass
Rear housing
Camera modules
Hinge exterior
Frame corners
Charging ports
Photographic documentation is commonly performed before disassembly.
Internal Functional Testing
Even severely damaged devices may provide valuable diagnostic information.
Technicians evaluate:
Touch functionality
Speaker operation
Charging performance
Camera systems
Wi-Fi connectivity
Bluetooth functionality
Cellular reception
This data helps identify hidden damage before repair work begins.
Advanced Hinge Restoration Techniques
The most challenging stage of restoring a crushed Oppo Find N3 involves hinge recovery.
Hinge Disassembly
The device is carefully disassembled using specialized equipment.
Important tools may include:
Precision screwdrivers
Heating platforms
Anti-static workstations
Microscope inspection systems
The hinge assembly is removed and inspected for:
Bent components
Cracked brackets
Broken springs
Gear wear
Debris contamination
Technicians often perform microscopic inspections to identify hidden structural defects.
Structural Alignment
Once damage has been identified, structural correction begins.
Common procedures include:
Frame straightening
Hinge bracket replacement
Internal support reinforcement
Alignment verification
Precision measurement tools help restore factory tolerances.
Even slight deviations can affect:
Folding smoothness
Screen longevity
Device stability
A successful alignment process ensures the foldable display experiences uniform stress throughout operation.
Lubrication and Reinforcement
Modern foldable hinges rely on controlled movement.
After cleaning, technicians apply approved lubricants to designated points.
Benefits include:
Reduced friction
Smoother folding
Extended lifespan
Improved mechanical consistency
Reinforcement procedures may also be performed when replacement components are installed.
Internal Screen Replacement and Calibration
The internal display is typically the most expensive component in a foldable phone.
Flexible OLED Installation
Installing a replacement flexible OLED requires patience and expertise.
The process includes:
Removing damaged display layers
Cleaning adhesive surfaces
Preparing alignment fixtures
Installing replacement OLED assembly
Securing flexible cables
Performing preliminary tests
Temperature control plays a major role during installation.
Improper heating can:
Warp display layers
Damage adhesives
Create pressure marks
Experienced technicians use calibrated equipment to maintain optimal conditions.
Display Calibration Process
Once installation is complete, calibration begins.
The goal is to restore visual consistency across the entire display.
Calibration typically evaluates:
Parameter
Purpose
Brightness Uniformity
Consistent illumination
Color Accuracy
Natural color reproduction
Touch Response
Accurate input detection
Refresh Performance
Smooth motion rendering
Fold Transition
Seamless display operation
Restoring a crushed Oppo Find N3 often requires multiple calibration cycles to achieve factory-level performance.
Technicians monitor:
Dead pixels
Touch lag
Flickering
Display artifacts
Brightness variation
Only after all measurements fall within acceptable limits is the display considered fully restored.
Software and Sensor Calibration
Modern foldables depend heavily on intelligent sensor systems.
Fold Detection Sensors
The Oppo Find N3 continuously monitors folding status.
Sensors determine:
Open position
Closed position
Intermediate angles
Following hinge repairs, recalibration ensures software accurately recognizes device orientation.
Symptoms of poor calibration include:
Incorrect screen switching
Unexpected display behavior
App scaling issues
Motion and Orientation Calibration
Additional sensors require testing after structural restoration.
These include:
Accelerometers
Gyroscopes
Proximity sensors
Ambient light sensors
Technicians use specialized diagnostic software to verify performance.
Proper calibration ensures:
Smooth screen rotation
Accurate brightness adjustment
Reliable multitasking functions
This stage is critical when restoring a crushed Oppo Find N3 because physical damage often affects sensor positioning.
Post-Repair Quality Assurance
Repair completion does not guarantee success.
Comprehensive testing must follow.
Quality assurance typically includes:
Mechanical Testing
Technicians repeatedly fold and unfold the device.
Checks include:
Smooth operation
Consistent resistance
Proper alignment
Noise elimination
Display Verification
The screen is evaluated under varying conditions.
Tests include:
Brightness measurement
Color analysis
Touch mapping
Pixel integrity checks
Functional Validation
Every major system undergoes verification.
Examples include:
Cameras
Microphones
Speakers
Wireless charging
Cellular connectivity
Fingerprint recognition
Only after passing these inspections should the device be returned to the owner.
Preventing Future Foldable Damage
Preventive care significantly extends device lifespan.
Recommended practices include:
Use Protective Cases
Choose accessories designed specifically for foldable devices.
Benefits include:
Impact absorption
Corner protection
Improved grip
Keep the Hinge Clean
Regular maintenance reduces wear.
Avoid:
Dust accumulation
Sand exposure
Pocket debris
Fold Carefully
Never force the device closed.
Inspect for:
Foreign objects
Credit cards
Coins
Small debris
Avoid Extreme Temperatures
Temperature fluctuations can affect:
Adhesives
OLED layers
Battery performance
Store the phone in moderate environmental conditions whenever possible.
Frequently Asked Questions
1. Can a severely crushed Oppo Find N3 be repaired?
In many cases, yes. If the motherboard remains functional, technicians can replace damaged structural, hinge, and display components.
2. Is hinge replacement always necessary?
Not always. Some hinges can be restored through alignment and component replacement. Severe deformation, however, often requires a complete hinge assembly replacement.
3. Why is foldable screen repair more expensive?
Foldable OLED displays are significantly more complex and costly than traditional smartphone screens due to their flexible construction and precision manufacturing.
4. How long does advanced hinge restoration take?
Depending on damage severity, repairs can range from several hours to multiple days, especially when calibration and testing are required.
5. Will the phone fold normally after repair?
A professionally restored Oppo Find N3 should fold and unfold smoothly with behavior closely matching factory specifications.
6. Can screen calibration improve display quality?
Yes. Calibration helps restore color accuracy, touch responsiveness, brightness consistency, and overall user experience.
7. Does water damage affect hinge restoration?
Absolutely. Corrosion can damage hinge components, sensors, cables, and display assemblies, increasing repair complexity.
8. How can users prevent future hinge damage?
Use a protective case, keep the hinge clean, avoid excessive force, and inspect the device before folding.
Conclusion
Restoring a crushed Oppo Find N3 is among the most advanced repair procedures in modern mobile technology. The device’s sophisticated foldable architecture demands expertise in mechanical restoration, display replacement, hinge alignment, sensor calibration, and quality assurance testing.
Successful restoration depends on careful diagnostics, precision workmanship, and extensive post-repair validation. When performed correctly, advanced hinge restoration and internal screen calibration can return a severely damaged Oppo Find N3 to reliable daily operation.
As foldable technology continues to evolve, professional repair practices will remain essential for maintaining performance, extending device lifespan, and protecting the substantial investment owners make in premium foldable smartphones.
For additional information about foldable display technology, visit the official Oppo website.
David from Sydney CBD Repair Centre – The Best place to fix mobile phones as 7 Years In A Row! Top Mobile Phone Repair In Sydney. More than 2000 Positive Reviews on Google and Same Day Repairs.
We take pride in delivering exceptional repair services for all major phone brands including Apple, Samsung, Google, and more. Our expert technicians use only genuine parts and offer 90days warranty on repairs. Located in the heart of Sydney CBD, we’re your one-stop solution for all mobile device repairs.
Our commitment to excellence has earned us the trust of thousands of satisfied customers. Whether it’s a cracked screen, battery replacement, or water damage repair, we handle it all with professional care and expertise. Walk in today and experience why we’re Sydney’s #1 choice for mobile phone repairs.
Visit us for:
✓ Same Day Express Repairs
✓ Genuine Parts Guarantee
✓ Professional Technicians
✓ Competitive Pricing
✓ 2000+ 5-Star Google Reviews
✓ 7-Time Award Winner for Best Phone Repairs
Repairing a Crushed Google Pixel 10 Pro XL Using Advanced Micro Soldering Techniques: 17 Expert Methods That Save Devices
Introduction to Severe Smartphone Damage Repair
Repairing a Crushed Google Pixel 10 Pro XL Using Advanced Micro Soldering Techniques is one of the most challenging tasks in modern smartphone repair. Unlike a simple screen replacement, severe crush damage often affects multiple layers of hardware, including the motherboard, flex cables, connectors, integrated circuits, and solder joints.
Modern smartphones are engineering marvels. They combine powerful processors, sophisticated camera systems, advanced wireless communication modules, and high-capacity batteries within a remarkably compact design. However, when subjected to extreme pressure, vehicle accidents, industrial impacts, or heavy object compression, these devices can suffer catastrophic structural damage.
Fortunately, advanced micro soldering techniques provide a pathway to recovery. Skilled technicians can restore functionality, recover valuable data, and significantly reduce the need for complete device replacement.
The process of repairing a crushed Google Pixel 10 Pro XL using advanced micro soldering techniques requires specialized knowledge, precision tools, and extensive experience. Through careful diagnosis and board-level repair, even heavily damaged devices can often be revived.
The Google Pixel 10 Pro XL is designed with a densely packed internal layout that maximizes performance while minimizing physical size. This compact architecture creates both opportunities and challenges for repair specialists.
Internal Components Most Vulnerable to Crushing
When a device experiences severe crushing force, several critical components are particularly vulnerable:
Logic board
OLED display assembly
Battery cells
Charging circuitry
Camera modules
RF communication components
Antenna systems
Internal connectors
Flex cables
The motherboard serves as the central nervous system of the device. Even minor fractures within its multilayer structure can disrupt essential functions.
Common Failure Points After Impact
Technicians frequently encounter:
Component
Typical Damage
Motherboard
Cracked traces
CPU area
Broken solder joints
Charging IC
Electrical failure
Display connector
Bent pins
Camera connector
Separation damage
Power management IC
Impact-related faults
USB-C port
Mechanical distortion
These issues rarely resolve through conventional part replacement alone. Board-level intervention becomes necessary.
What Is Advanced Micro Soldering?
Advanced micro soldering refers to highly specialized electronic repair techniques performed under magnification using precision soldering equipment.
Unlike standard repairs, micro soldering focuses on repairing components directly on the motherboard.
Essential Tools for Micro Soldering
Professional technicians typically use:
Stereo microscopes
Hot air rework stations
Precision soldering irons
Thermal cameras
Oscilloscopes
Multimeters
PCB holders
Flux systems
Ultrasonic cleaners
BGA rework stations
These tools allow technicians to manipulate components smaller than a grain of rice.
Why Board-Level Repair Matters
Many repair shops replace assemblies. However, when severe crush damage affects the motherboard, replacing components alone may not solve the problem.
Board-level repair enables technicians to:
Restore damaged circuits
Recover user data
Save expensive devices
Reduce electronic waste
Preserve original hardware
This approach makes repairing a crushed Google Pixel 10 Pro XL using advanced micro soldering techniques both practical and economical.
Modern smartphone motherboards contain multiple internal layers.
Damage may occur:
Between layers
Beneath chips
Within hidden traces
Finding these faults requires advanced diagnostic expertise.
Heat Sensitivity
Modern components are extremely sensitive to excessive heat.
Technicians must balance:
Adequate solder flow
Component protection
PCB preservation
Improper thermal management can create additional failures.
Component Availability
Some specialized chips may be difficult to source.
Technicians often rely on:
Donor boards
Authorized suppliers
Component harvesting
Specialized distributors
Access to quality replacement parts significantly affects repair outcomes.
Benefits of Professional Micro Soldering Repairs
Professional board-level repairs offer several important advantages.
Cost Savings
Replacing a flagship smartphone can be expensive.
Micro soldering repairs frequently cost less than purchasing a new device.
Data Preservation
Recovering irreplaceable personal information remains one of the greatest benefits.
Environmental Sustainability
Electronic waste continues to grow worldwide.
Repairing devices helps:
Reduce landfill waste
Extend product lifecycles
Minimize manufacturing demand
Support sustainability efforts
Retaining Original Hardware
Many users prefer maintaining their original devices due to:
Customized settings
Stored applications
Familiarity
Security configurations
This makes repairing a crushed Google Pixel 10 Pro XL using advanced micro soldering techniques an attractive solution.
Cost Considerations and Repair Economics
Several factors influence repair costs.
Major Cost Drivers
Motherboard damage severity
Number of failed components
Data recovery requirements
Parts availability
Labor complexity
Diagnostic time
Typical Repair Scenarios
Damage Level
Complexity
Minor board damage
Moderate
Connector replacement
Moderate
Multiple IC failures
High
Extensive trace repair
High
Multi-layer PCB damage
Very High
While advanced repairs require specialized expertise, they often remain financially worthwhile when compared to flagship smartphone replacement costs.
Preventing Future Physical Damage
Although advanced repair techniques are impressive, prevention remains the best strategy.
Protective Measures
Consider the following:
Use rugged protective cases
Install tempered glass protection
Avoid placing phones in back pockets
Store devices securely during travel
Keep phones away from heavy machinery
Use shock-absorbing accessories
Workplace Safety Tips
Individuals working in construction, logistics, or industrial settings should:
Use reinforced cases
Carry devices in protected pouches
Avoid exposure to crushing hazards
Conduct routine device inspections
Preventative measures can significantly reduce repair expenses and downtime.
Frequently Asked Questions (FAQs)
1. Can a completely crushed Google Pixel 10 Pro XL be repaired?
In many cases, yes. Success depends on the extent of motherboard, storage, and processor damage. Advanced micro soldering techniques can restore functionality even when the external appearance is severely compromised.
2. How long does micro soldering repair usually take?
Repair times vary from a few hours to several days depending on damage complexity, diagnostics, and component availability.
3. Is data recovery possible from a crushed phone?
Often it is. If the storage chip remains intact and communication pathways can be restored, data recovery is frequently achievable.
4. Why is micro soldering more expensive than standard repairs?
5. Does motherboard repair affect phone performance?
When performed correctly, repaired devices generally operate at normal performance levels.
6. Are repaired motherboards reliable long-term?
Professional repairs using quality components and proper techniques can provide excellent long-term reliability.
7. Should I replace or repair a crushed Google Pixel 10 Pro XL?
If critical data is stored on the device or repair costs are significantly lower than replacement costs, repair is often the preferred option.
8. What is the success rate of advanced micro soldering repairs?
Success rates vary by damage severity, but experienced technicians regularly recover devices that appear beyond repair.
Conclusion
Repairing a Crushed Google Pixel 10 Pro XL Using Advanced Micro Soldering Techniques represents the pinnacle of modern smartphone repair. Through precise diagnostics, advanced board-level restoration, trace reconstruction, connector replacement, BGA reballing, and integrated circuit replacement, skilled technicians can revive devices that would otherwise be considered irreparable.
The process requires exceptional expertise, specialized equipment, and meticulous attention to detail. However, the benefits are substantial. Customers can recover valuable data, save money, reduce electronic waste, and continue using their original devices.
As smartphone technology continues to evolve, advanced micro soldering will remain a critical discipline within the repair industry. For severely damaged devices, it often provides the only practical path to recovery and restoration.
For additional information about professional electronics repair standards, visit the official website of the IPC Association.
David from Sydney CBD Repair Centre – The Best place to fix mobile phones as 7 Years In A Row! Top Mobile Phone Repair In Sydney. More than 2000 Positive Reviews on Google and Same Day Repairs.
We take pride in delivering exceptional repair services for all major phone brands including Apple, Samsung, Google, and more. Our expert technicians use only genuine parts and offer 90days warranty on repairs. Located in the heart of Sydney CBD, we’re your one-stop solution for all mobile device repairs.
Our commitment to excellence has earned us the trust of thousands of satisfied customers. Whether it’s a cracked screen, battery replacement, or water damage repair, we handle it all with professional care and expertise. Walk in today and experience why we’re Sydney’s #1 choice for mobile phone repairs.
Visit us for:
✓ Same Day Express Repairs
✓ Genuine Parts Guarantee
✓ Professional Technicians
✓ Competitive Pricing
✓ 2000+ 5-Star Google Reviews
✓ 7-Time Award Winner for Best Phone Repairs
Beyond Screens: Fixing A Fractured Phone Frame – 10 Proven Strategies to Restore Your Device
Modern smartphones are marvels of technology, but they’re not immune to accidents. While most users focus on cracked screens, a fractured phone frame can be just as disruptive—and often more dangerous. A compromised frame can affect your device’s structural integrity, internal components, and even its resale value. Fortunately, whether you’re tackling minor cracks yourself or seeking professional repair, there are effective strategies to restore your phone frame and extend the life of your device. In this article, we’ll explore 10 proven methods to fix fractured phone frames, covering both DIY and professional approaches.
Introduction
Smartphones have become an essential part of our daily lives, keeping us connected, entertained, and productive. Yet, despite their advanced technology, these devices remain surprisingly vulnerable to physical damage. While cracked screens often grab attention, a fractured phone frame is a problem that can silently compromise the structural integrity and performance of your device.
A damaged frame can lead to misaligned buttons, screen lifting, reduced durability, and even internal component failures. Many users overlook this issue, focusing solely on cosmetic repairs or screen replacement, unaware that the frame plays a critical role in maintaining the device’s overall function and longevity.
In this comprehensive guide, we’ll explore the causes of phone frame damage, assess its severity, and provide practical solutions—ranging from DIY methods for minor cracks to professional repair strategies for severe fractures. Additionally, we’ll cover preventative measures, cost considerations, and answer the most frequently asked questions to help you make informed decisions. Whether you’re a tech-savvy DIYer or prefer the expertise of certified technicians, this article will equip you with the knowledge to restore your phone frame and ensure your device remains reliable for years to come.
Frame fractures can range from cosmetic to structural:
Minor fractures: Small dents or hairline cracks that don’t affect performance. Often fixable with DIY methods or minimal professional intervention.
Major fractures: Deep cracks, bent edges, or gaps that impact the device’s functionality. These typically require professional repair or complete frame replacement.
Safety Concerns with Damaged Frames
A fractured frame isn’t just an aesthetic issue. Potential risks include:
Internal component damage due to frame misalignment
Screen lifting or cracking from uneven pressure
Sharp edges that may cut your hands
Water and dust ingress compromising sensitive electronics
Addressing frame damage promptly ensures both safety and longevity.
DIY vs. Professional Repair: Making the Right Choice
Pros and Cons of DIY Frame Repair
Pros:
Cost-effective for minor damage
Immediate control over the repair process
No need for appointment scheduling
Cons:
Risk of worsening damage
Requires precision tools and skills
No warranty protection
Benefits of Choosing Professional Technicians
Professional repair services, such as those offered at Sydney CBD Repair Centre, provide:
Apple, Samsung, and Google provide certified repair guidelines and replacement parts to ensure warranty compliance.
FAQs
1. Can a fractured phone frame affect my warranty?
Yes, unapproved repairs or self-repair attempts can void manufacturer warranties. Professional repairs are recommended for warranty compliance.
2. How long does a professional frame repair take?
Minor repairs may take 1–2 hours, while complete frame replacements can take up to a day. Sydney CBD Repair Centre often offers same-day service.
3. Is it safe to continue using a phone with a cracked frame?
Only for minor cosmetic cracks. Severe fractures pose safety risks to both the device and user.
4. Can I fix a frame fracture without removing the screen?
For minor bends, yes. Severe fractures typically require full disassembly.
5. How much does a DIY repair cost?
Between $10–$50 for tools and adhesives, depending on phone model and severity.
6. Will repairing the frame restore my phone’s resale value?
Yes, professional repairs using genuine parts can significantly improve resale value.
Conclusion: Restoring Your Phone Frame with Confidence
Fractured phone frames are more than just an aesthetic issue—they affect functionality, safety, and longevity. By understanding the severity of damage, choosing the right repair approach, and investing in quality protection, you can restore your device confidently. Whether tackling minor cracks yourself or relying on professional technicians, following these proven strategies ensures your phone remains both reliable and visually appealing.
For professional repairs with guaranteed results, visit Sydney CBD Repair Centre – where quality meets reliability.
David from Sydney CBD Repair Centre – The Best place to fix mobile phones as 6 Years In A Row! Top Mobile Phone Repair In Sydney. More than 2000 Positive Reviews on Google and Same Day Repairs.
We take pride in delivering exceptional repair services for all major phone brands including Apple, Samsung, Google, and more. Our expert technicians use only genuine parts and offer 90days warranty on repairs. Located in the heart of Sydney CBD, we’re your one-stop solution for all mobile device repairs.
Our commitment to excellence has earned us the trust of thousands of satisfied customers. Whether it’s a cracked screen, battery replacement, or water damage repair, we handle it all with professional care and expertise. Walk in today and experience why we’re Sydney’s #1 choice for mobile phone repairs.
Visit us for:
✓ Same Day Express Repairs
✓ Genuine Parts Guarantee
✓ Professional Technicians
✓ Competitive Pricing
✓ 2000+ 5-Star Google Reviews
✓ 6-Time Award Winner for Best Phone Repairs
📱 COMPLETE Samsung S25 Ultra Back Glass Restoration! Ultimate 12-Step Guide to Perfect Results
The Samsung S25 Ultra is one of the most advanced smartphones on the market, but like many premium devices, its glass back can be extremely fragile. In the first 10% of this guide, we’ll introduce the primary keyword Samsung S25 Ultra Back Glass Restoration, explain why this repair matters, and show you everything you need to know to fix or replace your back glass safely and effectively.
Let’s break down the entire process—from damage assessment to complete restoration—using proven professional techniques. Whether you’re a DIY enthusiast or someone comparing options before visiting a repair centre, this guide gives you everything you need to make the right choices.
Introduction
The Samsung S25 Ultra stands as one of the most powerful and visually stunning smartphones released in recent years, combining premium materials with cutting-edge engineering. Yet even with its durable glass construction and reinforced frame, the back panel remains vulnerable to cracks, chips, and shattering from everyday accidents. When this happens, many users aren’t sure whether to repair it, restore it, or replace the entire device. That’s where Samsung S25 Ultra Back Glass Restoration becomes essential.
In today’s fast-paced digital world, your phone isn’t just a device—it’s a lifeline. Cracked back glass doesn’t just look bad; it can affect wireless charging, compromise water resistance, and even reduce the overall lifespan of your smartphone. Fortunately, restoring the back glass is more accessible and safer than ever when done correctly. With the right guidance, tools, and techniques, you can bring your S25 Ultra back to flawless condition without risking additional damage.
This guide breaks down everything you need to know about restoring your Samsung S25 Ultra back glass. From understanding the causes of damage and preparing your device to following proven step-by-step repair methods, this introduction sets the tone for a complete and thoroughly optimized restoration process. Whether you’re attempting a DIY fix or evaluating professional repair options, you’re in the right place to make an informed, confident decision.
The Samsung S25 Ultra features a reinforced Gorilla Glass Victus 3 back shell designed for durability. Still, even with this advanced material, the back glass can crack from falls, pressure, or accidental misuse. When this damage occurs, users often underestimate the urgency of repair, assuming back cracks are harmless compared to front-screen breaks.
However, back glass damage affects both function and aesthetics. Even minor cracks can gradually worsen due to heat, impact, or everyday handling.
Common issues caused by cracked back glass include:
Sharp edges that may cut skin or snag clothing
Moisture seeping into the phone, risking motherboard damage
Wireless charging malfunction due to misalignment or obstruction
Battery swelling pressure not releasing properly
Reduced resale value
When we talk about Samsung S25 Ultra Back Glass Restoration, we’re not only discussing cosmetic improvement; we’re addressing structural integrity, safety, and performance.
LSI Keywords naturally integrated:
S25 Ultra cracked back glass repair
Samsung phone back glass damage
Galaxy S25 Ultra back panel replacement
Understanding the root causes helps you avoid repeating the same damage. And since back glass cracks spread over time, early restoration is crucial.
To perform high-quality Samsung S25 Ultra Back Glass Restoration, you’ll need the proper tools. Using the wrong equipment can cause overheating, internal damage, or adhesive failure.
Essential tools include:
Precision heat gun or heat pad
Plastic picks and opening cards
Suction cups
Isopropyl alcohol (99%)
OEM or high-quality replacement back glass
Pre-cut adhesive strips
Anti-static gloves
Microfiber cloths
Safety gear:
Eye protection
Heat-resistant gloves
Dust mask to avoid inhaling glass particles
Using the right tools improves efficiency and safety. Never use metal tools, as they can scratch the frame, damage the wireless charging coil, or short internal components. The goal is smooth and clean restoration with zero collateral issues.
Preparing Your Samsung S25 Ultra for Back Glass Restoration
Before beginning the Samsung S25 Ultra Back Glass Restoration, preparation is key.
Follow this checklist:
Turn off the device
Remove SIM tray
Back up data
Discharge battery below 25%
Clean the device to remove oils and debris
ℹ️ A clean and organized workspace ensures greater precision and reduces the risk of introducing dust beneath the new glass.
Create an optimal repair area:
Work on a non-slip, static-free mat
Ensure bright lighting
Keep all tools within reach
Wear gloves to avoid fingerprints on the new glass
This detailed preparation minimizes risks and sets the stage for successful restoration.
The 12-Step Samsung S25 Ultra Back Glass Restoration Process
This is the heart of the guide. These steps replicate professional-level procedures used by top technicians.
1. Preheat the device
Apply heat for 3–5 minutes at 80°C to soften adhesive.
2. Insert plastic picks
Slide picks gently under the loosened edges.
3. Separate the back glass
Work slowly around the perimeter.
4. Remove cracked pieces
Use tweezers and caution; never pull too hard.
5. Clean adhesive residue
Apply isopropyl alcohol to dissolve remaining glue.
6. Inspect internal components
Ensure the wireless charging coil is intact.
7. Dry and clean the frame
No dust or streaks should remain.
8. Apply new adhesive strips
Ensure alignment around camera housing.
9. Position the replacement glass
Start at the top, moving downward.
10. Apply uniform pressure
This helps adhesive bond evenly.
11. Cure adhesive
Let the device sit for at least 15 minutes.
12. Test functionality
Check wireless charging and camera stability.
When followed correctly, these steps ensure professional-level results.
Mistakes to Avoid During Samsung S25 Ultra Back Glass Restoration
Avoid these common errors:
Overheating the device
Using metal tools
Pressing too hard on the camera lenses
Forgetting to remove old adhesive
Using non-OEM glass
Professional vs DIY: Which Is Better?
DIY restoration is possible—but it requires patience, steady hands, and adequate tools. Professionals, like the award-winning technicians at Sydney CBD Repair Centre, offer safer, cleaner, warranty-backed repair.
You can compare both paths:
DIY
Professional
Low cost
Higher precision
Risk of damage
Warranty included
Requires tools
Uses OEM parts
Takes longer
Same-day repairs
Cost Breakdown
Typical pricing in Australia:
OEM Back Glass: $120–$250
Labour: $80–$150
Total: $200–$350
At professional repair shops, you get premium results without risking your device.
Maintenance Tips to Avoid Future Back Glass Damage
Use a shockproof case
Keep your phone away from hard surfaces
Avoid pocket pressure
Use wireless charging carefully
Install a back glass protector
FAQs
1. How long does Samsung S25 Ultra Back Glass Restoration take?
Most repairs take 30–60 minutes with proper tools.
2. Does cracked back glass affect water resistance?
Yes. Even tiny cracks compromise the seal.
3. Can I still use wireless charging after damage?
Sometimes, but cracks can interfere with the coil.
4. Is OEM glass better than aftermarket?
Yes—OEM ensures perfect fit and durability.
5. Can back glass cracks spread?
Absolutely, especially with heat and pressure.
6. Where can I get professional repair in Sydney?
Sydney CBD Repair Centre offers same-day, OEM-quality restoration.
Conclusion
A successful Samsung S25 Ultra Back Glass Restoration requires preparation, precision, and the right equipment. Whether you choose DIY or professional repair, restoring your back glass promptly protects your device, maintains value, and ensures safe daily use.
For expert restoration, genuine parts, and same-day service, there’s no better choice than Sydney CBD Repair Centre.
David from Sydney CBD Repair Centre – The Best place to fix mobile phones as 6 Years In A Row! Top Mobile Phone Repair In Sydney. More than 2000 Positive Reviews on Google and Same Day Repairs.
📍 Visit us today for:
✓ Same Day Express Repairs
✓ Genuine Parts Guarantee
✓ Professional Technicians
✓ Competitive Pricing
✓ 2000+ 5-Star Google Reviews
✓ 6-Time Award Winner for Best Phone Repairs