




Common Screen Replacement Mistakes That Ruin Sensors And Wi-Fi Antennas

Common Screen Replacement Mistakes That Ruin Sensors And Wi-Fi Antennas: 11 Costly Errors to Avoid
Introduction: Why Screen Replacement Requires More Than a New Display
A cracked smartphone screen can make everyday tasks frustrating. Touch controls might stop responding, display lines can appear, and broken glass can make a phone uncomfortable to use. Replacing the damaged display seems like a simple solution. However, modern smartphones contain delicate sensors, antenna connections, flex cables, and tiny components that can be damaged during an inexperienced repair.
The common screen replacement mistakes that ruin sensors and Wi-Fi antennas aren’t always obvious at first. A phone might look perfect after a screen replacement but struggle to connect to Wi-Fi, switch off its display during calls, or fail to adjust screen brightness automatically. These problems can develop when technicians overlook small components, use too much heat, install incompatible replacement parts, or fail to test the phone properly.
Fortunately, many of these problems are preventable. With the right tools, suitable replacement parts, careful handling, and a structured testing process, technicians can replace a damaged display while protecting the phone’s essential functions.
This guide explains 11 common repair mistakes, shows how they affect different smartphone components, and outlines practical ways to avoid unnecessary damage. Whether you’re researching a DIY repair or choosing a professional phone repair service, understanding these risks can help you make a better decision.
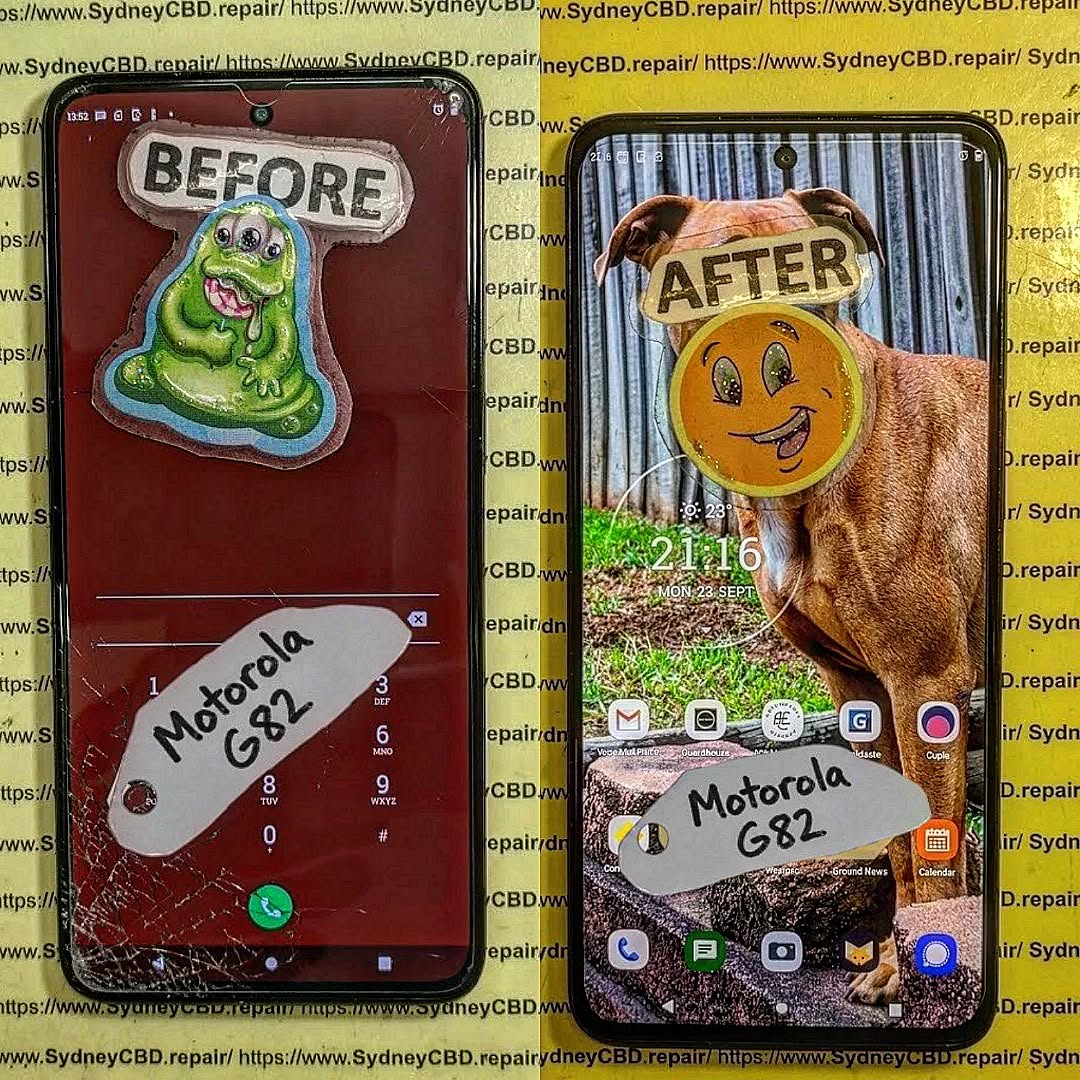
Understanding the Components Inside Your Smartphone
Modern smartphones are carefully designed electronic systems. The display is only one part of a much larger assembly. Behind and around it, manufacturers position components that support calls, wireless communication, automatic brightness, biometric security, and other everyday features.
Understanding how these parts work together is the first step toward avoiding repair damage.
What sensors do inside a smartphone
Sensors help a phone respond to its surroundings and to the user’s actions. Depending on the model, these components may include:
-
Proximity sensor: Detects when the phone is close to your face, helping switch off the display during calls.
-
Ambient light sensor: Measures surrounding light so the phone can adjust screen brightness.
-
Fingerprint sensor: Reads a fingerprint to unlock the device or authorise certain actions.
-
Gyroscope and accelerometer: Detect movement, rotation, and orientation.
-
Front camera and related sensors: Support selfies, video calls, facial recognition, and other features.
Some smartphones use dedicated sensors, while others rely on integrated modules or virtual sensing systems. Their locations and repair requirements vary by manufacturer and model.
Why Wi-Fi antennas matter
A Wi-Fi antenna receives and transmits radio signals between your smartphone and a wireless router. Depending on the design, a phone may use multiple antenna elements and connections for Wi-Fi, Bluetooth, cellular service, or other wireless functions.
These components can be positioned around the frame, near the top or bottom of the device, or in other areas of the internal assembly.
A display replacement can affect wireless performance if a technician accidentally damages an antenna cable, bends an antenna contact, loses a grounding screw, or fails to reconnect a component properly.
How display repairs can affect other components
A screen replacement often involves heating adhesive, opening the housing, disconnecting the battery, removing screws and brackets, and transferring selected components to the replacement display.
Each step introduces potential risks.
For example, a tool inserted too deeply can cut a flex cable. Excessive heat may damage nearby adhesives or delicate assemblies. A replacement screen with an incorrect sensor bracket can prevent a sensor from working as intended.
The important point is that a successful screen replacement must restore the phone’s functions, not merely its appearance.
11 Common Screen Replacement Mistakes That Ruin Sensors And Wi-Fi Antennas

The following mistakes can lead to expensive repairs, unreliable connectivity, or features that stop working after a display has been replaced.
Mistake 1: Using excessive heat during screen removal
Heat softens the adhesive that holds a screen to the phone’s frame. When applied correctly, it makes the display easier to separate.
However, excessive heat can damage nearby components, weaken adhesives, affect display layers, or harm sensitive flex cables and plastic parts.
The risk increases when someone uses a heat gun without controlling the temperature or concentrates heat on one small area for too long.
How to avoid it:
-
Use a suitable heating method and follow the model-specific repair procedure.
-
Apply heat gradually and evenly.
-
Avoid directing intense heat toward cameras, sensor assemblies, and battery areas.
-
Use opening tools designed for electronics.
-
Never force the screen when the adhesive hasn’t released.
Heat requirements vary between devices. A procedure suitable for one phone shouldn’t automatically be used on another.
Mistake 2: Damaging proximity and ambient light sensors
Proximity and ambient light sensors are easy to overlook because they’re small and often sit close to the earpiece or front camera.
During screen removal, a technician may accidentally pull on a sensor flex cable, scratch a sensor window, damage a mounting bracket, or transfer the sensor incorrectly to the replacement assembly.
A poorly aligned sensor window can also interfere with operation, even when the sensor itself remains undamaged.
Possible symptoms include:
-
The screen stays on against your face during calls.
-
The display turns off unexpectedly.
-
Automatic brightness becomes unreliable.
-
Call controls respond poorly because the screen activates at the wrong time.
How to avoid it:
Inspect the original display before removing components. Identify which sensors must be transferred, follow the correct disassembly instructions, and ensure that each sensor sits in its intended position.
After assembly, test the phone during a call and check automatic brightness in different lighting conditions.
Mistake 3: Tearing delicate flex cables
Flex cables are thin, flexible circuits that connect the display, touch layer, sensors, buttons, cameras, and other components to the phone’s mainboard.
They may look like ordinary ribbons, but their conductive tracks can be damaged by a small tear, sharp fold, or excessive pulling force.
A common error is lifting a display without checking where its cables run. Another is pulling a connector upward before releasing its locking mechanism.
Prevention tips:
-
Identify the cable locations before opening the device.
-
Follow the correct opening direction for the particular model.
-
Disconnect the battery before handling display connectors whenever the service procedure permits.
-
Use a suitable plastic tool to release connectors carefully.
-
Never pull a cable to remove a connector.
-
Inspect cables and sockets under magnification when necessary.
If a flex cable is torn, simply reconnecting it won’t repair the damaged circuit. Depending on the component, replacement or specialist board-level repair may be required.
Mistake 4: Misplacing or damaging Wi-Fi antenna contacts
Wi-Fi problems following screen repair can be confusing. The display might work perfectly, while wireless connections become weak or unstable.
One possible cause is damage to an antenna connection during disassembly or reassembly.
Depending on the phone, antenna connections may use coaxial cables, spring contacts, conductive brackets, or other arrangements. A missing screw or incorrectly positioned contact can affect electrical continuity or the antenna’s intended grounding.
Warning signs include:
-
Wi-Fi reception becomes noticeably weaker.
-
The phone disconnects frequently from the same router.
-
Bluetooth performance also deteriorates.
-
Wireless connectivity changes after the device is moved or handled.
These symptoms don’t automatically prove antenna damage. Router problems, software faults, interference, and existing hardware defects can produce similar results.
How to avoid the mistake:
Photograph the original internal layout before disassembly. Keep screws and brackets organised, inspect antenna cables for damage, and reconnect each contact according to the manufacturer’s design.
Never assume that a spare screw or metal bracket is unimportant. Its location may be essential to the device’s electrical and radio-frequency design.
Mistake 5: Installing an incompatible replacement screen
Not every screen that fits physically is suitable for a particular smartphone.
Replacement displays can differ in connector layout, panel technology, frame dimensions, sensor openings, flex cable position, and compatibility with the phone’s software.
A low-quality or incompatible assembly may introduce touch problems, unusual brightness, inaccurate colours, or difficulties with features that depend on integrated sensors.
Some models also require configuration, calibration, or manufacturer-supported procedures after certain component replacements.
Before installing a display, check:
-
The exact device model and regional variant.
-
Connector type and position.
-
Display technology and supported functions.
-
Sensor brackets and openings.
-
Frame dimensions and adhesive arrangement.
-
Whether calibration or configuration is required.
A reputable repairer should explain the replacement part’s compatibility and the limitations of any non-original component before starting the repair.
Mistake 6: Applying too much adhesive
Adhesive secures the replacement screen and helps maintain the intended fit between the display and frame.
However, excess adhesive can spread into openings, interfere with sensor windows, cover contacts, or prevent the screen from sitting correctly.
An uneven adhesive layer may also cause gaps or pressure points that place stress on the display.
Safer approach:
Remove old adhesive carefully, clean the bonding surfaces using an appropriate method, and apply the correct adhesive in the designated areas. Avoid covering microphones, speakers, sensor windows, and other openings.
Use the recommended clamping method and curing time where applicable. Don’t force the display into place to compensate for excess adhesive or a poorly fitted replacement part.
Mistake 7: Puncturing or bending internal components
A phone’s interior is tightly packed. The battery, display cables, antenna components, cameras, and circuit boards may sit close together.
Inserting a metal tool too deeply can scratch a circuit board, cut a cable, damage an antenna element, or puncture the battery.
Bending the frame to force a screen out can create additional problems. Even a small change in frame shape may prevent the new display from seating properly.
To reduce the risk:
-
Follow a repair guide for the exact device.
-
Use opening picks with suitable depth and thickness.
-
Avoid sliding tools blindly beneath the screen.
-
Keep metal tools away from exposed battery connections.
-
Stop if the display resists removal.
-
Inspect the frame for bends before fitting the new panel.
If a battery becomes swollen, punctured, unusually hot, or starts producing smoke, stop the repair and move away from the device. Don’t continue heating, pressing, or charging it.
Mistake 8: Ignoring grounding and connector alignment
Smartphones use carefully designed electrical connections. Grounding contacts, shielding brackets, screws, and connector positions all play a role in reliable operation.
If a technician forgets a bracket, uses the wrong screw, or forces a connector into place at an angle, the device may develop intermittent faults.
A connector that looks attached may still be misaligned. Forcing it can damage the socket or its delicate contacts.
Best practices include:
-
Sort screws by their original locations.
-
Inspect connectors before reconnecting them.
-
Align plugs correctly and press gently.
-
Reinstall shielding and grounding parts as specified.
-
Never substitute a longer screw without verifying its suitability.
Some phones use screws of different lengths in closely spaced locations. A screw installed in the wrong position can damage the board or nearby components.
Mistake 9: Failing to protect fingerprint sensors
Fingerprint systems vary widely across smartphone models. Some use a sensor mounted in a button, others place it under the display, and some integrate biometric functions into a broader assembly.
Screen replacement may involve transferring a sensor, preserving its flex cable, maintaining the correct sensor alignment, or completing a supported calibration process.
A damaged cable or incompatible screen assembly can prevent reliable fingerprint recognition.
To prevent fingerprint sensor problems:
-
Identify the sensor design before disassembly.
-
Follow the manufacturer’s instructions for any required transfer.
-
Avoid scratching or bending sensor components.
-
Check that the replacement display supports the device’s fingerprint system.
-
Complete any supported calibration or setup process.
-
Test fingerprint recognition after the repair.
Don’t assume that a fingerprint problem always means the sensor is broken. Incorrect assembly, incompatible parts, software settings, or a calibration requirement may also be responsible.
Mistake 10: Neglecting waterproofing and sealing
Many smartphones are designed with resistance to water and dust, but their seals can be disturbed during a screen replacement.
Removing the display usually breaks or compromises some part of the original adhesive seal. If the technician doesn’t restore the appropriate sealing materials, the phone may be more vulnerable to moisture and dust.
Water resistance depends on the model, the condition of the housing, and the quality of the repair. A phone shouldn’t be considered waterproof simply because the new screen fits tightly.
How to reduce the risk:
-
Remove old adhesive residue properly.
-
Install compatible replacement seals.
-
Inspect the frame for damage or deformation.
-
Follow the manufacturer’s assembly procedure.
-
Perform appropriate sealing or pressure tests when supported.
Even when a phone passes a test, that doesn’t guarantee permanent water resistance under every real-world condition. Avoid deliberately immersing a recently repaired device unless its resistance has been properly verified and the manufacturer supports that use.
Mistake 11: Skipping post-repair testing
This is one of the most preventable mistakes.
A phone can turn on and display an image while other functions remain faulty. If the repairer doesn’t test sensors, Wi-Fi, touch response, and related features, the customer may discover problems hours or days later.
A proper final inspection should include:
-
Touchscreen response across the full panel.
-
Display brightness and colour consistency.
-
Proximity sensor operation during calls.
-
Ambient light sensor response, where applicable.
-
Fingerprint or other supported biometric functions.
-
Wi-Fi connectivity and signal stability.
-
Bluetooth and cellular connectivity.
-
Front camera, earpiece, and microphone.
-
Charging, buttons, and other relevant functions.
Testing should also compare any suspected fault with the phone’s condition before repair.
The golden rule: Don’t consider a screen replacement complete until the essential functions have been checked and any limitations have been explained to the customer.
Recognising Sensor and Wi-Fi Problems After a Screen Replacement
Even a careful repair can reveal a pre-existing fault or an unexpected compatibility issue. The key is to identify the symptoms early rather than assuming that the new screen is working correctly.
Common warning signs to watch for
| Symptom | Possible cause | Recommended next step |
|---|---|---|
| Screen stays on during calls | Proximity sensor alignment or connection issue | Test the sensor and inspect its assembly |
| Automatic brightness stops working | Sensor obstruction, damage, or software issue | Check the sensor window and settings |
| Wi-Fi signal becomes weak | Antenna connection, grounding, or unrelated network issue | Compare signal performance and inspect connections |
| Bluetooth disconnects frequently | Antenna or software issue | Test other devices and inspect relevant connections |
| Fingerprint unlock fails | Sensor damage, incompatibility, or calibration issue | Check compatibility and supported calibration |
| Touchscreen has dead zones | Display defect, connector issue, or installation pressure | Test the panel and inspect the connector |
| Display flickers after repair | Connector, display, or power-related issue | Stop forcing the display and arrange diagnosis |
| Phone overheats unexpectedly | Electrical fault, battery problem, or another hardware issue | Stop using or charging it if overheating persists |
These are diagnostic clues, not definitive diagnoses. Different faults can produce similar symptoms, so proper testing is essential.
What to do if Wi-Fi becomes unreliable
First, check whether other devices connect normally to the same router. Test the phone near the router and compare performance on another reliable network if possible.
If the problem started immediately after the screen replacement, contact the repair provider and explain when the issue began. Ask for the antenna connections, grounding contacts, and internal assembly to be inspected.
Avoid repeatedly opening the phone yourself if you’re unfamiliar with its internal design. Additional disassembly may create new damage or make it harder to identify the original fault.
What to do if sensors stop working
Check the phone’s settings and restart the device if appropriate. For a proximity sensor, make sure the screen protector or case isn’t covering the relevant area. For automatic brightness, confirm that the feature is enabled.
If the problem remains, a technician should inspect the sensor assembly, connector, replacement screen compatibility, and any model-specific calibration requirements.
If a sensor was functioning before the repair but fails immediately afterward, tell the repairer. That timing is useful diagnostic information, although it doesn’t by itself establish the cause.
DIY Screen Replacement Versus Professional Repair
DIY screen replacement can be rewarding for people with suitable skills, tools, and experience. However, modern smartphones are often more difficult to repair than older devices because they use tightly packed assemblies, strong adhesives, delicate connectors, and integrated components.
The right choice depends on your experience, the value of the device, the replacement part, and your willingness to accept the risk of additional damage.
Comparing the two approaches
| Factor | DIY repair | Professional repair |
|---|---|---|
| Initial cost | May be lower if you already own suitable tools | Includes labour and parts |
| Tools | Must be purchased or sourced | Usually supplied by the repairer |
| Technical knowledge | Essential for safe disassembly | Should be provided by an experienced technician |
| Sensor handling | Depends on individual skill | Should follow model-specific procedures |
| Antenna inspection | May be overlooked without experience | Can be included in diagnostic testing |
| Part selection | Quality and compatibility must be verified | A reputable provider can explain available options |
| Testing | Depends on your tools and knowledge | Can include a structured functional check |
| Repair warranty | Depends on the part supplier and circumstances | Depends on the provider’s written terms |
Professional repair isn’t automatically perfect, and DIY work isn’t automatically unsuccessful. What matters is the quality of the procedure, the suitability of the parts, and the testing performed afterward.
When DIY repair may be reasonable
A DIY repair may be suitable if you have previous electronics repair experience, access to model-specific instructions, appropriate tools, and a reliable replacement assembly.
Before starting, review a trusted repair guide and check whether the model requires special tools, sensor transfers, calibration, or other procedures.
The iFixit repair guide library is a useful starting point for researching device-specific disassembly procedures and repair considerations.
When professional repair is the safer option
Consider a professional service if the phone has an under-display fingerprint reader, a complex folding display, a damaged frame, previous liquid exposure, or a history of unexplained connectivity problems.
Professional diagnosis is also sensible when you need to preserve valuable data, when the replacement display is expensive, or when a previous repair has already caused additional faults.
Ask the repairer which parts will be used, whether any original components need transferring, what testing is included, and what warranty applies.
A Practical Checklist for Protecting Sensors and Wi-Fi Antennas
Prevention starts before the first tool touches the device. A structured checklist helps reduce avoidable errors and makes it easier to identify problems if something goes wrong.
Before opening the phone
-
Record the exact device model and variant.
-
Check the screen assembly’s compatibility.
-
Test the existing sensors and connectivity.
-
Document existing damage and reported symptoms.
-
Back up important data.
-
Obtain the correct repair instructions and tools.
-
Check the battery for swelling or other signs of damage.
During the replacement
-
Follow the correct opening procedure.
-
Control heat and avoid prolonged exposure.
-
Keep track of screws, brackets, and shielding.
-
Disconnect and reconnect flex cables carefully.
-
Protect antenna contacts and sensor assemblies.
-
Avoid forcing connectors or bending the frame.
-
Keep adhesive away from sensor windows and electrical contacts.
-
Follow the model-specific battery isolation procedure.
After the replacement
-
Inspect the screen fit and frame alignment.
-
Check touch response across the entire display.
-
Test proximity and ambient light sensors where applicable.
-
Verify fingerprint recognition and other supported biometric features.
-
Test Wi-Fi and Bluetooth connectivity.
-
Check cameras, speakers, microphones, and charging.
-
Confirm that the phone operates normally under everyday conditions.
-
Explain any limitations or outstanding issues before returning the device.
Why documentation matters
Before-and-after test results can help distinguish a new repair-related problem from an existing fault.
For example, recording that Wi-Fi worked normally before the repair but became unreliable afterward gives the technician a useful starting point. Similarly, documenting a pre-existing proximity sensor fault helps prevent confusion during diagnosis.
Clear records also help repair businesses communicate with customers and investigate warranty claims fairly.
Frequently Asked Questions
1. Can replacing a phone screen damage the Wi-Fi antenna?
Yes. The antenna or its connections can be damaged if a technician tears a cable, bends a contact, loses a grounding screw, or incorrectly reassembles the phone. However, weak Wi-Fi can also result from software, router, interference, or unrelated hardware problems.
2. Why does my proximity sensor stop working after a screen replacement?
Possible causes include incorrect sensor alignment, a damaged flex cable, an obstructed sensor window, an incompatible display assembly, or a calibration requirement. A technician should inspect the specific phone model rather than immediately assuming that the sensor needs replacing.
3. Can a cheap replacement screen cause sensor problems?
It can. An incompatible or poorly manufactured display may have incorrect openings, unsuitable brackets, or components that don’t work correctly with the device. However, a low price alone doesn’t prove that a screen is defective. Compatibility, manufacturing quality, and installation are all important.
4. Will replacing the screen affect Wi-Fi signal strength?
A correctly performed screen replacement shouldn’t normally reduce Wi-Fi performance. If reception deteriorates after the repair, possible causes include disturbed antenna connections, damaged cables, missing grounding hardware, or an unrelated fault that happened around the same time.
5. How can I tell whether a sensor is damaged or simply misaligned?
Symptoms alone may not provide a clear answer. A sensor that works intermittently might have an alignment or connection problem, while a damaged cable or component may fail completely. Model-specific diagnostics, visual inspection, and appropriate testing can help identify the cause.
6. Does a professional screen replacement guarantee that water resistance is preserved?
No. Water resistance depends on the phone’s original design, condition, replacement seals, and assembly quality. Even when suitable seals are installed and testing is performed, permanent water resistance can’t be guaranteed under every condition. Ask the repair provider what sealing procedures and limitations apply.
7. Should I continue using my phone if Wi-Fi stops working after repair?
You may be able to use other functions, but arrange an inspection if the problem started immediately after the repair. If the device also becomes unusually hot, smells burnt, shows battery swelling, or behaves erratically, stop using and charging it until it has been assessed safely.
8. What should I ask a repair shop before replacing my screen?
Ask whether the replacement display is compatible with your exact model, whether sensors or other components need transferring, whether calibration is required, and which functions will be tested. You should also ask about the repair warranty, adhesive and sealing procedures, and what happens if a problem appears after the repair.
Conclusion: Protect Your Phone Beyond the Screen

A smartphone screen replacement involves much more than removing cracked glass and fitting a new display. Sensors, Wi-Fi antennas, flex cables, grounding contacts, and other internal components must be handled with care throughout the repair.
The most common mistakes include excessive heat, careless cable handling, incorrect sensor alignment, incompatible screens, misplaced antenna contacts, poor adhesive application, and inadequate post-repair testing. Fortunately, these risks can be reduced through proper preparation, model-specific repair procedures, suitable replacement parts, and careful quality checks.
If you’re considering a DIY repair, make sure you have the necessary tools and technical knowledge before starting. If you want to reduce the risk of further damage, choose an experienced repair provider that understands your phone’s internal design and tests its essential functions after the repair.
At Sydney CBD Repair Centre, our goal is to help customers restore their devices with quality parts, professional care, and dependable service. Whether you’re dealing with a cracked display, sensor issues, or connectivity problems after a repair, getting the right diagnosis is the first step toward a reliable solution.
A great screen repair doesn’t just make your phone look new. It helps restore the performance and functionality you depend on every day.
David from Sydney CBD Repair Centre – The Best place to fix mobile phones as 7 Years In A Row! Top Mobile Phone Repair In Sydney. More than 2000 Positive Reviews on Google and Same Day Repairs.
We take pride in delivering exceptional repair services for all major phone brands including Apple, Samsung, Google, and more. Our expert technicians use only genuine parts and offer 90days warranty on repairs. Located in the heart of Sydney CBD, we’re your one-stop solution for all mobile device repairs.
Our commitment to excellence has earned us the trust of thousands of satisfied customers. Whether it’s a cracked screen, battery replacement, or water damage repair, we handle it all with professional care and expertise. Walk in today and experience why we’re Sydney’s #1 choice for mobile phone repairs.
Visit us for:
-
✓ Same Day Express Repairs
-
✓ Genuine Parts Guarantee
-
✓ Professional Technicians
-
✓ Competitive Pricing
-
✓ 2000+ 5-Star Google Reviews
-
✓ 7-Time Award Winner for Best Phone Repairs
Sydney CBD Repair Centre – Where Quality Meets Reliability.
Call: +61280114119
Website: https://SydneyCBD.repair/locate-us

