Repair Costs: How Much for a Samsung Galaxy S22 Ultra? (2025 Update + Expert Breakdown)
Introduction: Why the Samsung S22 Ultra Still Reigns Supreme
The Samsung Galaxy S22 Ultra remains one of the most powerful flagship phones even in 2025. With its stunning Dynamic AMOLED 2X display, 108MP camera, and S-Pen integration, it’s no wonder that many users still rely on it daily. However, as durable as it may seem, even the most advanced devices are not immune to wear and tear — especially screens and batteries.
If you’re asking, “How much does it cost to repair a Samsung S22 Ultra?” — you’re not alone. Understanding Samsung S22 Ultra repair costs can help you make an informed decision between repairing and replacing your device. Let’s explore the full breakdown below.
Understanding Samsung S22 Ultra Repair Costs
The cost of repairing a Samsung S22 Ultra varies depending on several factors — from the type of damage to the repair shop you choose.
Factors That Influence Repair Prices
Type of Damage: A cracked screen costs more than a battery replacement.
Parts Used: Genuine Samsung parts are more expensive but ensure long-term reliability.
Labor Costs: Skilled technicians with experience in flagship repairs often charge more.
Warranty Coverage: If your device is under warranty, certain issues may be covered.
Location: Repair costs in Sydney CBD might differ from smaller towns or online stores.
Genuine vs. Third-Party Parts: What You Need to Know
While third-party parts can save you money initially, they often lead to performance issues like screen discoloration or battery swelling. Sydney CBD Repair Centre exclusively uses genuine Samsung parts, backed by a 90-day warranty for complete peace of mind.
The Samsung S22 Ultra screen replacement is one of the most common and expensive repairs due to its 6.8-inch curved AMOLED display. Prices typically range from $450 to $600 in Sydney, depending on part availability and labor.
2. Battery Replacement
If your S22 Ultra battery drains quickly or overheats, it’s time for a replacement. Expect to pay around $150 to $180 for a genuine Samsung battery replacement with same-day service.
3. Camera and Lens Repair
The rear 108MP camera system is delicate — one accidental drop can cause blurry photos or malfunction. Replacing a damaged camera module costs around $200–$250.
4. Charging Port and Audio Jack Repair
Dust, moisture, or wear can damage the charging port, affecting fast-charging capability. Replacements cost approximately $120–$160.
5. Water Damage Treatment
Water exposure can cause internal corrosion. A professional cleaning and diagnostics service costs $90–$120, depending on the extent of the damage.
Average Repair Costs in 2025
Official Samsung Service Centre Pricing
Samsung-authorized service centers maintain premium pricing. For instance:
Screen Replacement: $550–$700
Battery Replacement: $180
Camera Repair: $250–$300
Independent Repair Shop Costs (Sydney Focus)
At Sydney CBD Repair Centre, you can save up to 30% compared to official centers:
Screen Replacement: From $450
Battery Replacement: From $150
Camera Repair: From $200
Water Damage Treatment: From $90
This balance of affordability and authenticity makes it the top choice for Sydney locals.
Why Choose Sydney CBD Repair Centre
6-Time Award-Winning Service
Recognized for excellence six years in a row, Sydney CBD Repair Centre leads the market in professional phone repairs.
Genuine Samsung Parts Guarantee
Unlike many competitors, they use 100% genuine parts to maintain your device’s integrity and performance.
Fast Turnaround and Expert Technicians
With same-day repairs and over 2000+ five-star Google reviews, customers trust their speed and expertise.
Real Customer Reviews
“Fixed my Samsung S22 Ultra screen within an hour — looks brand new!”
“Affordable, transparent, and super professional. Highly recommended!”
While AMOLED displays offer vibrant colors and deeper contrast, they are more expensive to replace — typically adding $50–$100 to the repair cost.
Cost by Damage Type
Type of Damage
Average Cost (AUD)
Minor Crack
$350–$400
Major Shatter
$450–$600
Touch Malfunction
$500
Screen Burn-In
$480–$520
Battery Replacement Cost Guide
When to Replace Your Battery
Replace your battery if:
It drains faster than usual
It swells or bulges
The phone heats excessively
It shuts down unexpectedly at 20–30%
Genuine Battery vs. Generic Battery
Battery Type
Cost (AUD)
Lifespan
Safety
Genuine Samsung
$150–$180
2–3 years
✅ Safe
Generic/Aftermarket
$80–$100
6–12 months
⚠️ Risky
Water Damage: What It Really Costs
Water exposure can damage circuits and screen components. A thorough inspection, cleaning, and part replacement typically range from $90 to $250, depending on the damage level. Always power off your phone and visit a technician immediately after water exposure.
Tips to Save on Samsung S22 Ultra Repairs
Use a shockproof case and tempered glass screen protector.
Avoid third-party charging cables.
Schedule annual maintenance.
Opt for Sydney CBD Repair Centre for quality repairs and fair pricing.
FAQs
1. How much does it cost to fix a cracked Samsung S22 Ultra screen in Sydney?
Expect to pay $450–$600 depending on part type and labor cost.
2. How long does a Samsung S22 Ultra repair take?
Most repairs at Sydney CBD Repair Centre are completed within an hour.
3. Does repairing my phone void the Samsung warranty?
If done by an authorized repair center like Sydney CBD Repair Centre using genuine parts, your warranty remains valid.
4. Can I repair only the glass instead of the whole display?
No, the S22 Ultra’s screen and glass are fused, requiring full display replacement.
5. Is it worth repairing or should I buy a new phone?
If the cost is under 50% of a new device’s price, repair is often more cost-effective.
6. Do you offer walk-in repairs?
Yes. You can visit Sydney CBD Repair Centre directly for same-day service.
Conclusion: Choose Smart Repairs with Sydney CBD Repair Centre
When it comes to Samsung S22 Ultra repair costs, quality matters. Choosing professionals who use genuine parts, offer fast turnaround, and provide a 90-day warranty ensures long-term satisfaction.
At Sydney CBD Repair Centre, you’ll get:
Same-day repairs
Transparent pricing
Over 2000 five-star reviews
Trusted experts serving Sydney for over six years
Visit SydneyCBD.repair/locate-us or call +61280114119 today to experience Sydney’s #1 mobile repair service.
The Smartphone Repair Tips For Beginners: 15 Essential Steps You Can’t Miss
📱 Introduction
Smartphones are essential tools in modern life, and when they break, it can feel like everything comes to a halt. The good news? With the right guidance, even beginners can handle basic smartphone repairs. This guide will walk you through 15 essential steps to repair your phone safely and effectively.
Whether it’s a cracked screen, fading battery, or speaker issue, knowing how to troubleshoot and fix common problems will save you money and extend your phone’s life. So grab your toolkit and let’s get into the essentials.
💡 Always cross-check part numbers and ensure warranty terms are provided.
❌ 14. Common Mistakes to Avoid
Rushing the process
Using the wrong tools
Not disconnecting the battery first
Skipping screen tests before final assembly
Forgetting screws or mixing them up
Take your time and double-check each step.
🧑🔧 15. Benefits of Professional Repair Services
Sometimes, DIY isn’t the best option. Professional repair services offer:
Genuine parts with warranties
Trained technicians with specialized tools
Faster turnaround times
Better diagnostics for deep hardware issues
📍 If you’re in Sydney, visit David at Sydney CBD Repair Centre—trusted by over 2000 customers and 6-time award winner for best phone repair!
❓ FAQs
1. Is it safe to repair my phone at home?
Yes, if you follow safety procedures and use proper tools. Avoid complex motherboard repairs unless you’re trained.
2. What’s the hardest part of smartphone repair?
Handling delicate parts like flex cables and reassembling the phone without damaging components.
3. Will DIY repair void my warranty?
Yes. Once the device is opened, most manufacturers void the warranty.
4. Can I repair a water-damaged phone myself?
Minor water damage can sometimes be fixed, but extensive corrosion requires professional care.
5. How do I know if my battery needs replacement?
If your phone shuts off randomly, charges slowly, or the battery swells, it’s time to replace it.
6. Where can I get quality phone parts in Sydney?
Sydney CBD Repair Centre sources genuine parts and offers 90-day warranties on repairs.
✅ Conclusion
Smartphone repairs may seem intimidating, but with the right knowledge and tools, you can handle many common issues yourself. Whether you’re replacing a screen, fixing a charging port, or recovering from water damage, always proceed with care.
However, for more complex problems, trusting professionals like Sydney CBD Repair Centre ensures your device gets the expert attention it needs.
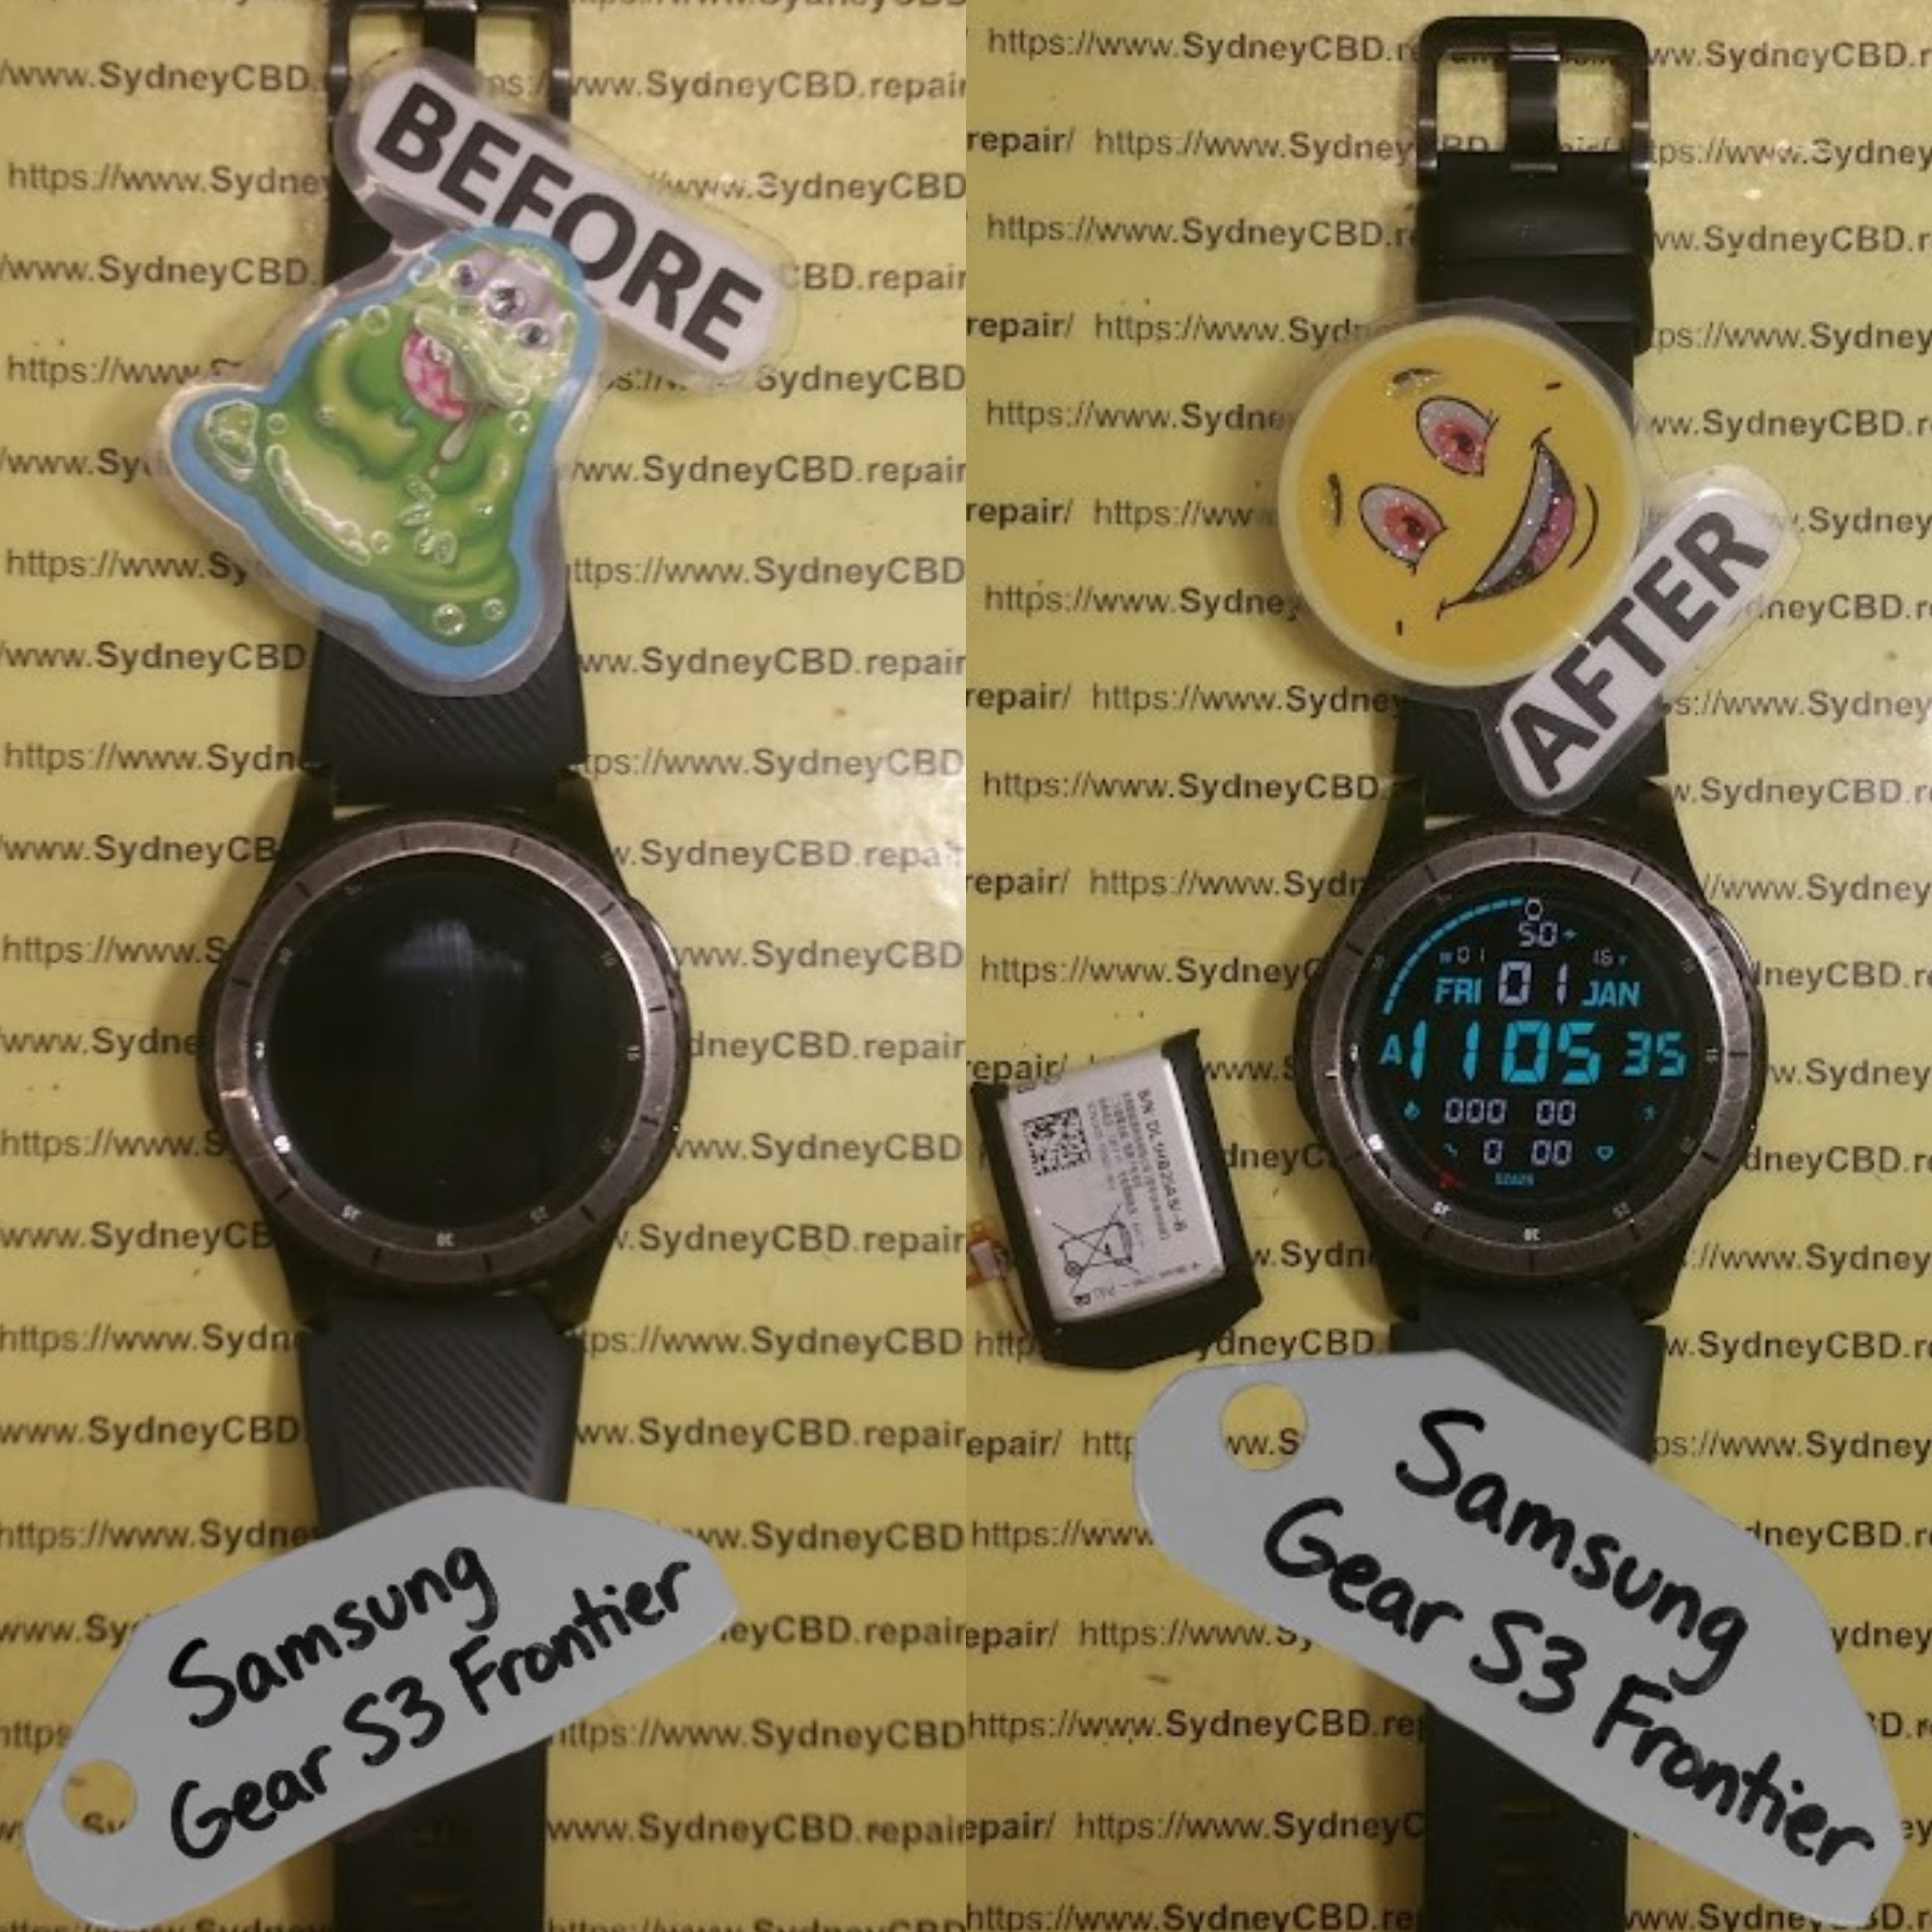
A Samsung Gear S3 Frontier can still be a useful smartwatch long after its original battery has started to struggle. If your watch now needs charging several times a day, shuts down unexpectedly, or loses power much faster than it used to, the battery may be reaching the end of its service life.
The good news is that a Samsung Gear S3 Frontier battery replacement can be done with the right tools, patience, and a careful approach. However, the process isn’t as simple as swapping batteries in a TV remote. The watch is compact, sealed, and contains delicate components that can be damaged by excessive force.
This guide explains the process in beginner-friendly language. You’ll learn what you need, how to prepare the watch, how to open the rear housing, how to disconnect the old battery, and how to test the replacement.
Important: Opening a smartwatch can damage seals, cables, connectors, or the display. If you’re uncomfortable working with tiny electronic components, professional repair is the safer option.
Lithium-ion batteries don’t last forever. Every charging cycle contributes to gradual battery degradation. After years of regular use, the battery may hold considerably less energy than it did when the watch was new.
Several symptoms can point toward a worn battery.
Rapid Battery Drain
If your Gear S3 Frontier once lasted a day or longer but now drops from 100% to 20% within a few hours, battery degradation is one possible explanation.
However, don’t automatically blame the battery. GPS usage, Bluetooth connections, screen brightness, notifications, apps, and software behavior can also affect runtime.
Unexpected Shutdowns
An aging battery may show 30% or 40% remaining and then suddenly shut down. This can happen because the battery voltage falls below the level required by the watch.
Battery Percentage Changes Quickly
Another warning sign is a battery indicator that behaves strangely. For example, the watch might remain at 100% for a long time and then rapidly fall toward 50%.
The Watch Gets Hot
Heat during charging or normal use deserves attention. A significantly swollen, damaged, or unusually hot lithium-ion battery shouldn’t be handled casually.
If you notice physical swelling, stop using the device and don’t attempt to puncture, crush, or force the battery out.
Having the right tools makes a huge difference. Improvised tools can scratch the case or damage small connectors.
Tool
Purpose
Replacement battery
Replaces the worn battery
Precision screwdriver
Removes small rear screws
Plastic opening pick
Helps separate components
Plastic spudger
Disconnects delicate connectors
Tweezers
Handles small parts
Soft work mat
Protects the watch
Small container
Keeps screws organized
Isopropyl alcohol
Helps clean adhesive residue
Microfiber cloth
Keeps surfaces clean
A magnifying lamp can also be useful, especially if you’re new to electronics repair.
Choose the Correct Battery
Don’t buy a replacement simply because it says “Gear S3 battery.”
Check that the battery is specifically compatible with the Samsung Gear S3 Frontier and matches the appropriate electrical specifications and connector arrangement.
A reputable replacement supplier should provide compatibility information. If you’re uncertain, compare the markings on the original battery with the replacement before installation.
Safety Precautions Before Starting
Before beginning a Samsung Gear S3 Frontier battery replacement, take a few minutes to prepare your workspace.
Turn the Watch Off
Power down the watch completely before opening it.
Don’t attempt to disconnect the battery while the watch is operating.
Work on a Clean Surface
Tiny screws are remarkably easy to lose. A bright, clean workspace makes the job much less frustrating.
Avoid Metal Tools Near the Battery
A metal tool can potentially short battery contacts or damage nearby components. Plastic tools are preferable for prying and disconnecting.
Never Puncture the Battery
Lithium-ion batteries contain materials that can become hazardous if damaged.
If the battery appears swollen or physically compromised, don’t press on it or attempt to bend it.
Protect the Display
Place the watch face-down only on a soft, clean surface. Scratching the glass during a battery repair would be an unfortunate own goal.
Step 1: Prepare the Samsung Gear S3 Frontier
Before opening the watch, remove it from its charger and make sure it is powered off.
Remove any accessories that could interfere with the repair. If you’ve recently used the watch heavily, allow it to cool to room temperature.
It’s also sensible to back up important information before beginning. A hardware repair shouldn’t normally erase your data, but unexpected problems can happen when working on electronics.
Take a few photos of the rear assembly before removing anything. These pictures can act as a useful reference during reassembly.
Step 2: Remove the Rear Screws
The Gear S3 Frontier’s rear assembly is secured with small screws.
Use a precision screwdriver that fits the screw heads properly. Press downward gently while turning rather than applying excessive force.
Remove each screw carefully and place it in a small container.
Why Screw Organization Matters
Not all tiny screws are necessarily interchangeable. Keeping them organized in the order they were removed can prevent confusion later.
Don’t rush this stage. Stripped screws can turn a straightforward repair into a much bigger project.
Step 3: Separate the Rear Housing
Once the screws have been removed, the rear section can be separated carefully.
This is where beginners often get into trouble.
Don’t insert a sharp metal object aggressively into the seam. Instead, use a plastic opening pick and work gradually around the edge.
The goal is to loosen the housing without damaging cables, seals, or internal components.
Take Your Time
If the housing doesn’t separate easily, stop and inspect the area again.
Applying more force isn’t always the answer. A remaining screw, adhesive section, or internal connection may still be holding the assembly together.
Step 4: Locate and Disconnect the Battery
After accessing the internal components, identify the battery connector.
Before touching the connector, take a clear photograph of its original position.
Use a plastic spudger or another suitable non-metallic tool to disconnect it carefully.
Don’t pull on the battery cable itself. Disconnect the connector from its socket using controlled pressure.
A Good Rule for Beginners
Think “lift and release,” not “pull and yank.”
Small electronic connectors can be surprisingly fragile. If you damage the socket on the motherboard, the repair becomes much more complicated.
Step 5: Remove the Old Battery
With the battery disconnected, examine how it’s secured.
Many compact electronic devices use adhesive to hold batteries in place. If adhesive is present, work slowly.
Use an appropriate plastic tool to loosen the battery.
Never bend, puncture, or crush the battery while removing it.
If it refuses to move, don’t force it. Excessive pressure can damage the battery or components underneath it.
What About Adhesive?
Old adhesive may have become stronger over time. Gentle, controlled separation is preferable to sudden force.
If a manufacturer-approved repair procedure specifies a particular removal method, follow that method whenever possible.
Step 6: Install the Replacement Battery
Compare the new battery with the old one before installing it.
Check:
Physical dimensions
Connector position
Battery labeling
Voltage specifications
Capacity
Compatibility with the Gear S3 Frontier
The new battery should sit naturally in its designated position.
Don’t force it into place.
Once positioned correctly, reconnect the battery connector carefully.
Step 7: Reassemble the Watch
Before fully closing the watch, inspect the interior.
Make sure:
The battery cable is properly connected.
No cables are trapped.
No screws are missing.
The battery is seated correctly.
No debris is inside the housing.
The rear cover is aligned properly.
If everything looks correct, carefully reinstall the rear assembly and screws.
Tighten screws firmly but don’t overtighten them. Tiny screws and housings can be damaged surprisingly easily.
Step 8: Test the Watch
Now comes the satisfying part.
Power on the Gear S3 Frontier.
Check whether:
The Samsung logo appears.
The watch boots normally.
The battery percentage is displayed.
Charging works.
The touchscreen responds.
Buttons operate normally.
Bluetooth functions correctly.
Sensors appear to operate normally.
If the watch doesn’t start, don’t immediately assume the new battery is defective.
Turn it off again and inspect the battery connection.
Step 9: Monitor the New Battery
A new battery may not provide a meaningful picture of its performance immediately.
Use the watch normally and observe how quickly the battery percentage falls.
Keep an eye out for:
Sudden percentage drops
Unexpected shutdowns
Excessive heat
Failure to charge
Extremely short runtime
If any of these occur, investigate the installation and battery compatibility.
Common Samsung Gear S3 Frontier Battery Replacement Mistakes
Even experienced DIY repairers can make mistakes. Beginners should pay particular attention to these issues.
Using the Wrong Screwdriver
A poorly fitting screwdriver can damage the screw head.
Using Too Much Force
If a component doesn’t move, stop and investigate why.
Pulling Cables
Never use a cable as a handle.
Forgetting the Battery Connector
It’s easy to close the watch and discover that the battery wasn’t properly connected.
Buying an Incompatible Battery
A battery that physically looks similar isn’t necessarily electrically compatible.
Damaging the Seal
Opening the watch can compromise its original sealing. Don’t assume the watch retains its original water resistance after being opened.
For general information about Samsung products and support resources, you can consult Samsung Support.
Troubleshooting After Battery Installation
Problem
Possible Cause
What to Check
Watch won’t turn on
Battery connector
Recheck connection
Doesn’t charge
Connector or battery issue
Inspect charging system
Battery drains quickly
Poor battery quality or software
Monitor usage
Watch becomes hot
Battery or electrical issue
Stop using if unusually hot
Buttons don’t work
Cable or assembly issue
Inspect internal connections
Rear cover won’t close
Battery positioning
Check seating and alignment
The Watch Won’t Turn On
First, confirm that the battery connector is properly seated.
Then connect the watch to a compatible charger and allow it some time before attempting to power it on.
If there’s still no response, the battery, connector, charging system, or another internal component may require professional diagnosis.
Battery Still Drains Quickly
A replacement battery doesn’t automatically eliminate every cause of battery drain.
If the battery continues to drain unusually fast, professional testing may be worthwhile.
How to Extend the Life of Your Replacement Battery
Once you’ve completed your Samsung Gear S3 Frontier battery replacement, good charging habits can help you get more useful service from the new battery.
Avoid Excessive Heat
Heat is hard on lithium-ion batteries. Don’t leave the watch in a hot vehicle or direct sunlight for extended periods.
Keep Software Updated When Appropriate
Software updates can sometimes improve power management or resolve bugs that contribute to battery drain.
Manage Power-Hungry Features
GPS, high screen brightness, continuous connectivity, and frequent notifications can increase energy consumption.
You don’t need to disable everything. Instead, adjust features according to how you actually use the watch.
Don’t Ignore Physical Damage
If the watch is dropped or exposed to liquid after repair, inspect it carefully before continuing normal use.
DIY Repair vs Professional Battery Replacement
A DIY repair can be appealing because it gives you control over the process. It can also be a useful learning experience.
However, professional repair has some advantages.
DIY Repair
Professional Repair
Lower labor cost
Technician expertise
Hands-on experience
Specialized equipment
Immediate personal control
Lower risk of accidental damage
Requires tools
Tools supplied by repairer
Repair risk is yours
Diagnostic support available
The best choice depends on your experience, tools, confidence, and the condition of the watch.
If the watch is valuable to you or you’re uncomfortable handling lithium-ion batteries, professional service may be more appropriate.
Samsung Gear S3 Frontier Battery Replacement FAQs
1. How long does a Samsung Gear S3 Frontier battery usually last?
Battery lifespan varies according to usage, charging habits, temperature, and battery quality. A battery that has been used for several years may naturally provide much less runtime than when it was new.
2. Can I replace the Gear S3 Frontier battery myself?
Yes, a technically capable person can attempt the repair with appropriate tools and a compatible replacement battery. However, the watch contains small and delicate components, so beginners should proceed cautiously.
3. How do I know if my Gear S3 Frontier battery is bad?
Common signs include rapid battery drain, unexpected shutdowns, unusual battery percentage changes, poor charging performance, and significantly reduced runtime.
4. Does replacing the battery erase the watch?
Battery replacement shouldn’t normally erase stored information. Nevertheless, backing up important data before hardware work is a sensible precaution.
5. Can I use any Gear S3 battery?
No. The replacement should be specifically compatible with your Gear S3 Frontier and match the required electrical and physical specifications.
6. Why is my new battery draining quickly?
Possible causes include a poor-quality or incompatible battery, incorrect installation, excessive GPS or display use, wireless activity, software issues, or another hardware problem.
7. Is the Gear S3 Frontier waterproof after battery replacement?
You shouldn’t assume that the original water resistance remains unchanged after opening the watch. The condition and replacement of seals, as well as the quality of the reassembly, matter.
8. What should I do if the battery is swollen?
Don’t puncture, bend, crush, or continue using a visibly swollen lithium-ion battery. Move away from DIY removal and seek appropriate professional assistance.
Final Thoughts
A Samsung Gear S3 Frontier battery replacement can breathe new life into an aging smartwatch, but careful preparation is essential. The most important principles are simple: use the correct battery, choose suitable precision tools, work slowly, protect the connectors, and never force a component.
For beginners, the hardest part isn’t necessarily the battery itself. It’s avoiding accidental damage while accessing the battery and reconnecting everything correctly.
If your watch is otherwise in good condition, replacing a worn battery may be a practical way to extend its useful life. And if you’re not confident about opening the device, professional repair can provide a safer route.
David from Sydney CBD Repair Centre – The Best place to fix mobile phones as 7 Years In A Row! Top Mobile Phone Repair In Sydney. More than 2000 Positive Reviews on Google and Same Day Repairs.
We take pride in delivering exceptional repair services for all major phone brands including Apple, Samsung, Google, and more. Our expert technicians use only genuine parts and offer 90days warranty on repairs. Located in the heart of Sydney CBD, we’re your one-stop solution for all mobile device repairs.
Our commitment to excellence has earned us the trust of thousands of satisfied customers. Whether it’s a cracked screen, battery replacement, or water damage repair, we handle it all with professional care and expertise. Walk in today and experience why we’re Sydney’s #1 choice for mobile phone repairs.
Visit us for:
✓ Same Day Express Repairs
✓ Genuine Parts Guarantee
✓ Professional Technicians
✓ Competitive Pricing
✓ 2000+ 5-Star Google Reviews
✓ 7-Time Award Winner for Best Phone Repairs
Sydney CBD Repair Centre – Where Quality Meets Reliability. Call: +61280114119 Website:Sydney CBD Repair Centre
🔋 HIDDEN WEAR AND TEAR! Comprehensive Battery Health Swap For Google Pixel 7 Phone + Ultimate Guide 2026
Introduction to Battery Health
Battery health is one of those sneaky things most users ignore—until their phone suddenly starts dying at 20%. If you’re using the Google Pixel 7, understanding battery health isn’t just helpful—it’s essential.
Modern smartphones rely on lithium-ion batteries, which degrade over time. Even if you take good care of your device, battery capacity naturally declines. That’s just physics doing its thing.
So what’s the solution when your Pixel 7 no longer holds a charge like it used to? A battery health swap—a practical and cost-effective way to restore your device’s performance.
A degraded battery doesn’t just mean shorter screen time—it disrupts your entire routine. Imagine needing to charge your phone twice a day. That’s not just inconvenient; it’s inefficient.
Effects on System Performance
Here’s the kicker: poor battery health can actually slow down your phone.
Devices like the Pixel 7 may reduce performance to prevent crashes when the battery can’t deliver consistent power. So yes, your laggy phone might not be old—it might just be tired.
What is a Battery Health Swap?
A battery health swap refers to replacing your worn-out battery with a new one to restore optimal performance.
Battery Replacement vs Optimization
Optimization: Adjusting settings to extend battery life
Replacement: Physically installing a new battery
Optimization helps temporarily, but replacement solves the root problem.
When Should You Replace?
You should consider a battery health swap if:
Battery health is below 80%
Device shuts down unexpectedly
Charging frequency increases drastically
Tools and Equipment Required
Professional vs DIY Tools
If you’re going DIY, you’ll need:
Heat gun or hair dryer
Plastic pry tools
Suction cup
Isopropyl alcohol
Replacement battery
Professional repair centers, however, use precision tools and controlled environments—reducing risk significantly.
Step-by-Step Battery Swap Guide
Preparation
Power off the device
Remove SIM tray
Heat the back panel to loosen adhesive
Disassembly
Carefully pry open the back panel. Take your time—rushing can crack the glass.
Disconnect internal components like:
Battery connector
Wireless charging coil
Flex cables
Battery Replacement
Remove the old battery using adhesive remover if needed. Install the new battery and reconnect everything securely.
Reassembly
Seal the phone with new adhesive and test functionality before final closure.
Risks and Precautions
Safety Tips
Avoid puncturing the battery
Work in a static-free environment
Don’t use metal tools near circuits
Warranty Considerations
Opening your Pixel 7 may void its warranty. Always check your coverage before attempting a DIY repair.
Benefits of a Battery Health Swap
Performance Boost
A new battery restores:
Faster performance
Stable power delivery
Longer usage time
Extended Lifespan
Instead of buying a new phone, a battery health swap gives your Pixel 7 a second life.
Cost Analysis
DIY vs Professional Repair
Option
Cost
Risk
Quality
DIY
Low
High
Variable
Professional
Moderate
Low
High
While DIY may save money upfront, professional repairs offer peace of mind.
Replacing your battery instead of your entire phone reduces electronic waste. That’s a win for both your wallet and the planet.
❓ FAQs
1. How long does a Pixel 7 battery last?
Typically 2–3 years depending on usage and charging habits.
2. Is a battery health swap worth it?
Absolutely. It’s far cheaper than buying a new phone and restores performance.
3. Can I replace the battery myself?
Yes, but it requires skill and proper tools. Mistakes can damage your phone.
4. How much does a battery replacement cost?
It varies by location, but professional services usually range from $80–$150.
5. Will a new battery improve performance?
Yes, especially if your old battery was degraded.
6. Is it safe to use third-party batteries?
Only if they’re high-quality and certified. Cheap ones can be dangerous.
Conclusion
Battery degradation is inevitable—but dealing with it doesn’t have to be complicated. A battery health swap for your Google Pixel 7 is one of the smartest ways to extend your device’s life, improve performance, and avoid unnecessary upgrades.
Whether you go DIY or trust a professional, the key is acting before the problem gets worse. After all, your phone isn’t failing—it just needs a fresh start.
David from Sydney CBD Repair Centre – The Best place to fix mobile phones as 7 Years In A Row! Top Mobile Phone Repair In Sydney. More than 2000 Positive Reviews on Google and Same Day Repairs.
We take pride in delivering exceptional repair services for all major phone brands including Apple, Samsung, Google, and more. Our expert technicians use only genuine parts and offer 90days warranty on repairs. Located in the heart of Sydney CBD, we’re your one-stop solution for all mobile device repairs.
Our commitment to excellence has earned us the trust of thousands of satisfied customers. Whether it’s a cracked screen, battery replacement, or water damage repair, we handle it all with professional care and expertise. Walk in today and experience why we’re Sydney’s #1 choice for mobile phone repairs.
Visit us for:
✓ Same Day Express Repairs
✓ Genuine Parts Guarantee
✓ Professional Technicians
✓ Competitive Pricing
✓ 2000+ 5-Star Google Reviews
✓ 7-Time Award Winner for Best Phone Repairs
Charging Mystery: Diagnosing and Solving Flashing Lights and Dead Batteries That Finally Make Sense ⚡ (7-Step Expert Guide)
Introduction: Why Charging Problems Are So Confusing
Few things are more frustrating than plugging in your phone and seeing nothing happen—or worse, watching a tiny light blink at you like it’s mocking your effort. Solving your charging mystery can feel overwhelming because charging problems don’t always have one clear cause. Sometimes it’s the battery. Other times, it’s the charger, cable, port, or even the software playing tricks.
What makes diagnosing flashing lights and dead batteries especially tricky is that symptoms often overlap. A flashing red light might mean low battery, overheating, or a hardware fault depending on the brand. A phone that won’t charge today might work perfectly tomorrow. That uncertainty is why many users delay repairs, hoping the problem magically disappears.
The good news? It doesn’t have to stay mysterious. By understanding how charging systems work and what common warning signs really mean, you can take confident steps toward a solution—whether that’s a quick fix at home or a professional repair.
Before solving your charging mystery, it helps to know what’s actually happening when you plug your phone in.
How Power Flows From Charger to Battery
When you connect a charger, electricity travels from the power outlet, through the adapter, along the cable, and into your phone’s charging port. From there, the charging IC (integrated circuit) regulates voltage and current before sending power to the battery.
If any point along this chain fails—even slightly—you may see slow charging, flashing lights, or a completely dead battery. That’s why charging issues are rarely caused by just one component.
Role of Charging IC and Battery Management
The charging IC is essentially your phone’s gatekeeper. It decides how much power enters the battery and when to stop charging. Modern smartphones also rely on battery management software to prevent overheating and overcharging.
If this system detects abnormal voltage, moisture, or temperature issues, it may intentionally stop charging. From the user’s perspective, it looks like a fault—but in reality, it’s a safety feature doing its job.
Flashing lights are one of the most misunderstood charging signals.
Common LED Indicators Explained
While meanings vary by brand, some general rules apply:
Flashing red light: Extremely low battery or charging error
Flashing orange/amber: Charging paused due to temperature
Blinking white: Notification alert, not charging-related
No light at all: Possible battery, port, or motherboard issue
Understanding these signals is a major step in solving your charging mystery, because they point you toward the right diagnosis faster.
Brand-Specific Charging Light Behaviors
Different manufacturers interpret LED signals differently. For example, Samsung devices often flash red when charging fails, while some Android models blink when moisture is detected. Apple devices rely more on on-screen alerts than LEDs.
If you’re unsure, checking the manufacturer’s support page—or a trusted repair guide like those from iFixit—can help clarify what your device is trying to tell you.
👉 External resource: iFixit Smartphone Charging Guides
The Real Reasons Behind Dead Batteries
A phone that won’t power on isn’t always “dead” in the way people think.
Battery Aging and Chemical Degradation
Lithium-ion batteries degrade over time. After 2–3 years, most phone batteries lose a noticeable amount of capacity. They may drain quickly, shut down unexpectedly, or refuse to charge past a certain percentage.
In many cases, users assume the phone is broken when in reality, a simple battery replacement would restore normal performance. This is one of the most common discoveries when solving your charging mystery.
Software vs Hardware Battery Failures
Not all battery issues are physical. Corrupted firmware, failed updates, or power management bugs can cause incorrect battery readings. Your phone might show 0% even when the battery still has charge.
Restarting the device, performing a forced reboot, or updating the operating system can sometimes resolve these issues without hardware repairs.
Charging Cables, Adapters, and Power Sources
Never underestimate the importance of accessories.
Why Cheap Chargers Cause Big Problems
Low-quality chargers often deliver unstable voltage. Over time, this can damage the charging IC or battery. Even if the phone still charges, it may do so slowly or inconsistently.
Certified chargers are designed to communicate properly with your phone. Using the correct adapter is a simple but powerful step in solving your charging mystery.
Port Problems: The Hidden Culprit
Charging ports are exposed to daily wear and tear.
Dust, Corrosion, and Bent Pins
Pocket lint, dust, and debris can block the connection between the cable and port. Moisture can cause corrosion, while repeated force can bend internal pins.
A professional cleaning often restores charging instantly. However, attempting to scrape inside the port with metal tools can cause permanent damage—so caution is key.
Software Glitches That Stop Charging
Modern phones rely heavily on software.
Updates, Bugs, and Power Management Errors
Sometimes, charging issues begin right after a software update. Background processes may drain power faster than it charges, giving the illusion of a dead battery.
Safe mode testing, clearing cache partitions, or performing a factory reset (as a last resort) can help identify whether software is the root cause.
Advanced Diagnostics: When DIY Isn’t Enough
If you’ve tried multiple chargers, cables, and outlets with no success, the issue may be internal. Faulty charging ICs, damaged motherboards, or battery connectors require professional diagnostic tools.
At this stage, solving your charging mystery usually means visiting a trusted repair centre with experience in board-level diagnostics.
Professional Repair vs Replacement Decisions
Many people assume replacement is cheaper than repair—but that’s not always true. Battery and port replacements are often far more affordable than buying a new device.
A professional technician can assess whether repair is cost-effective and advise honestly, saving you money in the long run.
Preventing Future Charging Issues
Prevention goes a long way:
Use certified chargers
Avoid charging in extreme heat
Keep the charging port clean
Don’t let batteries drain to 0% regularly
Update software responsibly
Small habits can significantly extend battery life and reduce charging failures.
Frequently Asked Questions (FAQs)
Why is my phone flashing but not charging?
This often indicates low battery, overheating, or a charging error caused by the cable, port, or battery.
Can a dead battery be revived?
In some cases, yes. Deeply discharged batteries may recover with a stable charger, but many require replacement.
Does wireless charging fix charging port issues?
It can be a temporary workaround, but it doesn’t fix underlying port or battery problems.
Is it safe to keep trying different chargers?
Yes, as long as they’re certified. Avoid cheap, unregulated chargers.
How long should a phone battery last?
Typically 2–3 years with normal use before noticeable degradation.
When should I see a professional repairer?
If the phone won’t charge after basic troubleshooting, professional diagnostics are recommended.
Conclusion: Ending Your Charging Mystery for Good
Charging issues don’t have to remain frustrating or mysterious. By understanding how your phone’s charging system works and recognizing the signs behind flashing lights and dead batteries, you’re already halfway toward a solution. Whether it’s a simple cable swap, a battery replacement, or expert diagnostics, solving your charging mystery is entirely possible with the right approach.
David from Sydney CBD Repair Centre – The Best Place to Fix Mobile Phones, 6 Years In A Row!
We take pride in delivering exceptional repair services for all major phone brands including Apple, Samsung, Google, and more. Our expert technicians use only genuine parts and offer a 90-day warranty on repairs. Located in the heart of Sydney CBD, we’re your one-stop solution for all mobile device repairs.
Our commitment to excellence has earned us the trust of thousands of satisfied customers. Whether it’s a cracked screen, battery replacement, or water damage repair, we handle it all with professional care and expertise. Walk in today and experience why we’re Sydney’s #1 choice for mobile phone repairs.
Visit us for:
✓ Same Day Express Repairs
✓ Genuine Parts Guarantee
✓ Professional Technicians
✓ Competitive Pricing
✓ 2000+ 5-Star Google Reviews
✓ 6-Time Award Winner for Best Phone Repairs
OVERHEATING ISSUE! Removing Swollen Batteries Safely From A Fragile Motorola Edge 50 – Ultimate Guide 7
Introduction to Swollen Batteries in Motorola Edge 50
The Motorola Edge 50 is known for its sleek design, high performance, and ultra-thin construction. However, like many modern smartphones, it’s not immune to one major issue—battery swelling. If you’ve ever noticed your phone bulging, overheating, or separating at the seams, you’re likely dealing with a swollen battery.
Battery swelling isn’t just inconvenient—it’s dangerous. It can lead to screen damage, internal component failure, or even fire hazards if handled incorrectly. That’s why learning how to remove a swollen battery safely is essential, especially for fragile devices like the Edge 50.
In this guide, we’ll walk you through everything you need to know, from identifying the issue to safely removing and replacing the battery. Whether you’re a technician or a DIY enthusiast, this comprehensive resource ensures you stay safe and effective.
The Motorola Edge 50 is designed with compact internal components and strong adhesive seals. While this improves aesthetics and durability, it makes repairs more challenging.
Key fragility factors include:
Thin OLED display
Strong adhesive bonding
Compact internal layout
Delicate flex cables
Risks of DIY Repairs
Attempting battery removal without proper knowledge can result in:
Screen cracks
Motherboard damage
Battery puncture (very dangerous)
Loss of waterproofing
That said, with the right guidance and tools, safe removal is absolutely possible.
Essential Tools for Safe Battery Removal
Recommended Repair Tools
To safely remove a swollen battery, you’ll need:
Heat gun or hairdryer
Plastic pry tools
Suction cup
Isopropyl alcohol (90%+)
Tweezers
Screwdriver set (precision)
Safety Equipment Checklist
Never skip safety gear:
Anti-static gloves
Safety goggles
Fire-resistant surface
Battery-safe container
Preparing Your Workspace
Ideal Environment Setup
Set up a clean, well-lit workspace:
Flat surface
No flammable materials nearby
Good ventilation
Organized tools
Safety Precautions Before Starting
Before you begin:
Power off the phone completely
Discharge battery below 25%
Remove SIM tray
Avoid metal tools near battery
Step-by-Step Guide to Removing a Swollen Battery
Powering Down the Device
Always ensure the device is turned off. This minimizes risk of short circuits.
Opening the Phone Safely
Apply gentle heat to soften adhesive
Use suction cup to lift the back panel
Insert plastic pry tool carefully
⚠️ Avoid forcing it open—this can crack the glass.
Disconnecting Components
Once inside:
Disconnect battery connector first
Remove any shields or screws
Carefully detach flex cables
Removing the Swollen Battery
This is the most critical step.
Apply isopropyl alcohol around battery edges
Gently pry using plastic tools
Never puncture or bend the battery
If resistance is strong, apply more heat and patience.
Handling a Swollen Battery Safely
What NOT to Do
Never:
Puncture the battery
Use metal tools directly
Expose it to heat or flames
Throw it in regular trash
Proper Disposal Methods
Dispose of swollen batteries at:
Certified e-waste centers
Electronics recycling facilities
Authorized service centers
Installing a New Battery
Choosing the Right Replacement
Always use:
OEM or high-quality replacement batteries
Compatible model-specific parts
Trusted suppliers
Reassembly Tips
Reconnect all components securely
Replace adhesive strips
Test before sealing device
Preventing Future Battery Swelling
Charging Best Practices
Avoid overnight charging
Use original chargers
Keep battery between 20–80%
Temperature Management
Avoid extreme heat
Don’t leave phone in cars
Remove case during heavy use
Common Mistakes to Avoid
Rushing the process
Using sharp tools
Ignoring safety precautions
Reusing damaged batteries
Professional Repair vs DIY
DIY repair saves money but carries risks. Professional services offer:
Expertise
Warranty
Proper tools
If unsure, always go pro.
FAQs
1. Is a swollen battery dangerous?
Yes, it can explode or catch fire if mishandled.
2. Can I still use my phone with a swollen battery?
No, stop using it immediately to avoid further damage.
3. How long does battery replacement take?
Typically 30–90 minutes depending on skill level.
4. Can swelling damage other components?
Yes, it can damage the screen, motherboard, and casing.
5. What causes overheating in the Motorola Edge 50?
Heavy usage, poor ventilation, or battery failure are common causes.
6. Is it worth repairing or replacing the phone?
If the device is otherwise functional, repair is usually worth it.
Conclusion
Handling a swollen battery in a fragile phone like the Motorola Edge 50 can feel overwhelming, but with the right approach, tools, and patience, it’s entirely manageable. The key is safety—never rush, never force, and always prioritize proper handling.
By following this guide, you’ll not only protect your device but also ensure your own safety. And remember, when in doubt, seeking professional help is always the smartest move.
External Resource: Learn more about battery safety from the official Consumer Product Safety Commission guidelines.
David from Sydney CBD Repair Centre – The Best place to fix mobile phones as 7 Years In A Row! Top Mobile Phone Repair In Sydney. More than 2000 Positive Reviews on Google and Same Day Repairs.
We take pride in delivering exceptional repair services for all major phone brands including Apple, Samsung, Google, and more. Our expert technicians use only genuine parts and offer 90days warranty on repairs. Located in the heart of Sydney CBD, we’re your one-stop solution for all mobile device repairs.
Our commitment to excellence has earned us the trust of thousands of satisfied customers. Whether it’s a cracked screen, battery replacement, or water damage repair, we handle it all with professional care and expertise. Walk in today and experience why we’re Sydney’s #1 choice for mobile phone repairs.
Visit us for:
✓ Same Day Express Repairs
✓ Genuine Parts Guarantee
✓ Professional Technicians
✓ Competitive Pricing
✓ 2000+ 5-Star Google Reviews
✓ 7-Time Award Winner for Best Phone Repairs
Battle of the Batteries: iPhone 15 Pro Max vs. Samsung S24 Ultra – Ultimate Showdown 2026
Introduction to the iPhone 15 Pro Max vs. Samsung S24 Ultra Battery Battle
The iPhone 15 Pro Max vs. Samsung S24 Ultra battery comparison has become one of the most talked-about topics among smartphone users, reviewers, and repair professionals alike. Let’s face it—battery life can make or break a flagship phone experience. You can have the best camera or the fastest processor, but if your phone dies before dinner, it’s a deal-breaker.
Both Apple and Samsung promise all-day battery life, improved efficiency, and smarter power management. However, they take very different approaches. Apple relies heavily on tight hardware-software integration, while Samsung focuses on raw battery capacity combined with flexible charging options. So, which one really lasts longer when it matters?
In this in-depth guide, we’ll break down the iPhone 15 Pro Max vs. Samsung S24 Ultra battery performance using real-world usage, technical specifications, charging behavior, and long-term reliability. The goal is simple: help you understand which device fits your lifestyle better—whether you’re a power user, a gamer, or someone who just hates carrying a charger around.
On paper, the Samsung Galaxy S24 Ultra looks like the clear winner. It packs a larger battery, while Apple continues its trend of using a smaller-capacity cell in the iPhone 15 Pro Max. However, battery size alone doesn’t tell the whole story.
Apple uses high-density lithium-ion cells optimized for efficiency. Samsung, on the other hand, sticks with a larger lithium-ion battery that prioritizes endurance through sheer capacity. This difference sets the stage for an interesting iPhone 15 Pro Max vs. Samsung S24 Ultra battery showdown.
What’s surprising is how close these phones perform despite the capacity gap. Apple’s battery engineering focuses on minimizing energy loss, while Samsung gives users a bigger power reserve. In everyday terms, Apple aims to sip power, while Samsung isn’t afraid to gulp it.
Chipset Efficiency and Power Management
The iPhone 15 Pro Max runs on Apple’s latest A-series chip, built with efficiency in mind. It dynamically adjusts power usage based on tasks, which means less wasted energy during light use. Meanwhile, the Samsung S24 Ultra is powered by a Snapdragon chipset designed for performance but optimized better than previous generations.
In real life, this means the iPhone often feels more consistent throughout the day. The Samsung can drain faster under heavy workloads, but it compensates with a larger battery. This balance is central to the iPhone 15 Pro Max vs. Samsung S24 Ultra battery debate.
Display Technology and Power Consumption
Displays are major battery hogs. Samsung’s AMOLED panel is bright, colorful, and adaptive, but it can consume more power at higher brightness levels. Apple’s ProMotion display is equally smooth, yet Apple’s software tightly controls refresh rates to save power.
As a result, streaming videos or scrolling social media for hours can yield surprisingly similar battery drain on both devices. The difference comes down to how aggressively each phone manages background tasks and screen behavior.
In everyday use—calls, emails, messaging, and social media—the iPhone 15 Pro Max vs. Samsung S24 Ultra battery performance is impressively close. Both phones easily last a full workday for moderate users.
The iPhone tends to finish the day with slightly more battery remaining, thanks to efficient background management. Samsung users may notice higher drain if multiple apps run in the background, but nothing alarming.
For most people, either phone will comfortably get you from morning to night without panic.
Gaming, Streaming, and Heavy Tasks
This is where differences start to show. Gaming, 4K video recording, and extended streaming sessions push batteries hard. The Samsung S24 Ultra’s larger battery gives it an edge in raw endurance, especially during long gaming sessions.
However, the iPhone 15 Pro Max maintains steadier performance with less heat buildup. Excess heat can accelerate battery drain, so Apple’s thermal control plays a big role here.
In prolonged stress tests, the Samsung may last slightly longer, but the iPhone often feels more predictable. It’s a classic case of capacity versus control in the iPhone 15 Pro Max vs. Samsung S24 Ultra battery comparison.
Standby Time and Idle Drain
When it comes to standby time, Apple quietly dominates. The iPhone 15 Pro Max loses very little battery overnight. Samsung has improved significantly, but idle drain can still be a bit higher, especially with notifications and background syncing enabled.
If you’re the type who leaves your phone untouched for hours, the iPhone’s battery efficiency really shines.
Charging Speed, Technology, and Convenience
Wired Charging Comparison
Samsung clearly wins on charging speed. The S24 Ultra supports faster wired charging, meaning you can top up quickly before heading out. Apple’s charging speeds are more conservative, focusing on battery health rather than speed.
That said, Apple’s slower charging helps preserve long-term battery health, which matters over years of use. In the iPhone 15 Pro Max vs. Samsung S24 Ultra battery debate, this is a trade-off between convenience and longevity.
Wireless and Reverse Charging
Samsung adds versatility with reverse wireless charging, allowing you to power accessories like earbuds. Apple sticks to a more controlled wireless charging ecosystem.
Wireless charging efficiency is similar, but Samsung’s flexibility appeals to users who like options.
Heat Management While Charging
Heat is the enemy of batteries. Apple’s controlled charging reduces heat, especially overnight. Samsung’s faster charging can generate more warmth, though it’s still within safe limits.
From a repair perspective, better heat control often translates to fewer battery replacements over time.
Battery Longevity, Health, and Repair Considerations
Battery Degradation Over Time
All lithium-ion batteries degrade. Apple actively manages charging to slow this process, while Samsung gives users more control over charging limits.
Over two to three years, both phones will show reduced capacity, but iPhones tend to maintain battery health slightly better due to conservative charging algorithms.
Software Updates and Optimization
Apple’s long-term software support ensures ongoing battery optimizations. Samsung has improved greatly, but Apple still leads in consistency.
This ongoing optimization plays a huge role in the long-term iPhone 15 Pro Max vs. Samsung S24 Ultra battery experience.
Repairability and Replacement Costs
From a professional repair standpoint, battery replacement is inevitable. Costs vary, but using genuine parts is critical. For official specifications and battery care tips, you can refer to Apple’s official battery guide and Samsung’s battery safety documentation .
FAQs
1. Which phone has better battery life overall?
Both are excellent, but the iPhone 15 Pro Max offers more consistent daily efficiency, while the Samsung S24 Ultra excels in heavy use.
2. Is a bigger battery always better?
Not necessarily. Efficiency and software optimization matter just as much as capacity.
3. Which phone charges faster?
The Samsung S24 Ultra charges faster with wired charging.
4. Which battery lasts longer over years?
The iPhone generally maintains battery health better over time.
5. Is wireless charging safe for battery health?
Yes, if heat is managed properly and quality chargers are used.
6. Can battery replacement restore performance?
Absolutely. A genuine battery replacement can make your phone feel brand new.
Conclusion: Which Battery Truly Wins?
The iPhone 15 Pro Max vs. Samsung S24 Ultra battery battle doesn’t have a single winner—it depends on what you value most. If you want efficiency, predictable drain, and long-term health, the iPhone 15 Pro Max is hard to beat. If you prioritize fast charging, flexibility, and raw capacity, the Samsung S24 Ultra is a powerhouse.
Either way, both phones represent the pinnacle of battery technology in modern smartphones. Choosing the right one comes down to how you use your device day in and day out.
David from Sydney CBD Repair Centre – The Best place to fix mobile phones as 7 Years In A Row! Top Mobile Phone Repair In Sydney. More than 2000 Positive Reviews on Google and Same Day Repairs.
We take pride in delivering exceptional repair services for all major phone brands including Apple, Samsung, Google, and more. Our expert technicians use only genuine parts and offer 90days warranty on repairs. Located in the heart of Sydney CBD, we’re your one-stop solution for all mobile device repairs.
Our commitment to excellence has earned us the trust of thousands of satisfied customers. Whether it’s a cracked screen, battery replacement, or water damage repair, we handle it all with professional care and expertise. Walk in today and experience why we’re Sydney’s #1 choice for mobile phone repairs.
Visit us for:
✓ Same Day Express Repairs
✓ Genuine Parts Guarantee
✓ Professional Technicians
✓ Competitive Pricing
✓ 2000+ 5-Star Google Reviews
✓ 7-Time Award Winner for Best Phone Repairs
Top 5 Phones Designed for Easy Repairability in 2026: Ultimate Guide to Fixing Your Device
Introduction
In 2026, choosing a smartphone isn’t just about performance, camera quality, or sleek design—it’s also about how easy it is to repair. As devices become more sophisticated, repairing them has often become a complex and costly process. However, some manufacturers are now prioritizing repairability, designing phones that make it simple to replace batteries, screens, cameras, and other components.
Repair-friendly phones not only save users money but also contribute to a more sustainable tech ecosystem. They reduce electronic waste, extend device lifespan, and offer users the flexibility to perform DIY repairs when needed. Whether you’re a tech-savvy enthusiast or someone who just wants to avoid costly repairs, understanding which phones are easy to fix is more important than ever.
In this guide, we’ll explore the top 5 phones designed for easy repairability in 2026, highlighting their features, repair scores, and practical tips for keeping your device in top shape. By the end, you’ll know which smartphones combine cutting-edge technology with accessibility and longevity, empowering you to make smarter, eco-conscious choices for the future.
In 2026, phone repairability has become a major focus for both manufacturers and consumers. With environmental concerns, cost-saving measures, and the desire to extend the lifespan of devices, more people are prioritizing phones that are easy to repair. This guide explores the top 5 phones designed for easy repairability in 2026, showing you which devices allow hassle-free screen replacements, battery swaps, and component repairs. Whether you’re a DIY enthusiast or want a phone that won’t break the bank in repair costs, this article has you covered.
Repairability is no longer just a niche concern. With electronics becoming a major part of daily life, choosing a repair-friendly phone has multiple benefits. From cost savings to environmental responsibility, understanding why repairability matters is key for any savvy consumer.
Environmental Benefits of Repairable Phones
Electronic waste is a growing concern worldwide. According to the United Nations Environment Programme, more than 57 million metric tons of e-waste are generated each year. Repairable phones help reduce this by allowing users to replace only damaged components instead of discarding the entire device. Modular designs and readily available parts extend the phone’s life, significantly lowering environmental impact.
Cost Savings for Users
Repairable phones save money in the long run. Instead of paying for a full replacement due to a broken screen or battery failure, users can perform affordable repairs. For example, swapping a battery in a modular device often costs a fraction of the phone’s total price. This financial advantage makes repair-friendly phones highly attractive for budget-conscious buyers.
Enhancing Longevity and Performance
Phones that are easy to repair typically maintain performance longer. Regular component replacements, like batteries or worn-out buttons, prevent slowdowns and malfunctions that often plague non-repairable models. This ensures your device stays reliable and fast for years.
Repairability isn’t accidental; it’s designed. Several factors contribute to a phone being easy to repair.
Modular Components
Phones with modular components allow you to replace parts independently. Commonly modular parts include:
Batteries
Screens
Cameras
Charging ports
This modularity is a major factor in the repairability score, a rating system used by iFixit and other repair advocacy groups.
Availability of Genuine Parts
Repairing your phone is easier when manufacturers provide genuine replacement parts. OEM (Original Equipment Manufacturer) parts ensure compatibility, reduce risks of damage, and maintain warranties. In 2026, many leading brands now sell repair kits with step-by-step instructions.
User-Friendly Design
A repairable phone typically has:
Accessible screws instead of glued components
Minimal adhesive
Clear service manuals or online guides
These design choices empower users and reduce the chance of errors during repairs.
Top 5 Phones for Easy Repair in 2026
Now, let’s explore the five best phones in 2026 that are designed for easy repairability, along with their unique features, pros, and cons.
1. Fairphone 6
Overview: Fairphone has long been a leader in ethical, repairable devices. The Fairphone 6 continues this trend with a fully modular design.
Repair Features:
Easily replaceable battery, screen, and camera modules
Minimal screws, no adhesive
Step-by-step repair guides available online
Pros:
Strong ethical sourcing of components
Exceptional repairability score
Long software support
Cons:
Moderate performance compared to flagship models
Limited availability in some regions
2. iPhone 16
Overview: Apple has improved repairability significantly with the iPhone 16, acknowledging user demand for longer-lasting devices.
Repair Features:
Battery and screen replacements are now easier
Official repair kits available from Apple stores
Improved internal layout for easier component access
Pros:
Premium design and performance
Extensive support network
High resale value
Cons:
Repairs still cost more than other modular devices
Manufacturer manuals – Apple, Samsung, Google, Motorola official guides
YouTube tutorials – visual demonstrations for complex repairs
Frequently Asked Questions
1. Are all flagship phones hard to repair?
Not necessarily. While many flagship phones use glued components, models like iPhone 16 and Samsung Galaxy S26 are now designed with easier repairability in mind.
2. Can I replace my phone battery at home safely?
Yes, with proper tools, OEM batteries, and safety precautions, battery replacement can be done at home without damaging the phone.
3. Does repairing a phone void its warranty?
It depends on the brand. Using OEM parts and following official repair guides usually preserves the warranty, but unauthorized repairs can void it.
4. How can I tell if a phone is repairable before buying?
Check iFixit repair scores, look for modular designs, and see if official parts and guides are available.
5. Are repair-friendly phones more expensive?
Not necessarily. While some modular phones cost more, many mid-range options like Google Pixel 8a and Motorola Edge 40 offer excellent repairability at affordable prices.
6. Where can I buy genuine replacement parts?
Parts are available from official manufacturer stores, authorized resellers, and verified online retailers. Using genuine parts ensures safety and performance.
Conclusion
Repairability in 2026 is more important than ever. Phones like the Fairphone 6, iPhone 16, Samsung Galaxy S26, Google Pixel 8a, and Motorola Edge 40 showcase the shift toward devices that last longer, cost less to maintain, and reduce e-waste. By choosing a repair-friendly phone and understanding basic repair procedures, users can enjoy longer-lasting devices without breaking the bank.
David from Sydney CBD Repair Centre – The Best place to fix mobile phones as 7 Years In A Row! Top Mobile Phone Repair In Sydney. More than 2000 Positive Reviews on Google and Same Day Repairs.
We take pride in delivering exceptional repair services for all major phone brands including Apple, Samsung, Google, and more. Our expert technicians use only genuine parts and offer 90days warranty on repairs. Located in the heart of Sydney CBD, we’re your one-stop solution for all mobile device repairs.
Visit us for:
✓ Same Day Express Repairs
✓ Genuine Parts Guarantee
✓ Professional Technicians
✓ Competitive Pricing
✓ 2000+ 5-Star Google Reviews
✓ 7-Time Award Winner for Best Phone Repairs
The Ultimate Battery Lifespan: Samsung vs. Google Pixel Longevity Secrets Revealed + 7 Power Facts
Introduction: Why Battery Lifespan Matters More Than Ever
In today’s always-connected world, battery lifespan isn’t just a technical detail—it’s a daily quality-of-life issue. Whether you’re navigating, streaming, working, or gaming, your phone’s battery quietly determines how reliable your device feels. When comparing Samsung vs. Google Pixel battery lifespan, users often ask one simple question: Which one lasts longer in real life?
The truth is, both brands invest heavily in battery technology. However, their approaches differ in subtle but important ways. This article breaks down those differences clearly, using real-world logic, expert insights, and practical advice. By the end, you’ll know which phone suits your usage style best—and how to make any battery last longer.
Understanding Smartphone Battery Lifespan Basics
What Battery Lifespan Really Means
Battery lifespan refers to how long a battery maintains usable capacity before noticeable degradation occurs. Most smartphone batteries are rated for around 500–800 full charge cycles, after which capacity drops to about 80%. That doesn’t mean your phone stops working; it just means shorter daily runtime.
Importantly, lifespan isn’t only about time. It’s influenced by charging habits, heat, software optimization, and usage patterns. So, when we compare Samsung vs. Google Pixel, we’re really comparing ecosystems, not just hardware.
Lithium-Ion vs Lithium-Polymer Explained
Both Samsung and Google Pixel primarily use lithium-ion or lithium-polymer batteries. These batteries are lightweight, efficient, and powerful, but they’re sensitive to heat and overcharging. Samsung often favors lithium-polymer designs in flagship models, while Google Pixel typically uses high-density lithium-ion cells optimized by software.
Samsung phones, especially Galaxy S and Galaxy A series, use adaptive power management that learns your habits. Apps you rarely use are restricted in the background, reducing unnecessary drain. Over time, this helps preserve battery lifespan by limiting constant micro-charging cycles.
One UI Battery Optimization
Samsung’s One UI includes detailed battery health tools, power-saving modes, and charging limits. Some models even allow you to cap charging at 85%, a proven method to extend long-term battery health. This feature alone gives Samsung a slight edge in battery lifespan control.
Google Pixel phones lean heavily on artificial intelligence. Adaptive Battery uses machine learning to predict which apps you’ll use and when. Apps you don’t need are restricted aggressively, reducing background activity.
This AI-driven approach is especially effective for users with consistent daily routines. Over months of use, Pixel phones tend to show slower battery degradation compared to phones without intelligent optimization.
Adaptive Charging in Pixel Phones
Google Pixel devices feature Adaptive Charging, which slows charging overnight and finishes just before you wake up. This reduces stress on the battery, directly improving battery lifespan over time.
Real-World Battery Longevity: Samsung vs. Google Pixel
Daily Usage Scenarios
In light to moderate use—calls, messaging, browsing—both Samsung and Google Pixel easily last a full day. However, Samsung phones often pack larger batteries, which helps during heavy usage like gaming or video streaming.
Pixels, on the other hand, may have smaller batteries but compensate with efficient software. The result? Comparable daily endurance, even if raw capacity differs.
Long-Term Degradation Comparison
After two years, Samsung batteries typically retain around 80–85% capacity, while Google Pixel devices often sit slightly higher, around 82–88%, depending on usage. This suggests Pixel’s software-first approach may offer a small longevity advantage.
Charging Habits and Their Impact on Battery Health
Fast Charging Effects
Fast charging is convenient, but it generates heat. Samsung’s Super Fast Charging and Google’s fast charging both manage heat well, but frequent fast charging can still shorten battery lifespan. Using standard charging when possible helps both brands equally.
Wireless Charging Considerations
Wireless charging is less efficient and produces more heat. Samsung devices with better thermal management handle this slightly better, but Pixel phones benefit from adaptive charging even when wireless.
Software Updates and Battery Longevity
Software support plays a huge role in battery lifespan. Google Pixel phones receive updates directly from Google, often improving efficiency over time. Samsung has made major strides here, now offering long-term updates and security patches.
Regular updates mean better optimization, fewer background bugs, and improved power management—key factors in long-term battery health.
Repairability and Battery Replacement Options
Battery lifespan doesn’t end when capacity drops. Replacement matters. Samsung batteries are widely available, and repairs are straightforward at professional repair centers. Pixel batteries are also replaceable, though parts availability can vary by region.
Choosing a phone with accessible battery replacement can effectively double the device’s usable life.
Environmental and User Behavior Factors
Heat is the silent battery killer. Leaving your phone in a hot car or gaming while charging accelerates degradation. Both Samsung and Pixel batteries suffer equally under poor conditions. Good habits—moderate brightness, stable temperatures, and smart charging—make a huge difference.
Expert Tips to Maximize Battery Lifespan
Avoid charging to 100% daily
Don’t let battery hit 0% often
Use adaptive charging features
Keep software updated
Reduce heat exposure
Replace battery instead of upgrading phone
These tips apply equally when comparing Samsung vs. Google Pixel battery lifespan.
Frequently Asked Questions (FAQs)
1. Which has better battery lifespan, Samsung or Google Pixel?
Both are excellent, but Pixel has a slight edge due to AI-driven optimization.
2. Do larger batteries always last longer?
Not necessarily. Software efficiency matters just as much as capacity.
3. Is fast charging bad for battery lifespan?
Occasional fast charging is fine. Daily use can speed up degradation.
4. Can battery lifespan be restored?
Not fully, but replacing the battery restores performance.
5. How long should a phone battery last?
Typically 2–3 years before noticeable decline.
6. Are software updates good or bad for battery life?
Usually good. They often improve efficiency and fix drain issues.
For more technical battery insights, visit Battery University (external resource).
Conclusion: Which Brand Truly Lasts Longer?
When it comes to Samsung vs. Google Pixel battery lifespan, there’s no absolute winner—only better fits for different users. Samsung offers robust hardware, larger batteries, and excellent manual controls. Google Pixel shines with intelligent software, adaptive charging, and long-term optimization.
The real secret? Battery lifespan depends as much on you as the phone you choose. With good habits and professional support, both brands can easily last years.
David from Sydney CBD Repair Centre – The Best place to fix mobile phones as 7 Years In A Row! Top Mobile Phone Repair In Sydney. More than 2000 Positive Reviews on Google and Same Day Repairs.
We take pride in delivering exceptional repair services for all major phone brands including Apple, Samsung, Google, and more. Our expert technicians use only genuine parts and offer 90days warranty on repairs. Located in the heart of Sydney CBD, we’re your one-stop solution for all mobile device repairs.
Our commitment to excellence has earned us the trust of thousands of satisfied customers. Whether it’s a cracked screen, battery replacement, or water damage repair, we handle it all with professional care and expertise. Walk in today and experience why we’re Sydney’s #1 choice for mobile phone repairs.
Visit us for:
✓ Same Day Express Repairs
✓ Genuine Parts Guarantee
✓ Professional Technicians
✓ Competitive Pricing
✓ 2000+ 5-Star Google Reviews
✓ 7-Time Award Winner for Best Phone Repairs
Battery Swelling and Screen Lines: Why Replacing One Might Not Fix Both – 9 Powerful Facts Every Phone Owner Should Know
Introduction
Modern smartphones are powerful, sleek, and packed with advanced technology. However, they’re also delicate devices that can suffer from multiple hardware problems at once. Two of the most frustrating issues users face are battery swelling and screen lines. While these problems may appear connected, replacing one damaged component doesn’t always fix the other.
Many phone owners assume that a swollen battery is the direct cause of display lines or flickering screens. In some cases, that’s true. Yet the reality is often more complicated. A damaged display can remain faulty even after installing a new battery, while screen replacement alone may leave dangerous battery problems unresolved.
Understanding how these issues develop can save time, money, and stress. More importantly, it can help prevent further damage to your smartphone and protect your safety.
Battery swelling occurs when gases build up inside a lithium-ion battery. These gases create pressure that expands the battery pack, causing it to bulge inside the phone.
Smartphones today rely heavily on lithium-ion technology because it’s lightweight and efficient. However, these batteries degrade over time. Once damaged, they can become unstable and dangerous.
What Causes a Battery to Swell?
Several factors contribute to battery swelling:
Overcharging
Excessive heat exposure
Physical damage
Manufacturing defects
Aging batteries
Cheap replacement chargers
Power surges
Heat is one of the biggest culprits. Leaving a phone inside a hot car or constantly gaming while charging increases internal temperatures significantly. Over time, this stress damages the battery’s chemical structure.
Using low-quality charging accessories can also accelerate deterioration. Cheap cables and adapters may deliver unstable voltage, which harms battery cells.
Early Warning Signs of Battery Swelling
Spotting battery swelling early can prevent major damage. Common warning signs include:
Warning Sign
What It Means
Screen lifting from frame
Battery pushing against display
Phone overheating
Battery instability
Reduced battery life
Internal cell degradation
Random shutdowns
Power delivery issues
Thick or bulging back cover
Expanding battery pack
If you notice any of these symptoms, stop using the phone immediately and seek professional assistance.
That’s why reputable technicians replace swollen batteries immediately rather than attempting temporary fixes.
How Technicians Diagnose Both Problems
Professional repair technicians follow a detailed inspection process to identify the true source of the issue.
Accurate diagnosis prevents unnecessary repairs and saves customers money.
Professional Inspection Process
A complete diagnostic typically includes:
Visual inspection
Battery health testing
Display functionality checks
Internal connector examination
Thermal analysis
Charging circuit testing
Technicians may disassemble the device to inspect internal pressure damage.
Testing Internal Components
Specialized tools help determine whether the screen or motherboard has suffered permanent damage.
Technicians often test:
Component
Purpose
OLED panel
Detect pixel damage
Battery voltage
Measure battery stability
Display flex cable
Check signal transmission
Motherboard circuits
Identify shorts
Charging IC
Verify power management
Without these tests, replacing parts becomes guesswork.
Repair vs Replacement: Which Option Is Better?
Deciding whether to repair or replace a phone depends on several factors.
Sometimes repairing both the battery swelling and screen lines makes financial sense. Other times, replacement is the smarter choice.
When Repair Is Worth It
Repairing the device may be worthwhile if:
The phone is relatively new
Damage is limited
Genuine parts are available
The motherboard is intact
Repair costs remain reasonable
Flagship devices often justify repair because replacement phones cost significantly more.
When It’s Time for a New Phone
Replacement may be the better option when:
Repair costs exceed device value
The motherboard is damaged
Multiple components have failed
Water damage is severe
Battery swelling caused extensive internal stress
Older devices sometimes become unreliable even after repair.
Preventing Battery Swelling and Screen Lines
Preventative care dramatically reduces the risk of both battery swelling and screen damage.
Good habits extend smartphone lifespan and improve performance.
Charging Habits That Matter
Healthy charging practices include:
Avoid overnight charging constantly
Use genuine chargers
Keep battery levels between 20% and 80%
Avoid heavy gaming while charging
Disconnect chargers during overheating
These simple habits reduce battery stress significantly.
Environmental Factors to Avoid
External conditions also play a major role.
Avoid:
Direct sunlight exposure
Hot vehicles
Humid environments
Cheap charging accessories
Excessive phone pressure inside pockets
Protective cases can help minimize physical damage, but they won’t stop internal battery deterioration entirely.
Importance of Professional Repairs
DIY repairs may seem tempting, especially with online tutorials everywhere. However, modern smartphones are extremely delicate.
Improper handling can worsen both battery swelling and screen lines.
Professional repair centers offer:
Genuine replacement parts
Safe battery disposal
Proper adhesive sealing
Water resistance restoration
Warranty-backed repairs
Experienced technicians also identify hidden issues that casual users may miss.
For official safety guidance regarding lithium-ion batteries, visit Battery University.
Frequently Asked Questions
Can battery swelling cause green lines on a phone screen?
Yes. Battery swelling can place pressure on OLED displays, damaging delicate layers and causing green or white vertical lines.
Will replacing the battery remove screen lines?
Not always. If the display has already suffered permanent damage, screen lines may remain even after battery replacement.
Is a swollen phone battery dangerous?
Yes. Swollen lithium-ion batteries can leak, overheat, catch fire, or explode if ignored.
Why does my screen still flicker after replacing the battery?
The display connector, OLED panel, or motherboard may already be damaged from heat or internal pressure.
Can screen lines disappear on their own?
Temporary lines caused by loose connectors may disappear briefly. However, permanent OLED damage usually worsens over time.
Should I stop using my phone if the battery swells?
Absolutely. Continued use increases safety risks and may cause further internal damage.
Is it cheaper to repair or replace a phone with both issues?
It depends on the phone model and damage severity. High-end phones are often worth repairing, while older devices may be better replaced.
Conclusion
Battery swelling and screen lines are serious smartphone problems that frequently appear together. However, replacing one component doesn’t always solve the other issue.
A swollen battery can permanently damage a display, while a faulty screen repair may overlook dangerous battery instability. That’s why proper diagnostics matter so much.
Understanding the relationship between battery swelling and screen lines helps users make smarter repair decisions. More importantly, it protects both device performance and personal safety.
Professional technicians can accurately identify whether the battery, screen, motherboard, or multiple components require attention. Acting quickly often prevents further damage and reduces repair costs.
If your phone shows signs of swelling, overheating, or screen distortion, don’t ignore it. Early intervention can make all the difference.
David from Sydney CBD Repair Centre – The Best place to fix mobile phones as 7 Years In A Row! Top Mobile Phone Repair In Sydney. More than 2000 Positive Reviews on Google and Same Day Repairs.
We take pride in delivering exceptional repair services for all major phone brands including Apple, Samsung, Google, and more. Our expert technicians use only genuine parts and offer 90days warranty on repairs. Located in the heart of Sydney CBD, we’re your one-stop solution for all mobile device repairs.
Our commitment to excellence has earned us the trust of thousands of satisfied customers. Whether it’s a cracked screen, battery replacement, or water damage repair, we handle it all with professional care and expertise. Walk in today and experience why we’re Sydney’s #1 choice for mobile phone repairs.
Visit us for:
✓ Same Day Express Repairs
✓ Genuine Parts Guarantee
✓ Professional Technicians
✓ Competitive Pricing
✓ 2000+ 5-Star Google Reviews
✓ 7-Time Award Winner for Best Phone Repairs
Sydney CBD Repair Centre – Where Quality Meets Reliability.
Call : +61280114119
Website: Sydney CBD Repair Centre