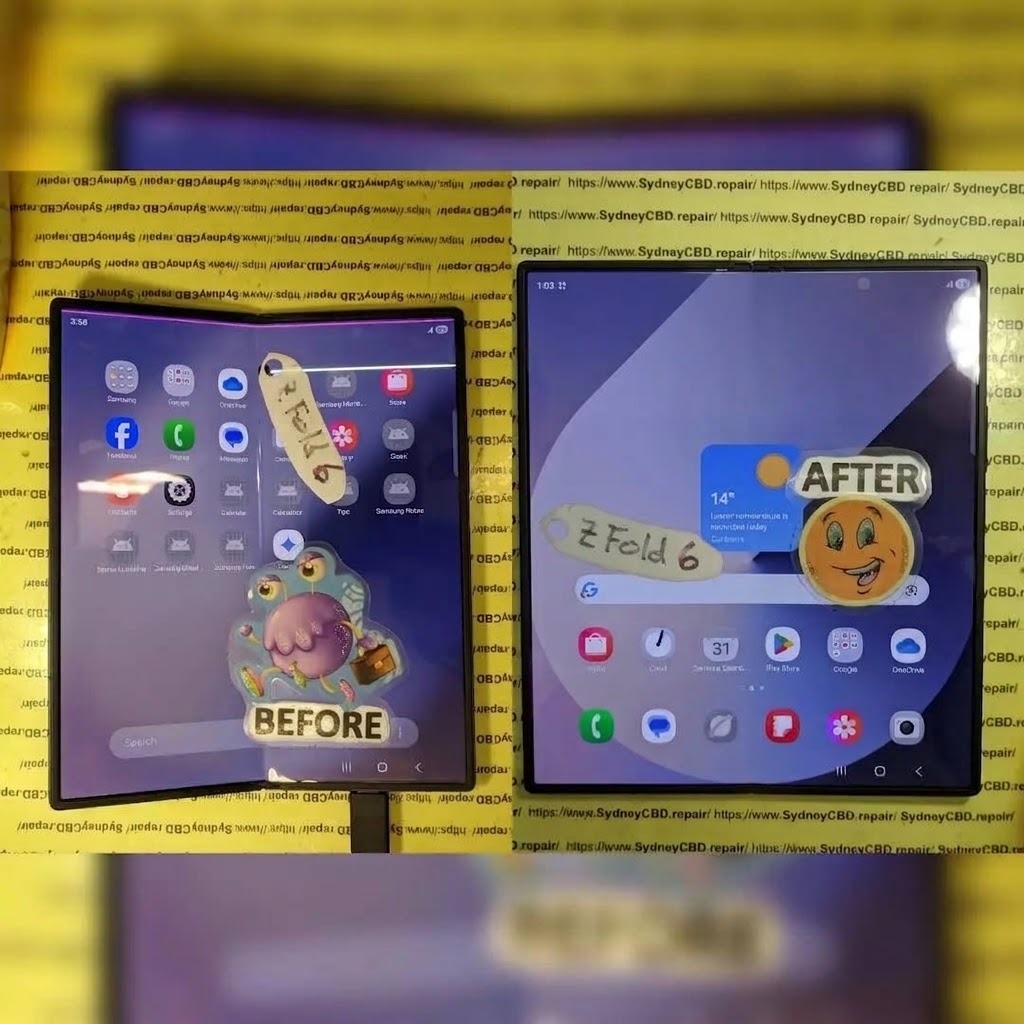
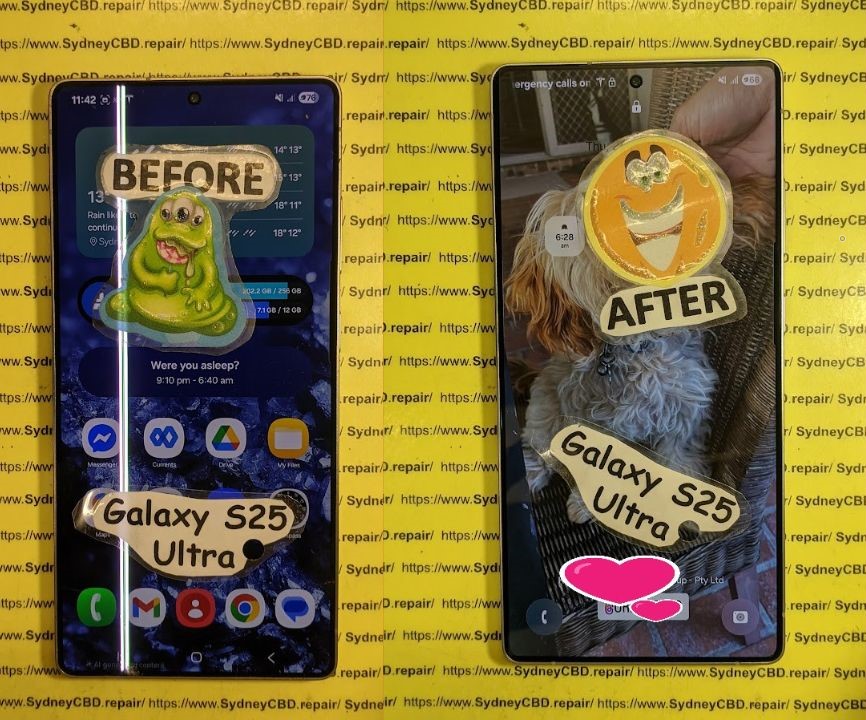
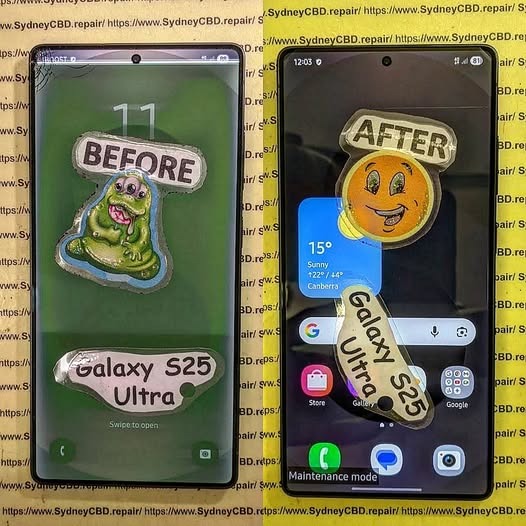
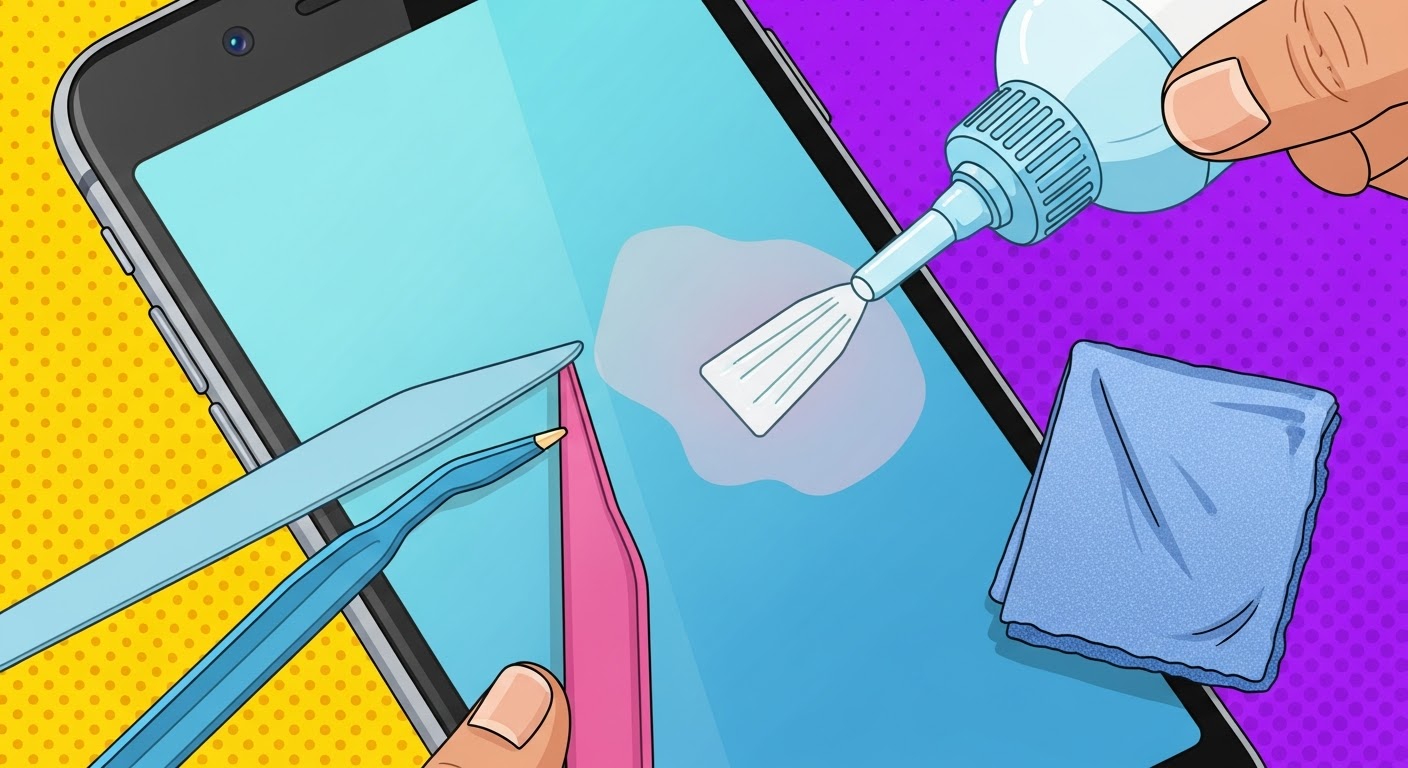
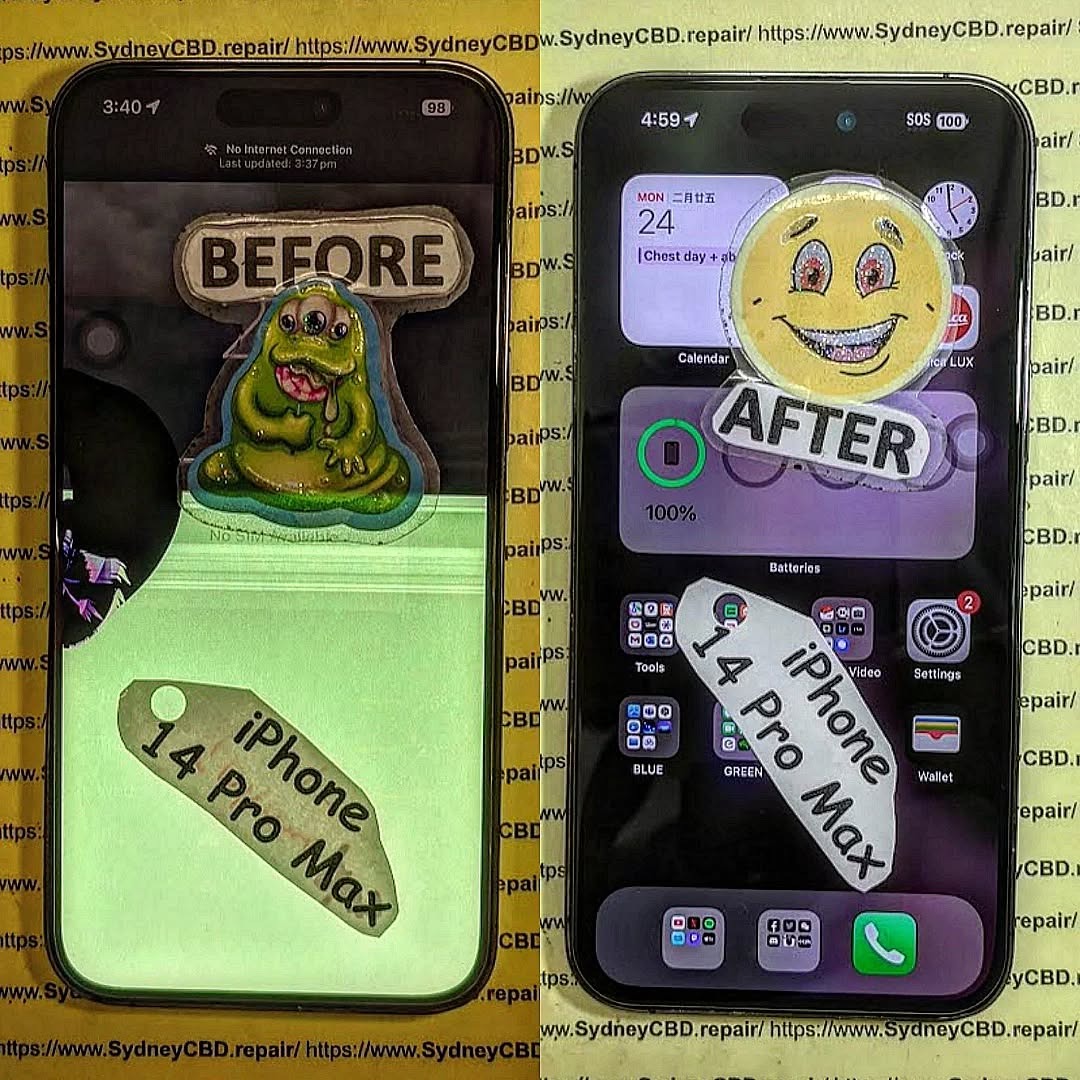
Solving The Samsung Phones Green Line Display Mystery During Expert Screen Panel Swaps: Ultimate Guide + 7 Powerful Fixes
📱 Introduction to Samsung Green Line Display Issue
What is the Samsung Green Line Display Problem?
The Samsung green line display issue is one of the most frustrating problems encountered by technicians and users alike. It appears as a vertical green line running across the screen, often permanent and highly visible. This problem frequently arises after drops, overheating, or even software updates.
Interestingly, the issue becomes even more complicated during screen panel swaps, where replacing the display doesn’t always eliminate the green line. That’s where deeper diagnostics come into play.
Why It Matters During Screen Panel Swaps
When performing repairs, especially premium AMOLED replacements, the expectation is a flawless display. However, many technicians encounter a persistent Samsung green line display even after installing a new panel.
This raises a critical question: is the problem truly the screen—or something deeper within the device?
Samsung devices use AMOLED technology, which offers vibrant colors but is sensitive to damage. Over time, individual pixels may fail, resulting in a Samsung green line display.
Flex Cable Damage
The display flex cable connects the screen to the motherboard. Even slight tears or bends can cause signal disruption, leading to vertical lines.
Software Glitches
Sometimes, software updates or bugs can mimic hardware issues. A quick factory reset or firmware reinstall may resolve what appears to be a hardware fault.
Manufacturing Defects
Certain batches of devices are more prone to this issue due to inherent design or production flaws.
A magnifying tool can reveal micro-damage invisible to the naked eye.
Diagnostic Tools and Apps
Use built-in diagnostic menus or apps to test:
RGB display
Touch responsiveness
Pixel integrity
Identifying Hardware vs Software Issues
A simple rule:
If the line appears in recovery mode → Hardware issue
If not → Possibly software-related
🔧 Expert Screen Panel Swap Process Explained
Tools Required
Heat gun or separator
Precision screwdrivers
Anti-static mat
High-quality adhesive
Replacement AMOLED panel
Step-by-Step Replacement
Power off the device
Heat and remove the back cover
Disconnect battery
Remove faulty display
Install new panel carefully
Reassemble device
Common Mistakes to Avoid
Overheating components
Using low-quality panels
Improper cable alignment
These mistakes can actually cause a Samsung green line display after repair.
✅ Post-Repair Testing and Calibration
Display Calibration Methods
After replacement, calibrate brightness and color settings to ensure uniform output.
Burn-in Testing
Run static images for 15–30 minutes to detect any abnormal lines or ghosting.
Final Quality Assurance
Checklist:
No visible lines
Smooth touch response
Even brightness
🛡️ Preventing Samsung Green Line After Repair
Proper Handling Practices
Avoid:
Excessive bending
Static discharge
Overheating
Choosing Quality Replacement Panels
Cheap panels are often the root cause of recurring issues. Always opt for OEM-grade parts.
Environmental Considerations
Humidity and heat can degrade display performance over time.
🔬 Advanced Repair Techniques
Micro-soldering Fixes
If the issue lies in the motherboard, micro-soldering may repair broken connections.
IC Replacement
Display IC failure can cause persistent lines. Replacing it requires expert-level skills.
OLED Layer Repair
In rare cases, internal OLED layers can be repaired—but this is highly specialized.
💰 Cost vs Value of Repair
When to Repair vs Replace
Scenario
Recommendation
Minor line issue
Repair
Severe motherboard damage
Replace device
High-end phone
Repair worth it
Long-term Device Health
A proper repair ensures:
Extended lifespan
Better resale value
Improved performance
❓ FAQs
1. Why does the green line remain after screen replacement?
It may be due to motherboard issues or faulty connectors rather than the screen itself.
2. Can software updates fix the Samsung green line display?
In rare cases, yes. But most issues are hardware-related.
3. Is the green line dangerous?
No, but it indicates underlying hardware damage.
4. How much does it cost to fix?
Costs vary depending on model and severity, typically ranging from moderate to high.
5. Can I fix it myself?
Only if you have proper tools and experience. Otherwise, it’s risky.
6. How do I prevent it from happening again?
Use protective cases, avoid overheating, and choose quality repairs.
🔚 Conclusion
The Samsung green line display issue isn’t just a simple screen defect—it’s often a complex interplay of hardware, software, and repair quality. While screen panel swaps are a common solution, they don’t always address the root cause.
By following expert diagnostics, using high-quality components, and applying advanced repair techniques when needed, technicians can confidently solve this persistent problem. In the end, attention to detail and professional expertise make all the difference.
David from Sydney CBD Repair Centre – The Best place to fix mobile phones as 7 Years In A Row! Top Mobile Phone Repair In Sydney. More than 2000 Positive Reviews on Google and Same Day Repairs.
We take pride in delivering exceptional repair services for all major phone brands including Apple, Samsung, Google, and more. Our expert technicians use only genuine parts and offer 90days warranty on repairs. Located in the heart of Sydney CBD, we’re your one-stop solution for all mobile device repairs.
Our commitment to excellence has earned us the trust of thousands of satisfied customers. Whether it’s a cracked screen, battery replacement, or water damage repair, we handle it all with professional care and expertise. Walk in today and experience why we’re Sydney’s #1 choice for mobile phone repairs.
Visit us for:
✓ Same Day Express Repairs
✓ Genuine Parts Guarantee
✓ Professional Technicians
✓ Competitive Pricing
✓ 2000+ 5-Star Google Reviews
✓ 7-Time Award Winner for Best Phone Repairs
Common Mistakes That Ruin Replacement Screens and How to Troubleshoot Them: 11 Critical Mistakes to Avoid
Introduction
Replacing a damaged phone screen can make your device look and feel brand new, but one small mistake during installation can lead to flickering, dead pixels, touchscreen problems, or even a completely black display. Understanding the common mistakes that ruin replacement screens is essential for protecting your device, avoiding unnecessary repair costs, and ensuring long-lasting performance. Whether you’re repairing an iPhone, Samsung Galaxy, Google Pixel, or another smartphone, knowing what can go wrong helps you make smarter decisions. In this guide, we’ll explore 11 critical screen replacement mistakes, explain how to troubleshoot common display issues, and share expert tips to help you achieve a safe and reliable repair. If you want to protect your investment and keep your phone working at its best, these practical insights will help you get started.
A smartphone screen is more than a piece of glass. It’s a carefully designed assembly that may include a protective glass layer, a touch-sensitive digitiser, an LCD or OLED panel, flexible cables, connectors, and supporting components.
During a screen replacement, each part must be handled correctly. A display can look perfect when it’s removed from its packaging but fail after installation because of pressure, a damaged connector, excessive heat, or an unsuitable replacement part.
Understanding these risks is the first step toward avoiding the common mistakes that ruin replacement screens.
LCD, OLED, and AMOLED Display Differences
Before beginning a repair, it’s important to understand the type of display fitted to the device.
Burn-in, pixel damage, pressure-related black spots
AMOLED
A type of active-matrix OLED display
Flexible panel damage, dead pixels, line defects
Flexible OLED
Designed to bend within specific limits
Creasing, cracked internal layers, cable damage
Although these technologies share some features, they aren’t interchangeable in every device. A replacement must match the phone’s model, regional variant, connector layout, and supported functions.
For example, fitting an unsuitable display to a premium smartphone may cause reduced brightness, inaccurate colours, poor touch response, or problems with an under-display fingerprint reader.
Signs of a Damaged Replacement Screen
A replacement screen doesn’t always fail completely. Sometimes, the damage appears gradually or affects only one function.
Look out for these warning signs:
Green, pink, or white lines across the display.
Black patches that spread over time.
Touchscreen areas that don’t respond.
Random touches or ghost touches.
Flickering when adjusting brightness.
Unusual colour changes or uneven brightness.
A screen that works intermittently.
A display that separates from the frame.
Fingerprint recognition that stops working after repair.
These symptoms can result from a faulty display, but they may also point to connector damage, a defective motherboard circuit, a damaged frame, or a software issue.
Important: If a screen becomes unusually hot, smells burnt, or shows signs of battery swelling, stop using the device and seek professional inspection. Don’t press a swollen battery or continue charging a device that may be unsafe.
Mistake 1: Choosing a Low-Quality Replacement Screen
One of the biggest mistakes during phone screen replacement is choosing a display based on price alone.
Online marketplaces offer replacement screens at many price points. Some are suitable aftermarket parts, while others may have inconsistent quality, incorrect specifications, or poor manufacturing standards.
A low price doesn’t automatically mean a screen is bad. However, an unknown supplier that offers no clear specifications, warranty, or return policy creates unnecessary risk.
Why Screen Quality Matters
The display affects several important parts of the user experience, including:
Brightness and outdoor visibility.
Colour accuracy and contrast.
Touchscreen sensitivity.
Power consumption.
Refresh rate and smooth scrolling.
Fingerprint sensor compatibility.
Durability under normal use.
For example, a cheaper LCD conversion may not deliver the same black levels, thickness, brightness, or power efficiency as the original OLED display. It may also fit differently within the frame.
On some phones, an unsuitable replacement can interfere with proximity sensors, ambient light sensors, or biometric functions.
How to Avoid Poor-Quality Parts
Before purchasing a replacement, check the exact model number and compare the supplier’s specifications with those of the original screen.
Ask the supplier or repair centre:
Is the replacement designed for the exact device model?
Is it an original service part, refurbished original display, or aftermarket assembly?
Are touch response and brightness tested before dispatch?
Does the replacement support the device’s required sensors and biometric functions?
What warranty applies if the display is defective?
Be careful with sellers who describe every product as “original quality” without explaining what that means.
A genuine service part, a refurbished original panel, and a third-party replacement aren’t necessarily the same thing. Clear descriptions help you understand what you’re buying.
When to Replace a Faulty Screen Again
If a newly installed display has dead pixels, persistent lines, or severe touch problems, don’t assume that another repair attempt will automatically solve the issue.
A technician should inspect the display and its connections before deciding whether to replace the panel, repair a connector, or investigate the motherboard.
The best approach is to identify the cause first. Replacing parts without a proper diagnosis can increase the cost of the repair.
Mistake 2: Applying Too Much Heat
Heat is often necessary when removing a smartphone screen. Manufacturers use adhesives to secure displays to their frames, and controlled warming can soften those adhesives.
However, excessive heat can damage the very components you’re trying to save.
What Can Go Wrong?
Too much heat may:
Damage an OLED or LCD panel.
Weaken or deform plastic components.
Affect battery safety.
Damage adhesive around cameras and sensors.
Harm nearby flex cables.
Cause discolouration or display defects.
Modern smartphones contain compact components packed closely together. A repair technique that works on one model may be unsuitable for another.
Foldable phones require particular care because their flexible displays, hinges, and internal structures have different limitations from traditional smartphones.
How to Use Heat More Safely
Always follow the device-specific repair procedure. Use a controlled heating tool and suitable temperature monitoring rather than guessing based on how hot the phone feels.
A safer approach includes:
Removing the device’s power source according to the manufacturer’s procedure.
Checking the manufacturer’s guidance on battery and screen removal.
Applying controlled heat only where needed.
Using suitable opening tools.
Avoiding concentrated heat near batteries, cameras, and delicate cables.
Allowing components to cool before further handling.
Don’t assume that a universal temperature setting is safe for every phone. Different adhesives, display assemblies, and frame materials have different requirements.
Troubleshooting Heat-Related Display Damage
If the replacement screen develops flickering, lines, or black patches immediately after heated installation, stop working on the device.
Let it cool naturally in a safe environment. Don’t use ice, a freezer, or sudden cooling methods.
Once the device is safe to handle, a qualified technician can determine whether the display panel, connector, or another component has been damaged.
If the replacement panel itself has failed, reconnecting it repeatedly is unlikely to fix the underlying damage.
Mistake 3: Using Excessive Force During Installation
A replacement screen should fit correctly without being forced into position.
When a display doesn’t sit flush with the frame, the problem may be caused by old adhesive, bent metal, misplaced cables, or a replacement assembly that doesn’t match the device.
Pushing harder may turn a simple fitting problem into an expensive repair.
Why Pressure Damages Displays
OLED panels are particularly sensitive to localised pressure. Excessive force can damage their thin internal layers even when the outer glass remains intact.
Common results include:
Black ink-like patches.
Vertical or horizontal lines.
Uneven brightness.
Dead pixels.
Cracked internal display layers.
Touchscreen failure.
These defects may appear immediately or become more noticeable after the device has been used for a while.
Correct Installation Techniques
Before fitting a replacement screen, inspect the frame and remove old adhesive carefully.
Check that:
The replacement matches the device’s dimensions.
Flex cables are positioned correctly.
No screws or loose components are trapped underneath.
The frame isn’t bent.
The adhesive is applied in the correct locations.
The display rests evenly in its housing.
Never use screws, clamps, or excessive hand pressure to force a screen into place.
Some devices require specific installation fixtures or controlled clamping procedures. Follow the manufacturer’s instructions for the model being repaired.
What If the Screen Already Has Black Spots?
If black spots appear after installation, avoid pressing them to see whether they disappear.
Pressure marks on an LCD may sometimes resemble other display faults, while black patches on OLED panels can indicate damaged pixels or internal layers. In either case, continued pressure can make the problem worse.
A professional inspection can help determine whether the display assembly needs replacement.
Mistake 4: Damaging Flexible Display Cables
Flexible printed circuits, commonly called flex cables, connect the screen to the phone’s mainboard.
These thin cables carry signals and power needed for the display and touchscreen. Some assemblies also use separate connections for fingerprint readers or other components.
Although flex cables look simple, they can be surprisingly delicate.
Common Flex Cable Mistakes
Damage can occur when someone:
Pulls a cable instead of releasing its connector.
Folds a cable too sharply.
Uses a metal tool near delicate connections.
Traps a cable beneath the display.
Repeatedly reconnects a damaged connector.
Installs a screen with an incompatible cable layout.
A cable can also be damaged by incorrect disassembly, even if the replacement screen itself is perfectly good.
How to Prevent Flex Cable Damage
Use appropriate nonconductive tools where specified and follow the correct disassembly sequence.
Disconnect connectors carefully, using the designated release point rather than pulling on the cable itself.
Before installation, inspect the cable for tears, creases, damaged contacts, or unusual bends.
Never force a connector into place. If it doesn’t align easily, stop and check the orientation.
Troubleshooting a Black Screen Caused by a Connection Problem
If a phone powers on but the screen remains black after replacement, a loose display connector is one possible cause.
However, the same symptom can result from a defective screen, a discharged battery, motherboard damage, or another hardware fault.
A trained technician can isolate the cause by checking the display connection and using a known-good compatible part when appropriate.
Avoid repeatedly disconnecting and reconnecting components without following the device’s power-isolation procedure.
Mistake 5: Connecting the Battery at the Wrong Time
Electrical safety is an essential part of smartphone repair.
On many devices, the battery should be disconnected before the display connector is removed or attached. The exact procedure depends on the model, so manufacturer guidance should always take priority.
Working on powered circuitry can increase the risk of short circuits and component damage.
Why Battery Disconnection Matters
A metal tool can accidentally bridge electrical contacts. Even a brief short circuit may damage a connector, display circuit, or power-management component.
Possible consequences include:
A replacement screen that won’t turn on.
Touchscreen failure.
Damage to a display power circuit.
Connector overheating.
Additional motherboard repairs.
A screen that worked before installation may stop functioning if a connection is disturbed while the circuit is powered.
A Safer Power-Isolation Procedure
Before starting a repair:
Review the correct disassembly instructions.
Power off the device.
Disconnect the battery at the stage specified by the repair procedure.
Handle connectors with suitable tools.
Reconnect components in the prescribed order.
Complete the required checks before sealing the device.
Some devices contain glued-in batteries or complex power arrangements that make repair more difficult. If you lack the correct tools or experience, professional service is the safer option.
If the Replacement Screen Doesn’t Turn On
Don’t assume the panel is defective immediately.
First, consider whether the device has sufficient battery charge and whether it shows other signs of power, such as vibration or sound. These clues can help a technician narrow down the fault.
The display connector, replacement panel, and board-level circuitry may all need testing.
If there’s evidence of a short circuit or overheating, stop attempting to power on the device until it’s been inspected.
Mistake 6: Forgetting to Test the Screen Before Sealing
Sealing a phone before testing the replacement display is a costly mistake.
Once adhesive has been applied and the display has been fully installed, reopening the device can take additional time and may damage the new screen.
Testing beforehand helps catch faults while the components remain accessible.
What Should You Test?
Before final sealing, follow the manufacturer’s procedure to test the replacement assembly safely.
Check the following where applicable:
Display brightness and uniformity.
Touch response across the entire screen.
Multi-touch performance.
Colour reproduction.
Dead pixels and display lines.
Proximity sensor operation.
Ambient light sensor response.
Fingerprint recognition.
Front camera and earpiece operation.
Charging and normal device startup.
Not every function is part of the display assembly, but nearby components can be affected during disassembly.
A Practical Touchscreen Test
Open a drawing application or another suitable touch-testing interface.
Slowly draw lines across the screen in multiple directions. Pay attention to the corners, edges, and areas around the keyboard.
If the lines break unexpectedly or touches aren’t registered, investigate the problem before sealing the phone.
For devices with multi-touch support, test gestures such as pinching and zooming.
Don’t rely on a single tap in the middle of the screen. Partial touchscreen failures can go unnoticed without a systematic test.
Why Testing Saves Money
Suppose a technician seals a device and later discovers that the upper section of the touchscreen doesn’t respond.
The phone may need to be opened again, the adhesive removed, and the connections inspected. This adds labour and creates another opportunity to damage the display.
Testing early makes troubleshooting more efficient and reduces unnecessary rework.
Mistake 7: Using Too Much Adhesive
Adhesive holds the replacement display in position and helps maintain the device’s intended fit.
However, more adhesive doesn’t mean a stronger or better repair.
Excessive or incorrectly placed adhesive can interfere with sensors, enter unwanted areas, or prevent the display from sitting properly.
Common Adhesive Problems
Too much adhesive may cause:
Uneven display seating.
Pressure on the screen assembly.
Adhesive residue near cameras or sensors.
Poor alignment.
Difficulty removing the screen during future repairs.
Inadequate sealing despite the extra material.
Using the wrong adhesive can also create problems. Household glue and general-purpose superglue aren’t appropriate substitutes for device-specific repair materials.
How to Apply Adhesive Correctly
Use the specified adhesive type and follow the manufacturer’s placement instructions.
Before applying new adhesive:
Remove old adhesive without damaging the frame.
Clean the bonding surfaces using an approved method.
Allow surfaces to dry completely.
Check that cables and components are correctly positioned.
Apply adhesive only where required.
Align the display carefully.
Follow the specified curing or pressing procedure.
Avoid improvising with excessive adhesive to compensate for a bent frame or an incorrectly sized replacement screen.
Does New Adhesive Restore Water Resistance?
Not necessarily.
A replacement adhesive seal may help restore the device’s intended assembly, but it doesn’t automatically guarantee the original water-resistance rating.
Water resistance depends on the device’s design, condition, seal quality, and correct installation. Some manufacturers also require specific testing equipment to verify the repair.
Don’t assume that a phone is waterproof simply because the display has been resealed.
Mistake 8: Ignoring Dust, Dirt, and Static Electricity
A clean repair environment helps protect delicate electronics and improves the finished result.
Dust beneath a screen can be visible during normal use, especially against a white background. Dirt around connectors can also interfere with reliable electrical contact.
Static electricity presents another risk because sensitive electronic components can be damaged by electrostatic discharge.
How Contamination Affects Repairs
Common problems include:
Dust trapped between the display and glass.
Debris preventing proper screen alignment.
Contaminated connector contacts.
Particles interfering with adhesive.
Scratches caused by debris during installation.
Even a small particle trapped in the wrong place can create a visible blemish or pressure point.
Best Practices for a Clean Workspace
Use a clean, well-lit workbench and suitable tools.
Before installation:
Remove loose debris from the frame.
Inspect the replacement screen under good lighting.
Keep adhesive surfaces clean.
Use appropriate electronic-component cleaning products.
Follow electrostatic-discharge precautions.
Store removed components in suitable containers.
Don’t use household cleaning sprays directly on the exposed electronics. Some products leave residue or damage sensitive materials.
Why Static Protection Matters
Technicians should use suitable electrostatic-discharge protection, such as a properly grounded ESD mat and wrist strap where appropriate.
Avoid working on sensitive components in an environment that encourages static buildup.
A component damaged by static electricity may not fail immediately. It may instead develop intermittent problems that are difficult to diagnose later.
Mistake 9: Overlooking Frame Damage
Sometimes, the replacement screen isn’t the problem at all.
A phone that has been dropped may have a bent frame, damaged mounting points, or deformed edges. Installing a new display without addressing these problems can cause the replacement to sit unevenly.
Signs of Frame Damage
Look for:
Gaps around the display.
Bent corners.
Uneven edges.
Damaged screw holes.
Distorted mounting points.
Previous repairs that used excessive adhesive.
A screen that repeatedly lifts from one side.
A damaged frame can place uneven pressure on the replacement panel.
How to Check the Frame
Before installing a screen, compare the frame with the device’s expected shape and inspect the mounting points.
Remove old adhesive carefully and check for hidden damage around the corners.
Don’t attempt to bend a frame back into shape while the display is installed. This can damage the panel and other internal components.
If the frame is significantly deformed, a suitable housing repair or replacement may be necessary.
Why Foldable Phones Need Extra Care
Foldable smartphones have more complex mechanical structures than traditional phones.
The hinge, flexible display, protective layers, and internal cables must work together. A screen that appears intact externally may still have internal damage.
For this reason, folding-screen repairs should follow model-specific procedures. Forcing a foldable display into position or ignoring hinge problems can lead to repeat failures.
Mistake 10: Ignoring Fingerprint and Sensor Calibration
Modern smartphones often include features that depend on the display and surrounding components working together.
These may include under-display fingerprint readers, proximity sensors, ambient light sensors, and face-recognition systems.
Replacing the screen can disturb these components or introduce compatibility issues.
Why Fingerprint Recognition May Stop Working
An under-display fingerprint reader relies on a particular relationship between the sensor and the display assembly.
A replacement with different optical characteristics or unsuitable specifications may reduce recognition performance.
Other possible causes include:
A loose sensor connector.
Incorrectly positioned components.
A damaged fingerprint sensor.
Software configuration issues.
A required calibration or registration procedure.
Not every device requires the same calibration process. Some require manufacturer-supported procedures, while others simply need fingerprints to be registered again.
Troubleshooting Sensor Problems
Start by confirming that the replacement is compatible with the exact device model.
Then follow the manufacturer’s recommended diagnostic and calibration process.
If the sensor still fails, a technician should inspect the connections and related components.
Avoid promising that every biometric feature will work after any third-party screen replacement. Compatibility depends on the specific phone, the replacement part, and the repair procedure.
What About Face Recognition?
Face recognition may use components that are separate from the display, but those components can still be affected during screen removal.
For example, careless handling around the earpiece or front sensor area may damage a cable or interfere with component alignment.
Test biometric functions before returning the device to its owner, and disclose any limitations that cannot be resolved through normal repair procedures.
Mistake 11: Skipping Final Quality Checks
A screen that turns on isn’t necessarily a successful repair.
Final quality checks help confirm that the display, touch functions, surrounding components, and physical assembly are working as expected.
Without them, a customer may discover a problem only after leaving the repair centre.
Essential Final Checks
Test
What to look for
Display
No unexpected lines, black patches, or flickering
Touchscreen
Accurate response across the entire screen
Brightness
Consistent brightness and expected adjustment
Colour
No unusual tint or severe unevenness
Cameras
Front and rear cameras operate normally
Sensors
Relevant proximity and ambient light functions work
Biometrics
Fingerprint or face recognition works where applicable
Buttons
Power and volume buttons operate correctly
Charging
Device charges normally without abnormal heat
Assembly
Display sits evenly with no unexpected gaps
Adhesive
Correct alignment and secure installation
Water resistance
Appropriate testing completed if supported and required
The precise checklist depends on the device and the repair performed.
Documenting the Repair
Professional repair centres can improve consistency by documenting the device’s initial condition, replacement part, tests performed, and any remaining limitations.
This helps distinguish pre-existing damage from problems that develop during the repair.
It also gives customers a clearer understanding of the service they received.
When to Stop and Seek Professional Help
Stop troubleshooting if you encounter damaged motherboard connectors, signs of electrical shorts, battery swelling, or a display that becomes unusually hot.
These problems may require specialist tools and component-level diagnostic skills.
Repeatedly powering on a device with suspected electrical damage can make the situation worse.
Check whether it occurs consistently and seek testing
Black patches
OLED damage, LCD damage, pressure injury
Avoid further pressure and inspect the display
Ghost touches
Defective digitiser, moisture, connection problem
Stop using the device if touch input becomes unsafe or uncontrollable
Fingerprint reader fails
Compatibility, sensor damage, calibration issue
Follow the device-specific diagnostic procedure
Screen lifts from frame
Adhesive failure, bent frame, poor alignment
Have the assembly inspected and resealed correctly
Battery drains quickly
Display power consumption, battery wear, software activity
Check battery health and display compatibility
Proximity sensor fails
Misalignment, blocked sensor, damaged cable
Inspect sensor placement and surrounding components
Step-by-Step Troubleshooting
Step 1: Record the symptoms.
Identify exactly what isn’t working. Does the screen remain black, or does the image appear while touch input fails? Does the problem happen immediately or after several minutes?
These details help narrow down possible causes.
Step 2: Check for safety concerns.
Look for excessive heat, a swollen battery, burning smells, or signs of liquid damage. If any are present, stop using and charging the device and seek professional assistance.
Step 3: Consider software-related causes.
If the display works but a feature behaves unexpectedly, check whether a normal restart or a manufacturer-recommended software diagnostic is appropriate. Don’t perform a factory reset without backing up important data and understanding the consequences.
Step 4: Inspect the hardware professionally.
If the fault persists, the screen connector, display assembly, frame, and relevant circuits may need inspection.
A qualified technician can use compatible test parts and diagnostic equipment to identify the failing component.
Step 5: Verify the repair.
Once the problem has been resolved, test the screen and related functions before the device is fully reassembled.
The goal is to confirm the repair rather than simply make the device turn on temporarily.
DIY Repair vs Professional Screen Replacement
Repairing a phone at home can be rewarding, especially when the damage is limited and the device has a straightforward design.
However, modern phones are compact and use delicate connectors, strong adhesives, and complex display assemblies. A mistake can turn a manageable repair into a more expensive one.
Comparing the Two Approaches
Factor
DIY repair
Professional repair
Initial cost
May be lower if tools are already available
Includes labour and service costs
Equipment
Requires suitable tools and a clean workspace
Typically has specialist equipment
Experience
Depends on the user’s skill
Depends on the technician and repair centre
Diagnosis
May be limited without test parts
Can include structured hardware diagnostics
Biometric features
Compatibility and calibration may be difficult
May have access to model-specific procedures
Repair warranty
Depends on the parts supplier
Depends on the repair provider’s terms
Water resistance
Difficult to verify without suitable equipment
Testing may be available for supported models
Risk of further damage
Higher without experience
Reduced when the repair is performed competently
Neither option is automatically right for every situation. A simple repair on an older device may be suitable for an experienced hobbyist, while a premium foldable phone may require specialist tools and training.
How to Choose a Reliable Repair Centre
Before booking a repair, ask the service provider about its parts, testing process, and warranty.
Look for a repair centre that:
Explains the difference between original, refurbished, and aftermarket displays.
Provides a clear quotation.
Tests touch response and display quality.
Checks relevant sensors and biometric functions.
Explains any limitations involving water resistance.
Offers clear warranty terms.
Handles your data and device responsibly.
Be cautious of guarantees that sound too good to be true. A repair provider should explain what its warranty covers and what conditions apply.
1. What are the most common mistakes that ruin replacement screens?
The most common mistakes that ruin replacement screens include choosing incompatible parts, applying excessive heat, using too much pressure, damaging flex cables, connecting components incorrectly, and skipping pre-installation testing.
Poor adhesive application, frame damage, dust contamination, and missed calibration steps can also cause problems.
2. Why is my phone screen black after replacement?
A black screen may indicate a defective replacement panel, a loose connector, a damaged flex cable, a power issue, or a fault in the display circuitry.
If the phone still vibrates or produces sounds, it may be running even though the display isn’t working. A technician can test the relevant components to identify the cause.
3. Can a replacement screen be damaged without cracking the glass?
Yes. The internal display layers can be damaged even when the outer glass looks intact.
Pressure, excessive heat, a damaged cable, or an electrical fault can cause black patches, coloured lines, flickering, and touchscreen problems without visible cracks.
4. Why does my replacement touchscreen have dead zones?
Dead zones can result from a defective digitiser, an incompatible display, damaged flex cables, a poor connector connection, or a fault in the device’s touchscreen circuitry.
Testing the screen and its connections can help determine whether the problem is caused by the replacement part or another component.
5. Is it safe to use a phone with green lines on the screen?
A green line doesn’t automatically mean the phone is unsafe, but it can indicate a display panel or connection fault.
Back up important data if the phone remains usable. Avoid pressing the affected area, and arrange a professional inspection, especially if the line spreads or the device becomes unusually hot.
6. Can cheap replacement screens damage a phone?
A poor-quality or incompatible screen may cause display, touch, power-consumption, or sensor problems. Installation errors can create additional damage.
However, price alone doesn’t prove that a replacement is defective. Check the part’s specifications, compatibility, supplier reputation, and warranty.
7. Should I test a replacement screen before applying adhesive?
Yes. Where the device’s repair procedure permits it, test the screen before final sealing.
Check image quality, brightness, touch response, and relevant sensors. Follow the manufacturer’s power-isolation and connection procedures, and don’t handle exposed circuitry while the device is powered.
8. Can a professional repair restore water resistance after screen replacement?
A professional may be able to restore the intended seals using the correct parts and procedures, but this isn’t guaranteed for every device.
Water resistance depends on the device’s condition, correct assembly, and any required validation tests. Ask the repair centre what testing it performs and whether it can verify the result.
9. Why does my fingerprint sensor stop working after a screen replacement?
The replacement may be incompatible with the sensor, the sensor may have been damaged during disassembly, or the device may require a supported calibration or registration procedure.
A technician should verify compatibility and inspect the relevant components before concluding that the fingerprint sensor itself has failed.
10. When should I replace a faulty replacement screen?
A replacement screen may need to be replaced if it has confirmed panel damage, persistent dead pixels, severe touch failure, or defects that cannot be resolved through proper connection or calibration.
However, diagnosis should come first. A loose connector or damaged motherboard circuit can produce similar symptoms, and replacing the screen again won’t necessarily solve those problems.
Conclusion: Protect Your Investment With Smarter Screen Repairs
Avoiding the common mistakes that ruin replacement screens comes down to preparation, compatible parts, careful handling, and thorough testing.
Excessive heat, unnecessary pressure, damaged flex cables, incorrect connections, poor adhesive application, and overlooked frame damage can all turn a routine repair into a costly problem.
The good news is that many of these risks can be reduced by following model-specific repair instructions, using suitable tools, and testing the device before final assembly.
If you’re repairing your own phone, take your time and stop when a step requires tools or skills you don’t have. If you’re unsure about the cause of a display fault, a professional diagnosis can help prevent further damage.
For reliable results, choose a repair provider that explains its replacement parts, tests the finished device, and offers clear warranty terms. A properly completed repair can restore everyday usability and help you get more life out of your device.
David from Sydney CBD Repair Centre – The Best place to fix mobile phones as 7 Years In A Row! Top Mobile Phone Repair In Sydney. More than 2000 Positive Reviews on Google and Same Day Repairs.
We take pride in delivering exceptional repair services for all major phone brands including Apple, Samsung, Google, and more. Our expert technicians use only genuine parts and offer 90days warranty on repairs. Located in the heart of Sydney CBD, we’re your one-stop solution for all mobile device repairs.
Our commitment to excellence has earned us the trust of thousands of satisfied customers. Whether it’s a cracked screen, battery replacement, or water damage repair, we handle it all with professional care and expertise. Walk in today and experience why we’re Sydney’s #1 choice for mobile phone repairs.
Visit us for:
✓ Same Day Express Repairs
✓ Genuine Parts Guarantee
✓ Professional Technicians
✓ Competitive Pricing
✓ 2000+ 5-Star Google Reviews
✓ 7-Time Award Winner for Best Phone Repairs
Sydney CBD Repair Centre – Where Quality Meets Reliability.
FIXING THE INFAMOUS GREEN LINE! SAMSUNG GALAXY S25 Ultra DISPLAY RESTORATION AND COST – Ultimate Repair Guide (2026)
Introduction to the Galaxy S25 Ultra Green Line Problem
The Galaxy S25 Ultra green line display issue has quickly become one of the most talked-about problems among smartphone users and repair technicians. While the device itself is packed with cutting-edge technology, even premium smartphones can occasionally experience display defects.
Many users notice a thin vertical green line suddenly appearing on the screen. At first glance, it might look harmless. However, over time the line can become more noticeable and interfere with normal device usage.
The Galaxy S25 Ultra green line display issue usually appears without warning. Sometimes it happens after a software update, while in other cases it appears following minor drops or screen pressure.
Here’s what typically happens:
A vertical green line appears on the display
The line remains visible across all apps
Restarting the phone does not remove it
The issue gradually becomes more prominent
Although this problem may seem alarming, the good news is that several repair solutions are available. In many cases, the phone can be restored without losing performance or data.
This guide explains everything you need to know about Galaxy S25 Ultra display restoration, including causes, repair methods, and the real cost of fixing the issue.
Repair costs vary depending on parts, location, and service quality.
Here’s a typical breakdown.
OEM Screen Replacement Costs
Original Samsung AMOLED displays are expensive.
Estimated cost:
Repair Type
Estimated Cost
OEM AMOLED Display
$350 – $520
Premium Service Center Repair
$450 – $650
OEM screens offer the best brightness, durability, and color accuracy.
Third-Party Screen Repair Pricing
Some repair shops offer aftermarket OLED screens.
Cost range:
Screen Type
Estimated Cost
Aftermarket OLED
$250 – $400
Refurbished OEM Panel
$300 – $450
These can be more affordable but may vary in quality.
Labor Costs
Labor fees depend on the repair center.
Typical charges:
$80 – $150 labor
same-day service in many shops
Professional technicians usually complete the repair within 1–2 hours.
Step-by-Step Repair Process Used by Professionals
Professional technicians follow a careful repair process to avoid damaging internal components.
Typical repair steps include:
Powering off the device
Heating the rear glass adhesive
Removing the back panel
Disconnecting the battery
Removing internal shields
Detaching the display flex cable
Heating and separating the broken display
Installing the new AMOLED screen
Reassembling the device
Running display quality tests
The entire process requires specialized tools and technical expertise.
Should You Repair or Replace Your Galaxy S25 Ultra
Many users wonder whether repair is worth it.
In most cases, repairing the Galaxy S25 Ultra green line display issue is significantly cheaper than buying a new phone.
Consider repair if:
the phone is less than 3 years old
the device still performs well
the damage is limited to the display
Replacing the device only makes sense if multiple hardware components are failing.
Preventing Green Line Issues on AMOLED Displays
Although some cases are unavoidable, you can reduce the risk of display damage.
Helpful tips include:
Avoid extreme heat
Use a protective phone case
Install screen protectors
Avoid dropping the phone
Keep software updated
These habits help extend the lifespan of AMOLED screens.
FAQs About Galaxy S25 Ultra Green Line Fix
1. Why does my Galaxy S25 Ultra suddenly show a green line?
The issue usually occurs due to OLED pixel failure or display cable damage.
2. Can software updates cause green lines?
Occasionally yes. Display driver bugs can trigger the issue, but hardware problems are more common.
3. Can a green line disappear on its own?
Rarely. If the line persists after restarting, it typically requires repair.
4. How long does the repair take?
Most professional repairs take 1 to 2 hours.
5. Is the repair covered by warranty?
If the issue is due to manufacturing defects, it may be covered under warranty.
6. Will replacing the screen fix the problem permanently?
Yes. A full AMOLED replacement usually resolves the issue permanently.
Conclusion
The Galaxy S25 Ultra green line display issue can be frustrating, especially when it appears unexpectedly. However, understanding the cause of the problem makes it much easier to find the right solution.
In many cases, the issue stems from OLED pixel column failure or connector damage. While software troubleshooting should always be attempted first, most situations ultimately require professional display restoration or screen replacement.
Fortunately, modern repair services can restore the device quickly and effectively. With the right technicians and genuine parts, your phone can return to perfect working condition.
If you ever encounter the Galaxy S25 Ultra green line display issue, don’t panic. With the repair solutions outlined in this guide, fixing the problem is entirely achievable.
David from Sydney CBD Repair Centre – The Best place to fix mobile phones as 7 Years In A Row! Top Mobile Phone Repair In Sydney. More than 2000 Positive Reviews on Google and Same Day Repairs.
We take pride in delivering exceptional repair services for all major phone brands including Apple, Samsung, Google, and more. Our expert technicians use only genuine parts and offer 90days warranty on repairs. Located in the heart of Sydney CBD, we’re your one-stop solution for all mobile device repairs.
Our commitment to excellence has earned us the trust of thousands of satisfied customers. Whether it’s a cracked screen, battery replacement, or water damage repair, we handle it all with professional care and expertise. Walk in today and experience why we’re Sydney’s #1 choice for mobile phone repairs.
Visit us for:
✓ Same Day Express Repairs
✓ Genuine Parts Guarantee
✓ Professional Technicians
✓ Competitive Pricing
✓ 2000+ 5-Star Google Reviews
✓ 7-Time Award Winner for Best Phone Repairs
MICROSURGERY ON THE EDGE: Samsung Galaxy S25 Ultra Digitizer Flex Cable Restoration + 10 Power Tips
Introduction to Digitizer Flex Cables
When it comes to the Samsung Galaxy S25 Ultra, the digitizer flex cable is one of the most critical components that ensures seamless touch functionality. This tiny, ribbon-like connector serves as the nervous system of your phone’s display, transmitting your every swipe and tap from the glass surface to the motherboard. Damage to this component can manifest as unresponsive touch, ghost touches, or complete screen failure, making understanding its function and restoration process essential.
Many users underestimate the fragility of the flex cable. Even minor bending, accidental punctures, or exposure to moisture can compromise its integrity. Fortunately, with precision tools, careful techniques, and a step-by-step microsurgical approach, the Samsung Galaxy S25 Ultra digitizer flex cable can be restored, saving both cost and data.
In this article, we’ll explore the anatomy of the digitizer flex cable, common causes of damage, essential tools for repair, detailed restoration steps, troubleshooting, preventive measures, and a real-world case study from the Sydney CBD Repair Centre. By the end, you’ll have a comprehensive understanding of how to tackle one of the trickiest yet most rewarding repairs for the S25 Ultra.
Anatomy of the Samsung Galaxy S25 Ultra Digitizer Flex Cable
The digitizer flex cable is more than just a connector—it’s a complex network of conductive traces designed to relay touch input with incredible precision. In the S25 Ultra, it consists of:
Connector pins: Tiny metallic contacts that slot into the motherboard.
Ribbon pathways: Flexible circuits that run across the back of the OLED panel.
Reinforcement layers: Thin polymer layers that prevent accidental tearing.
Integrated sensors: In some models, pressure-sensitive areas for advanced touch features.
Understanding these components is crucial because any improper handling during repair can permanently damage the cable. Even a slight misalignment when reattaching can lead to partial touch failure or flickering.
Common Causes of Digitizer Flex Cable Damage
Flex cables are surprisingly fragile. Here are the most frequent culprits behind failure:
Physical stress – Dropping, bending, or squeezing the phone can crack the ribbon traces.
Water and moisture exposure – Liquids cause corrosion of the metallic contacts.
Poor manufacturing tolerances – Rare, but occasional defects in solder points or connectors.
Improper DIY repair attempts – Without proper tools, flex cables are prone to tearing.
Heat exposure – Excessive heat during charging or soldering can warp the cable.
Identifying the root cause helps technicians determine whether a full replacement or cleaning-and-restoration approach is required.
Precision is everything when restoring a Samsung S25 Ultra digitizer flex cable. Here’s what professionals use:
Tool
Purpose
Anti-static wrist strap
Prevents electrostatic discharge (ESD) from frying the motherboard
Microscrewdriver set
For safely removing tiny screws without damaging the chassis
Spudgers & plastic picks
Gently separate screen and body without scratches
Magnifying microscope
Inspect cable traces for breaks or corrosion
Isopropyl alcohol (99%)
Cleans contacts and removes residue
Fine-tip tweezers
Handle delicate flex cable safely
Heat gun / iOpener
Softens adhesive without overheating the panel
Multimeter
Tests continuity of flex traces
Essential Safety Precautions
Always work on an ESD-safe mat to prevent static damage.
Keep the workspace dust-free and well-lit to avoid contamination.
Avoid excessive bending; flex cables can tear under slight pressure.
Always power off the device before attempting any disassembly.
These precautions reduce the risk of permanent damage and ensure a smooth restoration process.
Step-by-Step Restoration Process
Disassembly of the S25 Ultra Screen
Power off the device and remove any SIM cards or accessories.
Heat the edges using a heat gun or iOpener to soften the adhesive.
Use plastic picks or spudgers to gently separate the OLED screen from the frame.
Lift the screen carefully, taking note of ribbon cable locations to avoid tension.
Disconnect the battery first, followed by the digitizer and display connectors.
Pro tip: Avoid using metal tools directly on the OLED panel to prevent scratches or dead pixels.
Flex Cable Diagnosis and Cleaning
Inspect the flex cable under a microscope.
Look for broken traces, kinks, or corrosion.
Clean contacts with 99% isopropyl alcohol and a lint-free cloth.
Use a multimeter to check continuity along the flex cable. Broken pathways often indicate the need for replacement rather than repair.
Installing the New Digitizer Flex Cable
Align the new cable carefully with the connectors.
Press gently until it clicks into place.
Avoid twisting or bending; ensure the cable follows the original path without tension.
Reconnect the battery temporarily to test touch response before final assembly.
Reassembling the Device Safely
Reapply adhesive strips or use liquid adhesive sparingly.
Replace the screen carefully, ensuring even pressure to avoid air bubbles.
Reinsert all screws and connectors.
Power on the device to confirm full functionality.
Testing and Calibration
After assembly, testing is critical:
Perform touch sensitivity tests across all areas of the screen.
Check for ghost touches or unresponsive zones.
Run calibration software if necessary to ensure the touch controller is fully aligned.
Repeat testing after 24 hours to catch any delayed issues caused by adhesive settling.
Troubleshooting Common Post-Repair Issues
Even experienced technicians encounter issues post-repair:
Issue
Cause
Solution
Ghost touches
Flex cable misalignment or debris
Re-seat and clean contacts
Partial touch failure
Broken trace undetected
Replace flex cable
Flickering screen
Loose connectors
Secure and test connections
Screen unresponsive
ESD damage
Evaluate motherboard; may need replacement
Proactive troubleshooting ensures the repair holds up over time.
Preventive Measures to Extend Flex Cable Life
Always use a protective case to avoid accidental bends.
Keep your phone away from moisture and extreme heat.
Avoid DIY screen repairs unless trained.
Clean the screen and edges carefully to prevent debris accumulation.
Regularly inspect for signs of flex cable wear, especially after drops or impacts.
Cost Analysis: DIY vs Professional Repair
Option
Average Cost
Pros
Cons
DIY Repair
$50-$120
Lower cost, hands-on learning
High risk of permanent damage
Professional Repair
$180-$300
Warranty, genuine parts, expertise
Higher upfront cost
Professional repairs like those at Sydney CBD Repair Centre offer peace of mind with guaranteed functionality and genuine parts.
Case Study: Sydney CBD Repair Centre Success Stories
At Sydney CBD Repair Centre, technicians handle complex microsurgeries on S25 Ultra devices daily. Here’s a recent success:
Issue: Unresponsive digitizer due to flex cable tear.
Solution: Complete microsurgical restoration using genuine replacement cable.
Result: Full touch functionality restored, same-day service, 90-day warranty.
Thousands of satisfied customers trust the centre for high-risk repairs, highlighting the importance of experience, precision, and quality parts.
Frequently Asked Questions (FAQs)
Q1: Can a damaged flex cable be repaired without replacement? A1: Minor corrosion or dirt can sometimes be cleaned, but torn traces usually require a replacement for reliable performance.
Q2: How long does an S25 Ultra digitizer flex cable repair take? A2: Professional repair typically takes 2–3 hours, including diagnosis, restoration, and testing.
Q3: Is DIY repair safe for beginners? A3: Not recommended. Flex cables are fragile, and incorrect handling can cause permanent screen or motherboard damage.
Q4: How can I prevent future flex cable damage? A4: Use protective cases, avoid bending, and keep the device away from liquids and heat.
Q5: Will a replacement cable affect touch sensitivity? A5: Genuine replacement cables restore full touch sensitivity. Non-genuine parts may result in ghost touches or lag.
Q6: Does professional repair come with a warranty? A6: Yes. Sydney CBD Repair Centre offers a 90-day warranty on all flex cable repairs, ensuring peace of mind.
Conclusion
The Samsung Galaxy S25 Ultra digitizer flex cable is a delicate but vital component. Proper restoration requires precision, specialized tools, and careful adherence to microsurgical techniques. Whether you’re attempting a DIY fix or choosing a professional service, understanding the anatomy, causes of damage, restoration steps, and preventive measures ensures long-term performance.
For complex repairs, professional assistance from experienced technicians, like those at Sydney CBD Repair Centre, guarantees reliability, genuine parts, and peace of mind. With the right approach, your S25 Ultra can continue delivering a smooth, responsive touch experience for years to come.
David from Sydney CBD Repair Centre – The Best place to fix mobile phones as 7 Years In A Row! Top Mobile Phone Repair In Sydney. More than 2000 Positive Reviews on Google and Same Day Repairs.
We take pride in delivering exceptional repair services for all major phone brands including Apple, Samsung, Google, and more. Our expert technicians use only genuine parts and offer 90days warranty on repairs. Located in the heart of Sydney CBD, we’re your one-stop solution for all mobile device repairs.
Our commitment to excellence has earned us the trust of thousands of satisfied customers. Whether it’s a cracked screen, battery replacement, or water damage repair, we handle it all with professional care and expertise. Walk in today and experience why we’re Sydney’s #1 choice for mobile phone repairs.
Visit us for:
✓ Same Day Express Repairs
✓ Genuine Parts Guarantee
✓ Professional Technicians
✓ Competitive Pricing
✓ 2000+ 5-Star Google Reviews
✓ 7-Time Award Winner for Best Phone Repairs
DIY Phone Screen Replacement Fails: Expert Troubleshooting for Common Issues That Save You 💥 (7-Step Guide)
Introduction: Why DIY Screen Replacement Fails So Often
DIY screen replacement fails more often than most people expect. At first glance, replacing a cracked phone screen looks simple. After all, there are hundreds of videos promising “easy fixes in 10 minutes.” However, reality hits fast when the phone won’t turn on, the touch doesn’t respond, or strange lines appear across the display.
DIY screen replacement fails because modern smartphones are no longer designed for easy repairs. Screens are thinner, glued more aggressively, and tightly integrated with sensors, fingerprint readers, and Face ID components. As a result, one small mistake can cause big problems.
Still, people try DIY screen replacement to save money. That makes sense. But when a DIY screen replacement fails, the cost often doubles. You’re stuck buying another screen or paying a professional to fix the damage.
This guide explains why DIY screen replacement fails, how to troubleshoot common issues, and when it’s smarter to stop and seek expert help. More importantly, it’s written from real-world repair experience—not theory.
Before troubleshooting, it helps to understand what you’re actually working with. Many DIY screen replacement fails start with misunderstanding screen technology.
Types of Phone Screens Explained
Modern smartphones mainly use:
LCD (Liquid Crystal Display)
Found in older or budget models. These screens have separate layers for display and touch.
OLED / AMOLED
Used in most flagship phones like iPhone, Samsung Galaxy, and Google Pixel. OLED screens combine display and touch into a single delicate unit.
LTPO OLED
Advanced OLED with adaptive refresh rates. Extremely sensitive to damage.
OLED screens are thinner and more fragile. That’s why DIY screen replacement fails more often with newer phones.
Why Modern Screens Are Harder to Replace
Modern phones are engineered for performance, not repairability. Screens are:
Glued with industrial-strength adhesive
Integrated with biometric sensors
Connected via ultra-thin flex cables
Paired digitally to the motherboard (True Tone, Face ID)
Because of this, even a tiny slip can cause a DIY screen replacement fail instantly.
DIY screen replacement fails for predictable reasons. Understanding them helps you avoid repeating costly mistakes.
Poor Quality Replacement Screens
Low-cost screens are the #1 cause of DIY screen replacement fails. Cheap screens may:
Have incorrect voltage ratings
Lack proper shielding
Use inferior touch digitizers
Cause overheating or flickering
Even if they power on, performance is often poor. Touch lag, dull brightness, and ghost touches are common signs.
Incompatible Parts and Models
Not all screens are universal. A screen for “iPhone 13” may differ between regions or revisions. Installing the wrong version guarantees a DIY screen replacement fail.
Static Damage and Internal Short Circuits
Static electricity is invisible but deadly. One static discharge can kill:
Display IC
Touch controller
Backlight circuit
This is why professionals use ESD protection. DIY users rarely do.
Expert Troubleshooting for Common DIY Screen Replacement Issues
This section covers the most common problems when DIY screen replacement fails—and how experts diagnose them.
Screen Not Turning On
If the screen stays black:
Check flex cable alignment
Inspect connectors for bent pins
Test with the original screen (if possible)
Look for motherboard backlight damage
In many cases, DIY screen replacement fails because the connector wasn’t seated evenly.
Touch Not Working or Ghost Touch
Ghost touch usually means:
Poor digitizer quality
Incompatible screen firmware
Pinched flex cable
Unfortunately, no software fix exists. If DIY screen replacement fails here, replacement is the only solution.
Display Lines, Flickering, or Black Spots
These indicate:
Cracked OLED panel
Pressure damage during installation
Faulty screen IC
Once damaged, OLED panels cannot be repaired.
For professional diagnostics, trusted repair resources like iFixit offer teardown guides and part validation tools that help reduce DIY screen replacement fails.
Step-by-Step Troubleshooting Checklist (7 Steps)
When DIY screen replacement fails, follow this expert checklist:
Power off and disconnect battery
Reseat all flex cables carefully
Inspect connectors under magnification
Test with known-good screen
Check for torn flex cables
Inspect motherboard for burn marks
Decide whether to stop and seek help
Stopping early can save your phone from permanent damage.
When DIY Screen Replacement Is Not Worth It
DIY screen replacement fails are more likely when:
Phone uses Face ID or under-display fingerprint
OLED screens cost over 60% of phone value
Water resistance is required
Phone is under warranty
In these cases, professional repair is safer and often cheaper long-term.
Cost Comparison: DIY vs Professional Screen Repair
Repair Type
Initial Cost
Risk Level
Long-Term Cost
DIY Repair
Low
High
Often Higher
Professional Repair
Moderate
Low
Predictable
DIY screen replacement fails often erase the savings you expected.
Preventing DIY Screen Replacement Fails in the Future
Why does my phone screen stay black after replacement?
DIY screen replacement fails here due to loose connectors, faulty screens, or backlight damage.
Can a failed DIY screen replacement damage the motherboard?
Yes, short circuits and static damage are common risks.
Is it safe to try DIY screen replacement twice?
Only if no internal damage occurred the first time.
Why does touch work intermittently?
Usually poor digitizer quality or flex cable damage.
Can professionals fix a failed DIY screen replacement?
In most cases, yes—unless the motherboard is damaged.
Is DIY screen replacement worth it in 2026?
For older LCD phones, yes. For modern OLED phones, often no.
Conclusion: Repair Smart, Not Hard
DIY screen replacement fails are frustrating, expensive, and common. While DIY repairs may look easy online, modern smartphones demand precision, tools, and experience. Knowing when to troubleshoot—and when to stop—can save your device and your wallet.
Sometimes, the smartest DIY decision is knowing when not to DIY at all.
David from Sydney CBD Repair Centre – The Best place to fix mobile phones as 7 Years In A Row! Top Mobile Phone Repair In Sydney. More than 2000 Positive Reviews on Google and Same Day Repairs.
We take pride in delivering exceptional repair services for all major phone brands including Apple, Samsung, Google, and more. Our expert technicians use only genuine parts and offer 90 days warranty on repairs. Located in the heart of Sydney CBD, we’re your one-stop solution for all mobile device repairs.
Our commitment to excellence has earned us the trust of thousands of satisfied customers. Whether it’s a cracked screen, battery replacement, or water damage repair, we handle it all with professional care and expertise. Walk in today and experience why we’re Sydney’s #1 choice for mobile phone repairs.
Visit us for:
✓ Same Day Express Repairs
✓ Genuine Parts Guarantee
✓ Professional Technicians
✓ Competitive Pricing
✓ 2000+ 5-Star Google Reviews
✓ 7-Time Award Winner for Best Phone Repairs
DIY Fix for Common Smartphone Screen Discoloration: Ultimate Repair Guide + Proven Methods + 10 Solutions
Smartphone screen discoloration is one of those annoying problems that can creep up slowly or suddenly shock you when you unlock your phone. Whether it’s a yellow tint, green patches, purple smudges, or uneven brightness, the issue can be alarming. The good news? Many cases can be fixed at home—safely and without spending hundreds of dollars.
This guide covers everything you need to know: causes, symptoms, DIY fixes, pro repair methods, and prevention strategies—all written in a simple Grade 7 reading level with clear, optimistic steps.
Introduction
Smartphone screen discoloration is one of the most common display issues faced by users today, showing up as yellow tints, purple smudges, green patches, or uneven brightness across the screen. While it may look alarming at first glance, the good news is that many discoloration problems can be fixed at home with safe, simple, and effective DIY methods. Understanding what causes this issue—and knowing the right steps to diagnose and repair it—can save you time, stress, and money.
In this comprehensive guide, you’ll learn how smartphone screens develop discoloration, the early signs to watch out for, and the easiest DIY techniques you can try before turning to professional repair services. We’ll walk you through proven troubleshooting methods, prevention tips, and expert recommendations written in a clear, Grade 7 reading level for effortless understanding. Whether you’re dealing with mild tinting or stubborn display patches, this introduction sets the stage for a complete, actionable repair roadmap that empowers you to restore your screen’s clarity and color accuracy.
Smartphone screen discoloration can be subtle at first—just a faint tint on one side of the display. Eventually, though, it can spread or worsen as you continue using the device. Understanding what’s happening under the glass helps you diagnose and choose the right fix.
What Causes Screen Discoloration?
Several factors can trigger screen discoloration, including:
A small patch today can become a large blotch tomorrow. Early detection saves money.
Mild vs Severe Discoloration
Mild:
Tint appears only at low brightness
Small patches that disappear briefly after reboot
Discoloration shifts with temperature
Severe:
Permanent purple/green blobs
Expanding color distortion
Severe gradient shifts covering half the screen
When It’s Still Fixable
DIY fixes usually work if:
Tint is software-related
The screen has no cracks
You recently installed new apps
Discoloration appeared after overheating
If cracks are visible or the discoloration spreads quickly, skip DIY and go straight to professional repair.
Safety Precautions Before Any DIY Fix
Before attempting anything, protect both yourself and your phone.
Tools You May Need
Lint-free cloth
Isopropyl alcohol (optional)
Wireless charger (for testing charging heat)
Computer (for cache clear or system refresh)
Damage You Must Avoid
Pressing hard on discolored areas
Using hair dryers or heaters
Putting phone in the freezer
Prying open the phone without training
Top 10 DIY Fixes for Smartphone Screen Discoloration
Here are the most trusted, safe, and effective DIY remedies you can try at home.
1. Soft Reset
A simple restart can recalibrate software-based color issues.
2. Forced Restart
Useful when the OS itself glitches and causes false color rendering.
3. Safe Mode Testing
Safe mode disables third-party apps that may interfere with display settings.
4. Pixel Refresh Apps
These rapidly cycle colors to unstick AMOLED pixels.
5. Clearing System Cache
Android system cache corruption can cause screen rendering issues.
6. Adjusting Color Correction Settings
Built-in accessibility tools can override damaged color profiles.
7. Remove Magnetic Phone Cases
Some cases interfere with sensors and display elements.
8. Fix Overheating
Turn off background apps, remove the case, and stop heavy gaming.
9. Battery Calibration
Low or unstable voltage from old batteries can distort AMOLED displays.
10. Dry Moisture-Affected Screens
Put your phone in a cool, dry place—not rice—for 24–48 hours.
When DIY Fixes Won’t Work
Some screen issues are purely hardware-related.
Signs It’s a Hardware Problem
Purple blobs expanding outward
Display flickers and discolors at the same time
Physical dents or pressure marks
Water damage indicators triggered
Why Only Professionals Should Proceed
Modern smartphones are sealed with adhesives, sensitive cables, and fragile AMOLED layers that can shatter with minimal force.
How Professionals Fix Screen Discoloration
If DIY doesn’t help, here’s what pros do:
Digitizer Replacement
For pressure damage affecting touch and color.
AMOLED Panel Replacement
The only way to fix purple, green, or black smudges.
Connector Cleaning / Reseating
Especially after minor shocks or moisture exposure.
Prevention Tips to Avoid Future Discoloration
Temperature Protection
Never leave your phone in hot cars or under direct sun.
Good Charging Habits
Avoid overnight charging and let your phone cool between sessions.
Physical Care Tips
Use shock-absorbing cases and avoid tight pockets.
FAQs
1. Can screen discoloration fix itself?
Sometimes, yes. Software-caused tinting may disappear after a reset or cooling.
2. Is purple screen discoloration always serious?
Yes. On AMOLED screens, purple marks indicate internal pressure cracks.
3. Can overheating permanently damage OLED screens?
Absolutely. Excess heat can cause pixel burn or adhesive yellowing.
4. Are discoloration apps safe?
Yes, as long as they’re from the Play Store or App Store.
5. Does replacing the screen remove all discoloration?
Yes, since discoloration is within the screen layers.
6. Is moisture always visible from the outside?
No. Even tiny droplets inside can cause color distortion.
Conclusion
Screen discoloration can be frustrating, but many issues can be fixed with simple, safe DIY steps. Whether it’s overheating, software miscalibration, or minor moisture exposure, knowing the root cause helps you choose the right solution. When DIY stops working, professional repair ensures your phone returns to perfect condition without risking further damage.
David from Sydney CBD Repair Centre – The Best place to fix mobile phones as 6 Years In A Row! Top Mobile Phone Repair In Sydney. More than 2000 Positive Reviews on Google and Same Day Repairs.
We take pride in delivering exceptional repair services for all major phone brands including Apple, Samsung, Google, and more. Our expert technicians use only genuine parts and offer 90 days warranty on repairs. Located in the heart of Sydney CBD, we’re your one-stop solution for all mobile device repairs.
Visit us for:
✓ Same Day Express Repairs
✓ Genuine Parts Guarantee
✓ Professional Technicians
✓ Competitive Pricing
✓ 2000+ 5-Star Google Reviews
✓ 6-Time Award Winner for Best Phone Repairs