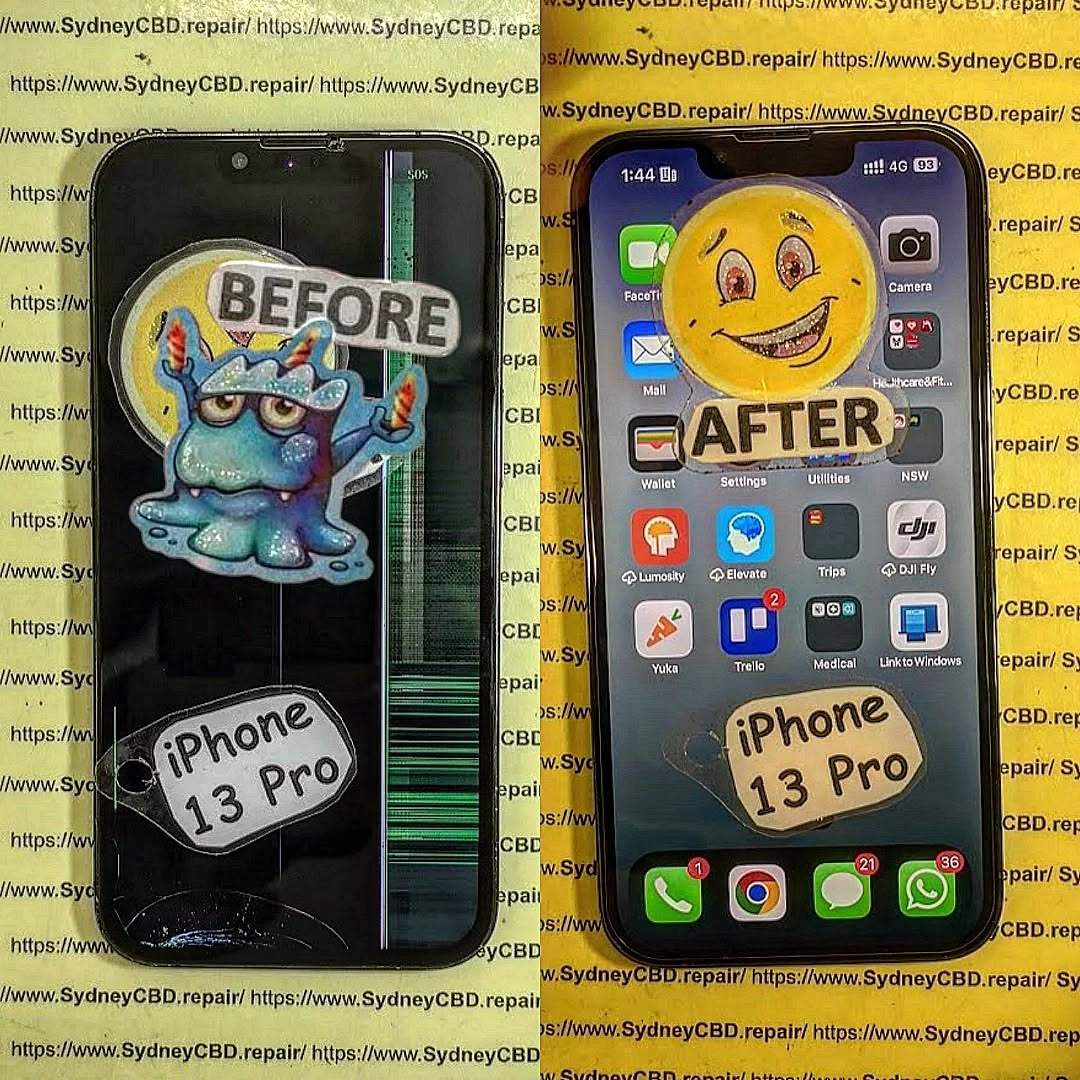
iPhone 17 Pro Max: Is This the TOUGHEST Screen to Replace? Shocking Truth + 7 Expert Insights
Introduction to iPhone 17 Pro Max Screen Technology
The iPhone 17 Pro Max is already shaping up to be one of Apple’s most ambitious smartphones yet. While Apple hasn’t officially released every technical detail, industry analysts and repair professionals agree on one thing: the iPhone 17 Pro Max screen replacement process may be the most complex Apple has ever designed.
At first glance, the display looks sleek and familiar. However, beneath the surface lies a highly integrated structure that prioritizes durability, visual clarity, and power efficiency. This is great news for users—but not always for repair technicians.
In fact, within the first 10% of this discussion, it’s important to highlight that iPhone 17 Pro Max screen replacement difficulty is expected to increase due to layered glass composites, tighter internal tolerances, and advanced sensor bonding. Simply put, Apple has doubled down on innovation, even if it makes repairs more challenging.
Apple is rumored to use a next-generation Ceramic Shield Ultra for the iPhone 17 Pro Max. This material reportedly blends nano-ceramic crystals with reinforced glass layers. As a result, it offers improved drop resistance but becomes significantly harder to separate during screen replacement.
Additionally, the OLED panel itself is thinner yet more rigid. This rigidity reduces flex during removal, increasing the risk of cracking if improper tools are used.
Micro-Bezel Engineering
The bezels on the iPhone 17 Pro Max are expected to be the thinnest ever. While visually stunning, micro-bezels mean:
Less margin for error during disassembly
Higher likelihood of damaging the display cable
Increased adhesive density around the edges
These changes alone make iPhone 17 Pro Max screen replacement a precision-based task rather than a routine repair.
Apple designs its devices with longevity and performance in mind. However, repairability often takes a back seat. The iPhone 17 Pro Max continues this trend by integrating components directly into the display assembly.
This includes:
Ambient light sensors
Proximity sensors
Face ID components
Each of these elements must remain perfectly aligned during reassembly.
Increased Component Integration
Unlike older models, the iPhone 17 Pro Max screen isn’t just a display. It’s a hub. The tighter the integration, the higher the risk during replacement. Consequently, even experienced technicians must proceed cautiously.
Tools and Skills Required to Replace iPhone 17 Pro Max Screen
Replacing an iPhone 17 Pro Max screen isn’t something you tackle with household tools. It demands:
Precision heat plates
Anti-static workstations
OEM-grade replacement screens
Advanced calibration software
Professional vs DIY Repairs
DIY repairs may seem tempting. However, without the right experience, the odds of permanent damage skyrocket. Professional repair centers invest in training and equipment specifically for complex models like the iPhone 17 Pro Max.
Common Risks During iPhone 17 Pro Max Screen Replacement
Face ID and Sensor Damage
One of the biggest risks is damaging the Face ID module. Apple pairs this system tightly with the original screen. A minor misalignment can disable Face ID permanently.
Other risks include:
Display cable tearing
Dust contamination
Loss of True Tone functionality
These issues highlight why iPhone 17 Pro Max screen replacement should be handled by experts.
Cost Breakdown of iPhone 17 Pro Max Screen Replacement
Screen replacement costs are expected to rise due to:
Cost Factor
Impact
Advanced OLED
High
Ceramic Shield
Medium
Labor Expertise
High
Calibration
Medium
On average, professional repairs may cost more upfront. However, they often save money long-term by preventing secondary damage.
Professional Repair vs Apple Authorized Service
Apple Authorized Service Providers follow strict protocols. While reliable, they may charge premium prices. Independent professional repair centers, on the other hand, often provide faster turnaround times and competitive pricing—without compromising quality.
The iPhone 17 Pro Max is designed to withstand daily wear. Its improved water and dust resistance means stronger seals, which also make disassembly harder. While durability is a win for users, it adds another layer of complexity to screen replacement.
Future of iPhone Screen Repairs
Looking ahead, Apple may continue moving toward modular repairs—but we’re not there yet. For now, the iPhone 17 Pro Max represents a peak in screen engineering complexity. Repair professionals must evolve alongside Apple’s innovations.
Frequently Asked Questions (FAQs)
1. Is the iPhone 17 Pro Max screen harder to replace than previous models?
Yes, due to advanced materials and tighter internal integration.
2. Can I replace the iPhone 17 Pro Max screen myself?
Technically yes, but it’s strongly discouraged without professional tools and training.
3. Will replacing the screen affect Face ID?
If not done correctly, Face ID can be permanently disabled.
4. How long does professional screen replacement take?
Typically same day, depending on part availability.
5. Are aftermarket screens safe to use?
Quality varies. Genuine or OEM-grade parts are recommended.
6. Does screen replacement void warranty?
Unauthorized repairs may void Apple’s warranty.
Conclusion
So, is the iPhone 17 Pro Max screen replacement the toughest yet? All signs point to yes. Apple’s relentless pursuit of innovation has resulted in a display that’s stronger, sleeker, and smarter—but also far more complex to repair.
The good news? With the right expertise, tools, and genuine parts, screen replacement is still very achievable. Choosing a trusted repair professional ensures your iPhone 17 Pro Max stays as powerful and polished as the day you bought it.
David from Sydney CBD Repair Centre – The Best place to fix mobile phones as 7 Years In A Row! Top Mobile Phone Repair In Sydney. More than 2000 Positive Reviews on Google and Same Day Repairs.
We take pride in delivering exceptional repair services for all major phone brands including Apple, Samsung, Google, and more. Our expert technicians use only genuine parts and offer 90 days warranty on repairs. Located in the heart of Sydney CBD, we’re your one-stop solution for all mobile device repairs.
Our commitment to excellence has earned us the trust of thousands of satisfied customers. Whether it’s a cracked screen, battery replacement, or water damage repair, we handle it all with professional care and expertise. Walk in today and experience why we’re Sydney’s #1 choice for mobile phone repairs.
Visit us for:
✓ Same Day Express Repairs
✓ Genuine Parts Guarantee
✓ Professional Technicians
✓ Competitive Pricing
✓ 2000+ 5-Star Google Reviews
✓ 7-Time Award Winner for Best Phone Repairs
Step By Step iPhone 17 Pro Screen Replacement for Advanced DIY Enthusiasts: 17 Powerful Expert Techniques
Introduction
The iPhone 17 Pro screen replacement process has become one of the most searched repair topics among advanced DIY enthusiasts. Modern smartphones are more powerful than ever, but they’re also more fragile. A single drop onto concrete can crack the expensive OLED panel instantly.
Fortunately, experienced DIY repairers can replace the display successfully with the right tools, patience, and technical understanding. While the process isn’t easy, it’s definitely achievable for skilled enthusiasts who understand electronics repair fundamentals.
In recent years, smartphone manufacturers have improved repairability slightly, yet premium devices like the iPhone 17 Pro still require careful handling. Tiny screws, delicate flex cables, and waterproof seals demand attention to detail at every stage.
This comprehensive guide walks you through the entire iPhone 17 Pro screen replacement procedure step by step. You’ll also discover advanced repair techniques used by professionals to avoid common failures and maintain display performance after installation.
For official repair information and Apple repair policies, visit Apple Support.
DIY smartphone repair has exploded in popularity. Rising repair costs and improved access to replacement parts have encouraged many enthusiasts to learn advanced repair techniques.
Several factors contribute to this trend:
Repair videos are easier to access
Premium phones cost more than ever
Consumers want longer device lifespans
Environmental awareness is increasing
Repair communities share valuable knowledge
An iPhone 17 Pro screen replacement performed correctly can save hundreds of dollars compared to buying a new device. Moreover, many repair enthusiasts enjoy the technical challenge itself.
Still, DIY repair isn’t risk-free. A mistake can damage:
Before beginning your iPhone 17 Pro screen replacement, gather all necessary tools. Missing even one item can slow down the process or increase damage risk.
Recommended Tool Kit
Tool
Purpose
Pentalobe screwdriver
Removes bottom screws
Tri-point screwdriver
Internal bracket removal
Precision tweezers
Handling tiny components
Plastic opening picks
Separating adhesive safely
Heat pad or heat gun
Softening display adhesive
Suction cup
Lifting display assembly
Magnetic project mat
Organizing screws
Isopropyl alcohol
Cleaning adhesive residue
Replacement adhesive
Restoring water resistance
Anti-static wrist strap
Preventing ESD damage
Professional technicians also recommend using:
OLED-safe pry tools
Microscope lighting
Battery disconnect picks
Display testing equipment
Cheap tools often create problems. Stripped screws and damaged connectors frequently result from low-quality screwdriver sets.
Understanding the iPhone 17 Pro Display Technology
The iPhone 17 Pro features a sophisticated OLED display with advanced touch and brightness technologies.
Key Display Features
High refresh rate OLED panel
Ceramic Shield protection
Integrated touch digitizer
Adaptive brightness system
Dynamic Island integration
Because modern OLED displays are extremely thin, excessive bending can permanently damage them.
Additionally, the screen assembly contains:
Ambient light sensors
Proximity sensors
Front-facing camera components
Earpiece speaker connections
During your iPhone 17 Pro screen replacement, preserving these components is critical.
Safety Precautions Before Starting
Repairing smartphones requires proper safety procedures. Skipping these precautions can lead to injury or device destruction.
Important Safety Tips
1. Power Off Completely
Never attempt an iPhone 17 Pro screen replacement while the device is powered on.
2. Discharge the Battery
Reduce battery charge below 25% to minimize thermal runaway risk.
3. Avoid Metal Pry Tools Near the Battery
Lithium-ion batteries can puncture easily.
4. Use Eye Protection
Tiny glass shards may fly during removal.
5. Work Slowly
Rushing is the number one cause of repair failure.
A clean workspace also reduces contamination risks inside the device.
Preparing Your Workspace Properly
Professional-level repairs begin with proper organization.
Ideal Workspace Conditions
Workspace Feature
Benefit
Bright LED lighting
Better visibility
Anti-static surface
Reduces ESD damage
Magnetic screw tray
Prevents lost screws
Dust-free environment
Cleaner installation
Comfortable seating
Reduces fatigue
Many advanced DIY enthusiasts underestimate workspace preparation. However, organization dramatically improves repair accuracy.
Backing Up Your iPhone Before Repair
Before any iPhone 17 Pro screen replacement, create a complete backup.
You can back up using:
iCloud
Finder on Mac
iTunes on Windows
A backup protects your:
Photos
Contacts
App data
Passwords
Settings
Hardware repairs always carry some risk, even for professionals.
How to Power Down and Open the Device
Opening the device is one of the most delicate stages.
Step-by-Step Opening Procedure
Step 1: Remove Bottom Screws
Use a precision pentalobe screwdriver to remove the two charging-port screws.
Step 2: Apply Controlled Heat
Warm the display edges for 1-2 minutes.
Avoid overheating because OLED panels are heat-sensitive.
Step 3: Use a Suction Cup
Lift gently near the bottom edge.
Step 4: Insert Plastic Picks
Slide carefully around the perimeter.
Step 5: Open Like a Book
Do not pull the display completely away.
Internal flex cables remain attached.
This stage of the iPhone 17 Pro screen replacement requires patience more than force.
Removing the Damaged Display Carefully
Once opened, disconnect the battery immediately.
Internal Disconnection Process
Remove protective brackets
Disconnect battery flex
Disconnect display cables
Disconnect sensor assemblies
Professional technicians always disconnect power first.
Failing to disconnect the battery can short sensitive components instantly.
Inspect for Hidden Damage
Look carefully for:
Bent pins
Torn flex cables
Corrosion
Loose shielding
Missing screws
If the phone suffered a hard impact, internal frame damage may also exist.
Disconnecting Internal Components Safely
The front sensor assembly is one of the most sensitive parts during an iPhone 17 Pro screen replacement.
Components Requiring Extra Care
Component
Risk Level
Face ID sensors
Very high
Proximity sensor
High
OLED connector
High
Front camera flex
High
Earpiece speaker
Medium
Face ID damage can permanently disable biometric authentication.
Always use plastic tools when disconnecting flex cables.
Inspecting the Internal Frame and Connectors
Before installing the new display, inspect the housing thoroughly.
Important Inspection Areas
Frame Alignment
Bent frames create pressure points on OLED panels.
Connector Integrity
Use magnification if available.
Adhesive Residue
Old adhesive prevents proper sealing.
Water Damage Indicators
Check for red liquid contact markers.
A professional-quality iPhone 17 Pro screen replacement depends heavily on proper inspection.
Installing the New OLED Screen
Now comes the most exciting part: installing the replacement display.
Installation Steps
Step 1: Dry Test the Screen
Connect the display temporarily before sealing.
Step 2: Check Touch Functionality
Test all corners thoroughly.
Step 3: Verify Brightness
Ensure OLED output looks even.
Step 4: Confirm Sensor Operation
Test Face ID and proximity sensors.
Step 5: Install Fresh Adhesive
Apply evenly around the frame.
Step 6: Reassemble Carefully
Avoid pinching flex cables.
A high-quality OLED replacement significantly affects final results. Cheap aftermarket screens often suffer from:
Poor brightness
Weak touch sensitivity
Battery drain
Color inaccuracies
Premature failure
Reconnecting Flex Cables Correctly
Connector alignment is critical.
Never force connectors into place.
Proper Connector Technique
Align carefully
Press gently from center
Listen for soft clicking
Avoid side pressure
Many failed iPhone 17 Pro screen replacement attempts occur because connectors were partially seated.
Improper connections may cause:
Ghost touch
Green screen issues
Flickering
No display output
Sensor failures
Replacing Adhesive and Waterproof Seals
Modern smartphones rely heavily on adhesive sealing.
Why Waterproofing Matters
The iPhone 17 Pro includes strong water resistance protections, but opening the device compromises factory sealing.
Professional repairers replace:
Perimeter adhesive
Dust barriers
Mesh protection seals
Adhesive Application Tips
Tip
Benefit
Clean thoroughly first
Better adhesion
Use OEM-grade adhesive
Stronger seal
Apply evenly
Consistent pressure
Avoid stretching strips
Better alignment
Even after careful repair, water resistance may not fully match factory specifications.
Testing the Screen Before Final Assembly
Testing before complete sealing saves enormous frustration later.
Complete Functional Checklist
Display Tests
Brightness consistency
Dead pixels
Color uniformity
Refresh smoothness
Touch Tests
Edge responsiveness
Multi-touch support
Gesture operation
Sensor Tests
Face ID
Ambient light sensor
Proximity sensor
Audio Tests
Earpiece sound
Speaker clarity
A complete iPhone 17 Pro screen replacement should include comprehensive testing before final closure.
Common Mistakes During iPhone 17 Pro Screen Replacement
Even experienced enthusiasts sometimes make errors.
Most Common DIY Repair Mistakes
Using Excessive Heat
Too much heat damages OLED layers.
Mixing Screws
Incorrect screw placement can puncture the motherboard.
Skipping Battery Disconnect
This can cause catastrophic shorts.
Poor Adhesive Cleaning
Old residue weakens waterproof sealing.
Buying Cheap Displays
Low-grade parts create long-term reliability issues.
Avoiding these mistakes dramatically improves success rates.
Professional Tips for Better Repair Results
Professional repair shops follow strict procedures for consistency.
Expert Techniques
Use Screw Maps
Organize screws by location.
Photograph Every Stage
Reference photos help during reassembly.
Test Before Sealing
Never skip dry testing.
Use OEM-Quality Parts
Higher-quality components reduce callbacks.
Maintain Cleanliness
Dust under OLED panels is extremely noticeable.
These habits separate average repairs from truly professional-quality work.
DIY Repair vs Professional Repair Services
DIY repair offers advantages, but professional repair still has major benefits.
DIY Advantages
Lower cost
Learning experience
Personal satisfaction
Flexible timing
Professional Repair Advantages
Warranty coverage
Specialized tools
Faster turnaround
Reduced risk
Water resistance testing
If you’re uncertain about performing an iPhone 17 Pro screen replacement, professional repair may ultimately save money and stress.
Frequently Asked Questions
Is iPhone 17 Pro screen replacement difficult?
Yes, it’s considered an advanced repair because modern iPhones contain delicate flex cables, strong adhesive, and complex sensor systems.
Can Face ID stop working after screen replacement?
Absolutely. Damaging the sensor assembly during repair can permanently disable Face ID functionality.
How long does an iPhone 17 Pro screen replacement take?
Advanced DIY enthusiasts usually need between 1-3 hours depending on experience level.
Is waterproofing maintained after repair?
Not perfectly. New adhesive helps restore resistance, but factory-level sealing is difficult to replicate completely.
Should I use aftermarket OLED displays?
High-quality aftermarket displays can work well, but premium OEM-quality parts generally offer better brightness and durability.
Can replacing the screen damage the motherboard?
Yes. Improper tool usage, screw placement, or connector handling can damage motherboard components.
Do I need special software calibration?
Some advanced display features may require calibration tools used by professional repair technicians.
Conclusion
Performing an iPhone 17 Pro screen replacement is a challenging but rewarding project for advanced DIY enthusiasts. With the correct tools, organized preparation, and professional-level patience, you can successfully restore a damaged device to excellent working condition.
The key to success lies in careful handling, proper adhesive replacement, thorough testing, and using high-quality components. While modern smartphones are more complex than ever, skilled repair enthusiasts can still achieve impressive results at home.
Whether you choose DIY repair or professional service, understanding the repair process gives you greater confidence and appreciation for modern smartphone engineering.
David from Sydney CBD Repair Centre – The Best place to fix mobile phones as 7 Years In A Row! Top Mobile Phone Repair In Sydney. More than 2000 Positive Reviews on Google and Same Day Repairs.
We take pride in delivering exceptional repair services for all major phone brands including Apple, Samsung, Google, and more. Our expert technicians use only genuine parts and offer 90days warranty on repairs. Located in the heart of Sydney CBD, we’re your one-stop solution for all mobile device repairs.
Our commitment to excellence has earned us the trust of thousands of satisfied customers. Whether it’s a cracked screen, battery replacement, or water damage repair, we handle it all with professional care and expertise. Walk in today and experience why we’re Sydney’s #1 choice for mobile phone repairs.
Visit us for:
✓ Same Day Express Repairs
✓ Genuine Parts Guarantee
✓ Professional Technicians
✓ Competitive Pricing
✓ 2000+ 5-Star Google Reviews
✓ 7-Time Award Winner for Best Phone Repairs
Why Your Face ID Stops Working After A Simple DIY Screen Replacement: 9 Shocking Reasons Every iPhone Owner Must Know
Introduction
Many iPhone users try fixing cracked screens at home to save money. At first glance, replacing a screen looks easy. You watch a few videos online, order a replacement display kit, and begin the repair yourself. However, many people quickly discover a frustrating surprise: Face ID suddenly stops working after the repair.
This issue is more common than most people realize. In fact, one small mistake during a DIY screen replacement can disable Face ID permanently. Since Apple designed Face ID with advanced security hardware, every tiny component must stay perfectly connected and calibrated.
When people search for why your Face ID stops working after a simple DIY screen replacement, they often assume the screen itself caused the problem. Yet the real issue usually comes from damaged sensors, torn cables, poor-quality parts, or improper installation techniques.
The good news is that understanding the causes can help you avoid expensive mistakes. More importantly, professional repair shops can often diagnose and fix the issue before it becomes irreversible.
In this guide, you’ll learn exactly why Face ID fails after screen repairs, how the technology works, what warning signs to watch for, and why expert repair matters more than ever.
Before discussing repair mistakes, it’s important to understand how Face ID operates.
Face ID isn’t just a simple front camera. Instead, it’s a highly advanced biometric security system made up of several delicate components working together.
These include:
Infrared camera
Flood illuminator
Dot projector
Ambient light sensor
Proximity sensor
Front camera module
Together, these parts create a detailed 3D map of your face. Unlike traditional fingerprint systems, Face ID constantly analyzes depth and facial geometry for security.
Apple also pairs many of these components to the phone’s logic board. That means replacing or damaging certain parts can break communication between the hardware and software.
As a result, even a “simple” screen replacement can become risky if proper procedures aren’t followed.
DIY repairs have become increasingly popular for several reasons.
First, replacement kits are widely available online. Second, tutorial videos make repairs appear fast and easy. Finally, many users want to avoid expensive repair costs from official service centers.
Still, DIY repairs often overlook one important fact: modern smartphones are incredibly delicate.
Unlike older phones with modular designs, newer iPhones contain tightly integrated systems. Components are layered closely together, and even minor force can damage hidden cables or sensors.
Additionally, aftermarket repair kits may include:
Low-quality screens
Weak adhesives
Incorrect screws
Cheap tools
Poor flex cable alignment
Consequently, people attempting repairs without professional experience often encounter problems immediately afterward.
One of the most frustrating outcomes is discovering that Face ID no longer functions properly.
The Fragile Components Connected to Face ID
The Face ID system sits near the top portion of the iPhone display assembly. During a screen replacement, technicians must carefully transfer these components from the old screen to the new one.
Unfortunately, these parts are extremely sensitive.
A tiny tear in a cable or slight misalignment can trigger errors such as:
“Face ID Not Available”
“Unable to Activate Face ID”
Face recognition failure
Camera malfunction messages
What makes matters worse is that some Face ID components are cryptographically paired to the motherboard. Once damaged, they cannot simply be replaced with generic parts.
This is why professional technicians use specialized microscopes, calibration tools, and anti-static equipment during repairs.
#1 Damaged Flex Cables
One of the most common causes of Face ID failure is torn flex cables.
The flex cable connecting the front sensor assembly is extremely thin. During DIY repairs, people may accidentally:
Pull the screen too hard
Pry at the wrong angle
Bend the cable sharply
Disconnect connectors improperly
Even microscopic tears can interrupt communication between sensors and the motherboard.
Unfortunately, these cables are fragile enough that damage may not even be visible to the naked eye.
Professional repair technicians inspect these cables under magnification to detect tiny breaks or stress points.
#2 Incorrect Screen Installation
Improper installation can also stop Face ID from working.
When a replacement screen isn’t seated correctly, the sensor assembly may become slightly misaligned. Since Face ID relies on precision positioning, even a tiny shift can interfere with depth mapping.
Common installation mistakes include:
Uneven screw pressure
Missing brackets
Incorrect screw placement
Misaligned sensor brackets
Interestingly, using the wrong screw length can even damage internal motherboard layers. This issue is known in repair circles as “long screw damage.”
Therefore, attention to detail is critical during every repair step.
#3 Dot Projector Misalignment
The dot projector is arguably the most important Face ID component.
It projects thousands of invisible infrared dots onto your face to create a 3D map.
However, this module is extremely delicate.
If the dot projector becomes damaged or misaligned during screen replacement, Face ID may stop working permanently.
Unlike ordinary camera modules, dot projectors require factory-level precision. In many cases, replacing the projector alone won’t restore functionality because the system is uniquely paired to the motherboard.
This is why expert handling matters so much during repairs.
#4 Water Resistance Seal Problems
Modern iPhones use adhesive seals to maintain water resistance.
During DIY screen replacement, these seals are often damaged or discarded entirely.
While this may not immediately affect Face ID, moisture exposure afterward can cause corrosion around sensitive front sensor components.
Over time, corrosion may damage:
Infrared sensors
Camera connectors
Dot projector circuitry
Ambient light sensors
As a result, Face ID may fail days or weeks after the repair.
Professional repair centers typically replace waterproof seals properly using precision adhesives and controlled installation methods.
#5 Non-Genuine Screen Compatibility Issues
Cheap aftermarket screens are another major problem.
Although many third-party displays appear similar to genuine Apple screens, they often lack proper compatibility with Face ID systems.
Common issues include:
Sensor interference
Poor proximity sensor alignment
Excessive display thickness
Weak flex cable shielding
In some cases, aftermarket displays trigger random touchscreen problems alongside Face ID errors.
That’s why reputable repair centers usually recommend premium-quality or genuine replacement parts whenever possible.
#6 Static Electricity Damage
Static electricity can silently destroy sensitive electronics.
Without proper anti-static protection, touching internal iPhone components may discharge electricity into delicate circuits.
The scary part is that static damage often leaves no visible signs.
A repair may appear successful initially, only for Face ID problems to appear later.
Professional technicians use:
ESD-safe workstations
Anti-static mats
Grounded wrist straps
Controlled environments
These precautions dramatically reduce the risk of hidden electrical damage.
#7 Software Calibration Errors
Face ID depends on both hardware and software communication.
Sometimes, after screen replacement, calibration issues occur.
This can happen when:
Connectors are not fully seated
Sensors initialize incorrectly
Software detects hardware mismatch
The repair interrupts TrueDepth calibration
In some situations, software updates or advanced calibration tools may help restore normal operation.
However, severe hardware damage usually requires board-level repair expertise.
#8 Front Camera Damage During Repair
The front camera assembly sits extremely close to the Face ID sensors.
During DIY repairs, users may accidentally damage:
Camera lenses
Sensor brackets
Camera connectors
Infrared filters
When this happens, Face ID often fails simultaneously because the system relies on multiple interconnected modules.
Typical symptoms include:
Symptom
Possible Cause
Blurry selfies
Front camera damage
Black camera screen
Connector issue
Face ID unavailable
Sensor communication failure
Auto-brightness failure
Ambient sensor damage
Therefore, even if the screen replacement seems successful, hidden camera damage may still exist internally.
#9 Improper Tools and Repair Techniques
Many DIY kits include low-quality tools that increase repair risks.
Using metal prying tools incorrectly can scratch circuits, damage connectors, or puncture cables.
Likewise, excessive heat from cheap heat guns may damage nearby components.
Professional repair centers use specialized equipment such as:
Precision screwdrivers
Controlled heating systems
Microsoldering stations
Screen separation machines
Calibration software
These tools help ensure safe, accurate repairs.
Signs Your Face ID Is Failing
After a DIY repair, watch for warning signs immediately.
Common symptoms include:
Face ID setup fails
Unlocking becomes inconsistent
Face recognition slows down
Front camera issues appear
Auto-brightness stops working
Portrait mode fails on selfies
These signs usually indicate sensor communication problems or physical damage.
The sooner the phone is inspected, the better the chances of successful repair.
Can Face ID Be Repaired After DIY Damage?
In many situations, yes — but not always.
The outcome depends on which component failed.
Minor issues like:
Loose connectors
Poor installation
Misaligned brackets
can often be repaired successfully.
However, severe damage to paired components like the dot projector may require advanced microsoldering or specialized data transfer procedures.
In worst-case scenarios, Face ID may become permanently disabled.
That’s why early diagnosis from experienced technicians is extremely important.
Why Professional Repair Matters
Professional repair isn’t only about replacing parts. It’s about protecting delicate systems throughout the repair process.
Experienced technicians understand:
Safe disassembly methods
Component sensitivity
Calibration procedures
Static protection
Screw mapping
Adhesive sealing
Moreover, professional shops often test all sensors before and after repair to confirm everything functions correctly.
This dramatically lowers the risk of accidental Face ID failure.
How Technicians Restore Face ID Properly
Professional repair specialists follow strict procedures when handling Face ID systems.
Typical steps include:
Diagnostic testing
Sensor inspection
Connector verification
Microscope examination
Flex cable testing
Software calibration
Waterproof resealing
Final quality testing
Some advanced repair centers even perform board-level microsoldering repairs to recover damaged Face ID systems.
This expertise can save customers from replacing their entire device.
For official repair information, users can also visit Apple Support.
Tips To Prevent Face ID Problems
If you’re considering screen replacement, these tips can help protect your device.
Always Use Quality Parts
Cheap screens may create compatibility issues.
Avoid Excessive Force
Never pull the display aggressively during opening.
Disconnect Battery First
This reduces electrical damage risks.
Use Proper Tools
Precision tools lower the chance of connector damage.
Consider Professional Repair
Complex devices deserve experienced handling.
Preventive care is usually far cheaper than repairing Face ID damage afterward.
DIY Repair vs Professional Repair Comparison
Feature
DIY Repair
Professional Repair
Lower upfront cost
Yes
No
Risk of Face ID failure
High
Low
Waterproof sealing
Often missing
Professionally restored
Warranty protection
Usually none
Often included
Calibration tools
Limited
Advanced
Microsoldering capability
Rare
Available
Genuine parts access
Limited
Better availability
Although DIY repairs may seem cheaper initially, failed repairs can ultimately become far more expensive.
Frequently Asked Questions
Does replacing an iPhone screen automatically disable Face ID?
No. Proper repairs usually preserve Face ID functionality. Problems happen when components become damaged or improperly installed.
Why does Face ID say “Unavailable” after screen replacement?
This message often appears due to damaged flex cables, sensor misalignment, or communication errors between the TrueDepth system and motherboard.
Can aftermarket screens break Face ID?
Yes. Some low-quality screens interfere with sensor alignment and proximity systems, leading to Face ID issues.
Is Face ID repair expensive?
Costs vary depending on the damage severity. Simple connector fixes may be affordable, while microsoldering repairs are more advanced and costly.
Can Apple repair Face ID damage caused by DIY repair?
In many cases, Apple may recommend full device replacement if paired Face ID components are damaged.
Should I attempt DIY repair again after Face ID failure?
Usually no. Reopening the phone without proper tools or expertise may worsen the damage.
How can I protect Face ID during repair?
Use professional repair services, quality parts, anti-static precautions, and proper installation techniques.
Conclusion
Understanding why your Face ID stops working after a simple DIY screen replacement can help you avoid one of the most frustrating iPhone repair mistakes.
Although DIY repairs may appear simple online, modern iPhones contain incredibly delicate hardware systems. Tiny errors involving flex cables, dot projectors, sensors, or calibration can permanently disable Face ID functionality.
The reality is that Face ID technology requires precision, experience, and specialized tools. While some repair issues are recoverable, severe damage may become irreversible.
That’s why choosing professional repair services remains the safest option for protecting both your device and your data security.
When it comes to modern smartphone repairs, expertise truly matters.
David from Sydney CBD Repair Centre – The Best place to fix mobile phones as 7 Years In A Row! Top Mobile Phone Repair In Sydney. More than 2000 Positive Reviews on Google and Same Day Repairs.
We take pride in delivering exceptional repair services for all major phone brands including Apple, Samsung, Google, and more. Our expert technicians use only genuine parts and offer 90days warranty on repairs. Located in the heart of Sydney CBD, we’re your one-stop solution for all mobile device repairs.
Our commitment to excellence has earned us the trust of thousands of satisfied customers. Whether it’s a cracked screen, battery replacement, or water damage repair, we handle it all with professional care and expertise. Walk in today and experience why we’re Sydney’s #1 choice for mobile phone repairs.
Visit us for:
✓ Same Day Express Repairs
✓ Genuine Parts Guarantee
✓ Professional Technicians
✓ Competitive Pricing
✓ 2000+ 5-Star Google Reviews
✓ 7-Time Award Winner for Best Phone Repairs
Step By Step iPhone 13 Pro Screen Replacement Using Professional Level Repair Techniques – 15 Expert Methods for a Flawless Repair
Introduction
The process of a Step By Step iPhone 13 Pro Screen Replacement can look intimidating at first. However, with the right tools, proper preparation, and professional repair techniques, replacing a damaged display becomes much more manageable. Whether your screen is cracked, unresponsive, flickering, or showing black spots, understanding the repair process helps you restore your device safely and efficiently.
The Apple iPhone 13 Pro features a premium Super Retina XDR OLED display that delivers exceptional image quality. Unfortunately, even a minor drop can damage the screen assembly. As a result, many users search for reliable repair solutions that balance quality and affordability.
In this comprehensive guide, you’ll learn every stage of the repair process using industry-standard methods. We’ll also cover important technician tips, waterproofing restoration, display testing, and quality control procedures. By the end, you’ll understand exactly how professional technicians perform an iPhone 13 Pro screen replacement with precision.
Before beginning a Step By Step iPhone 13 Pro Screen Replacement, it’s important to understand how the display assembly works.
The iPhone 13 Pro display consists of several integrated components:
OLED display panel
Touch digitizer
Front sensor assembly
Earpiece speaker
Ambient light sensor
Face ID components
Unlike older smartphones, modern iPhones combine multiple systems into one compact assembly. Consequently, technicians must work carefully to avoid damaging delicate flex cables and sensors.
The OLED technology used in the iPhone 13 Pro offers:
Feature
Benefit
Super Retina XDR
Sharp visuals
High brightness
Better outdoor visibility
ProMotion 120Hz
Smooth scrolling
HDR support
Improved video quality
Deep blacks
Enhanced contrast
Because these displays are expensive, professional handling is crucial during an iPhone 13 Pro screen replacement.
Lithium-ion batteries can become dangerous if punctured. Therefore, never force components during the repair process.
Professional repair centers also wear:
Safety glasses
Anti-static wrist straps
Heat-resistant gloves
These precautions reduce the risk of injury and device damage.
Preparing Your Workspace Like a Technician
A professional workspace dramatically improves repair success.
Ideal Workspace Setup
Lighting
Bright LED lighting helps identify tiny connectors and screws.
Organization
Use a magnetic project mat to separate screws by location.
Dust Control
Dust particles trapped under the display can ruin the final result.
Temperature Control
Moderate room temperatures improve adhesive handling.
Professional technicians understand that preparation matters just as much as technical skill during a Step By Step iPhone 13 Pro Screen Replacement.
Step By Step iPhone 13 Pro Screen Replacement Process
This section covers the complete repair workflow.
Step 1: Remove Bottom Screws
The two pentalobe screws are located beside the charging port.
Use a proper pentalobe screwdriver to avoid stripping them.
Step 2: Apply Controlled Heat
Heat softens the waterproof adhesive securing the display.
Apply moderate heat around the screen edges for 1–2 minutes.
Avoid overheating the OLED panel.
Step 3: Lift the Display Carefully
Attach a suction cup near the bottom edge.
Gently create a small gap and insert a plastic opening pick.
Slowly slide around the edges.
Do not insert the tool too deeply.
Step 4: Open the Screen Sideways
The iPhone 13 Pro opens like a book from the left side.
Be cautious of flex cables attached internally.
Step 5: Disconnect the Battery
Remove the battery connector bracket first.
Disconnecting the battery prevents accidental short circuits.
Step 6: Disconnect Display Cables
Carefully disconnect:
OLED connector
Touch connector
Sensor assembly connector
Use a plastic spudger only.
At this stage, the damaged display can now be removed safely during the iPhone 13 Pro screen replacement.
Removing the Bottom Screws Correctly
Many beginners accidentally strip screws during repairs.
To avoid this:
Use the correct screwdriver size
Apply downward pressure
Turn slowly
Avoid cheap toolkits
Stripped screws can significantly delay repairs.
Professional technicians often use precision screwdrivers with magnetic tips for better control.
Heating and Lifting the Display Safely
Heat application is one of the most critical repair stages.
Too little heat makes removal difficult.
Too much heat can damage:
OLED layers
Flex cables
Internal seals
Battery
Recommended Heating Methods
Method
Safety Level
Heat pad
Excellent
Controlled heat gun
Good
Hair dryer
Acceptable
Open flame
Dangerous
The goal is to soften adhesive—not melt components.
During a professional Step By Step iPhone 13 Pro Screen Replacement, technicians maintain consistent heat movement to prevent hot spots.
Disconnecting the Battery and Screen Cables
Battery disconnection is mandatory before touching display connectors.
Modern iPhones are highly sensitive to power surges.
Important Tips
Never use metal tools
Lift connectors vertically
Avoid flex cable bending
Keep screws organized
Damaging a connector can result in:
No display output
Touch malfunction
Face ID failure
Boot loops
This stage requires patience and precision.
Transferring Components to the New Display
The replacement display often arrives without small components installed.
You’ll typically need to transfer:
Earpiece speaker
Sensor flex
Brackets
Mesh grills
Face ID components are especially delicate.
Damaging the sensor assembly may permanently disable biometric authentication.
Professional Transfer Tips
Use Gentle Heat
This softens adhesive securing sensors.
Avoid Excessive Flexing
Sensor cables tear easily.
Maintain Screw Positions
Incorrect screw placement can damage the motherboard.
During a high-quality iPhone 13 Pro screen replacement, technicians inspect transferred parts under magnification.
Installing the Replacement Screen
Now it’s time to install the new display assembly.
Installation Steps
Connect display flex cables
Reconnect battery connector
Test the display before sealing
Power on the device
Verify touch responsiveness
Testing before final assembly prevents unnecessary reopening.
Screen Testing Checklist
Function
Test
OLED display
Brightness and color
Touchscreen
Full responsiveness
Face ID
Authentication
Front camera
Clarity
Earpiece
Audio quality
Proximity sensor
Screen dimming
Once testing passes, apply fresh waterproof adhesive around the frame.
Testing Face ID and Touch Functionality
Face ID issues are common after improper repairs.
The front sensor assembly is paired to the motherboard, meaning replacement isn’t simple.
Face ID Testing Procedure
Open Settings
Navigate to Face ID
Attempt setup
Test unlock functionality
Touch Testing
Drag an app icon around the screen to identify dead zones.
Professional technicians also run diagnostic software during an iPhone 13 Pro screen replacement to verify:
Multi-touch response
Display brightness
Sensor calibration
Common Mistakes During Screen Repair
Even experienced repair technicians occasionally make errors.
Here are the most common repair mistakes:
Using Excessive Force
Forcing the display open can tear flex cables.
Mixing Screws
Incorrect screws may puncture internal layers.
Skipping Battery Disconnection
This can short circuit components.
Cheap Replacement Screens
Low-quality displays often suffer from:
Poor brightness
Weak touch sensitivity
Battery drain
Color inaccuracies
Ignoring Waterproof Adhesive
Without sealing adhesive, water resistance is compromised.
Avoiding these mistakes greatly improves repair success rates.
OEM vs Aftermarket iPhone 13 Pro Screens
Choosing the right replacement screen matters.
OEM Displays
Original equipment manufacturer screens offer:
Superior brightness
Accurate colors
Better durability
Reliable touch response
However, they’re more expensive.
Aftermarket Screens
Aftermarket options vary widely in quality.
Screen Type
Quality
Hard OLED
Mid-range
Soft OLED
Excellent
LCD conversion
Low
Refurbished OEM
Premium
Professional repair shops usually recommend Soft OLED or OEM displays for the best user experience during an iPhone 13 Pro screen replacement.
Waterproofing and Adhesive Restoration
The iPhone 13 Pro includes factory water resistance.
Opening the phone breaks the original seal.
Therefore, technicians must install new waterproof adhesive after repair.
Adhesive Installation Tips
Clean old adhesive completely
Use precision-cut seals
Align carefully
Apply even pressure
Although resealing improves protection, repaired devices should still avoid heavy water exposure.
Post-Repair Quality Inspection
Professional repairs always conclude with quality testing.
Final Inspection Checklist
Visual Inspection
No screen gaps
No dust under display
Proper alignment
Functional Testing
Charging
Audio
Cameras
Sensors
Face ID
Pressure Test
Some repair centers perform seal pressure testing to evaluate waterproofing integrity.
A professional Step By Step iPhone 13 Pro Screen Replacement always includes comprehensive final checks.
When to Seek Professional Repair Services
DIY repairs can save money, but they aren’t ideal for everyone.
You should consider professional repair if:
Face ID is involved
The frame is bent
The phone suffered water damage
You lack proper tools
You’ve never repaired smartphones before
Experienced repair technicians reduce the risk of costly secondary damage.
Professional repair shops also provide:
Warranty coverage
Genuine parts
Fast turnaround
Diagnostic testing
Frequently Asked Questions
How long does an iPhone 13 Pro screen replacement take?
Professional technicians usually complete the repair within 1–2 hours.
Will Face ID still work after screen replacement?
Yes, provided the original sensor assembly remains undamaged.
Is the iPhone 13 Pro waterproof after repair?
Water resistance can be improved using replacement adhesive, but factory waterproofing may not be fully restored.
Can I replace only the glass?
Glass-only repairs are possible but require advanced equipment and expertise.
Are aftermarket screens worth buying?
High-quality Soft OLED screens can perform very well, but cheap screens often cause problems.
Does replacing the screen affect True Tone?
True Tone functionality may require programming tools during an iPhone 13 Pro screen replacement.
Is DIY repair cheaper?
DIY repairs can reduce costs, but mistakes may become expensive.
Conclusion
Performing a Step By Step iPhone 13 Pro Screen Replacement requires patience, technical precision, and proper tools. From careful adhesive heating to delicate flex cable handling, every stage influences the final repair quality.
Although many users successfully complete DIY repairs, professional-level results depend heavily on experience and attention to detail. Choosing quality replacement parts, maintaining organized work habits, and testing all functions thoroughly are essential for long-lasting performance.
Whether you’re a beginner learning smartphone repair or an experienced technician refining your process, following professional repair techniques ensures safer and more reliable outcomes.
By understanding the full repair workflow, you can confidently restore the stunning display performance of your Apple iPhone 13 Pro while minimizing repair risks.
David from Sydney CBD Repair Centre – The Best place to fix mobile phones as 7 Years In A Row! Top Mobile Phone Repair In Sydney. More than 2000 Positive Reviews on Google and Same Day Repairs.
We take pride in delivering exceptional repair services for all major phone brands including Apple, Samsung, Google, and more. Our expert technicians use only genuine parts and offer 90days warranty on repairs. Located in the heart of Sydney CBD, we’re your one-stop solution for all mobile device repairs.
Our commitment to excellence has earned us the trust of thousands of satisfied customers. Whether it’s a cracked screen, battery replacement, or water damage repair, we handle it all with professional care and expertise. Walk in today and experience why we’re Sydney’s #1 choice for mobile phone repairs.
Visit us for:
✓ Same Day Express Repairs
✓ Genuine Parts Guarantee
✓ Professional Technicians
✓ Competitive Pricing
✓ 2000+ 5-Star Google Reviews
✓ 7-Time Award Winner for Best Phone Repairs
Sydney CBD Repair Centre – Where Quality Meets Reliability.
Call : +61280114119
Website: Sydney CBD Repair Centre
Step by Step Guide to the First Ever iPhone 17 Pro Screen Replacement – Ultimate Expert Guide (2026)
📱 Introduction to iPhone 17 Pro Screen Replacement
The first ever iPhone 17 Pro screen replacement is already becoming a hot topic among repair technicians and DIY enthusiasts. With the latest innovations from Apple, screen repair isn’t what it used to be.
Let’s face it—dropping your phone happens to the best of us. But when it comes to replacing the display of the iPhone 17 Pro, things have evolved. This guide walks you through every step in a clear, easy-to-follow way.
Whether you’re a beginner or an experienced technician, you’ll find this guide practical, detailed, and worth your time.
These tools can make your iPhone 17 Pro screen replacement smoother and safer.
⚠️ Safety Precautions Before Starting
Personal Safety Tips
Always power off the device
Work in a clean, well-lit space
Wear anti-static gloves
Device Protection Measures
Avoid overheating the phone
Handle connectors gently
Keep screws organized
Skipping these steps can damage your phone permanently.
🔧 Step-by-Step iPhone 17 Pro Screen Replacement Guide
Step 1: Power Off the Device
Turn off your phone completely. This prevents electrical damage.
Step 2: Remove Screws
Use a pentalobe screwdriver to remove the bottom screws near the charging port.
Step 3: Heat and Lift Display
Apply gentle heat around the edges. Then:
Use a suction cup
Insert a plastic pry tool
Slowly lift the screen
Take your time here—rushing can crack the display further.
Step 4: Disconnect Battery
Before touching any internal parts:
Locate the battery connector
Carefully disconnect it
This is critical for safety.
Step 5: Remove Display Connectors
Next, disconnect:
Display cable
Touch sensor cable
Face ID components
Handle these with extreme care.
Step 6: Install New Screen
Now comes the exciting part:
Align the new screen
Reconnect all cables
Secure the display
Replace screws
Congratulations—you’ve completed the iPhone 17 Pro screen replacement!
❌ Common Mistakes to Avoid
Even pros slip up sometimes. Watch out for:
Using too much heat
Pulling cables too hard
Forgetting to disconnect the battery
Mixing up screws
Avoiding these mistakes saves time and money.
💰 Cost Analysis: DIY vs Professional Repair
Option
Cost
Risk Level
Time
DIY Repair
$150–$300
High
1–2 hours
Professional Repair
$300–$600
Low
30–60 mins
If you’re unsure, professional repair is often the safer bet.
⏱️ How Long Does the Repair Take?
Typically:
Beginners: 1–2 hours
Experts: 30–45 minutes
Your first iPhone 17 Pro screen replacement might take longer—and that’s perfectly okay.
✅ Testing the New Screen
Before sealing everything:
Turn on the phone
Check touch responsiveness
Test brightness and colors
Verify Face ID functionality
If something feels off, reopen and check connections.
🔋 Maintenance Tips After Replacement
Keep your new screen in top shape:
Use a screen protector
Avoid drops
Clean regularly
Use a protective case
Simple habits go a long way.
🧑🔧 When to Seek Professional Help
DIY isn’t always the best route. Consider professional repair if:
Screen is completely unresponsive
Internal damage is suspected
You lack proper tools
Sometimes, it’s smarter to leave it to experts.
❓ FAQs
1. Is iPhone 17 Pro screen replacement difficult?
Yes, it’s more complex than older models due to advanced technology.
2. Can I replace the screen myself?
You can, but it requires skill, patience, and the right tools.
3. Will replacing the screen affect Face ID?
It might, especially if sensors are damaged or misaligned.
4. How much does iPhone 17 Pro screen replacement cost?
DIY costs around $150–$300, while professional repair can reach $600.
5. Is the new screen as good as the original?
If you use high-quality parts, performance should be very close.
6. How do I know if my screen needs replacement?
Signs include cracks, unresponsive touch, flickering, or black display.
🏁 Conclusion
The first ever iPhone 17 Pro screen replacement is a blend of precision, patience, and technical know-how. While it’s possible to do it yourself, it’s not without risks.
If you follow this guide carefully, you’ll improve your chances of a successful repair. Still, don’t hesitate to seek professional help when needed.
At the end of the day, keeping your device in top condition ensures it serves you well for years to come.
David from Sydney CBD Repair Centre – The Best place to fix mobile phones as 7 Years In A Row! Top Mobile Phone Repair In Sydney. More than 2000 Positive Reviews on Google and Same Day Repairs.
We take pride in delivering exceptional repair services for all major phone brands including Apple, Samsung, Google, and more. Our expert technicians use only genuine parts and offer 90days warranty on repairs. Located in the heart of Sydney CBD, we’re your one-stop solution for all mobile device repairs.
Our commitment to excellence has earned us the trust of thousands of satisfied customers. Whether it’s a cracked screen, battery replacement, or water damage repair, we handle it all with professional care and expertise. Walk in today and experience why we’re Sydney’s #1 choice for mobile phone repairs.
Visit us for:
✓ Same Day Express Repairs
✓ Genuine Parts Guarantee
✓ Professional Technicians
✓ Competitive Pricing
✓ 2000+ 5-Star Google Reviews
✓ 7-Time Award Winner for Best Phone Repairs
Repairing a Shattered iPhone 17 Display Without Losing Face ID Sensor Function: 9 Proven Methods
Introduction
Cracking your iPhone 17 display is one of those frustrating moments every smartphone user dreads. Beyond the obvious cosmetic damage, the iPhone 17’s sophisticated TrueDepth camera system adds another layer of concern—how to repair the screen without compromising Face ID functionality. Face ID isn’t just a convenience; it’s a security feature tied directly to the front-facing camera and sensor system. A misaligned or improperly installed screen can disable it completely, leaving your phone less secure and less functional.
In this comprehensive guide, we’ll walk you through step-by-step methods to repair a shattered iPhone 17 display while preserving Face ID. From DIY approaches to professional services and Apple-authorized repairs, you’ll learn how to handle each option safely. We’ll also cover pre-repair preparation, testing procedures, common challenges, and maintenance tips to prevent future damage. By following these expert recommendations, you can restore your device’s screen and maintain its cutting-edge facial recognition without worry.
This article is designed for anyone looking to confidently tackle iPhone 17 screen damage—from tech enthusiasts attempting a DIY repair to users seeking professional solutions. With detailed guidance, practical tips, and a focus on preserving critical features, you’ll gain the knowledge needed to make an informed decision and keep your iPhone 17 fully functional.
Repairing your iPhone 17 display can feel like a high-stakes operation, especially if you rely on Face ID daily. The iPhone 17’s advanced TrueDepth camera system is integrated tightly with the front display, making screen replacements delicate. In this guide, we’ll walk you through 9 proven methods to restore your display without compromising Face ID functionality, ensuring your device stays as secure and responsive as ever.
The iPhone 17 features Apple’s most advanced display and Face ID system yet. The Super Retina XDR display combined with the TrueDepth camera ensures both stunning visuals and secure facial recognition.
How the TrueDepth Camera Works
The TrueDepth camera uses infrared sensors, flood illuminators, and a dot projector to map your face in 3D. Any misalignment during screen replacement can prevent Face ID from functioning. Maintaining its precise placement is crucial.
1. Can I replace my iPhone 17 screen without affecting Face ID?
Yes, but you must handle the TrueDepth camera with care or opt for professional repair.
2. How much does it cost to replace the iPhone 17 screen professionally?
Prices typically range from $250 to $400 depending on parts and labor.
3. Will Apple repair Face ID if it stops working after a DIY repair?
Apple may require a full sensor/module replacement, which could be costly.
4. Are aftermarket screens safe for Face ID?
Not always. Only high-quality replacements maintain accurate sensor alignment.
5. Can I calibrate Face ID myself after screen replacement?
Yes, via Settings → Face ID & Passcode → Reset Face ID, then re-scan your face.
6. How long does a professional repair take?
Most professional repairs take 30–60 minutes for screen and sensor replacements.
Conclusion
Repairing a shattered iPhone 17 display without losing Face ID functionality is doable if approached carefully. Whether you choose DIY, professional services, or Apple authorized repair, understanding the TrueDepth camera, preparing properly, and testing post-repair are key steps. By following these 9 proven methods, you can restore your phone’s display and secure authentication while extending the device’s lifespan.
David from Sydney CBD Repair Centre – The Best place to fix mobile phones as 7 Years In A Row! Top Mobile Phone Repair In Sydney. More than 2000 Positive Reviews on Google and Same Day Repairs.
We take pride in delivering exceptional repair services for all major phone brands including Apple, Samsung, Google, and more. Our expert technicians use only genuine parts and offer 90days warranty on repairs. Located in the heart of Sydney CBD, we’re your one-stop solution for all mobile device repairs.
Visit us for:
✓ Same Day Express Repairs
✓ Genuine Parts Guarantee
✓ Professional Technicians
✓ Competitive Pricing
✓ 2000+ 5-Star Google Reviews
✓ 7-Time Award Winner for Best Phone Repairs
Fixing The Titanium Frame Damage On A Smashed iPhone 16 Pro Max: 10 Proven Methods To Restore Its Strength
Introduction
The iPhone 16 Pro Max is renowned for its sleek design, cutting-edge features, and the robust titanium frame that provides superior strength compared to earlier models. However, even the toughest materials can suffer damage when faced with accidental drops, high-impact collisions, or everyday wear and tear. Titanium frames, while durable, are not immune to dents, bends, or cracks that can compromise both the device’s structural integrity and its aesthetic appeal.
Repairing a smashed titanium frame is not as straightforward as replacing a cracked screen. The process requires specialized tools, precise techniques, and a deep understanding of the material’s properties. Whether you’re a tech enthusiast considering a DIY fix or someone seeking professional assistance, knowing how to approach titanium frame repairs can save you time, money, and stress.
In this article, we will explore the causes of titanium frame damage, assess how to identify the severity of the damage, and provide step-by-step solutions for restoring your iPhone 16 Pro Max to its original condition. We’ll also discuss the pros and cons of DIY versus professional repairs, maintenance tips to prevent future damage, and answer frequently asked questions to ensure you have all the guidance needed to handle your device safely and effectively. By the end, you’ll be equipped with the knowledge to make informed decisions about repairing your titanium-framed iPhone without compromising its functionality or design.
The iPhone 16 Pro Max introduced a titanium frame, a significant upgrade from the stainless steel used in previous models. Titanium offers exceptional strength-to-weight ratio, corrosion resistance, and aesthetic appeal. However, despite its robustness, it is not impervious to damage. Drops, impacts, or even pressure from pockets can leave your iPhone with bent corners, dents, or cracks along the frame. Understanding the properties of titanium helps in choosing the right repair method. Unlike aluminum or steel, titanium cannot be bent easily without proper tools, and improper handling can lead to permanent damage or misalignment.
Common Causes of Titanium Frame Damage
Titanium frames are durable, but they are still vulnerable under certain conditions:
Accidental Drops: Even a short drop onto a hard surface can cause frame deformation.
Excessive Pressure: Sitting on the phone or forcing it into tight pockets.
DIY Repairs: Attempting frame repair without proper tools can worsen damage.
Environmental Stress: Exposure to extreme heat or sudden temperature changes.
Understanding the cause is critical for determining whether a DIY repair is feasible or if professional intervention is required.
Assessing the Extent of Damage
Before attempting any repair, thorough assessment is necessary:
Visual Inspection: Look for dents, bends, or visible cracks.
Component Check: Ensure buttons, screens, and internal components are not compromised.
Alignment Test: Check if the screen sits flush with the frame.
Tools for Assessment: Precision rulers, magnifiers, and small straight edges help measure misalignments.
A proper assessment prevents unnecessary damage during repair.
Safety Precautions Before Repair
Repairing a titanium frame can be hazardous. Consider these precautions:
Disconnect the battery to avoid short circuits.
Use anti-static mats and wristbands to protect sensitive components.
Wear gloves to avoid cuts from sharp edges.
Avoid high heat on internal components to prevent melting adhesives.
Safety is as important as the repair process itself.
Having the right tools prevents further damage and ensures a high-quality finish.
Step-by-Step Titanium Frame Repair Process
Disassembling the iPhone Safely
Remove the screen carefully using suction cups.
Disconnect the battery and internal flex cables.
Label screws and components to avoid reassembly errors.
Straightening Bent Frames
Use micro clamps to gently bend the frame back into shape.
Avoid excessive force; small incremental adjustments prevent fractures.
Welding and Adhesive Options
For minor cracks, specialized titanium adhesives can bond frame edges.
Professional welding may be necessary for severe dents or splits.
Always follow manufacturer guidelines for temperature and curing times.
Polishing and Finishing
Smooth out rough edges with microfiles.
Polish the frame to restore its original aesthetic.
Ensure screen and buttons align correctly post-polish.
Testing Frame Integrity Post-Repair
After repair:
Conduct flex and pressure tests.
Ensure all buttons click properly.
Verify screen and back panel alignment.
Test device for normal functionality, including charging and camera operation.
Cost vs. Benefit Analysis of Frame Repairs
Consider:
Repair cost vs. replacement cost
iPhone resale value after frame repair
Risk of DIY damage
Longevity of professional repair
In many cases, professional repair maximizes device lifespan and resale potential.
Maintaining Your iPhone Post-Repair
Use high-quality protective cases.
Avoid tight pockets and pressure-prone situations.
Regularly inspect frame and screen for early signs of wear.
Common Mistakes To Avoid
Overheating during bending or welding
Using non-specific adhesives
Applying excessive force to bends
Skipping battery disconnection
Ignoring button and screen alignment checks
Avoiding these mistakes ensures a successful repair.
Frequently Asked Questions (FAQ)
1. Can a titanium frame be bent back without welding?
Yes, minor bends can often be corrected using micro clamps and precision tools, but welding may be required for severe damage.
2. Is DIY repair safe for an iPhone 16 Pro Max?
Only if you have the proper tools and expertise. Otherwise, professional repair is safer and more reliable.
3. How long does a professional titanium frame repair take?
At Sydney CBD Repair Centre, most repairs are completed the same day, depending on damage severity.
4. Will repaired titanium frames affect phone resale value?
If professionally repaired with genuine parts, resale value is minimally impacted. DIY repairs may reduce value.
5. Can adhesives replace welding entirely?
For small cracks, yes. Severe dents usually require welding for structural integrity.
6. What maintenance prolongs titanium frame life?
Protective cases, careful handling, avoiding high-pressure situations, and regular inspections.
External Resources
For more detailed information on official repair guidelines, visit Apple iPhone Repair for certified procedures.
Conclusion
Fixing the titanium frame damage on a smashed iPhone 16 Pro Max requires precision, the right tools, and knowledge of material properties. While DIY repairs are possible for minor issues, professional services ensure long-lasting results and preserve device integrity. At Sydney CBD Repair Centre, we provide expert titanium frame repairs using genuine parts, professional techniques, and same-day service to get your iPhone back in top condition.
David from Sydney CBD Repair Centre – The Best place to fix mobile phones as 7 Years In A Row! Top Mobile Phone Repair In Sydney. More than 2000 Positive Reviews on Google and Same Day Repairs.
We take pride in delivering exceptional repair services for all major phone brands including Apple, Samsung, Google, and more. Our expert technicians use only genuine parts and offer 90days warranty on repairs. Located in the heart of Sydney CBD, we’re your one-stop solution for all mobile device repairs.
Our commitment to excellence has earned us the trust of thousands of satisfied customers. Whether it’s a cracked screen, battery replacement, or water damage repair, we handle it all with professional care and expertise. Walk in today and experience why we’re Sydney’s #1 choice for mobile phone repairs.
Visit us for:
✓ Same Day Express Repairs
✓ Genuine Parts Guarantee
✓ Professional Technicians
✓ Competitive Pricing
✓ 2000+ 5-Star Google Reviews
✓ 7-Time Award Winner for Best Phone Repairs
From Scrap to Sparkle: Reviving a Critically Damaged iPhone 15 Pro Max Screen + 12 Proven Techniques
Introduction:
Your iPhone 15 Pro Max is more than just a phone—it’s a personal assistant, a camera, a gaming device, and a hub for your digital life. So, when its screen suffers a critical crack or shatter, it can feel like your entire day comes to a halt. The good news? Even the most damaged iPhone 15 Pro Max screens can be revived with the right approach, tools, and professional guidance.
In this article, we’ll take you step by step through understanding the screen’s complex structure, diagnosing hidden damage, exploring both DIY and professional repair options, and applying preventive measures to keep your screen looking flawless. Whether you’re a tech enthusiast eager to attempt a self-repair or someone seeking trusted professional services, this guide provides practical, detailed, and reliable solutions to bring your iPhone back to life.
By the end of this guide, you’ll not only understand how to restore your device but also learn how to protect it for the long haul—turning that “scrap” into true “sparkle.”
The iPhone 15 Pro Max is an engineering marvel, but even the toughest phones aren’t immune to damage. A shattered screen can make your smartphone almost unusable—but fear not. Reviving a critically damaged iPhone 15 Pro Max screen isn’t impossible. With the right knowledge, tools, and a touch of expertise, you can restore your device to like-new condition. This guide dives into everything you need to know—from diagnosing damage to professional repairs, DIY strategies, and preventive tips.
Before attempting any repair, it’s vital to understand what makes up your iPhone 15 Pro Max screen. Modern Apple devices use a combination of advanced materials and sensors to deliver exceptional display quality.
Display Panels: OLED vs Super Retina XDR
The iPhone 15 Pro Max uses a Super Retina XDR OLED display, providing vibrant colors, deep blacks, and high contrast ratios. OLED technology allows each pixel to emit its own light, making it more energy-efficient but slightly more delicate compared to older LCDs. Understanding this helps prevent unnecessary errors during repairs.
Touch Sensitivity & Haptic Layer
Underneath the screen lies the touch-sensitive layer, which detects every tap and swipe. The haptic feedback layer gives the tactile response you feel when interacting with your device. Damage to these layers may not always be visible, but it can severely affect the device’s functionality, even if the glass appears intact.
Knowing how your screen can get damaged helps in both repair and prevention.
Accidental Drops and Impacts
Most screen damage happens from drops. Even a small fall on a hard surface can cause cracks or dislodge internal components. According to research, 40% of iPhone repairs are due to accidental drops.
Water and Liquid Exposure
Though the iPhone 15 Pro Max is water-resistant, liquid can still seep in, damaging the OLED layer and sensors. Sticky residues from drinks or saltwater are particularly harmful.
Heat, Pressure, and Environmental Factors
High temperatures, prolonged sun exposure, or excessive pressure (like sitting with your phone in your pocket) can warp or fracture the screen. These factors can cause subtle cracks that worsen over time.
Diagnosing the Extent of Damage
Not all damage is obvious. Proper diagnosis ensures effective repair.
Visual Inspection: Cracks and Shards
Start by checking for visible cracks, chips, or shattered glass. Look for discoloration or dead pixels, which indicate deeper damage.
Functional Tests: Touch, Display, and Sensors
Test the touch responsiveness, brightness levels, and color display. Check Face ID and haptic feedback for any issues.
Professional Diagnostic Tools
Advanced repair shops use microscopes, thermal imaging, and software diagnostics to pinpoint hidden faults. Consulting professionals can save you time and money in the long run.
DIY Screen Repair: Risks and Limitations
DIY repairs are tempting but come with risks.
Necessary Tools and Kits
You’ll need precision screwdrivers, suction tools, anti-static mats, and specialized adhesives. Without these, you risk further damage.
Step-by-Step Replacement Process
Power off your iPhone.
Remove screws near the Lightning port.
Carefully separate the screen from the frame.
Disconnect the battery and display connectors.
Replace the screen assembly and reassemble.
Even with careful steps, minor misalignments can impair performance.
Common Mistakes and How to Avoid Them
Using excessive force on connectors.
Skipping anti-static precautions.
Not testing the new screen before final assembly.
Professional Repair Options
Apple Authorized Service Providers
Offers original parts and warranty coverage. Repairs are often costlier but guarantee quality and compatibility.
Independent Repair Shops
Many independent shops, like Sydney CBD Repair Centre, offer competitive pricing, rapid turnaround, and genuine parts, often with a 90-day warranty. Independent shops can sometimes handle issues that Apple may not cover under warranty.
Sydney CBD Repair Centre Case Study
Our experts have repaired thousands of iPhones, restoring shattered screens efficiently. With 7 years of awards and 2000+ 5-star reviews, we’re the trusted choice for Sydney locals. Learn more here.
Screen Protection Post-Repair
Prevention is key after repair.
Tempered Glass & Film Protectors
High-quality tempered glass reduces the risk of future cracks. Look for ultra-clear, high-durability options.
Cases and Edge Protection
Rugged cases with reinforced edges absorb shock and prevent direct impact on the screen.
Usage Habits to Extend Screen Life
Avoid placing phones in back pockets.
Keep away from heat and liquids.
Clean gently with microfiber cloths.
Cost Analysis: DIY vs Professional Repair
Factor
DIY
Professional
Cost
$80–$200
$250–$450
Time
1–3 hours
30–60 minutes
Risk
High
Low
Warranty
None
90 days+
Skill Required
Advanced
Minimal
Professional repair is generally safer, faster, and more reliable, especially for critical damage.
FAQs
1. Can I repair my iPhone 15 Pro Max screen myself?
Yes, but it carries risks. Professional repair is recommended for severe damage.
2. How long does a screen repair take?
DIY can take 1–3 hours; professional services often complete repairs in under an hour.
3. Will my warranty be voided by DIY repair?
Yes, self-repair may void Apple’s warranty. Always check before attempting.
4. What is the cost difference between Apple and independent repair?
Apple repairs are typically higher due to original parts; independent shops are more affordable but still reliable.
5. Can cracked screens affect Face ID?
Yes, cracks near the TrueDepth sensor can impair Face ID functionality.
6. How can I prevent future screen damage?
Use tempered glass, protective cases, and avoid drops, heat, and pressure.
Conclusion
Reviving a critically damaged iPhone 15 Pro Max screen requires understanding the screen’s structure, accurate damage diagnosis, and selecting the right repair path—DIY or professional. With careful attention and preventive measures, your iPhone can return to pristine condition. Remember, investing in professional repair services and protective accessories ensures both performance and longevity.
David from Sydney CBD Repair Centre – The Best place to fix mobile phones as 7 Years In A Row! Top Mobile Phone Repair In Sydney. More than 2000 Positive Reviews on Google and Same Day Repairs.
Visit us for:
✓ Same Day Express Repairs
✓ Genuine Parts Guarantee
✓ Professional Technicians
✓ Competitive Pricing
✓ 2000+ 5-Star Google Reviews
✓ 7-Time Award Winner for Best Phone Repairs
Repairing a 2010 iPhone 4 in 2025? Complete Guide + 10 Essential Tips
Introduction
Repairing a 2010 iPhone 4 in 2025 may seem unusual, yet thousands of enthusiasts and pragmatic users still opt to revive this iconic device. While technology has advanced significantly, the iPhone 4’s classic design and durable build have earned it a lasting place in smartphone history. Whether you’re nostalgic, aiming to save money, or need a secondary device, understanding repair options today is crucial. This article explores repair feasibility, common issues, DIY versus professional repair strategies, and how to extend your iPhone 4’s lifespan efficiently.
The iPhone 4, released in June 2010, marked a major shift in Apple’s smartphone design. Featuring a sleek glass-and-steel chassis, the Retina display, and improved camera capabilities, it set a benchmark in mobile technology. Its release was pivotal for Apple, introducing FaceTime, a high-resolution front-facing camera, and iOS 4 multitasking.
Technical Specs
Display: 3.5-inch Retina, 960×640 resolution
Processor: Apple A4 chip, 512MB RAM
Storage Options: 8GB, 16GB, 32GB
Camera: 5MP rear, VGA front
Battery: 1420 mAh, non-removable
Connectivity: 3G, Wi-Fi, Bluetooth 2.1
Even today, these specifications allow for basic web browsing, calls, messaging, and app usage compatible with legacy software.
Over 15 years, lithium-ion batteries naturally degrade, leading to reduced capacity, sudden shutdowns, or swelling. Replacing the battery can restore performance and is crucial for safety.
Screen Damage
The glass display is prone to cracks, scratches, and LCD malfunctions. Old digitizers may respond inconsistently, impacting touch functionality. Repairing or replacing the screen is often the first step in reviving a 2010 iPhone 4.
Water Damage
Exposure to water or moisture often leads to corrosion in the motherboard or connectors. Immediate disassembly and professional drying techniques can save the device if acted on quickly.
Button Malfunctions
Frequent use of the home, power, or volume buttons can lead to mechanical wear. Repairing or replacing these components restores the phone’s physical interface.
Repair Feasibility in 2025
Availability of Parts
Original iPhone 4 parts are scarce but still obtainable through specialized suppliers. Aftermarket parts are more common but may compromise quality or longevity.
Cost Analysis
Depending on the repair type, restoring an iPhone 4 today can range from $50–$150. While not cost-efficient for daily use compared to modern devices, it’s reasonable for collectors or low-demand users.
DIY Repairs
Tools Needed
Precision screwdrivers
Suction cups and plastic spudgers
ESD-safe tweezers
Adhesive strips and cleaning solutions
Step-by-Step Guide
Power off the device and remove the screws.
Detach the front glass carefully with suction cups.
Replace the LCD and touch screen assembly.
Swap the battery, reconnect all connectors.
Reassemble and test functionality.
Safety note: DIY repairs carry risk. Ensure a static-free workspace and follow video tutorials.
Professional Repairs
Advantages
Opting for professional repair ensures:
Use of genuine parts
Expertise in delicate components
Warranty coverage
Faster turnaround times
Choosing a Repair Center
Select technicians with verified reviews, certifications, and transparent pricing. In Sydney, Sydney CBD Repair Centre is a trusted provider with over 2000 positive Google reviews.
Software Support
iOS Compatibility
The iPhone 4’s latest official update is iOS 7.1.2. Modern apps may not be compatible, limiting usability for some users.
Alternative OS Solutions
Legacy apps, jailbreaking, or installing custom firmware can extend functionality, though with potential security risks.
Extending Lifespan
Maintenance Tips
Charge using certified adapters
Avoid extreme temperatures
Clean ports and buttons regularly
Accessories & Upgrades
Use protective cases, tempered glass, and external battery packs to reduce wear and increase usability.
Cost-Benefit Comparison
Aspect
DIY
Professional
Cost
Lower
Moderate
Risk
High
Low
Warranty
None
Yes
Expertise
Limited
Certified
Time
Longer
Faster
FAQs
1. Can the iPhone 4 run modern apps?
Mostly no. It’s limited to legacy apps compatible with iOS 7.1.2.
2. How long will a replaced battery last?
Typically 1–2 years, depending on usage and care.
3. Are aftermarket parts safe?
They are usable but may have lower quality and durability.
4. Can water-damaged iPhone 4s be fully restored?
Yes, if corrosion is minimal and professional restoration is undertaken quickly.
5. Is DIY repair worth it?
It saves money but risks damaging delicate components without expertise.
6. Where can I find original iPhone 4 parts?
Specialized Apple part suppliers or reputable repair centers like Sydney CBD Repair Centre.
Conclusion
Repairing a 2010 iPhone 4 in 2025 is possible, practical, and even rewarding for certain users. While limitations exist in terms of software and hardware longevity, careful repair and maintenance can extend the device’s usefulness. Whether opting for DIY or professional services, understanding the costs, risks, and benefits ensures a successful restoration of this iconic smartphone.
David from Sydney CBD Repair Centre – The Best place to fix mobile phones as 6 Years In A Row! Top Mobile Phone Repair In Sydney. More than 2000 Positive Reviews on Google and Same Day Repairs.
Visit us for:
✓ Same Day Express Repairs
✓ Genuine Parts Guarantee
✓ Professional Technicians
✓ Competitive Pricing
✓ 2000+ 5-Star Google Reviews
✓ 6-Time Award Winner for Best Phone Repairs
iPhones are renowned for their sleek designs and durable build, but even the toughest glass isn’t invincible. Apple’s commitment to high-quality materials, such as Gorilla Glass and Ceramic Shield, ensures enhanced resistance to scratches, drops, and everyday wear and tear. However, accidents happen, and screens can crack, chip, or develop other issues. Understanding what makes iPhone glass resilient and how it can be repaired is essential for maintaining your device’s functionality and aesthetic appeal.
This article explores 10 proven solutions to fix iPhone glass damage, offers insights into professional versus DIY repairs, and highlights preventive measures to keep your screen in pristine condition.
iPhone glass durability stems from advanced technology and precise manufacturing processes. Apple combines chemical strengthening, layered designs, and reinforced edges to ensure screens withstand daily stress. The introduction of Ceramic Shield in newer models has further increased drop resistance by up to 4x compared to previous generations.
Gorilla Glass vs Ceramic Shield
Feature
Gorilla Glass
Ceramic Shield
Material
Aluminosilicate glass
Glass infused with nano-ceramic crystals
Drop Resistance
Moderate
Up to 4x better
Scratch Resistance
Good
Very good
Common Models
iPhone 6–12
iPhone 12–16 series
Repair Consideration
Easier to replace
Slightly more complex, requires professional tools
Manufacturing Process of Tough Glass
Apple’s glass manufacturing involves ion-exchange processes that replace smaller ions with larger ones, creating compressive stress layers that resist impact. For Ceramic Shield, nano-ceramic crystals are embedded into the glass to strengthen the structure without compromising clarity. Understanding this helps users appreciate why certain repairs require professional expertise.
Even the toughest glass can succumb to accidents. Most screen damage occurs from a combination of impact, pressure, or environmental factors.
Accidental Drops
Statistics show that over 60% of screen damage results from dropping the device. Even a minor fall from waist height can lead to cracks, especially if the surface is hard.
Pressure and Bending
Placing the phone under pressure—like sitting on it—or bending can stress the glass and internal components, resulting in hairline fractures or full breakage.
Temperature Extremes
Extreme heat or cold can weaken the glass structure. Rapid temperature changes may cause expansion and contraction, leading to cracks over time.
Signs That Your iPhone Glass Needs Repair
Recognizing early signs of damage can prevent further issues and costly repairs.
Visible Cracks and Chips
Even small chips at the corners can spread quickly if untreated. Minor cracks may seem cosmetic but can compromise touch sensitivity.
Unresponsive Touch or Ghost Touch
A damaged screen can lead to ghost touches, where the phone responds unpredictably or doesn’t respond at all.
Display Issues
Screen damage can manifest as dead pixels, discoloration, or flickering. Ignoring these signs may affect internal components like the digitizer or LCD.
DIY vs Professional Repair: Which is Best?
Choosing between DIY kits and professional repairs requires evaluating cost, risk, and quality.
DIY Screen Repair Kits
Pros:
Lower cost
Convenient at home
Learning experience
Cons:
Risk of further damage
No warranty
Requires precision and patience
Professional Repair Services
Pros:
Guaranteed quality
Use of genuine parts
Warranty coverage
Fast, same-day service (e.g., Sydney CBD Repair Centre)
Cons:
Higher cost compared to DIY
Availability may vary by location
Step-by-Step Guide to Fixing iPhone Glass
Safety first: Always power off your device and use an anti-static workspace.
Tools and Equipment Needed
Precision screwdrivers
Suction cups
Plastic spudgers
Adhesive strips
Replacement screen (OEM recommended)
Heat gun or iOpener
Repair Process Overview
Remove the screws near the charging port.
Apply heat to soften adhesive and lift the screen using suction cups.
Disconnect the battery to prevent electrical damage.
Carefully remove the broken screen, paying attention to the cables.
Attach the new screen and reconnect cables.
Test touch functionality and display before sealing.
Apply new adhesive and reassemble the phone.
Tip: Professional repair centers like Sydney CBD Repair Centre ensure proper calibration and warranty coverage.
Cost Analysis of iPhone Glass Repair
Repair costs vary depending on model, repair type, and whether you choose Apple, third-party service, or DIY.
Apple vs Third-Party Repair Costs
Repair Type
Cost Range (USD)
Warranty
Apple Official
$199–$399
90 days
Third-Party
$100–$250
30–90 days
DIY Kit
$50–$120
None
Hidden Costs to Consider
Labor charges
Additional parts (battery, sensors)
Shipping fees for mail-in repairs
Risk of voiding warranty
Preventive Measures to Protect Your iPhone Glass
Proper care can extend screen life significantly.
Choosing the Right Screen Protector
Tempered glass: strong, scratch-resistant
Liquid protectors: flexible, invisible layer
Protective Cases
Shockproof: maximum drop protection
Slim/rugged: balance between style and durability
Maintenance Habits
Avoid placing phone in back pocket
Clean screen with microfiber cloth
Keep away from extreme temperatures
Frequently Asked Questions
Q1: Can iPhone glass be replaced without affecting touch sensitivity?
Yes, using quality replacement screens ensures full functionality, though professional repair is recommended for high-end models.
Q2: How long does a typical screen repair take?
Professional repairs can be completed in 30–90 minutes depending on model and service.
Q3: Is DIY repair safe for iPhone 16 Pro Max?
DIY is risky for newer models due to complex internals; professional repair ensures safety and maintains warranty.
Q4: Will screen repair void Apple warranty?
Using unauthorized repair services may void Apple warranty; Apple-certified repairs preserve coverage.
Q5: Can minor cracks be ignored?
Minor cracks may worsen over time, leading to costly repairs or internal damage. Prompt repair is advisable.
Q6: Are tempered glass protectors enough for heavy users?
They provide decent protection, but combining a rugged case with tempered glass offers maximum durability.
Conclusion: Is Fixing iPhone Glass Worth It?
Repairing iPhone glass is absolutely worth it to maintain device functionality, aesthetics, and resale value. While DIY repairs may appeal due to lower costs, professional services guarantee quality, genuine parts, and warranty coverage. Preventive measures further extend the lifespan of your device. Ultimately, whether it’s a minor chip or a shattered screen, timely repair ensures your iPhone continues to perform at its best.
David from Sydney CBD Repair Centre – The Best place to fix mobile phones as 6 Years In A Row! Top Mobile Phone Repair In Sydney. More than 2000 Positive Reviews on Google and Same Day Repairs.
Visit us for:
✓ Same Day Express Repairs
✓ Genuine Parts Guarantee
✓ Professional Technicians
✓ Competitive Pricing
✓ 2000+ 5-Star Google Reviews
✓ 6-Time Award Winner for Best Phone Repairs