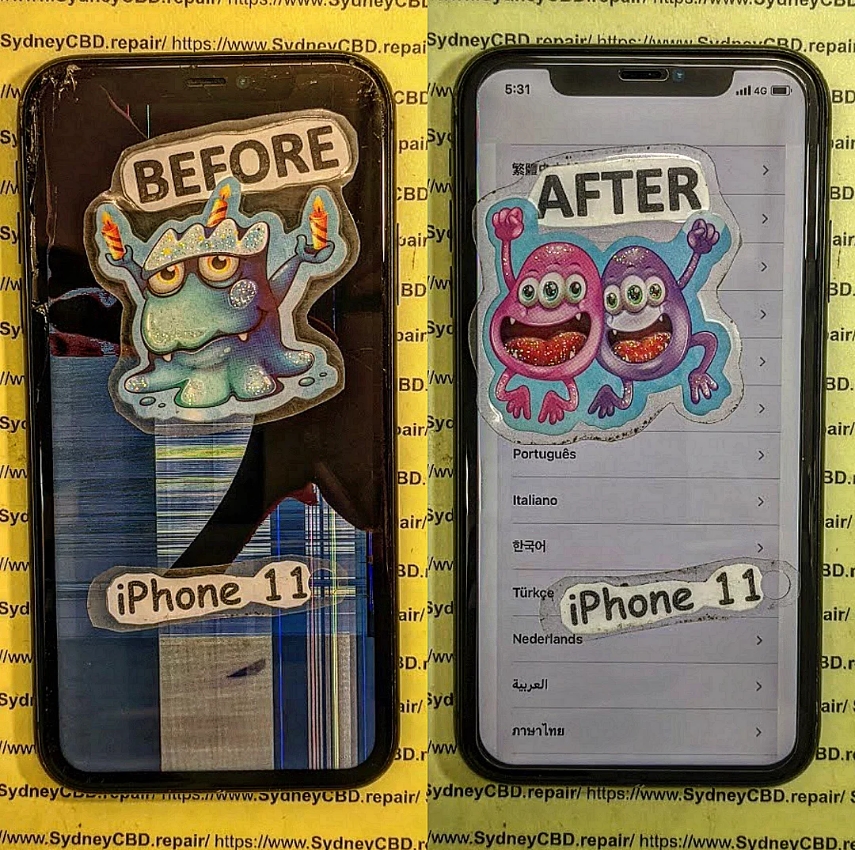
THE CRITICAL iPHONE 11 SCREEN REPAIR: WHAT WENT WRONG? (7 Common Mistakes You Must Avoid)
Introduction
Cracked screens, unresponsive touch panels, and dull displays — these are some of the most common issues iPhone 11 users face. While the iPhone 11 is known for its durability and vibrant display, even the most careful users can’t always avoid accidental drops or impacts. When that happens, the first instinct is to get the screen fixed quickly and cheaply. But here’s the catch — not all screen repairs are created equal.
Many iPhone 11 owners learn this the hard way: after a poorly done repair, their device may develop new issues such as Face ID failure, flickering screens, color inaccuracy, or loss of water resistance. What was supposed to be a simple fix turns into an expensive and frustrating experience.
In this article, we’ll uncover what often goes wrong during iPhone 11 screen repairs, explore the most common mistakes made by DIY enthusiasts and unqualified technicians, and show you how to avoid these pitfalls. You’ll also discover why choosing a trusted and certified service provider — like Sydney CBD Repair Centre, a six-time award-winning repair shop — ensures your iPhone gets back to perfect working condition safely and efficiently.
Whether you’re considering a DIY replacement or searching for a reputable Sydney repair shop, this guide will help you make informed decisions, protect your investment, and keep your iPhone 11 looking and functioning like new.
When your iPhone 11 screen cracks or stops responding, the urge to fix it immediately is understandable. However, a quick or cheap repair often leads to further damage, especially when the technician isn’t trained or uses non-genuine parts. The iPhone 11 is a high-precision device, and its screen system includes sensors, cameras, and complex connectors that require expertise to handle.
This article reveals the 7 most common mistakes people make during iPhone 11 screen repairs — and how you can avoid them by choosing professional repair services like Sydney CBD Repair Centre, Sydney’s top-rated phone repair shop six years in a row.
Unlike older iPhone models, the iPhone 11’s screen integrates several high-tech components:
OLED or Liquid Retina Display (LCD) technology
True Tone and Haptic Touch features
Face ID sensors and front camera module
Water-resistant adhesive seals
Because of this complexity, replacing an iPhone 11 screen isn’t just about removing glass. It’s about maintaining display accuracy, water resistance, and functionality. That’s why professional handling is critical.
🔍 OLED vs LCD – Why It Matters
Apple’s iPhone 11 uses a Liquid Retina HD (LCD) display, unlike its Pro models that feature OLED. But both screen types are sensitive to improper repairs.
Feature
OLED
LCD
Display Type
Organic Light-Emitting Diode
Liquid Crystal Display
Color Accuracy
Superior
Very Good
Repair Cost
Higher
Moderate
Durability
Slightly lower
Better resistance
Common Issue
Burn-in risk
Backlight bleeding
Choosing the wrong screen type or using low-quality third-party panels often results in dull colors, poor brightness, or dead pixels — problems that only worsen over time.
⚠️ Common Mistakes During iPhone 11 Screen Repairs
Even small repair errors can cause irreversible damage. Below are seven critical mistakes every iPhone 11 owner should know.
⚙️ Mistake #1: Using Cheap Replacement Screens
While it’s tempting to save money, cheap screens lack Apple’s calibration and quality control. These parts often:
Display inaccurate colors
Reduce touch sensitivity
Fail True Tone detection
Break more easily under slight pressure
A genuine iPhone screen may cost more upfront but saves money long-term by lasting longer and maintaining resale value.
🌈 Mistake #2: Ignoring True Tone Calibration
True Tone automatically adjusts color temperature based on ambient lighting. When you replace your screen, this calibration is lost unless transferred correctly using specialized tools.
Untrained technicians often skip this step, causing the screen to appear unnaturally blue or yellow, especially in low light.
😷 Mistake #3: Damaging the Face ID Module
The iPhone 11’s Face ID sensor sits dangerously close to the display flex cables. If mishandled during a screen swap, it can disable Face ID permanently.
Repairing Face ID damage often requires logic board work, which is expensive and complex — something only expert technicians like those at Sydney CBD Repair Centre can handle safely.
💧 Mistake #4: Poor Adhesive Application
Apple uses precision waterproof adhesives to maintain water resistance. Incorrect or uneven application leads to:
Gaps around the frame
Dust or moisture ingress
Reduced structural integrity
A professional repairer uses factory-grade adhesive strips and presses to ensure a perfect seal, keeping your device resistant to spills and rain.
⚡ Mistake #5: Static Discharge and Motherboard Damage
Static electricity can fry delicate components on the iPhone’s logic board. Many DIY repairers forget ESD (electrostatic discharge) precautions. A single spark can destroy touch controllers or cause ghost-touch problems.
Professional shops use anti-static workbenches, gloves, and grounded mats to prevent this.
🧰 Mistake #6: Incorrect Tools Used
Using screwdrivers or pry tools not designed for Apple devices often strips screws or cracks internal glass shields. Precision tools like tri-point and pentalobe drivers are essential to avoid permanent damage.
🔄 Mistake #7: Skipping Post-Repair Testing
Some repairs end with screen replacement but skip diagnostics. Without testing:
Proximity sensors might fail
Display may flicker or freeze
Face ID might not align
A professional repair shop conducts a complete 15-step diagnostic before returning your iPhone — ensuring every feature functions properly.
🧩 The Importance of Genuine Parts
Genuine parts not only fit perfectly but also maintain Apple’s color accuracy, responsiveness, and durability.
Non-genuine screens often lead to:
Shorter lifespan
Uneven brightness
Overheating issues
Sydney CBD Repair Centre sources authentic and OEM-grade parts, ensuring your device performs just like new. That’s backed by their 90-day repair warranty.
📍 Choosing the Right Repair Shop in Sydney
With so many repair options available, it’s vital to choose a service that guarantees transparency and reliability.
🧾 Certification, Warranty, and Reviews
Before trusting your iPhone to any repairer, check:
Certifications for Apple or electronic repair standards
Warranty coverage on parts and labor
Google Reviews and local reputation
A trustworthy repair shop should provide clear pricing, a written warranty, and same-day repair options.
🏆 Why Sydney CBD Repair Centre Excels
Located in the heart of Sydney, Sydney CBD Repair Centre has:
2000+ verified 5-star Google reviews
6-time “Best Mobile Phone Repair” award
Expert Apple-certified technicians
Genuine parts guarantee
Same-day express repairs
They’ve built their reputation on transparency, quality, and trust, making them the go-to repair centre for iPhone 11 screen replacements.
Once repaired, you can extend your iPhone 11 screen’s life by:
Using a tempered glass protector
Avoiding exposure to heat or moisture
Keeping the device in a protective case
Cleaning the display with a microfiber cloth
Getting minor cracks repaired immediately before spreading
Simple precautions go a long way toward keeping your device in top shape.
❓ FAQs About iPhone 11 Screen Repair
1. How long does an iPhone 11 screen repair take?
Most professional repairs, including testing, take under 1 hour at Sydney CBD Repair Centre.
2. Does replacing the screen affect Face ID?
Not if done correctly by experts. Mishandling flex cables, however, can cause Face ID failure.
3. Is the new screen water-resistant?
Yes, when installed with original-grade adhesives by certified technicians.
4. Can I keep True Tone after a screen replacement?
Absolutely — if your repair shop uses data transfer tools to copy True Tone calibration.
5. Why does my new screen look dimmer?
This usually happens with cheap aftermarket panels that lack Apple’s brightness specs.
6. What warranty does Sydney CBD Repair Centre offer?
All repairs come with a 90-day warranty covering workmanship and parts.
🏁 Conclusion: Professional Repair for Peace of Mind
Your iPhone 11 deserves the best care. Avoiding cheap parts, untrained technicians, and improper repairs ensures long-lasting performance and perfect display quality.
Trust Sydney CBD Repair Centre — Sydney’s most reviewed and award-winning mobile repair shop — for your next screen replacement.
David from Sydney CBD Repair Centre – The best place to fix mobile phones for six years in a row!
Top-rated mobile phone repair in Sydney with 2000+ positive reviews, genuine parts, and same-day repairs.
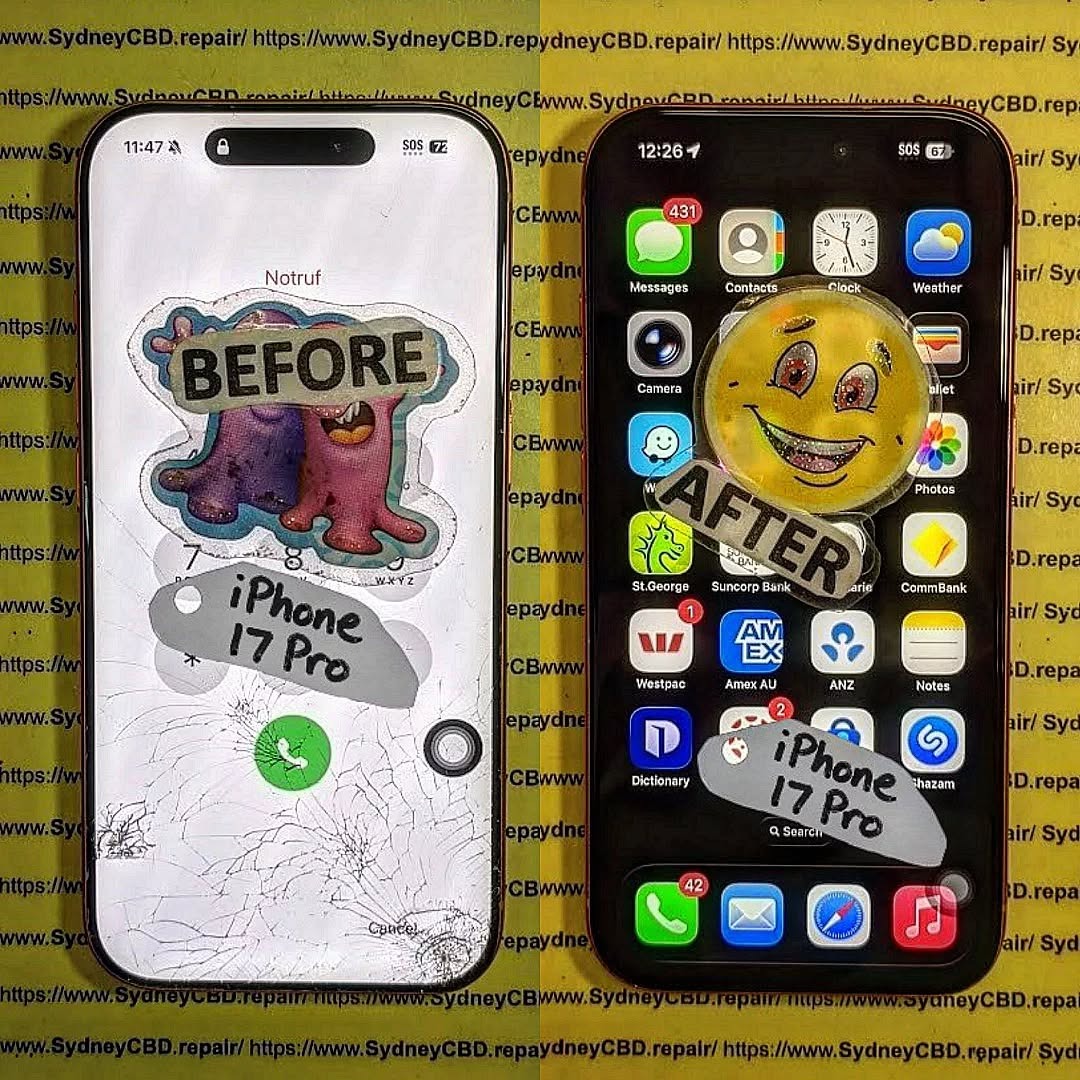
The Step by Step Guide to the First Ever iPhone 17 Pro Screen Replacement – Ultimate Expert Guide (2026)
📱 Introduction to iPhone 17 Pro Screen Replacement
The first ever iPhone 17 Pro screen replacement is already becoming a hot topic among repair technicians and DIY enthusiasts. With the latest innovations from Apple, screen repair isn’t what it used to be.
Let’s face it—dropping your phone happens to the best of us. But when it comes to replacing the display of the iPhone 17 Pro, things have evolved. This guide walks you through every step in a clear, easy-to-follow way.
Whether you’re a beginner or an experienced technician, you’ll find this guide practical, detailed, and worth your time.
These tools can make your iPhone 17 Pro screen replacement smoother and safer.
⚠️ Safety Precautions Before Starting
Personal Safety Tips
Always power off the device
Work in a clean, well-lit space
Wear anti-static gloves
Device Protection Measures
Avoid overheating the phone
Handle connectors gently
Keep screws organized
Skipping these steps can damage your phone permanently.
🔧 Step-by-Step iPhone 17 Pro Screen Replacement Guide
Step 1: Power Off the Device
Turn off your phone completely. This prevents electrical damage.
Step 2: Remove Screws
Use a pentalobe screwdriver to remove the bottom screws near the charging port.
Step 3: Heat and Lift Display
Apply gentle heat around the edges. Then:
Use a suction cup
Insert a plastic pry tool
Slowly lift the screen
Take your time here—rushing can crack the display further.
Step 4: Disconnect Battery
Before touching any internal parts:
Locate the battery connector
Carefully disconnect it
This is critical for safety.
Step 5: Remove Display Connectors
Next, disconnect:
Display cable
Touch sensor cable
Face ID components
Handle these with extreme care.
Step 6: Install New Screen
Now comes the exciting part:
Align the new screen
Reconnect all cables
Secure the display
Replace screws
Congratulations—you’ve completed the iPhone 17 Pro screen replacement!
❌ Common Mistakes to Avoid
Even pros slip up sometimes. Watch out for:
Using too much heat
Pulling cables too hard
Forgetting to disconnect the battery
Mixing up screws
Avoiding these mistakes saves time and money.
💰 Cost Analysis: DIY vs Professional Repair
Option
Cost
Risk Level
Time
DIY Repair
$150–$300
High
1–2 hours
Professional Repair
$300–$600
Low
30–60 mins
If you’re unsure, professional repair is often the safer bet.
⏱️ How Long Does the Repair Take?
Typically:
Beginners: 1–2 hours
Experts: 30–45 minutes
Your first iPhone 17 Pro screen replacement might take longer—and that’s perfectly okay.
✅ Testing the New Screen
Before sealing everything:
Turn on the phone
Check touch responsiveness
Test brightness and colors
Verify Face ID functionality
If something feels off, reopen and check connections.
🔋 Maintenance Tips After Replacement
Keep your new screen in top shape:
Use a screen protector
Avoid drops
Clean regularly
Use a protective case
Simple habits go a long way.
🧑🔧 When to Seek Professional Help
DIY isn’t always the best route. Consider professional repair if:
Screen is completely unresponsive
Internal damage is suspected
You lack proper tools
Sometimes, it’s smarter to leave it to experts.
❓ FAQs
1. Is iPhone 17 Pro screen replacement difficult?
Yes, it’s more complex than older models due to advanced technology.
2. Can I replace the screen myself?
You can, but it requires skill, patience, and the right tools.
3. Will replacing the screen affect Face ID?
It might, especially if sensors are damaged or misaligned.
4. How much does iPhone 17 Pro screen replacement cost?
DIY costs around $150–$300, while professional repair can reach $600.
5. Is the new screen as good as the original?
If you use high-quality parts, performance should be very close.
6. How do I know if my screen needs replacement?
Signs include cracks, unresponsive touch, flickering, or black display.
🏁 Conclusion
The first ever iPhone 17 Pro screen replacement is a blend of precision, patience, and technical know-how. While it’s possible to do it yourself, it’s not without risks.
If you follow this guide carefully, you’ll improve your chances of a successful repair. Still, don’t hesitate to seek professional help when needed.
At the end of the day, keeping your device in top condition ensures it serves you well for years to come.
David from Sydney CBD Repair Centre – The Best place to fix mobile phones as 7 Years In A Row! Top Mobile Phone Repair In Sydney. More than 2000 Positive Reviews on Google and Same Day Repairs.
We take pride in delivering exceptional repair services for all major phone brands including Apple, Samsung, Google, and more. Our expert technicians use only genuine parts and offer 90days warranty on repairs. Located in the heart of Sydney CBD, we’re your one-stop solution for all mobile device repairs.
Our commitment to excellence has earned us the trust of thousands of satisfied customers. Whether it’s a cracked screen, battery replacement, or water damage repair, we handle it all with professional care and expertise. Walk in today and experience why we’re Sydney’s #1 choice for mobile phone repairs.
Visit us for:
✓ Same Day Express Repairs
✓ Genuine Parts Guarantee
✓ Professional Technicians
✓ Competitive Pricing
✓ 2000+ 5-Star Google Reviews
✓ 7-Time Award Winner for Best Phone Repairs
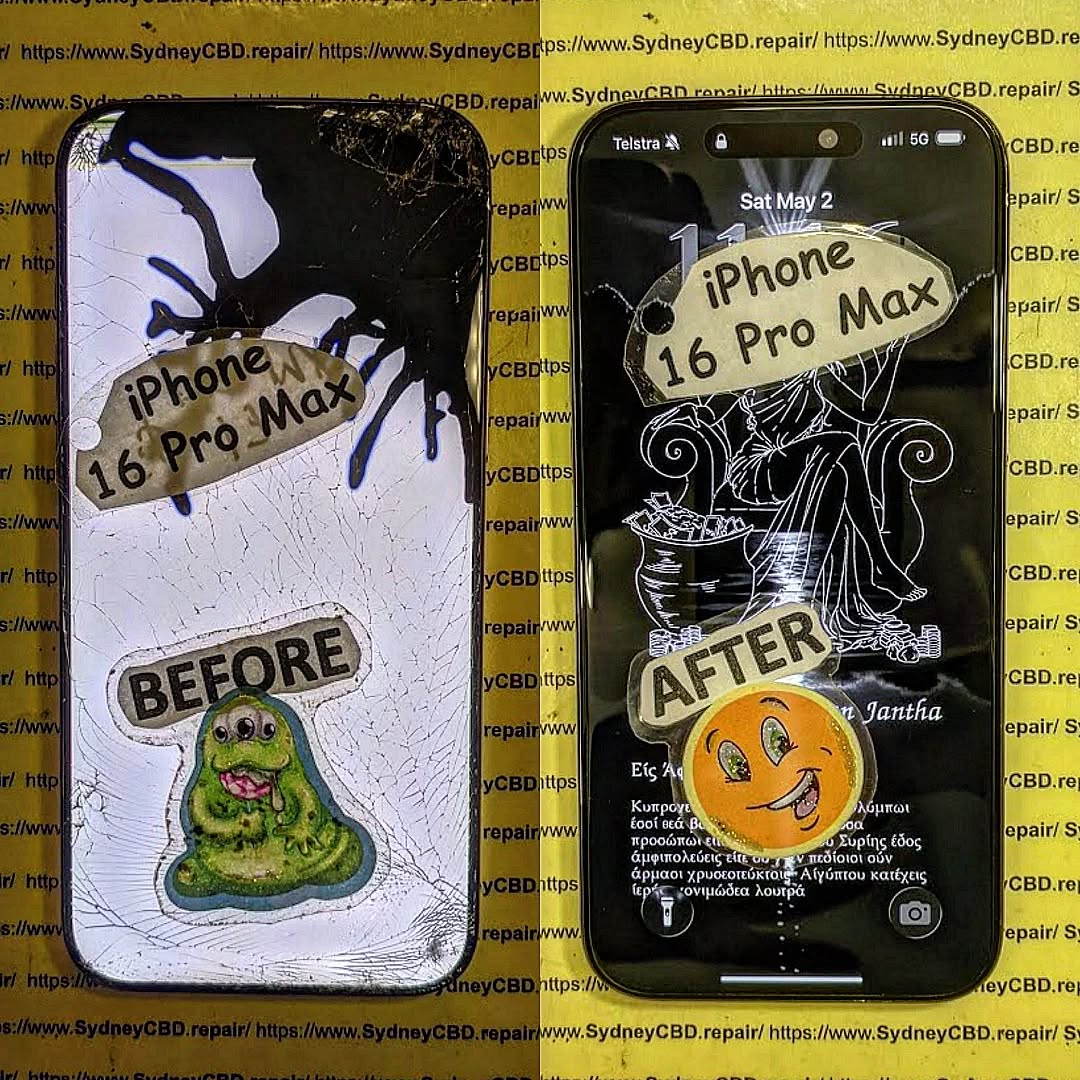
iPhone 17 Pro Max Screen Replacement Step By Step Display Removal Guide: 55 Essential Steps
Introduction to iPhone 17 Pro Max Screen Replacement
Replacing an iPhone 17 Pro Max display isn’t a simple matter of removing a few screws and installing a new panel. The phone contains delicate display, sensor, battery, and connector components, so careful preparation is essential. This guide explains the iPhone 17 Pro Max screen replacement process in a structured, step-by-step format, based on currently available repair documentation and established repair procedures.
Apple provides an official iPhone 17 Pro Max Repair Manual covering display procedures, safety, tools, diagnostics, and other components.
Important: This is an advanced repair. If you’re not experienced with smartphone disassembly, professional repair is the safer option. Lithium-ion batteries, fragile display cables, and Face ID-related components can be damaged by improper tools or excessive force.
The iPhone 17 Pro Max screen replacement process requires patience, precision, and the right equipment. A damaged display may show cracked glass, black areas, lines, flickering, ghost touches, dead pixels, or complete loss of image. In some cases, however, a screen problem can be caused by a connector or another internal component rather than the display itself.
Apple’s repair documentation for the iPhone 17 Pro Max includes dedicated procedures for the display, battery, front camera, troubleshooting, tools, screws, and safety.
That matters because modern iPhones are tightly integrated. The screen isn’t simply a slab of glass that can be swapped without consequences. Display connectors, sensor assemblies, clips and perimeter adhesive all have to be handled correctly.
The good news is that a careful repair can be approached systematically.
What Does a Screen Replacement Involve?
A complete display replacement generally involves:
Backing up important data.
Powering the iPhone down.
Protecting yourself from broken glass.
Removing the bottom pentalobe screws.
Softening the display adhesive.
Separating the screen from the frame.
Disconnecting the battery.
Disconnecting display and sensor connectors.
Removing the old display.
Transferring components where necessary.
Cleaning the frame.
Installing fresh display adhesive.
Connecting and testing the replacement screen.
Sealing the phone.
Completing software calibration when required.
The current iFixit repair procedure documents this general sequence and contains 55 numbered steps, including display removal, sensor transfer, adhesive installation, testing, and final reassembly.
Before opening the phone, it helps to understand what you’re working with.
The display assembly isn’t only the visible screen. It also interacts with the front sensor system and the phone’s internal electronics through flexible cables and press connectors.
Some replacement displays may arrive with certain components already installed, while others require transferring components from the original display.
Why the Front Sensors Matter
The front sensor assembly is particularly delicate. During a component transfer, excessive force can damage the flexible cable or sensor hardware.
For that reason, the sensor transfer should be treated as a separate operation rather than an afterthought.
If you’re purchasing a replacement display, check exactly what is included before beginning the repair.
Genuine Versus Non-Genuine Displays
Replacement-screen quality varies considerably.
A poor-quality panel can potentially produce differences in:
Brightness
Colour reproduction
Touch responsiveness
Viewing angles
Power consumption
Auto-brightness behavior
True Tone functionality
Long-term reliability
iFixit’s current guide notes that True Tone and auto-brightness may require calibration after replacement, particularly where the replacement display isn’t recognized as genuine.
For a premium phone such as the iPhone 17 Pro Max, using a high-quality replacement component is therefore important.
Before starting, assemble everything. Stopping halfway through a phone repair because you’re missing adhesive is a recipe for frustration.
Essential Tools
A typical display replacement requires tools such as:
P2 pentalobe screwdriver
JIS 00 screwdriver
Y000 tri-point screwdriver
Opening picks
Plastic spudger
Suction handle
Tweezers
Heat source
Safety glasses
Lint-free cloth
High-concentration isopropyl alcohol
Replacement display
Replacement display adhesive
The iFixit guide specifically identifies P2, JIS 00 and Y000 drivers at different stages and recommends replacement screen adhesive.
Recommended Workspace
Work on a clean, flat surface with good lighting.
Keep small screws organized because different screws can look almost identical while having different lengths or positions.
A magnetic project mat or labelled screw tray can make a huge difference.
Safety Preparations Before Starting
Safety should come before speed.
iFixit’s current procedure recommends reducing the battery charge below 25% before starting because a damaged charged lithium-ion battery can present a fire risk.
Also disconnect all external cables and power the iPhone off completely.
Broken Glass Safety
If the display is shattered, tiny pieces of glass can come loose during opening.
Wear eye protection and cover the broken display glass with suitable tape before applying a suction tool. This can help contain loose fragments and improve suction.
Don’t press unnecessarily hard on severely damaged glass.
Heat Safety
Heat is used to soften display adhesive, but excessive heat can damage components.
The iFixit procedure calls for heating individual edges before separating their adhesive.
Use controlled, moderate heat rather than attempting to cook the adhesive loose.
Prepare and Inspect the iPhone
Before opening the device, inspect it carefully.
Check whether:
The display still produces an image.
Touch works.
The phone powers on.
The frame is bent.
The back glass is damaged.
Cameras function.
Face ID works.
Buttons work.
The phone has liquid-damage indicators or signs of moisture.
If the frame is severely bent, installing a replacement display may not solve the underlying problem.
Back Up Your Data
A display replacement normally isn’t intended to erase your data, but repairs always carry some risk.
Create a current backup before opening the phone.
If the device is operational, verify that important photos, contacts and files are synchronized or backed up.
Step 1: Remove the Pentalobe Screws
Begin at the bottom edge of the phone.
The iFixit guide identifies two 7.5 mm pentalobe screws located on either side of the charging port.
Use a suitable P2 pentalobe driver and apply controlled downward pressure.
Avoid slipping because a stripped screw can turn a straightforward repair into a much harder extraction job.
Place both screws in a labelled container.
Step 2: Mark Your Opening Pick
Before inserting an opening pick, limit how deeply it can enter.
The iFixit procedure recommends marking the pick approximately 3 mm from its tip.
This simple preparation is important because deeper insertion can contact internal components or cables.
Think of the pick as a blade with a depth limit: more isn’t better.
Step 3: Heat the Bottom Edge
Apply controlled heat to the bottom edge to soften the adhesive.
The objective isn’t to make the entire phone extremely hot. You’re simply trying to make the adhesive more flexible.
Check the temperature continuously and avoid prolonged heating in one spot.
Step 4: Apply the Suction Handle
Position the suction handle close to the bottom edge.
Apply steady upward force until a small gap forms between the display and frame.
This may require patience.
If the gap doesn’t form, don’t immediately increase force dramatically. Reapply moderate heat and try again.
Step 5: Insert the Opening Pick Carefully
Once the gap forms, insert the opening pick.
The correct insertion point and depth are critical because the display perimeter contains sensitive components and cables.
The iFixit guide specifically warns against inserting the pick deeper than approximately 3 mm.
Step 6: Separate the Bottom Adhesive
Slide the opening pick along the bottom edge.
The goal is to cut through the adhesive rather than pry aggressively against the display.
Keep another pick in the opened section where necessary to prevent the adhesive from resealing.
Step 7: Separate the Right Edge
Heat the right edge before working on its adhesive.
Insert a second opening pick near the bottom-right corner and carefully move it upward.
There are clips around the perimeter, so some resistance is normal.
Don’t force the pick.
If resistance increases unexpectedly, stop and reassess its position.
Step 8: Separate the Top Edge
Apply controlled heat to the top edge.
Move an opening pick along the upper perimeter while staying within the safe working area.
Extra caution is needed around the front sensor area.
The iFixit guide specifically warns that moving too far around the top-left area can damage the ambient-light-sensor cable.
Step 9: Separate the Left Edge
Heat the left edge and use another opening pick.
Move carefully upward, stopping before sensitive button-related areas.
Again, the goal is adhesive separation, not forceful prying.
If the display doesn’t release, don’t assume more pressure is the answer. Reheat and inspect the perimeter.
Step 10: Lift and Prop Up the Display
Once the adhesive and clips are released, the display should separate from the frame.
Lift it carefully.
Don’t yank it away because display cables are still connected.
The iFixit procedure recommends swinging the display over the left side and supporting it so that the cables aren’t strained.
At this stage, the phone should remain stable on your work surface.
Step 11: Remove the Connector Covers
Next, access the internal connector covers.
Keep track of every screw.
Small screws can easily become mixed up, and incorrect screw placement can cause damage.
Use the appropriate driver and remove the screws securing the covers.
Set the covers aside in an organized location.
Step 12: Disconnect the Battery
Disconnecting the battery is an important safety step before manipulating display connectors.
Use a plastic spudger or appropriate non-metallic tool to disconnect the battery press connector.
Avoid slipping across the logic board.
Don’t use excessive force.
Step 13: Disconnect the Display and Sensor Connectors
Once the battery is disconnected, carefully disconnect the display-related press connectors.
Use the appropriate non-metallic tool.
Never force a connector sideways.
A press connector should release from the correct lifting point.
The current iFixit procedure identifies separate screen and front-sensor connectors at this stage.
Step 14: Remove the Old Display
With the connectors disconnected, the old display can be removed.
Place it somewhere safe rather than immediately throwing it away.
If the replacement screen has no front sensor assembly, you’ll need the original sensor hardware for transfer.
This is also a useful opportunity to inspect the inside of the phone for:
Dust
Broken glass
Bent clips
Damaged cables
Adhesive residue
Signs of liquid exposure
Step 15: Transfer the Front Sensor Assembly
This is one of the most delicate parts of the procedure.
If the replacement screen doesn’t already include the required front sensor components, remove the sensor bracket and carefully release the sensor assembly from the old display.
The documented procedure uses a Y000 driver for the sensor screws and controlled heat to soften adhesive.
Take Extra Care
The sensor cable is fragile.
Don’t pry directly against the sensor itself.
Instead, work underneath the appropriate cable or tab and use minimal force.
If the adhesive refuses to release, apply additional controlled heat rather than pulling harder.
Step 16: Install the Front Sensors on the New Display
Position the transferred sensor assembly correctly on the replacement screen.
Ensure the components sit in their designated recesses.
Reinstall the bracket and screws.
The iFixit guide describes securing the front sensor bracket with two 1.0 mm screws.
Before proceeding, visually inspect the sensor cable for folds, tears or incorrect positioning.
Step 17: Clean the iPhone Frame
Old display adhesive must be removed before applying new adhesive.
Use tweezers for larger adhesive pieces and an appropriate plastic tool for residue.
Be careful around grounding clips.
The repair guide recommends high-concentration isopropyl alcohol for stubborn adhesive residue and a lint-free cloth for cleaning.
Why Cleaning Matters
A dirty frame can cause:
Uneven screen seating
Gaps around the display
Poor adhesive bonding
Dust intrusion
Display movement
Reduced sealing performance
Take your time here.
Step 18: Prepare the Replacement Display
Before permanently attaching the replacement display, inspect it.
Check for:
Scratches
Cracks
Damaged flex cables
Missing brackets
Bent clips
Contamination
Incorrect component placement
Never install a visibly damaged replacement panel.
Step 19: Apply New Display Adhesive
Use replacement adhesive designed for the iPhone 17 Pro Max display.
Align it carefully with the frame perimeter.
Don’t rush this stage.
Once pressure is applied to the adhesive, repositioning can be difficult.
The current iFixit procedure specifically notes that correctly aligned adhesive should be pressed into place carefully and that repositioning may require new adhesive.
Step 20: Connect the Replacement Display
Place the new screen beside the phone so its cables reach the logic board without being stretched.
Connect the display connectors carefully.
Press them into position using a finger or the flat side of a suitable spudger.
Don’t force a connector.
If it doesn’t align, lift it and reposition it.
Step 21: Reconnect the Battery
After the display connectors are seated, reconnect the battery.
Make sure the connector is correctly aligned before applying pressure.
A connector that isn’t aligned correctly can potentially damage contacts.
Step 22: Test the Repair Before Sealing
This is one of the most important stages.
Before permanently sealing the display, power on the phone and test it.
Check:
Display image
Brightness
Touch response
Multi-touch
Dead areas
Flickering
Front sensors
Auto-brightness
Face ID-related functionality
Cameras
Earpiece
Proximity behavior
Buttons
Charging
If something doesn’t work, investigate before sealing the phone.
The iFixit procedure explicitly recommends testing the repair before completing final reassembly.
Step 23: Reinstall Connector Covers
Once the replacement display has passed initial testing, reinstall the connector covers.
Ensure each cover sits correctly.
Use the correct screws in their original positions.
Avoid overtightening.
Small electronic-device screws don’t require excessive force.
Step 24: Close the Display
Remove the remaining adhesive liners according to the adhesive layout.
Lower the display carefully, beginning with the appropriate edge and ensuring no cables are trapped.
The display should sit flush against the frame.
If you feel unusual resistance, stop.
A bent perimeter clip or trapped cable can prevent proper seating.
Step 25: Press the Display Into Position
Once correctly aligned, apply even pressure around the display perimeter.
Don’t concentrate all your force on one corner.
The aim is consistent contact between the display and new adhesive.
Step 26: Apply Controlled Heat
Moderate heat can help the adhesive establish a strong bond.
The iFixit guide recommends heating the perimeter after the screen is installed to soften the adhesive and improve bonding.
Don’t overheat the device.
Step 27: Reinstall the Pentalobe Screws
Finally, reinstall the two pentalobe screws beside the charging port.
Confirm that both are correctly seated.
The phone should now have a fully installed replacement display.
Display Calibration and Repair Assistant
Completing the physical installation doesn’t necessarily mean the repair is finished.
Apple provides a Repair Assistant process for supported repairs. The iFixit guide notes that a genuine replacement screen may need calibration through Repair Assistant to restore functions such as True Tone and auto-brightness.
Apple’s official iPhone 17 Pro Max repair documentation also includes diagnostics and display troubleshooting resources.
After installation, check the phone’s Parts & Service History and follow any available on-screen repair-completion instructions.
Common iPhone 17 Pro Max Screen Replacement Problems
Touch Doesn’t Work
Possible causes include:
Display connector not fully seated
Damaged replacement screen
Connector contamination
Cable damage
Disconnect the battery and inspect the connections before repeatedly restarting the device.
Display Is Black
Check:
Battery connection.
Display connector.
Display cable.
Replacement panel.
Signs of internal damage.
Don’t immediately assume the motherboard has failed.
Auto-Brightness Doesn’t Work
Calibration may be required.
Also verify that the relevant front sensor components were transferred correctly.
True Tone Isn’t Available
A replacement display may require Apple’s repair/calibration process.
This is one reason replacement-part quality and post-repair configuration matter.
Screen Sits Unevenly
Inspect for:
Remaining adhesive
Bent clips
Misaligned adhesive
Trapped cables
Debris around the frame
Don’t try to force an uneven display flush with excessive pressure.
Professional Repair Versus DIY Replacement
DIY repair can be appealing, particularly if you already have repair experience.
However, professional repair offers several practical advantages.
DIY Repair
Professional Repair
Lower labor cost
Technician handles disassembly
Requires specialist tools
Professional equipment available
Risk of accidental damage
Controlled repair process
You manage calibration
Repairer can handle post-repair checks
More time required
Often faster
Warranty depends on parts/work
Repair warranty may be available
For a high-value device, the cheapest screen isn’t always the lowest-cost option if it fails shortly afterward.
A professional technician can also identify whether the problem is actually the display before replacing it.
How to Choose a Replacement Screen
When purchasing a replacement display, consider more than price.
Look for:
Correct iPhone 17 Pro Max compatibility
Reliable supplier
Quality display panel
Proper connector configuration
Sensor compatibility
New perimeter adhesive
Warranty
Return policy
Calibration compatibility
Ask whether the replacement is a complete assembly or requires transferring components from your original screen.
That distinction can significantly change the complexity of the repair.
iPhone 17 Pro Max Screen Replacement Checklist
Before finishing, run through this checklist:
Before Opening
Back up data
Power off iPhone
Battery below recommended charge level
Disconnect cables
Wear eye protection
Prepare tools
During Removal
Remove pentalobe screws
Mark opening-pick depth
Apply controlled heat
Separate adhesive carefully
Avoid deep pick insertion
Support display cables
Disconnect battery
Disconnect display connectors
During Installation
Inspect replacement screen
Transfer sensors if necessary
Clean frame
Install new adhesive
Connect display
Reconnect battery
Test before sealing
Install connector covers
Align display
Press perimeter evenly
Reinstall bottom screws
After Repair
Test touch
Test brightness
Test cameras
Test sensors
Test Face ID-related functions
Check charging
Check Parts & Service History
Complete available calibration
Frequently Asked Questions
1. How difficult is an iPhone 17 Pro Max screen replacement?
It’s an advanced repair. The process involves adhesive removal, delicate flex cables, small screws, connector handling and potentially transferring front sensor components. Someone without prior smartphone repair experience may find it challenging.
2. Can I replace the iPhone 17 Pro Max screen myself?
Yes, technically, but the repair requires suitable tools, a compatible replacement assembly and careful handling. Apple’s official repair manual provides documentation for the device, while detailed third-party guides can provide additional visual assistance.
3. Do I need to replace the display adhesive?
Yes. Reusing old display adhesive isn’t recommended when completing a proper screen replacement. A fresh adhesive perimeter helps the replacement display seat correctly.
4. Will Face ID work after screen replacement?
The display replacement itself doesn’t necessarily mean Face ID must stop working. However, the front sensor assembly is delicate, and damage or incorrect transfer of relevant components can cause functionality problems.
5. Why should I disconnect the battery before removing the display?
Disconnecting the battery reduces the chance of accidentally energizing components while manipulating connectors. The documented iFixit procedure disconnects the battery before disconnecting the screen connectors.
6. Why is my replacement display missing True Tone or auto-brightness?
The replacement may require calibration or may not support all original display functions. iFixit specifically notes that True Tone and auto-brightness can require Repair Assistant after replacement.
7. How do I know whether my screen is actually defective?
Look for symptoms such as persistent black areas, broken touch response, lines, flickering, visible physical damage or a display that remains unresponsive after basic troubleshooting. However, connector or logic-board problems can produce similar symptoms, so diagnosis is useful before purchasing a replacement.
8. Can a cracked display be repaired without replacing the whole screen?
That depends on the damage and repair method. A badly damaged display assembly is generally handled by replacing the display assembly rather than attempting a glass-only repair. Glass-only repair requires specialized equipment and is a different procedure.
9. Should I use an aftermarket display?
The decision depends on your priorities and the exact component available. Aftermarket displays can vary significantly in quality and feature compatibility. For a premium device, verify the supplier, warranty, specifications and post-repair functionality before choosing a replacement.
10. What should I do if the new screen doesn’t work?
Don’t seal the phone immediately. Power it down, disconnect the battery and inspect the display connectors for alignment, contamination or damage. If the problem persists with a known-good screen, professional diagnosis may be appropriate.
Conclusion
The iPhone 17 Pro Max screen replacement process is detailed but manageable when approached methodically. The key is not speed. It’s controlling each stage: safely opening the display, protecting internal cables, disconnecting the battery, handling the front sensors carefully, cleaning the frame, applying fresh adhesive and testing the replacement before final sealing.
Apple’s official repair documentation confirms that the iPhone 17 Pro Max has dedicated procedures for display repair, troubleshooting, tools and safety, while current third-party repair documentation provides a detailed 55-step display replacement workflow.
If you’re experienced with electronics repair and have the correct tools, following a structured procedure can make the job much more predictable. If you’re not, professional repair is worth considering because a mistake involving the display cable, battery, sensors or logic board can turn a screen replacement into a much more expensive repair.
Above all, don’t rush. A careful repair today can prevent a costly repair tomorrow.
David from Sydney CBD Repair Centre – The Best place to fix mobile phones as 7 Years In A Row! Top Mobile Phone Repair In Sydney. More than 2000 Positive Reviews on Google and Same Day Repairs.
We take pride in delivering exceptional repair services for all major phone brands including Apple, Samsung, Google, and more. Our expert technicians use only genuine parts and offer 90days warranty on repairs. Located in the heart of Sydney CBD, we’re your one-stop solution for all mobile device repairs.
Our commitment to excellence has earned us the trust of thousands of satisfied customers. Whether it’s a cracked screen, battery replacement, or water damage repair, we handle it all with professional care and expertise. Walk in today and experience why we’re Sydney’s #1 choice for mobile phone repairs.
Visit us for: ✓ Same Day Express Repairs ✓ Genuine Parts Guarantee ✓ Professional Technicians ✓ Competitive Pricing ✓ 2000+ 5-Star Google Reviews ✓ 7-Time Award Winner for Best Phone Repairs
Sydney CBD Repair Centre – Where Quality Meets Reliability. Call : +61280114119 Website: Sydney CBD Repair Centre
Why Cheap Screen DIYs Fail and How Professionals Fix Your iPhone Correctly: 11 Powerful Reasons You Should Know
Introduction
When an iPhone screen cracks, many people immediately search for affordable repair options online. Countless videos promise easy repairs, and inexpensive repair kits appear to offer a quick solution. However, the reality is often very different. Understanding Why Cheap Screen DIYs Fail and How Professionals Fix Your iPhone Correctly can save you time, money, and frustration.
Modern iPhones are sophisticated devices with tightly integrated components. While replacing a screen may seem straightforward, even a small mistake can create bigger problems than the original crack. From damaged Face ID systems to reduced display quality, DIY repairs frequently lead to unexpected costs.
Professional technicians, on the other hand, use specialized tools, tested procedures, and high-quality parts to restore devices properly. In this article, we’ll explore the reasons cheap DIY repairs fail and explain how experts ensure reliable results.
Today’s iPhones use advanced display technology. Models equipped with OLED and Super Retina displays deliver exceptional brightness, color accuracy, and contrast levels. These displays are not simple glass panels. They contain multiple delicate layers that work together to create a premium viewing experience. Separating or replacing them incorrectly can permanently affect image quality.
Touch Layer Integration
The touch sensor layer is integrated directly into the display assembly. This design improves responsiveness but makes repairs more complex. If a technician lacks proper equipment, damage can occur during disassembly or installation.
The internet is filled with repair guides that make screen replacement look simple. Many videos condense an hour-long repair into a few minutes, skipping critical details.
As a result, users often underestimate the difficulty involved.
The Appeal of Saving Money
Cost savings remain the biggest motivation. A cheap repair kit may cost significantly less than a professional repair service.
Unfortunately, many people discover later that the initial savings disappear after:
Purchasing replacement tools
Ordering additional parts
Fixing accidental damage
Paying professionals to correct mistakes
Common Mistakes Made During DIY Repairs
Using Low-Quality Parts
One of the biggest reasons Why Cheap Screen DIYs Fail and How Professionals Fix Your iPhone Correctly becomes apparent is the quality of replacement components.
Low-cost screens frequently suffer from:
Problem
Effect
Poor color accuracy
Washed-out images
Low brightness
Difficult outdoor visibility
Weak glass
Increased cracking risk
Inferior touch sensors
Delayed response
Many aftermarket screens simply do not match original performance standards.
Damaging Internal Components
Inside an iPhone are delicate flex cables and connectors. A slight slip during disassembly can damage:
Display cables
Battery connectors
Front camera modules
Face ID components
Proximity sensors
Such damage can dramatically increase repair costs.
Incorrect Adhesive Installation
Apple devices use specialized adhesives to secure displays and help maintain structural integrity.
Improper adhesive application can cause:
Dust intrusion
Display lifting
Reduced water resistance
Future screen failures
Hidden Costs of Cheap DIY Screen Repairs
Additional Part Replacements
Many DIY enthusiasts discover secondary damage after opening the device.
Common unexpected replacements include:
Batteries
Charging ports
Camera assemblies
Sensor modules
What began as a budget repair can quickly become expensive.
Loss of Device Value
Potential buyers often inspect screen quality carefully. Poor repairs may reduce resale value because buyers notice:
Uneven display brightness
Gaps around the frame
Touchscreen issues
Non-functioning sensors
A professionally repaired device typically retains greater market value.
Why Cheap Replacement Screens Often Disappoint
Display Quality Differences
At first glance, a low-cost screen may seem acceptable. However, daily use reveals major differences.
Common complaints include:
Dull colors
Lower brightness
Increased battery consumption
Reduced viewing angles
Users frequently regret choosing the cheapest available option.
Touch Sensitivity Problems
Touch responsiveness affects every interaction with the device.
Low-quality screens may cause:
Missed taps
Delayed gestures
Ghost touching
Scrolling inconsistencies
These issues create a frustrating user experience.
How Professionals Fix Your iPhone Correctly
Diagnostic Procedures
Professional technicians begin with a thorough diagnosis.
Before replacing the display, they check:
Battery condition
Sensor functionality
Camera performance
Face ID operation
Internal damage
This process identifies hidden issues before repairs begin.
Genuine Quality Components
Professional repair providers prioritize quality components that meet strict standards.
Benefits include:
Better durability
Improved touch performance
Accurate color reproduction
Reliable long-term operation
Many reputable repair centres also provide warranties for additional peace of mind.
Precision Installation Methods
Professional technicians use specialized equipment including:
Precision screwdrivers
Heat separation tools
Microscope inspection systems
Screen calibration tools
These tools help ensure accurate installation and proper functionality.
Benefits of Professional Repair Services
Warranty Protection
One major advantage of professional repair services is warranty coverage.
If a problem develops after repair, customers can return for assistance without additional expense in many cases.
This protection simply doesn’t exist with most DIY repairs.
Time Savings
Repairing an iPhone correctly takes skill and experience.
A professional technician can often complete repairs quickly because they:
Follow established procedures
Have proper tools
Understand common complications
Perform quality control testing
The result is less downtime and greater reliability.
Signs Your DIY Repair Has Gone Wrong
Watch for these warning signs after a DIY repair:
Display Problems
Flickering screen
Dead pixels
Discoloration
Bright spots
Touchscreen Issues
Delayed response
Ghost touches
Unresponsive areas
Physical Problems
Raised display edges
Visible gaps
Loose components
Functional Failures
Face ID not working
Front camera issues
Sensor malfunctions
Any of these symptoms indicate the repair may require professional attention.
Professional Repair Process Step-by-Step
Understanding the professional workflow further explains Why Cheap Screen DIYs Fail and How Professionals Fix Your iPhone Correctly.
Step 1: Initial Assessment
Technicians inspect the device and verify all functions.
Step 2: Safe Disassembly
Specialized tools minimize the risk of internal damage.
Step 3: Component Transfer
Important components are carefully transferred to the new display assembly.
Step 4: Quality Screen Installation
A premium replacement screen is installed precisely.
Step 5: Adhesive Application
Correct adhesives restore structural integrity.
Step 6: Functional Testing
Every feature is tested before returning the device.
Step 7: Final Quality Control
The technician confirms performance standards have been met.
How to Choose a Reliable Repair Centre
Not all repair providers deliver the same quality.
Consider the following factors:
Factor
Why It Matters
Experience
Reduces repair risks
Warranty
Protects your investment
Customer Reviews
Indicates service quality
Quality Parts
Ensures durability
Transparent Pricing
Prevents surprises
For additional consumer information regarding device care and electronics, visit the official website of Apple Support.
Frequently Asked Questions (FAQs)
1. Is replacing an iPhone screen yourself worth it?
In most cases, DIY repairs carry significant risks. While they may appear cheaper initially, mistakes often result in higher overall costs.
2. Why do cheap replacement screens look different?
Low-cost screens frequently use lower-grade materials, resulting in reduced brightness, color accuracy, and touch responsiveness.
3. Can DIY repairs damage Face ID?
Yes. Face ID components are delicate and can be damaged during improper disassembly or installation.
4. Do professional repairs maintain water resistance?
Professional technicians use appropriate adhesives and procedures that help preserve the device’s original sealing characteristics.
5. How long does a professional screen repair take?
Many repair centres can complete screen replacements on the same day, depending on model availability and repair complexity.
6. Will a professional repair improve resale value?
Generally, yes. High-quality repairs using reliable components are more attractive to potential buyers.
7. What should I do if my DIY repair caused new problems?
Stop using the device if significant issues appear and consult an experienced technician for a diagnostic assessment.
8. How can I tell if a screen replacement is high quality?
Look for proper brightness levels, accurate colors, responsive touch performance, and warranty-backed workmanship.
Conclusion
Understanding Why Cheap Screen DIYs Fail and How Professionals Fix Your iPhone Correctly is essential before attempting a repair. While online tutorials and inexpensive kits may seem attractive, they rarely show the full complexity of modern iPhone screen replacement.
From fragile internal components to advanced display technology, numerous factors contribute to successful repairs. Professional technicians bring experience, specialized tools, quality components, and proven procedures that dramatically reduce risks and improve outcomes.
Ultimately, investing in professional repair services can save money, preserve device value, and provide peace of mind. Rather than gambling with an expensive smartphone, choosing experienced experts remains the safest and most reliable solution.
David from Sydney CBD Repair Centre – The Best place to fix mobile phones as 7 Years In A Row! Top Mobile Phone Repair In Sydney. More than 2000 Positive Reviews on Google and Same Day Repairs.
We take pride in delivering exceptional repair services for all major phone brands including Apple, Samsung, Google, and more. Our expert technicians use only genuine parts and offer 90days warranty on repairs. Located in the heart of Sydney CBD, we’re your one-stop solution for all mobile device repairs.
Our commitment to excellence has earned us the trust of thousands of satisfied customers. Whether it’s a cracked screen, battery replacement, or water damage repair, we handle it all with professional care and expertise. Walk in today and experience why we’re Sydney’s #1 choice for mobile phone repairs.
Visit us for:
✓ Same Day Express Repairs
✓ Genuine Parts Guarantee
✓ Professional Technicians
✓ Competitive Pricing
✓ 2000+ 5-Star Google Reviews
✓ 7-Time Award Winner for Best Phone Repairs
HARSH WINTER DAMAGE! iPhone 17 Pro Max Screen Recovery in Sydney CBD Shop – 7 Powerful Reasons Expert Repair Saves Your Device
Introduction
Winter weather can be surprisingly harsh on modern smartphones. Even premium devices like the iPhone 17 Pro Max are not immune to temperature-related issues. When cold conditions combine with accidental drops, moisture exposure, and rapid temperature changes, display damage can occur quickly.
This is where iPhone 17 Pro Max screen recovery in Sydney CBD shop services become essential. Professional technicians can diagnose, repair, and restore damaged displays while preserving the functionality and value of your device.
Whether you’re experiencing flickering screens, touch sensitivity problems, or visible OLED damage, understanding the causes and solutions can help you make informed decisions. In this guide, we’ll explore everything you need to know about iPhone 17 Pro Max screen recovery in Sydney CBD shop services and why expert repairs remain the smartest option.
Cold weather affects smartphones in ways many users don’t expect. While modern devices are engineered for durability, extreme environmental conditions still create risks.
Winter damage often develops gradually. A phone may appear normal initially, only to reveal display problems days later.
Common winter-related screen issues include:
Screen flickering
OLED discoloration
Reduced touch responsiveness
Green or white vertical lines
Black spots on the display
Internal moisture buildup
Cracked glass from temperature stress
For users seeking iPhone 17 Pro Max screen recovery in Sydney CBD shop solutions, identifying the cause of damage is the first step toward effective repair.
Temperature Fluctuations and OLED Stress
One of the biggest threats to smartphone displays is rapid temperature change.
Imagine walking from a cold Sydney morning into a heated office. The sudden transition creates thermal expansion and contraction within the device. Over time, these changes place stress on delicate display components.
OLED panels contain numerous microscopic layers. Repeated expansion and contraction can contribute to:
Pixel abnormalities
Display separation
Touch sensor issues
Internal connector instability
Moisture Condensation Risks
Another hidden danger is condensation.
When a cold phone enters a warm environment, moisture can form inside the device. Even tiny amounts of water can affect display circuitry.
Symptoms may include:
Temporary screen flickering
Random touch inputs
Brightness fluctuations
Display discoloration
Professional iPhone 17 Pro Max screen recovery in Sydney CBD shop technicians use advanced diagnostics to identify moisture-related damage before it becomes permanent.
The iPhone 17 Pro Max incorporates advanced display technology designed for exceptional visual performance. However, higher complexity often means greater sensitivity to certain forms of damage.
Modern OLED displays include:
Component
Function
OLED Layer
Produces vibrant colors
Digitizer
Detects touch input
Display Controller
Processes image signals
Flexible Cables
Connect display to motherboard
Protective Glass
Shields internal components
Damage to any of these elements can impact functionality.
Although Apple’s engineering standards are exceptionally high, physical impacts combined with winter conditions can still create repair needs.
Professional repair specialists understand these components thoroughly and can determine whether the problem requires:
Display replacement
Connector repair
Moisture treatment
Board-level diagnostics
Signs Your Screen Needs Immediate Attention
Not all display damage is obvious. Early intervention often prevents more serious issues.
Flickering Display
Flickering usually indicates:
OLED panel stress
Connector damage
Display controller issues
Ignoring flickering can eventually lead to complete screen failure.
Touch Response Failure
If certain areas of the screen stop responding, the digitizer may have sustained damage.
Warning signs include:
Delayed responses
Missed taps
Ghost touches
Unresponsive zones
Green Lines and Dead Pixels
Green lines have become one of the most discussed OLED-related issues in modern smartphones.
These lines often indicate:
OLED layer damage
Connector failure
Display circuit problems
Dead pixels may appear as:
Black dots
Colored spots
Permanently illuminated pixels
Professional iPhone 17 Pro Max screen recovery in Sydney CBD shop services can quickly determine the extent of the damage and recommend the most cost-effective solution.
Professional iPhone 17 Pro Max Screen Recovery Process
Repairing a premium smartphone requires far more than simply replacing a screen.
Experienced technicians follow a structured process designed to protect device integrity and maximize repair success.
Initial Device Inspection
The repair journey begins with a comprehensive inspection.
Technicians assess:
Screen condition
Frame integrity
Water exposure indicators
Face ID functionality
Charging performance
Camera operation
This evaluation helps identify both visible and hidden issues.
Advanced Diagnostics
Professional repair centers use specialized tools to test:
Display communication
Touch sensor functionality
Internal connections
Power consumption patterns
Diagnostics prevent misdiagnosis and ensure accurate repairs.
Precision Screen Replacement
Screen replacement involves meticulous attention to detail.
The process typically includes:
Safe device disassembly
Component inspection
Removal of damaged display
Installation of replacement screen
Calibration procedures
Quality assurance testing
Professional repair ensures all critical features continue operating correctly after installation.
Benefits of Choosing a Sydney CBD Shop
Local expertise matters.
A reputable Sydney CBD repair center offers several advantages compared with mail-in services or inexperienced providers.
Same-Day Repairs
Time is valuable.
Many professional repair centers complete screen replacements within the same day, minimizing disruption to work and daily life.
Benefits include:
Faster turnaround
Immediate diagnostics
Face-to-face consultation
Reduced downtime
Genuine Quality Components
Display quality directly affects user experience.
High-quality replacement screens deliver:
Accurate color reproduction
Smooth touch response
Reliable brightness levels
Enhanced durability
Choosing quality components helps preserve the premium feel of the iPhone 17 Pro Max.
Skilled Technicians
Experience makes a significant difference.
Professional technicians possess:
Advanced repair training
Specialized tools
Board-level repair knowledge
Extensive device familiarity
This expertise reduces risks and improves long-term reliability.
Preventing Future Winter Damage
While professional repairs restore functionality, prevention remains the best strategy.
Protecting your device from winter conditions helps reduce future repair costs.
Protective Cases and Accessories
A quality case provides valuable protection against:
Accidental drops
Temperature shock
Structural stress
Recommended accessories include:
Shock-resistant cases
Tempered glass protectors
Waterproof pouches
Insulated phone sleeves
Safe Charging Practices
Charging habits influence device health.
Avoid:
Charging immediately after exposure to cold temperatures
Using damaged cables
Leaving devices in vehicles overnight
Instead:
Allow devices to reach room temperature first
Use certified charging equipment
Monitor battery performance regularly
Temperature Management Tips
Simple precautions can significantly extend device lifespan.
Best practices include:
Keeping phones inside jackets during cold weather
Avoiding direct exposure to rain
Preventing sudden temperature changes
Storing devices in dry environments
These habits help minimize the need for future iPhone 17 Pro Max screen recovery in Sydney CBD shop services.
Cost Versus Replacement Analysis
Many users immediately consider replacing their phone after significant screen damage.
However, repair is often the smarter financial decision.
Option
Advantages
Disadvantages
Screen Repair
Lower cost, preserves data, fast turnaround
Requires professional service
Device Replacement
Brand-new device
Much higher expense
DIY Repair
Lower initial cost
High risk of additional damage
Professional repair frequently restores devices to excellent working condition at a fraction of replacement cost.
Additionally, repairing rather than replacing reduces electronic waste and supports sustainable technology practices.
For most users, expert iPhone 17 Pro Max screen recovery in Sydney CBD shop services represent the most practical solution.
Why Professional Repair Delivers Better Results
The sophistication of modern smartphones leaves little room for error.
DIY repairs may seem appealing initially, but they often introduce new problems.
Common DIY risks include:
Face ID failure
Connector damage
Battery punctures
Display calibration issues
Water resistance compromise
Professional repair providers invest in:
Precision equipment
Advanced training
Quality testing procedures
Warranty-backed service
These advantages deliver greater peace of mind and superior outcomes.
Industry best practices recommended by manufacturers and repair professionals emphasize proper diagnostics and quality components. For additional information about smartphone care and device maintenance, users can visit the official Apple support website: Apple Support
Ultimately, professional expertise remains the safest route when dealing with premium smartphones.
Frequently Asked Questions
1. Can cold weather really damage an iPhone 17 Pro Max screen?
Yes. Extreme cold and rapid temperature changes can contribute to OLED stress, condensation issues, and display malfunctions.
2. How do I know if my screen needs replacement?
Visible cracks, flickering, green lines, dead pixels, and touch responsiveness issues are common indicators.
3. Can water condensation inside the phone affect the display?
Absolutely. Internal moisture can interfere with display circuits and create temporary or permanent screen problems.
4. Is same-day screen repair possible?
Many professional repair centers offer same-day services depending on parts availability and repair complexity.
5. Will Face ID continue working after a professional screen repair?
When performed correctly by experienced technicians, Face ID functionality can often be preserved.
6. Is repairing an iPhone 17 Pro Max cheaper than replacing it?
In most situations, yes. Screen repair is typically far more cost-effective than purchasing a new device.
7. Can a damaged OLED screen worsen over time?
Yes. Small display issues frequently progress into larger failures if left untreated.
8. How can I protect my phone during winter?
Use a protective case, avoid sudden temperature changes, keep the phone dry, and follow safe charging practices.
Conclusion
Winter conditions can be surprisingly damaging to advanced smartphone displays. The combination of cold temperatures, moisture, accidental impacts, and thermal stress creates a perfect environment for screen-related issues to develop.
Fortunately, professional iPhone 17 Pro Max screen recovery in Sydney CBD shop services provide a reliable solution. Through expert diagnostics, precision repairs, and high-quality replacement components, technicians can restore performance while preserving the value of your device.
Rather than risking further damage through DIY methods or spending significantly more on a replacement device, professional repair offers a practical, efficient, and cost-effective path forward. When display problems appear, early intervention remains the key to achieving the best possible outcome.
David from Sydney CBD Repair Centre – The Best place to fix mobile phones as 7 Years In A Row! Top Mobile Phone Repair In Sydney. More than 2000 Positive Reviews on Google and Same Day Repairs.
We take pride in delivering exceptional repair services for all major phone brands including Apple, Samsung, Google, and more. Our expert technicians use only genuine parts and offer 90days warranty on repairs. Located in the heart of Sydney CBD, we’re your one-stop solution for all mobile device repairs.
Our commitment to excellence has earned us the trust of thousands of satisfied customers. Whether it’s a cracked screen, battery replacement, or water damage repair, we handle it all with professional care and expertise. Walk in today and experience why we’re Sydney’s #1 choice for mobile phone repairs.
Visit us for:
✓ Same Day Express Repairs
✓ Genuine Parts Guarantee
✓ Professional Technicians
✓ Competitive Pricing
✓ 2000+ 5-Star Google Reviews
✓ 7-Time Award Winner for Best Phone Repairs
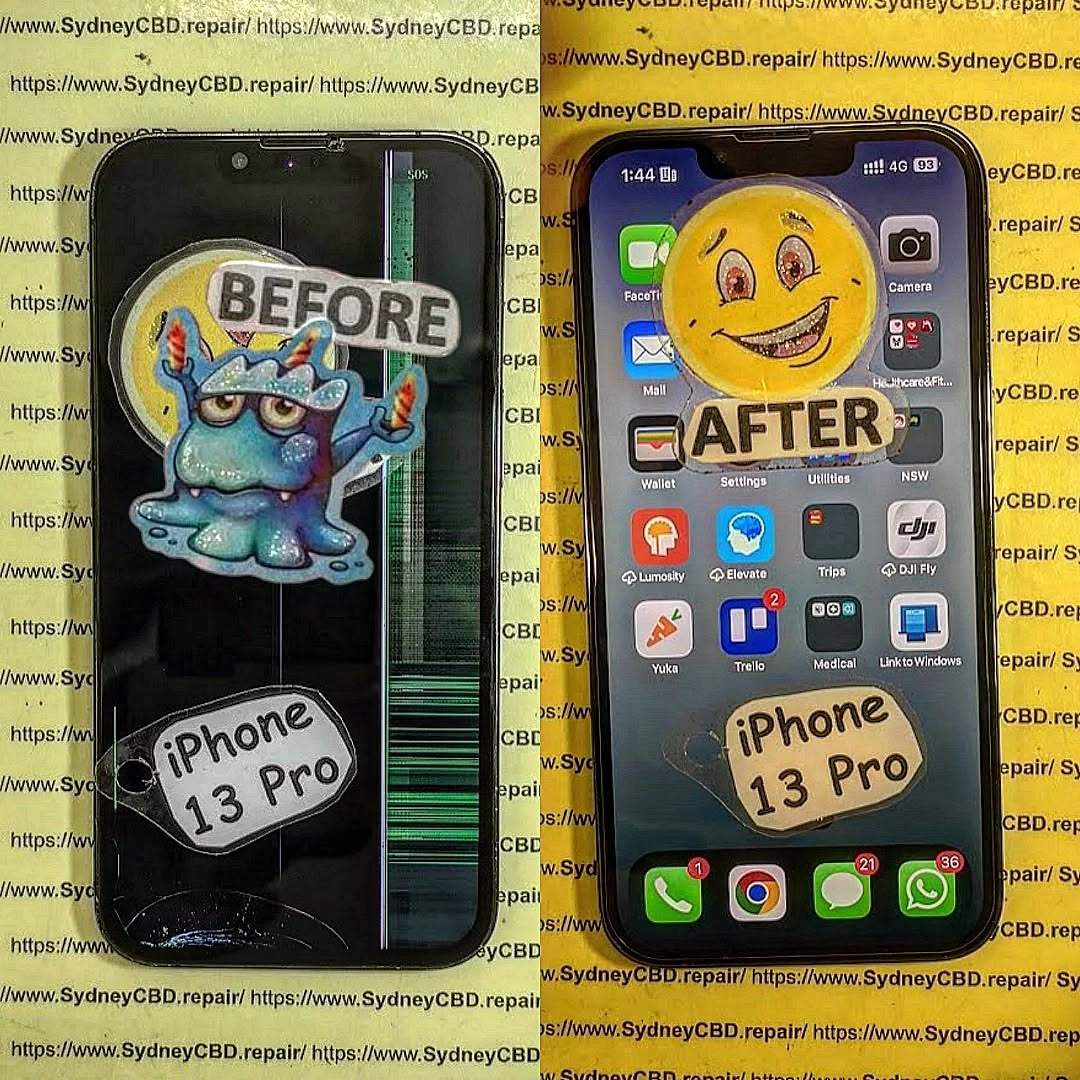
Step By Step iPhone 13 Pro Screen Replacement Using Professional Level Repair Techniques – 15 Expert Methods for a Flawless Repair
Introduction
The process of a Step By Step iPhone 13 Pro Screen Replacement can look intimidating at first. However, with the right tools, proper preparation, and professional repair techniques, replacing a damaged display becomes much more manageable. Whether your screen is cracked, unresponsive, flickering, or showing black spots, understanding the repair process helps you restore your device safely and efficiently.
The Apple iPhone 13 Pro features a premium Super Retina XDR OLED display that delivers exceptional image quality. Unfortunately, even a minor drop can damage the screen assembly. As a result, many users search for reliable repair solutions that balance quality and affordability.
In this comprehensive guide, you’ll learn every stage of the repair process using industry-standard methods. We’ll also cover important technician tips, waterproofing restoration, display testing, and quality control procedures. By the end, you’ll understand exactly how professional technicians perform an iPhone 13 Pro screen replacement with precision.
Before beginning a Step By Step iPhone 13 Pro Screen Replacement, it’s important to understand how the display assembly works.
The iPhone 13 Pro display consists of several integrated components:
OLED display panel
Touch digitizer
Front sensor assembly
Earpiece speaker
Ambient light sensor
Face ID components
Unlike older smartphones, modern iPhones combine multiple systems into one compact assembly. Consequently, technicians must work carefully to avoid damaging delicate flex cables and sensors.
The OLED technology used in the iPhone 13 Pro offers:
Feature
Benefit
Super Retina XDR
Sharp visuals
High brightness
Better outdoor visibility
ProMotion 120Hz
Smooth scrolling
HDR support
Improved video quality
Deep blacks
Enhanced contrast
Because these displays are expensive, professional handling is crucial during an iPhone 13 Pro screen replacement.
Lithium-ion batteries can become dangerous if punctured. Therefore, never force components during the repair process.
Professional repair centers also wear:
Safety glasses
Anti-static wrist straps
Heat-resistant gloves
These precautions reduce the risk of injury and device damage.
Preparing Your Workspace Like a Technician
A professional workspace dramatically improves repair success.
Ideal Workspace Setup
Lighting
Bright LED lighting helps identify tiny connectors and screws.
Organization
Use a magnetic project mat to separate screws by location.
Dust Control
Dust particles trapped under the display can ruin the final result.
Temperature Control
Moderate room temperatures improve adhesive handling.
Professional technicians understand that preparation matters just as much as technical skill during a Step By Step iPhone 13 Pro Screen Replacement.
Step By Step iPhone 13 Pro Screen Replacement Process
This section covers the complete repair workflow.
Step 1: Remove Bottom Screws
The two pentalobe screws are located beside the charging port.
Use a proper pentalobe screwdriver to avoid stripping them.
Step 2: Apply Controlled Heat
Heat softens the waterproof adhesive securing the display.
Apply moderate heat around the screen edges for 1–2 minutes.
Avoid overheating the OLED panel.
Step 3: Lift the Display Carefully
Attach a suction cup near the bottom edge.
Gently create a small gap and insert a plastic opening pick.
Slowly slide around the edges.
Do not insert the tool too deeply.
Step 4: Open the Screen Sideways
The iPhone 13 Pro opens like a book from the left side.
Be cautious of flex cables attached internally.
Step 5: Disconnect the Battery
Remove the battery connector bracket first.
Disconnecting the battery prevents accidental short circuits.
Step 6: Disconnect Display Cables
Carefully disconnect:
OLED connector
Touch connector
Sensor assembly connector
Use a plastic spudger only.
At this stage, the damaged display can now be removed safely during the iPhone 13 Pro screen replacement.
Removing the Bottom Screws Correctly
Many beginners accidentally strip screws during repairs.
To avoid this:
Use the correct screwdriver size
Apply downward pressure
Turn slowly
Avoid cheap toolkits
Stripped screws can significantly delay repairs.
Professional technicians often use precision screwdrivers with magnetic tips for better control.
Heating and Lifting the Display Safely
Heat application is one of the most critical repair stages.
Too little heat makes removal difficult.
Too much heat can damage:
OLED layers
Flex cables
Internal seals
Battery
Recommended Heating Methods
Method
Safety Level
Heat pad
Excellent
Controlled heat gun
Good
Hair dryer
Acceptable
Open flame
Dangerous
The goal is to soften adhesive—not melt components.
During a professional Step By Step iPhone 13 Pro Screen Replacement, technicians maintain consistent heat movement to prevent hot spots.
Disconnecting the Battery and Screen Cables
Battery disconnection is mandatory before touching display connectors.
Modern iPhones are highly sensitive to power surges.
Important Tips
Never use metal tools
Lift connectors vertically
Avoid flex cable bending
Keep screws organized
Damaging a connector can result in:
No display output
Touch malfunction
Face ID failure
Boot loops
This stage requires patience and precision.
Transferring Components to the New Display
The replacement display often arrives without small components installed.
You’ll typically need to transfer:
Earpiece speaker
Sensor flex
Brackets
Mesh grills
Face ID components are especially delicate.
Damaging the sensor assembly may permanently disable biometric authentication.
Professional Transfer Tips
Use Gentle Heat
This softens adhesive securing sensors.
Avoid Excessive Flexing
Sensor cables tear easily.
Maintain Screw Positions
Incorrect screw placement can damage the motherboard.
During a high-quality iPhone 13 Pro screen replacement, technicians inspect transferred parts under magnification.
Installing the Replacement Screen
Now it’s time to install the new display assembly.
Installation Steps
Connect display flex cables
Reconnect battery connector
Test the display before sealing
Power on the device
Verify touch responsiveness
Testing before final assembly prevents unnecessary reopening.
Screen Testing Checklist
Function
Test
OLED display
Brightness and color
Touchscreen
Full responsiveness
Face ID
Authentication
Front camera
Clarity
Earpiece
Audio quality
Proximity sensor
Screen dimming
Once testing passes, apply fresh waterproof adhesive around the frame.
Testing Face ID and Touch Functionality
Face ID issues are common after improper repairs.
The front sensor assembly is paired to the motherboard, meaning replacement isn’t simple.
Face ID Testing Procedure
Open Settings
Navigate to Face ID
Attempt setup
Test unlock functionality
Touch Testing
Drag an app icon around the screen to identify dead zones.
Professional technicians also run diagnostic software during an iPhone 13 Pro screen replacement to verify:
Multi-touch response
Display brightness
Sensor calibration
Common Mistakes During Screen Repair
Even experienced repair technicians occasionally make errors.
Here are the most common repair mistakes:
Using Excessive Force
Forcing the display open can tear flex cables.
Mixing Screws
Incorrect screws may puncture internal layers.
Skipping Battery Disconnection
This can short circuit components.
Cheap Replacement Screens
Low-quality displays often suffer from:
Poor brightness
Weak touch sensitivity
Battery drain
Color inaccuracies
Ignoring Waterproof Adhesive
Without sealing adhesive, water resistance is compromised.
Avoiding these mistakes greatly improves repair success rates.
OEM vs Aftermarket iPhone 13 Pro Screens
Choosing the right replacement screen matters.
OEM Displays
Original equipment manufacturer screens offer:
Superior brightness
Accurate colors
Better durability
Reliable touch response
However, they’re more expensive.
Aftermarket Screens
Aftermarket options vary widely in quality.
Screen Type
Quality
Hard OLED
Mid-range
Soft OLED
Excellent
LCD conversion
Low
Refurbished OEM
Premium
Professional repair shops usually recommend Soft OLED or OEM displays for the best user experience during an iPhone 13 Pro screen replacement.
Waterproofing and Adhesive Restoration
The iPhone 13 Pro includes factory water resistance.
Opening the phone breaks the original seal.
Therefore, technicians must install new waterproof adhesive after repair.
Adhesive Installation Tips
Clean old adhesive completely
Use precision-cut seals
Align carefully
Apply even pressure
Although resealing improves protection, repaired devices should still avoid heavy water exposure.
Post-Repair Quality Inspection
Professional repairs always conclude with quality testing.
Final Inspection Checklist
Visual Inspection
No screen gaps
No dust under display
Proper alignment
Functional Testing
Charging
Audio
Cameras
Sensors
Face ID
Pressure Test
Some repair centers perform seal pressure testing to evaluate waterproofing integrity.
A professional Step By Step iPhone 13 Pro Screen Replacement always includes comprehensive final checks.
When to Seek Professional Repair Services
DIY repairs can save money, but they aren’t ideal for everyone.
You should consider professional repair if:
Face ID is involved
The frame is bent
The phone suffered water damage
You lack proper tools
You’ve never repaired smartphones before
Experienced repair technicians reduce the risk of costly secondary damage.
Professional repair shops also provide:
Warranty coverage
Genuine parts
Fast turnaround
Diagnostic testing
Frequently Asked Questions
How long does an iPhone 13 Pro screen replacement take?
Professional technicians usually complete the repair within 1–2 hours.
Will Face ID still work after screen replacement?
Yes, provided the original sensor assembly remains undamaged.
Is the iPhone 13 Pro waterproof after repair?
Water resistance can be improved using replacement adhesive, but factory waterproofing may not be fully restored.
Can I replace only the glass?
Glass-only repairs are possible but require advanced equipment and expertise.
Are aftermarket screens worth buying?
High-quality Soft OLED screens can perform very well, but cheap screens often cause problems.
Does replacing the screen affect True Tone?
True Tone functionality may require programming tools during an iPhone 13 Pro screen replacement.
Is DIY repair cheaper?
DIY repairs can reduce costs, but mistakes may become expensive.
Conclusion
Performing a Step By Step iPhone 13 Pro Screen Replacement requires patience, technical precision, and proper tools. From careful adhesive heating to delicate flex cable handling, every stage influences the final repair quality.
Although many users successfully complete DIY repairs, professional-level results depend heavily on experience and attention to detail. Choosing quality replacement parts, maintaining organized work habits, and testing all functions thoroughly are essential for long-lasting performance.
Whether you’re a beginner learning smartphone repair or an experienced technician refining your process, following professional repair techniques ensures safer and more reliable outcomes.
By understanding the full repair workflow, you can confidently restore the stunning display performance of your Apple iPhone 13 Pro while minimizing repair risks.
David from Sydney CBD Repair Centre – The Best place to fix mobile phones as 7 Years In A Row! Top Mobile Phone Repair In Sydney. More than 2000 Positive Reviews on Google and Same Day Repairs.
We take pride in delivering exceptional repair services for all major phone brands including Apple, Samsung, Google, and more. Our expert technicians use only genuine parts and offer 90days warranty on repairs. Located in the heart of Sydney CBD, we’re your one-stop solution for all mobile device repairs.
Our commitment to excellence has earned us the trust of thousands of satisfied customers. Whether it’s a cracked screen, battery replacement, or water damage repair, we handle it all with professional care and expertise. Walk in today and experience why we’re Sydney’s #1 choice for mobile phone repairs.
Visit us for:
✓ Same Day Express Repairs
✓ Genuine Parts Guarantee
✓ Professional Technicians
✓ Competitive Pricing
✓ 2000+ 5-Star Google Reviews
✓ 7-Time Award Winner for Best Phone Repairs
Sydney CBD Repair Centre – Where Quality Meets Reliability.
Call : +61280114119
Website: Sydney CBD Repair Centre
iPhone 14 Pro Max Screen Replacement Sydney: The Ultimate 2025 Guide to Fast, Affordable & Reliable Repairs
Introduction
If you’ve accidentally cracked or shattered your iPhone 14 Pro Max screen, you’re not alone — and you’ve come to the right place. The iPhone 14 Pro Max, with its stunning Super Retina XDR OLED display, delivers incredible color accuracy and brightness, but even this advanced screen isn’t immune to damage from unexpected drops or impacts.
When your screen breaks, it’s more than just a cosmetic issue. A damaged display can affect touch sensitivity, Face ID accuracy, and overall usability. That’s why getting a professional iPhone 14 Pro Max screen replacement in Sydney is crucial to restoring your device’s flawless performance and premium look.
At Sydney CBD Repair Centre, our team of expert technicians specializes in same-day iPhone repairs using genuine Apple parts. With over 2000 five-star reviews and six consecutive Best Mobile Repair Service Awards, we’ve earned Sydney’s trust as the go-to destination for reliable, affordable, and high-quality phone repairs.
In this detailed guide, we’ll walk you through everything you need to know about iPhone 14 Pro Max screen replacement — from common causes of damage and repair costs to professional benefits and aftercare tips. Whether you’ve got a small crack or a completely blacked-out display, you’ll discover exactly how to get your iPhone back to looking and working like new — quickly, safely, and affordably.
The iPhone 14 Pro Max is one of Apple’s most advanced models, featuring a Super Retina XDR display with ProMotion technology. However, even the toughest screens can crack or malfunction. If you’re in Sydney and searching for iPhone 14 Pro Max screen replacement, you’ve landed on the right guide.
At Sydney CBD Repair Centre, we specialize in same-day iPhone screen repairs using genuine Apple parts. Whether your phone has a cracked glass, touch issues, or display discoloration, our technicians ensure it looks and performs like new — fast, reliable, and affordable.
Apple’s iPhone 14 Pro Max boasts a 6.7-inch OLED Super Retina XDR display with a 120Hz refresh rate, HDR10, and always-on display. Its precision engineering makes replacement more complex than older models. The screen integrates Face ID sensors, True Tone technology, and adaptive brightness — all requiring calibrated replacement tools and expertise.
That’s why choosing a qualified Sydney repair centre is essential. Untrained technicians or cheap third-party screens can cause issues like color distortion, flickering, or Face ID malfunction.
Common Causes of iPhone 14 Pro Max Screen Damage
Despite Apple’s use of Ceramic Shield glass, the iPhone 14 Pro Max is not indestructible. Here are the most frequent causes of screen damage:
Accidental Drops
Even minor falls can cause microfractures that worsen over time. Dropping your phone on concrete or tiles is a leading cause of shattered glass.
Pressure and Bending
Sitting on your iPhone or keeping it in a tight pocket can bend the chassis, causing the OLED to separate from the digitizer. Once this happens, only a full screen replacement can restore full functionality.
Signs You Need a Screen Replacement
Knowing when to replace your screen can prevent further damage. Look out for:
Cracks or spiderweb patterns
Unresponsive touch
Dead pixels or black spots
Dim or flickering display
Face ID not recognizing
Discoloration or burn-in effects
If you notice any of these symptoms, it’s best to visit Sydney CBD Repair Centre immediately. Ignoring them can cause internal damage to the display connector or motherboard.
DIY vs Professional Screen Replacement
Risks of DIY Screen Repairs
While online tutorials may seem tempting, DIY repair can:
Void your Apple warranty
Cause Face ID failure
Damage internal connectors
Use non-genuine parts that reduce display quality
Lead to costly re-repairs
Benefits of Professional Repairs in Sydney
Professional repair ensures:
Certified technicians handle your device
Use of OEM-quality parts
Warranty coverage on the repair
Quick same-day turnaround
Accurate calibration of Face ID and True Tone
Sydney CBD Repair Centre provides free diagnostics, transparent pricing, and a 90-day warranty on all iPhone 14 Pro Max repairs.
Step-by-Step Process: iPhone 14 Pro Max Screen Replacement
Initial Inspection: Technicians assess the device for visible and hidden damage.
Component Disassembly: Battery is safely disconnected before removing the damaged screen.
Screen Removal: The cracked display is gently detached to protect internal components.
Cleaning & Preparation: Dust and adhesive residues are removed.
Genuine Screen Installation: A new OEM-quality screen is fitted.
Calibration: Face ID and True Tone settings are reconfigured.
Final Testing: Touch sensitivity, brightness, and camera alignment are verified.
The entire process typically takes 45–60 minutes for most customers.
Why Choose Sydney CBD Repair Centre
Sydney CBD Repair Centre has been Sydney’s #1 rated mobile phone repair shop for six consecutive years. With over 2000 5-star Google reviews, customers consistently praise their professionalism and genuine parts.
Genuine Parts Guarantee
Unlike many competitors, Sydney CBD Repair Centre uses only genuine or OEM-grade parts, ensuring perfect color accuracy and touch sensitivity.
90-Day Warranty & Same-Day Repairs
Every repair comes with a 90-day warranty, covering any manufacturing or workmanship issues. Plus, most repairs are completed the same day, so you can get your iPhone back quickly.
Cost of iPhone 14 Pro Max Screen Replacement in Sydney
The average cost for a genuine iPhone 14 Pro Max screen replacement in Sydney ranges between $480–$650, depending on part availability and damage extent.
At Sydney CBD Repair Centre, you’ll always receive transparent pricing, with no hidden fees. Discounts may be available for students, walk-ins, or multiple repairs.
How Long Does the Replacement Take?
Most iPhone 14 Pro Max screen repairs are completed within 1 hour. However, complex cases (such as water damage or sensor issues) may take longer. Walk-ins are welcome, but booking ahead ensures faster service.
Maintaining Your New Screen
To make your new iPhone 14 Pro Max screen last:
Use a tempered glass protector
Invest in a shockproof case
Avoid extreme heat or pressure
Clean regularly with a microfiber cloth
Schedule regular device checkups
Following these simple tips ensures maximum longevity and clarity for your display.
Frequently Asked Questions
1. How do I know if my iPhone 14 Pro Max screen needs replacing?
If your display is cracked, flickering, or touch is unresponsive, you likely need a replacement.
2. Will replacing the screen affect Face ID?
Not at Sydney CBD Repair Centre — our technicians recalibrate Face ID after installation.
3. How long does the repair take?
Most screen replacements are finished within the hour.
4. Do you use genuine Apple parts?
Yes. We use genuine or OEM-quality parts to maintain performance and warranty compliance.
5. What if the screen breaks again?
You’re covered with a 90-day warranty for workmanship and part defects.
Your iPhone 14 Pro Max deserves the best care possible. Whether you’re dealing with a cracked screen or display malfunction, Sydney CBD Repair Centre offers the most trusted, affordable, and professional iPhone repair service in Sydney.
With same-day service, genuine parts, and 2000+ five-star reviews, it’s easy to see why thousands of Sydneysiders trust David and his expert team.
👉 Visit us today at SydneyCBD.repair/locate-us or call +61280114119 to experience Sydney’s leading phone repair specialists.
David from Sydney CBD Repair Centre — Sydney’s trusted name for iPhone, Samsung, and Google Pixel repairs.
Thank you for using
Themify Popup
This is a sample pop up. Themify Builder or Builder Lite (free) plugin is recommended to design the pop up layouts.