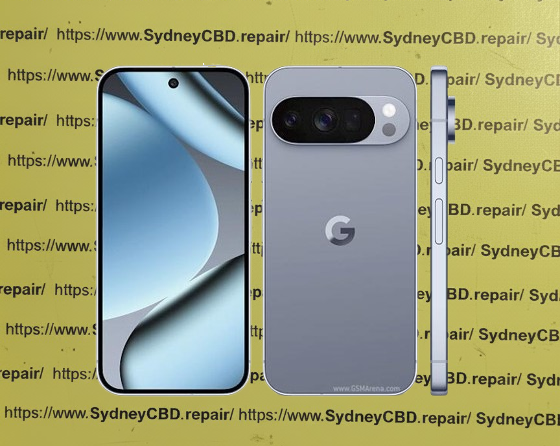
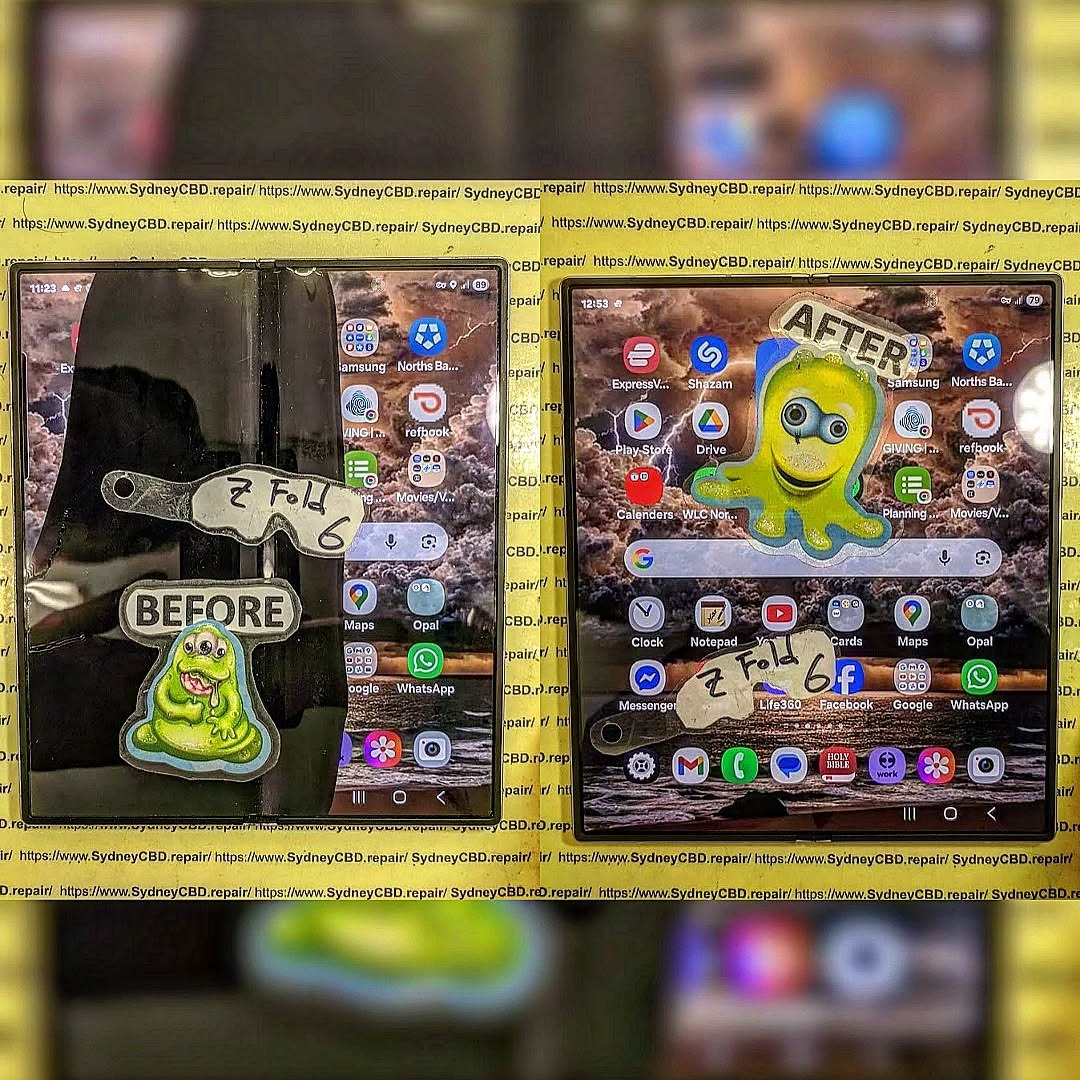
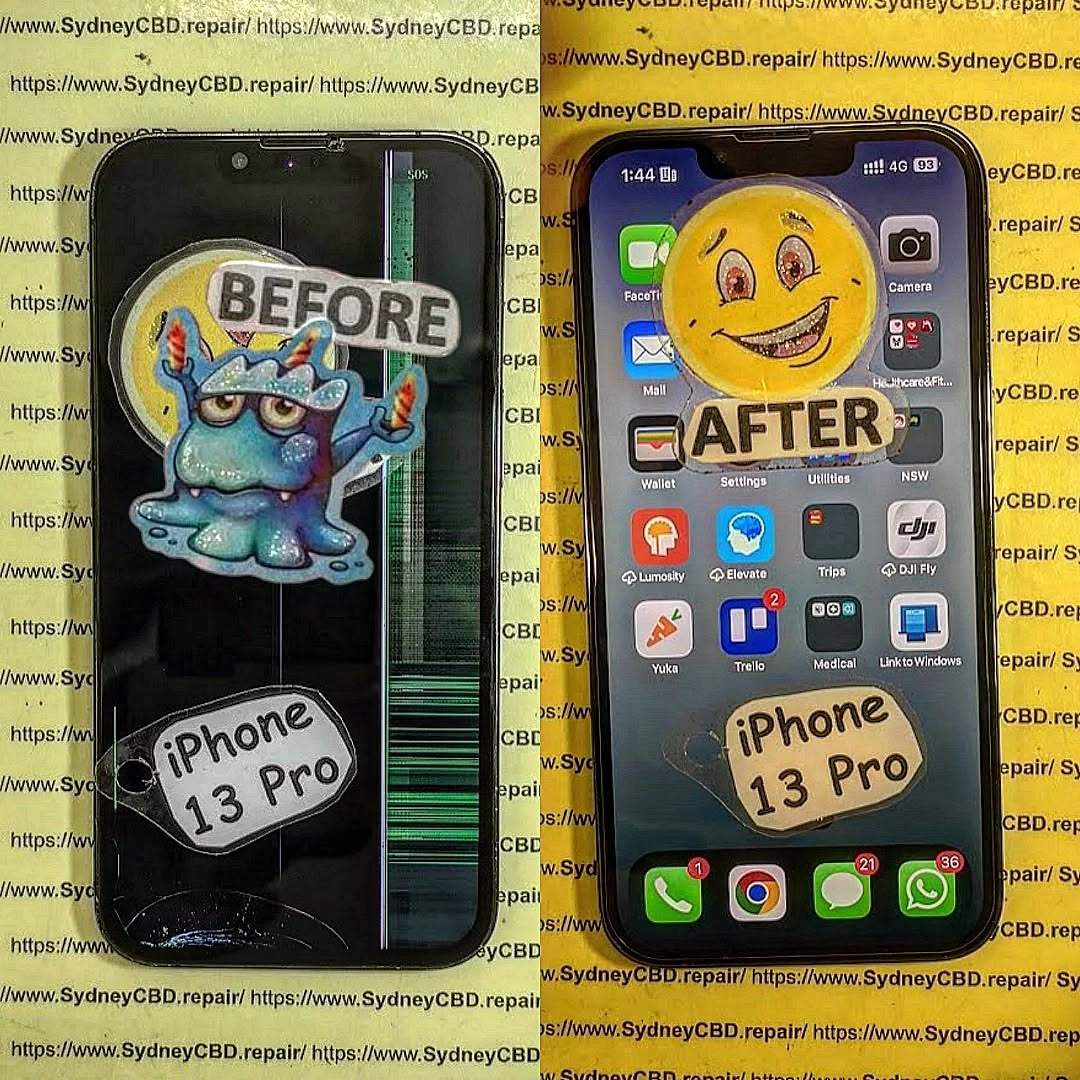
Fixing process of a Google Pixel 10 Pro With Severe Thermal Damage and Battery Swelling: Ultimate Repair Guide (2026)
Introduction to Thermal Damage in Smartphones
Fixing a Google Pixel 10 Pro with severe thermal damage and battery swelling is no small task. Modern smartphones like the Google Pixel 10 Pro pack immense power into a compact frame, and that naturally generates heat. When this heat isn’t managed properly, it can lead to serious internal damage.
Thermal damage occurs when internal components are exposed to excessive temperatures for extended periods. Over time, this heat degrades circuits, weakens solder joints, and compromises battery integrity. Combine that with battery swelling, and you’ve got a potentially dangerous situation on your hands.
Now, here’s the thing—phones aren’t designed to fail easily. Companies like Google invest heavily in thermal management systems. However, factors like heavy gaming, fast charging, environmental heat, and manufacturing defects can still push devices beyond their limits.
Despite advanced cooling systems, the Pixel 10 Pro can still suffer thermal stress due to:
High-performance processors
Compact internal layout
Aggressive fast-charging technology
When these elements combine, internal temperatures can spike quickly—especially in tropical climates.
Understanding Battery Swelling
Battery swelling is often the most visible sign of internal failure. If you’re fixing a Google Pixel 10 Pro with severe thermal damage and battery swelling, this is the part you absolutely can’t ignore.
Signs of a Swollen Battery
Look out for:
Bulging back cover
Screen lifting from the frame
Reduced battery life
Device overheating even when idle
Difficulty pressing buttons
Risks of Ignoring Battery Swelling
Ignoring a swollen battery can lead to:
Battery rupture
Fire hazards
Permanent motherboard damage
In extreme cases, lithium-ion batteries can become unstable and dangerous.
Initial Assessment Before Repair
Before diving into fixing a Google Pixel 10 Pro with severe thermal damage and battery swelling, proper assessment is critical.
Safety Precautions
Always:
Power off the device
Work in a well-ventilated area
Wear anti-static gloves
Keep a fire-resistant surface nearby
Tools Required
Tool
Purpose
Heat gun
Loosen adhesive
Plastic pry tools
Open device safely
Precision screwdriver set
Remove screws
Isopropyl alcohol
Clean components
Replacement battery
Core repair part
Step-by-Step Disassembly Guide
Removing the Back Cover
Start by gently heating the back panel. Use a suction cup and pry tool to lift it carefully. Don’t rush—this is where many accidental damages occur.
Disconnecting Internal Components
Once open:
Disconnect the battery first
Remove flex cables
Unscrew shielding plates
This ensures safe access to internal components.
Diagnosing Thermal Damage
Fixing a Google Pixel 10 Pro with severe thermal damage and battery swelling requires identifying affected areas.
Inspecting the Motherboard
Check for:
Burn marks
Corroded components
Loose solder joints
Checking the Cooling System
Modern phones use graphite sheets or vapor chambers. If these are damaged, heat won’t dissipate properly.
Battery Replacement Process
Removing the Swollen Battery
Carefully detach adhesive strips. Never puncture the battery—it’s extremely dangerous.
Installing a New Battery
Use original or high-quality replacement
Align properly
Secure with adhesive
Repairing Heat-Damaged Components
Replacing IC Chips
Advanced repairs may involve replacing power ICs using micro-soldering techniques.
Fixing Burnt Connectors
Damaged connectors must be cleaned or replaced to restore functionality.
Reassembly and Testing
Reassemble in reverse order:
Reconnect all cables
Seal the back cover
Power on and test
Check:
Battery performance
Temperature stability
Charging functionality
Preventing Future Thermal Damage
To avoid repeating the issue:
Avoid heavy usage while charging
Use certified chargers
Remove thick cases during gaming
Keep software updated
Cost Analysis: Repair vs Replacement
Option
Cost
Pros
Cons
Repair
Moderate
Saves data
Requires expertise
Replacement
High
Brand new device
Expensive
Professional Repair vs DIY
DIY repairs can save money, but they carry risks. Professional technicians offer:
Warranty
Proper tools
Experience
If you’re unsure, don’t gamble—seek expert help.
FAQs
1. Can a swollen battery fix itself?
No. Once swollen, it must be replaced immediately.
2. Is it safe to use a phone with thermal damage?
Not at all. It can worsen and become hazardous.
3. How long does repair take?
Typically 1–3 hours depending on severity.
4. Can thermal damage affect data?
Yes, especially if the motherboard is impacted.
5. What causes battery swelling the most?
Heat, overcharging, and aging batteries.
6. Should I repair or replace my Pixel 10 Pro?
If damage is limited, repair is often the better choice.
Conclusion
Fixing a Google Pixel 10 Pro with severe thermal damage and battery swelling requires patience, precision, and the right knowledge. While it may seem intimidating, understanding the process empowers you to make informed decisions—whether you go DIY or professional.
The key takeaway? Don’t ignore early warning signs. Heat and battery issues only get worse over time. Act quickly, repair smartly, and your device can still have a long, functional life ahead.
David from Sydney CBD Repair Centre – The Best place to fix mobile phones as 7 Years In A Row! Top Mobile Phone Repair In Sydney. More than 2000 Positive Reviews on Google and Same Day Repairs.
We take pride in delivering exceptional repair services for all major phone brands including Apple, Samsung, Google, and more. Our expert technicians use only genuine parts and offer 90days warranty on repairs. Located in the heart of Sydney CBD, we’re your one-stop solution for all mobile device repairs.
Our commitment to excellence has earned us the trust of thousands of satisfied customers. Whether it’s a cracked screen, battery replacement, or water damage repair, we handle it all with professional care and expertise. Walk in today and experience why we’re Sydney’s #1 choice for mobile phone repairs.
Visit us for:
✓ Same Day Express Repairs
✓ Genuine Parts Guarantee
✓ Professional Technicians
✓ Competitive Pricing
✓ 2000+ 5-Star Google Reviews
✓ 7-Time Award Winner for Best Phone Repairs
Samsung Galaxy Z Fold 6 Inner Screen Replacement and Biometric Sensor Calibration: 15 Essential Facts for a Flawless Repair
Introduction
The Samsung Galaxy Z Fold 6 Inner Screen Replacement and Biometric Sensor Calibration process is one of the most advanced smartphone repair procedures available today. Foldable smartphones represent cutting-edge technology, combining the functionality of a tablet and a phone into a single device. However, their sophisticated design also means repairs require specialized expertise.
When the inner display becomes damaged, replacing it isn’t as straightforward as changing a standard smartphone screen. The repair must be performed carefully to protect the folding mechanism, maintain display quality, and ensure biometric systems continue functioning correctly.
Furthermore, biometric sensor calibration is an essential step after many repairs. Without proper calibration, features such as fingerprint recognition and secure authentication may not operate as intended.
This guide explores every aspect of Samsung Galaxy Z Fold 6 Inner Screen Replacement and Biometric Sensor Calibration, helping device owners understand what to expect from the repair process and how to maintain their investment afterward.
1. How long does a Samsung Galaxy Z Fold 6 inner screen replacement take?
Most professional repairs are completed within several hours to one business day, depending on parts availability and calibration requirements.
2. Is biometric sensor calibration always necessary?
In many cases, yes. Calibration ensures that fingerprint and security systems operate correctly after repairs involving internal components.
3. Can I replace the inner screen myself?
Due to the complexity of foldable devices, DIY repairs are generally not recommended. Specialized tools and expertise are required.
4. Will replacing the screen affect waterproofing?
Professional repair centers use proper sealing methods to restore device protection as closely as possible to factory standards.
5. How can I prevent future screen damage?
Use protective cases, avoid excessive pressure, keep the hinge clean, and handle the device carefully during opening and closing.
6. Are genuine replacement parts important?
Absolutely. Genuine components help maintain display quality, durability, compatibility, and long-term reliability.
7. Does screen replacement improve device performance?
If display-related issues were affecting usability, replacing the screen can restore normal functionality and enhance the user experience.
8. What happens if biometric calibration is skipped?
Users may experience fingerprint recognition failures, authentication errors, or reduced security feature functionality.
Conclusion
The Samsung Galaxy Z Fold 6 Inner Screen Replacement and Biometric Sensor Calibration process is far more sophisticated than a standard smartphone repair. The foldable display, flexible architecture, and integrated security systems require specialized expertise, professional tools, and meticulous attention to detail.
By choosing an experienced repair provider, using genuine parts, and ensuring proper biometric sensor calibration, users can restore their Galaxy Z Fold 6 to optimal condition. Regular maintenance and careful handling will further extend the lifespan of the repaired device, helping owners continue enjoying the innovative features that make foldable smartphones so unique.
For additional information about Samsung devices and support resources, visit the official Samsung Support.
David from Sydney CBD Repair Centre – The Best place to fix mobile phones as 7 Years In A Row! Top Mobile Phone Repair In Sydney. More than 2000 Positive Reviews on Google and Same Day Repairs.
We take pride in delivering exceptional repair services for all major phone brands including Apple, Samsung, Google, and more. Our expert technicians use only genuine parts and offer 90days warranty on repairs. Located in the heart of Sydney CBD, we’re your one-stop solution for all mobile device repairs.
Our commitment to excellence has earned us the trust of thousands of satisfied customers. Whether it’s a cracked screen, battery replacement, or water damage repair, we handle it all with professional care and expertise. Walk in today and experience why we’re Sydney’s #1 choice for mobile phone repairs.
Visit us for:
✓ Same Day Express Repairs
✓ Genuine Parts Guarantee
✓ Professional Technicians
✓ Competitive Pricing
✓ 2000+ 5-Star Google Reviews
✓ 7-Time Award Winner for Best Phone Repairs
Sydney CBD Repair Centre – Where Quality Meets Reliability.
Call : +61280114119
Website: Sydney CBD Repair Centre
Step By Step iPhone 13 Pro Screen Replacement Using Professional Level Repair Techniques – 15 Expert Methods for a Flawless Repair
Introduction
The process of a Step By Step iPhone 13 Pro Screen Replacement can look intimidating at first. However, with the right tools, proper preparation, and professional repair techniques, replacing a damaged display becomes much more manageable. Whether your screen is cracked, unresponsive, flickering, or showing black spots, understanding the repair process helps you restore your device safely and efficiently.
The Apple iPhone 13 Pro features a premium Super Retina XDR OLED display that delivers exceptional image quality. Unfortunately, even a minor drop can damage the screen assembly. As a result, many users search for reliable repair solutions that balance quality and affordability.
In this comprehensive guide, you’ll learn every stage of the repair process using industry-standard methods. We’ll also cover important technician tips, waterproofing restoration, display testing, and quality control procedures. By the end, you’ll understand exactly how professional technicians perform an iPhone 13 Pro screen replacement with precision.
Before beginning a Step By Step iPhone 13 Pro Screen Replacement, it’s important to understand how the display assembly works.
The iPhone 13 Pro display consists of several integrated components:
OLED display panel
Touch digitizer
Front sensor assembly
Earpiece speaker
Ambient light sensor
Face ID components
Unlike older smartphones, modern iPhones combine multiple systems into one compact assembly. Consequently, technicians must work carefully to avoid damaging delicate flex cables and sensors.
The OLED technology used in the iPhone 13 Pro offers:
Feature
Benefit
Super Retina XDR
Sharp visuals
High brightness
Better outdoor visibility
ProMotion 120Hz
Smooth scrolling
HDR support
Improved video quality
Deep blacks
Enhanced contrast
Because these displays are expensive, professional handling is crucial during an iPhone 13 Pro screen replacement.
Lithium-ion batteries can become dangerous if punctured. Therefore, never force components during the repair process.
Professional repair centers also wear:
Safety glasses
Anti-static wrist straps
Heat-resistant gloves
These precautions reduce the risk of injury and device damage.
Preparing Your Workspace Like a Technician
A professional workspace dramatically improves repair success.
Ideal Workspace Setup
Lighting
Bright LED lighting helps identify tiny connectors and screws.
Organization
Use a magnetic project mat to separate screws by location.
Dust Control
Dust particles trapped under the display can ruin the final result.
Temperature Control
Moderate room temperatures improve adhesive handling.
Professional technicians understand that preparation matters just as much as technical skill during a Step By Step iPhone 13 Pro Screen Replacement.
Step By Step iPhone 13 Pro Screen Replacement Process
This section covers the complete repair workflow.
Step 1: Remove Bottom Screws
The two pentalobe screws are located beside the charging port.
Use a proper pentalobe screwdriver to avoid stripping them.
Step 2: Apply Controlled Heat
Heat softens the waterproof adhesive securing the display.
Apply moderate heat around the screen edges for 1–2 minutes.
Avoid overheating the OLED panel.
Step 3: Lift the Display Carefully
Attach a suction cup near the bottom edge.
Gently create a small gap and insert a plastic opening pick.
Slowly slide around the edges.
Do not insert the tool too deeply.
Step 4: Open the Screen Sideways
The iPhone 13 Pro opens like a book from the left side.
Be cautious of flex cables attached internally.
Step 5: Disconnect the Battery
Remove the battery connector bracket first.
Disconnecting the battery prevents accidental short circuits.
Step 6: Disconnect Display Cables
Carefully disconnect:
OLED connector
Touch connector
Sensor assembly connector
Use a plastic spudger only.
At this stage, the damaged display can now be removed safely during the iPhone 13 Pro screen replacement.
Removing the Bottom Screws Correctly
Many beginners accidentally strip screws during repairs.
To avoid this:
Use the correct screwdriver size
Apply downward pressure
Turn slowly
Avoid cheap toolkits
Stripped screws can significantly delay repairs.
Professional technicians often use precision screwdrivers with magnetic tips for better control.
Heating and Lifting the Display Safely
Heat application is one of the most critical repair stages.
Too little heat makes removal difficult.
Too much heat can damage:
OLED layers
Flex cables
Internal seals
Battery
Recommended Heating Methods
Method
Safety Level
Heat pad
Excellent
Controlled heat gun
Good
Hair dryer
Acceptable
Open flame
Dangerous
The goal is to soften adhesive—not melt components.
During a professional Step By Step iPhone 13 Pro Screen Replacement, technicians maintain consistent heat movement to prevent hot spots.
Disconnecting the Battery and Screen Cables
Battery disconnection is mandatory before touching display connectors.
Modern iPhones are highly sensitive to power surges.
Important Tips
Never use metal tools
Lift connectors vertically
Avoid flex cable bending
Keep screws organized
Damaging a connector can result in:
No display output
Touch malfunction
Face ID failure
Boot loops
This stage requires patience and precision.
Transferring Components to the New Display
The replacement display often arrives without small components installed.
You’ll typically need to transfer:
Earpiece speaker
Sensor flex
Brackets
Mesh grills
Face ID components are especially delicate.
Damaging the sensor assembly may permanently disable biometric authentication.
Professional Transfer Tips
Use Gentle Heat
This softens adhesive securing sensors.
Avoid Excessive Flexing
Sensor cables tear easily.
Maintain Screw Positions
Incorrect screw placement can damage the motherboard.
During a high-quality iPhone 13 Pro screen replacement, technicians inspect transferred parts under magnification.
Installing the Replacement Screen
Now it’s time to install the new display assembly.
Installation Steps
Connect display flex cables
Reconnect battery connector
Test the display before sealing
Power on the device
Verify touch responsiveness
Testing before final assembly prevents unnecessary reopening.
Screen Testing Checklist
Function
Test
OLED display
Brightness and color
Touchscreen
Full responsiveness
Face ID
Authentication
Front camera
Clarity
Earpiece
Audio quality
Proximity sensor
Screen dimming
Once testing passes, apply fresh waterproof adhesive around the frame.
Testing Face ID and Touch Functionality
Face ID issues are common after improper repairs.
The front sensor assembly is paired to the motherboard, meaning replacement isn’t simple.
Face ID Testing Procedure
Open Settings
Navigate to Face ID
Attempt setup
Test unlock functionality
Touch Testing
Drag an app icon around the screen to identify dead zones.
Professional technicians also run diagnostic software during an iPhone 13 Pro screen replacement to verify:
Multi-touch response
Display brightness
Sensor calibration
Common Mistakes During Screen Repair
Even experienced repair technicians occasionally make errors.
Here are the most common repair mistakes:
Using Excessive Force
Forcing the display open can tear flex cables.
Mixing Screws
Incorrect screws may puncture internal layers.
Skipping Battery Disconnection
This can short circuit components.
Cheap Replacement Screens
Low-quality displays often suffer from:
Poor brightness
Weak touch sensitivity
Battery drain
Color inaccuracies
Ignoring Waterproof Adhesive
Without sealing adhesive, water resistance is compromised.
Avoiding these mistakes greatly improves repair success rates.
OEM vs Aftermarket iPhone 13 Pro Screens
Choosing the right replacement screen matters.
OEM Displays
Original equipment manufacturer screens offer:
Superior brightness
Accurate colors
Better durability
Reliable touch response
However, they’re more expensive.
Aftermarket Screens
Aftermarket options vary widely in quality.
Screen Type
Quality
Hard OLED
Mid-range
Soft OLED
Excellent
LCD conversion
Low
Refurbished OEM
Premium
Professional repair shops usually recommend Soft OLED or OEM displays for the best user experience during an iPhone 13 Pro screen replacement.
Waterproofing and Adhesive Restoration
The iPhone 13 Pro includes factory water resistance.
Opening the phone breaks the original seal.
Therefore, technicians must install new waterproof adhesive after repair.
Adhesive Installation Tips
Clean old adhesive completely
Use precision-cut seals
Align carefully
Apply even pressure
Although resealing improves protection, repaired devices should still avoid heavy water exposure.
Post-Repair Quality Inspection
Professional repairs always conclude with quality testing.
Final Inspection Checklist
Visual Inspection
No screen gaps
No dust under display
Proper alignment
Functional Testing
Charging
Audio
Cameras
Sensors
Face ID
Pressure Test
Some repair centers perform seal pressure testing to evaluate waterproofing integrity.
A professional Step By Step iPhone 13 Pro Screen Replacement always includes comprehensive final checks.
When to Seek Professional Repair Services
DIY repairs can save money, but they aren’t ideal for everyone.
You should consider professional repair if:
Face ID is involved
The frame is bent
The phone suffered water damage
You lack proper tools
You’ve never repaired smartphones before
Experienced repair technicians reduce the risk of costly secondary damage.
Professional repair shops also provide:
Warranty coverage
Genuine parts
Fast turnaround
Diagnostic testing
Frequently Asked Questions
How long does an iPhone 13 Pro screen replacement take?
Professional technicians usually complete the repair within 1–2 hours.
Will Face ID still work after screen replacement?
Yes, provided the original sensor assembly remains undamaged.
Is the iPhone 13 Pro waterproof after repair?
Water resistance can be improved using replacement adhesive, but factory waterproofing may not be fully restored.
Can I replace only the glass?
Glass-only repairs are possible but require advanced equipment and expertise.
Are aftermarket screens worth buying?
High-quality Soft OLED screens can perform very well, but cheap screens often cause problems.
Does replacing the screen affect True Tone?
True Tone functionality may require programming tools during an iPhone 13 Pro screen replacement.
Is DIY repair cheaper?
DIY repairs can reduce costs, but mistakes may become expensive.
Conclusion
Performing a Step By Step iPhone 13 Pro Screen Replacement requires patience, technical precision, and proper tools. From careful adhesive heating to delicate flex cable handling, every stage influences the final repair quality.
Although many users successfully complete DIY repairs, professional-level results depend heavily on experience and attention to detail. Choosing quality replacement parts, maintaining organized work habits, and testing all functions thoroughly are essential for long-lasting performance.
Whether you’re a beginner learning smartphone repair or an experienced technician refining your process, following professional repair techniques ensures safer and more reliable outcomes.
By understanding the full repair workflow, you can confidently restore the stunning display performance of your Apple iPhone 13 Pro while minimizing repair risks.
David from Sydney CBD Repair Centre – The Best place to fix mobile phones as 7 Years In A Row! Top Mobile Phone Repair In Sydney. More than 2000 Positive Reviews on Google and Same Day Repairs.
We take pride in delivering exceptional repair services for all major phone brands including Apple, Samsung, Google, and more. Our expert technicians use only genuine parts and offer 90days warranty on repairs. Located in the heart of Sydney CBD, we’re your one-stop solution for all mobile device repairs.
Our commitment to excellence has earned us the trust of thousands of satisfied customers. Whether it’s a cracked screen, battery replacement, or water damage repair, we handle it all with professional care and expertise. Walk in today and experience why we’re Sydney’s #1 choice for mobile phone repairs.
Visit us for:
✓ Same Day Express Repairs
✓ Genuine Parts Guarantee
✓ Professional Technicians
✓ Competitive Pricing
✓ 2000+ 5-Star Google Reviews
✓ 7-Time Award Winner for Best Phone Repairs
Sydney CBD Repair Centre – Where Quality Meets Reliability.
Call : +61280114119
Website: Sydney CBD Repair Centre
Every Internal Component Revealed In A High Speed Galaxy Z Flip 6 Teardown – Ultimate 25-Step Breakdown
🔍 Introduction to the Galaxy Z Flip 6 Teardown
The latest foldable from Samsung Electronics has once again pushed engineering boundaries. In this Galaxy Z Flip 6 teardown, we take a deep dive into every internal component, revealing how this compact device manages to house cutting-edge technology within a folding form factor.
Right from the first glance, it’s clear the Galaxy Z Flip 6 teardown is not just about dismantling a phone—it’s about understanding innovation. From its reinforced hinge to its refined dual battery system, each component tells a story of evolution.
In this article, we’ll walk you through a high-speed teardown process, highlighting every internal part, analyzing its purpose, and sharing expert repair insights. Whether you’re a technician or just curious, this teardown reveals everything.
Foldable smartphones have come a long way since their debut. The Samsung Galaxy Z Flip6 represents a mature stage in this evolution, featuring improved durability, enhanced display technology, and smarter internal layout.
Unlike traditional slab phones, foldables must balance flexibility with strength. That’s no easy task.
Design Philosophy Behind Samsung Foldables
Samsung’s approach is simple: maximize usability without compromising portability. The Z Flip 6 achieves this through:
Ultra-thin glass technology
Reinforced hinge mechanism
Compact clamshell design
Optimized internal component stacking
And honestly, it’s impressive how everything fits so seamlessly.
Even with improvements, potential weak spots include:
Flex cables near hinge
Dust ingress over time
Mechanical wear
📊 Repairability Score & Insights
Let’s be honest—this isn’t an easy phone to repair.
Repairability Score: 6/10
Pros:
Modular components in some areas
Improved adhesive design
Cons:
Fragile display
Complex hinge system
⚠️ Common Issues Found During Teardown
During the Galaxy Z Flip 6 teardown, technicians often observe:
Battery swelling (rare but possible)
Display crease wear
Loose connectors after drops
💡 Professional Repair Tips
If you’re planning repairs:
Always use genuine parts
Avoid DIY display replacements
Test components before reassembly
🔄 Comparison With Previous Models
Compared to earlier versions:
Feature
Z Flip 5
Z Flip 6
Hinge
Improved
More durable
Battery
Smaller
Larger capacity
Cooling
Basic
Enhanced
The upgrades are subtle—but meaningful.
❓ FAQs
1. Is the Galaxy Z Flip 6 easy to repair?
Not really. The foldable design makes it complex and delicate.
2. What is the biggest risk during teardown?
Damaging the foldable display—it’s extremely fragile.
3. Does the hinge wear out over time?
Yes, but Samsung has improved durability significantly.
4. Can the battery be replaced easily?
It’s possible, but requires professional tools and care.
5. Is water resistance affected after repair?
Absolutely. Once opened, original sealing is compromised.
6. Should I attempt a DIY teardown?
Only if you have experience—otherwise, it’s risky.
🧠 Conclusion
The Galaxy Z Flip 6 teardown reveals a masterpiece of modern engineering. From its intricate hinge system to its compact internal layout, every component reflects innovation and precision.
While it’s not the easiest device to repair, it’s undoubtedly one of the most fascinating smartphones to explore internally. For professionals, it offers both a challenge and an opportunity to understand next-generation design.
If you’re considering repairs or just curious about foldable tech, this teardown gives you a front-row seat to the future of smartphones.
🌐 External Resource: Learn more about foldable technology from Samsung’s official page: https://www.samsung.com
David from Sydney CBD Repair Centre – The Best place to fix mobile phones as 7 Years In A Row! Top Mobile Phone Repair In Sydney. More than 2000 Positive Reviews on Google and Same Day Repairs.
We take pride in delivering exceptional repair services for all major phone brands including Apple, Samsung, Google, and more. Our expert technicians use only genuine parts and offer 90days warranty on repairs. Located in the heart of Sydney CBD, we’re your one-stop solution for all mobile device repairs.
Our commitment to excellence has earned us the trust of thousands of satisfied customers. Whether it’s a cracked screen, battery replacement, or water damage repair, we handle it all with professional care and expertise. Walk in today and experience why we’re Sydney’s #1 choice for mobile phone repairs.
Visit us for:
✓ Same Day Express Repairs
✓ Genuine Parts Guarantee
✓ Professional Technicians
✓ Competitive Pricing
✓ 2000+ 5-Star Google Reviews
✓ 7-Time Award Winner for Best Phone Repairs
Inside the Google Pixel 10 Pro XL: A Complete Masterclass in Professional Screen Repair + Ultimate Guide 2026
Introduction to Google Pixel 10 Pro XL Screen Repair
The Google Pixel 10 Pro XL screen repair process is more than just replacing a broken display—it’s a delicate operation requiring precision, technical expertise, and the right tools. With smartphones becoming thinner and more complex, modern repairs demand a deeper understanding of internal structures.
In today’s repair industry, professionals and DIY enthusiasts alike are diving into advanced methods to restore devices efficiently. If you’re aiming to master Google Pixel 10 Pro XL screen repair, this guide offers everything you need—from fundamentals to expert-level insights.
Whether you’re running a repair shop or simply trying to fix your own phone, understanding the anatomy of the device is the first step toward success.
The Pixel 10 Pro XL features cutting-edge display technology, delivering vibrant colors and deep contrasts. OLED panels are self-lighting, meaning each pixel operates independently. This results in better energy efficiency and sharper visuals.
AMOLED, a refined version, enhances refresh rates and brightness levels. However, both technologies are sensitive to impact, making Google Pixel 10 Pro XL screen repair particularly challenging.
Structural Design and Fragility Points
Modern smartphones prioritize aesthetics—thin bezels, curved edges, and edge-to-edge displays. Unfortunately, these design elements also increase vulnerability.
Key weak points include:
Corners and edges
Display flex zones
Adhesive bonding areas
Understanding these areas helps prevent further damage during repair.
Drops are the number one cause of screen damage. Even a minor fall can crack the display or damage internal layers.
Pressure and Flex Damage
Sitting on your phone or placing it under heavy objects can cause invisible stress fractures. Over time, these lead to display malfunction.
Water and Heat Exposure
Moisture can seep into the display layers, while excessive heat may weaken adhesives and internal components.
Tools Required for Professional Screen Repair
Essential Tools Checklist
To perform a proper Google Pixel 10 Pro XL screen repair, you’ll need:
Precision screwdriver set
Plastic pry tools
Heat gun or heating pad
Suction cup
Isopropyl alcohol (90%+)
Tweezers
Replacement display assembly
Recommended Workstation Setup
A clean, well-lit workspace is crucial. Use anti-static mats and organize tools for efficiency. A clutter-free environment reduces the risk of losing small components.
Safety Precautions Before Repair
ESD Protection
Electrostatic discharge can damage sensitive components. Always use:
Anti-static wrist straps
Grounded mats
Battery Safety Measures
Lithium-ion batteries can be hazardous if punctured. Always:
Power off the device
Avoid using sharp tools near the battery
Step-by-Step Google Pixel 10 Pro XL Screen Repair Process
Device Disassembly
Removing the Back Cover
Apply controlled heat around the edges to soften adhesive. Use a suction cup to lift the back panel gently.
Disconnecting Internal Components
Once inside:
Remove screws securing shields
Disconnect battery first
Carefully detach display connectors
Screen Removal Techniques
Heat the front panel evenly. Insert a plastic tool between the frame and screen. Work slowly to avoid damaging internal cables.
Installing the New Display
Clean adhesive residue
Align the new screen precisely
Reconnect all flex cables
Test before sealing
This stage is critical in ensuring a successful Google Pixel 10 Pro XL screen repair.
Common Mistakes and How to Avoid Them
Even experienced technicians make errors. Here’s what to watch out for:
Overheating components → Use controlled heat
Forgetting to disconnect battery → Always prioritize safety
Improper alignment → Leads to touch issues
Using low-quality parts → Results in poor display performance
Testing and Quality Assurance
After reassembly:
Check touch responsiveness
Test brightness and color accuracy
Inspect for dead pixels
Verify sensor functionality
Quality control ensures the repair meets professional standards.
Cost Analysis: DIY vs Professional Repair
Option
Cost
Risk Level
Quality
DIY Repair
Low
High
Variable
Professional Service
Higher
Low
Consistent
While DIY can save money, professional services guarantee reliability and warranty.
For more repair insights, visit this helpful resource:
1. How long does Google Pixel 10 Pro XL screen repair take?
Typically, it takes 1–2 hours for professionals. DIY repairs may take longer depending on experience.
2. Can I repair the screen myself?
Yes, but it requires proper tools and knowledge. Mistakes can cause further damage.
3. How much does a replacement screen cost?
Prices vary depending on quality, but premium displays are more expensive.
4. Will water resistance remain after repair?
Not always. Re-sealing may not restore original waterproofing fully.
5. What are signs I need screen replacement?
Cracks
Dead pixels
Touch issues
Flickering display
6. Is it worth repairing or replacing the phone?
If the device is relatively new, repair is usually the better option.
Conclusion
Mastering Google Pixel 10 Pro XL screen repair requires patience, precision, and the right knowledge. From understanding display technology to executing careful disassembly, every step matters.
As smartphones evolve, so does the complexity of repairs. However, with the right approach, anyone—from beginners to professionals—can achieve excellent results.
Stay informed, use quality parts, and always prioritize safety. That’s the true formula for successful repairs.
David from Sydney CBD Repair Centre – The Best place to fix mobile phones as 7 Years In A Row! Top Mobile Phone Repair In Sydney. More than 2000 Positive Reviews on Google and Same Day Repairs.
We take pride in delivering exceptional repair services for all major phone brands including Apple, Samsung, Google, and more. Our expert technicians use only genuine parts and offer 90days warranty on repairs. Located in the heart of Sydney CBD, we’re your one-stop solution for all mobile device repairs.
Our commitment to excellence has earned us the trust of thousands of satisfied customers. Whether it’s a cracked screen, battery replacement, or water damage repair, we handle it all with professional care and expertise. Walk in today and experience why we’re Sydney’s #1 choice for mobile phone repairs.
Visit us for:
✓ Same Day Express Repairs
✓ Genuine Parts Guarantee
✓ Professional Technicians
✓ Competitive Pricing
✓ 2000+ 5-Star Google Reviews
✓ 7-Time Award Winner for Best Phone Repairs
Foldable Stress Test: Replacing a Galaxy Z Fold 6 Screen After 200k Folds – Ultimate Durability Guide #1
Introduction to Foldable Stress Testing
The phrase foldable stress test: replacing a Galaxy Z Fold 6 screen after 200k folds might sound like something straight out of a lab experiment—but in reality, it’s becoming increasingly relevant for everyday users. Foldable smartphones are no longer futuristic gadgets; they’re part of daily life. Still, with innovation comes curiosity—and concern.
People often ask: How long will a foldable screen really last? Manufacturers claim durability of up to 200,000 folds, but what happens after that threshold? Does the screen fail completely, or does it show gradual wear and tear?
This article dives deep into what happens when a device reaches that milestone. More importantly, it explains the process of replacing a foldable display, what challenges you might face, and how to extend the life of your device afterward.
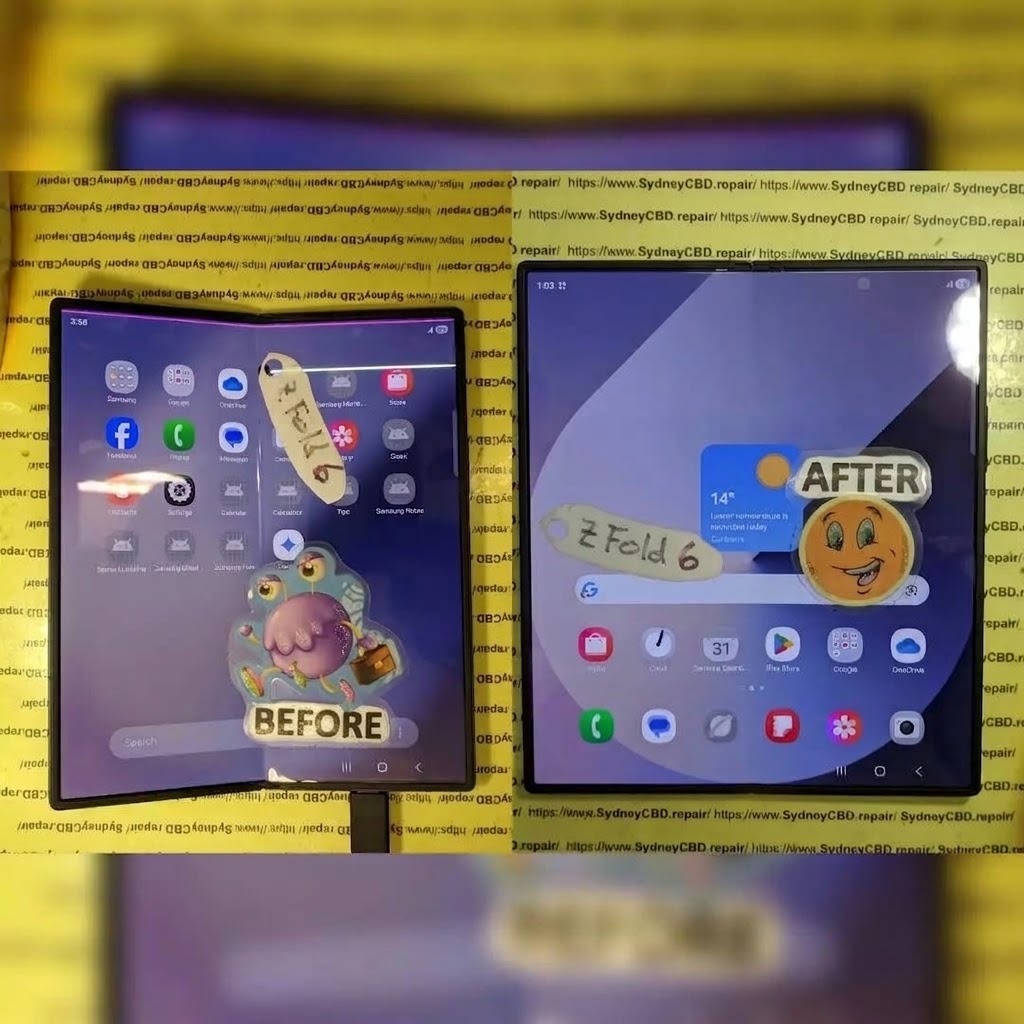
Foldable displays are engineered with flexibility in mind. Unlike traditional rigid screens, these displays use ultra-thin glass layered with plastic polymers, allowing them to bend repeatedly without cracking—at least in theory.
What sets them apart is the hinge mechanism working in tandem with the display. Every fold introduces stress, and over time, that stress accumulates.
Materials Used in Foldable Displays
Modern foldables rely on:
Ultra-Thin Glass (UTG)
Flexible OLED panels
Protective polymer layers
Reinforced hinge systems
These materials are designed to withstand repeated folding. However, after extensive use—like the foldable stress test: replacing a Galaxy Z Fold 6 screen after 200k folds—even the best materials begin to show fatigue.
Most foldable phones are tested under controlled environments. Robots repeatedly fold and unfold the device at consistent speeds and angles. The goal? Reach 200,000 folds without catastrophic failure.
That translates to:
About 5 years of use (100 folds/day)
Controlled conditions (no dust, no pressure)
Real-World Usage vs Lab Testing
Here’s the catch—real life isn’t a lab.
In daily use:
Dust enters the hinge
Pressure varies
Users fold at different speeds
Temperature fluctuates
So while 200k folds is impressive, real-world performance may vary. That’s why many devices begin to show issues slightly before or after this mark.
Signs Your Foldable Screen Needs Replacement
Visual Damage Indicators
You might notice:
Crease deepening in the center
Dead pixels or black spots
Flickering display
Visible cracks along the fold
These are early warning signs that the screen is nearing the end of its lifespan.
Functional Issues
Beyond visuals, performance can degrade:
Touch sensitivity loss
Ghost touches
Screen unresponsiveness
Partial display failure
If you’re experiencing these after heavy use, you’re likely approaching a scenario similar to the foldable stress test: replacing a Galaxy Z Fold 6 screen after 200k folds.
Step-by-Step Replacement Process

Tools Required
Replacing a foldable screen isn’t your average DIY job. You’ll need:
Heat gun or separator machine
Precision screwdrivers
Plastic pry tools
Adhesive strips
Anti-static equipment
Screen Removal
This step is delicate:
Heat the device to soften adhesive
Carefully separate the display
Disconnect internal flex cables
Remove damaged panel
One wrong move, and you could damage the hinge or motherboard.
Installing the New Display
Once removed:
Align the new foldable display
Reconnect all cables
Apply adhesive precisely
Reassemble and test
It’s a meticulous process requiring skill and patience.
Cost of Replacing a Foldable Screen
Parts Pricing
Foldable screens are expensive—no sugarcoating it.
Typical price range:
Component
Cost Range
Foldable OLED Screen
$400 – $700
Protective Layers
$50 – $100
Labor Costs
Professional repair adds:
$100 – $300 depending on expertise
Total cost can easily exceed $800, making it one of the most expensive smartphone repairs today.
Risks and Challenges in Foldable Repairs
Repairing foldables isn’t just costly—it’s risky.
Challenges include:
Fragile internal components
Complex hinge mechanisms
Limited availability of genuine parts
High failure rate in DIY repairs
That’s why professional handling is strongly recommended.
Preventing Screen Damage After Replacement
Once you’ve gone through the foldable stress test: replacing a Galaxy Z Fold 6 screen after 200k folds, prevention becomes key.
Here’s how to protect your investment:
Avoid excessive folding
Keep the hinge clean
Use protective cases
Don’t press hard on the screen
Keep away from extreme temperatures
Small habits can significantly extend lifespan.
Expert Tips from Technicians
Experienced technicians often say:
“Treat it like a laptop, not a regular phone.”
“Fold gently, don’t snap it shut.”
“Regular cleaning prevents long-term damage.”
They’ve seen countless cases where minor care could’ve avoided major repairs.
Comparing Foldable vs Traditional Smartphone Repairs
Feature
Foldable Phones
Traditional Phones
Repair Cost
Very High
Moderate
Complexity
Advanced
متوسط
Durability
Improving
Stable
Repair Time
Longer
Faster
Foldables offer innovation—but at a price.
Environmental Impact of Screen Replacement
Replacing a foldable screen contributes to electronic waste. However, repairing instead of replacing the entire device still reduces environmental impact.
Consider:
Recycling old components
Using certified repair centers
Extending device lifespan
Sustainability matters more than ever.
FAQs
1. How long does a foldable screen last?
Typically up to 200,000 folds, but real-world usage may vary depending on care.
2. Can I replace a foldable screen myself?
It’s possible but not recommended due to complexity and risk.
3. Why are foldable screen repairs so expensive?
The technology is advanced, and parts are costly and delicate.
4. What happens after 200k folds?
The screen may show wear like creases, dead pixels, or reduced responsiveness.
5. Is it worth repairing a foldable phone?
Yes, if the device is still functional and valuable. Otherwise, replacement might be considered.
6. How can I extend my foldable screen’s lifespan?
Handle gently, keep it clean, and avoid extreme conditions.
Conclusion
The journey through the foldable stress test: replacing a Galaxy Z Fold 6 screen after 200k folds reveals both the brilliance and limitations of modern smartphone innovation. Foldable devices are engineering marvels—but they require care, patience, and sometimes a hefty repair budget.
Still, with proper handling and timely maintenance, you can enjoy the benefits of foldable technology without constantly worrying about durability. And if the time comes for a screen replacement, knowing what to expect makes all the difference.
🔗 External Resource
For more technical insights into foldable durability testing, visit: https://www.samsung.com
David from Sydney CBD Repair Centre – The Best place to fix mobile phones as 7 Years In A Row! Top Mobile Phone Repair In Sydney. More than 2000 Positive Reviews on Google and Same Day Repairs.
We take pride in delivering exceptional repair services for all major phone brands including Apple, Samsung, Google, and more. Our expert technicians use only genuine parts and offer 90days warranty on repairs. Located in the heart of Sydney CBD, we’re your one-stop solution for all mobile device repairs.
Our commitment to excellence has earned us the trust of thousands of satisfied customers. Whether it’s a cracked screen, battery replacement, or water damage repair, we handle it all with professional care and expertise. Walk in today and experience why we’re Sydney’s #1 choice for mobile phone repairs.
Visit us for:
✓ Same Day Express Repairs
✓ Genuine Parts Guarantee
✓ Professional Technicians
✓ Competitive Pricing
✓ 2000+ 5-Star Google Reviews
✓ 7-Time Award Winner for Best Phone Repairs
Building an ASUS ROG Phone 6 from Parts + Power Boost Guide + 12 Steps
Introduction
Building an ASUS ROG Phone 6 from parts is a challenging yet incredibly rewarding project for anyone passionate about smartphone engineering, customization, or high-performance gaming devices. Because the ROG Phone series is designed with modularity, advanced thermal structures, and premium components, it offers a unique opportunity for enthusiasts to understand what truly powers a flagship gaming smartphone. Whether you’re assembling a unit for repair, learning the inner workings of mobile hardware, or attempting a full DIY build from scratch, this guide will walk you through every essential step.
In today’s tech-driven world, many users want more control over their devices—from how they’re assembled to how they perform. This introduction sets the stage for exploring the ROG Phone 6 from the inside out, helping you gain confidence working with its motherboard layout, AMOLED display, cooling system, dual-cell battery, camera modules, and performance-oriented features. We’ll also discuss the tools you need, precautions to follow, and optimization techniques for squeezing out maximum power once your build is complete.
You don’t need to be a master technician to understand this process—just patience, the right tools, and a willingness to learn. By the end of this article, you’ll have a deeper appreciation for the engineering brilliance behind the ASUS ROG Phone 6 and the knowledge to assemble or repair one with precision and confidence.
Building an ASUS ROG Phone 6 from parts may sound like a massive task, but once you understand the hardware, tools, and assembly process, you’ll realize it’s entirely doable with patience and precision. The ASUS ROG Phone 6 is known for its elite gaming performance, Snapdragon 8+ Gen 1 processor, advanced cooling, and highly modular internal design—which actually makes it easier to build than many expect.
In this guide, we’ll walk through everything: the components required, workspace preparation, full assembly steps, power optimization, and common troubleshooting. By the end, you’ll be familiar with how every part comes together, and you’ll know how to boost the phone’s performance once your build is complete.
Let’s jump straight into the architecture and structure.
The ASUS ROG Phone 6 is engineered with a gaming-first design that revolves around extreme cooling, raw processing power, and a highly modular component layout. Understanding its internal structure is essential if you want to successfully build the device from individual parts.
The Core Motherboard
The motherboard houses the Snapdragon 8+ Gen 1 chipset, LPDDR5 RAM, and UFS 3.1 storage. ASUS uses a dual-board stack architecture: the mainboard at the top and a sub-board near the bottom for the charging port and audio system.
Cooling System
One of the highlights of the ROG Phone 6 is its advanced cooling mechanism, with a vapor chamber, graphite sheets, and heat dissipation layers. Proper installation is essential to prevent the device from overheating.
Display Assembly
The phone features a 6.78-inch AMOLED display with a 165 Hz refresh rate. This component is fragile and must be installed with precision to avoid micro-fractures or alignment issues.
External Components
Additional components include the camera modules, fingerprint sensor, buttons, battery, speakers, haptic motors, antennas, and the modules for the ROG RGB lighting system.
Knowing how everything fits gives you a huge advantage when assembling the device from scratch.
Preparing Your Workspace and Tools
Before assembling the ASUS ROG Phone 6, you need the right tools and a safe environment.
Essential Tools for Assembly
Precision screwdriver set
Plastic pry tools
Suction tool for display handling
ESD wrist strap (anti-static)
Tweezers
Heat gun or iOpener (for adhesive softening)
Thermal paste or pads
SIM ejector
Microfiber cloth
Safety & Anti-Static Measures
Because modern smartphone chips are extremely sensitive, ESD (electrostatic discharge) protection is critical. Always ground yourself, work on an anti-static mat, and ensure your tools are magnetically neutral.
Once your ROG Phone 6 is assembled, it’s time to optimize.
Performance Tweaks
Enable X Mode
Update GPU drivers
Clear thermal throttling limits safely
Thermal Enhancements
Reapply high-quality thermal paste
Use external ROG Coolers
Avoid covering vents during gaming
Troubleshooting Common Errors
Boot Loop Fixes
Reflash firmware
Reseat battery connector
Check for shorted components
Touchscreen or Display Issues
Reconnect display flex
Replace damaged AMOLED panel
Inspect for micro-tears in ribbon cables
FAQs
1. Can anyone build an ASUS ROG Phone 6 from parts?
It’s possible—but only if you have experience with smartphone repair.
2. How long does assembly take?
Around 2–4 hours for experienced technicians.
3. Is it cheaper to build the phone yourself?
Usually no, because parts sold separately are priced higher.
4. Will software work normally after assembly?
Yes, as long as the correct firmware is installed.
5. What is the hardest part to install?
The display and cooling system require the most precision.
6. Are aftermarket parts safe for the ROG Phone 6?
Some are fine, but OEM parts always perform best.
Conclusion
Building an ASUS ROG Phone 6 from parts isn’t just a technical project—it’s a rewarding engineering experience. With patience, the right tools, and a careful approach, you can assemble a fully functional gaming powerhouse and optimize it for maximum performance.
David from Sydney CBD Repair Centre – The Best place to fix mobile phones as 6 Years In A Row! Top Mobile Phone Repair In Sydney. More than 2000 Positive Reviews on Google and Same Day Repairs.
We take pride in delivering exceptional repair services for all major phone brands including Apple, Samsung, Google, and more. Our expert technicians use only genuine parts and offer 90 days warranty on repairs. Located in the heart of Sydney CBD, we’re your one-stop solution for all mobile device repairs.
Visit us for:
✓ Same Day Express Repairs
✓ Genuine Parts Guarantee
✓ Professional Technicians
✓ Competitive Pricing
✓ 2000+ 5-Star Google Reviews
✓ 6-Time Award Winner for Best Phone Repairs