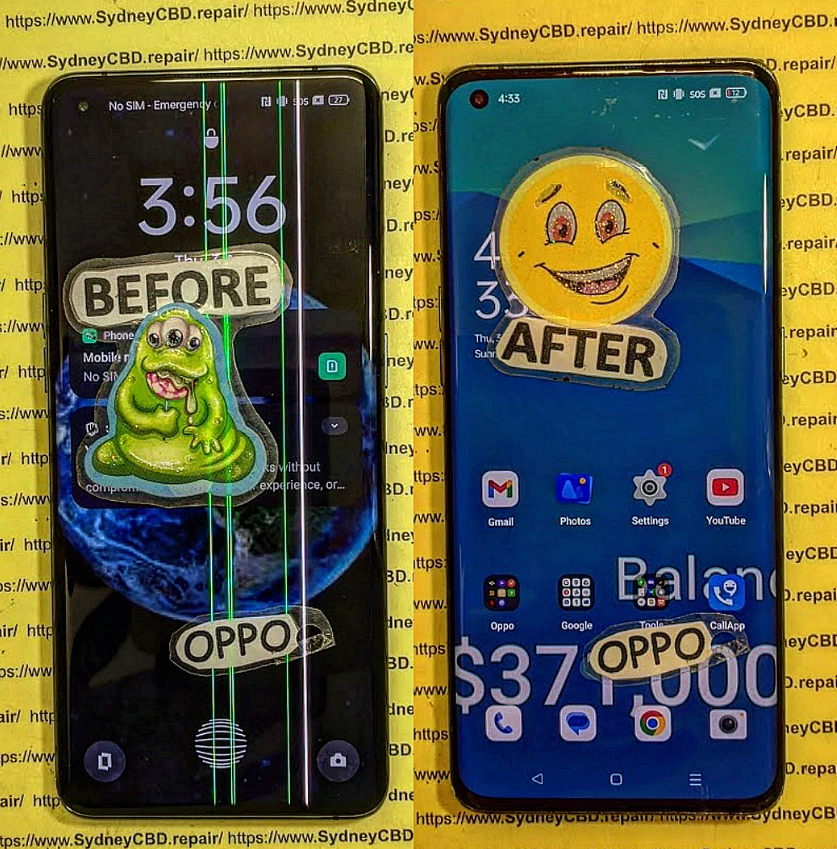
FRAME VS NO FRAME! Comparing Two Different OPPO Find X3 Pro Phone Repair Methods + 7 Expert Tips
Introduction to Oppo Find X3 Pro Repair Challenges
The Oppo Find X3 Pro is a flagship smartphone boasting advanced design, ultra-smooth displays, and a premium build. Unfortunately, the sleek design makes repairs challenging, particularly after drops, screen cracks, or water exposure. Choosing the right repair method is critical for device longevity, warranty retention, and cost-efficiency. Here, we compare FRAME vs NO FRAME repair methods to help you make an informed decision.
FRAME repair, also known as full chassis or mid-frame replacement, involves replacing the entire outer frame of the device along with the display assembly. This method is commonly used for extensive physical damage, including bent frames or major structural compromise.
Advantages of FRAME Repair
Restores device integrity completely.
Ideal for devices with severe bending or impact damage.
Reduces risk of internal component misalignment.
Often ensures better resale value post-repair.
Disadvantages of FRAME Repair
More expensive due to replacement parts and labor.
Requires professional expertise; DIY is highly risky.
No-frame repair focuses on replacing only the damaged components such as the back glass, camera lens, or display panel, without touching the mid-frame. This method preserves most of the original chassis and is usually quicker and cheaper.
Advantages of NO FRAME Repair
Cost-effective and faster.
Less intrusive, minimizing risks of further internal damage.
Retains original frame, which may appeal to purists or warranty holders.
Disadvantages of NO FRAME Repair
Limited effectiveness for severely bent frames.
Slight misalignment risks if not done correctly.
May compromise structural rigidity compared to full-frame replacement.
Step-by-Step FRAME Repair Process
Backup Data – Always start by backing up all device data.
Power Down Device – Remove battery power completely.
Remove Screws and Back Panel – Use specialized screwdrivers and pry tools.
Separate Display Assembly from Frame – Heat gun or ultrasonic tools recommended.
Transfer Internal Components – Carefully move motherboard, cameras, and other modules.
Install New Frame with Display – Ensure perfect alignment and tight fit.
Test Device – Check touchscreen, camera, and connectivity before final assembly.
Seal Device – Apply adhesive strips or sealant for waterproofing.
Step-by-Step NO FRAME Repair Process
Backup Data and Power Down.
Heat Damaged Panel – Use a heat gun to soften adhesive.
Pry Off Damaged Screen/Backglass – Avoid frame bending.
Clean Frame Surface – Remove residual adhesive.
Install Replacement Component – Use appropriate adhesive.
Test Functions – Screen, touch response, cameras, and sensors.
Seal and Finish – Ensure proper sealing for dust and water resistance.
Cost Comparison Between FRAME and NO FRAME Repairs
Repair Method
Estimated Cost (USD)
Repair Time
Complexity
Durability
FRAME Repair
$250–$400
3–5 hours
High
High
NO FRAME Repair
$120–$200
1–2 hours
Medium
Moderate
Risk Assessment and Durability
FRAME repairs offer superior structural integrity, making them ideal for devices that have undergone significant physical stress. NO FRAME repairs, while cheaper and faster, are better suited for minor cosmetic or component-specific damages.
Common Mistakes During Oppo Find X3 Pro Repairs
Applying excessive heat leading to screen or battery damage.
Minor Scratches or Cracked Backglass → NO FRAME repair is sufficient.
Warranty Concerns → NO FRAME preserves more original parts.
Budget Constraints → NO FRAME may be the better choice.
Resale Value → FRAME repair often restores maximum value.
Frequently Asked Questions (FAQs)
1. Is frame replacement always necessary?
No, frame replacement is only necessary when the structural integrity is compromised or when the device is bent severely. Minor cracks can often be fixed with a no-frame approach.
2. Can I DIY Oppo Find X3 Pro repair?
DIY repair is risky. Professionals have specialized tools and expertise. Attempting DIY may void warranties and cause further damage.
3. How long does each repair method take?
FRAME repair: 3–5 hours
NO FRAME repair: 1–2 hours
4. Does no-frame repair affect waterproofing?
Yes, improper no-frame repairs can compromise water resistance. Professionals ensure proper adhesive sealing to maintain water resistance.
5. Is there a warranty difference?
FRAME repair usually comes with longer warranties because it uses full replacement parts. NO FRAME repairs may offer shorter warranties.
6. Which method is better for resale value?
FRAME repair typically maintains higher resale value as the device appears structurally new and fully functional.
External Resources and References
For official guidance on Oppo repairs: Oppo Support.
Conclusion
Both FRAME and NO FRAME repairs have their place depending on damage severity, budget, and long-term considerations. For major structural damage or resale value preservation, FRAME repair is ideal. For minor cosmetic fixes and faster turnaround, NO FRAME repair works perfectly. Ultimately, consulting a certified repair centre like Sydney CBD Repair Centre ensures professional handling, genuine parts, and peace of mind.
David from Sydney CBD Repair Centre – The Best place to fix mobile phones as 7 Years In A Row! Top Mobile Phone Repair In Sydney. More than 2000 Positive Reviews on Google and Same Day Repairs.
Visit us for:
✓ Same Day Express Repairs
✓ Genuine Parts Guarantee
✓ Professional Technicians
✓ Competitive Pricing
✓ 2000+ 5-Star Google Reviews
✓ 7-Time Award Winner for Best Phone Repairs
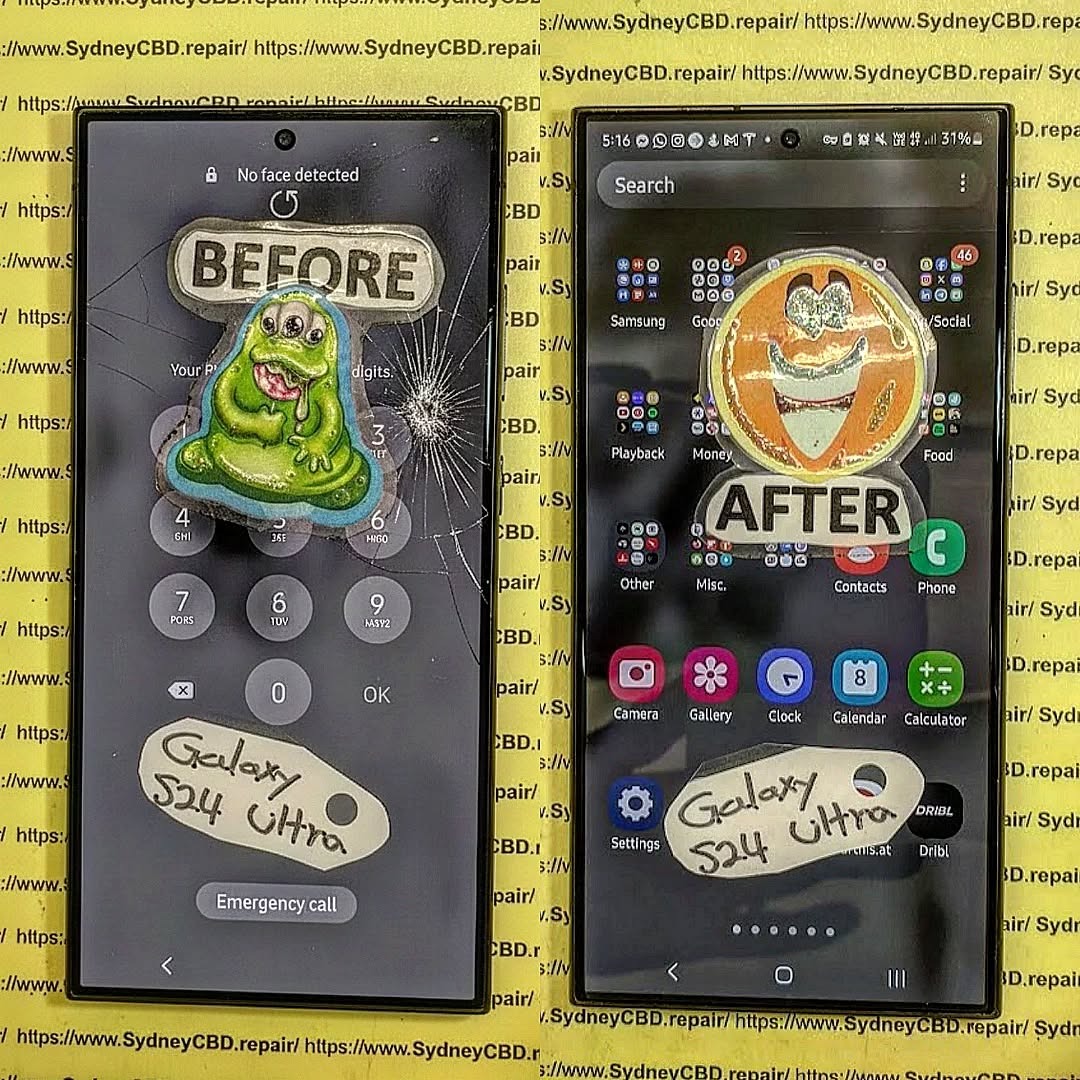
The DIY disaster vs. The professional fix: Galaxy S24 Ultra screen replacementShockingly Revealed + 9 Critical Facts
Introduction
The Galaxy S24 Ultra is a powerhouse smartphone built with cutting-edge display technology, premium materials, and precision engineering. So when its screen cracks or fails, many users face a critical decision: attempt a DIY repair or trust a professional technician. At first glance, a do-it-yourself screen replacement may seem like a quick and affordable solution. However, beneath the surface, this repair is far more complex than it appears. In this article, we explore the real risks, costs, and consequences of a DIY disaster versus a professional fix for Galaxy S24 Ultra screen replacement. By breaking down expert insights, real-world scenarios, and long-term outcomes, you’ll gain the clarity needed to protect your investment and make the smartest repair choice with confidence.
The Galaxy S24 Ultra screen replacement conversation must start with an understanding of what you’re actually dealing with. Samsung’s Galaxy S24 Ultra isn’t just another smartphone. It’s a premium flagship device built with cutting-edge display engineering that blends performance, durability, and precision.
What Makes the S24 Ultra Screen So Advanced
The Galaxy S24 Ultra features a Dynamic AMOLED 2X display with adaptive refresh rates up to 120Hz. It uses reinforced glass technology, advanced touch layers, and ultra-thin bonding adhesives. On top of that, the display is tightly integrated with the fingerprint sensor, front camera, and proximity sensors.
Because of this integration, even a minor mistake during a Galaxy S24 Ultra screen replacement can affect multiple components. It’s not like swapping a battery or changing a case. Every millimeter matters.
Why Screen Replacement Is More Complex Than It Looks
Many people assume replacing a screen is just removing glass and snapping a new one on. In reality, the screen is fused with layers that include OLED panels, digitizers, and sensors. These layers require controlled heat, precision tools, and technical experience.
Samsung themselves outline the complexity of modern display repairs through their official support documentation (see Samsung’s official repair guidance for Galaxy devices). This alone should signal caution to anyone considering a DIY attempt.
DIY phone repairs have grown rapidly, thanks to online tutorials and affordable toolkits. However, popularity doesn’t always equal safety or success.
Why People Attempt DIY Repairs
The main motivation is cost. A cracked screen looks like an easy fix, and DIY kits promise savings. Some people also enjoy the challenge or believe they’re technically inclined enough to handle it.
While confidence is great, overconfidence often leads to a DIY disaster vs. professional fix Galaxy S24 Ultra screen replacement scenario that ends badly.
Common Tools and Kits Used
Most DIY kits include suction cups, pry tools, heat pads, and generic replacement screens. Unfortunately, these screens are often aftermarket, not genuine, and may lack proper calibration.
That’s where the trouble starts. The Galaxy S24 Ultra is unforgiving when it comes to low-quality components.
DIY Disaster Scenarios You Should Know
This is where reality hits hard. Many repair centers see the aftermath of failed DIY repairs every single day.
Hidden Damage During Self-Repair
Internal cables can tear easily. One slip can damage the fingerprint sensor or OLED panel connector. Worse still, static discharge can silently damage internal chips without immediate symptoms.
A DIY Galaxy S24 Ultra screen replacement often turns a single problem into multiple expensive ones.
Loss of Waterproofing and Structural Integrity
The Galaxy S24 Ultra is designed with IP-rated water resistance. Once opened without proper resealing equipment, that protection is gone. DIY repairs rarely restore factory-level seals.
That means future exposure to moisture can lead to corrosion, even if the phone looks fine at first.
Professional Galaxy S24 Ultra Screen Replacement Explained
A professional repair isn’t just about skill. It’s about process, tools, and accountability.
Step-by-Step Professional Repair Process
Professionals use temperature-controlled heat plates, anti-static environments, and genuine parts. The screen is removed carefully, connectors are inspected, and the replacement display is installed with precision.
In a professional Galaxy S24 Ultra screen replacement, every step follows manufacturer-recommended procedures.
Quality Control and Post-Repair Testing
After installation, technicians test brightness, touch sensitivity, fingerprint accuracy, and display uniformity. Water resistance seals are reapplied using industrial adhesives.
This level of testing simply isn’t possible at home.
Cost Comparison: DIY vs Professional Fix
At first glance, DIY looks cheaper. But that’s only part of the story.
Short-Term Savings vs Long-Term Costs
DIY kits may save money upfront. However, if something goes wrong, repair costs double or triple. In many cases, professional technicians must undo DIY damage before fixing the original issue.
A professional Galaxy S24 Ultra screen replacement often ends up cheaper in the long run.
Warranty and Resale Value Considerations
DIY repairs void warranties and reduce resale value. Buyers can spot non-genuine screens easily due to color inconsistency or poor brightness.
Professional repairs, especially with genuine parts, help preserve your phone’s value.
Time, Safety, and Peace of Mind
Time isn’t just money. It’s stress, risk, and frustration.
Time Investment and Stress Levels
A DIY repair can take hours, sometimes days. One mistake means starting over. Professional repairs are often completed the same day.
Knowing your phone is in expert hands offers peace of mind you can’t put a price on.
Safety Risks in DIY Repairs
Lithium batteries, sharp glass shards, and heat tools pose real safety risks. Professionals are trained to handle these hazards safely.
Frequently Asked Questions (FAQs)
1. Is DIY Galaxy S24 Ultra screen replacement safe?
Not really. The complexity and risk of damage make DIY repairs unsafe for most users.
2. Will DIY repair affect fingerprint sensor performance?
Yes, improper installation often causes fingerprint sensor failure.
3. Are aftermarket screens reliable?
They usually have lower brightness, poorer color accuracy, and shorter lifespan.
4. How long does a professional screen replacement take?
Most professional repairs are completed within a few hours.
5. Does professional repair restore water resistance?
Professionals can reseal the device close to factory standards.
6. Is professional repair worth the cost?
Absolutely, especially when considering long-term reliability and value.
Conclusion: Making the Smart Choice
When weighing DIY disaster vs. professional fix Galaxy S24 Ultra screen replacement, the answer becomes clear. DIY repairs may look tempting, but the risks far outweigh the savings. Professional repair offers expertise, safety, and lasting results.
Your Galaxy S24 Ultra is a premium device. It deserves premium care.
David from Sydney CBD Repair Centre – The Best place to fix mobile phones as 7 Years In A Row! Top Mobile Phone Repair In Sydney. More than 2000 Positive Reviews on Google and Same Day Repairs.
We take pride in delivering exceptional repair services for all major phone brands including Apple, Samsung, Google, and more. Our expert technicians use only genuine parts and offer 90days warranty on repairs. Located in the heart of Sydney CBD, we’re your one-stop solution for all mobile device repairs.
Our commitment to excellence has earned us the trust of thousands of satisfied customers. Whether it’s a cracked screen, battery replacement, or water damage repair, we handle it all with professional care and expertise. Walk in today and experience why we’re Sydney’s #1 choice for mobile phone repairs.
Visit us for:
✓ Same Day Express Repairs
✓ Genuine Parts Guarantee
✓ Professional Technicians
✓ Competitive Pricing
✓ 2000+ 5-Star Google Reviews
✓ 7-Time Award Winner for Best Phone Repairs
Step By Step iPhone 17 Pro Screen Replacement for Advanced DIY Enthusiasts: 17 Powerful Expert Techniques
Introduction
The iPhone 17 Pro screen replacement process has become one of the most searched repair topics among advanced DIY enthusiasts. Modern smartphones are more powerful than ever, but they’re also more fragile. A single drop onto concrete can crack the expensive OLED panel instantly.
Fortunately, experienced DIY repairers can replace the display successfully with the right tools, patience, and technical understanding. While the process isn’t easy, it’s definitely achievable for skilled enthusiasts who understand electronics repair fundamentals.
In recent years, smartphone manufacturers have improved repairability slightly, yet premium devices like the iPhone 17 Pro still require careful handling. Tiny screws, delicate flex cables, and waterproof seals demand attention to detail at every stage.
This comprehensive guide walks you through the entire iPhone 17 Pro screen replacement procedure step by step. You’ll also discover advanced repair techniques used by professionals to avoid common failures and maintain display performance after installation.
For official repair information and Apple repair policies, visit Apple Support.
DIY smartphone repair has exploded in popularity. Rising repair costs and improved access to replacement parts have encouraged many enthusiasts to learn advanced repair techniques.
Several factors contribute to this trend:
Repair videos are easier to access
Premium phones cost more than ever
Consumers want longer device lifespans
Environmental awareness is increasing
Repair communities share valuable knowledge
An iPhone 17 Pro screen replacement performed correctly can save hundreds of dollars compared to buying a new device. Moreover, many repair enthusiasts enjoy the technical challenge itself.
Still, DIY repair isn’t risk-free. A mistake can damage:
Before beginning your iPhone 17 Pro screen replacement, gather all necessary tools. Missing even one item can slow down the process or increase damage risk.
Recommended Tool Kit
Tool
Purpose
Pentalobe screwdriver
Removes bottom screws
Tri-point screwdriver
Internal bracket removal
Precision tweezers
Handling tiny components
Plastic opening picks
Separating adhesive safely
Heat pad or heat gun
Softening display adhesive
Suction cup
Lifting display assembly
Magnetic project mat
Organizing screws
Isopropyl alcohol
Cleaning adhesive residue
Replacement adhesive
Restoring water resistance
Anti-static wrist strap
Preventing ESD damage
Professional technicians also recommend using:
OLED-safe pry tools
Microscope lighting
Battery disconnect picks
Display testing equipment
Cheap tools often create problems. Stripped screws and damaged connectors frequently result from low-quality screwdriver sets.
Understanding the iPhone 17 Pro Display Technology
The iPhone 17 Pro features a sophisticated OLED display with advanced touch and brightness technologies.
Key Display Features
High refresh rate OLED panel
Ceramic Shield protection
Integrated touch digitizer
Adaptive brightness system
Dynamic Island integration
Because modern OLED displays are extremely thin, excessive bending can permanently damage them.
Additionally, the screen assembly contains:
Ambient light sensors
Proximity sensors
Front-facing camera components
Earpiece speaker connections
During your iPhone 17 Pro screen replacement, preserving these components is critical.
Safety Precautions Before Starting
Repairing smartphones requires proper safety procedures. Skipping these precautions can lead to injury or device destruction.
Important Safety Tips
1. Power Off Completely
Never attempt an iPhone 17 Pro screen replacement while the device is powered on.
2. Discharge the Battery
Reduce battery charge below 25% to minimize thermal runaway risk.
3. Avoid Metal Pry Tools Near the Battery
Lithium-ion batteries can puncture easily.
4. Use Eye Protection
Tiny glass shards may fly during removal.
5. Work Slowly
Rushing is the number one cause of repair failure.
A clean workspace also reduces contamination risks inside the device.
Preparing Your Workspace Properly
Professional-level repairs begin with proper organization.
Ideal Workspace Conditions
Workspace Feature
Benefit
Bright LED lighting
Better visibility
Anti-static surface
Reduces ESD damage
Magnetic screw tray
Prevents lost screws
Dust-free environment
Cleaner installation
Comfortable seating
Reduces fatigue
Many advanced DIY enthusiasts underestimate workspace preparation. However, organization dramatically improves repair accuracy.
Backing Up Your iPhone Before Repair
Before any iPhone 17 Pro screen replacement, create a complete backup.
You can back up using:
iCloud
Finder on Mac
iTunes on Windows
A backup protects your:
Photos
Contacts
App data
Passwords
Settings
Hardware repairs always carry some risk, even for professionals.
How to Power Down and Open the Device
Opening the device is one of the most delicate stages.
Step-by-Step Opening Procedure
Step 1: Remove Bottom Screws
Use a precision pentalobe screwdriver to remove the two charging-port screws.
Step 2: Apply Controlled Heat
Warm the display edges for 1-2 minutes.
Avoid overheating because OLED panels are heat-sensitive.
Step 3: Use a Suction Cup
Lift gently near the bottom edge.
Step 4: Insert Plastic Picks
Slide carefully around the perimeter.
Step 5: Open Like a Book
Do not pull the display completely away.
Internal flex cables remain attached.
This stage of the iPhone 17 Pro screen replacement requires patience more than force.
Removing the Damaged Display Carefully
Once opened, disconnect the battery immediately.
Internal Disconnection Process
Remove protective brackets
Disconnect battery flex
Disconnect display cables
Disconnect sensor assemblies
Professional technicians always disconnect power first.
Failing to disconnect the battery can short sensitive components instantly.
Inspect for Hidden Damage
Look carefully for:
Bent pins
Torn flex cables
Corrosion
Loose shielding
Missing screws
If the phone suffered a hard impact, internal frame damage may also exist.
Disconnecting Internal Components Safely
The front sensor assembly is one of the most sensitive parts during an iPhone 17 Pro screen replacement.
Components Requiring Extra Care
Component
Risk Level
Face ID sensors
Very high
Proximity sensor
High
OLED connector
High
Front camera flex
High
Earpiece speaker
Medium
Face ID damage can permanently disable biometric authentication.
Always use plastic tools when disconnecting flex cables.
Inspecting the Internal Frame and Connectors
Before installing the new display, inspect the housing thoroughly.
Important Inspection Areas
Frame Alignment
Bent frames create pressure points on OLED panels.
Connector Integrity
Use magnification if available.
Adhesive Residue
Old adhesive prevents proper sealing.
Water Damage Indicators
Check for red liquid contact markers.
A professional-quality iPhone 17 Pro screen replacement depends heavily on proper inspection.
Installing the New OLED Screen
Now comes the most exciting part: installing the replacement display.
Installation Steps
Step 1: Dry Test the Screen
Connect the display temporarily before sealing.
Step 2: Check Touch Functionality
Test all corners thoroughly.
Step 3: Verify Brightness
Ensure OLED output looks even.
Step 4: Confirm Sensor Operation
Test Face ID and proximity sensors.
Step 5: Install Fresh Adhesive
Apply evenly around the frame.
Step 6: Reassemble Carefully
Avoid pinching flex cables.
A high-quality OLED replacement significantly affects final results. Cheap aftermarket screens often suffer from:
Poor brightness
Weak touch sensitivity
Battery drain
Color inaccuracies
Premature failure
Reconnecting Flex Cables Correctly
Connector alignment is critical.
Never force connectors into place.
Proper Connector Technique
Align carefully
Press gently from center
Listen for soft clicking
Avoid side pressure
Many failed iPhone 17 Pro screen replacement attempts occur because connectors were partially seated.
Improper connections may cause:
Ghost touch
Green screen issues
Flickering
No display output
Sensor failures
Replacing Adhesive and Waterproof Seals
Modern smartphones rely heavily on adhesive sealing.
Why Waterproofing Matters
The iPhone 17 Pro includes strong water resistance protections, but opening the device compromises factory sealing.
Professional repairers replace:
Perimeter adhesive
Dust barriers
Mesh protection seals
Adhesive Application Tips
Tip
Benefit
Clean thoroughly first
Better adhesion
Use OEM-grade adhesive
Stronger seal
Apply evenly
Consistent pressure
Avoid stretching strips
Better alignment
Even after careful repair, water resistance may not fully match factory specifications.
Testing the Screen Before Final Assembly
Testing before complete sealing saves enormous frustration later.
Complete Functional Checklist
Display Tests
Brightness consistency
Dead pixels
Color uniformity
Refresh smoothness
Touch Tests
Edge responsiveness
Multi-touch support
Gesture operation
Sensor Tests
Face ID
Ambient light sensor
Proximity sensor
Audio Tests
Earpiece sound
Speaker clarity
A complete iPhone 17 Pro screen replacement should include comprehensive testing before final closure.
Common Mistakes During iPhone 17 Pro Screen Replacement
Even experienced enthusiasts sometimes make errors.
Most Common DIY Repair Mistakes
Using Excessive Heat
Too much heat damages OLED layers.
Mixing Screws
Incorrect screw placement can puncture the motherboard.
Skipping Battery Disconnect
This can cause catastrophic shorts.
Poor Adhesive Cleaning
Old residue weakens waterproof sealing.
Buying Cheap Displays
Low-grade parts create long-term reliability issues.
Avoiding these mistakes dramatically improves success rates.
Professional Tips for Better Repair Results
Professional repair shops follow strict procedures for consistency.
Expert Techniques
Use Screw Maps
Organize screws by location.
Photograph Every Stage
Reference photos help during reassembly.
Test Before Sealing
Never skip dry testing.
Use OEM-Quality Parts
Higher-quality components reduce callbacks.
Maintain Cleanliness
Dust under OLED panels is extremely noticeable.
These habits separate average repairs from truly professional-quality work.
DIY Repair vs Professional Repair Services
DIY repair offers advantages, but professional repair still has major benefits.
DIY Advantages
Lower cost
Learning experience
Personal satisfaction
Flexible timing
Professional Repair Advantages
Warranty coverage
Specialized tools
Faster turnaround
Reduced risk
Water resistance testing
If you’re uncertain about performing an iPhone 17 Pro screen replacement, professional repair may ultimately save money and stress.
Frequently Asked Questions
Is iPhone 17 Pro screen replacement difficult?
Yes, it’s considered an advanced repair because modern iPhones contain delicate flex cables, strong adhesive, and complex sensor systems.
Can Face ID stop working after screen replacement?
Absolutely. Damaging the sensor assembly during repair can permanently disable Face ID functionality.
How long does an iPhone 17 Pro screen replacement take?
Advanced DIY enthusiasts usually need between 1-3 hours depending on experience level.
Is waterproofing maintained after repair?
Not perfectly. New adhesive helps restore resistance, but factory-level sealing is difficult to replicate completely.
Should I use aftermarket OLED displays?
High-quality aftermarket displays can work well, but premium OEM-quality parts generally offer better brightness and durability.
Can replacing the screen damage the motherboard?
Yes. Improper tool usage, screw placement, or connector handling can damage motherboard components.
Do I need special software calibration?
Some advanced display features may require calibration tools used by professional repair technicians.
Conclusion
Performing an iPhone 17 Pro screen replacement is a challenging but rewarding project for advanced DIY enthusiasts. With the correct tools, organized preparation, and professional-level patience, you can successfully restore a damaged device to excellent working condition.
The key to success lies in careful handling, proper adhesive replacement, thorough testing, and using high-quality components. While modern smartphones are more complex than ever, skilled repair enthusiasts can still achieve impressive results at home.
Whether you choose DIY repair or professional service, understanding the repair process gives you greater confidence and appreciation for modern smartphone engineering.
David from Sydney CBD Repair Centre – The Best place to fix mobile phones as 7 Years In A Row! Top Mobile Phone Repair In Sydney. More than 2000 Positive Reviews on Google and Same Day Repairs.
We take pride in delivering exceptional repair services for all major phone brands including Apple, Samsung, Google, and more. Our expert technicians use only genuine parts and offer 90days warranty on repairs. Located in the heart of Sydney CBD, we’re your one-stop solution for all mobile device repairs.
Our commitment to excellence has earned us the trust of thousands of satisfied customers. Whether it’s a cracked screen, battery replacement, or water damage repair, we handle it all with professional care and expertise. Walk in today and experience why we’re Sydney’s #1 choice for mobile phone repairs.
Visit us for:
✓ Same Day Express Repairs
✓ Genuine Parts Guarantee
✓ Professional Technicians
✓ Competitive Pricing
✓ 2000+ 5-Star Google Reviews
✓ 7-Time Award Winner for Best Phone Repairs
Can We Fix It? Restoring a Smashed Google Pixel 10 Pro XL – Ultimate Guide 2026
Introduction
A smashed phone can feel like a disaster. One moment your device is perfectly fine, and the next, your beloved Google Pixel 10 Pro XL slips from your hand and crashes onto concrete. The screen shatters, the frame bends, and suddenly you’re wondering whether it’s time to replace it completely.
The good news is this: in many cases, a smashed Google Pixel 10 Pro XL can absolutely be repaired.
Modern smartphones are incredibly advanced, but they’re also designed with repairability in mind. Skilled technicians can replace broken OLED screens, restore bent frames, repair damaged charging ports, and even recover precious data from heavily damaged devices.
Today’s repair industry has evolved dramatically. Professional repair centres use specialized equipment, precision tools, and genuine components to restore phones that once seemed impossible to fix. In fact, many devices that appear “dead” can be brought back to life with the right expertise.
According to Google Store Official Website, Pixel devices are engineered with premium hardware and advanced AI features, making them valuable investments worth repairing instead of discarding.
In this detailed guide, we’ll explore every stage involved in restoring a smashed Google Pixel 10 Pro XL. From diagnostics and screen replacement to motherboard repair and waterproofing, you’ll learn exactly what’s possible and how professional technicians tackle severe smartphone damage.
When a Google Pixel 10 Pro XL suffers impact damage, the visible cracks often tell only part of the story. Underneath the shattered glass, there may be hidden issues affecting performance and safety.
Common Causes of Severe Phone Damage
Most major phone damage happens because of:
Accidental drops
Vehicle accidents
Water exposure
Pressure damage in bags or pockets
Battery swelling
Heavy impacts onto hard surfaces
A smashed Google Pixel 10 Pro XL may experience several failures at once. For example, the display might stop responding while internal connectors become loose after impact.
In some cases, the phone still powers on but shows:
Green lines
Black spots
Flickering
Ghost touch
No display output
These are strong signs of OLED damage.
Signs Your Pixel 10 Pro XL Can Still Be Saved
Even badly damaged phones can often be repaired if:
The motherboard still powers up
The device vibrates or rings
Charging is detected
Data remains accessible
The frame isn’t excessively twisted
Professional technicians use specialized tools to determine whether the logic board remains functional before beginning repairs.
Premium smartphones like the Google Pixel 10 Pro XL are expensive devices packed with advanced technology.
Premium Hardware Features
The Google Pixel 10 Pro XL typically includes:
Advanced AI processing
High-end OLED display technology
Powerful cameras
Long software support
Premium build quality
Because of these features, repairing the device often makes more financial sense than replacing it.
Cost Comparison: Repair vs Replacement
Here’s a general comparison:
Option
Estimated Cost
Benefit
Screen Repair
Moderate
Saves original device
Full Restoration
Moderate to High
Preserves data and performance
Brand-New Replacement
Very High
Expensive and time-consuming
Repairing a smashed Google Pixel 10 Pro XL can save hundreds of dollars while preserving apps, files, and personal settings.
Moreover, repairing electronics helps reduce e-waste, which is increasingly important for environmental sustainability.
The Full Diagnostic Process
Professional phone restoration starts with diagnostics.
External Inspection
Technicians first inspect:
Cracked glass
Bent housing
Camera damage
Frame separation
Button functionality
This initial step identifies visible structural damage.
Internal Component Testing
After opening the device, technicians test:
Battery health
Motherboard functionality
Display connectors
Charging circuitry
Camera modules
Wireless charging coils
Advanced repair centres use microscope inspections and thermal imaging to locate hidden board faults.
Water Damage Assessment
Sometimes impact damage occurs alongside liquid exposure.
Corrosion may appear:
Around connectors
Under IC chips
Near battery terminals
If untreated, corrosion can worsen over time and permanently destroy the motherboard.
Screen Restoration for a Smashed Google Pixel 10 Pro XL
The screen is usually the most expensive and most commonly damaged component.
OLED Display Replacement
Modern Google Pixel devices use advanced OLED panels. These displays deliver:
Deep blacks
High brightness
Smooth refresh rates
Excellent colour accuracy
Unfortunately, OLED screens are fragile.
Professional replacement involves:
Removing broken glass safely
Disconnecting battery power
Installing a new OLED assembly
Testing touch responsiveness
Calibrating display functions
A properly installed screen restores the original viewing experience.
Glass-Only Repairs Explained
Some repair centres offer glass-only repairs when:
OLED still works
Touch remains functional
Internal layers are intact
Glass-only repair is more affordable but requires advanced equipment such as:
Laminating machines
Vacuum separators
Bubble removers
Not every smashed Google Pixel 10 Pro XL qualifies for this procedure.
Frame Straightening and Housing Repair
Severe drops may bend the phone frame.
Bent housings can cause:
Pressure on the OLED
Poor waterproof sealing
Wireless charging failure
Professional technicians use precision tools to straighten frames and restore structural integrity.
Repairing Internal Damage
Sometimes the visible cracks are only the beginning.
Battery Replacement
Impact damage may puncture or weaken lithium-ion batteries.
Signs of battery issues include:
Overheating
Swelling
Random shutdowns
Rapid battery drain
Battery replacement restores safe performance and reliability.
Charging Port Repairs
A smashed Google Pixel 10 Pro XL may stop charging after impact.
Common causes include:
Broken USB-C connectors
Damaged charging ICs
Debris inside ports
Technicians test charging voltage and current flow to determine the exact fault.
Camera Module Restoration
Modern Pixel phones feature sophisticated camera systems.
Impact damage can affect:
Autofocus
Optical stabilization
Lens clarity
Sensor alignment
Replacing damaged camera modules restores image quality and video performance.
Data Recovery from a Damaged Google Pixel 10 Pro XL
For many users, the most valuable part of the phone isn’t the hardware — it’s the data.
Recovering Photos and Videos
Professional repair technicians often prioritize:
Family photos
Business files
Contacts
Messages
Videos
If the motherboard still functions, temporary repairs can sometimes recover data even before complete restoration.
Motherboard Repair Techniques
Logic board repair is one of the most advanced areas of phone restoration.
Technicians may perform:
Microsoldering
IC replacement
Trace repair
Connector rebuilding
These procedures require:
High-powered microscopes
Hot air stations
Soldering expertise
Board-level repair can revive phones considered “beyond repair” by inexperienced technicians.
Genuine Parts vs Cheap Replacement Parts
Part quality matters enormously.
Benefits of Genuine Components
Genuine parts typically offer:
Better durability
Accurate colour reproduction
Proper brightness levels
Reliable touch sensitivity
Longer lifespan
Using genuine components helps maintain the original user experience.
Risks of Low-Quality Parts
Cheap replacement parts may cause:
Poor touch response
Fast battery degradation
Display flickering
Weak adhesive seals
Compatibility problems
Low-cost repairs sometimes create additional long-term issues.
That’s why reputable repair centres prioritize quality over shortcuts.
Waterproofing After Repair
One of the biggest concerns after restoring a smashed Google Pixel 10 Pro XL is water resistance.
Can Water Resistance Be Restored?
Professional repair centres can often restore partial water resistance by:
Replacing adhesive seals
Installing fresh waterproof gaskets
Using precision alignment techniques
However, no repair shop can guarantee factory-level waterproofing forever.
Pressure Testing Procedures
Advanced repair centres perform pressure testing to evaluate sealing quality.
Pressure testing helps identify:
Air leaks
Improper sealing
Weak adhesive points
This process gives customers extra confidence after repairs.
Professional Repair vs DIY Repair
Many people consider repairing phones themselves after watching online tutorials.
Risks of Home Repairs
DIY repair can easily cause:
Torn flex cables
Battery punctures
Static damage
Lost screws
Broken connectors
Without proper tools, repairs become extremely risky.
Advantages of Certified Technicians
Professional technicians provide:
Specialized equipment
Repair warranties
Genuine parts
Experience with complex faults
Safer procedures
Experienced repair experts understand how delicate modern smartphones really are.
Preventing Future Damage
Once your Google Pixel 10 Pro XL is repaired, protecting it becomes essential.
Best Protective Accessories
Strong protection includes:
Shockproof cases
Tempered glass protectors
Waterproof pouches
Camera lens protectors
These accessories reduce the chance of another major accident.
Smart Maintenance Habits
Good habits include:
Avoiding overcharging
Keeping phones away from water
Cleaning charging ports carefully
Avoiding extreme temperatures
Simple care routines help extend phone lifespan dramatically.
Frequently Asked Questions
Can a completely smashed Google Pixel 10 Pro XL be repaired?
Yes, many severely damaged devices can be restored depending on motherboard condition and component availability.
Is it cheaper to repair or replace a Google Pixel 10 Pro XL?
In most cases, repair is significantly cheaper than buying a brand-new flagship device.
Will my phone still be waterproof after repair?
Professional repair centres can restore some water resistance, but factory waterproofing can’t always be fully guaranteed.
How long does screen replacement take?
Most screen repairs can be completed within a few hours to one business day depending on damage severity.
Can data be recovered from a dead Google Pixel 10 Pro XL?
Yes, data recovery is often possible through motherboard repair or temporary restoration procedures.
Are genuine parts really better?
Absolutely. Genuine parts provide superior performance, durability, and compatibility compared to cheap alternatives.
Can a bent phone frame be repaired?
Yes, professional technicians can often straighten or replace damaged frames.
Conclusion
A smashed Google Pixel 10 Pro XL may look beyond saving, but modern repair technology has changed what’s possible. Skilled technicians can restore screens, repair internal components, recover important data, and bring heavily damaged devices back to life.
The key is acting quickly and choosing an experienced repair centre that uses proper diagnostic procedures and high-quality parts.
Repairing instead of replacing can save money, preserve important files, and extend the life of a premium smartphone. Whether the issue is a shattered OLED display, bent frame, charging failure, or motherboard damage, professional restoration offers a practical and environmentally responsible solution.
If your Google Pixel 10 Pro XL has suffered major damage, don’t assume it’s the end of the road. With the right expertise, there’s a very good chance your device can be repaired and returned to excellent working condition.
David from Sydney CBD Repair Centre – The Best place to fix mobile phones as 7 Years In A Row! Top Mobile Phone Repair In Sydney. More than 2000 Positive Reviews on Google and Same Day Repairs.
We take pride in delivering exceptional repair services for all major phone brands including Apple, Samsung, Google, and more. Our expert technicians use only genuine parts and offer 90days warranty on repairs. Located in the heart of Sydney CBD, we’re your one-stop solution for all mobile device repairs.
Our commitment to excellence has earned us the trust of thousands of satisfied customers. Whether it’s a cracked screen, battery replacement, or water damage repair, we handle it all with professional care and expertise. Walk in today and experience why we’re Sydney’s #1 choice for mobile phone repairs.
Visit us for:
✓ Same Day Express Repairs
✓ Genuine Parts Guarantee
✓ Professional Technicians
✓ Competitive Pricing
✓ 2000+ 5-Star Google Reviews
✓ 7-Time Award Winner for Best Phone Repairs
Expert Comparison: Repairing the Google Pixel 10 Pro XL vs Galaxy S25 Ultra Internals – 15 Powerful Insights Every Technician Should Know
Introduction to Modern Smartphone Repair Challenges
Smartphone repair has changed dramatically over the last few years. Devices are now thinner, faster, and packed with premium materials. While these upgrades improve user experience, they also make repairs more complicated. When comparing repairing the Google Pixel 10 Pro XL vs Galaxy S25 Ultra internals, technicians quickly notice how different engineering philosophies affect repairability.
Manufacturers are focusing heavily on waterproofing, slim designs, and camera performance. Unfortunately, these features often come at the cost of easy repairs. Adhesives are stronger, internal layouts are tighter, and delicate flex cables sit dangerously close to opening points.
Both flagship devices represent the peak of Android engineering. However, they differ significantly once you remove the rear glass and examine the internal structure. Understanding these differences is critical for repair technicians, DIY enthusiasts, and customers wanting reliable long-term ownership.
According to Google Official Store and Samsung Official Website, both devices prioritize premium durability and advanced AI features. Yet from a repair standpoint, those priorities create unique service challenges.
Why Repairability Matters More Than Ever
Repairability isn’t just about replacing a cracked screen anymore. Consumers now expect smartphones to last several years. As device prices rise, users want affordable repair options instead of expensive replacements.
Here’s why repairability matters:
Lower ownership costs
Reduced electronic waste
Faster repair turnaround
Better resale value
Longer device lifespan
The debate surrounding repairing the Google Pixel 10 Pro XL vs Galaxy S25 Ultra internals has become increasingly important because these are ultra-premium devices with equally premium repair costs.
Modern consumers also care more about sustainability. Companies like Sydney CBD Repair Centre have pushed manufacturers toward improving repairability scores. Even so, flagship smartphones remain difficult to service compared to older models.
The Google Pixel 10 Pro XL follows Google’s familiar minimalist internal design philosophy. Once opened, technicians immediately notice a relatively organized layout with modular sections.
Pixel 10 Pro XL Frame Construction
Google uses a reinforced aluminum frame combined with Gorilla Glass protection. The frame feels sturdy, but the rear glass remains vulnerable during opening procedures.
One advantage of the Pixel design is its cleaner cable routing. Flex cables are positioned more predictably compared to Samsung’s denser arrangement.
Internal highlights include:
Layered motherboard architecture
Centrally positioned battery
Independent camera housing
Modular charging assembly
These features make repairing the Google Pixel 10 Pro XL vs Galaxy S25 Ultra internals somewhat easier on the Google side for intermediate technicians.
Battery Placement and Adhesive Layout
The Pixel battery uses pull-tab adhesive strips that simplify removal. While adhesive remains strong, controlled heat and proper lifting techniques reduce battery puncture risks significantly.
Benefits include:
Pixel 10 Pro XL Battery Design
Advantage
Pull-tab adhesives
Easier extraction
Central battery location
Better access
Reduced cable overlap
Lower accidental damage risk
Camera Module Accessibility
Google’s camera modules are surprisingly accessible once the upper protective shields are removed. This helps technicians replace faulty cameras without fully dismantling the motherboard.
That modular approach saves time and lowers labor costs.
Samsung approaches flagship engineering differently. The Galaxy S25 Ultra emphasizes rigidity, thermal management, and dense component integration.
S25 Ultra Structural Reinforcement
Samsung reinforces the internal structure heavily. The titanium frame and additional support brackets improve durability but increase repair complexity.
Technicians often notice:
Multiple hidden screws
Strong perimeter adhesive
Layered shielding plates
Tighter cable pathways
This makes repairing the Google Pixel 10 Pro XL vs Galaxy S25 Ultra internals more challenging on Samsung devices, especially for beginners.
Samsung’s Display Assembly Design
Samsung’s display assembly is incredibly thin and expensive. Because of curved-edge technology and integrated digitizer layers, screen replacements require extreme caution.
A damaged OLED panel can cost hundreds of dollars alone.
Additionally, Samsung screens often integrate:
Ultrasonic fingerprint sensors
High-refresh LTPO technology
Flexible OLED connectors
Delicate ribbon cable assemblies
Cooling System and Heat Dissipation
Samsung includes an advanced vapor chamber cooling system. While excellent for gaming and thermal performance, it complicates motherboard removal.
Technicians must carefully disconnect thermal layers to avoid bending critical components.
Comparing Opening Procedures
Opening procedures reveal major differences between both phones.
Heat Application Requirements
The Galaxy S25 Ultra generally requires more heat because Samsung uses stronger adhesive around the rear panel.
The Pixel 10 Pro XL opens slightly easier because its adhesive softens more consistently under controlled temperatures.
Recommended repair temperatures:
Device
Suggested Opening Temperature
Pixel 10 Pro XL
75°C–80°C
Galaxy S25 Ultra
85°C–90°C
Too much heat can damage wireless charging coils and OLED layers.
Adhesive Strength Differences
Samsung prioritizes water resistance aggressively. As a result, the S25 Ultra’s adhesive can feel almost cement-like during first entry.
Google balances waterproofing with moderate repairability, making rear glass separation slightly safer.
Still, both devices demand:
Precision pry tools
Isopropyl alcohol
Controlled heat pads
Suction cups
Patience
Rushing repairs is where things go pear-shaped quickly.
Screen Repair Difficulty Comparison
Display repairs remain the most common smartphone repair worldwide.
When comparing repairing the Google Pixel 10 Pro XL vs Galaxy S25 Ultra internals, Samsung’s screen replacement is notably more difficult and expensive.
Google Pixel 10 Pro XL Screen Repairs
Advantages:
Flatter display profile
Easier frame alignment
Reduced OLED flex stress
Less edge cracking risk
Disadvantages:
Fragile under-display sensors
Strong display adhesive
Delicate flex connectors
Galaxy S25 Ultra Screen Repairs
Advantages:
Exceptional display quality
Strong structural frame
Disadvantages:
Curved edge vulnerability
Expensive OLED assembly
Difficult adhesive cleanup
Increased accidental crack risk
Technicians often spend longer calibrating Samsung displays after replacement due to fingerprint sensor integration.
Battery Replacement Analysis
Battery replacements are essential after years of charging cycles.
Google performs better here.
Pixel 10 Pro XL Battery Serviceability
The Pixel’s pull-tab system significantly reduces repair risk. Batteries can often be removed cleanly with less force.
This minimizes:
Battery swelling incidents
Frame bending
Internal punctures
Thermal runaway risks
Galaxy S25 Ultra Battery Serviceability
Samsung batteries use stronger adhesive layers without equally effective pull tabs. Removing them safely often requires additional solvent and careful prying.
That extra difficulty increases labor time and risk.
Motherboard and Component-Level Repair Accessibility
Component-level repair specialists care deeply about motherboard accessibility.
Google provides:
Cleaner shield layouts
Easier connector access
More logical screw placement
Samsung prioritizes compact engineering over repair simplicity.
Common Component Repairs
| Repair Type | Pixel Difficulty | Samsung Difficulty |
|—|—|
| Charging port | Moderate | Hard |
| Front camera | Easy | Moderate |
| Rear camera | Moderate | Hard |
| Power IC repair | Hard | Very Hard |
| Audio IC replacement | Hard | Very Hard |
The tighter Samsung layout means accidental cable damage occurs more frequently during disassembly.
Camera Repair and Lens Replacement
Camera technology is one of the biggest selling points for both phones.
However, camera repairs differ considerably.
Pixel Camera Repairs
Google’s modular camera design allows individual lens replacements more efficiently. Technicians can isolate defective units faster.
Samsung Camera Repairs
Samsung’s larger sensor array and integrated stabilization system complicate repairs.
Potential issues include:
Dust contamination
Autofocus calibration
Sensor alignment
OIS instability
Professional clean-room handling becomes increasingly important.
Water Resistance Challenges After Repairs
Both devices advertise strong IP ratings. However, maintaining waterproofing after repair is difficult.
Why Water Resistance Changes After Repair
Once opened:
Factory seals break
Adhesive consistency changes
Pressure equalization alters
Tiny gaps may appear
Even expert technicians can’t fully recreate factory conditions.
That’s why customers should understand realistic expectations after repairs.
Parts quality dramatically affects repair outcomes.
Genuine Parts Advantages
Genuine Components
Benefit
Better OLED quality
Improved visuals
Proper calibration
Stable performance
Accurate fitment
Easier installation
Reliable waterproofing
Better durability
Aftermarket Risks
Cheap parts may cause:
Ghost touch issues
Poor brightness
Battery overheating
Weak adhesives
Camera malfunctions
Repair technicians should always explain these trade-offs clearly to customers.
Repair Costs and Long-Term Value
Premium smartphones come with premium repair costs.
Typical Repair Cost Comparison
| Repair Type | Pixel 10 Pro XL | Galaxy S25 Ultra |
|—|—|
| Screen replacement | High | Very High |
| Battery replacement | Moderate | Moderate-High |
| Rear glass repair | Moderate | High |
| Charging port repair | Moderate | High |
Samsung repairs usually cost more because:
OLED panels are pricier
Labor time increases
Curved displays raise risks
Component density complicates work
Still, both phones offer excellent longevity when repaired properly.
Tools Technicians Need for Both Devices
Professional repairs require specialized equipment.
Essential Repair Tools
Precision screwdrivers
OLED-safe pry picks
Controlled heating pads
Microscope for board work
ESD protection
Adhesive removal tools
High-quality tweezers
Advanced technicians also use:
Thermal cameras
DC power supplies
Microsoldering stations
Without proper tools, expensive mistakes happen fast.
Common Repair Mistakes to Avoid
Many repair failures happen because technicians rush.
Frequent Errors
Overheating the Rear Glass
Too much heat weakens OLED layers and damages wireless charging coils.
Using Excessive Prying Force
This often snaps flex cables hidden beneath the glass.
Poor Adhesive Cleanup
Uneven adhesive creates waterproofing issues and frame gaps.
Installing Cheap Batteries
Low-quality batteries may swell prematurely or trigger thermal instability.
Forgetting Calibration Steps
Modern smartphones require calibration after repairs, especially fingerprint sensors and cameras.
Which Phone Is Easier to Repair?
When evaluating repairing the Google Pixel 10 Pro XL vs Galaxy S25 Ultra internals, the Google Pixel 10 Pro XL is generally easier to repair overall.
Why the Pixel Wins for Repairability
Simpler internal organization
Better battery adhesive system
Easier camera access
Reduced cable congestion
Less aggressive adhesive usage
Why Samsung Still Excels
Despite repair complexity, Samsung offers:
Outstanding structural durability
Premium thermal engineering
Exceptional display technology
Advanced camera systems
Ultimately, the better device depends on whether users prioritize repairability or cutting-edge engineering.
Frequently Asked Questions
Is the Google Pixel 10 Pro XL easier to repair than the Galaxy S25 Ultra?
Yes. The Pixel 10 Pro XL generally offers easier battery access, cleaner cable routing, and simpler modular repairs.
Why are Samsung screen repairs more expensive?
Samsung uses advanced curved OLED panels with integrated technologies that increase both parts cost and repair difficulty.
Can waterproofing remain after repairs?
Professional technicians can restore some water resistance using premium adhesives, but factory-level sealing is difficult to fully replicate.
Are genuine parts worth the extra cost?
Absolutely. Genuine parts improve reliability, performance, durability, and compatibility.
Which phone has better long-term repair value?
The Pixel 10 Pro XL often provides better repair value because labor times are shorter and component access is simpler.
Should DIY users attempt these repairs?
Only experienced DIY users should attempt flagship repairs. Modern smartphones contain fragile components that are easy to damage.
Conclusion
Modern flagship smartphones are engineering marvels, but they’re also increasingly difficult to repair. Comparing repairing the Google Pixel 10 Pro XL vs Galaxy S25 Ultra internals reveals two very different design philosophies.
Google prioritizes cleaner layouts and somewhat improved serviceability, while Samsung focuses heavily on durability, thermal management, and cutting-edge display technology.
For technicians, the Pixel 10 Pro XL offers a smoother repair experience overall. For consumers, both devices remain excellent choices if serviced properly using genuine parts and professional repair methods.
As smartphones continue evolving, repairability will remain a major factor influencing long-term ownership costs, sustainability, and customer satisfaction.
David from Sydney CBD Repair Centre – The Best place to fix mobile phones as 7 Years In A Row! Top Mobile Phone Repair In Sydney. More than 2000 Positive Reviews on Google and Same Day Repairs.
We take pride in delivering exceptional repair services for all major phone brands including Apple, Samsung, Google, and more. Our expert technicians use only genuine parts and offer 90days warranty on repairs. Located in the heart of Sydney CBD, we’re your one-stop solution for all mobile device repairs.
Our commitment to excellence has earned us the trust of thousands of satisfied customers. Whether it’s a cracked screen, battery replacement, or water damage repair, we handle it all with professional care and expertise. Walk in today and experience why we’re Sydney’s #1 choice for mobile phone repairs.
Visit us for:
✓ Same Day Express Repairs
✓ Genuine Parts Guarantee
✓ Professional Technicians
✓ Competitive Pricing
✓ 2000+ 5-Star Google Reviews
✓ 7-Time Award Winner for Best Phone Repairs
Is It Waterproof? Restoring IP68 Seals After a Professional Screen Repair – 7 Powerful Truths You Must Know
📱 Introduction to Waterproofing and Screen Repairs
Smartphones today are more advanced than ever. Brands like Apple Inc. and Samsung Electronics have pushed durability to new heights, especially with water-resistant designs. But here’s the real question most people ask after fixing a cracked screen: Is it waterproof after repair?
The short answer? Not always—but it can be restored under the right conditions.
Modern phones come with IP68 ratings, which means they’re designed to withstand dust and water exposure. However, once a device is opened—even by professionals—the original seal is broken. From that point on, restoring that protection becomes a delicate and technical process.
This process breaks the original waterproof seal, which is precisely engineered in controlled factory conditions.
🧠 Understanding IP68 Sealing Technology
To appreciate restoration, you need to understand what’s being replaced.
🧩 Components That Keep Your Phone Waterproof
🔒 Adhesive Seals
Strong, custom-cut adhesives bond the display to the frame.
🧱 Gaskets and Barriers
Rubber seals protect buttons, speakers, and ports.
🌬️ Pressure Equalization Membranes
Allow air movement while blocking water entry.
These components work together like a tight fortress—once disturbed, they must be carefully rebuilt.
⚠️ Is It Waterproof After Repair? The Honest Answer
Let’s be blunt: your phone is not guaranteed to be waterproof after repair.
🏭 Manufacturer vs Third-Party Repairs
Authorized repairs may restore water resistance but rarely guarantee IP68 again.
Third-party repairs depend heavily on technician skill and tools.
🌍 Real-World Performance After Repair
Even with professional restoration:
Splash resistance is usually achievable
Full submersion protection is uncertain
So yes—it can be water-resistant again, but not identical to factory conditions.
🛠️ Restoring IP68 Seals After Screen Replacement
Now here’s where expertise matters.
🔬 Professional Techniques Used
🎯 Precision Adhesive Application
Technicians use pre-cut OEM-grade adhesive to replicate factory seals.
🔥 Heat Press Sealing
Specialized machines apply controlled heat and pressure to bond components tightly.
💦 Water Resistance Testing
Shops may use:
Vacuum pressure tests
Seal integrity diagnostics
These don’t make it “new,” but they significantly improve protection.
🌊 Risks of Losing Waterproofing
Skipping proper sealing? That’s asking for trouble.
🚨 Water Damage Scenarios
Rain exposure
Accidental drops in water
Humidity buildup
⏳ Long-Term Effects
Corrosion of internal parts
Battery damage
Screen malfunction
Even a tiny gap can let moisture in over time.
🧴 How to Maintain Water Resistance After Repair
You’ve had it fixed—now what?
✅ Best Practices for Users
Avoid water exposure for 24–48 hours after repair
Use protective cases
Keep ports clean and dry
❌ What to Avoid
Swimming with your phone
High-pressure water (showers, jets)
Charging when wet
Think of your phone as water-resistant, not waterproof.
📊 Comparing Brands and Repair Quality
Different manufacturers design seals differently.
🍎 Apple Devices
Devices like iPhones use laser-cut adhesives and tight tolerances, making restoration more precise but still imperfect.
📱 Samsung Devices
Samsung phones often include layered sealing systems, offering slightly better post-repair restoration potential.
🤖 Other Android Phones
Quality varies widely depending on brand and build.
🔧 Professional vs DIY Repairs
Tempted to fix it yourself? Think twice.
❌ Why DIY Repairs Compromise Waterproofing
No access to OEM adhesives
Lack of pressure sealing tools
Improper alignment risks
DIY repairs almost always result in zero water resistance.
💰 Cost vs Value of Waterproof Restoration
💡 Is It Worth Paying Extra?
Absolutely—if you care about longevity.
Factor
Cheap Repair
Professional Repair
Seal Quality
Poor
High
Water Resistance
None
Partial restoration
Longevity
Short
Extended
Paying more upfront can save you from costly water damage later.
🚀 Future of Waterproof Smartphone Repairs
The industry is evolving fast.
🔮 New Technologies
Improved adhesive materials
Modular waterproof designs
AI-assisted repair diagnostics
Soon, restoring IP68 may become more reliable—but we’re not fully there yet.
❓ FAQs
1. Is it waterproof after a screen replacement?
No, not fully. It can be water-resistant if professionally sealed.
2. Can IP68 rating be restored completely?
Not to factory level, but close with expert repair.
3. How do I test water resistance safely?
Use professional pressure tests—not actual water.
4. Does warranty cover water damage after repair?
Usually not, especially after third-party repairs.
5. How long does waterproof sealing last after repair?
It depends on usage, but typically several months to a year.
6. Should I avoid water completely after repair?
Yes, especially submersion. Light splashes may be okay.
🏁 Conclusion
So, is it waterproof after a professional screen repair? The truth is nuanced.
While modern repair techniques can restore a level of water resistance, achieving the original IP68 rating is extremely difficult outside factory conditions. That said, choosing a skilled technician and following proper care practices can significantly reduce your risk.
In the end, it comes down to this: treat your repaired phone with a bit more caution, and it’ll reward you with longer life and better performance.
David from Sydney CBD Repair Centre – The Best place to fix mobile phones as 7 Years In A Row! Top Mobile Phone Repair In Sydney. More than 2000 Positive Reviews on Google and Same Day Repairs.
We take pride in delivering exceptional repair services for all major phone brands including Apple, Samsung, Google, and more. Our expert technicians use only genuine parts and offer 90days warranty on repairs. Located in the heart of Sydney CBD, we’re your one-stop solution for all mobile device repairs.
Our commitment to excellence has earned us the trust of thousands of satisfied customers. Whether it’s a cracked screen, battery replacement, or water damage repair, we handle it all with professional care and expertise. Walk in today and experience why we’re Sydney’s #1 choice for mobile phone repairs.
Visit us for:
✓ Same Day Express Repairs
✓ Genuine Parts Guarantee
✓ Professional Technicians
✓ Competitive Pricing
✓ 2000+ 5-Star Google Reviews
✓ 7-Time Award Winner for Best Phone Repairs
Waterproof phone rebuild is a trending specialty repair technique, especially as modern smartphones evolve with advanced sealing systems, pressure-sensitive adhesives, and IP-rated designs. Many users believe their phones stay waterproof for life, but that’s far from true. Any repair—screen replacement, battery change, back glass fix—breaks the factory seal. This article walks you through a complete, professional, and deeply detailed guide to rebuilding waterproof protection and performing an extreme waterproof test to ensure durability and long-term safety.
Below, you’ll find everything from the basic science of waterproofing to the advanced rebuild and testing methods used by pro repair centres worldwide.
Introduction
Waterproof phones have become a must-have in today’s fast-paced digital lifestyle, where unexpected spills, sudden rain, and underwater moments are all part of everyday life. But what happens when a device loses its factory seal after a screen replacement, battery swap, or back glass repair? That’s where the waterproof phone rebuild comes in—a detailed restoration process that brings back the protective strength your phone once had. This guide explores the science, techniques, and real-world testing behind waterproof rebuilds, helping users understand how crucial proper sealing is for long-term device safety.
In a world filled with moisture hazards—humidity, sweat, accidental drops—rebuilding waterproof integrity is more than a repair step; it’s a safeguard for your smartphone’s performance and lifespan. Whether you’re a technician, a phone repair enthusiast, or a curious user, this introduction sets the stage for understanding how extreme waterproof testing ensures your device remains safe, durable, and ready for life’s unexpected challenges.
Waterproof smartphone design has come a long way in just a few short years. Early devices relied on flimsy rubber plugs, but today’s phones depend on a combination of precision engineering, nano-coatings, adhesives, internal gaskets, and tightly fitted chassis designs. Because the technology keeps evolving, it’s crucial to understand how waterproof features work before attempting a waterproof phone rebuild.
Modern flagship devices like the iPhone 15 Pro Max, Samsung Galaxy S24 Ultra, and Google Pixel 9 Pro arrive with IP68 or IP69K ratings. These standards define how well the device can resist dust and water penetration. Although people often assume IP ratings cover all conditions, real-world scenarios are far harsher. Phones undergo extreme pressure in pockets, sudden temperature shifts, and accidental drops—each of which slowly weakens sealing points.
When you start a waterproof phone rebuild, you’re essentially restoring the integrity of the phone’s barrier system. It isn’t just about slapping a new adhesive onto the frame. Instead, you’re reconstructing a precisely engineered system. That includes microscopic seams, speaker mesh membranes, pressure equalisation points, and sensitive buttons. All these elements rely on compatible materials designed to maintain elasticity under stress.
A rebuild becomes even more essential after any cracked glass repair. Once a screen breaks, micro-gaps open along the frame. Even a hairline crack compromises the water barrier, turning the device into a sponge for moisture. That’s why experts strongly recommend resealing the entire frame if any repair breaks the original adhesive bond.
If you’re reading this guide, chances are you’re interested in learning the complete process of restoring a phone’s water-resistance to its highest possible level. You’ll gain essential technical insight while also receiving hands-on instructions that match professional repair standards.
Smartphones are no longer just communication tools; they store sensitive information, payment details, health data, and personal images. A single water damage incident can destroy components and erase years of memories. The cost of replacing a water-damaged board often exceeds the price of the initial phone repair. That’s precisely why a waterproof phone rebuild matters.
Every repair centre knows that customers depend on the advertised water resistance long after the device leaves the factory. However, most users don’t realise the water-resistance disappears the moment a phone is opened for a battery or screen replacement. In fact, even gentle heat applied during opening weakens the adhesive’s structure.
Rebuilding waterproof protection is not just for heavy smartphone users. Even average users experience moisture exposure daily—rain, sweat, humidity, accidental spills, and shower steam. Over time, the tiniest opening can draw moisture into the charging port or speaker assembly. Rebuilding waterproofing significantly reduces this risk.
Another reason waterproof rebuilds matter is resale value. A device with restored waterproof seals is far more attractive to buyers. It assures them that the phone has been professionally serviced and is less prone to hidden corrosion.
Finally, environmental sustainability plays a role. Waterproof rebuilds extend the life of smartphones, reducing electronic waste. When users can confidently continue using their device without fear of water damage, fewer devices end up in landfills.
Common Failure Points in Waterproof Smartphones
Charging port membrane
Speaker mesh area
SIM tray seal
Back glass adhesive
Display frame adhesive
Button gaskets
These areas weaken over time, especially after drops or repairs.
Tools & Materials Required for a Proper Waterproof Rebuild
(List, table, explanation)
Precision screwdrivers
Heat mat
Anti-static tweezers
3M waterproof adhesive
OEM-grade gasket rings
Isopropyl alcohol 99%
Dust-free microfibre cloth
UV-sealant lamp
Material
Purpose
3M frame adhesive
Primary waterproof seal
Rubber gasket
Protects buttons & ports
Waterproof mesh
Speaker protection
Nano-coating spray
Extra internal moisture resistance
Step-by-Step Waterproof Phone Rebuild Procedure
Disassembly: Opening the Frame Without Damage
Use proper heating tools and avoid excessive force. A damaged frame compromises waterproof integrity.
Cleaning Internal Components Correctly
Remove all adhesive residue, dust, and moisture traces using isopropyl alcohol 99%.
Replacing Gaskets, Seals & Pressure Adhesives
Ensure you install OEM-quality materials, particularly around cameras and charging ports.
Rebuilding & Resealing the Device
Apply new 3M waterproof adhesive evenly, then clamp the device for uniform pressure curing.
The Extreme Waterproof Test: How It’s Done
Submersion Test
Placing device 1–1.5m underwater for 30 minutes.
Pressure Test
Simulates pocket pressure underwater movement.
Thermal Shock Test
Tests sudden temperature change from hot to cold.
How to Know If Your Rebuild Passed the Waterproof Checklist
✔ No bubbles during pressure testing
✔ No condensation under glass
✔ Buttons remain firm
✔ Speakers sound clear
✔ Charging port functions correctly
Expert Tips for Long-Lasting Waterproof Integrity
Don’t expose device to hot water
Avoid bending pressure
Replace seals annually
Keep SIM tray fully closed
FAQs
1. Is a waterproof rebuild as strong as factory waterproofing?
Not always identical, but a high-quality rebuild can get extremely close with the right materials.
2. Can any repair centre perform a waterproof rebuild?
Only experienced centres with specialised equipment should attempt it.
3. How often should waterproof seals be replaced?
Every 12–18 months or after any major repair.
4. Does waterproofing protect against salt water?
No. Salt water corrodes components rapidly.
5. Will waterproof rebuilding void warranty?
If your phone is already out of warranty, no. Otherwise, yes.
A waterproof phone rebuild is one of the best ways to extend your smartphone’s life, improve durability, and protect it from moisture damage. With proper tools, the right adhesives, and advanced testing methods, you can restore your device’s water resistance close to factory levels. This guide covered the complete process from understanding waterproof engineering to performing extreme waterproof tests—equipping you with pro-level knowledge to ensure your device stays safe.
David from Sydney CBD Repair Centre – The Best place to fix mobile phones as 6 Years In A Row! Top Mobile Phone Repair In Sydney. More than 2000 Positive Reviews on Google and Same Day Repairs.
We take pride in delivering exceptional repair services for all major phone brands including Apple, Samsung, Google, and more. Our expert technicians use only genuine parts and offer 90 days warranty on repairs. Located in the heart of Sydney CBD, we’re your one-stop solution for all mobile device repairs.
Visit us for:
✓ Same Day Express Repairs
✓ Genuine Parts Guarantee
✓ Professional Technicians
✓ Competitive Pricing
✓ 2000+ 5-Star Google Reviews
✓ 6-Time Award Winner for Best Phone Repairs
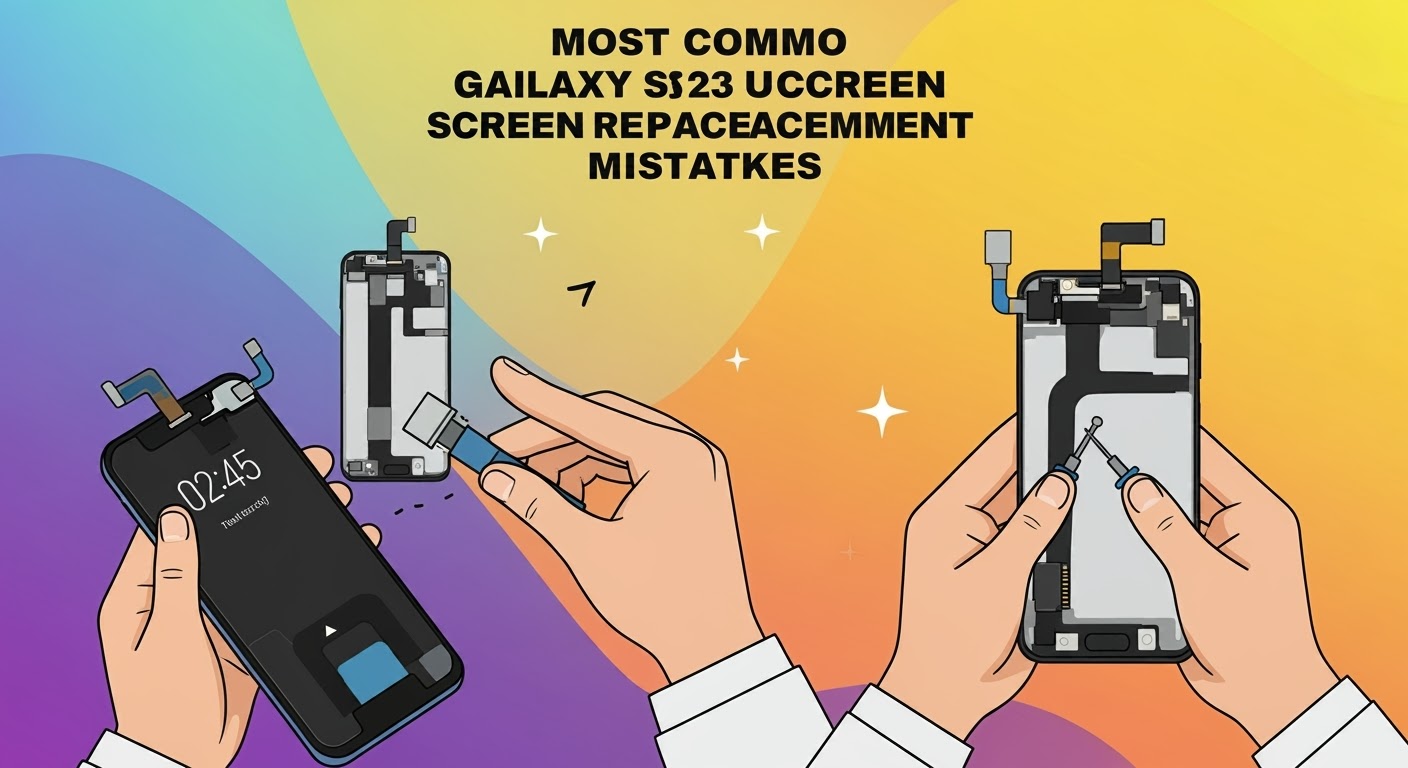
Most Common Galaxy S23 Ultra Screen Replacement Mistakes
📱 Why the Galaxy S23 Ultra Requires Expert Handling
The Samsung Galaxy S23 Ultra is one of the most advanced smartphones on the market—with a powerful AMOLED display, curved edges, and integrated S Pen technology. But these premium features come with added complexity when it’s time for a screen replacement.
At Sydney CBD Repair Centre, we’ve seen too many repair attempts go wrong—often from DIY methods or inexperienced technicians. Here’s a look at the most common mistakes people make when replacing the Galaxy S23 Ultra screen—and how to avoid them.
One of the biggest benefits of flagship phones like the Galaxy S23 Ultra is IP68 water resistance. But after screen replacement, this can easily be compromised if:
New adhesives aren’t applied properly
Seals aren’t aligned during reassembly
The technician skips the water resistance check
At Sydney CBD Repair Centre, we restore water resistance with every repair using Samsung-grade sealing solutions.
💰 Mistake #6: Overpaying for Poor Service
Not all repair shops are created equal. Many charge a premium for:
Low-quality screens
Inexperienced staff
No warranty coverage
We’ve had numerous customers come to us after a failed screen replacement elsewhere, having paid twice as much for inferior parts.
🛡 Mistake #7: Skipping the Warranty
Your S23 Ultra deserves more than a one-time fix—it deserves a guaranteed solution.
Sydney CBD Repair Centre offers:
✅ 90-Day Warranty on All Repairs
✅ Genuine Samsung Parts
✅ 2000+ Verified Google Reviews
✅ Same Day Express Repairs
Don’t settle for less than professional, long-term reliability.
🔄 Mistake #8: Not Backing Up Data Before Repair
Although rare, any hardware intervention poses a minimal risk to your phone’s data. Always back up your:
Contacts
Photos
App data
Notes and messages
We take every precaution during the repair, but data safety begins with you.
🧠 How to Avoid These Mistakes: Choose Sydney CBD Repair Centre
With years of hands-on experience, we know exactly how to handle Galaxy S23 Ultra screen replacements—safely, efficiently, and affordably.
Why Choose Us?
🔧 Certified Technicians Trained on Samsung Devices
💯 Genuine AMOLED Screens with Full Touch and Brightness Retention
🛠 Precision Equipment for Curved Screen Handling
🧴 Waterproofing Restoration as Standard Practice
🏆 Award-Winning Service for 6 Consecutive Years
💬 Transparent Pricing & Free Diagnostics
📍 Visit Us Today
📌 Sydney CBD Repair Centre
📞 Call Now: +61280114119
🌐 Locate Us Here
Thank you for using
Themify Popup
This is a sample pop up. Themify Builder or Builder Lite (free) plugin is recommended to design the pop up layouts.