




Advanced Disassembly Of OPPO A79 5G For A Seamless Professional Display Replacement

Advanced Disassembly Of OPPO A79 5G For A Seamless Professional Display Replacement: Ultimate 15-Step Expert Guide
Introduction
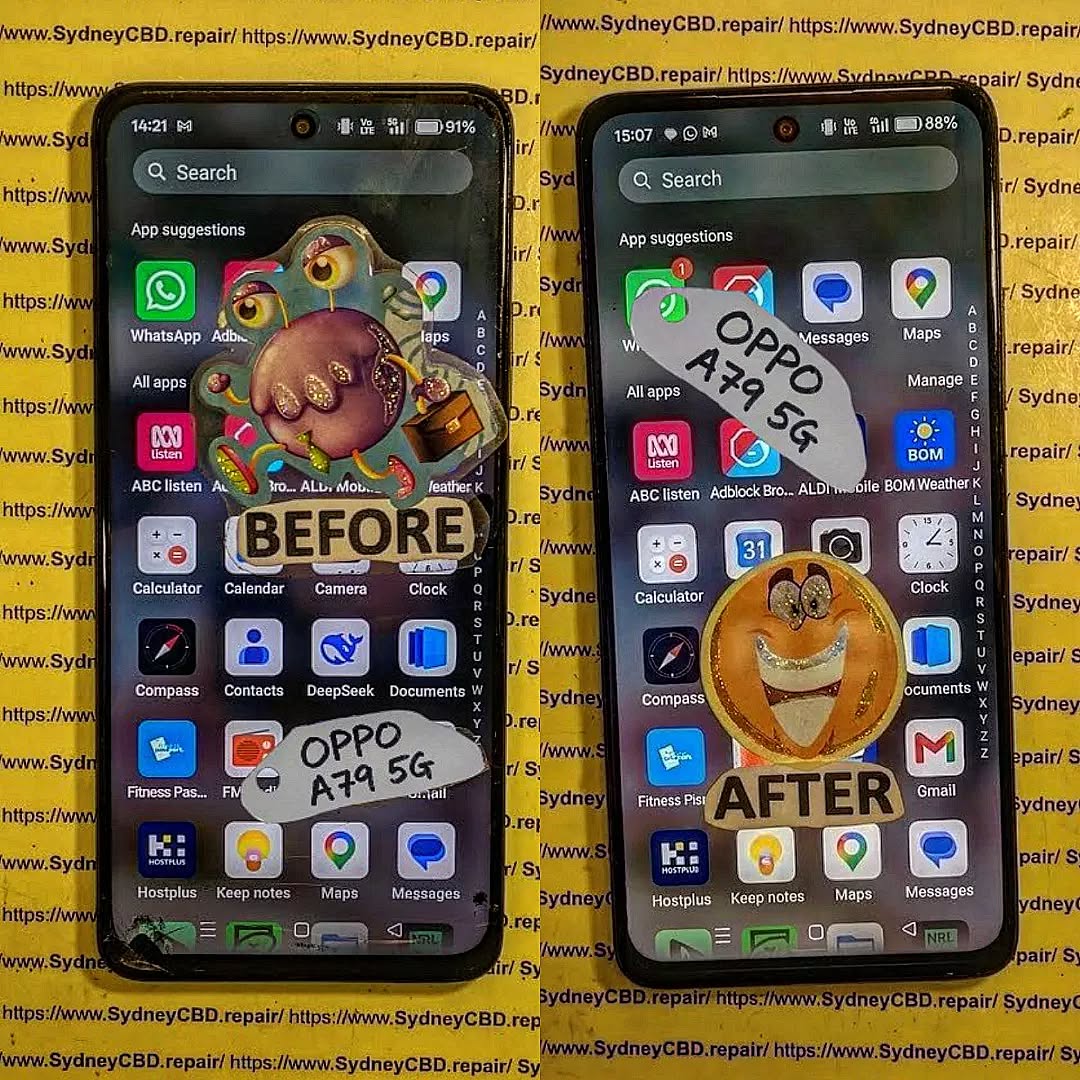
Replacing a damaged smartphone display isn’t simply about removing broken glass and installing a new screen. Modern smartphones like the OPPO A79 5G are carefully engineered with delicate ribbon cables, waterproof adhesives, sensitive antennas, and tightly integrated internal components. Successfully completing an Advanced Disassembly Of OPPO A79 5G For A Seamless Professional Display Replacement requires technical knowledge, patience, and the right tools.
Professional technicians understand that every repair starts long before lifting the display. Proper diagnosis, careful inspection, battery safety, and organized disassembly all contribute to a successful repair.
In this guide, you’ll discover how professionals approach an OPPO A79 5G screen replacement while minimizing risk to the motherboard, cameras, charging port, battery, and other critical components. Whether you’re an experienced repair technician or simply interested in learning how experts work, this article provides an in-depth look into the entire process.
Understanding the OPPO A79 5G Internal Design
Before beginning any repair, it’s important to understand how the OPPO A79 5G is built. Manufacturers continue making smartphones thinner while packing in larger batteries, improved cameras, and faster processors. As a result, every internal component is positioned with remarkable precision.
Unlike older smartphones that featured removable back covers and replaceable batteries, the OPPO A79 5G uses industrial-strength adhesive and tightly fitted plastic and metal brackets. This construction enhances durability while making professional disassembly significantly more challenging.
Several internal components deserve special attention during an Advanced Disassembly Of OPPO A79 5G For A Seamless Professional Display Replacement:
- OLED/LCD display assembly
- Touch digitizer
- Battery
- Mainboard
- Daughterboard
- USB-C charging board
- Side fingerprint sensor flex
- Volume button flex cable
- Rear camera assembly
- Front camera module
- Loudspeaker assembly
- Vibration motor
- Antenna routing
- Interconnecting flex cables
Each component is interconnected. Damaging one ribbon cable can disable multiple phone functions.
Display Assembly
The display is securely adhered to the frame using strong factory adhesive. Removing it requires controlled heat and precise lifting techniques.
Too much force may:
- Crack the replacement screen
- Damage the frame
- Tear display flex cables
- Bend the chassis
Professional repair centers carefully soften adhesive before attempting removal.
Battery Placement
The battery occupies most of the phone’s internal space.
Although it appears simple, lithium-ion batteries are sensitive to:
- Sharp tools
- Excessive bending
- Heat exposure
- Compression
- Punctures
A damaged battery can swell or fail, making safe handling a priority.
Motherboard Layout
The motherboard houses the:
- MediaTek processor
- RAM
- Storage chips
- Power management IC
- Display connectors
- Camera interfaces
- RF modules
Technicians disconnect the battery before touching any motherboard connectors to avoid short circuits.
Flex Cable Routing
Modern smartphones rely on flexible printed cables instead of traditional wiring.
These ultra-thin connectors carry signals between:
- Display
- Battery
- Charging board
- Cameras
- Buttons
- Fingerprint reader
Because they’re extremely fragile, professionals disconnect each one using plastic pry tools rather than metal objects.
Essential Tools Required Before Beginning
Professional repairs depend on using the correct equipment. While inexpensive toolkits may seem attractive, quality precision tools greatly reduce the chance of accidental damage.
Precision Screwdriver Set
Different screws secure various components throughout the OPPO A79 5G.
A professional kit typically includes:
- Phillips bits
- Torx bits
- Flat-head bits
- Precision handles
Using the wrong driver can strip screw heads, making removal difficult.
Heat Source
Adhesive must be softened before opening the device.
Professionals often use:
- Heat pads
- Controlled hot air stations
- LCD heating plates
Controlled heat prevents frame deformation while loosening adhesive effectively.
Plastic Opening Picks
Plastic picks slide between the display or rear cover and the frame.
They help:
- Cut adhesive
- Prevent scratches
- Reduce cracking risk
- Protect internal cables
Metal blades are used sparingly and only by experienced technicians.
Suction Cup
A suction cup creates a small opening after heating.
This gap allows plastic picks to enter without damaging the frame.
Plastic Spudgers
Plastic spudgers safely disconnect ribbon cables.
They’re essential for:
- Battery connector removal
- Display connector removal
- Camera connector removal
Unlike metal tools, they minimize the risk of electrical shorts.
Tweezers
Fine-point ESD-safe tweezers allow technicians to handle:
- Small screws
- Brackets
- Mesh covers
- Adhesive strips
Precision improves organization during reassembly.
Isopropyl Alcohol
High-purity isopropyl alcohol helps dissolve stubborn adhesive without damaging electronics when used carefully.
Professionals apply only small amounts around adhesive edges.
Magnetic Project Mat
Keeping dozens of tiny screws organized prevents assembly mistakes.
Professional repair benches frequently use magnetic mats labeled according to each disassembly stage.
Replacement Adhesive
Installing a new display requires fresh adhesive.
Proper adhesive:
- Holds the screen securely
- Reduces dust entry
- Improves long-term durability
- Maintains factory appearance
Reusing old adhesive is never recommended.
Anti-Static Equipment
Electrostatic discharge (ESD) can damage sensitive chips.
Repair shops reduce this risk using:
- Grounded wrist straps
- Anti-static mats
- ESD-safe tools
These precautions protect expensive components from invisible electrical damage.
Why Preparation Determines Repair Success

Many repair failures happen before the first screw is removed. Professional technicians follow a structured preparation process to minimize mistakes and protect the device throughout the repair.
Preparation begins with inspecting the phone for existing damage, including bent frames, liquid exposure indicators, cracked back covers, and faulty buttons. Identifying these issues beforehand helps distinguish pre-existing faults from repair-related concerns.
Next, the technician powers the device off completely. This simple step reduces the risk of electrical shorts while disconnecting internal components. If the screen is still responsive, backing up important data is also recommended before any disassembly begins.
The work area should be clean, well-lit, and free of static-generating materials. Organizing tools in advance prevents unnecessary interruptions once the phone has been opened.
Professional repair centers also document the repair with photos during each stage of disassembly. These reference images make reassembly easier and help verify the original placement of cables, brackets, and screws.
Finally, replacement parts should always be inspected before installation. A quality display assembly should be free from scratches, dead pixels, damaged flex cables, or manufacturing defects. Testing the new display before permanently sealing the device saves time and prevents repeat repairs.
By combining careful preparation with the proper tools and techniques, technicians significantly improve the success rate of an Advanced Disassembly Of OPPO A79 5G For A Seamless Professional Display Replacement.
Removing the Back Cover Professionally
One of the most delicate stages in the Advanced Disassembly Of OPPO A79 5G For A Seamless Professional Display Replacement is removing the rear cover without damaging the plastic frame or internal components. Although the OPPO A79 5G features a durable design, its rear panel is secured with strong adhesive that requires patience and precision to separate safely.
Step 1: Apply Controlled Heat
Begin by evenly heating the perimeter of the back cover for approximately two to three minutes. The goal is to soften the adhesive—not overheat the device.
Professional technicians avoid concentrating heat in one area, as excessive temperatures can damage the battery or warp the plastic housing.
Best Practices
- Keep the heat source moving continuously.
- Avoid overheating the camera module.
- Wear heat-resistant gloves if necessary.
- Monitor the phone’s temperature throughout the process.
Step 2: Create an Opening
Once the adhesive softens, attach a suction cup near the lower edge of the back cover.
Gently lift while inserting a thin plastic opening pick into the gap.
Avoid using excessive force. If resistance remains high, apply additional heat instead of prying harder.
Step 3: Separate the Adhesive
Carefully slide the plastic pick around the perimeter.
Take extra care near:
- Side buttons
- Camera housing
- Fingerprint sensor flex (if applicable)
- Antenna areas
Slow and steady movements greatly reduce the risk of cracking the rear panel.
Step 4: Lift the Rear Cover
Once all adhesive has been released, lift the back cover carefully.
Inspect the adhesive pattern before removing any remaining residue.
Professionals immediately place the cover in a dust-free container to prevent scratches during the remainder of the repair.
Disconnecting the Battery Safely
Battery disconnection is arguably the most important safety step during an Advanced Disassembly Of OPPO A79 5G For A Seamless Professional Display Replacement.
Skipping this procedure significantly increases the risk of electrical shorts and accidental component damage.
Remove Protective Covers
The battery connector is typically protected by a metal bracket secured with several screws.
Technicians:
- Remove each screw.
- Keep screws organized.
- Lift the bracket using plastic tweezers.
Different screw lengths should never be mixed during reassembly.
Disconnect the Battery Connector
Using a plastic spudger, gently lift the battery connector from the motherboard.
Never use:
- Metal screwdrivers
- Sharp blades
- Excessive force
The connector should release with minimal pressure.
Why Battery Isolation Matters
Disconnecting power protects:
- Display IC
- Charging IC
- Motherboard
- Cameras
- Fingerprint sensor
- USB-C board
Professional repair shops never disconnect display cables before isolating battery power.
Accessing Internal Components
Once the battery has been disconnected, internal repairs can proceed safely.
Several components may need temporary removal before the display assembly can be replaced.
Speaker Assembly
The loudspeaker module usually covers important flex cable routing.
Remove:
- Retaining screws
- Plastic clips
- Speaker housing
Inspect for dust accumulation before reinstalling.
Charging Board Flex Cable
Disconnect the flex cable linking:
- Mainboard
- Charging board
Lift evenly using a plastic pry tool.
Never fold flex cables sharply.
Display Flex Cable
The damaged display remains connected beneath protective brackets.
Professionals remove:
- Metal shields
- Connector brackets
- Protective tape
Only after these have been removed should the display connector be disconnected.
Camera Modules
If necessary, camera modules may be removed temporarily.
Handle carefully to avoid:
- Dust contamination
- Lens scratches
- Flex cable damage
Store cameras inside anti-static containers whenever possible.
Removing the Damaged Display Assembly
Removing the damaged display is the most technically demanding portion of the repair.
The display assembly is firmly bonded to the frame using factory adhesive that must be softened carefully.
Heating the Front Display
Apply controlled heat around the front glass.
Professional technicians maintain moderate temperatures to avoid:
- OLED damage
- LCD discoloration
- Frame warping
- Battery overheating
Several heating cycles may be necessary.
Separating the Screen
Insert a plastic opening pick between:
- Display glass
- Mid-frame
Slowly work around the edges.
Avoid inserting tools too deeply because internal display flex cables may be damaged.
Removing Adhesive
Once loosened, carefully cut through remaining adhesive.
Professionals avoid rushing this stage.
The display should lift naturally after all adhesive has been released.
Cleaning the Frame
Before installing the replacement screen, remove:
- Old adhesive
- Glass fragments
- Dust
- Residual glue
Use:
- Plastic scraper
- Isopropyl alcohol
- Microfiber cloth
A clean frame ensures proper adhesion and prevents pressure points beneath the new display.
Installing the New Display
A successful Advanced Disassembly Of OPPO A79 5G For A Seamless Professional Display Replacement depends just as much on installation as it does on careful disassembly.
Professional technicians never permanently seal a new display before verifying that every function works correctly.
Dry Testing the Display
Before applying fresh adhesive:
- Connect the new display flex cable.
- Reconnect the battery temporarily.
- Power on the phone.
- Check the display for normal operation.
Test the following:
- Brightness
- Touch sensitivity
- Multi-touch response
- Dead pixels
- Color consistency
- Flickering
- Black spots
- Ghost touch issues
If any defects are found, disconnect the battery again and replace the faulty display before proceeding.
Applying Fresh Adhesive
Once the display passes all functional tests:
- Remove temporary protective films.
- Apply high-quality replacement adhesive around the frame.
- Ensure even placement with no gaps or overlaps.
- Avoid covering microphones, sensors, or speaker openings.
Using fresh adhesive restores the phone’s structural integrity and helps keep dust from entering the device.
Seating the Display
Align the display carefully with the frame before lowering it into position.
Apply light, even pressure around the edges to ensure full contact with the adhesive.
Avoid pressing directly on the center of the display, as excessive force can damage the LCD or OLED panel.
Professional repair shops often use display clamps or rubber bands for 20 to 30 minutes to ensure the adhesive cures evenly without creating pressure points.
Professional Repair Techniques and Best Practices
Experienced technicians follow strict procedures that improve repair quality and reduce the likelihood of customer returns.
Keep Every Screw Organized
Modern smartphones use screws of varying lengths and thread types.
Mixing them can result in:
- Damaged motherboard layers
- Cracked display assemblies
- Loose brackets
- Improper grounding
Magnetic project mats or labeled containers are invaluable during complex repairs.
Avoid Fingerprints on Internal Components
Fingerprints on camera lenses or the inside of the display can become visible after reassembly.
Professionals wear nitrile gloves or finger cots and use lint-free cloths to keep components spotless.
Replace Worn Adhesive
Never rely on the original adhesive after opening the phone.
Fresh adhesive ensures:
- Better structural support
- Improved resistance to dust
- Professional cosmetic finish
- Longer-lasting repair results
Inspect Flex Cables Carefully
Before final assembly, examine every ribbon cable for:
- Tears
- Creases
- Loose connectors
- Bent contacts
Replacing a damaged flex cable before sealing the phone can prevent future failures and unnecessary repeat repairs.
Perform Multiple Functional Tests
Technicians don’t stop after confirming the screen turns on.
A comprehensive post-installation test should include:
- Display quality
- Touch responsiveness
- Charging
- Cameras
- Speaker
- Microphone
- Wi-Fi
- Bluetooth
- Mobile signal
- Fingerprint sensor
- Proximity sensor
- Volume buttons
- Power button
- Vibration motor
Completing these checks ensures the phone leaves the repair bench functioning as expected.
Reassembling the Device
After successfully installing and testing the replacement display, the next step is careful reassembly. This stage is just as important as disassembly because incorrect screw placement, poorly routed cables, or improperly secured brackets can lead to future failures.
Reconnect Internal Components
Reconnect every flex cable in the reverse order of disassembly. Apply gentle, even pressure until each connector clicks securely into place.
Reconnect the following components:
- Display flex cable
- Charging board flex cable
- Battery connector
- Side button flex cable
- Fingerprint sensor flex cable (if applicable)
- Camera modules
- Antenna connectors
Always inspect each connector under good lighting before moving on.
Reinstall Protective Brackets
Metal shields and plastic covers protect delicate motherboard connectors from movement and accidental disconnection.
Ensure:
- Every bracket sits perfectly flat.
- Correct screws are returned to their original locations.
- No cables are trapped beneath brackets.
Overtightening screws can damage threaded inserts or crack plastic mounting points.
Replace the Speaker Module
Position the loudspeaker assembly carefully and tighten all retaining screws evenly.
While the speaker is removed, many professionals also clean:
- Dust from the loudspeaker grille
- Charging port debris
- Microphone openings
- Internal frame surfaces
Cleaning during repair improves both appearance and functionality.
Seal the Rear Cover
Remove any remaining adhesive residue from the rear housing.
Apply fresh waterproof-style adhesive around the perimeter before reinstalling the back cover.
Align the cover carefully before applying light, even pressure around all edges.
Professional repair centres often use alignment clamps for approximately 30 minutes to ensure a consistent seal.
Common Repair Mistakes
Even experienced technicians continue refining their techniques because smartphone repairs leave little room for error. Avoiding these common mistakes significantly improves repair quality.
Forgetting to Disconnect the Battery
This is one of the most frequent causes of motherboard damage.
Failing to isolate battery power may result in:
- Short circuits
- Burned display ICs
- Damaged charging circuits
- Unresponsive touch functionality
Disconnect the battery before removing or reconnecting any flex cable.
Using Excessive Heat
Heat softens adhesive, but too much can permanently damage internal components.
Excessive temperatures may cause:
- Battery swelling
- Display discoloration
- Plastic frame warping
- Camera focus issues
Controlled, even heating is always the safest approach.
Damaging Ribbon Cables
Ribbon cables are among the most fragile components inside the OPPO A79 5G.
Avoid:
- Pulling cables at an angle
- Folding cables sharply
- Using metal tools
- Applying excessive force
Replacing a torn flex cable often adds unnecessary repair time and cost.
Reusing Old Adhesive
Old adhesive loses much of its bonding strength once removed.
Fresh adhesive provides:
- Better structural support
- Improved dust resistance
- Professional appearance
- Longer-lasting repairs
Skipping this step may result in display lifting or back cover separation over time.
Skipping Functional Tests
Never assume a repair is complete simply because the phone powers on.
Professionals verify:
- Display brightness
- Touch accuracy
- Cameras
- Charging
- Wi-Fi
- Bluetooth
- Microphones
- Speakers
- Fingerprint sensor
- Proximity sensor
- Auto brightness
- Mobile reception
Testing everything before sealing the device helps prevent costly repeat repairs.
Post-Repair Quality Control
Quality control separates professional repairs from rushed workmanship.
Every repaired OPPO A79 5G should undergo a structured inspection before being returned to its owner.
Visual Inspection
Check for:
- Even display alignment
- Dust beneath the screen
- Uniform adhesive bonding
- Flush rear cover installation
- No cosmetic damage
A professional finish inspires customer confidence.
Functional Testing Checklist
Complete the following checks:
| Function | Status |
|---|---|
| Display | ✓ |
| Touchscreen | ✓ |
| Front Camera | ✓ |
| Rear Cameras | ✓ |
| Charging | ✓ |
| Speaker | ✓ |
| Microphone | ✓ |
| Wi-Fi | ✓ |
| Bluetooth | ✓ |
| Mobile Signal | ✓ |
| Fingerprint Sensor | ✓ |
| Vibration Motor | ✓ |
| Power Button | ✓ |
| Volume Buttons | ✓ |
Final Cleaning
Before returning the phone:
- Remove fingerprints.
- Clean camera lenses.
- Polish the display.
- Wipe the rear cover.
- Remove adhesive residue.
A spotless device reflects professional workmanship.
Frequently Asked Questions
1. How difficult is an OPPO A79 5G display replacement?
It is considered an intermediate to advanced repair. The device contains delicate ribbon cables, strong adhesive, and tightly packed internal components that require specialised tools and careful handling.
2. Can I replace only the broken glass?
In most cases, no. Professional repair centres typically replace the complete display assembly because separating the glass from the display requires specialised equipment and carries a high risk of damaging the panel.
3. Why should the battery be disconnected first?
Disconnecting the battery prevents accidental short circuits and protects sensitive motherboard components while flex cables are removed or reconnected.
4. Does replacing the display affect water resistance?
Opening the device compromises the factory seal. Using high-quality replacement adhesive helps restore resistance to dust and minor moisture, but it may not fully return the phone to its original factory-rated sealing.
5. How long does a professional display replacement usually take?
An experienced technician can often complete the repair in approximately one to two hours, depending on the extent of the damage and whether any additional components require replacement.
6. What tools are essential for this repair?
The most important tools include:
- Precision screwdriver set
- Plastic opening picks
- Suction cup
- Plastic spudger
- ESD-safe tweezers
- Heat source
- Isopropyl alcohol
- Magnetic project mat
- Replacement adhesive
7. Should I repair the display myself or visit a professional?
If you have limited repair experience, seeking professional assistance is usually the safer option. Experienced technicians have the proper tools, genuine-quality replacement parts, and the expertise to reduce the risk of further damage.
Conclusion

Completing an Advanced Disassembly Of OPPO A79 5G For A Seamless Professional Display Replacement requires far more than simply swapping one screen for another. Every stage—from careful preparation and controlled heating to battery isolation, display installation, and final quality testing—plays a vital role in achieving a reliable, long-lasting repair.
Professional technicians follow structured procedures to protect sensitive internal components, preserve the integrity of the device, and ensure every feature functions correctly before the phone is returned to its owner. Investing time in proper disassembly techniques, using quality tools, and performing comprehensive testing significantly reduces the likelihood of repeat repairs and improves overall customer satisfaction.
Whether you’re a repair enthusiast looking to expand your skills or a smartphone owner wanting to understand what goes into a professional repair, following industry best practices is essential. When precision matters, experience, patience, and attention to detail make all the difference.
David from Sydney CBD Repair Centre – The Best place to fix mobile phones as 7 Years In A Row! Top Mobile Phone Repair In Sydney. More than 2000 Positive Reviews on Google and Same Day Repairs.
We take pride in delivering exceptional repair services for all major phone brands including Apple, Samsung, Google, and more. Our expert technicians use only genuine parts and offer 90 days warranty on repairs. Located in the heart of Sydney CBD, we’re your one-stop solution for all mobile device repairs.
Our commitment to excellence has earned us the trust of thousands of satisfied customers. Whether it’s a cracked screen, battery replacement, or water damage repair, we handle it all with professional care and expertise. Walk in today and experience why we’re Sydney’s #1 choice for mobile phone repairs.
Visit us for:
- ✓ Same Day Express Repairs
- ✓ Genuine Parts Guarantee
- ✓ Professional Technicians
- ✓ Competitive Pricing
- ✓ 2000+ 5-Star Google Reviews
- ✓ 7-Time Award Winner for Best Phone Repairs
Sydney CBD Repair Centre – Where Quality Meets Reliability.
Call: +61 2 8011 4119
Website: https://SydneyCBD.repair/locate-us

