




The Five Most Common Mistakes People Make Replacing A Samsung Galaxy S26 Ultra Screen

The Five Most Common Mistakes People Make Replacing a Samsung Galaxy S26 Ultra Screen – 7 CRITICAL TRAPS TO AVOID!
Introduction
Replacing a premium smartphone display isn’t as simple as removing broken glass and installing a new screen. The Samsung Galaxy S26 Ultra features advanced display technology, delicate internal components, and important functions that must be protected during repairs.
Even a small mistake can turn a straightforward screen replacement into an expensive repair. In this guide, we’ll explore the five most common mistakes people make, along with two additional critical traps that can affect display performance, durability, and everyday usability.
Whether you’re considering a DIY repair or looking for a professional Samsung screen replacement in Sydney, understanding these problems will help you make a smarter decision.
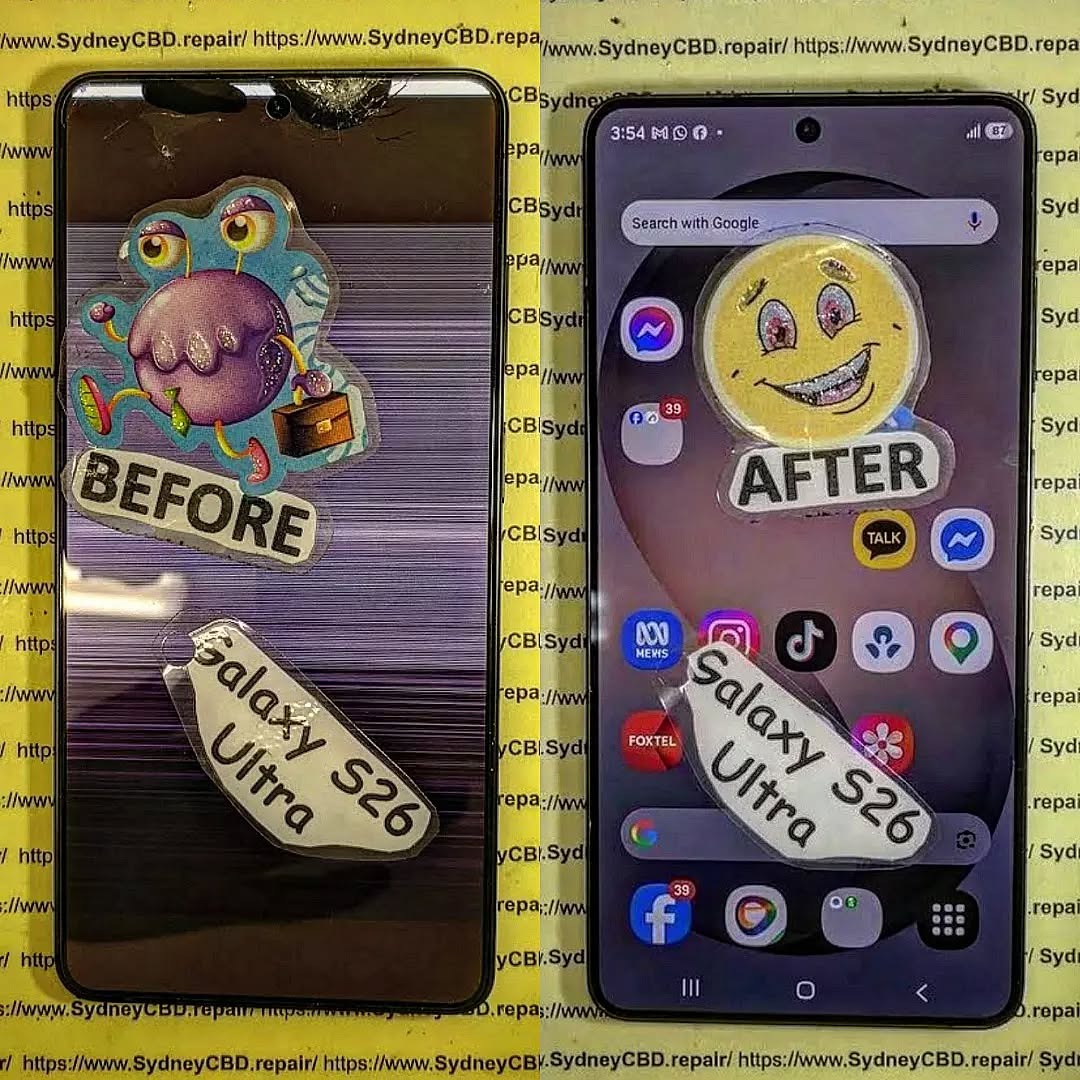
Understanding Why Samsung Galaxy S26 Ultra Screen Replacement Requires Care
The Samsung Galaxy S26 Ultra is a premium smartphone designed for users who expect excellent display quality, smooth performance, and reliable everyday operation. Its large AMOLED display is one of its most important features.
When the screen cracks, develops lines, flickers, or stops responding to touch, replacing the display may seem like the obvious solution.
However, there’s more to the job than installing a new panel.
A modern smartphone contains several delicate components positioned close to the display assembly. These include flexible cables, sensors, connectors, cameras, and other electronic parts. Incorrect handling can damage components that were working perfectly before the repair began.
Why the Display Assembly Is So Important
The display assembly affects several important smartphone functions:
-
Visual quality and colour accuracy.
-
Touchscreen responsiveness.
-
Display brightness and smoothness.
-
Fingerprint recognition.
-
Front sensor operation.
-
Overall device appearance.
-
Structural protection and internal sealing.
A poor-quality replacement can affect more than just the appearance of the phone.
For example, a display that looks acceptable when first installed might develop touch problems, uneven brightness, flickering, or other faults later.
What Makes Premium Samsung Displays Challenging?
Premium Samsung displays use advanced AMOLED technology. These panels are thin, delicate, and designed to deliver excellent image quality.
Unlike older LCD screens, AMOLED displays produce light through individual pixels. This allows deep blacks, strong contrast, and vibrant colours.
However, this technology also requires careful handling.
A technician must understand how to disconnect the original display, protect the internal components, prepare the frame, install the replacement, and test the finished device.
The important lesson is simple: a screen replacement should restore the phone’s functionality, not introduce additional problems.
Mistake 1: Buying Cheap Replacement Screens Without Checking Quality
It’s understandable. Premium Samsung display assemblies can be expensive, and customers naturally want to reduce repair costs.
However, a low price doesn’t always mean good value.
Some inexpensive replacement panels use lower-quality materials, inconsistent manufacturing processes, or components that don’t match the original display’s performance.
Genuine, Service-Pack, and Aftermarket Displays
Before purchasing a replacement, it’s important to understand the differences between display categories.
| Display Type | Potential Advantages | Possible Disadvantages |
|---|---|---|
| Genuine Samsung service-pack display | Designed to meet Samsung specifications | Usually more expensive |
| Quality aftermarket AMOLED | May offer a lower-cost alternative | Quality varies by supplier |
| Refurbished original display | May retain original panel characteristics | Condition and refurbishment quality vary |
| Low-grade replacement | Cheapest upfront price | Greater risk of poor performance |
Not every aftermarket display is automatically bad. Some suppliers produce reliable alternatives.
However, customers should never assume that a screen is genuine simply because an online listing uses words such as “original quality”, “OEM”, or “premium”.
Common Problems With Cheap Screens
An unsuitable replacement screen may cause:
-
Poor colour reproduction.
-
Lower maximum brightness.
-
Uneven screen illumination.
-
Delayed touch response.
-
Inconsistent refresh-rate performance.
-
Premature display failure.
-
Fingerprint recognition difficulties.
These problems can become frustrating because the customer expects the repaired phone to perform like it did before the accident.
How to Avoid This Mistake
Before agreeing to a replacement, ask the repair provider:
-
Is the display a genuine Samsung component?
-
Is it a new or refurbished assembly?
-
Does it support the phone’s original display functions?
-
Is the replacement covered by a warranty?
-
Can the technician test the screen before installation?
A trustworthy repair centre should explain the available options clearly.
Expert tip: Don’t compare replacement screens by price alone. Compare their quality, compatibility, warranty, and expected performance.
Mistake 2: Applying Excessive Heat During Screen Removal
Heat is commonly used during smartphone repairs to soften adhesive.
However, applying too much heat is one of the most dangerous mistakes during display removal.
The screen assembly is attached to the phone using adhesive materials designed to hold the components securely together. Controlled heating can make this adhesive easier to separate.
The problem starts when someone uses excessive temperature or applies heat unevenly.
Why Excessive Heat Is Dangerous
A Samsung Galaxy S26 Ultra contains delicate electronic components.
Uncontrolled heat can potentially damage:
-
Display layers.
-
Flexible ribbon cables.
-
Battery components.
-
Internal adhesives.
-
Nearby sensors.
-
Plastic and insulating materials.
Even if the screen is already broken, the technician must protect everything underneath it.
The Danger of DIY Heating Methods
Some inexperienced repairers use household hair dryers or heat guns without understanding how quickly temperatures can rise.
This can create several problems.
Uneven heating: One section may become significantly hotter than another.
Excessive temperature: Sensitive components may be exposed to damaging heat.
Poor separation technique: Applying force before the adhesive has softened can crack the frame or damage internal connections.
Battery safety concerns: Heat applied near a damaged or swollen battery can create additional risks.
How Professionals Reduce Heat-Related Risks
Professional technicians use controlled heating equipment and appropriate separation tools.
A careful procedure includes:
-
Inspecting the device before starting.
-
Checking for battery swelling or other safety concerns.
-
Applying controlled heat where required.
-
Separating the display gradually.
-
Avoiding unnecessary pressure.
-
Protecting nearby cables and components.
Why Patience Matters
Removing a broken display isn’t a race.
A technician who rushes the process may save a few minutes but create a much more expensive problem.
The correct approach is to work slowly, monitor the device, and use suitable tools.
Remember: Heat should make the repair easier, not create additional damage.
Mistake 3: Damaging Internal Flex Cables and Connectors
Another common mistake is overlooking the delicate internal connections during screen replacement.
Modern smartphones use flexible ribbon cables to connect different components to the motherboard.
These cables are thin and can be damaged if they are pulled, bent, twisted, or disconnected incorrectly.
What Are Flex Cables?
Flex cables are flexible electronic connectors that carry power and data between different smartphone components.
Depending on the device’s internal design, display-related connections may include:
-
Display signal connections.
-
Touchscreen connections.
-
Sensor connections.
-
Front camera connections.
-
Other supporting component connections.
A technician must identify each connector before removing or reinstalling components.
Common Connector Mistakes
1. Pulling cables instead of releasing connectors
Some connectors have small clips or pressure-fit connections. Pulling the cable directly can damage the connector or tear the ribbon.
2. Using metal tools incorrectly
Metal tools can cause accidental short circuits if used carelessly around powered electronic components.
3. Bending ribbon cables sharply
Flex cables are designed to bend within certain limits. Sharp folds can damage internal conductive tracks.
4. Reconnecting components incorrectly
A connector that isn’t properly seated may cause intermittent operation or prevent a component from working.
How to Prevent Internal Damage
A professional repair process should include:
-
Safe device shutdown.
-
Appropriate battery isolation.
-
Inspection of connectors.
-
Use of suitable non-conductive tools where appropriate.
-
Gentle removal of flexible cables.
-
Careful connector alignment.
-
Inspection before final assembly.
What Happens When a Flex Cable Is Damaged?
The symptoms depend on the affected component.
| Possible Damage | Potential Symptom |
|---|---|
| Display connection | Black screen or no image |
| Touch connection | Unresponsive touchscreen |
| Sensor connection | Sensor malfunction |
| Camera connection | Camera failure |
| Damaged connector | Intermittent operation |
This is why a screen replacement requires more than basic mechanical skills.
The technician must understand the phone’s internal construction and recognise when a problem is related to the display or another component.
Mistake 4: Removing Old Adhesive Incorrectly and Damaging the Frame
Many people focus entirely on the replacement display and forget that the phone’s frame is equally important.
After removing a broken screen, old adhesive may remain around the display mounting area.
If this adhesive isn’t removed correctly, the replacement display may not sit evenly.
Why Adhesive Preparation Matters
The frame provides the foundation for the new display.
If the mounting surface is uneven, the replacement screen may experience:
-
Uneven pressure.
-
Poor alignment.
-
Small gaps.
-
Adhesive failure.
-
Increased dust exposure.
-
Stress around display edges.
These problems may not be obvious immediately after the repair.
However, they can become noticeable during everyday use.
Common Adhesive Removal Mistakes
Using sharp metal objects: These can scratch the frame or damage nearby components.
Leaving old adhesive behind: Remaining adhesive can prevent the replacement panel from sitting correctly.
Using unsuitable cleaning chemicals: Certain solvents may damage coatings, plastics, or internal materials.
Applying too much adhesive: Excess adhesive can spread into areas where it doesn’t belong.
The Correct Preparation Process
A careful technician should:
-
Remove the broken display.
-
Inspect the frame for bends and damage.
-
Remove remaining adhesive carefully.
-
Clean the mounting surface using suitable materials.
-
Check alignment and mounting points.
-
Apply the correct replacement adhesive.
-
Install the display without unnecessary pressure.
What If the Frame Is Bent?
A bent frame can make a successful display installation difficult.
Even a high-quality replacement panel may not sit correctly if the phone’s structure is damaged.
For this reason, technicians should inspect the frame before recommending a replacement.
Expert tip: A new display cannot compensate for a damaged mounting frame. Both components must be suitable for a reliable repair.
Mistake 5: Skipping Final Testing After Screen Installation
This is one of the most overlooked mistakes in smartphone repairs.
Some repairers install the replacement display, turn on the phone, see an image, and assume the job is finished.
Unfortunately, seeing the Samsung logo doesn’t prove that every function works correctly.
A replacement screen must be tested thoroughly before the repair is considered complete.
Important Display Functions to Test
A professional inspection should cover the following:
| Function | What to Check |
|---|---|
| Display image | No unexpected lines, flickering, or black areas |
| Touchscreen | Accurate response across the entire panel |
| Brightness | Smooth adjustment and consistent visibility |
| Colours | No unusual tinting or colour distortion |
| Refresh rate | Smooth scrolling and supported operation |
| Fingerprint sensor | Successful recognition and enrolment |
| Front sensors | Normal operation where applicable |
| Display connection | Stable operation without intermittent faults |
Why Touchscreen Testing Is Essential
A screen may display images perfectly but still have touch problems.
For example, the centre of the display may work while one edge remains unresponsive.
This can affect:
-
Typing messages.
-
Scrolling through websites.
-
Using the keyboard.
-
Playing games.
-
Opening applications.
-
Navigating menus.
A full touchscreen test helps identify these issues before the customer receives the phone.
Check for Display Flickering
Flickering can result from several issues, including an unsuitable replacement panel, connector problems, or display-related faults.
The technician should inspect the display at different brightness settings and check for unexpected behaviour.
Test the Phone Before Closing It
Whenever practical, essential testing should happen before the device is permanently sealed.
This gives the technician an opportunity to correct installation problems without repeating unnecessary disassembly.
The golden rule: A screen replacement isn’t finished until the display and related functions have been checked.
Mistake 6: Ignoring Fingerprint Sensor Compatibility and Calibration
The fingerprint sensor is another important feature that can be affected by an incorrect screen replacement.
Samsung’s premium Galaxy smartphones use under-display fingerprint technology. This system allows users to unlock their phones by placing a finger on the designated area of the display.
However, replacing the screen can affect fingerprint recognition if the replacement panel isn’t compatible or the installation isn’t completed correctly.
Why Fingerprint Recognition Can Stop Working
The fingerprint system relies on several factors working together.
These include:
-
Compatible display construction.
-
Correct sensor positioning.
-
Proper installation.
-
Suitable screen thickness and materials.
-
Clean sensor contact area.
-
Software and calibration requirements, where applicable.
If one of these factors isn’t right, fingerprint recognition may become unreliable.
Common Fingerprint Sensor Problems
After a poor-quality display replacement, users may experience:
-
Fingerprint recognition taking longer than usual.
-
Failed fingerprint readings.
-
Difficulty registering new fingerprints.
-
Inconsistent unlocking.
-
Reduced recognition accuracy.
It’s important to understand that not every fingerprint problem is caused by the display. A damaged sensor, connector issue, software problem, or incorrect installation can also be responsible.
How to Avoid Fingerprint Sensor Problems
Before choosing a replacement screen, ask whether it supports the phone’s fingerprint technology.
After installation, the technician should:
-
Inspect the fingerprint sensor area.
-
Check that the relevant connections are secure.
-
Follow applicable manufacturer repair procedures.
-
Test fingerprint enrolment.
-
Test unlocking several times.
-
Investigate any inconsistent readings.
Customers should also be advised to re-register fingerprints if the replacement or repair procedure requires it.
Why This Mistake Can Be Expensive
Many people buy a premium smartphone because they value convenience and security.
Having to enter a PIN every time because the fingerprint sensor no longer works can quickly become frustrating.
That’s why biometric functionality should be included in the repair checklist rather than treated as an optional extra.
Mistake 7: Using Incorrect Adhesive and Ignoring Proper Sealing
The final critical mistake is using unsuitable adhesive or failing to restore the phone’s original sealing as closely as possible.
A smartphone’s display isn’t simply held in place for appearance. Its adhesive also contributes to the device’s structural assembly and resistance to dust and moisture.
When the original screen is removed, the factory adhesive seal is disturbed.
Installing a new display without proper preparation can leave gaps around the edges.
Why Incorrect Adhesive Creates Problems
The wrong adhesive may result in:
-
Poor screen attachment.
-
Uneven display positioning.
-
Visible gaps.
-
Adhesive separation over time.
-
Dust entering the device.
-
Reduced resistance to moisture.
Excess adhesive can also create problems if it spreads into sensitive areas.
Does a Repaired Samsung Phone Remain Waterproof?
This is an important question.
A phone’s original water-resistance rating shouldn’t automatically be assumed to remain unchanged after a screen replacement.
The repair process can disturb factory seals, and the final result depends on the quality of the replacement materials, installation, and any testing performed.
Even when new adhesive is installed, that alone doesn’t prove the device has recovered its original water resistance.
How Professionals Handle Screen Sealing
A suitable process includes:
-
Removing old adhesive residue.
-
Inspecting the frame for damage.
-
Selecting compatible replacement adhesive.
-
Preparing the mounting surface.
-
Positioning the replacement display correctly.
-
Applying appropriate, even pressure.
-
Allowing the adhesive to settle according to its requirements.
-
Performing suitable sealing checks when available.
Why Pressure Testing Matters
Some professional repair environments use specialised equipment to check the integrity of a device’s seals.
However, customers should ask what testing was actually performed.
A visual inspection isn’t the same as a pressure test.
Likewise, passing a particular test doesn’t mean the phone is guaranteed to be waterproof under every condition.
Important advice: After a display replacement, avoid deliberately exposing the phone to water unless its sealing performance has been properly assessed and the repair provider has explained the limitations.
DIY Versus Professional Samsung Galaxy S26 Ultra Screen Replacement
When a premium Samsung smartphone screen breaks, owners usually consider two options: replacing it themselves or taking it to a professional repair centre.
Both options have advantages and disadvantages.
However, the best choice depends on your technical experience, available tools, replacement screen quality, and willingness to accept repair risks.
Understanding DIY Screen Replacement
DIY repairs can look attractive because online videos make the process appear straightforward.
You can find tutorials showing how to heat the phone, remove the broken display, disconnect cables, and install a replacement.
But watching a repair video isn’t the same as having practical experience.
Advantages of DIY Repair
-
You control the repair process.
-
You can learn about smartphone construction.
-
You may save on labour costs.
-
You can choose your preferred replacement component.
Disadvantages of DIY Repair
-
Specialised tools may be expensive.
-
Incorrect heating can damage internal components.
-
Delicate cables can tear.
-
Replacement displays may be incompatible.
-
Adhesive installation can be difficult.
-
Repair mistakes may increase the final cost.
For a premium device, one small mistake can quickly remove any money saved through DIY work.
Why Professional Repair Is Often the Safer Option
Professional technicians have experience handling different smartphone models and display assemblies.
They also have access to specialised equipment and repair materials.
A qualified repair provider should be able to inspect the device, explain the available display options, and identify any additional damage.
Professional Repair Advantages
| Repair Area | Professional Advantage |
|---|---|
| Diagnosis | Identifies display and internal damage |
| Equipment | Access to suitable repair tools |
| Screen selection | Can explain component quality |
| Installation | Experienced handling of delicate parts |
| Testing | Checks touchscreen and related functions |
| Warranty | May offer a written repair warranty |
| Sealing | Uses appropriate replacement adhesive |
Which Option Should You Choose?
If you’ve never repaired a premium smartphone before, professional assistance is generally the more sensible option.
DIY repairs may be suitable for experienced technicians with the correct tools, reliable parts, and access to proper repair information.
However, if you depend on your phone for work, communication, banking, or everyday activities, reliability should be a priority.
Preparing Your Samsung Galaxy S26 Ultra Before a Screen Replacement
A little preparation can make the repair process easier and help protect your information.
Before taking your device to a repair centre, consider these important steps.
1. Back Up Your Important Data
A display replacement doesn’t normally require deleting personal information. However, unexpected problems can occur during any hardware repair.
Back up important items such as:
-
Photos and videos.
-
Contacts.
-
Documents.
-
Messages.
-
Important application data.
-
Work-related information.
Samsung offers backup options through its official support resources.
Visit Samsung Australia Support for relevant device support information.
2. Record Existing Damage
Take photographs of your phone before handing it over.
This helps document:
-
Cracked glass.
-
Scratches.
-
Frame dents.
-
Camera damage.
-
Existing gaps.
-
Other visible problems.
This is particularly useful if the phone has suffered a significant impact.
3. Describe the Screen Symptoms
Don’t simply tell the technician that the screen is broken.
Explain exactly what happened.
For example:
-
The display is completely black.
-
Green or pink lines appeared.
-
The touchscreen works only in certain areas.
-
The screen flickers.
-
The display has black patches.
-
The glass is cracked but the image remains visible.
These details help the technician understand the problem.
4. Ask About Replacement Options
Before approving the repair, request information about the display being installed.
Ask about its quality, warranty, availability, and compatibility.
A clear explanation helps prevent misunderstandings.
5. Discuss Security and Privacy
Follow the repair provider’s instructions regarding device access.
Back up your data, understand any diagnostic requirements, and avoid sharing passwords unnecessarily. If a repair requires unlocking the device for testing, discuss a suitable privacy-conscious procedure.
What Happens During a Professional Samsung Display Replacement?
Understanding the repair process helps customers recognise why professional installation requires time and attention.
Although procedures vary according to the device’s construction and the replacement component, a careful repair generally follows several stages.
Stage 1: Initial Inspection
The technician examines the phone’s external condition.
This includes checking the display, frame, cameras, buttons, and other visible components.
The technician may also ask about the accident that caused the damage.
Stage 2: Diagnosis
The next step is determining whether the problem is limited to the display.
A cracked screen can sometimes hide additional damage.
For example, a strong impact may affect internal connectors or other components.
Stage 3: Safe Disassembly
The phone is opened using suitable repair equipment and procedures.
The technician must carefully manage heat, adhesive, connectors, and internal components.
Battery safety is also important during this stage.
Stage 4: Display Removal
The damaged display assembly is separated from the frame.
Old adhesive is removed, and the mounting area is inspected.
If the frame is bent or damaged, further work may be necessary.
Stage 5: Replacement Display Installation
The replacement assembly is checked for compatibility and visible defects.
The technician then connects and positions the new display carefully.
Stage 6: Functional Testing
Before completing the assembly, the technician checks the display and relevant functions.
This may include image quality, touch response, brightness, fingerprint recognition, and other applicable features.
Stage 7: Final Assembly
The mounting surface is prepared, suitable adhesive is applied, and the display is secured.
The phone is then inspected for alignment, gaps, and general appearance.
Stage 8: Final Quality Inspection
The completed device should undergo another functional inspection.
The customer should receive information about the work completed, warranty conditions, and any limitations relating to water resistance.
Warning Signs of a Poor Samsung Screen Replacement
Not all screen replacements deliver the same results.
Knowing what to look for can help you identify problems early.
1. Unusual Display Colours
If the replacement screen has an unexpected colour tint, poor contrast, or uneven brightness, it may indicate a display quality or installation issue.
2. Touchscreen Dead Zones
If parts of the display don’t respond to touch, the screen should be inspected.
3. Visible Gaps Around the Edges
A replacement screen should sit correctly within the frame.
Visible gaps may indicate poor alignment, incorrect adhesive, or structural damage.
4. Fingerprint Recognition Problems
If fingerprint recognition becomes unreliable after the repair, the sensor and display compatibility should be checked.
5. Random Flickering
Unexpected flickering can indicate a display defect, connector problem, or another underlying fault.
6. Screen Lifting
If the display begins separating from the frame, the adhesive installation or frame condition may be responsible.
Don’t press the display back into place yourself. Have it inspected.
7. Unexpected Battery or Heating Problems
If the phone becomes unusually hot or develops battery problems after repair, stop using it if there are signs of battery damage and seek professional assessment.
Samsung Galaxy S26 Ultra Screen Replacement Cost: What Affects the Price?
The cost of replacing a premium Samsung display can vary considerably.
There isn’t one universal price that applies to every repair.
Several factors influence the final quotation.
| Cost Factor | How It Affects the Price |
|---|---|
| Display quality | Genuine and alternative components have different prices |
| Damage severity | Additional internal damage may require more work |
| Frame condition | Frame-related repairs can increase costs |
| Component availability | Stock and supplier availability affect pricing |
| Labour | Repair complexity influences labour costs |
| Warranty | Warranty coverage may affect the service package |
Is Replacing the Screen Worth It?
In many situations, yes.
A screen replacement may be more economical than purchasing another premium smartphone.
However, the decision should consider the total repair cost and the phone’s overall condition.
If the motherboard, cameras, battery, and other components remain in good condition, repairing the display may be a sensible investment.
On the other hand, if the device has extensive internal damage, comparing the repair quotation with the cost of upgrading may be worthwhile.
How to Avoid Paying Twice
The cheapest repair isn’t necessarily the most affordable in the long run.
A replacement display that fails shortly after installation can lead to another repair bill.
Before choosing a repair provider, compare:
-
Component quality.
-
Total quoted price.
-
Warranty duration.
-
Repair experience.
-
Testing procedures.
-
Customer reviews.
A transparent quotation helps you understand what you’re paying for.
Frequently Asked Questions About Samsung Galaxy S26 Ultra Screen Replacement
1. Is it worth replacing a cracked Samsung Galaxy S26 Ultra screen?
Yes, replacing a cracked screen can be worthwhile if the rest of the phone is in good working condition. A professional replacement can restore display visibility and touchscreen functionality without requiring you to purchase another expensive smartphone. Compare the repair quotation with the cost of upgrading before making your decision.
2. Can I replace my Samsung Galaxy S26 Ultra screen myself?
DIY replacement is possible for people with suitable technical experience, specialised tools, and compatible replacement components. However, the process involves delicate connectors, adhesive removal, and careful display installation. Inexperienced repairs can cause additional damage, so professional assistance is generally recommended.
3. Will a replacement screen affect fingerprint recognition?
It can. An incompatible display, incorrect installation, or damaged fingerprint sensor can affect recognition. The replacement must support the phone’s fingerprint technology, and the technician should test fingerprint enrolment and unlocking after installation.
4. How long does a Samsung Galaxy S26 Ultra screen replacement take?
Repair time depends on component availability, the extent of the damage, and the repair centre’s workload. Straightforward display replacements may be completed on the same day when suitable parts and technicians are available. Additional internal damage can increase the turnaround time.
5. Are aftermarket Samsung replacement screens reliable?
Some aftermarket displays offer acceptable performance, but quality varies between manufacturers and suppliers. Customers should check compatibility, display specifications, warranty coverage, and the repair provider’s reputation before choosing an aftermarket component.
6. Will my Samsung phone remain waterproof after screen replacement?
The phone’s original water-resistance performance shouldn’t be assumed to remain unchanged after a screen replacement. Opening the device disturbs its factory adhesive seals. Proper replacement adhesive and suitable testing can help assess sealing, but they don’t guarantee the original water-resistance rating.
7. What should I do if my replacement screen starts flickering?
Stop using the device if the flickering is accompanied by unusual heat, a burning smell, or other signs of electrical damage. Otherwise, arrange an inspection with a qualified technician. Possible causes include a defective display, connector problems, or other internal faults.
8. Can a screen replacement fix green lines and black spots?
It can if the problem originates from physical damage to the display panel. However, similar symptoms may sometimes be associated with internal connection or electronic faults. Proper diagnosis is important before replacing components.
9. Should I choose a genuine Samsung display or a cheaper replacement?
A genuine Samsung service-pack display is generally the preferred option when original specifications and component compatibility are priorities. However, a reputable alternative may suit customers with a tighter budget. Ask about the exact component being supplied rather than relying on marketing descriptions.
10. Does Sydney CBD Repair Centre offer Samsung screen repairs?
Sydney CBD Repair Centre provides mobile phone repair services for major brands, including Samsung. Customers can contact the repair centre to discuss their device’s damage, replacement options, component availability, pricing, and repair warranty.
Conclusion: Avoid These Seven Mistakes and Protect Your Samsung Investment

Replacing a premium smartphone display requires experience, patience, and the correct equipment.
The Samsung Galaxy S26 Ultra is an advanced device, and its display replacement process involves much more than removing broken glass and attaching a new panel.
As we’ve explored, seven common mistakes can create expensive problems:
-
Buying cheap replacement screens without checking quality.
-
Applying excessive heat during screen removal.
-
Damaging internal flex cables and connectors.
-
Removing adhesive incorrectly and damaging the frame.
-
Skipping final testing after installation.
-
Ignoring fingerprint sensor compatibility and calibration.
-
Using incorrect adhesive and ignoring proper sealing.
Avoiding these mistakes can make a significant difference to the quality and reliability of your repair.
The most important step is choosing a repair provider that understands premium Samsung smartphones and follows a careful repair and testing process.
Don’t risk an expensive device by choosing a replacement based on price alone. Ask questions, compare component quality, check warranty conditions, and make sure the finished phone is properly tested.
If your Samsung Galaxy S26 Ultra has a cracked display, black screen, flickering panel, or touchscreen problem, professional diagnosis can help you understand the best repair option.
For dependable Samsung screen repairs in Sydney CBD, contact Sydney CBD Repair Centre and speak with an experienced technician.
David from Sydney CBD Repair Centre – The Best place to fix mobile phones as 7 Years In A Row! Top Mobile Phone Repair In Sydney. More than 2000 Positive Reviews on Google and Same Day Repairs.
We take pride in delivering exceptional repair services for all major phone brands including Apple, Samsung, Google, and more. Our expert technicians use only genuine parts and offer 90days warranty on repairs. Located in the heart of Sydney CBD, we’re your one-stop solution for all mobile device repairs.
Our commitment to excellence has earned us the trust of thousands of satisfied customers. Whether it’s a cracked screen, battery replacement, or water damage repair, we handle it all with professional care and expertise. Walk in today and experience why we’re Sydney’s #1 choice for mobile phone repairs.
Visit us for:
✓ Same Day Express Repairs
✓ Genuine Parts Guarantee
✓ Professional Technicians
✓ Competitive Pricing
✓ 2000+ 5-Star Google Reviews
✓ 7-Time Award Winner for Best Phone Repairs
Sydney CBD Repair Centre – Where Quality Meets Reliability.
Call: +61280114119
Website: https://SydneyCBD.repair/locate-us

