




Nokia G21 Cracked LCD Screen Replacement And Frame Separation Guide

Nokia G21 Cracked LCD Screen Replacement And Frame Separation Guide: 7 Powerful Repair Tips
Introduction
The Nokia G21 cracked LCD screen replacement process requires patience, the correct replacement assembly, suitable tools, and careful handling of the phone’s internal components. A cracked display doesn’t always mean the entire phone is beyond repair. In many cases, a damaged Nokia G21 can be restored by replacing the screen assembly and, when necessary, addressing damage or separation around the frame.
The Nokia G21 features a 6.5-inch display with a 1600 × 720 resolution and an adaptive refresh rate of up to 90 Hz. It also uses a polycarbonate rear panel, while the power/lock button incorporates the fingerprint sensor. These details matter during repair because the display, frame, buttons, connectors, and internal components all need to be protected during disassembly.
If your Nokia G21 has been dropped, sat on, or hit against a hard surface, you may see anything from a small glass crack to complete display failure. The good news is that understanding the type of damage makes it much easier to decide whether you need a screen replacement, frame repair, or a more extensive inspection.
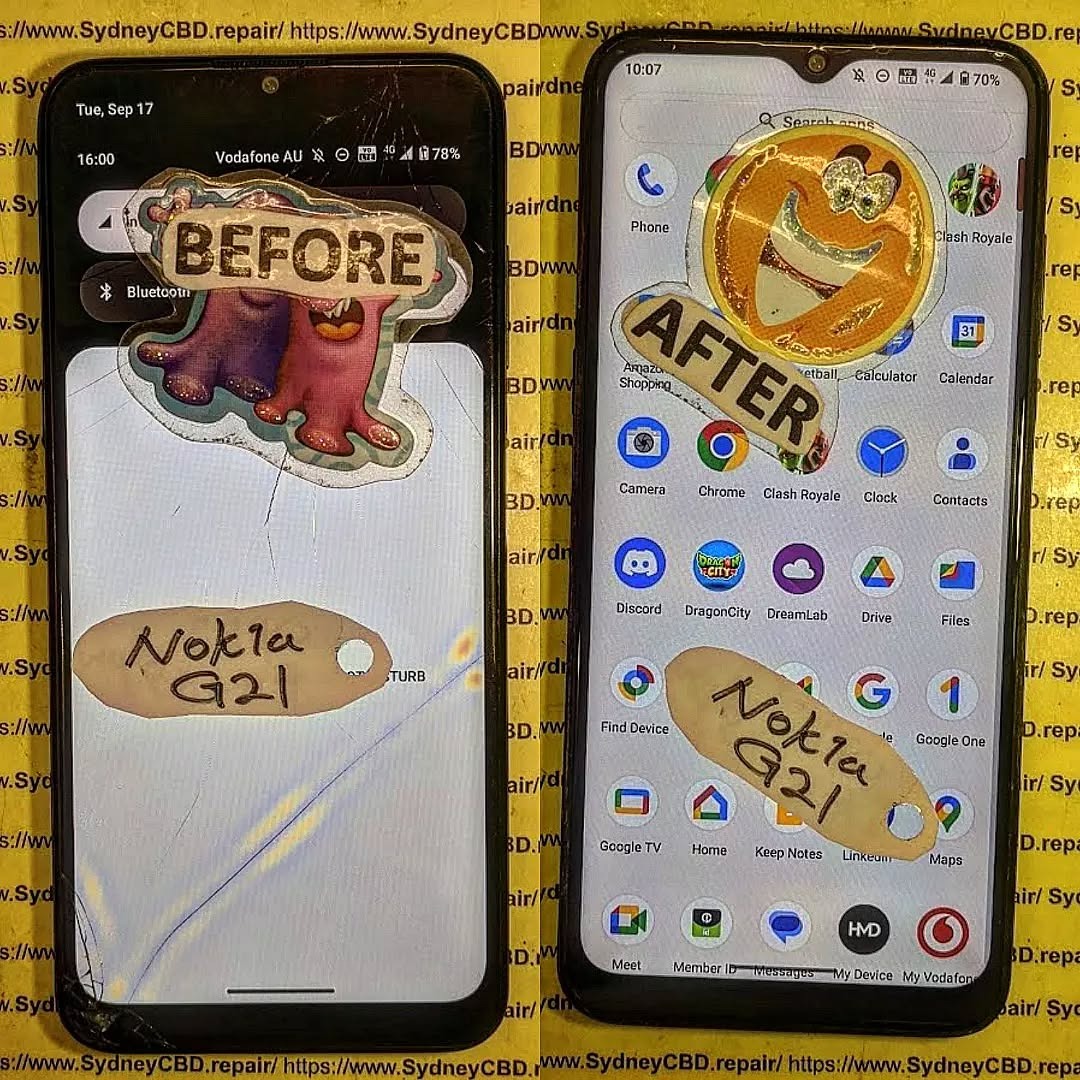
Nokia G21 Screen Damage: What Actually Needs Replacing?
Before reaching for a repair kit, it’s important to understand the difference between cover glass damage, LCD damage, and frame damage.
A crack limited to the outer glass may leave the image and touch functionality working normally. However, if the display has black spots, coloured lines, flickering, bleeding, dead areas, or no image at all, the display assembly itself may be damaged.
Frame separation adds another complication. A strong impact can deform the chassis or cause the display assembly to lift away from its mounting surface. In that situation, simply installing a new screen may not produce a durable repair.
Common Nokia G21 Screen Problems
| Damage type | Typical symptoms | Likely repair |
|---|---|---|
| Front glass crack | Visible cracks but normal image | Screen assembly or glass repair |
| LCD damage | Black spots, lines, bleeding or no image | LCD/display assembly replacement |
| Touch failure | Image works but touch doesn’t respond | Display assembly inspection/replacement |
| Frame separation | Screen or housing lifting away | Frame/chassis inspection and reseating |
| Bent frame | Uneven housing or display gap | Frame replacement or specialist repair |
| Connector damage | Intermittent or missing display | Connector/internal inspection |
| Severe impact | Screen plus housing damage | Full diagnostic assessment |
The Nokia G21’s official documentation identifies several model variants, including TA-1404, TA-1405, TA-1412, TA-1415 and TA-1418. Checking the exact model before ordering a replacement component is therefore a sensible first step.
1. Diagnose the Nokia G21 Before Opening It
A proper diagnosis can save you from replacing a perfectly functional component.
If the phone still powers on, begin by checking whether you can see the Nokia logo, lock screen, or Android interface. Next, test touch response across the entire display.
Look carefully for:
- Black or completely dark sections.
- Vertical or horizontal lines.
- Flickering.
- Bright spots.
- Ink-like LCD bleeding.
- Ghost touches.
- Areas where touch doesn’t respond.
- A screen that is lifting from the frame.
- A housing that has become visibly bent.
- Gaps between the screen and chassis.
If the display works perfectly except for cracked glass, the situation is different from a phone with a completely dead screen.
Why Diagnosis Matters
It’s tempting to assume that every cracked screen needs the same repair. That’s not necessarily the case.
For example, a phone may have a cracked screen but an undamaged frame. Another device may look similar from the front but have a badly distorted chassis underneath. Installing a replacement display onto a distorted frame can create pressure points and may result in another broken screen.
That’s why frame condition should be checked before final installation.
2. Back Up Your Data Before Screen Replacement
If the Nokia G21 still works, back up important information before beginning the repair.
Ideally, transfer:
- Photos and videos.
- Contacts.
- Important documents.
- WhatsApp or other messaging backups.
- Authentication information.
- Notes.
- Important application data.
A screen repair usually doesn’t require deleting the phone’s data. Nevertheless, accidents can happen during any hardware repair. A damaged connector, unexpected power problem, or additional impact could leave the device unusable.
Backing up first is a simple bit of housekeeping that can prevent a major headache later.
3. Prepare the Correct Tools and Replacement Parts
A successful Nokia G21 screen replacement starts before the phone is opened.
Typical repair equipment may include:
- Replacement Nokia G21 display assembly.
- Precision screwdriver set.
- Plastic opening picks.
- Plastic spudger.
- Suction tool where appropriate.
- Tweezers.
- Heat source designed for electronics repair.
- Cleaning materials suitable for electronic assemblies.
- Replacement adhesive.
- ESD-safe work equipment.
- Soft protective work mat.
Avoid using excessive heat. The objective is to soften adhesive, not cook the internal components.
It’s also important to avoid metal tools around exposed connectors and sensitive circuitry whenever possible. A plastic opening tool is generally safer for separating components.
Choosing the Replacement Screen

Replacement screens can differ in quality.
Before purchasing, verify:
- The replacement is specifically compatible with the Nokia G21.
- The connector configuration matches the original.
- The assembly is intended for the correct model variant.
- The display has been inspected or tested.
- The seller provides appropriate information about the part.
- The replacement doesn’t have visible damage.
- The frame dimensions and mounting points match the original assembly.
HMD’s repair information explains that official self-repair programs and parts are available for certain HMD devices through designated partners, while not every Nokia model has the same self-repair support. The company’s current self-repair information specifically highlights devices such as the Nokia G22 and Nokia G42 5G rather than listing the G21 as one of its designated self-repair models.
That distinction is worth remembering if you’re looking for official repair documentation.
4. Safely Open the Nokia G21
Opening the phone is one of the stages where rushing can turn a straightforward repair into a complicated one.
Before opening the device:
- Power it down completely.
- Remove any SIM or memory card tray as appropriate.
- Work on a clean, well-lit surface.
- Keep screws organised.
- Photograph cable positions before disconnecting them.
- Avoid pulling on flex cables.
- Don’t force a component that refuses to move.
A teardown of the Nokia G21 screen assembly demonstrates a sequence involving removal of the rear panel, removal of the middle frame, battery disconnection, disconnection of flex cables, and removal of the screen from the case.
This highlights an important point: screen replacement isn’t simply a matter of prying the cracked display from the front and snapping another one into place.
Why Battery Disconnection Matters
Once the phone is opened, the battery should be treated as a critical component.
Disconnecting power before manipulating display connectors helps reduce the risk of electrical damage. Never puncture, bend, crush, or excessively heat a lithium-ion battery.
If the battery is swollen, leaking, badly dented, or producing unusual heat, stop the repair and have the device handled by a qualified technician.
5. Nokia G21 Cracked LCD Screen Removal
Once the phone is safely opened and powered down, the damaged display can be separated from the chassis.
The adhesive holding the screen needs to be loosened carefully. Controlled heat may help soften adhesive, but temperature and application time must be managed carefully.
Work Around the Display Edge
Insert a suitable plastic opening tool gradually around the perimeter.
Don’t push the tool too deeply.
Behind the display are delicate components and flex connections. Excessive pressure can damage something that wasn’t broken in the original accident.
Work slowly around the perimeter rather than trying to lift the display in one large movement.
Disconnect the Display Flex
Once the screen is sufficiently separated, locate the display connector.
The connector should be released carefully using an appropriate plastic tool. Never yank the display cable.
The general principle used in professional phone repair is simple: disconnect connectors by lifting the connector itself, not by pulling on the cable.
Modern HMD repair documentation for other models similarly stresses careful handling of display connectors and recommends using a plastic tool to disconnect them.
After the damaged screen has been removed, inspect the phone before installing anything.
6. Inspect the Frame for Separation or Bending
This is one of the most important stages of the entire repair.
A replacement screen won’t sit correctly if the underlying frame is damaged.
Look at the chassis from several angles. Check whether:
- The frame is twisted.
- One corner is higher than another.
- The display mounting surface is uneven.
- Adhesive residue is preventing proper seating.
- Clips or mounting points are damaged.
- The screen gap changes around the perimeter.
- The phone has a visible bow or bend.
- The replacement display rocks when placed into position.
What Is Frame Separation?
Frame separation occurs when the display or housing no longer sits securely against its intended mounting surface.
Sometimes this happens because the original adhesive has failed. Other times, an impact has bent the frame.
If the frame itself is distorted, simply adding more adhesive isn’t a proper solution.
More adhesive can actually hide the underlying problem while putting additional stress on the new display.
When the Frame Should Be Replaced
A severely bent or cracked frame may need replacement rather than straightening.
Trying to force a badly distorted metal or plastic structure back into shape can cause further damage. The correct solution depends on the extent and location of the damage.
A technician should also inspect whether the impact has affected internal components.
7. Clean and Prepare the Mounting Surface
Before fitting a new display, remove old adhesive and loose debris.
The mounting surface should be:
- Clean.
- Dry.
- Flat.
- Free of broken glass.
- Free of loose adhesive.
- Free of dust.
Don’t scrape aggressively against delicate components.
This stage may seem boring, but it’s one of those little jobs that makes a big difference. A clean mounting surface helps the new screen sit evenly and reduces the possibility of pressure points.
8. Test the Replacement Display Before Final Installation
Never rush straight into permanent installation.
If practical for the replacement part and repair procedure, connect the replacement display temporarily and perform a functional test before final bonding.
Check:
- Display brightness.
- Touch response.
- Screen uniformity.
- Dead pixels or unusual areas.
- Colour consistency.
- Front camera clearance.
- Proximity-related functionality where applicable.
- Fingerprint functionality.
- Power and volume buttons.
- Charging.
- General phone operation.
Testing before final installation gives you a much easier opportunity to identify a defective replacement component.
If the replacement doesn’t work, don’t immediately assume the part is faulty. Recheck the connector, cable seating, battery connection, and surrounding components.
9. Install the Replacement Screen Carefully
Once the replacement display has passed testing, prepare it for final installation.
Remove protective films only when appropriate and keep dust away from adhesive surfaces.
Position the display carefully so that:
- The edges align with the frame.
- The connector reaches its intended location.
- The camera opening is correctly positioned.
- The display isn’t sitting on debris.
- No flex cable is trapped underneath the assembly.
The display should sit naturally within the frame rather than requiring significant force.
HMD repair documentation for other models demonstrates the same basic principle: the display cable must pass through its intended opening, the screen needs to be seated flush with the frame, and the assembly should be secured without forcing it. (HMD – Human Mobile Devices)
10. Avoid Excessive Adhesive
More adhesive isn’t necessarily better.
Too much adhesive can:
- Enter unwanted areas.
- Make future repairs harder.
- Create uneven pressure.
- Prevent the screen from sitting flat.
- Interfere with buttons or other components.
Use the appropriate adhesive solution for the replacement assembly and follow the part manufacturer’s instructions.
A professional repair should look clean both inside and outside the device.
11. Reassemble the Nokia G21
After the screen is properly seated, reassemble the phone in the reverse order of disassembly.
Reconnect the required components carefully.
Before closing the phone completely, perform another functional check.
Test:
- Display.
- Touch.
- Power button.
- Volume controls.
- Fingerprint sensor.
- Front camera.
- Rear cameras.
- Speaker.
- Microphone.
- USB-C charging.
- Headphone connection if applicable.
- SIM detection.
- Wi-Fi and Bluetooth.
- Mobile network connectivity.
The Nokia G21 user guide confirms the presence of the USB connector, headset connector, cameras, volume keys, power/lock key and fingerprint sensor, making these useful components to verify after a screen repair.
12. Common Mistakes During Nokia G21 Screen Replacement
Even experienced DIY repairers can make mistakes.
Using Too Much Heat
Heat can soften adhesive, but excessive heat can damage internal components or the battery.
Using a Metal Pry Tool
A metal tool can scratch components, damage connectors, or create electrical shorts.
Pulling the Screen Too Quickly
The display cable may still be connected.
Ignoring Frame Damage
A new screen mounted onto a damaged frame may not last.
Skipping the Pre-Installation Test
If the replacement screen is faulty, discovering the problem after permanent installation creates unnecessary work.
Forgetting Small Screws
Different screws can have different lengths and positions. Keep them organised.
Reusing Damaged Adhesive
Old adhesive may not provide the support required for the new display.
13. Professional Nokia G21 Screen Repair vs DIY Repair
DIY repair can look attractive because it may reduce labour costs. However, the actual difficulty depends heavily on your experience and the condition of the phone.
A professional repair is particularly useful when:
- The phone has severe impact damage.
- The frame is bent.
- The display is completely dead.
- The phone has suffered liquid exposure.
- The battery appears damaged.
- Connectors are damaged.
- You don’t have appropriate tools.
- You need the repair completed quickly.
- The device contains important data.
HMD notes that customers can use its support resources and repair channels, while official self-repair availability depends on the specific device.
For a complicated frame-separation repair, professional inspection can be especially valuable because the technician can assess the condition of the chassis and internal components rather than treating the screen as an isolated part.
14. How to Tell If Your Nokia G21 Needs More Than an LCD Replacement
A damaged display isn’t always the only problem.
Look for these warning signs:
The Phone Won’t Turn On
The impact may have affected the battery, motherboard, charging system, or another internal component.
The Phone Restarts Repeatedly
This may indicate damage beyond the display.
The Camera Doesn’t Work
Check whether the camera connector or surrounding components were disturbed during the impact or repair.
The Frame Is Clearly Bent
A bent chassis should be assessed before a replacement screen is installed.
The Battery Is Swollen
Stop the repair immediately and don’t continue using or charging the phone until the battery is professionally assessed.
The Screen Keeps Lifting
This can indicate poor adhesive, debris under the display, frame distortion, or another structural issue.
15. Nokia G21 Screen Replacement Quality Checklist
After completing the repair, use this checklist:
| Test | What to check |
|---|---|
| Display | Clear image without lines or flicker |
| Touch | Full response across the screen |
| Frame | Screen sits evenly |
| Adhesive | No visible lifting |
| Camera | Front and rear cameras work |
| Fingerprint | Sensor responds normally |
| Buttons | Power and volume operate correctly |
| Charging | USB-C connection works |
| Audio | Speaker and microphone function |
| Network | SIM and mobile connection work |
| Wi-Fi | Connects normally |
| Bluetooth | Pairs with accessories |
| Proximity | Functions normally during calls |
| Housing | No major gaps or movement |
A good repair isn’t simply one where the phone turns on. The goal is to return the device to reliable everyday operation.
Frequently Asked Questions
1. Can a cracked Nokia G21 LCD be replaced?
Yes. A damaged Nokia G21 display can be removed and replaced with a compatible replacement assembly. The exact repair depends on whether the damage is limited to the display or also affects the frame, connectors, or other internal components.
2. Does a cracked screen always mean the LCD is damaged?
No. The outer glass can crack while the display and touch layer continue working. However, black spots, lines, flickering, dead areas, or touch problems can indicate deeper display damage.
3. What should I do if my Nokia G21 screen is separating from the frame?
Don’t simply push it back into place or add large amounts of glue. First determine why it separated. The adhesive may have failed, or the frame may have been bent by an impact. A professional inspection is recommended when the chassis is distorted.
4. Can I replace the Nokia G21 screen myself?
It may be possible for an experienced repairer with suitable tools and a compatible part. However, the repair involves opening the phone, disconnecting internal components, removing adhesive, and handling a lithium-ion battery. Anyone without appropriate experience should consider professional repair.
5. How can I prevent the replacement screen from separating?
Use the correct replacement part, clean the mounting surface thoroughly, make sure the frame is straight, use suitable adhesive, and allow the adhesive to set according to the product instructions.
6. Should I test the new screen before gluing it?
Yes. When the repair procedure and replacement assembly allow it, test the display and touch functionality before permanently installing it. This can prevent unnecessary rework if the replacement component has a problem.
7. Can a bent Nokia G21 frame cause another screen to crack?
Yes. A distorted mounting surface can place uneven pressure on a replacement display. If the frame is visibly bent, it should be assessed before installing a new screen.
8. What tools are needed for a Nokia G21 screen repair?
Tools vary depending on the repair method and replacement assembly, but precision screwdrivers, plastic opening tools, tweezers, suitable adhesive-removal equipment, and an appropriate heat source are commonly used in professional phone repair.
9. Does Nokia still provide support for the G21?
HMD continues to provide Nokia phone support resources and user guides, and its support website lists the Nokia G21 among its documented devices. The G21 itself is now listed as discontinued on HMD’s product page.
10. Is frame separation more serious than a simple cracked screen?
It can be. A cracked display may be limited to the screen assembly, while frame separation can indicate structural damage. If the frame is bent or damaged, replacing only the display may not provide a reliable long-term repair.
Conclusion: Restore Your Nokia G21 the Right Way

A Nokia G21 cracked LCD screen replacement is more than simply removing broken glass and installing another display. A reliable repair starts with accurate diagnosis and continues with careful disassembly, battery safety, connector protection, frame inspection, proper surface preparation, display testing, and precise reassembly.
Frame separation deserves particular attention. If the chassis is bent or the mounting surface has been damaged, installing a new screen without correcting the underlying problem can lead to poor alignment, display pressure, adhesive failure, or another cracked screen.
For DIY repairers, the biggest lesson is simple: don’t rush the job. Keep track of screws, protect flex cables, use suitable plastic tools, control heat carefully, and test the replacement display before final installation.
For customers who aren’t comfortable opening a smartphone, professional repair is often the more straightforward option. A trained technician can inspect the display, frame, connectors, battery, and other components together, helping ensure that the repair addresses the actual cause of the problem rather than just the visible crack.
The Nokia G21 was designed as a durable everyday smartphone, and a damaged screen doesn’t necessarily mean the end of the device. With the right replacement part, careful workmanship, and a proper frame inspection, a damaged G21 can often return to normal everyday use.
David from Sydney CBD Repair Centre – The Best place to fix mobile phones as 7 Years In A Row! Top Mobile Phone Repair In Sydney. More than 2000 Positive Reviews on Google and Same Day Repairs.
We take pride in delivering exceptional repair services for all major phone brands including Apple, Samsung, Google, and more. Our expert technicians use only genuine parts and offer 90days warranty on repairs. Located in the heart of Sydney CBD, we’re your one-stop solution for all mobile device repairs.
Our commitment to excellence has earned us the trust of thousands of satisfied customers. Whether it’s a cracked screen, battery replacement, or water damage repair, we handle it all with professional care and expertise. Walk in today and experience why we’re Sydney’s #1 choice for mobile phone repairs.
Visit us for:
✓ Same Day Express Repairs
✓ Genuine Parts Guarantee
✓ Professional Technicians
✓ Competitive Pricing
✓ 2000+ 5-Star Google Reviews
✓ 7-Time Award Winner for Best Phone Repairs
Sydney CBD Repair Centre – Where Quality Meets Reliability.
Call: +61280114119
Website: Sydney CBD Repair Centre – Locate Us

