




Step by Step Samsung Galaxy Z Fold 7 Inner Screen Assembly and Display Replacement

Step by Step Samsung Galaxy Z Fold 7 Inner Screen Assembly and Display Replacement: 11 Essential Steps
Introduction
Replacing the inner display on a foldable smartphone is very different from replacing a conventional flat phone screen. The Samsung Galaxy Z Fold 7 inner screen assembly and display replacement process involves a flexible AMOLED panel, precision adhesives, delicate connectors, and a hinge area that requires careful handling.
The Galaxy Z Fold7 features an 8-inch Dynamic AMOLED 2X main display with a 2184 × 1968 resolution and adaptive refresh rate up to 120Hz. Samsung also redesigned the device around a thinner, lighter structure and an updated hinge system.
Because of that construction, an inner-screen replacement should generally be treated as a specialist repair rather than a casual DIY project. The steps below are intended to explain the professional workflow, preparation, inspection, and testing involved. Always use the appropriate manufacturer-approved procedures and replacement components for the exact model.
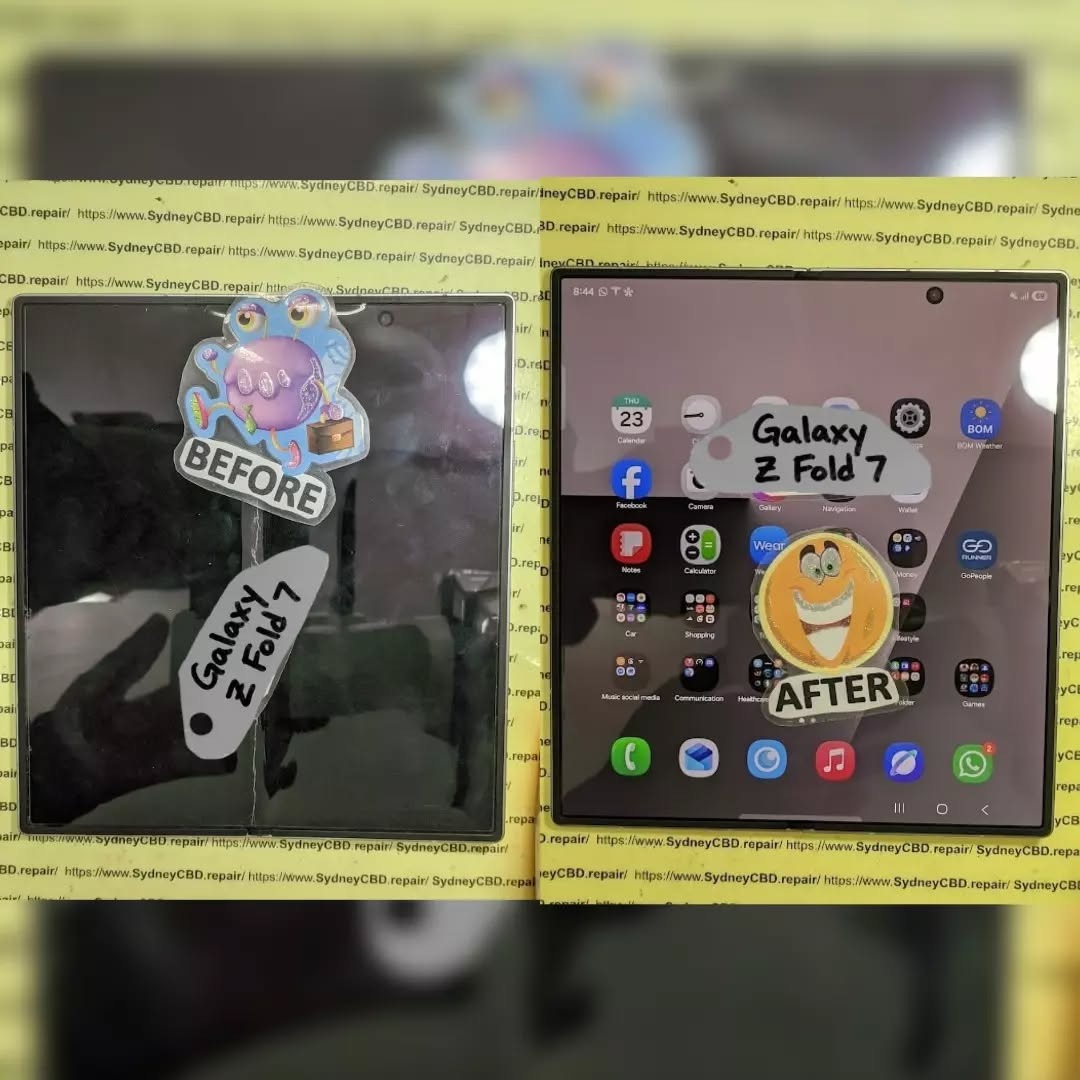
Why the Galaxy Z Fold7 Inner Display Requires Special Care
The Galaxy Z Fold7 isn’t built like a standard slab-style smartphone. Its main screen is a flexible foldable display designed to repeatedly bend around the device’s central hinge. Samsung lists the main display as an 8-inch Dynamic AMOLED 2X panel with 120Hz adaptive refresh.
That construction creates several important repair considerations.
A traditional smartphone screen can often be separated from its frame using controlled heat and appropriate prying techniques. A foldable display, however, has a much more complicated structure. Excessive pressure, incorrect tool placement, contamination, or improper adhesive handling can turn a simple display replacement into additional damage.
The inner screen is also significantly more expensive than many conventional smartphone displays. Samsung’s current U.S. repair pricing page lists separate Fold7 inner-screen repair and inner screen-module replacement prices, illustrating how the selected repair method and component can affect the final cost. Prices vary by region, service type, warranty status, and repair provider.
Key Galaxy Z Fold7 Display Specifications
| Feature | Galaxy Z Fold7 Main Display |
|---|---|
| Display size | 8.0 inches |
| Technology | Dynamic AMOLED 2X |
| Resolution | 2184 × 1968 |
| Refresh rate | Up to 120Hz adaptive |
| Display type | Foldable/flexible main display |
| Cover display | 6.5-inch Dynamic AMOLED 2X |
| Main display purpose | Folded/unfolded multitasking and media |
These specifications matter because replacement testing shouldn’t stop at simply checking whether the screen turns on. A properly completed repair should also be evaluated for touch response, brightness, color uniformity, folding behavior, refresh behavior, and general display stability.
Diagnosing the Problem Before Replacing the Screen
Before beginning a Samsung Galaxy Z Fold 7 inner screen assembly and display replacement, diagnose the actual failure.
A black screen doesn’t automatically mean that the display assembly is defective. The problem could involve a connector, software issue, board-level fault, physical impact, or another component.
Start with a visual inspection.
Look for:
- Cracks or visible damage
- Black spots or ink-like spreading
- Vertical or horizontal lines
- Flickering
- Dead pixels
- Touch failures
- Display discoloration
- Brightness abnormalities
- Damage around the center fold
- Display problems that appear only when folding
If the phone still displays an image, test as many functions as possible before opening it.
Check Touch Response
Open a drawing application or another suitable touch-testing interface and slowly move a finger across the entire inner display.
Pay particular attention to the central folding region and edges.
If certain areas don’t respond, document their location before the repair.
Check the Display While Folding
A foldable display should be assessed in several positions rather than only when completely open.
Observe whether:
- The display works while fully open.
- The display remains stable while partially folded.
- The image changes unexpectedly around the hinge.
- Touch input remains consistent.
- Flickering occurs during movement.
This information can help determine whether the problem is isolated to the panel or related to another part of the foldable assembly.
Tools and Replacement Components
A professional repair environment should use appropriate precision tools and manufacturer-compatible parts.
Typical equipment may include:
- Precision screwdrivers
- Plastic opening tools
- Approved opening picks
- Suction equipment where appropriate
- ESD-safe equipment
- Tweezers
- Magnification
- Cleaning materials approved for electronics
- Replacement adhesive
- Display assembly or appropriate replacement component
- Protective work mat
- Inspection lighting
The exact tools and disassembly sequence can vary according to the service documentation and replacement assembly being used.
Why Genuine or Approved Parts Matter
The replacement component should match the Galaxy Z Fold7 model and regional variant where required.
Samsung’s Philippine support information states that its authorized service centers use genuine Samsung parts for repairs.
This is particularly important for a foldable phone because the display isn’t simply a piece of glass. Compatibility involves the panel, electronics, flex connections, physical dimensions, adhesives, and interaction with the phone’s software and hardware.
Preparing the Galaxy Z Fold7 for Repair
Before opening the device, protect the customer’s data and establish a record of the phone’s condition.
Back up important data whenever the device is operational.
Record:
- Existing cracks
- Frame damage
- Camera condition
- Cover-screen condition
- Inner-screen condition
- Buttons
- Charging function
- Speakers
- Microphones
- Cameras
- Wireless connectivity
- General device condition
If the phone is being handed to a service center, Samsung recommends using Maintenance Mode to restrict access to personal data during repair.
Step 1: Power Down and Secure the Device
The phone should be shut down using the appropriate procedure before internal work begins.
Remove external accessories and keep the work area clean.
Avoid placing unnecessary pressure on the inner display. A foldable screen can be damaged by pressure even when there isn’t obvious external cracking.
A clean, organized workspace also reduces the chance of losing tiny components.
Step 2: Carefully Access the Device
Professional disassembly begins by gaining access to the internal structure using the approved procedure for the Galaxy Z Fold7.
This is where repair technicians need to be especially careful.
The Fold7 is only about 4.2 mm thick when unfolded, excluding the main-screen frame, and 8.9 mm when folded. Samsung lists its weight at 215 grams.
That thin construction leaves less room for careless tool movement.
Never force an opening tool into an unknown area. A tool inserted too deeply can damage internal components, flex cables, or other layers.
Step 3: Disconnect the Relevant Connections
Once the correct internal access point has been reached, the relevant connectors must be identified and handled carefully.
The general principle is simple:
Disconnect power and relevant display connections before attempting to remove the damaged display assembly.
Connectors should be lifted using appropriate tools rather than pulled by their cables.
This is one of those moments where patience pays off. A connector that seems stubborn should be inspected rather than forced.
Step 4: Remove the Damaged Inner Display Assembly
The damaged display assembly is then separated according to the appropriate service procedure.
This is the most delicate stage of the operation.
A foldable display should not be treated like a conventional rigid glass panel. Avoid bending, twisting, puncturing, or applying concentrated pressure to the flexible display layers.
Important Safety Principle
Never use excessive force simply because an assembly isn’t separating.
If a component doesn’t release as expected, stop and identify what is still holding it.
Potential causes include:
- Remaining adhesive
- A connector
- A retaining component
- A frame section
- An overlooked attachment point
Trying to “muscle through” the process can cause secondary damage.
Step 5: Inspect the Frame and Hinge
Once the damaged assembly has been removed, inspect the supporting structure before installing the replacement.
Look for:
- Bent frame sections
- Foreign particles
- Adhesive residue
- Hinge-area damage
- Deformation
- Liquid contamination
- Damaged connectors
- Missing or damaged fasteners
Samsung says the Fold7 uses an Armor FlexHinge with a multi-rail structure designed to distribute stress and support the thinner foldable design.
That makes hinge inspection an important part of the repair.
If the underlying structure is damaged, simply installing another display may not provide a reliable long-term repair.
Step 6: Prepare the Replacement Display Assembly
Before installation, compare the replacement assembly with the removed component.
Check:
- Model compatibility
- Physical dimensions
- Connector arrangement
- Visible damage
- Flex cable condition
- Display surface
- Frame alignment
- Protective films
- Adhesive condition
Don’t remove protective material unnecessarily early.
Keeping the replacement component protected until the installation stage reduces the chance of scratches, dust contamination, or accidental handling damage.
Keep the Work Area Dust-Free
Dust is a small problem that can become a big problem beneath a display assembly.
Even a tiny particle can create:
- A visible bump
- Uneven pressure
- Poor adhesive contact
- Cosmetic defects
- Localized stress
Therefore, cleanliness isn’t just about appearance. It can directly affect the quality of the finished repair.
Step 7: Position and Align the New Display
The replacement display should be positioned carefully according to the appropriate repair procedure.
Alignment is critical.
Before final adhesion or securing, verify that:
- Edges are correctly positioned.
- The central fold area is correctly aligned.
- Connectors can reach their mating points.
- The display sits evenly.
- No flex cable is trapped.
- No debris is underneath the assembly.
Don’t rush this stage.
A few extra minutes spent checking alignment can prevent the need to repeat a complicated repair.
Step 8: Reconnect the Display and Internal Components
After the replacement assembly is correctly positioned, reconnect the required components in the prescribed sequence.
Each connector should sit correctly before pressure is applied.
Never press directly on delicate flex cables.
After connections are restored, inspect the work visually before proceeding with final reassembly.
Connector Inspection Checklist
| Check | What to Look For |
|---|---|
| Connector seating | Fully and evenly seated |
| Flex cable | No tears, sharp bends, or crushing |
| Contact area | Clean and free of debris |
| Routing | Cable follows the intended path |
| Nearby components | Nothing trapped underneath |
Step 9: Test the New Inner Display
Testing before final closure is one of the most valuable steps in any screen replacement.
Power the device using the approved service procedure and test the replacement display.
Check the following:
Image Quality
Display a white, black, red, green, and blue screen if suitable diagnostic tools are available.
Look for:
- Dead pixels
- Lines
- Flickering
- Uneven brightness
- Color abnormalities
- Black spots
- Image retention or other unexpected behavior
Touch Response
Test the entire panel.
Move across:
- Top edge
- Bottom edge
- Left edge
- Right edge
- Center
- Fold region
The touch system should respond consistently.
Refresh and Motion
Where applicable, verify smooth scrolling and normal display behavior.
The Fold7 main display supports an adaptive refresh rate up to 120Hz.
Step 10: Reassemble the Device
Once the replacement display has passed preliminary tests, complete the remaining reassembly according to the appropriate service instructions.
Check every component before closing the device.
A good technician doesn’t simply put the screws back and call it a day.
The final inspection should include:
- Screw placement
- Connector seating
- Adhesive positioning
- Flex routing
- Frame alignment
- Hinge movement
- Cover display condition
- Camera condition
- External buttons
Step 11: Perform Final Functional Testing
After complete reassembly, perform another full test.
This second test is important because a device can work before final closure but develop an issue if something is incorrectly positioned during reassembly.
Test:
- Inner display
- Cover display
- Touchscreen
- Folding/unfolding
- Charging
- Cameras
- Speakers
- Microphones
- Wi-Fi
- Bluetooth
- Cellular connectivity
- Buttons
- Fingerprint functionality where applicable
Folding Test
Open and close the phone carefully.
Do not repeatedly cycle the hinge unnecessarily. A small number of controlled checks should be enough to confirm normal operation.
Watch the inner screen while changing the device position.
The display should remain stable without unexpected flickering, lines, or touch failures.
Common Samsung Galaxy Z Fold7 Screen Replacement Mistakes

Even experienced technicians need to work carefully on foldable devices.
Here are some common mistakes to avoid.
Using Excessive Heat
Foldable displays contain sensitive components and materials. Excessive heat can create additional problems.
Use only the approved service method and temperature guidance applicable to the specific repair.
Prying Too Deeply
An opening tool should never be inserted farther than necessary.
Deep insertion can damage internal components.
Touching Display Surfaces Unnecessarily
Fingerprints, dust, and oils can complicate final inspection.
Use appropriate clean handling practices.
Ignoring Frame Damage
If the frame or hinge has been damaged by the original impact, installing a new screen alone may not resolve the underlying problem.
Skipping the Pre-Repair Test
Without a baseline test, it can be difficult to determine whether another component developed a problem during the repair.
Skipping the Post-Repair Test
A screen that turns on isn’t necessarily a successful repair.
Touch, brightness, color, folding behavior, connectivity, and other functions should also be checked.
Inner Screen Assembly vs Display-Only Replacement
One important consideration is whether the repair provider is replacing only the screen or an entire display assembly/module.
These approaches can differ in:
- Parts availability
- Labor requirements
- Repair complexity
- Price
- Warranty terms
- Expected turnaround time
Samsung’s published U.S. repair pricing demonstrates that Fold7 inner-screen repairs and inner screen-module replacement can have different prices.
Because prices and service options differ by country, the best approach is to obtain a repair quotation based on the exact damage and model.
How Much Does Galaxy Z Fold7 Inner Screen Repair Cost?
There isn’t one universal worldwide price.
The cost can depend on:
- Country
- Repair provider
- Warranty status
- Insurance or protection plan
- Display-only versus module replacement
- Additional frame or hinge damage
- Availability of replacement components
For example, Samsung’s U.S. support page currently lists separate pricing for the Galaxy Z Fold7 inner display repair and inner screen-module replacement.
Those U.S. prices shouldn’t be used as a direct quotation for Australia, the Philippines, or another market.
For an official repair route in the Philippines, Samsung provides a service-center locator and states that its authorized centers use genuine Samsung parts.
Professional Repair vs DIY Replacement
The Galaxy Z Fold7 inner screen is not an ideal beginner repair.
A professional repair is especially worth considering when:
- The phone contains important data.
- The display has severe physical damage.
- The hinge is damaged.
- The frame is bent.
- The replacement part is expensive.
- You don’t have foldable-phone repair experience.
- The device may still be under warranty or protection coverage.
- You need a repair warranty.
A DIY attempt may appear cheaper initially, but a damaged replacement display, connector, hinge component, or frame can increase the total repair cost.
In short, this is a job where the cheapest approach isn’t always the least expensive approach.
How to Find an Authorized Samsung Repair Center
Samsung Philippines provides an official service-center locator for mobile devices. Its support page states that there are more than 100 authorized service centers across the Philippines and explains how to search by city, town, or postal code.
For official support and service-center information, use Samsung Philippines Service Center.
When requesting service, provide the technician with a clear description of:
- What happened
- Whether the phone was dropped
- Whether the inner display still works
- Whether touch works
- Whether the cover screen works
- Whether the phone has liquid exposure
- Whether the hinge feels normal
This information can make diagnosis more efficient.
Samsung Galaxy Z Fold7 Inner Screen Replacement Checklist
Use this checklist when evaluating a completed repair.
| Test | Pass Condition |
|---|---|
| Inner display | Clear image |
| Touch | Responsive across panel |
| Brightness | Consistent |
| Colors | No obvious abnormalities |
| Pixels | No unexpected dead areas |
| Fold area | Stable during movement |
| Hinge | Opens and closes normally |
| Cover display | Fully operational |
| Cameras | Working |
| Speakers | Working |
| Microphones | Working |
| Charging | Working |
| Connectivity | Working |
| Physical assembly | No gaps or loose parts |
Frequently Asked Questions
1. Can the Galaxy Z Fold7 inner screen be replaced?
Yes, the inner display can be serviced, but the procedure is significantly more complicated than replacing a conventional smartphone screen. Samsung provides repair options for the Fold7 inner screen in supported markets.
2. Is Galaxy Z Fold7 inner screen replacement a DIY repair?
It’s possible to find repair procedures and replacement components, but the inner foldable display is delicate. For most users without professional foldable-device repair experience, an authorized or experienced repair technician is the safer option.
3. What size is the Galaxy Z Fold7 inner screen?
The Galaxy Z Fold7 has an 8-inch main display with a 2184 × 1968 resolution and a maximum adaptive refresh rate of 120Hz.
4. Can I replace only the cracked surface layer?
The correct repair method depends on the nature of the damage and the available service parts. A cracked or malfunctioning foldable display may require an appropriate screen or display-module replacement rather than a simple glass replacement.
5. How do I know whether my display or motherboard is damaged?
A complete diagnosis is required. If the phone has image, touch, or connector-related symptoms, a technician should test the display and associated hardware before ordering replacement parts.
6. Does screen replacement restore water resistance?
You shouldn’t assume that a repaired phone has exactly the same water-resistance performance as a factory-sealed device. The outcome depends on the repair method, components, seals, and service procedure. Samsung lists the Galaxy Z Fold7 as IP48-rated, but that rating should not be interpreted as a guarantee after third-party repair.
7. Should I repair the hinge at the same time?
If the hinge or frame has visible damage, it should be inspected before installing a replacement display. A damaged supporting structure may cause problems with a new display.
8. Is the Galaxy Z Fold7 display covered by warranty?
Warranty coverage depends on the market, warranty terms, cause of damage, and condition of the device. Accidental physical damage is often treated differently from manufacturing defects. Check the warranty terms applicable to your country and device.
9. How long does a Fold7 screen repair take?
Turnaround time varies according to the repair provider, part availability, diagnosis, and whether additional components are damaged. Some service providers offer same-day service, while others may require more time.
10. Where can I get official Samsung Fold7 repair support?
Samsung Philippines provides an official service-center locator and repair-support information.
Conclusion

The Samsung Galaxy Z Fold 7 inner screen assembly and display replacement is a precision repair that requires significantly more care than a standard smartphone screen replacement.
The most important principles are straightforward: diagnose the fault before replacing parts, protect the flexible display, use compatible components, keep the work area clean, avoid excessive force, inspect the hinge and frame, and thoroughly test the phone after installation.
The Galaxy Z Fold7 combines an 8-inch flexible Dynamic AMOLED 2X inner display with a thin foldable structure, making careful handling especially important.
For users without professional foldable-phone repair experience, an authorized Samsung service center or qualified specialist can reduce the risk of additional damage. Samsung’s Philippine service network provides an official starting point for customers seeking repair assistance.
A successful repair isn’t simply about making the screen light up again. It’s about restoring reliable display performance, touch response, folding behavior, structural integrity, and overall functionality while protecting the rest of the device.
For professional assistance with Samsung Galaxy Z Fold7 and other mobile-device repairs, Sydney CBD Repair Centre provides repair services for major smartphone brands.
David from Sydney CBD Repair Centre – The Best place to fix mobile phones as 7 Years In A Row! Top Mobile Phone Repair In Sydney. More than 2000 Positive Reviews on Google and Same Day Repairs.
We take pride in delivering exceptional repair services for all major phone brands including Apple, Samsung, Google, and more. Our expert technicians use only genuine parts and offer 90days warranty on repairs. Located in the heart of Sydney CBD, we’re your one-stop solution for all mobile device repairs.
Our commitment to excellence has earned us the trust of thousands of satisfied customers. Whether it’s a cracked screen, battery replacement, or water damage repair, we handle it all with professional care and expertise. Walk in today and experience why we’re Sydney’s #1 choice for mobile phone repairs.
Visit us for:
✓ Same Day Express Repairs
✓ Genuine Parts Guarantee
✓ Professional Technicians
✓ Competitive Pricing
✓ 2000+ 5-Star Google Reviews
✓ 7-Time Award Winner for Best Phone Repairs
Sydney CBD Repair Centre – Where Quality Meets Reliability.
Call: +61280114119
Website: Sydney CBD Repair Centre

