Screen Time is one of the best features in iOS 12, allowing you to keep track of how often an iPhone or iPad gets used, what apps are being used, and perhaps best of all, Screen Time gives you the ability to easily set time limits for apps and categories of apps, and even set restrictions on content and privacy. While many iPhone and iPad owners will appreciate Screen Time, whether for better understanding their own device usage or for managing a childs device or someone else’s, some iOS users may also decide they do not want the Screen Time feature enabled and reporting usage data points or limiting app use at all.
If you want to turn off Screen Time completely in iOS 12 for iPhone or iPad, this tutorial will show you how to do so.
Note that by turning off Screen Time you will no longer be able to see the daily and weekly charts of device usage, app usage, reports on device pickups, limit apps use, limit device use, or any of the other associated features. However, it’s also noteworthy to point out that some users who found that iOS 12 battery life is worse anecdotally discovered that disabling Screen Time can improve their devices battery life. Whether or not you wish to use the feature on an iPhone or iPad is entirely up to you.
How to Turn Off Screen Time in iOS 12
Disabling Screen Time on any iPhone or iPad with iOS 12 or later is easy:
Open the Settings app in iOS
Go to “Screen Time”
Once at the Screen Time screen, scroll all the way down and choose “Turn Off Screen Time”
Confirm that you want to disable Screen Time on the iPhone or iPad
Once Screen Time is off you’ll no longer have reporting of app use and device usage, you’ll no longer have time limit options on apps or device use, and all content and privacy restrictions are disabled as well.
How to Re-Enable Screen Time in iOS 12
Of course you can re-enable Screen Time at any point and turn the feature back on by toggling the appropriate settings switch again:
Open the Settings app in iOS
Go to “Screen Time” in the settings
Scroll down at the Screen Time settings screen and tap on “Turn On Screen Time”
With Screen Time enabled again you can configure the options to limit iOS device use, restrict app usage, and much more. Screen Time in iOS is kind of like parental controls (or even self controls), so if you’re hoping to set a daily time limit of 15 minutes for social media apps or 20 minutes for gaming, or 10 minutes for a particular app, it’s very easy to do exactly that.
Full Photoshop will be available for iPad in 2019.
Adobe is bringing Photoshop CC to iPad in 2019 and in its announcement this morning, it placed emphasis on one word: real as in real Photoshop.
Photoshop on iPad will have all the might of the desktop version but with the pencil and touch workflow of the tablet. The work will automatically and seamlessly sync to the desktop.
“Recently, two Photoshop engineers proposed this crazy idea to try and run Photoshop on the iPad using the real Photoshop code,” Pam Clark wrote for the Adobe blog. “We told them to give it a try, but don’t tell anyone in case it doesn’t work. Inspired by this, our design team also started to reimagine the Photoshop experience on a device.
“With Photoshop on an iPad, designers and photographers no longer need to be tethered to their desktops. Instead you can do real work that is powerful, quick, and transformative right on the iPad either as a companion to your desktop or away.”
Photoshop on iPad: Powerful tools with new touch
Earlier this year, Adobe’s chief product officer for Creative Cloud, Scott Belsky, hinted at the development of full Photoshop for iPad.
Currently, creatives can use the limited powers of Photoshop Express, Photoshop Mix or Lightroom Mobile on iPad. Several software competitors have developed fairly powerful tools for iPad including Affinity and Pixelmator.
Photoshop on iPad will make use of the same multi-layered PSD files while offering the same set of tools familiar to long-time desktop users.
The Adobe blog featured a “proof of life” video showing Photoshop on iPad being applied to a multi-layer file. Adobe’s announcement of Photoshop CC on iPad was part of a number of software developments rolled out.
Adobe did not announce a date, but iPad users can sign up here for updates. Adobe plans to release a 1.0 version featuring basic tools, with more powers to follow in software updates.
The iPad is going to get a powerful new graphics tool.
There are some great graphics apps available for iPad. One which has been largely absent up until now? The proper full version of Adobe Photoshop.
Fortunately, that looks like it will change this year as Adobe Systems plans to launch the full version of the iconic photo-editing app for iPad. The move is part of a new strategy designed to boost subscription sales by focusing on mobile apps.
According to a new report from Bloomberg, Photoshop for iPad will be shown off later this year at Adobe’s MAX creative conference in October. It will officially go on sale sometime in 2019, although the exact date is still up in the air.
Adobe’s chief product officer of Creative Cloud Scott Belsky tells Bloomberg that a new “cross-platform iteration of Photoshop and other applications” are indeed being worked on, but wouldn’t give an exact timeline for it.
“My aspiration is to get these on the market as soon as possible,” Belsky told the publication. “There’s a lot required to take a product as sophisticated and powerful as Photoshop and make that work on a modern device like the iPad. We need to bring our products into this cloud-first collaborative era.”
Growing the Photoshop user base
Adobe switched to its cloud-based subscription model in 2012, causing stock to soar by upwards of 700 percent. In an effort to grow this user base even further, it’s now embracing mobile devices alongside more traditional PCs.
At present, the closest thing Adobe offers to Photoshop on iPad is a stripped-down version called Photoshop Mix, available as part of Adobe’s Creative Cloud subscription service. If you’re looking for full Photoshop rivals already on iPad, the best options available right now include the likes of Pixelmator, Affinity and Enlight Photofox.
Adobe’s decision to bring the full modern version of Photoshop to iPad would represent a new era in collaboration between Apple and Adobe. The two companies famously fell out over the use (or perhaps non-use) of Flash on iPhones a decade ago.
The infamous iPhone XS charging bug and 2.4GHz Wi-Fi connection problem should be gone now.
Apple has released iOS 12.0.1 for iPhone and iPad users. The new small software update resolves multiple bugs present in the prior build and is thus recommended for all iPhone and iPad users who are running iOS 12.
iOS 12.0.1 fixes a variety of problems, including where the iPhone XS and iPhone XS Max were not charging properly when connected to a Lightning cable, an issue with iPhone XS models joining a slower wi-fi band, an iPad keyboard tweak for the “?123” key, an issue with Bluetooth becoming unavailable, and an issue with subtitles not appearing on some videos. Additionally, some security fixes appear to be included in the iOS 12.0.1 software update. The full release notes are included further below, along with direct download links for iOS 12.0.1 IPSW files.
How to Update to iOS 12.0.1
Most iPhone and iPad users will find that updating to iOS 12.0.1 is easiest with the Software Update mechanism on their devices.
Be sure to back up your iPhone or iPad to iCloud and/or iTunes before installing any system software update.
Back up your iPhone or iPad if you have not done so already
Open the “Settings” app and go to “General” and then to “Software Update”
Choose to ‘Download and Install’ when iOS 12.0.1 shows as available
Installing any iOS software update requires the device to reboot.
Users can also update to iOS 12.0.1 by connecting an iPhone or iPad to a computer with iTunes and choosing to update software that way.
iOS 12.0.1 IPSW Download Links
Direct download links for iOS 12.0.1 firmware files are included below, each link points to the appropriate IPSW file on Apple servers.
Using IPSW files to update iOS requires iTunes and a computer, it is considered advanced but it’s not particularly complicated. Nonetheless the majority of iPhone and iPad users are better off using the built-in software update mechanism which is a simpler experience overall.
iOS 12.0.1 Release Notes
The release notes accompanying the iOS 12.0.1 download are as follows:
iOS 12.0.1 includes bug fixes and improvements for your iPhone or iPad. This update:
– Fixes an issue where some iPhone XS devices do not immediately charge when connected to a Lightning cable
– Resolves an issue that could cause iPhone XS devices to rejoin a Wi-Fi network at 2.4 GHz instead of 5 GHz
– Restores the original position of the “.?123” key on the iPad keyboard
– Fixes an issue where subtitles may not appear in some video apps
– Addresses an issue where Bluetooth could become unavailable
– For information on the security content of Apple software updates, please visit this website: https://support.apple.com/kb/HT201222
If you do not yet see the iOS 12.0.1 software update available yet, or the Software Update section is stuck on ‘checking for updates…’ try quitting and relaunching the Settings app.
Similarly, if you see an “Unable to Check for Update – An error occurred while checking for a software update” simply trying again momentarily typically resolves that issue.
When going to install the iOS 12.0.1 update you’ll have to agree to Terms and Conditions, which the iOS update process sometimes appears to freeze or get stuck on the “Terms and Conditions” agree / disagree screen. If that happens, force quit out of the Settings app and try again. You also may need to restart the iOS device before the Terms and Conditions screen will dismiss properly in some situations.
Have you discovered your iPhone or iPad is getting notifications and alerts for “TV” ads? For example, you might have recently seen a pop-up alert on your iPhone or iPad promoting “TV – Football is Back – Stream live games in the Apple TV App now” which presents itself as a promotion for watching football. Then, if you tap on the “TV” notification, you’ll find it’s sort of like an advertisement for the TV app that asks you to then download other apps or subscribe to various third party services or apps that are not bundled by default on the iPhone or iPad.
If you don’t want to see these promotional “TV” notifications showing up on the iPhone or iPad screen, you’ll be happy to know they can be easily disabled. Once the “TV” alerts are disabled you will no longer receive any more unsolicited TV banners promoting various TV app things and popping up on your iOS device screen.
How to Disable TV Notifications on iPhone or iPad
You can stop the TV ad notifications coming to your device just like disabling other app alerts and notifications in iOS, here’s how:
Open the “Settings” app on the iPhone or iPad
Go to “Notifications”
Find and tap on “TV”
Flip the switch for “Allow Notifications” to the OFF position to stop getting TV banner notifications for events, products, and other TV ads
Exit Settings
You can also be a little more specific in the TV notifications settings and disable notifications, sounds, alerts, and banners for specific items only, like “Up Next Alerts”, “Featured Sports and Events”, or “Product Announcements”.
Apple labels the “TV” app promotions as three different things; “Product Announcements” and “Featured Sports and Events” and “Up Next Alerts”, so if you don’t want any of the unsolicited TV banner alerts popping up on the screen it’s probably easiest to just turn them all off as we detailed in this tutorial. Nonetheless you can toggle settings individually if you feel like seeing some TV app notifications or promotions on your iPhone or iPad screen.
For what it’s worth, the now named “TV” app in iOS used to be named as the “Videos” app, and it also contains iTunes Store video downloads and rentals, as well as maintaining a library of your purchased iTunes Store video content. Aside from that, other parts of the “TV” app – particularly the “Watch Now” and “Sports” sections – function largely as a front-end to promotions for other third party TV apps and services, each of which typically require a separate app download (for example, app downloads for ESPN, HBO, or FOX) which then often requires a separate subscription to those specific individual services, or perhaps a subscription to a cable TV provider that offers those services as part of a broader cable television package.
While you’re tinkering around in Notifications settings, you might want to also disable notifications for other apps in iOS that you find unnecessary, or ust focus on the other frequently seen alerts like stopping News app headlines and alerts showing up on your lock screen in iOS.
How you handle notifications is entirely a matter of user preference, and while some users don’t like seeing notifications, other people really like having them pop-up frequently with various details, headlines, ads, events, announcements, and whatever else is being pushed to your iPhone or iPad to get your attention as notify you.
How do you flip the FaceTime Camera in iOS 12? Where did the Flip camera button go in FaceTime for iOS 12? You’re probably not the only person wondering the answer to these questions.
FaceTime video chat is very popular amongst iPhone and iPad users, and a common component of many FaceTime video conversations involves flipping the camera around so that whoever you are FaceTiming with can see things with either the front or rear cameras. Switching the FaceTime camera used to be really easy and obvious with a nearly always visible Flip Camera button on screen in iOS during FaceTime chats, but iOS 12 has changed that. Flipping the FaceTime camera is still possible in iOS 12 but it is a slower process now that is hidden behind other options in the FaceTime app.
We’ll show you the steps necessary to flip the FaceTime Camera in iOS 12, on either an iPhone or iPad.
How to Flip FaceTime Camera in iOS 12 for iPhone or iPad
Can’t find the ‘flip camera’ button in iOS 12 FaceTime? Here is where to look and how to switch the cameras at any time during a FaceTime video call:
During an active FaceTime video chat (or during the call to initiate a FaceTime chat), tap on the screen
Tapping on the FaceTime screen will reveal a few additional buttons like mute and hangup, but no “Flip Camera” setting, so instead tap on the three dots button that looks like “(…)”
This will reveal an additional control panel of FaceTime buttons, including the now hidden “Flip” camera button in FaceTime for iOS 12
Tap the “flip” button to switch the FaceTime camera
You can access the hidden Flip camera button anytime during a FaceTime video call, just remember to tap the screen first, then tap the “…” triple dot circle button, then tap on “flip”. Once you do it a few times it’ll stick with you.
The “Flip” button will switch the FaceTime camera to either the front facing or the rear facing camera, depending on which camera is actively in use. Typically FaceTime calls start off using the front-facing camera, so tapping “Flip” would switch the camera to the rear-facing camera. Of course you can tap it again to switch the cameras again and flip them at any time.
It may feel a little cumbersome to access the “Flip” camera feature in FaceTime for iOS 12, and given the frequency of flipping the camera around during FaceTime video chat, it wouldn’t be too surprising if Apple made a change to this control panel in a future iOS software update to make the “Flip” camera button more visible and more accessible. But that change may not happen to, so for now all iPhone and iPad users who regularly use FaceTime video chat will want to learn how to flip the camera in iOS 12 FaceTime calls using the method described.
Enjoy using FaceTime, and flip that camera however you want!
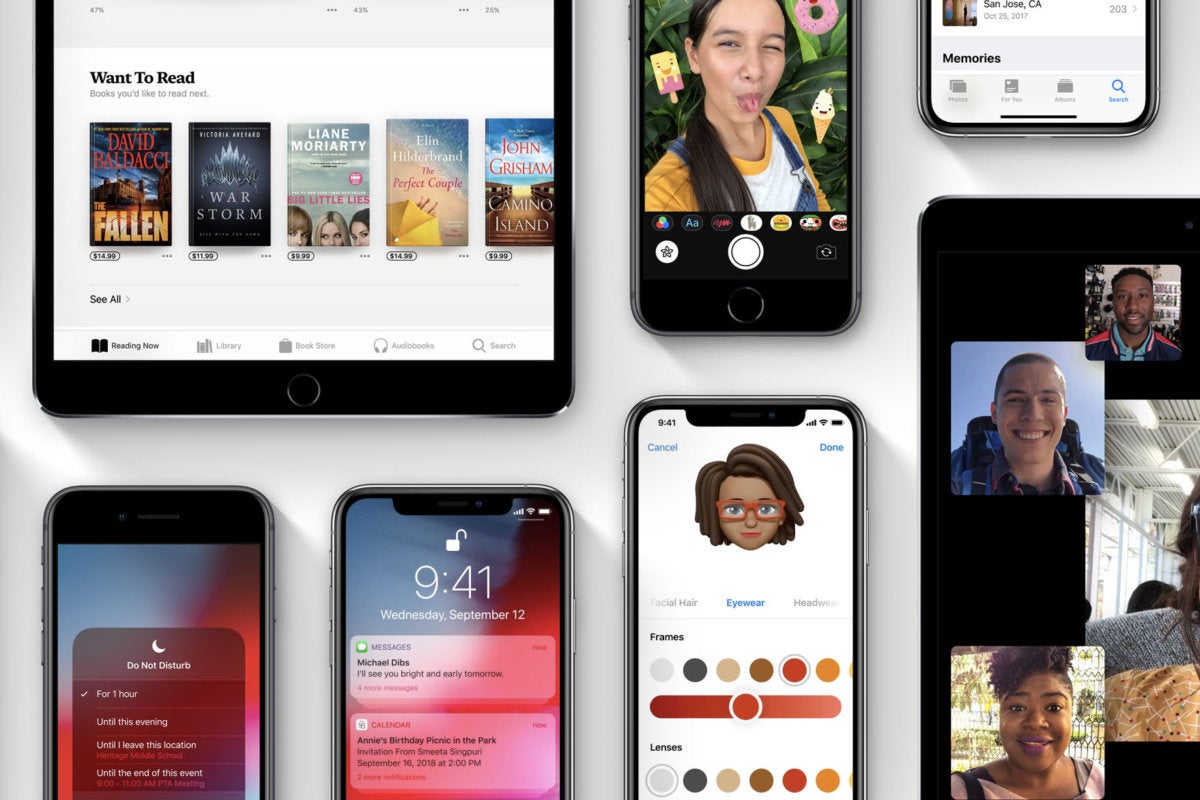
iOS 12 is a performance focused software update, aiming to boost the usability of older iPhone and iPad models. But that doesn’t mean iOS 12 is without new fancy features too, so while the iOS 12 update may not be as outwardly flashy as some other past releases, there are still some interesting new additions and changes to the mobile operating system for iPhone and iPad users.
We’re going to review a handful of great iOS 12 features that you’re likely to actually use. Let’s get to it!
1: The Virtual Trackpad & Text Selection Cursor
Selecting text has long been a challenge on the iPhone or iPad, and if you spend a lot of time writing emails, messages, notes, Pages, or in any other text editor you’ll appreciate the new virtual cursor tool that makes text selection and navigation much easier.
From any app where a block of text is on screen, like in Mail, Pages, Notes, Messages, tap and hold on the Spacebar of the keyboard
Keep holding down until the keys all turn blank, continue to hold down while you swipe around on the digital trackpad to move the text selection cursor around on screen
You can also then place a second finger on the trackpad to enter text selection mode with the cursor, which then allows you to drag the cursor and select text while in this virtual trackpad mode.
This is a great feature that you really should try out for yourself, as it’s much better experienced directly. For anyone who spends much time typing or writing in iOS this is particularly fantastic, since it’s much easier to direct the little cursor around with a virtual trackpad compared to pecking on screen between letters or words with a finger or stylus.
It should be noted this is not a new feature, it’s just how you access it that is new, and the number of devices it’s available on is new. Now you can simply tap and hold the Spacebar on any iPad or iPhone with iOS 12, whereas perviously accessing the virtual trackpad for text selection was available on iPhone with 3D Touch support only.
2: Screen Time & App Time Limits
Screen Time is arguably the best new feature of iOS 12. Screen Time gives you insight into how an iPhone or iPad is being used, allowing you to see exactly how much time is spent in particular apps. More importantly, you can take action based on that information and set time limits for app usage, and place other restrictions on app usage if desired. This makes Screen Time a fantastic tool particularly for parents or anyone providing child care or education, but also for anyone who wants to reduce their time wasted in any unproductive apps or detrimental device usage. Want to set a 15 minute time limit for a particular game? You can do that with Screen Time. Want to limit yourself to only 20 minutes of social media use? Screen Time lets you do that too.
Open the “Settings” app and choose “Screen Time”
Tap on the device usage graph near the top to see Screen Time usage data on that particular device
Once in Screen Time you can set time limits with App Limits, or even outright block an app from being used entirely, or set aside times of the day where the device itself isn’t usable through Downtime. There are also Content & Privacy Restriction settings available if you want to block adult content or otherwise limit device usage. It’s sort of like a broad self-control / parental controls feature built right into iOS, and it’s pretty great.
Don’t be surprised if you look at Screen Time and discover some uncomfortable data… maybe you’re spending a few hours every day lost in the misery generating abyss of social media, maybe you discover that your kids iPad is being used to spend hours every night in a video game rather than doing homework, or maybe you find that you’re not committing enough time every day to learning a new foreign language with an app like DuoLingo and you decide you want to change that. These are examples of the type of data you can get out of Screen Time on any iPhone or iPad.
By the way, for best results with Screen Time, it’s good to check it after a few days or so of device usage so that it has more data to work with. Even after you set some limits or restrictions, you should periodically check into Screen Time to see if it’s making any difference in behavior or device usage.
3: Disable Notifications Faster Than Ever
Let’s go ahead and state the obvious; Notifications are often annoying, distracting, and rarely important.
And by default just about every app on the iPhone and iPad wants to fill your device up with constant alerts and a barrage of notifications about every inconsequential event, happenstance, and useless tidbit under the sun. Do you really need to be notified instantaneously when some celebrity is on their 23rd marriage?
Do you need a giant banner splashing onto your screen to inform you about creamy salad dressing in the News app?
Is any of this stuff important enough to disrupt you and what you were doing with a giant notification message? Probably not.
But what if the breaking news notification delivered instantly to your iPhone or iPad is about the flavor of creamy salad dressing!?!??!? Stop everything that you are doing and read this notification about creamy salad dressing!! It’s breaking news, according to the News app!
But it’s kind of hard to focus when you have constant notifications bothering you, right? Did that point get across as you tried to read this section that is interspersed with that image of a useless notification?
If you feel the vast majority of notifications are simply annoying distractions, noise, and clutter, then fortunately the latest version of iOS makes it easier than ever to manage them as they come in to pester you. In fact, you can completely disable notifications faster than ever and right from the lock screen of your device:
From the lock screen or Notification Center of iOS 12, swipe left on any notification
Choose “Manage” from the list of options
Select “Turn Off” from the menu to permanently disable notifications from that app
You can also choose “Deliver Silently” if you still want to see the annoyifications err notifications in Annoyification Center errr Notification Center for some reason, but choosing Turn Off is the simplest way to never see them again. And of course you can return to the Settings app Notifications section if you later change your mind.
My personal opinion is that only actual communication with actual humans should be sending you notifications, things like messages and phone calls, as everything else is likely nothing more than distraction. Make your own decisions here, but focus on what is important and think critically about the kind of stuff that is splashing onto your screen to get your attention and disrupting your device use.
4: Automatic iOS Software Updates
Do you want to make sure you’re always on the latest version of iOS? Do you frequently forget to update your iOS system software? Are you tired of wandering into the Settings app to check if a software update is available? iOS 12 has a great feature that solves all of this, it will automatically install iOS updates when they’re available onto an iPhone or iPad.
You can turn this feature on easily:
Open the “Settings” app then go to “Software Update”
Choose “Automatic Update” and turn the feature on
Just be sure that you have iCloud backups enabled so that your device is always backing up when it’s plugged in to charge.
The auto-update iOS feature pairs well with automatic app updates in iOS too, allowing you a very hands-off approach to device management.
5: Siri Shortcuts & Shortcuts App
The Shortcuts app (once called Workflow) allows you to create simple automation of tasks in iOS, and you can now tie those actions directly into Siri. There’s a plethora of options available with Shortcuts, you can use the feature to create animated GIFs out of Animojior a series of images, you can use your current location to find any nearby gas stations, you can create custom replies to messages that will send someone your most recent photo taken, and so much more. If it’s a task in iOS, you might just be able to automate the entire thing with Shortcuts.
Curiously, the Shortcuts app is not included by default in iOS 12, so you have to download it separately from the iOS App Store. Not to worry though, it’s free from Apple:
Get Shortcuts app from the App Store
Launch the Shortcuts app and explore the default and example options, and create your own. Tie them to Siri so that you can simply ask Siri to perform that task for you. There’s a lot of potential here, so if you’re a fan of automation and macros, you’ll almost certainly be thrilled with Shortcuts for iOS.
Where did Control Center go in iOS 12? And how do you access it? If you have these questions about Control Center on your iPad or iPhone after updating to iOS 12 you’re not alone, as the ability to access Control Center in iOS 12 has changed. But fear not, Control Center still exists on iPad and iPhone, it’s just the gesture that you use to summon the feature that has changed.
No longer do you swipe from the bottom of the screen to access Control Center on the iPad and some iPhone models, instead, all new devices will swipe down from the top right corner of the screen instead to summon Control Center. Everything else is the same, including the ability to customize Control Center and all the options are still there, it’s just that initial access which has changed.
How to Access Control Center in iOS 12 on iPad and iPhone
This change applies to all iPad models, and all iPhone models without a Home button:
From the Home Screen or Lock Screen of iPhone or iPad, look at the top right corner of the screen to where the wi-fi and battery indicator are located
Swipe down from the top-right corner of the screen to access Control Center in iOS 12 on iPhone or iPad
Control Center will appear as normal, except it comes from the top right corner of the display
Swipe back up to dismiss Control Center again
The key thing to remember is that you now swipe down from the top-right corner of the display to access Control Center in iOS 12, regardless of whether the device is an iPad or an iPhone. All devices now access Control Center this way.
The animated GIF below demonstrates Control Center being accessed in iOS 12 by using the swipe down gesture from the top-right corner of an iPad, it works the exact same on all other iPad models and some iPhone models as well, like iPhone X, iPhone XS, iPhone XR, and iPhone XS Max :
In fact, this change brings the method of accessing Control Center on iPhone X to all other new iPhone models and all iPad devices, it’s the exact same gesture and same move.
This adjustment can lead to a little bit of confusion since many users are long accustomed to swiping up from the bottom of their screen to get to Control Center on an iPad or iPhone, but as iOS evolves and changes so will the gestures and how to access certain features. It may be a little confusing at first, but once you get used to it it’s quite simple, and you’ll soon commit the new gesture location and direction to memory.
If you are swiping down from the top right corner of the display and continue to not be able to access Control Center you might want to check your settings. This is particularly valid if Control Center is inaccessible on the Lock Screen, that’s almost always due to a settings issue in iOS that can be easily resolved, usually because it has been disabled there. Regardless, you’ll still be using the swipe-down from the right-corner to access Control Center, whether it’s from inside an app, on the lock screen, or on the home screen of a device.
Update: iPhone models with Touch ID apparently still use the swipe-up from the bottom gesture to access Control Center, thanks to our readers who noted that change in the comments below. Only new iPhone models with no Home button will use this new gesture for accessing Control Center. However, all new iPad models even those with Touch ID use this new gesture for Control Center access.
Are you ready to install iOS 12 on your iPhone or iPad? The iOS 12 release date is September 17, and if you intend on updating right away you might want to take a few moments ahead of time to prepare for the iOS 12 software update.
We’ll walkthrough a few helpful tips to get your iOS device ready for the latest mobile operating system from Apple. From confirming device compatibility to performing some basic cleanup and maintenance, you’ll be ready for updating to iOS 12 in no time.
1: Check iOS 12 Compatibility: Can the iPhone or iPad run iOS 12?
The first thing you’ll want to do is review the iOS 12 compatible devices list to make sure your particular iPhone, iPad, or iPod touch supports the new operating system. The good news is that iOS 12 has generous support for a wide variety of devices, and if your iPhone is newer than a 5s or iPad is newer than an Air, it will be able to run the iOS 12 update. The full list is as follows:
iPads with iOS 12 support: iPad Pro 12.9″ 1st and 2nd generations, iPad Pro 10.5″, iPad Pro 9.7″, iPad Air 2, iPad Air 1, iPad 5th gen, iPad 2018 model (not pro), iPad 2017 model (not pro), iPad Mini 4, iPad Mini 3, iPad Mini 2
iPods with iOS 12 support: iPod Touch 6th Generation
Note the iPhone XS, iPhone XS Max, and iPhone XR will come with iOS 12 preinstalled, so there is no need to update those devices unless a smaller point release is available for them (like iOS 12.0.1 or iOS 12.1, etc).
The good news is that iOS 12 aims to boost performance of older iPhone and iPad hardware, so if you have a device currently running iOS 11 or iOS 10 that feels sluggish, updating to iOS 12 may improve the performance on that device.
2: Tidy Up & Free up Storage Space
Before you update to a major new iOS release, it’s often a good idea to tidy up your device, delete some long unused apps, and update your remaining apps.
You’ll also need to have a few free GB of storage available to install iOS 12 in the first place, so aside from tidying up and ridding yourself of dusty apps, if you’re tight on storage space now is a good time to take care of that.
You can check your devices available storage capacity by going to Settings > General > iPhone Storage / iPad Storage
If you are low on storage space, some simple ways to free up storage in iOS include:
You will want to have at least a few GB or so of space available to update iOS 12, partially because the iOS 12 download is several GB in and of itself, and then it needs temporary space to further complete the update.
3: Update Your Apps
After you have deleted unused apps and cleared up storage space (if needed) and made sure you have sufficient storage available for the iOS 12 update, it’s a good idea to update all iOS apps on the device so that they are new and more likely to be compatible with the latest iOS release.
Simply open the App Store, then go to the Updates tab, and choose “Update All”
An added bonus tip: be sure to again go through and update all your apps in the weeks following installing the iOS 12 software update, as more apps will be updated as time goes on.
4: Back up the iPhone or iPad
This is the most important step! You must backup an iOS device before installing iOS 12, or any other software update for that matter. Having fresh backups allow you to recover quickly if something goes wrong, and being able to restore an iPhone or iPad from a fresh backup helps guard against permanent data loss. Do not skip backing up!
For performing an iCloud backup of the iPhone or iPad, open the Settings app in iOS, then tap on your name to access iCloud settings, next go to “iCloud” and choose “iCloud Backup”, finally you want to select to “Back Up Now”.
Make and complete the iCloud backup right before installing iOS 12, so that your data is freshly saved and backed up. This includes all your contacts, photos, notes, movies, apps, all personal data, and customizations to the device.
You can also backup to iTunes on a Mac or PC. Connect the iPhone or iPad to a computer and open iTunes, and then choose to backup. Be sure to encrypt the backup in iTunes so that passwords and health data are preserved as well.
To be thorough, you can backup to both iCloud and iTunes, there’s nothing wrong with backup redundancy and many would consider that prudent.
5: Time to Install iOS 12!
Once you have completed the above tasks, you’re easy to install iOS 12. iOS 12 is a free software update for any compatible iPhone, iPad, and iPod touch.
The simplest way to install the iOS 12 update is through the Settings app on the iPhone or iPad. Just open Settings, go to General, then choose Software Update. When iOS 12 is available, click to Download and Install.
The Files app on iPhone and iPad serves as a file system of sorts to the iOS world, complete with many commonly used file system functions. One of the more frequently used features in file systems is the ability to change how you sort files or folders, and the iOS Files app also allows for sorting of files and folders using a variety of methods, including sorting files by name, sorting files by date, sorting files by size, and sorting by tags.
The ability to sort files in the Files app on iPhone and iPad is a little hidden however, and if you open the app initially you won’t see any sorting capabilities immediately available. Instead, the iOS Files sorting functionality is hidden from initial user view, but it’s quite simple to reveal and use once you learn how.
Though sorting files and folders in Files app for iOS is basically the same on iPhone and iPad, the two are slightly different in appearance and behavior, so we’ll be covering them separately. Nonetheless if you learn to sort the Files app on one device, you can apply the same general logic to the other device too.
How to Sort Files by Date, Name, Size, or Tags on iPad
Changing how files are sorted in the Files app for iOS on iPad is simple enough, the screenshots here show the Files app in horizontal landscape orientation but it works the same in vertical portrait orientation too:
Open the “Files” app in iOS
Navigate to any folder within the Files app
From the file view, tap and pull down on the file listing to reveal additional options including the Sorting options for Files app
Choose the Files sorting you’d like to apply to the active folder:
Name – sort alphabetically by file / folder name
Date – sort by date of file / folder added
Size – sort by file size
Tags – sort by tags used on files / folders
Changes to file sorting takes effect immediately.
How to Sort Files by Date, Name, Size, Tags on Files app for iPhone
The file sorting features in Files app for iOS on iPhone is basically the same as the iPad, though the app looks a little different to accommodate for the smaller iPhone display, and the sorting options show up in a pop-up window rather than at the top of the Files app display:
Open the “Files” app on iPhone
From any folder or file view, tap and drag down on the file listing to show the file sorting options for Files app
Choose the sorting method for Files from the pop-up option that appears to change the files sorting in the current folder:
Name – sort alphabetically by name
Date – sort by date added
Size – sort by size
Tags – sort by tags used
Whichever sorting method you choose will take effect instantly on either the iPhone or iPad, and you can change it again at anytime by repeating the steps above and selecting a different sort method in the Files app.
Sorting by name or sorting by date are perhaps the most useful sorting options for most iOS Files app users, both of which are equally useful and popular on the Mac too. And yes, as most Mac users probably know, the Finder in Mac OS also offers file sorting by date, name, kind, size, and much more. Finder on the Mac is much more capable and feature rich than Files on iOS. however, so if you’re accustomed to the myriad options available in Finder you may have to scale back your expectations when using the Files app in the iPhone or iPad world.
File sorting is just one of a variety of great features in the Files app for iOS, which functions as a simple file management and storage solution for iPhone and iPad users, for both local storage and storage through cloud services like iCloud Drive, Google Drive, Dropbox, and others. The Files app has a variety of convenient file management options available, including folder creation, file and folder renaming, file tagging, simple zip file handling for saving and previewing, a customizable sidebar with Favorites, and much more. The Files app in iOS is sure to develop further and gain even more functionality as iOS continues to evolve too, so there should be even more exciting options and features available down the road in future releases of system software for the iPad and iPhone.
The Location Services capabilities of iPhone and iPad allow the devices to use onboard GPS, Wi-Fi, cell tower location data, and Bluetooth to determine the location of the iPhone or iPad. With iPhone, this location data can be pretty much exact, placing the location of the iPhone (and potentially you) perfectly on a map thanks to GPS and cell tower triangulation, and it’s impressively accurate with iPad too. Many iOS apps rely on location data to function properly, for example the various map applications rely on device location data to be able to accurately route directions to and from destinations, you can easily share your current location with someone through Messages, and weather apps use location data to gather location relevant weather data. But not everyone is thrilled with their location being used by apps or the iOS operating system, and some users in high security or privacy-important environments may wish to completely disable Location Services on their iPhone or iPad.
This article will show you how to disable all Location Services on an iPhone or iPad, preventing geographic location data from being gathered or used by all apps and most iOS services too.
How to Disable All Location Services on iPhone or iPad
Note this completely turns off all geographic location services and features on an iPhone or iPad, which may prevent some apps (like Maps) from behaving as expected:
Open the “Settings” app on iPhone or iPad
Choose “Privacy” from the settings options
Now choose “Location Services” from the privacy options
To disable all Location Services completely, toggle the switch next to “Location Services” to the OFF position
Confirm that you want to turn off and disable all possible location services by tapping on “Turn Off”
(Note that by disabling Location Services, the location information of an iPhone will still be used if that iPhone is used to place an emergency call from that device.*)
Remember, turning off Location Services completely will prevent any app from being able to use your geographic location or location data. That includes apps that require geolocation to function properly, like Maps.
You can also choose to disable Location Services on a per-app basis, which is a great targeted approach if you’d rather keep the Location Services feature on broadly, for things like maps and directions, but still want to strictly limit which apps and system services are able to use, access, and retrieve your location data. Most iPhone and iPad users should probably follow this approach, and leave the feature enabled while instead selectively turning off location data for the majority of apps. This is done through the same Location Services section of Privacy settings, but you must choose each app specifically in the list to customize, selecting “Never” to disable location services for the apps in question.
My personal opinion (in case you wanted my specific thoughts on this topic) is to leave Location Services enabled in iOS, but to very strictly limit what apps and services are able to use your location data. Frankly, the vast majority of apps do not need your location data, and they should not have access to it. My opinion is that some apps make sense to use your location data, including apps like Maps, Google Maps, Find My iPhone, Find My Friends, Compass, Waze, Weather, maybe even apps like Calendar and Reminders if you just location aware features in those. But that’s about it. Anything else almost certainly doesn’t need your location data to function, but if you aren’t sure, just think about how the app is used… is location required to get the usage you desire out of a particular app? The answer is probably obvious, and also probably a no. Does a camera app need your location in order to function? Nope, turn it off. Does social media need your location data to function? Nope, turn that off too. Does a language learning app need your location? Nope. Does a maps app that uses your current location to route you accurately to a destination need your location? Yes. Just use a little common sense.
Why Disable Geographic Location Services on an iPhone or iPad?
There are many possible reasons to disable geographic location services on an iPhone or iPad, but the most commonly cited reasons to disable location data come down to security and/or privacy.
Security: If you’re using an iPhone or iPad in a high security environment, you may want to disable location services to protect the location. In fact, depending on your job and where you live, you may even be required to disable location services on a device, as is the case now with many personnel employed by government and military.
Privacy: If you’re using an iPhone or iPad at a location that you’d rather keep private, perhaps your personal home address, an office, school, shelter, a favorite swim hole, or some other beautiful place that you’d rather not be discovered, overused, and ruined, then disabling geolocation and geotagging on iPhone camera, disabling geolocation and location services for all social media apps, removing location from photos, stripping geotags and geolocation and other metadata from pictures, and anything similar is a great idea.
Battery life: The other reason that many iPhone and iPad users choose to disable location services – though usually only on a per-app basis – is to improve device battery life. Using GPS and location data requires more power, and thus if an app is using a lot of location data, it can reduce the battery life of an iOS device. If you’re interested in this particular concept, we’ve discussed before here how you can find what apps are using location services in iOS, which can also help to mitigate battery drain on iPhone and iPad.
* You can get more information about location services and how your iPhone or iPad uses them by tapping the little blue text in the Settings that says “About Location Services & Privacy”, where you’ll be presented with the following information in the iOS Settings app (as of iOS 11.4.1), repeated below for easier reference and reading:
Location Services allows Apple and third-party apps and websites to gather and use information based on the current location of your iPhone or Apple Watch to provide a variety of location-based services. For example, an app might use your location data and location search query to help you find nearby coffee shops or theaters, or your device may set its time zone automatically based on your current location. To use features such as these, you must enable Location Services on your iPhone and give your permission to each app or website before it can use your location data. Apps may request limited access to your location data (only when you are using the app) or full access (even when you are not using the app). For safety purposes, however, your iPhone’s location information may be used when you place an emergency call to aid response efforts regardless of whether you enable Location Services.
Location Services uses GPS and Bluetooth (where those are available) along with crowd-sourced Wi-Fi hotspot and cell tower locations to determine your device’s approximate location. Your Apple Watch may use the location of your paired iPhone if it is nearby. If Location Services is on, your iPhone will periodically send the geo-tagged locations of nearby Wi-Fi hotspots and cell towers in an anonymous and encrypted form to Apple, to be used for augmenting this crowd-sourced database of Wi-Fi hotspot and cell tower locations. By enabling Location Services, location-based system services such as these will also be enabled:
Traffic. If you are physically moving (for example, traveling in a car), your iPhone will periodically send GPS locations and travel speed information in an anonymous and encrypted form to Apple, to be used for augmenting a crowd-sourced road traffic database.
Popular Near Me. Your iPhone will periodically send locations of where, and when, you have purchased or used Apps in an anonymous and encrypted form to Apple, to improve a crowd-sourced database that may be used to offer geographically-relevant Apps and other Apple products and services.
Significant Locations. Your iPhone will keep track of places you have recently been, as well as how often and when you visited them, in order to learn places that are significant to you. This data is transmitted end-to-end encrypted between your iCloud connected devices and will not be shared without your consent. It will be used to provide you with personalized services, such as predictive traffic routing, and to build better Photos Memories.
Location-Based Apple Ads. Your iPhone will send your location, including its travel speed and direction, to Apple in order to provide you with geographically relevant iAds.
Location-Based Suggestions. The location of your iPhone will be sent to Apple to provide more relevant recommendations. If you turn off Location Services for Location-based Suggestions, your precise location will not be sent to Apple. To deliver relevant search suggestions and news, Apple may use the IP address of your internet connection to approximate your location by matching it to a geographic region.
Location-Based Alerts. Your iPhone and Apple Watch will use your location in order to provide you with geographically-relevant alerts, such as a reminder to call someone when you get to a specific place, when to leave for your next appointment, or an app recommendation based on where you currently are.
Share My Location. You can choose to share your current location with others, on a temporary or ongoing basis, from within certain apps such as Messages and Find My Friends.
HomeKit. Your iPhone will use your location to enable accessories to turn on or off when you arrive or leave a specific location, such as turning on your lights when you get home.
The crowd-sourced location data gathered by Apple does not personally identify you.
By enabling Location Services for your devices, you agree and consent to the transmission, collection, maintenance, processing, and use of your location data and location search queries by Apple and its partners and licensees to provide and improve location-based and road traffic-based products and services.
You may choose to disable Location Services at any time. To do so, open Settings on your iPhone, tap Privacy, tap Location Services, and either turn off the global Location Services switch or turn off the individual location switch of each location-aware app or feature by setting it to “Never”. To disable Location Services for all websites, set the Location Services setting for Safari to “Never”. You may also disable location-based system services by tapping on System Services and turning off the switch for each location-based system service.
If you allow third-party apps or websites to use your current location, you are subject to their terms and privacy policy and practices. You should review the terms, privacy policies, and practices of such apps and websites to understand how they use your location and other information.
Information collected by Apple will be treated in accordance with Apple’s Privacy Policy, which can be found at http://www.apple.com/privacy.
Ultimately it’s up to you as a user (and perhaps your employer) how you use Location Services and whether or not you want certain apps, all apps, or as little as possible using your geographic location data.