Have you ever lost an iPhone somewhere in a house, office, or car, and can’t quite find it? Trying to locate a misplaced iPhone can be frustrating, but if you have another iOS device, Apple Watch, or Mac nearby then you can use Siri to help find a lost iPhone.
With this great trick, you’ll be using Siri to play a sound alert on the lost iPhone to help you locate it and track it down. This is perfect for those routine scenarios of an iPhone getting buried under a seat cushion, falling into a car abyss, or just generally being misplaced.
To use the Find My iPhone feature to locate your misplaced iPhone, you’ll obviously need another device with Siri, and Find My iPhone must be enabled on the missing iPhone.
How to Find a Lost iPhone with Siri
Summon Siri as usual, then issue the command “Find my iPhone”
If you have multiple iPhones, choose the iPhone model that is lost to find
Confirm that you want to play a sound / alert on the iPhone
The iPhone will now play a loud alert sound, helping you to locate the misplaced iPhone
The iPhone alert sound will continue to ping until it is picked up and interacted with, either by pressing a button on the device, unlocking the iPhone, or acknowledging the on-screen alert.
If someone is actively using the iPhone, it will still make an alert sound and display a “Find My iPhone Alert” message, but once someone taps “OK” the alert sound will stop.
So if you think that your iPhone is lost to you but that someone else is actively using your iPhone, and it’s not truly lost or misplaced, but has simply been accosted (like maybe a kid snuck off to hide somewhere with your iPhone to play Fortnite), keep that in mind.
f you don’t have another iPhone, iPad, or Mac with Siri, or if you only have a Windows PC, Android, or older iPhone or iPad nearby, you can also initiate a pinging sound on a lost iPhone from iCloud as discussed here.
For Apple Watch users, a similar feature allows you to ping an iPhone from Apple Watch to help find it, which is also quite useful.
While this is part of the Find My iPhone feature set, this is just a simple finding mechanism initiated by Siri, it’s not the same as iCloud Lock or remote wipe, both of which are much more extreme measures to take if an iPhone (or iPad) is truly lost or was stolen. You can access those features and more by tapping on the Siri option for “Open Find My iPhone”, however.
If you’re tired of a particular app posting notifications, you don’t have to drill down.
Notifications are one of iOS’s best features, letting apps and the iOS system alert you about important updates: a new episode of a show is available, a new text has arrived, your Lyft is on its way, and more. But you can wind up with apps that either notify you too often, or change their notification pattern after you’ve given permission.
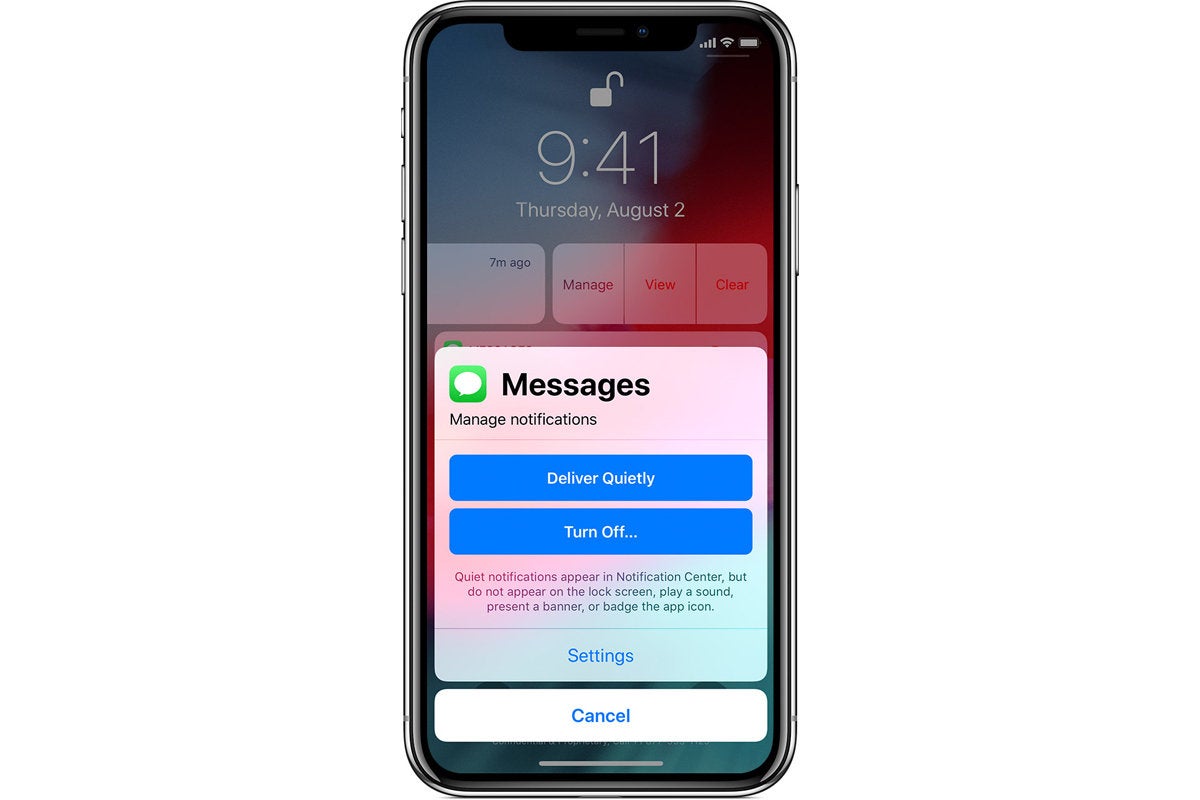
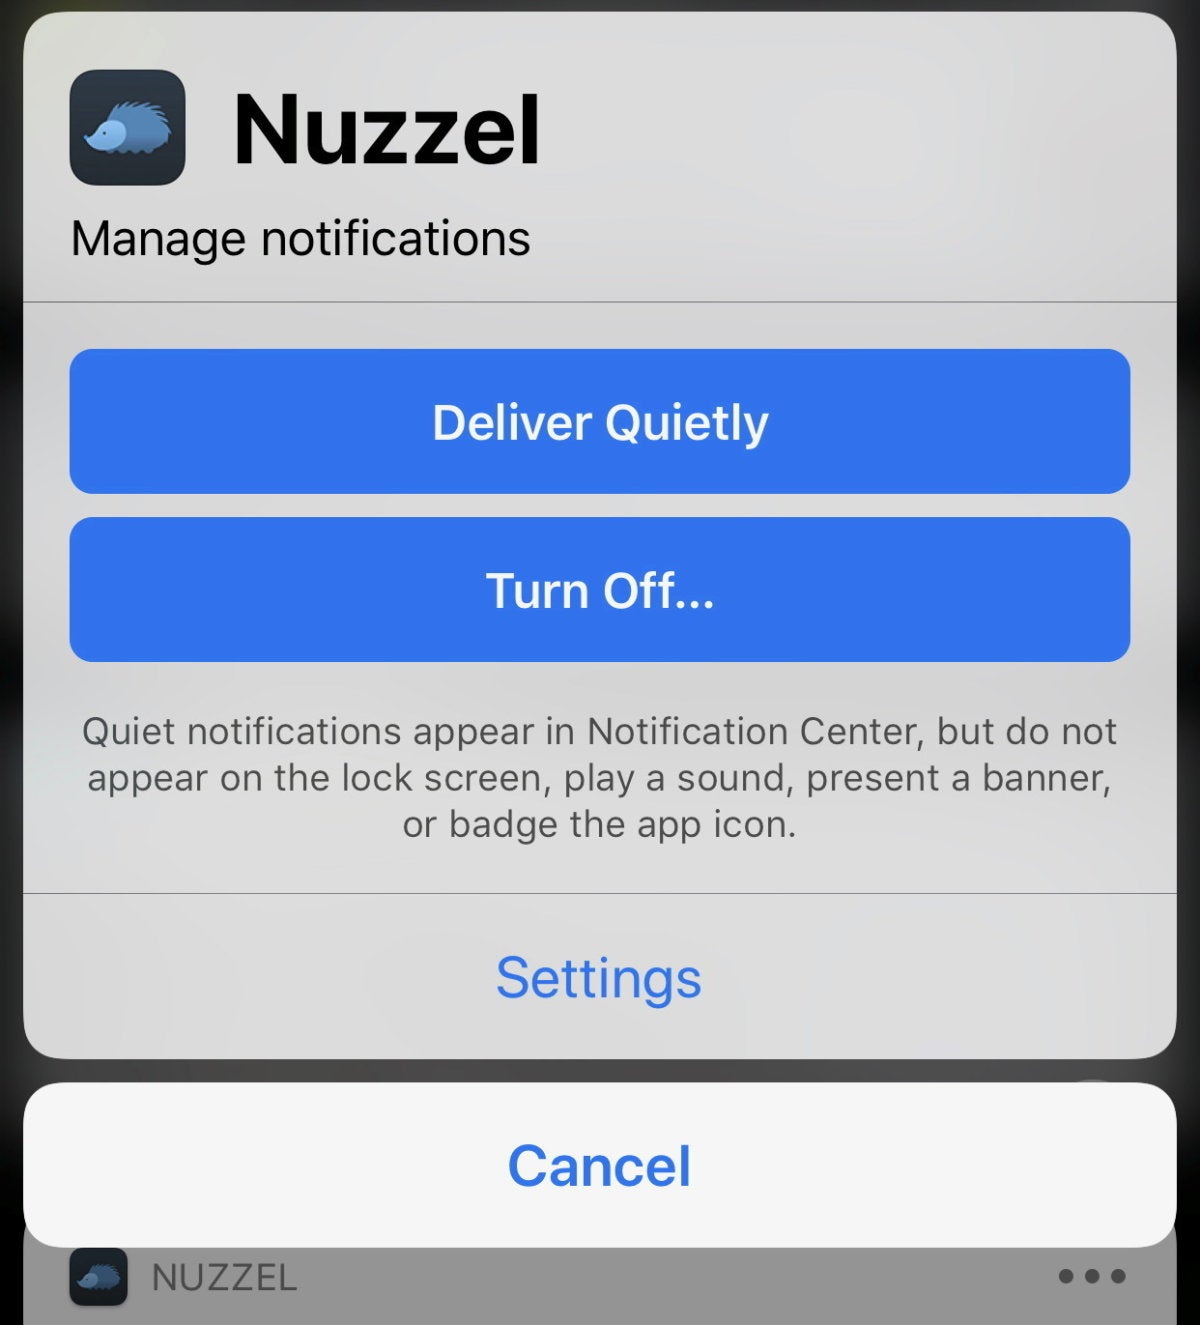
You can dive into Settings > Notifications, swipe to find the app, and adjust settings there. But Apple introduced a nifty way in iOS 12 to change notification settings from within a lock screen alert.
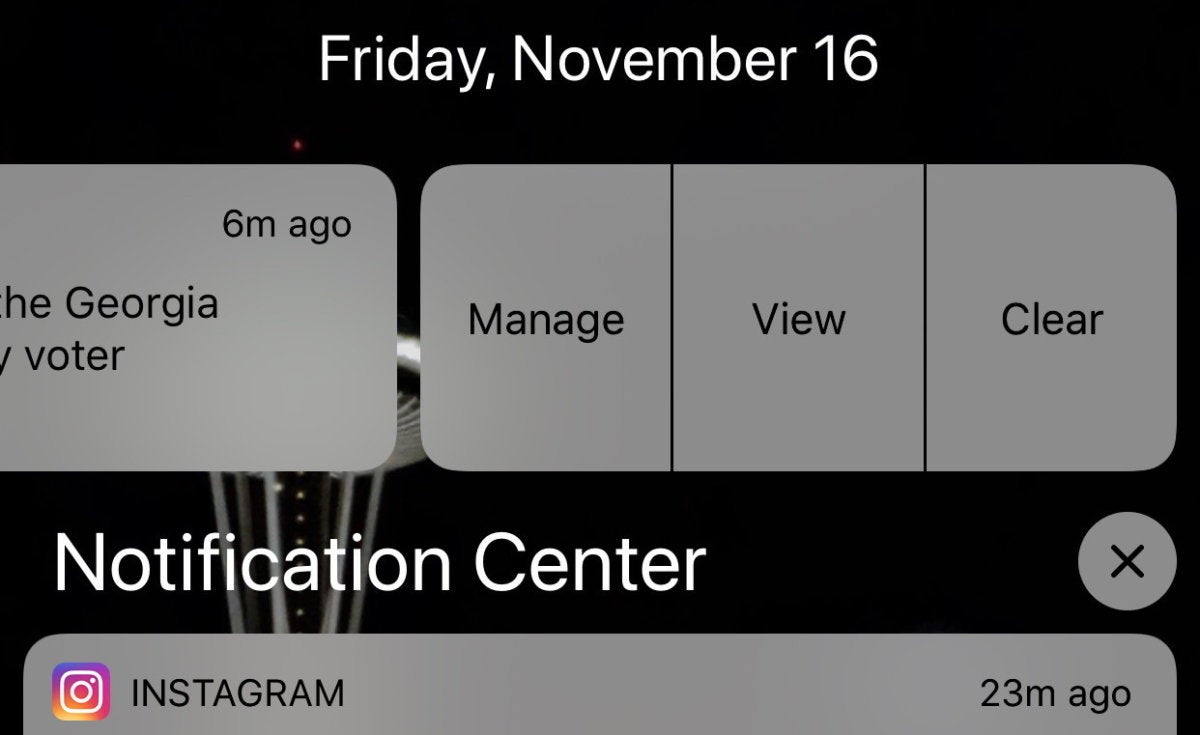
Swipe left and you can tap Manage.
From the lock screen, either swipe left and tap Manage, or “peek” (press lightly) to preview the notification and then from the preview tap the three dots (…) in the upper right corner.
A pop-up menu offers Deliver Quietly or Turn Off, as well as a Settings link.
Tap Delivery Quietly and the notifications will only appear in Notification Center from now on.
Tap Turn Off and confirm by tapping Turn Off All Notifications. The app’s notifications are fully disabled.
Tap Settings and it dives you right to that app’s specific notification settings, where you can tweak them.
You can “peek” (press lightly) and get a number of notification control options from the lock screen.
If you have connected an iPhone, iPad, or iPod touch to a USB accessory, or even a Mac or PC lately, you may have seen an “USB Accessory – Unlock iPhone to use accessories” message appear on the screen (or “Unlock iPad to use accessories” for iPad of course).
This message appears on screen due to a new security feature introduced in iOS, which aims to better protect iPhone and iPad from unauthorized access attempts by USB connections. This is mostly a good thing, but until you approve the USB accessory and unlock the iOS device, you may find that the iPhone or iPad won’t communicate with the USB accessory, or it might not even charge.
Resolving the “Unlock iPhone to Use Accessories” Message with USB
The simplest way to resolve this message if you see it on the screen of your iPhone or iPad is to unlock the iPhone or iPad using your passcode, while the USB device or USB accessory is connected to the iOS device.
You may have guessed that already based on the message itself, but once you unlock the iPhone or iPad with a proper passcode, the message goes away, and the USB accessory or USB device will be able to communicate with the iOS device as intended, including charging the iPhone or iPad as intended.
How to Disable the USB Accessory Unlock Message on iPhone or iPad
If you connect many different USB devices and USB Accessories to an iPhone or ipad you may decide you don’t want to see that “Unlock to use accessories” message anymore, and no longer want to unlock the device every time to deal with this. You can disable this protective mechanism in iOS settings, but realize that doing so comes at a theoretical security risk since it will allow USB devices to connect to the iOS device without the iOS device being unlocked.
Open the “Settings” app in iOS
Go to “Face ID & Passcode” (or “Touch ID & Passcode”)
Scroll down and locate the “USB Accessories” setting and toggle that ON to disable the USB security restriction protection
By turning on the setting for “USB Accessories” you will no longer see the “USB Accessory – Unlock iPhone to use accessories” or “USB Accessory – Unlock iPad to use accessories” messages on the devices when connecting anything via USB.
If you have noticed that your iPhone won’t charge when plugged into some computers or devices and you’ve followed the usual troubleshooting steps to resolve charging issues, and the iPhone is running a modern version of iOS showing the ‘USB Accessory’ message on the lock screen, this very well could be the reason why.
What’s the point of restricting USB Accessories on iPhone or iPad?
Restriction of USB accessory attachments to the iPhone and iPad is a fairly new feature that is aimed at improving the security of iOS devices, by aiming to prevent unintended access of a device through any USB connection or USB mechanism.
A prominent example of what the USB security setting is aiming to prevent is something like the GrayKey box which is apparently used by some agencies and law enforcement bodies to gain access to otherwise locked iPhone and iPad devices, by revealing a devices passcode. But these capabilities are never limited, that’s just the nature of security flaws and exploits, and so if such a tool is available to the “good guys” then such a tool would also be available to the “bad guys” who could also gain unauthorized access to an iPhone or iPad, thus something like this poses a security risk.
Whether or not you want to keep the default setting with USB Accessories toggled ‘off’ or turn it ‘on’ as mentioned here so that you can avoid the message on your screen anytime a new untrusted USB devices is connected to the iPhone or iPad is entirely up to you, and a matter of your own security needs and privacy desires. For some users disabling the alert and USB restriction will be desired, whereas for others they might prefer the sense of security knowing that their device is inaccessible without authorization.
And of course if you turned this feature off so that you’d stop seeing the USB Accessory unlock message, you can always change your mind later, toggling this USB restriction setting off or on as needed in iOS. So perhaps if you’re planning a trip to a place where you’d be more concerned about prying eyes you could return to the default setting of restricting USB accessory access to an iPhone or iPad – it’s your call! If you feel like doing that, simply return to the same settings and turn ‘USB Accessories’ back off again.
This USB security feature exists enabled by default on all iPhone or iPad models running iOS 12 and later, and was first introduced in iOS 11.4.1, but no earlier versions of iOS system software have the USB restrictions as an option, and also won’t display the message when a USB cable is connected to the iOS device.
Visual Voicemail on iPhone makes checking voicemail super easy, whether it’s just quickly listening to a voicemail message or reading voicemail transcripts, so it’s understandably frustrating if you discover that voicemail is suddenly not working on the iPhone.
One peculiar voicemail issue on iPhone can be where there are numerical indicators showing new voicemail messages, but iPhone Voicemail is unable to load any of them and instead suggests that voicemail isn’t setup or configured when it certainly is, with an error stating “to retrieve a voicemail first set a password and greeting.” without any option to set a greeting or password.
If you know for certain that you already have voicemail set up with a password and greeting and you’re seeing this message in the voicemail tab of the Phone app, you can likely quickly remedy the error and get access to your voicemail again.
The solution to this voicemail problem is usually rather simple: forcibly reboot the iPhone.
Forcibly restarting an iPhone differs per iPhone model:
iPhone XS, iPhone XS Max, iPhone XR, iPhone X, and newer iPhone models without a Home button: Press volume up, press volume down, then press and hold Power button until the iPhone reboots and you see the Apple logo on screen
iPhone 8 Plus, iPhone 8: Press volume up, press volume down, then press and hold Power button until the iPhone restarts
iPhone 7 Plus, iPhone 7: press and hold Volume Down and Power button until iPhone restarts
iPhone 6s Plus, iPhone 6s, iPhone 6, iPhone 6 Plus, iPhone 5s, iPhone SE, and older: press and hold the Power button and the Home button until the Apple logo shows on screen
After the iPhone boots back up again, unlock the iPhone and return to the “Phone” app and to the Voicemail tab, your voicemails should be available again as expected where you can share or save voicemails from iPhone.
In the example screenshots here, an iPhone had a blank voicemail screen with the erroneous voicemail message stating “To retrieve a voicemail first set a password and greeting.”
(Note: you can see that error for legitimate reasons, but typically if visual voicemail is actually not set up on the iPhone, there will be a button at that screen to configure visual voicemail – in this case obviously there is no setup button and this is an erroneous message thus requiring troubleshooting)
This was remedied with a simple force reboot, and now you can see the iPhone Voicemail is available, in this case filled with dozens of lovely spam voicemail calls from spam robocallers and scam automated calls (hooray).
If you reboot and then find a blank red badge on the Voicemail tab, you’ll need to re-enter or change the voicemail password though Settings > Phone, though this shouldn’t be necessary if you had voicemail configured properly before.
If you still have issues with visual voicemail on iPhone after these steps, resetting network settings can often resolve the problem, though that should be considered a last resort since doing so will clear out wi-fi passwords and other custom network configurations.
Remember, not all iPhone cellular carriers will support visual voicemail, so if the feature never worked for you because your mobile provider isn’t supporting the feature than none of these tricks will work to resolve something that your carrier does not support to begin with.
Rebooting an iPhone can often resolve voicemail issues, including if they show up but won’t play, and sometimes if you get the Visual Voicemail Unavailable error on the iPhone too, though that latter error is usually a connection issue.
The iPhone and iPad have a little known text-to-speech functionality that will verbally spell out a selected word or string for you. This great feature is useful for many obvious reasons, whether for educational purposes, or perhaps you can’t quite make out if what you’re reading on the iPad or iPhone screen is supposed to be an uppercase O or a zero 0, or any other situation where you can imagine it’s useful to have your iOS device speak aloud the spelling of a word or selected item.
This great trick literally spells out a word that is selected, for example if you selected the word “burrito”, then iOS will spell out b-u-r-r-i-t-o by annunciating each individual letter in sequential order, making this a completely different spelling feature from auto-correct or the general text to speech and Speak Screen functions in iOS.
Spell Out Words Aloud to You on iPhone or iPad
In any application where you can select text, be it on a web page with Safari, or in a word processor application like Pages or Google Docs, you can have iOS verbally spell out a word for you. Be sure the audio is turned up on the iPhone or iPad, then you can test this trick out yourself by doing the following:
Tap and hold on the word / string you want to spell out so that it’s selected by iOS
When the pop-up menu appears on screen, choose “Spell” (note in some apps like Pages you may need to tap the > arrow button to show the ‘Spell’ options)
iOS will spell out the word aloud, character by character
You can spell individual words, text strings, or even numerical sequences, as long as you can select the word or string in iOS, the “Spell” option should be available on any modern iPhone or iPad, and when chosen it will spell out the word or string.
If you’re reading this very web page on an iOS device you can try it out yourself simply by tapping and holding on any single word on this page, then selecting the “Spell” option from the pop-up menu that shows on screen.
Remember, if you’re using an app like Pages with a lot of pop-up menu options, you’ll need to tap on the arrow button to show the ‘Spell’ option in the menu.
Note: if this feature is not available to you, then you will need to have “Speak Selection” enabled in iOS Settings to have this feature available to you. Go “Settings” then to “General” > “Accessibility” > and Speech, choosing to enable “Speak Selection” in those settings. This enables many helpful features, including general Text-to-Speech capabilities, and allowing for tricks like having your iPhone or iPad reading your emails to you, or Siri reading the iOS screen to you, and much more.
This spelling aloud capability is part of the iOS text to speech functions, but rather than speaking aloud a word, it spells out the word or selected string. This isn’t really meant to be a typographical error correction method, as that’s what autocorrect and the QuickType keyboard bar are for, but it certainly can serve that function too if you need it to, particularly if you can’t quite see what the spelling of a word is on screen, and of course assuming you know how to properly spell the word to begin with.
The text-to-speech capabilities on the iPhone and iPad are really great with a lot of hidden tricks available. Two of my personal favorite capabilities are using the iOS text-to-speech abilities to have Siri read the screen to you in iOS, or to enable Speak Screen to have iOS read entire articles to you with a gesture. If the general topic of text-to-speech interests you then check out archives on that subject here, where text to speech tips for iOS and MacOS are covered.
Have you ever noticed that your iPad or iPhone wallpaper moves around as you pick up the device and physically move it around? If you’re prone to motion sickness, you’ve almost undoubtedly noticed this Perspective Zoom feature, as the parallax effect induces nausea in some susceptible users, and for others they’re maybe just left wondering why their icons and wallpaper picture is sliding around and panning in the background of the Home Screen and Lock Screen of an iOS device.
While you can use Reduce Motion to disable those movement effects everywhere in iOS another option is to simply focus on the wallpaper, and turn off the movement of your background wallpaper picture on an iPhone or iPad, which is what we’ll show you here.
How to Disable Perspective Zoom for iOS Wallpapers
Open the “Settings” app in iOS
Choose “Wallpaper” then tap directly on your currently active wallpaper (either the Lock Screen or Home Screen, you can change the other one separately either way)
At the “Wallpaper Preview” screen look for “Perspective Zoom” and tap on that so that it says “Perspective Zoom: Off” to disable the wallpaper background movement
Choose to set the image as your wallpaper for Lock Screen or Home Screen again, then repeat with the other screen if desired
That’s it, now your wallpaper will no longer move around in the background as you pick up your iPhone or iPad, whether it’s at the lock screen or home screen.
If you dislike all of the general zooming and moving and panning and parallax effects and animations in iOS, you can also enable Reduce Motion in iOS to dramatically reduce the number of motion and parallax, which instead causes iOS to replace those zooming animations with a fading transition effect that some users may enjoy more, but also sometimes feels faster for some devices.
You can also adjust the Perspective Zoom setting while setting a picture as your wallpaper in iOS from the Photos app or elsewhere.
If you aren’t entirely sure what this article is referencing, the topmost animated GIF image (repeated immediately below) shows the effect on an iPad, with the wallpaper background moving around and the icons sliding around, as the device itself is moved. The same feature exists as default on the iPhone and iPad and iOS in general:
Note this is specifically about the motion you see in wallpapers, it does not relate to zooming of the image itself. If you are trying to reduce the zoomed effect of wallpaper images this workaround in iOS works quite well for that purpose, particularly if you’re trying to fit a photo of people as your wallpaper image.
This obviously only applies if your current wallpaper has “Perspective Zoom” enabled, if the feature was not enabled to begin with when setting a wallpaper you won’t have any movement of the icons or wallpaper. Likewise if you have Reduce Motion enabled, you won’t see the wallpaper movements and backgrounds either.
Whether or not you like the parallax perspective motion feature in iOS is entirely a matter of personal preference, and perhaps your proneness to motion sickness, vestibular disturbances, and nausea, but for some users it’s also entirely a matter of taste as well. Set your iPhone or iPad as you like, whether it’s moving, or still!
Want to quickly get the battery life of an iPhone or iPad? While on some iOS devices you can glance at the top of the screen to see the battery percentage remaining, newer iPhone models with the top screen notch hide the battery life percentage and instead require users to find battery life in Control Center, like on the iPhone XS Max, iPhone XS, iPhone XR, and iPhone X.
But there’s another way to get battery life percentage remaining quickly in iOS, and that’s by using everyones favorite voice assistant, Siri.
Getting Battery Life Remaining on iPhone or iPad with Siri
Summon Siri as usual, and then ask “what is my battery life?”
Siri will report back something along the lines of “Your iPhone is at 100%” or “Your iPad is at 82%”
You can bring up the Siri request through any way you want, whether it’s Hey Siri voice activation, holding the Home button if your iOS device has one, or holding the Power button if the iPhone X, iPhone XS, iPhone XR, or iPad Pro has no Home button, or by using Assistive Touch.
While the screenshot above shows this trick working on an iPhone, it works the exact same on iPad too, as the screen shot image below demonstrates:
If you’re checking battery life because you feel like your device is running down a little too fast, one of the best possible battery life extending tricks is to use Low Power Mode on iPhone which dramatically boosts battery life at the expense of some features and performance that you likely won’t notice anyway. Unfortunately Low Power Mode does not exist for iPad for whatever reason (yet anyway), but it’s a wonderful feature for iPhone users to enjoy.
And of course if you’re obsessing about battery life because battery performance seems to be rapidly declining like after updating iOS system software, you can check out some battery life tips here for iOS 12 devices that can be quite useful for prolonging battery usage.
The iPhone and iPad now have the ability to make Group FaceTime video calls, where you can have up to 32 people participating in a group video chat.
Let’s walk through how to start a Group FaceTime video chat on the iPhone and iPad, and also demonstrate how to add people to an existing FaceTime video chat to turn that into a group video chat in iOS.
Note: Group FaceTime video is limited to iPhone 6s or newer, iPad Pro or newer, iPad Air 2 or newer, and iPad Mini 4 or newer, and those devices must be running iOS 12.1 or later. However, users with other iOS 12.1 supported devices can still join a Group FaceTime call, but they will be limited to audio capabilities only. Aside from those limitations, you’ll also need to be sure that FaceTime is enabled on your iOS device, and that whatever recipients you’re video chatting with also have FaceTime enabled and that their devices are up to date and compatible with FaceTime group video chat.
How to Start a Group FaceTime Video Chat on iPhone or iPad
You can start a new Group FaceTime video chat at any time from iOS with multiple participants, here’s how:
Open the FaceTime app in iOS if you have not done so already
Tap the “+” plus button in the upper right corner of the FaceTime app
Add the contacts you want to join a Group FaceTime video call with *, you can add up to 32 people
Tap on “Video” to start the Group FaceTime video chat
This approach will ring all of the video chat participants who then join directly to the same group FaceTime video call.
Anyone (yourself included) can disconnect and hangup on the group FaceTime video chat by tapping the big red x button on the screen.
How to Add More People to Existing FaceTime Video Chat on iPhone or iPad
You can also turn a regular FaceTime video chat into a Group FaceTime video chat, or add more people to an existing FaceTime video call, by adding people to a currently active FaceTime Call:
From an active FaceTime conversation, tap the screen so that options are shown
Now tap on the “(…)” three period gray button
Tap on “+ Add Person” from the additional options, then add the contact(s) you’d like to add into the existing current FaceTime video chat*
This method is convenient particularly if you’re on a current FaceTime video call and decide you want to bring in another person, or group of people. You can have up to 32 people total in a group FaceTime video chat this way.
Hanging up a Group FaceTime video call is the same as disconnecting any other FaceTime call, just tap the red (X) button to hangup the call.
* Recall that all participants of the Group FaceTime video chat must be using a compatible device and have iOS 12.1 or later on their iPhone or iPad, or macOS Mojave 10.14.1 or later on their Mac. If their device is not compatible with group video chat, but compatible with iOS 12.1 or later generally, then they’ll instead join as an audio stream.
It’s also noteworthy to point out thatflipping the FaceTime camera in iOS 12 and iOS 12.1 is tucked behind the “(…)” triple dot gray button, though that method has changed in iOS 12.1.1 onward and now the switch camera button is back on the main FaceTime screen, so if you’re on a video call and want to switch the camera then you’ll need to access the additional FaceTime options screen.
You can also start group FaceTime video chats from a group text message (or single video calls for that matter from a single message thread) directly from the Messages app of iOS, just remember that accessing FaceTime video form Messages via the “Details” info button in Messages for iOS 12 is now hidden behind the users name at the top of a message conversation thread.
Wondering where the Bluetooth status indicator icon went in iOS 12? As you may recall, prior versions of iOS has a Bluetooth icon that would appear in the status bar at the top of an iPhone or iPad screen when Bluetooth was enabled. But with iOS 12, that Bluetooth on status indicator is now missing, and the Bluetooth symbol is also no longer present in the status bar. Because the Bluetooth status icon is missing, some iPhone and iPad users may be curious about how to check if Bluetooth is enabled or disabled in iOS 12.
This article will show you two simple ways to confirm that Bluetooth is enable for disabled now that the Bluetooth symbol icon is no longer visible.
Check Bluetooth Status in iOS 12 by Control Center
Probably the fastest and easiest way to check Bluetooth status in iOS 12 is through Control Center. Do recall that accessing Control Center in iOS 12 is different now on some devices like the iPad, so keep that in mind while you proceed:
Open Control Center from the iPhone or iPad; on all iPad models and iPhone X, XS, XS Max, and XR, swipe down from the top right corner of the screen to access Control Center. On iPhone 8, iPhone 7, iPhone 6 and older, swipe up from the bottom of the screen to access Control Center
Look for the Bluetooth icon in the Control Center:
Bluetooth is enabled / connected if the Bluetooth icon is highlighted Blue
Bluetooth is disabled / disconnected if the Bluetooth icon is not highlighted, instead showing a small slash through it
Toggling Bluetooth connections off or on is just a matter of tapping the Control Center icon to suit your needs
Swiping open Control Center to check on Bluetooth status has the notable advantage of allowing you to also immediately toggle Bluetooth off or toggle Bluetooth on, depending on what you need.
Many devices that pair with iPhone and iPad require Bluetooth, including Apple Watch, most external keyboards foriPhone and Bluetooth keyboards foriPad, AirPods, and many external speakers and wireless headphones, and much more. Thus if you use any of these accessories with your iPhone or iPad, you’ll probably appreciate knowing that you can quickly check Bluetooth status in iOS as well as toggle the feature off and on as needed.
Check Bluetooth Status in Settings for iOS 12
Another method of checking Bluetooth status is through the iOS Settings app, which also allows you to disable Bluetooth in iOS 12 rather than simply disconnect Bluetooth devices from an iPhone or ipad:
Open the “Settings” app in iOS
Look for “Bluetooth” in the settings options, if it says “On” then Bluetooth is enabled, if it says “Off” than Bluetooth is disabled
Tap the “Bluetooth” setting and adjust the toggle as needed to turn the feature off or on
Opening Settings to check on Bluetooth status is a bit slower for most users than simply using Control Center, but it may be preferred for some, particularly since it actually allows for turning off the feature completely instead of simply disconnecting Bluetooth devices. The other benefit to checking Bluetooth status through Settings is that it works exactly the same in iOS 12 and later as it does in iOS 12 and earlier, as the Settings app has always reported if Bluetooth is off or on while also allowing you to disable or enable Bluetooth in iOS as needed.
And of course the obvious indicator; if you have a Bluetooth device synced with an iPhone or iPad, whether that’s an Apple Watch or AirPods or external keyboard, if that device is actively working with iOS, then of course Bluetooth is enabled on that paired iOS device.
Screen Time is one of the best features in iOS 12, allowing you to keep track of how often an iPhone or iPad gets used, what apps are being used, and perhaps best of all, Screen Time gives you the ability to easily set time limits for apps and categories of apps, and even set restrictions on content and privacy. While many iPhone and iPad owners will appreciate Screen Time, whether for better understanding their own device usage or for managing a childs device or someone else’s, some iOS users may also decide they do not want the Screen Time feature enabled and reporting usage data points or limiting app use at all.
If you want to turn off Screen Time completely in iOS 12 for iPhone or iPad, this tutorial will show you how to do so.
Note that by turning off Screen Time you will no longer be able to see the daily and weekly charts of device usage, app usage, reports on device pickups, limit apps use, limit device use, or any of the other associated features. However, it’s also noteworthy to point out that some users who found that iOS 12 battery life is worse anecdotally discovered that disabling Screen Time can improve their devices battery life. Whether or not you wish to use the feature on an iPhone or iPad is entirely up to you.
How to Turn Off Screen Time in iOS 12
Disabling Screen Time on any iPhone or iPad with iOS 12 or later is easy:
Open the Settings app in iOS
Go to “Screen Time”
Once at the Screen Time screen, scroll all the way down and choose “Turn Off Screen Time”
Confirm that you want to disable Screen Time on the iPhone or iPad
Once Screen Time is off you’ll no longer have reporting of app use and device usage, you’ll no longer have time limit options on apps or device use, and all content and privacy restrictions are disabled as well.
How to Re-Enable Screen Time in iOS 12
Of course you can re-enable Screen Time at any point and turn the feature back on by toggling the appropriate settings switch again:
Open the Settings app in iOS
Go to “Screen Time” in the settings
Scroll down at the Screen Time settings screen and tap on “Turn On Screen Time”
With Screen Time enabled again you can configure the options to limit iOS device use, restrict app usage, and much more. Screen Time in iOS is kind of like parental controls (or even self controls), so if you’re hoping to set a daily time limit of 15 minutes for social media apps or 20 minutes for gaming, or 10 minutes for a particular app, it’s very easy to do exactly that.