The App Store in iOS will now automatically play video previews of apps while you navigate through the App Store on an iPhone or iPad. These video previews can offer a helpful look into what an app does or may look like, but they can also be distracting, cause battery to drain faster than otherwise, lead to unintentional bandwidth and data usage, and be annoying if you’re not inclined to enjoy automatically playing videos of iOS apps you may or may not have any interest in.
Users can disable video auto-playing in the iOS App Store by adjusting the appropriate settings on their iPhone or iPad.
Be aware the App Store video auto-play feature is available in iOS 11 or newer, as is the ability to turn off video autoplay in the App Store. If your device is on an older version this will not be relevant to you.
How to Turn Off Video AutoPlay on the App Store in iOS
Open the “Settings” app on the iPhone or iPad and locate ‘iTunes & App Store’
Tap on “Video Autoplay”
From the available settings options chose “Off” to disable Video Auto-Play
You’ll notice there is also an option to have video autoplay limited to wi-fi only, which may be a reasonable setting option for some iPhone or iPad users if they like the autoplaying videos but don’t want them to consume their cellular bandwidth.
A little notice under the video autoplay settings for the App Store also mentions that “autoplay will temporarily turn off if you have low battery or a slow internet connection” which may make some iPhone and iPad owners happy, but for others they’ll still want to disable the video autoplaying feature entirely.
If you don’t like video autoplay in general you might also be interested in turning off similar autoplay features elsewhere, you can turn off autoplay in Twitter for iOS, stop Facebook autoplaying audio in iOS, stop YouTube autoplay, or even stopping autoplay video in Safari on a Mac and stopping iPhone autoplay music over Bluetooth too are options. Whether you love or loathe autoplaying of video or sound likely depends on user preference, but fortunately most of the time those features can be adjusted to accommodate for what each person sees fit for their individual device usage.
Of course, if you decide you regret turning off video autoplay for the App Store, you can return to the settings and adjust as necessary to get the feature back again.
With iOS 11, the new Control Center toggles for turning off Wi-Fi and Bluetooth do not actually turn off Bluetooth and Wi-Fi on an iPhone or iPad. Instead, if you hit the buttons for disabling Wi-Fi or Bluetooth in Control Center, the iPhone or iPad will disconnect from wi-fi or Bluetooth, but not actually turn off those wireless services on the iPhone or iPad. This can cause some confusion for obvious reasons, and many users are left wondering why wi-fi or Bluetooth is not actually turned off on their devices, or how to turn off wi-fi or Bluetooth in iOS 11 completely.
You can still turn off wi-fi and disable Bluetooth on an iPhone or iPad with iOS 11, but rather than use Control Center to turn the wireless features off, you must go to the Settings app to disable either.
To be clear, turning “off” Bluetooth or Wi-Fi in Control Center simply disconnects the iPhone or iPad from wi-fi or Bluetooth. For example, if you hit the wi-fi off button in Control Center, it actually just disconnects from the current wi-fi router, but the wi-fi service remains active on the device. Similarly, if you hit the Bluetooth “off” button in Control Center, it only disconnects any connected Bluetooth device (like a keyboard or Apple Watch), and does not actually turn off the Bluetooth service on the iPhone or iPad. This is different from how Control Center worked in past versions of iOS, where hitting the toggle buttons would actually disable the service rather than simply disconnect from connected devices.
How to Disable Wi-Fi in iOS 11 on iPhone or iPad
Because the toggles in Control Center no longer turn off wi-fi or Bluetooth, you will instead need to turn to the Settings app to disable these services:
Open the “Settings” app
Near the top of the settings options choose “Wi-Fi” and flip the switch to the OFF position to completely disable wi-fi on the iPhone or iPad
How to Disable Bluetooth in iOS 11 on iPad or iPhone
Open the Settings app on the iPhone or iPad
In Settings choose “Bluetooth” and flip the switch to the OFF position to completely disable Bluetooth on the iPhone or iPad
Note that the AirPlay mode option in Control Center continues to work to disable both Bluetooth and Wi-Fi, but AirPlay mode also turns off the cellular capabilities of the device, thereby taking it completely offline.
Remember, the wi-fi and Bluetooth toggles in Control Center for iOS 11 disconnects only, it does not turn off wi-fi or Bluetooth. To actually turn off wi-fi or Bluetooth now, you must go to the Settings app instead. The wi-fi settings section still allows you to forget wi-fi networksand perform other similar more advanced options as well.
In some ways this change is a feature improvement because now there is an easy way to disconnect from wi-fi or Bluetooth without disabling those services, this can make it slightly easier to join a hidden wi-fi network from an iOS device for example, particularly if your device is auto-joining another network, but the change in Control Center button behavior can lead to some confusion if the new behavior is not understood.
This isn’t the only change brought to the totally redesigned Control Center of iOS 11, and there are some other feature adjustments that take some getting used to as well, like accessing the Night Shift toggle in Control Center of iOS 11. Fortunately much of Control Center in iOS is now customizable via the Settings app too, so it’s possible that future versions of the operating system will unveil new button toggles to have these functions more directly.
Keeping apps updated on an iPhone and iPad is generally a good idea, as app updates frequently include bug fixes, performance improvements, enhancements to compatibility, or even entirely new features to apps and games. iOS users can update apps by opening the App Store and going to the “Updates” tab, but sometimes an update may not show up despite being available either on other devices or to other users. The solution to such a situation is to refresh the Updates section and check for new app updates available
You can refresh the Updates section of the App Store on an iPhone or iPad, though how you refresh the Updates tab in the App Store has changed in the latest versions of iOS 11 compared to prior versions. The good news is the change is for the better, and checking for new updates to the App Store is better and easier than before.
How to Check for Updates in the App Store for iOS 11
Want to see if new app updates are available in iOS 11 App Store? You can use a nice little gesture to force the App Store Updates tab to refresh, here’s how this works:
Open the App Store in iOS as usual by tapping on the icon on your Home Screen
Go to the “Updates” section of App Store
Tap near the top of the screen near the ‘Updates’ text, then hold and pull down, then release
When the spinning wait cursor finishes spinning, any new app updates will appear
Once the Updates section has refreshed, you can find additional updates if they’re available, and the little badge indicator on both the Updates tab and the App Store icon will update accordingly as well.
As usual, you can update all existing apps that have new versions available by tapping on the “Update All” section, or by individually updating each app as desired.
This “pull down and release to refresh” gesture now introduced into the App Store is actually the same in various other iOS apps. In fact, this is the same pull gesture that will check for new email in Mail for iOS, though many users seem to not know about that capability either.
Keep in mind that prior versions of iOS App Store used either a series of quirky tricks, or a repeated tap of the Updates tab trick to refresh the App Store, so ultimately the change with the latest versions of iOS 11 are a notable improvement. Meanwhile on Mac OS, the Mac App Store can be refreshed via a keyboard shortcut that has remained the same since the introduction of the App Store on the Mac.
Yesterday’s Google event finally brought us the Google Pixel 2 and Pixel 2 XL, the Pixelbook, and the Home Mini/Max but even though the Google fervor is now dying down, there’s still much for Android enthusiasts to look forward to in the coming weeks. The mighty Huawei Mate 10 will soon make its debut on October 16th at a press event in Munich, Germany, and it will be the first public look we will have on Huawei’s upcoming EMUI 6 based on Android 8.0 Oreo. Ahead of this event, we have obtained access to a pre-release firmware build of Android Oreo/EMUI 6 for the Huawei Mate 9, and there are quite a few interesting changes to note for this upcoming update.
The Huawei Mate 9 was unveiled in only November of last year with top-tier hardware specifications, so it’s unsurprising to see this device receive an Android Oreo update. There were hints of early work being done on an Android 8.0 update even as far back as April of this year, though the build that was leaked at that time was fairly barebones. Now, the build that we have obtained is fully functional and can actually install right on top of MHA-L29C432 (the international Huawei Mate 9 variant) so we did just that to start digging in to what’s new in the EMUI 6 update.
EMUI 6 based on Android Oreo for the Huawei Mate 9
The Things You Would Expect
For starters, let’s get the uninteresting details out of the way. As you would expect, most of the required Android Oreo features are available in this build. That means picture-in-picture mode support, the strict background app limitations, notification channels, and even that annoying “app is running in the background” notification that you can thankfully still hide using an app.
We should note that although Huawei implemented notification channels, their notification importance controls is actually a holdover from EMUI 5 and not based on the AOSP version that you may be familiar with. I see this as a boon because it means you don’t need a third-party app to bring back notification importance controls for apps that don’t target Android Oreo.
EMUI 6 Updates
Here is where things get a little bit more interesting. Overall, I would say there aren’t many changes between EMUI 5 and EMUI 6 on the surface, but there are a few new software additions that should make some people happy.
First up, there is a new “screen resolution” option in display settings. This builds upon EMUI 5’s dynamic screen resolution feature called “smart resolution” (which is also present in EMUI 6). While smart resolution would automatically switch between 720p and 1080p in order to conserve power, this new option allows you to manually change between the two resolutions. This method likely beats using the ADB “wm size” command, as that ADB command only adjusts the virtual resolution rather than actually having the display render at a lower resolution.
Next, there is a new button that can be placed on the navigation bar. When the button is enabled, it adds a small arrow to the left side of the navigation bar. Pressing this button will temporarily hide the navigation bar until you swipe up from the bottom. For those of you who like having the stock navigation bar but want to occasionally make use of the full-screen real estate on-demand, this new button beats the ADB command that permanently hides the navigation bar or enables immersive mode. This button isn’t technically new as it is present on the Chinese Huawei Mate 9 firmware, but it’s new to the international variant.
If you aren’t a fan of the software navigation bar, then there is another new navigation option available for you to try. It’s called navigation dock and what it does is it places a movable floating button that can replace the navigation bar for all back, home, or recent button presses. This is distinct from EMUI 5’s “floating dock” as that feature acted like a pseudo-pie control wherein pressing the button would expand a list of available navigation options. EMUI 6’s navigation dock instead uses gesture controls such as slide up to go home, slide right for recents, and touch to go back.
Lastly, in developer options, there is something strange that we found. The usual Bluetooth audio codec customization features are present, as is the ability to switch between various Bluetooth audio codecs—including aptX and aptX HD. aptX and aptX HD are proprietary Bluetooth audio codecs that are owned by Qualcomm, so companies that wish to use them must pay licensing fees to Qualcomm.
We’re not sure why Huawei even made it a selectable option as it doesn’t even work here (picking either of these options simply reverts the selection back to SBC), but then again this is a pre-release build so it’s possible these options will disappear in the final release. Perhaps with root access and a Magisk Module we can enable support for it much like Google Nexus 6P owners can.
Under-the-Hood Changes
You might be wondering by this point why we haven’t yet shown a screenshot of the “About Phone” section. That’s because, like every beta/testing build that Huawei releases internally, the software version is changed to mitigate leaks. Fortunately, it’s rather easy to verify the true software build by taking a peek at the build.prop file. In it, we can see that the following:
and from a separate command, we can find the Linux kernel version
Linux version 4.4.23+(android@localhost)(gcc version 4.9.x 20150123(prerelease)(GCC))#1 SMP PREEMPT Thu Sep 14 04:10:43 CST 2017
So, it’s pretty clear from this information that the Huawei Mate 9 build we have obtained is indeed based on Android 8.0 Oreo (SDK level 26). The Linux kernel version is 4.4, updated from 4.1 in the Nougat-based EMUI 5 on the Mate 9. Furthermore, the security patch level is September 2017 which means that the Mate 9 is safe from the Blueborne vulnerability.
Finally, there are a few things we discovered that are especially interesting to Android enthusiasts. First, Project Treble support is there. Though the kernel sources for the Mate 9 have been available for several months, there aren’t any custom AOSP-based ROMs available for the device. Maybe Project Treble support will change that, maybe not. This is still interesting as it is the first confirmed device that has Project Treble support even though it did not launch with Android Oreo.
Last but not least, here’s a thing that nobody expected to happen: Substratum support in EMUI. Yes, Substratum themes work on EMUI 6. This is all thanks to the Overlay Manager Service (OMS) commits that Sony made to AOSP that have finally made their way in a fully working state in Android Oreo. It’s thanks to this that Google Nexus and Pixel users are able to enjoy full custom theme support using the Andromeda add-on for Substratum. We tested both the command line interface as well as a dark theme in certain apps and can confirm it does indeed work.
Project Treble Support
Substratum Support
Substratum support may not seem as interesting at first glance since Huawei already has its own theme engine, but it should be noted that Substratum will allow you to theme more than just system applications as can be seen in the above screenshot of the Google Messenger application.
That’s all we’ve discovered in this internal, beta build of Android 8.0 Oreo for the Huawei Mate 9. Stay tuned to the XDA Portal as we have more to share about upcoming Huawei and Honor devices. The best way to follow the Portal is by installing the XDA Labs application!
The firmware was discovered by FunkyHuawei.club, a service which lets you install pre-release Huawei firmwares, recover bricked devices, and rebrand/convert China region phones to international variants. The service will support the Mate 10 upon release.
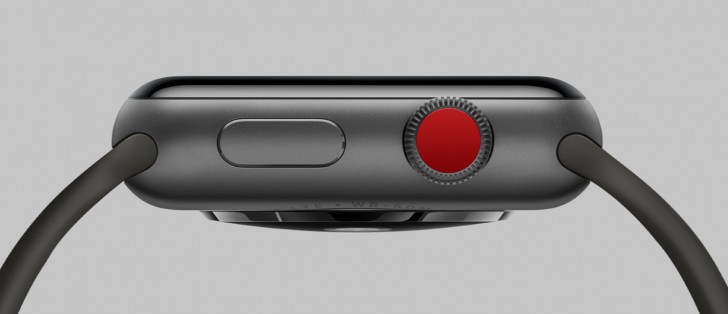
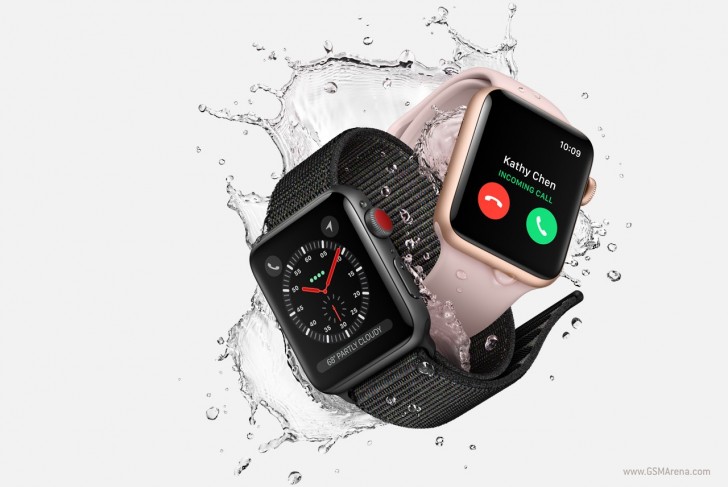
You may have heard that Apple‘s first LTE-enabled Apple Watch was having issues with unsecured Wi-Fi networks, which prevented the smartwatch from using its LTE connection. When out of known Wi-Fi coverage the Apple Watch Series 3 with LTE would latch onto public networks that require a browser sign-in to work. Given that the watch lacks a browser it would connect to the network but not have internet.
Now Apple has fixed the issue in its latest watchOS update – watchOS 4.0.1.
All you need to do in order to get the fix is download iOS 11.0.2 on your iPhone and then update the Apple Watch Series 3.
It’s been an unusually bumpy introduction for the cellular Apple Watch. Outside of the aforementioned issues users in the UK have reported difficulties activating the eSIM in the new Apple Watch.
Here’s hoping it’s smooth sailing from here on out.
HTC has quietly started to push the Android 7.0 Nougat update to the Desire 530 now available at Verizon, You can Check it here how to Update. Launched on the market last year, the HTC Desire 520 wasn’t supposed to be updated to Nougat since it’s rather a budget-friendly smartphone.
Surprisingly, HTC confirmed recently the Verizon Desire 530 is now eligible for an Android 7.0 Nougat upgrade. It even published a very short changelog that contains some of the most important new features and improvements included in the update.
According to HTC, besides Android 7.0 Nougat, the update adds the August security patch, a bit older than what we’ve been expecting, but that will do until the Taiwanese company releases another security update (if ever).
Before proceeding with the update, make sure your phone’s battery is charged to at least 35%. Also, the update should take around 20 minutes and requires around 1.5GB free storage. The smartphone will reboot multiple times during the upgrade process, so don’t worry about that.
Android 7.0 Nougat is likely to be the last major OS update that HTC Desire 530 receives, so if you’re hoping to get Android Oreo in the future you shouldn’t get your hopes up.
Nokias of the past have, over the years, received an almost ridiculous amount of praise for their solid construction. But does the newly revived Nokia brand still retain the same traits now that it’s slapped onto Android smartphones? If we go by a durability test undergone by the Nokia 6, then the answer is a resounding yes.
But what about the new flagship? We’re talking about the Nokia 8, of course. To find out how durable it is, leave it to YouTube channel JerryRigEverything to perform a comprehensive torture test, as usual. Here it is, embedded below for your viewing pleasure.
In case you can’t watch the video, here are the highlights. The front glass scratches exactly as easily as you’d expect Gorilla Glass 5 to, no surprises there. Similarly, when a flame is applied to the screen the pixels it touches go black after ten seconds, but since it’s an LCD they fully recover once the flame is extinguished.
The back of the phone is aluminum, which means a razor blade will scratch and damage it. The entire back camera section (which also features the LED flash) is covered by glass, so it won’t scratch as easily as if it were plastic.
Moving on to the most important part, the Nokia 8 does not bend. Not from the front, not from the back. This despite the fact that it uses 6000 series aluminum, which Apple had to give up on and replace with a 7000 series alloy in order to not have its handsets bend. The shape of the aluminum inside the Nokia 8 contributes to its durability. So for now, Nokia’s legacy is intact – at least from this point of view.
it’s time to take the Google Pixel 2 and Pixel XL 2 for a spin! We spent some time with both phones today and are ready to share some initial thoughts and run through a tour of each device.
My first major take away is that these feel like true Google phones. What I mean is the fact that these feel like phones Google actually designed, phones that weren’t just last-minute leftover parts from HTC’s iPhone knockoff department. Each phone is unique in this cluttered smartphone world, especially the Pixel XL 2.
Both phones feel really nice in hand, though the Pixel XL 2 definitely feels more premium. They are similarly finished, but the smaller Pixel 2 just isn’t quite up to par, at least to my hands. That’s not to say that it won’t be a heck of a phone, it just isn’t the flagship of the two and that’s OK.
The software experience is what you expect. It’s clean and minimal still even as Google continues to add-on their own custom touches. The updated Pixel Launcher with Search buried down in the dock is going to take some getting used to, but this is Android, so launchers can be changed if it’s not your thing. The squeezy side gesture to launch Google Assistant works well, and no, you can’t change it to do anything other than launch Assistant.
The camera is as fast as you would hope. I know that DxoMark crowned it the king of smartphone cameras, but I just didn’t have enough time to test its quality. I’m expecting it to be pretty damn good, though, just like last year’s Pixel cameras. Who needs dual shooters, eh?
And that’s pretty much it for now. We (obviously) didn’t have time to test battery life or look at performance or setup the fingerprint reader or train Google Assistant either. We definitely didn’t get a superb grip on which phone will be the one for you. I’m certainly leaning towards the Pixel XL 2, if only because it feels like the it’s on trend, unlike the smaller Pixel 2. Either way, we can’t wait for more.
Huawei’s EMUI 5 is a powerful version of Android. Here’s how to make it even better!
Huawei‘s EMUI 5 Android Skin adds a bit of personal flair and functionality to the company’s line of devices while including some additional tools and features aimed directly at helping you get the most out of your device’s battery.
The following tips should help you maximize the battery life of any Huawei device running EMUI 5.0, be it an Honor 6X, Mate 9, or MediaPad tablet.
Most of what we will cover below is found in the EMUI 5Settings app under Battery, which makes sense, of course. If a setting is found outside of that section, we will point it out.
1. Auto-close apps when locked
Rogue apps running in the background will almost always be an area to check when it comes to battery drain. Huawei gives you the option to force close background apps each and every time you lock your EMUI 5 device.
Select the option titled Close apps after screen lock in the Battery settings to view a list of all installed apps on your device, as well as adjust whether you want the app to be closed
Slide the switch next to an app to the Off position to disable force close for that respective app.
Something that’s easy to overlook in this section is the list of apps at the bottom that default to Offand will never force close when your device is locked. For example, Snapchat exempted itself from closing without any input whatsoever from me. And it’s almost always one of the apps I find at the top of my battery usage chart.
2. Power Intensive Apps
EMUI 5.0 provides a list of apps that are using, well, a lot of power. When you open this section of Battery settings, a list of apps that are currently running in the background will fill in. Sometimes there will be only one, other times the list will go on and on.
You can kill any of the apps listed by checking the box to the right, then tap Close at the bottom of the screen.
Tap on the app name itself to adjust whether or not you want to be alerted when it’s using too much power, as well as indicate if you want it to force close at screen lock.
3. Lower screen resolution
As with Samsung’s Galaxy devices, lowering display resolution on a Huawei device can improve battery life. Huawei doesn’t give you an option to pick the exact resolution you want to use, instead, you’re given an option to allow the device to automatically lower screen resolution when it determines it can save battery by doing so.
I currently have the setting enabled and have yet to experience any drastic change in experience.
4. Optimize
Within the Battery settings there’s an Optimize section. Select it and then let the scan complete. Once it’s done, a series of suggestions will populate the screen. Suggestions range from detailing how many apps are running when the screen is off, to screen timeout changes, to disabling vibrate on touch to save more battery.
Don’t take each and every suggestion here as gospel. If you prefer having vibrate on touch-enabled, it can’t be using too much battery. On the other hand, a lot of apps running in the background even after your device is locked is sure to eat into your daily battery life.
Some suggestions are enabled with a single tap of a button, while others offer a shortcut to adjust the setting yourself.
5. Disable notifications on lock screen
Indeed, viewing a notification on the lock screen of your Huawei device without having to manually wake it is convenient. But each time the screen lights up, it’s using a bit more of your battery, and throughout the day and bound to take a toll.
Open the Settings app > Notifications & status bar. Slide the switch next to Notifications turn on the screen to the Off position.
The obvious things, too
Not specific to Huawei, you should always check to ensure things like auto-brightness are turned on (or if you prefer turned off, your screen’s brightness is turned way down), and disable features you aren’t using. An app like IFTTT can be set up to toggle Wi-Fi on/off when you’re away from home or work, for example.
Go into Settings > Apps and disable or delete any non-essential apps, such a crapware that may have carried over from a carrier device. (My Mate 9 is loaded with AT&T apps, even without a SIM in it.)
In other words, do all of the things we recommend for each and every device we cover.
Battery life is still one of the biggest challenges for smartphone makers’ there’s no harm in doing our part to squeeze out every last bit of performance.
Apple today released iOS 11.0.2, its third iOS 11 update in as many weeks. This update is now available to download over the air, and you can grab it by going into Settings > General > Software Update on your iPhone or iPad.
As for what’s included in this update, Apple says that it fixes an issue where crackling sounds were being heard during calls on a “small number” of iPhone 8 and iPhone 8 Plus units. Also included are fixes for an issue where some photos would be come hidden and for an issue where attachments in S/MIME encrypted emails wouldn’t open.
The iPhone 8 and iPhone 8 Plus are brand new, and I’m sure that owners afflicted by the crackling issue were frustrated that their brand new phones were having problems during phone calls. The good news is that Apple now has a fix for that issue, so if you’ve got a crackly iPhone 8 or iPhone 8 Plus, go grab iOS 11.0.2 right now.