Step by Step Guide to the First Ever iPhone 17 Pro Screen Replacement – Ultimate Expert Guide (2026)
📱 Introduction to iPhone 17 Pro Screen Replacement
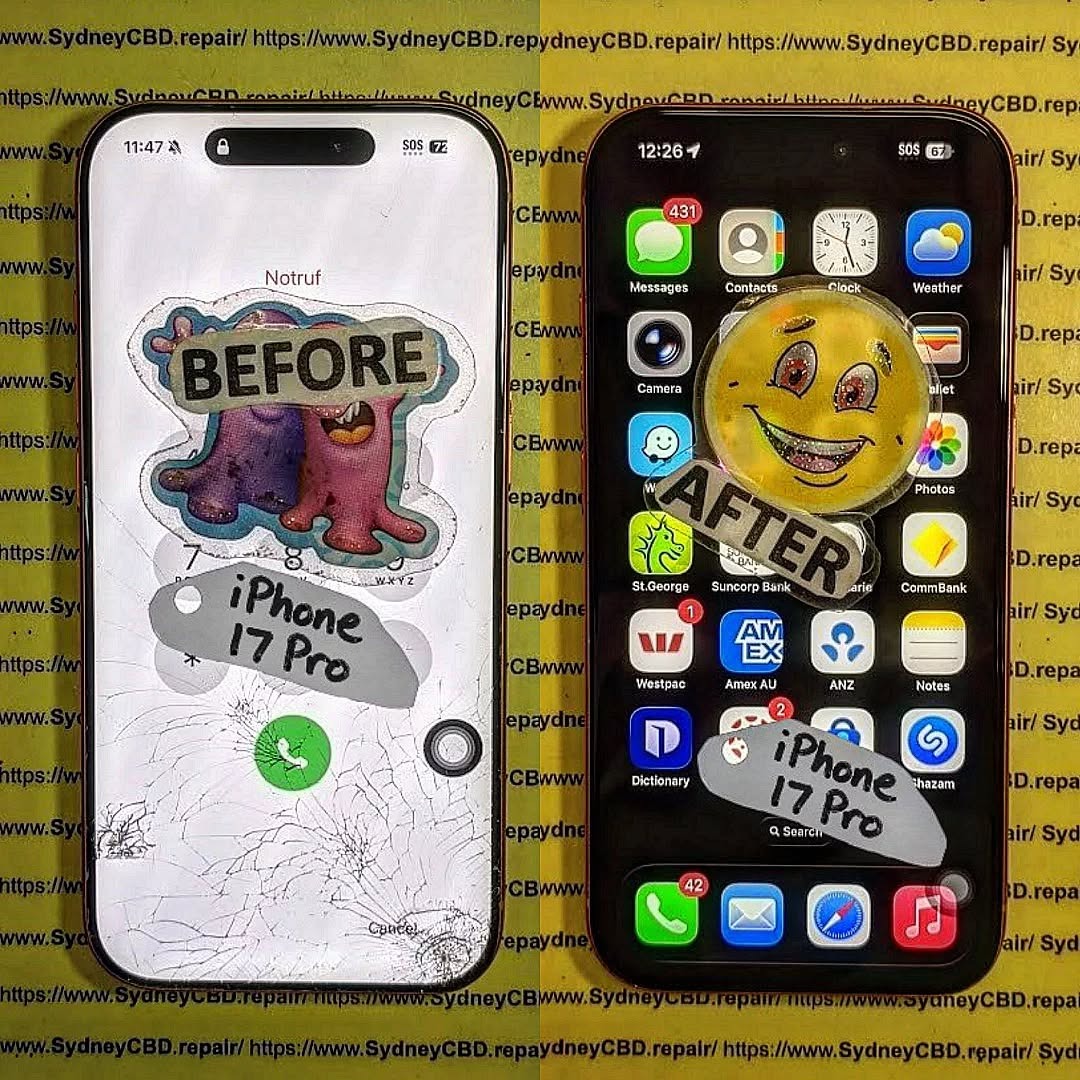
The first ever iPhone 17 Pro screen replacement is already becoming a hot topic among repair technicians and DIY enthusiasts. With the latest innovations from Apple, screen repair isn’t what it used to be.
Let’s face it—dropping your phone happens to the best of us. But when it comes to replacing the display of the iPhone 17 Pro, things have evolved. This guide walks you through every step in a clear, easy-to-follow way.
Whether you’re a beginner or an experienced technician, you’ll find this guide practical, detailed, and worth your time.
These tools can make your iPhone 17 Pro screen replacement smoother and safer.
⚠️ Safety Precautions Before Starting
Personal Safety Tips
Always power off the device
Work in a clean, well-lit space
Wear anti-static gloves
Device Protection Measures
Avoid overheating the phone
Handle connectors gently
Keep screws organized
Skipping these steps can damage your phone permanently.
🔧 Step-by-Step iPhone 17 Pro Screen Replacement Guide
Step 1: Power Off the Device
Turn off your phone completely. This prevents electrical damage.
Step 2: Remove Screws
Use a pentalobe screwdriver to remove the bottom screws near the charging port.
Step 3: Heat and Lift Display
Apply gentle heat around the edges. Then:
Use a suction cup
Insert a plastic pry tool
Slowly lift the screen
Take your time here—rushing can crack the display further.
Step 4: Disconnect Battery
Before touching any internal parts:
Locate the battery connector
Carefully disconnect it
This is critical for safety.
Step 5: Remove Display Connectors
Next, disconnect:
Display cable
Touch sensor cable
Face ID components
Handle these with extreme care.
Step 6: Install New Screen
Now comes the exciting part:
Align the new screen
Reconnect all cables
Secure the display
Replace screws
Congratulations—you’ve completed the iPhone 17 Pro screen replacement!
❌ Common Mistakes to Avoid
Even pros slip up sometimes. Watch out for:
Using too much heat
Pulling cables too hard
Forgetting to disconnect the battery
Mixing up screws
Avoiding these mistakes saves time and money.
💰 Cost Analysis: DIY vs Professional Repair
Option
Cost
Risk Level
Time
DIY Repair
$150–$300
High
1–2 hours
Professional Repair
$300–$600
Low
30–60 mins
If you’re unsure, professional repair is often the safer bet.
⏱️ How Long Does the Repair Take?
Typically:
Beginners: 1–2 hours
Experts: 30–45 minutes
Your first iPhone 17 Pro screen replacement might take longer—and that’s perfectly okay.
✅ Testing the New Screen
Before sealing everything:
Turn on the phone
Check touch responsiveness
Test brightness and colors
Verify Face ID functionality
If something feels off, reopen and check connections.
🔋 Maintenance Tips After Replacement
Keep your new screen in top shape:
Use a screen protector
Avoid drops
Clean regularly
Use a protective case
Simple habits go a long way.
🧑🔧 When to Seek Professional Help
DIY isn’t always the best route. Consider professional repair if:
Screen is completely unresponsive
Internal damage is suspected
You lack proper tools
Sometimes, it’s smarter to leave it to experts.
❓ FAQs
1. Is iPhone 17 Pro screen replacement difficult?
Yes, it’s more complex than older models due to advanced technology.
2. Can I replace the screen myself?
You can, but it requires skill, patience, and the right tools.
3. Will replacing the screen affect Face ID?
It might, especially if sensors are damaged or misaligned.
4. How much does iPhone 17 Pro screen replacement cost?
DIY costs around $150–$300, while professional repair can reach $600.
5. Is the new screen as good as the original?
If you use high-quality parts, performance should be very close.
6. How do I know if my screen needs replacement?
Signs include cracks, unresponsive touch, flickering, or black display.
🏁 Conclusion
The first ever iPhone 17 Pro screen replacement is a blend of precision, patience, and technical know-how. While it’s possible to do it yourself, it’s not without risks.
If you follow this guide carefully, you’ll improve your chances of a successful repair. Still, don’t hesitate to seek professional help when needed.
At the end of the day, keeping your device in top condition ensures it serves you well for years to come.
David from Sydney CBD Repair Centre – The Best place to fix mobile phones as 7 Years In A Row! Top Mobile Phone Repair In Sydney. More than 2000 Positive Reviews on Google and Same Day Repairs.
We take pride in delivering exceptional repair services for all major phone brands including Apple, Samsung, Google, and more. Our expert technicians use only genuine parts and offer 90days warranty on repairs. Located in the heart of Sydney CBD, we’re your one-stop solution for all mobile device repairs.
Our commitment to excellence has earned us the trust of thousands of satisfied customers. Whether it’s a cracked screen, battery replacement, or water damage repair, we handle it all with professional care and expertise. Walk in today and experience why we’re Sydney’s #1 choice for mobile phone repairs.
Visit us for:
✓ Same Day Express Repairs
✓ Genuine Parts Guarantee
✓ Professional Technicians
✓ Competitive Pricing
✓ 2000+ 5-Star Google Reviews
✓ 7-Time Award Winner for Best Phone Repairs
Inside The Sensors: Fixing Face ID After A Heavy Impact Screen Shatter – 9 Powerful Repair Insights
Introduction
Modern smartphones have evolved into highly sophisticated devices, and one of the most impressive innovations in recent years is Face ID. This advanced biometric security system allows users to unlock their phones, authorize payments, and access sensitive information with just a glance. However, when a device experiences a serious drop that results in a shattered display, the internal components responsible for Face ID can also suffer damage. In many cases, fixing Face ID after a heavy impact screen shatter becomes a complex repair that requires both technical knowledge and precision tools.
While a cracked screen is often the most visible consequence of a heavy impact, the real trouble can lie beneath the surface. Behind the display sits a delicate network of sensors—including the infrared camera, dot projector, and flood illuminator—that work together to create a secure 3D map of the user’s face. When the screen shatters, the force of the impact can misalign these components, damage fragile flex cables, or obstruct the sensors entirely. As a result, users may suddenly see messages such as “Face ID not available” or notice that their phone can no longer recognize their face.
Fortunately, modern repair techniques make it possible to restore this functionality in many cases. Professional technicians can diagnose the exact cause of the issue, whether it’s a disconnected cable, a misaligned sensor bracket, or debris interfering with the infrared system. Through careful inspection, specialized tools, and precise reassembly, experts can often succeed in fixing Face ID after a heavy impact screen shatter without replacing the entire device.
In this comprehensive guide, we’ll take a closer look inside the technology that powers Face ID, explore what actually happens when a phone suffers a major impact, and explain the professional repair methods used to bring the system back to life. Whether you’re a smartphone user dealing with Face ID failure or simply curious about the intricate engineering behind this technology, understanding the repair process can help you make informed decisions and protect your device in the future.
Face recognition has transformed smartphone security, especially with the introduction of Face ID in modern iPhones. However, when a phone suffers a heavy drop resulting in a shattered display, fixing Face ID after a heavy impact screen shatter becomes a delicate and complex repair process.
Face ID relies on a highly advanced sensor array that sits behind the display near the top notch. This system scans the user’s face in three dimensions and compares it to encrypted data stored securely within the phone.
Unlike fingerprint scanners, Face ID involves multiple optical sensors and projection systems working together. Because of this complexity, even a minor misalignment caused by a heavy impact can interrupt the entire authentication process.
How Face ID Sensors Work
The Face ID system uses a combination of advanced hardware components that operate simultaneously. These include:
Infrared camera
Dot projector
Flood illuminator
Proximity sensor
Ambient light sensor
When you look at your phone, the flood illuminator first detects your face. Then the dot projector sends more than 30,000 invisible infrared dots onto your face. The infrared camera reads the pattern and builds a depth map.
This data is processed through Apple’s Secure Enclave, ensuring that biometric information never leaves the device. According to Apple’s official security documentation available at https://support.apple.com/en-us/HT208108, Face ID data remains encrypted and inaccessible even to Apple itself.
Key Components Inside the Face ID System
Understanding these components helps explain why fixing Face ID after a heavy impact screen shatter is not as simple as replacing the screen.
Component
Function
Vulnerability
Dot Projector
Projects infrared dots for 3D mapping
Sensitive to misalignment
Flood Illuminator
Detects the face in low light
Can disconnect after impact
Infrared Camera
Captures dot pattern
Damage leads to authentication failure
Flex Cables
Connect sensors to motherboard
Often torn during impact
Front Sensor Assembly
Houses multiple sensors
Can be displaced by shattered glass
Even slight damage to one of these elements can disable Face ID entirely.
Dropping a smartphone onto a hard surface can cause far more than cosmetic damage. When the screen shatters due to a strong impact, shockwaves travel through the entire phone frame.
These internal vibrations can dislodge the delicate sensor assembly responsible for Face ID.
Impact Damage and Internal Sensor Misalignment
The Face ID system sits very close to the front glass. When the glass cracks or shatters, the following issues may occur:
Sensor bracket bending
Flex cable tearing
Infrared camera obstruction
Dot projector displacement
Debris interfering with sensors
Even if the display continues functioning normally, the sensors behind it may no longer align properly.
That’s why fixing Face ID after a heavy impact screen shatter often requires internal inspection rather than just replacing the screen.
Common Symptoms of Face ID Failure
Users typically notice Face ID problems immediately after a major drop. Some common signs include:
Face ID not available
Unable to activate Face ID
Face ID disabled message
Face recognition inconsistent
Front camera issues
These symptoms indicate potential sensor damage or communication failure between components.
Diagnosing Face ID Damage After Screen Impact
Before attempting repairs, technicians must carefully diagnose the root cause of the problem. Proper diagnosis ensures the correct component is repaired or replaced.
Initial Inspection Techniques
The first step in diagnosing Face ID failure is visual inspection.
Technicians examine:
Cracked screen severity
Frame bending
Sensor bracket condition
Dust or debris inside the notch
Flex cable integrity
Sometimes, the issue may simply be a loose connector, which can be fixed without replacing components.
Advanced Diagnostic Tools Used by Technicians
Professional repair centers often use specialized diagnostic tools.
Examples include:
Microscope inspection
Infrared sensor testing
Face ID calibration tools
Apple diagnostic software
These tools allow technicians to determine whether fixing Face ID after a heavy impact screen shatter is possible or if a full sensor replacement is required.
Step-by-Step Guide to Fixing Face ID After a Heavy Impact Screen Shatter
Repairing Face ID requires technical skill and careful handling of extremely delicate components. The repair process typically follows several steps.
Screen Removal and Sensor Inspection
The repair begins with removing the damaged screen.
Technicians must:
Heat the display adhesive
Carefully separate the screen
Disconnect battery power
Remove the front sensor assembly
Inspect all connectors
At this stage, they check whether the sensor assembly itself is damaged or simply misaligned.
Repairing or Replacing Damaged Components
If damage is discovered, technicians may perform several micro-repairs.
Possible fixes include:
Reattaching torn flex cables
Replacing sensor brackets
Cleaning obstructed lenses
Repositioning the dot projector
Repairing front sensor flex circuits
However, Apple pairs certain components to the logic board. This means some replacements require specialized programming equipment.
Reassembling and Recalibrating Face ID
After repairing the sensors, the phone must be carefully reassembled.
Steps include:
Reconnecting flex cables
Installing a new display
Securing the sensor assembly
Applying waterproof adhesive
Running Face ID calibration tests
Successful calibration restores full biometric functionality.
Challenges in Face ID Repair
Repairing Face ID is widely considered one of the most challenging smartphone repairs.
Apple Security Restrictions
Apple designs Face ID components with strong security protections. This prevents unauthorized replacements that could compromise biometric security.
As a result:
Dot projectors are paired to the motherboard
Replacement sensors may require programming
Some repairs require micro-soldering
These restrictions make fixing Face ID after a heavy impact screen shatter significantly more complex than standard screen replacements.
Precision Required During Repairs
Face ID components are extremely sensitive.
Even small mistakes during repair can cause:
Permanent Face ID failure
Camera malfunction
Sensor calibration errors
Technicians must work under microscopes and use specialized tools to ensure accuracy.
Professional vs DIY Repairs
Many smartphone users consider attempting repairs themselves. However, Face ID repair is rarely suitable for beginners.
Risks of Attempting DIY Fixes
DIY repairs can introduce additional problems.
Potential risks include:
Damaging sensor cables
Losing calibration
Breaking the dot projector
Causing motherboard damage
Once certain components are damaged, they may no longer be repairable.
Benefits of Professional Repair Services
Professional technicians offer several advantages:
Proper diagnostic equipment
Experience with Face ID components
Access to micro-soldering tools
Accurate calibration procedures
These factors greatly increase the success rate of fixing Face ID after a heavy impact screen shatter.
Preventing Future Face ID Damage
Prevention is always better than repair. Fortunately, there are several ways to protect your phone from severe impact damage.
Protective Accessories
Investing in protective accessories can significantly reduce damage from drops.
Recommended items include:
Shock-absorbing phone cases
Tempered glass screen protectors
Rugged protective frames
These accessories help absorb impact forces before they reach internal sensors.
Safe Phone Handling Practices
Simple habits can also prevent accidents.
Examples include:
Avoid placing phones near edges
Use secure grips while walking
Store phones safely in pockets or bags
Avoid using devices in risky environments
These small precautions can extend the lifespan of your device.
Cost of Fixing Face ID After Screen Damage
Repair costs vary depending on the severity of the damage.
Factors Affecting Repair Price
Several elements influence the cost:
Factor
Impact on Cost
Device Model
Newer iPhones cost more
Sensor Damage
More damage increases cost
Screen Replacement
Often required alongside sensor repair
Calibration
Specialized equipment may add cost
When Replacement is Necessary
Sometimes repair is not possible. In these situations, users may need:
Full sensor assembly replacement
Logic board repair
Device replacement
A professional diagnosis determines the most cost-effective option.
FAQs
1. Can Face ID stop working after dropping a phone?
Yes. A heavy drop can misalign or damage sensors, which may require fixing Face ID after a heavy impact screen shatter.
2. Is Face ID repair possible after screen replacement?
Yes, but only if the original sensor assembly remains intact and properly connected.
3. How long does Face ID repair take?
Professional repair typically takes 1–2 hours, depending on the severity of the damage.
4. Can Face ID be fixed without replacing the screen?
Sometimes. If the screen is intact and only sensors are affected, technicians may repair the internal components.
5. Is Face ID repair expensive?
Costs vary depending on device model and sensor damage. Minor repairs are cheaper than full sensor replacement.
6. Should I repair Face ID or replace the phone?
If the device is relatively new, repairing Face ID is usually the better option.
Conclusion
Modern smartphones rely heavily on biometric authentication, and Face ID plays a critical role in both security and convenience. Unfortunately, a heavy drop that shatters the display can disrupt the delicate sensor array responsible for facial recognition.
Fixing Face ID after a heavy impact screen shatter requires careful inspection, advanced tools, and highly skilled technicians. From diagnosing sensor misalignment to recalibrating the infrared system, every step must be performed with precision.
While some minor issues may be resolved quickly, severe sensor damage often demands specialized micro-repairs. That’s why seeking professional assistance remains the most reliable solution.
By understanding how Face ID works, recognizing the signs of damage, and taking preventive measures, smartphone users can better protect their devices and maintain secure biometric access.
David from Sydney CBD Repair Centre – The Best place to fix mobile phones as 7 Years In A Row! Top Mobile Phone Repair In Sydney. More than 2000 Positive Reviews on Google and Same Day Repairs.
We take pride in delivering exceptional repair services for all major phone brands including Apple, Samsung, Google, and more. Our expert technicians use only genuine parts and offer 90days warranty on repairs. Located in the heart of Sydney CBD, we’re your one-stop solution for all mobile device repairs.
Our commitment to excellence has earned us the trust of thousands of satisfied customers. Whether it’s a cracked screen, battery replacement, or water damage repair, we handle it all with professional care and expertise. Walk in today and experience why we’re Sydney’s #1 choice for mobile phone repairs.
Visit us for:
✓ Same Day Express Repairs
✓ Genuine Parts Guarantee
✓ Professional Technicians
✓ Competitive Pricing
✓ 2000+ 5-Star Google Reviews
✓ 7-Time Award Winner for Best Phone Repairs