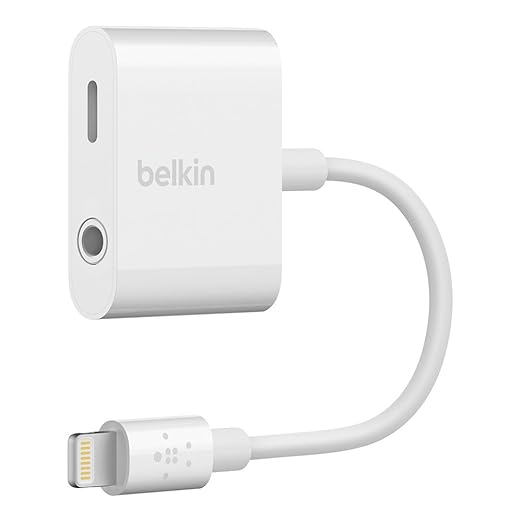
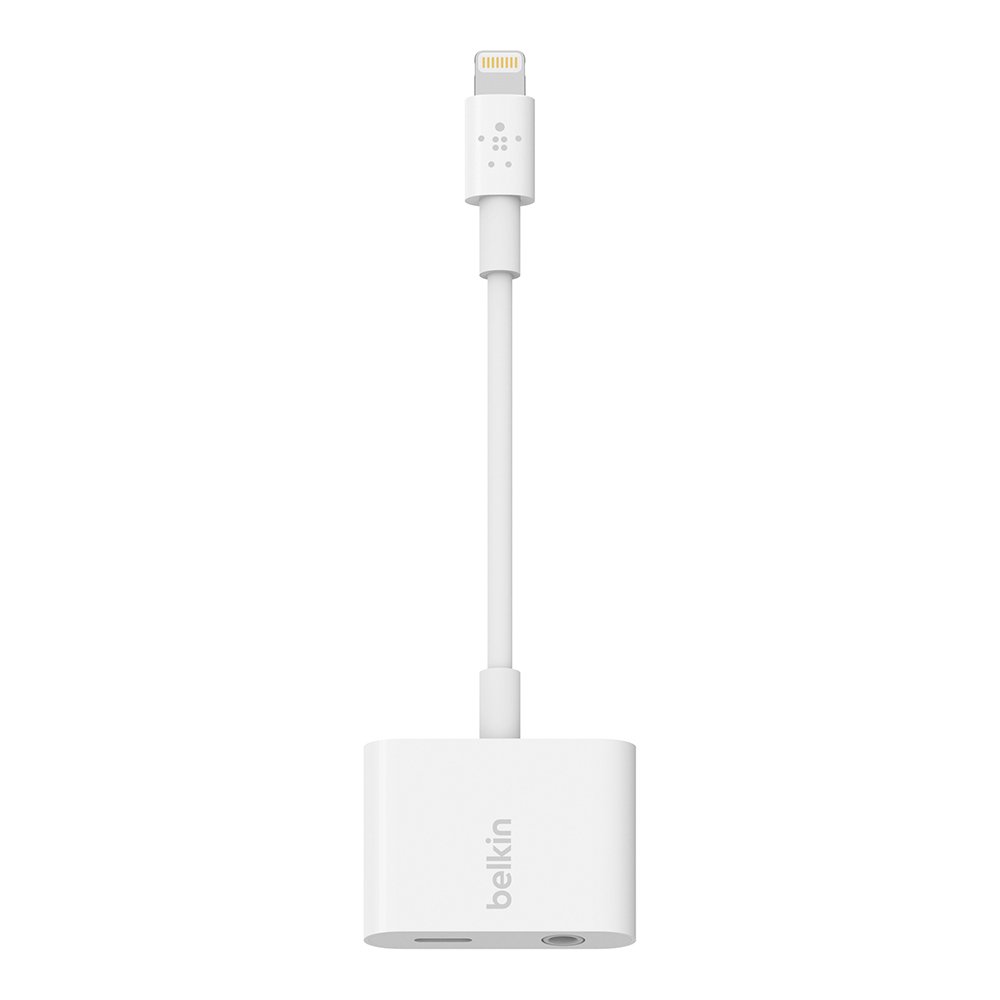
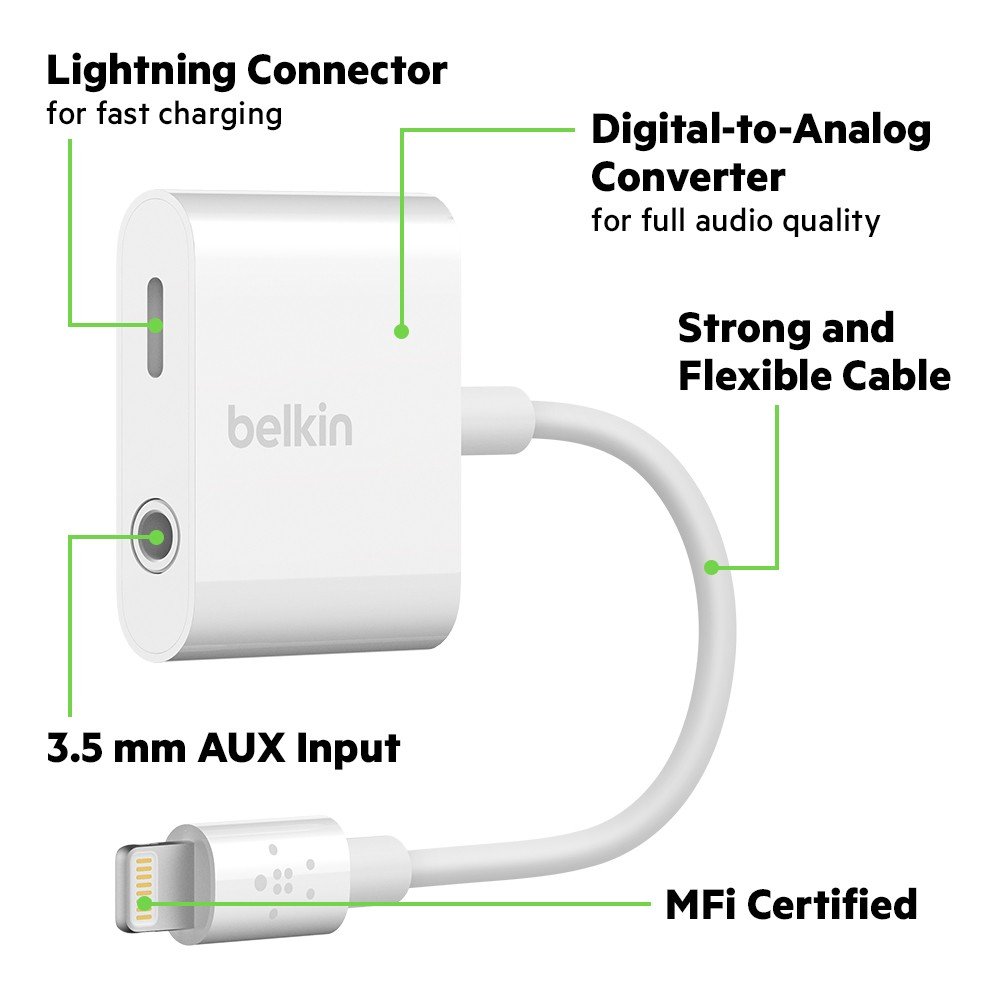
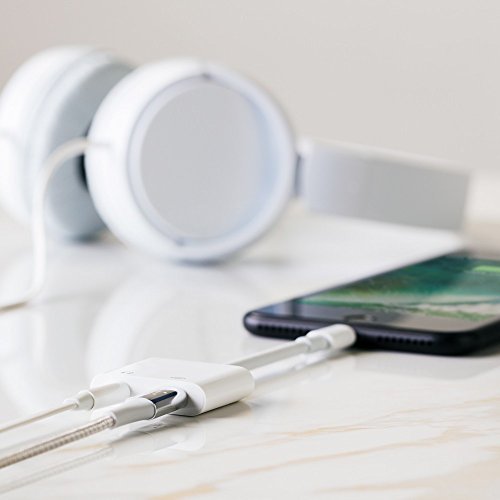
Want to listen to music via a 3.5mm audio source, while simultaneously charging an iPhone? That used to be easy, but all new iPhone models have done away with the longstanding headphone jack, which once allowed users to easily connect their iPhone to home stereo systems, car stereos, headphones, and other speakers and audio interfaces via the 3.5mm AUX port, while still maintaining the availability of the Lighting charger port.
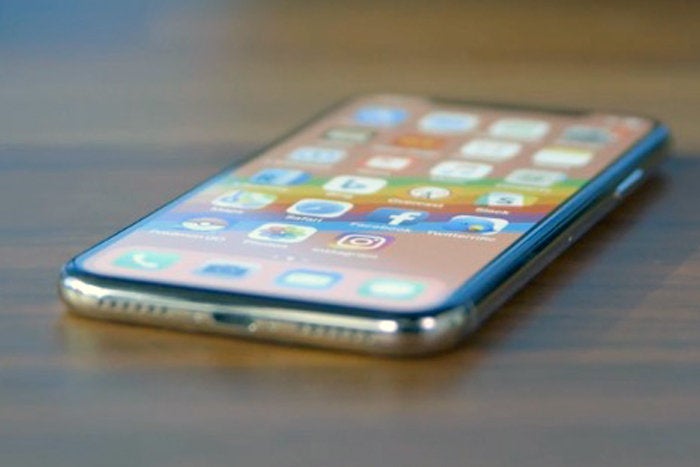
With the familiar AUX port gone for good from iPhone, Apple now instead offers a dongle connector with every new model iPhone X, iPhone 8, iPhone 8 Plus, iPhone 7, and iPhone 7 Plus devices. The dongle serves as an adapter interface allowing you to plug it into the Lighting port, and then connect to an AUX cable if need be.
But, using that dongle means the lightning port is taken up, which is also how you charge the iPhone. Thus, if you want to listen to music via a 3.5m audio source while also charging an iPhone, you’re out of luck since the lightning port is occupied by the aux-to-lightning dongle. Or are you?
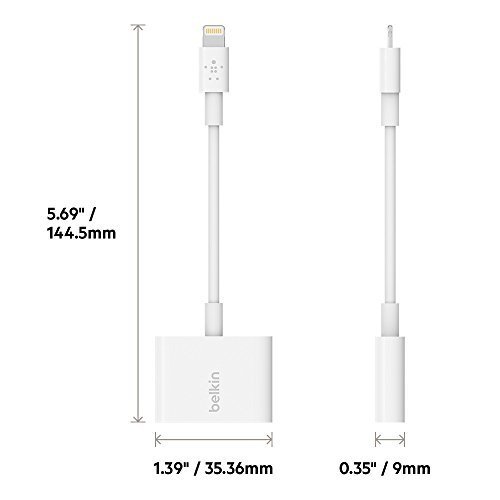
These dongle solutions will effectively solve the listening to music via a 3.5mm AUX cable while charging an iPhone simultaneously problem, something that a substantial number of iPhone owners experience in their car stereos and home audio systems.
You can find other similar adapters available on Amazon as well, but you’ll notice some of the much cheaper adapters are rated incredibly poorly and many of the reviews suggest they either don’t work at all, or fail quickly. Thus if you’re interested in a splitter cable like this, it’s probably best to spring the extra bucks for the higher quality and well-rated Belkin model.
Another option is to buy more of the AUX to Lightning dongles for every 3.5mm AUX cable you use, and then just hot-swap a charger cable when needed to power a device up, but that won’t solve the listen-while-charging issue which is a pain point for some audiophile iPhone owners. Or you could simply upgrade every speaker system you have to a Bluetooth stereo or Bluetooth receiver, whether in the car or at home. But that’s going to probably be more expensive than a $40 adapter.
Of course if you primarily listen to music from an iPhone over Bluetooth to a stereo system (car or speakers) then you can always just keep the iPhone plugged in via the single lightning port, and it will charge as usual. But if you use a lot of 3.5mm audio cables still, this just might appeal to you, so head on over to Amazon or Belkins website and grab one of the splitter adapters and you’ll be able to use an AUX port and lighting port simultaneously again.
If you’re buying a used iPhone or repairing an iPhone, you may wonder if you can find out if the iPhone was bought as new, is a refurbished model, or is a replacement device provided by Apple via a service request.
Wonder no more, you can use an interesting device model identifier trick to discover if an iPhone is new, refurbished, a replacement, or even personalized by engraving. This can be helpful information for buyers of used devices, if you’ve received a device as a gift or hand-me-down, if you’re troubleshooting or repairing an iPhone, and more.
How to Determine if iPhone is New, Refurbished, Replacement, or Personalized
You can decipher the device model prefix to determine the original status of an iPhone (and probably an iPad too) device, here’s how:
Open the “Settings” app on the iPhone
Go to “General” and then go to “About”
Look for “Model” and then read the model identifier next to that text, it will look something like “MN572LL/A”, the first character will let you know if the device is new, refurbished, replacement, or personalized:
M – Brand new device, meaning the device was purchased new
F – Refurbished device, meaning the device has been through refurbishing process
N – Replacement device, meaning the originally bought device was replaced by this model likely due to a service request
P – Personalized device with engraving, meaning the device was customized with an engraving on purchase
That’s all there is to it, now you know how to determine if an iPhone is new, referred, replaced, or other. It’s possible there are some other identifier prefixes for iPhone devices that aren’t listed here, if you know of any do share them in the comments.
I have tested this with a handful of my own iPhone devices that I know are either new, refurbished, or replacements, and it has held up. I haven’t personally seen the “P” identifier however.
By the way, it’s important to note the model identifier shown here (like MN572LL/A) is different from the general model (like iPhone X) and model number of the iOS device (like A1822) – admittedly a bit confusing since they all have similar labels, but they are indeed entirely different things.
Amid the battles over bezels, screens, and battery life, there’s one thing that all iPhones have in common: They’re powerful enough to replace your PC. Now before you start yelling at your screen, I’m not talking about the iMac Pro or the HP Omen. If you use your laptop or desktop to do something you can’t do on your phone, the point is moot. PCs and Macs still have their place in the world, and it’s going to be a long while before our mobile devices can handle the more strenuous tasks we call on our PCs to do.
But for the majority of people, an iPhone is enough. Apple knows this. It’s already marketing the iPad as a computer, and the iPhone is just a stone’s throw away, with the same processor, OS, and storage capacity. The only real problem is that the screen is too small for doing lengthy work.
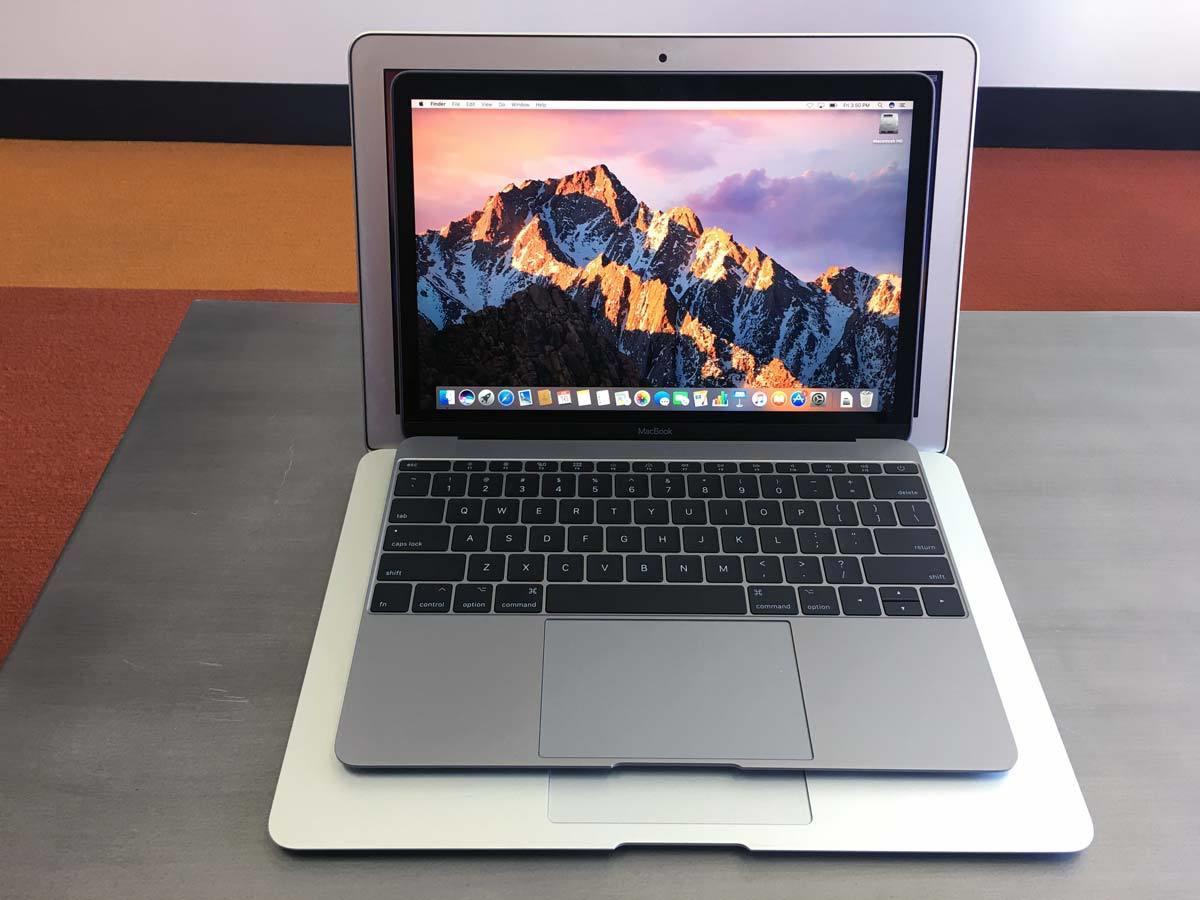
When Steve Jobs unveiled the MacBook Air 10 years ago, it’s main selling point was extreme portability. It wasn’t the fastest machine or the most capable, but people flocked to it for its thinness and lightness. At just 3 pounds and less than an inch thick, the MacBook Air ushered in a new era of portability years before the iPad made its debut.
The MacBook Air isn’t the smallest, thinnest, or lightest MacBook anymore.
But Apple’s strategy for the MacBook Air has hit something of a wall. It hasn’t been received a meaningful update in years (despite a spec bump at last year’s WWDC), and no longer holds the claim as the company’s lightest or thinnest laptop in Apple’s lineup. Essentially, it’s the Mac mini of the notebook line.
Ten years later, Apple’s ultimate portable isn’t the MacBook Air anymore. Nor is it the MacBook. In fact, it’s not a Mac at all: It’s the iPhone. Apple may still sell some 20 million Macs a year, but it ships twice as many iPhones in a down quarter. Simply put, the iPhone has become the MacBook Air for a generation of Apple users who have no use for the processing power of a PC. It’s more than capable for most tasks—messaging, web browsing, streaming, social media—has a great camera and lasts all day.
Screen with a view
The one thing the iPhone doesn’t have, however, is a large screen. The largest iPhone screen is just 5.8 inches, which isn’t exactly conducive to getting work done. Apple will happily sell you an iPad or a MacBook to fill that need, but otherwise there’s no way to expand the screen and no real multitasking, at least not like Split View or Picture in Picture on the iPad. And as long as the iPhone stays in the 6-inch range, it’s going to stay that way.
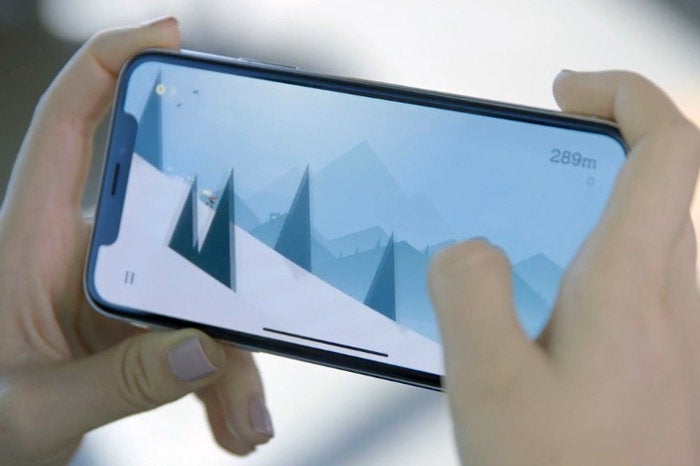
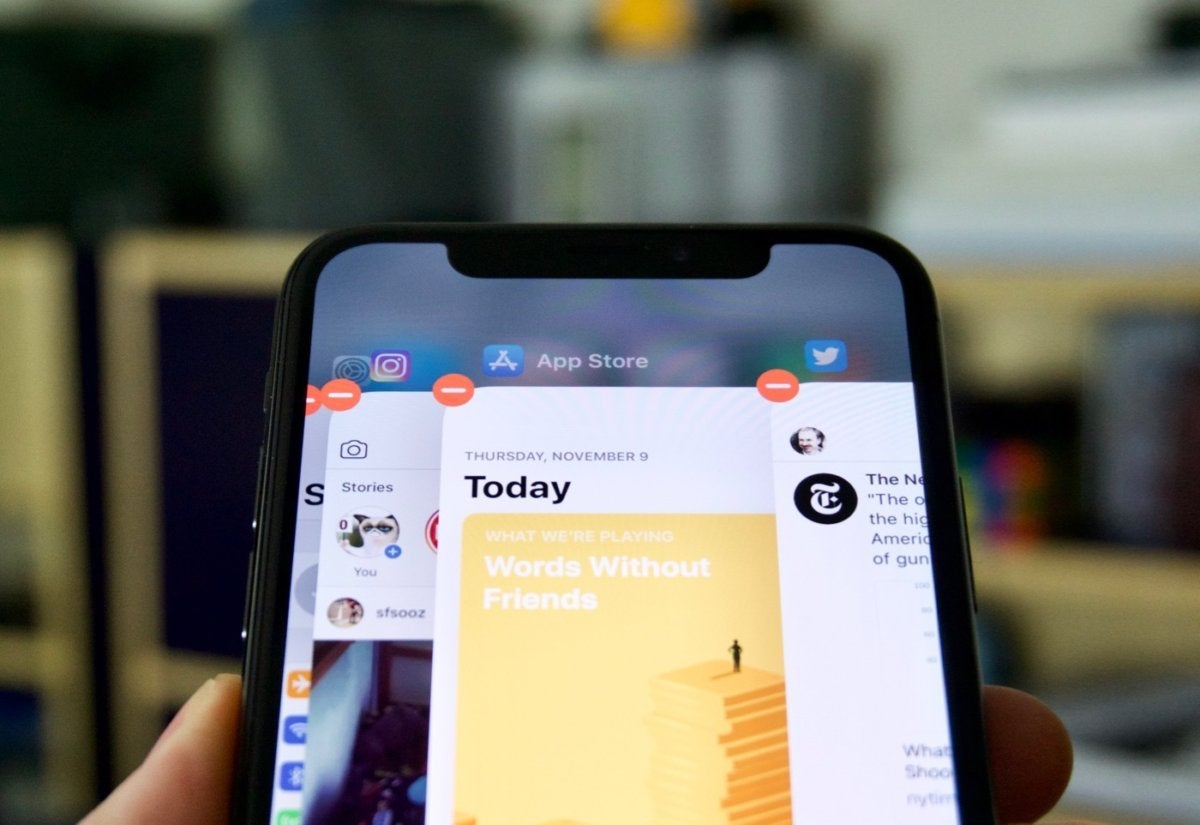
iPhone X has more screen than ever, but it’s still not built for work.
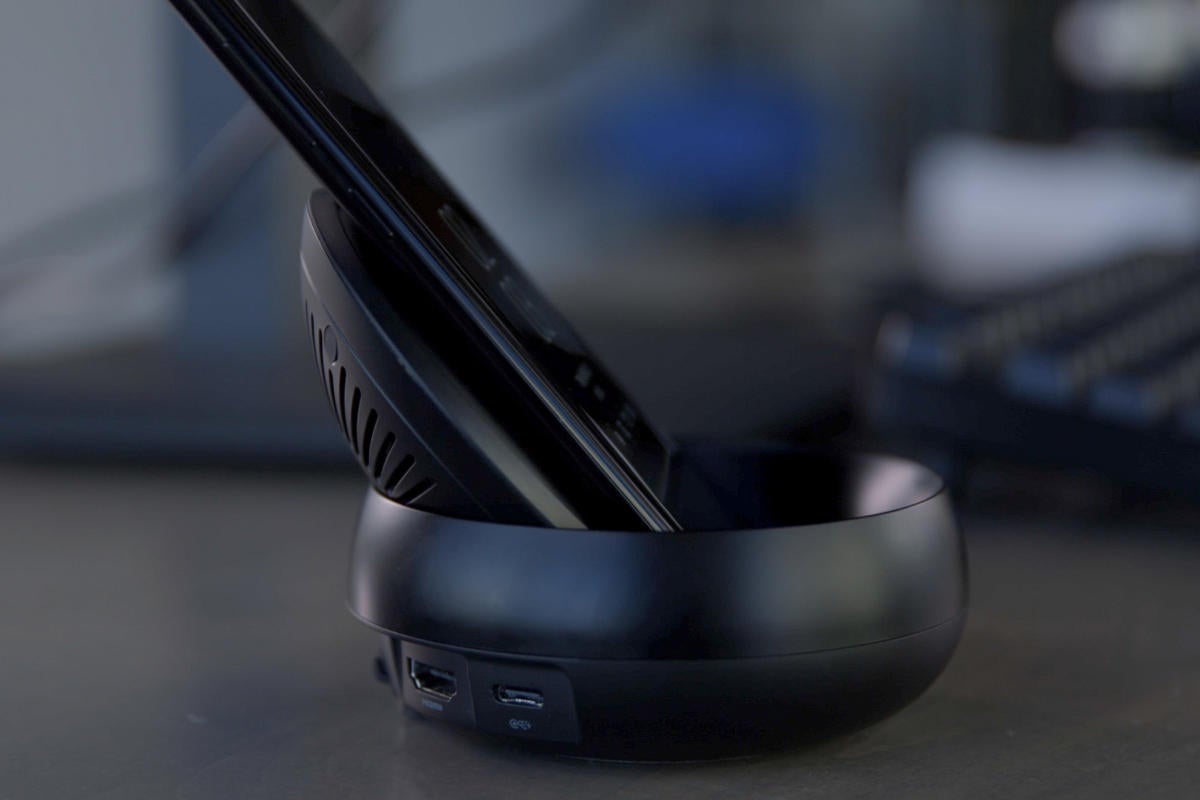
But it doesn’t have to. Back when it unveiled the Galaxy S8, Samsung also took the wraps off an innovative companion dock that transformed how we think of our smartphones. Called DeX, it allows the S8 to attach to a monitor for a full-sized workspace. It’s a true innovation that pushes the smartphone into new territory, and it’s a delight to use.
It’s easy to dismiss as a gimmick, but once you pop the S8 into the DeX dock, you can instantly see the potential. It might not be as polished as it could be, but Samsung has designed a legit desktop interface for the S8 that does for the phone what Chrome OS did for laptops. There’s no setup or preferences to speak of, but phone apps feel more like full PC ones than mobile apps, with resizable windows, robust interfaces, and traditional multitasking. Once you plug it in, it doesnt feel like you’re using a phone at all.
Samsung’s DeX dock turns your Galaxy S8 into a PC.
And other phone makers have taken notice. Huawei does something similar with the Mate 10 Pro, letting users connect a standard USB-C-to-HDMI cable to enter PC mode, but it was something Razer showed off at CES that really piqued my interest. It was just a prototype, but instead of a small dock, it was a full-sized laptop with a slot for the phone to slide into. And I wonder if there isn’t a prototype of something similar floating around Jony Ive’s laboratory.
macOS for the win
No matter what you use your iPhone to do, there are times when we all could use a break from holding our phones. And that’s where a dock could be a killer accessory. Unlike Samsung, Huawei, and Razer, however, Apple has a built-in advantage here: the Mac. Remember, iOS is built on OS X, so building a “lite” version of macOS for the iPhone would be a natural extension of iOS. But Apple could go a step further than a mobile operating system by incorporating Mac-like functions too: a full iCloud-based Apple File System, Spotlight search, dynamic notifications, powerful security, and of course, desktop-caliber apps.
A big screen would give iOS on the iPhone room to breathe—and give us room to work.
People have been clamoring for a hybrid Mac for years, and this would be the next best thing: essentially, a Mac that can fit in your pocket. The iPhone is evolving faster than the Mac ever did, so much so that it’s beginning to reach the limits of what it can do on our phone. Each new iteration of iOS might bring a couple new features, but for the most part, iOS is constrained by the limitations of the iPhone screen. And unless Apple plans on making a 10-inch iPhone in the near future, iOS won’t be able to break out of its mold.
The next step
If Apple were to expand and modify iOS to fit on a big screen and work with a trackpad and a mouse, it would turn the iPhone into a sort of modern MacBook Air. Except it would be even more mobile, more versatile, and more advanced.
So what would an iPhone dock look like? Apple could go the way of the S8 and create a portable desktop dock that connects to a monitor. Or maybe a wireless charging pad that delivers data once it rests on it. Or it could do something like what Razer demonstrated: A full-on laptop with an iPhone slot. That’s probably not viable (or affordable), but it would be the coolest way to bring the iPhone to the desktop. I know I’d buy one.
Whatever the method, it seems inevitable that Apple develops some kind of a way to bring iOS to the big screen. As cool as iPhone X is, it’s still just an iPhone, and until Apple embraces its full potential, that’s all it’s going to be. But while the MacBook Air may be on its last legs, its spirit is alive and well. All Apple needs to do is harness it. By combining the mobile prowess of the iPhone and the MacBook Air, Apple would create the ultimate mobile device, one that works as well in your hand as it does when you hook it up to a 20-inch screen.
Last week Apple pushed out iOS 11.2.2, which seeks to mitigate the risks associated with the Spectre chip flaw via a security update to Safari and Webkit. Since a Spectre attacker is most likely to attack your system via a Javascript vulnerability, Apple has addressed the issue in iOS 11.2.2 to make your system more secure.
The patch doesn’t actually fix the issue, however, and it’s unlikely Apple will ever release an iOS update that will. While researchers and programmers are actively working on ways to reduce the likelihood that your iPhone will ever be exploited using the Spectre flaws, Apple and others have made it clear that these are merely mitigations and not outright fixes.
Apple has warned that that there may be an impact on your iPhone’s performance. They shouldn’t be severe, but in some cases, they may be noticeable. Security researcher Melvin Mughal created a bit of a stir recently after he posted iPhone 6 benchmarks (since removed) showing a hit as high as 40 percent, but those results shouldn’t be common.
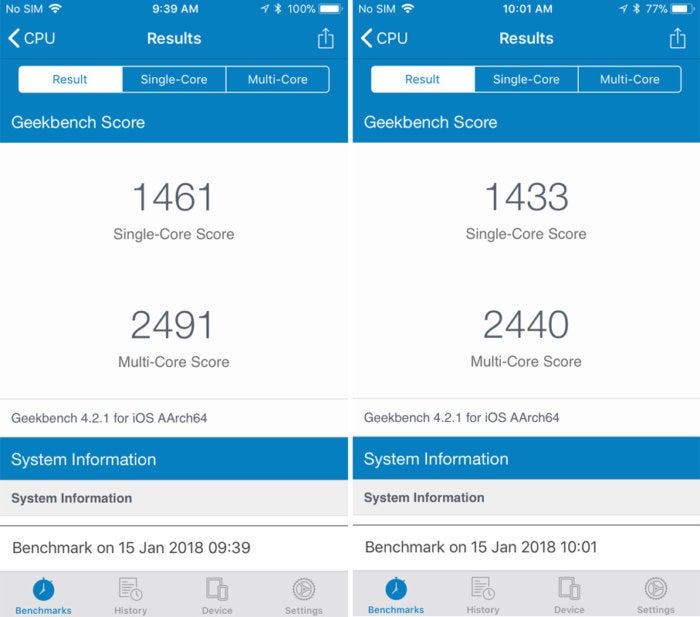
We tested an iPhone 6 with an original battery both before and after installing iOS 11.2.2, and the results were much more in line with what Apple told us. Here are the Geekbench 4 numbers we got, before and after installing iOS 11.2.2:
iPhone 6 bechmarks for iOS 11.2.1 (left) and iOS 11.2.2.
iOS 11.2.1 benchmarks
Single-core: 1461
Multi-core: 2491
Floating Point: 1244
Memory: 1998
iOS 11.2.2 benchmarks
Single-core: 1433
Multi-core: 2440
Floating Point: 1223
Memory: 1958
That’s roughly a 2.5-percent performance hit, a far cry from Mughal’s findings and not enough to be noticeable in common tasks. But your mileage may vary. So here’s what to do if you find your iPhone is sluggish after installing iOS 11.2.2:
The best way to fix PCs with lowdown issues is the best way to fix an iPhone too. Before you start fiddling with settings, simply turn off your iPhone by holding down the power button on the right side, slide the button to the right, and wait for it to turn off. Then start it up again.
Check your storage
Low storage is the biggest culprit for iPhone slowdowns, so check your available space by heading to Settings > General > iPhone Storage. Inside you’ll find a breakdown of how much storage you’re using on your iPhone and which apps are using the most. Then, you can easily delete or offload the app (which removes it from your phone but keeps the data).
Reset safari cache
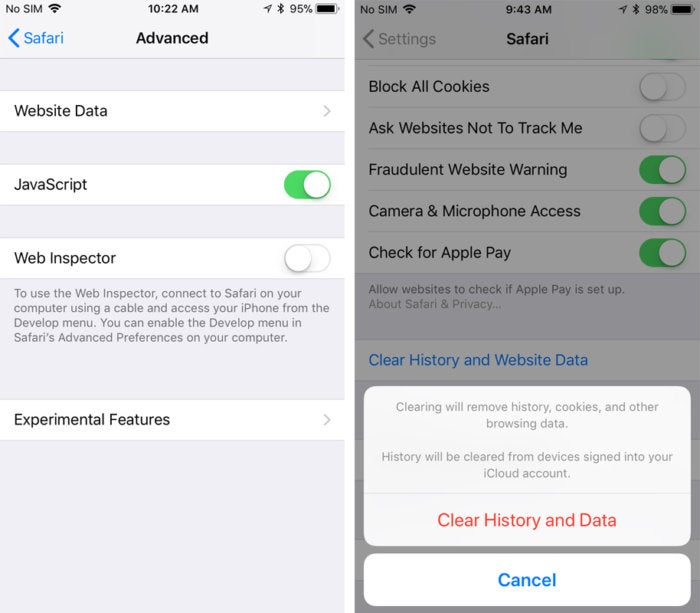
If the sluggishness is related to Safari (and neither of the above options help), you can try resetting the browser cache. In the Settings app, scroll down to the Safari tab, and scroll down until you see the Clear History and Website Data button. Tap it and you’ll zap your history, cookies, and browsing data to start fresh. If you want to keep your history, Select Advanced at the bottom of the page, tap Website Data, and Remove All Website Data at the bottom of the page.
If Safari is running slow after installing iOS 11.2.2., there are some ways to help speed it up.
Disable JavaScript
Since the iOS 11.2.2. mitigation affects JavaScript directly, there’s a chance it could be the culprit in any slowdowns you’re feeling in Safari. Inside the same Safari tab (Safari > Advanced), you’ll find a Javascript toggle that is turned on by default. Flip it off and you’ll disable JavaScript for Safari on your phone, which could make some pages load faster. Turning it off could cause issues with some of your favorite sites, however, so if there are serious issues, go to the settings and flip it back on.
Get a new battery
Apple has already admitted that it is throttling some older phones to compensate for declining battery life, so that could be the issue here. To swap out your aging battery for a new one and bring your performance back up to speed, head over to Apple’s support site and make an appointment.
Trust your eyes not the numbers
Benchmarks aren’t always accurate, and since the mitigations Apple is implementing for Spectre directly affect the way the chip and OS interact, it could throw benchmarks out of whack. So if your phone feels the same as it did before but Geekbench is telling you it’s way slower, don’t panic. Try some of the above fixes, keep your eye on things, but above all, keep calm and carry on.
AirPods are the new wireless earphones from Apple, they allow for completely wireless listening to music, interacting with Siri, answering phone calls, and interacting with music or audio. AirPods are particularly popular with iPhone users, but they work with most other iOS devices and Macs as well.
If you got a new pair of AirPods you might be wondering how to set them up to work with your iPhone or iPad. It turns out to be quite simple to configure AirPods and connect them to an iPhone or iPad, as this tutorial will demonstrate. Most of the AirPod setup process is automated and works a bit like magic. And not to worry, if something doesn’t go exactly as planned when connecting to AirPods we’ll show you how to reset the process and start over again too.
Before beginning, make sure the AirPods are charged (they usually come out of the package with a battery charge), and that the device you are attempting to sync them with is compatible. You can see supported AirPod hardware below if you aren’t sure, but almost any modern Apple hardware running modern system software will work with AirPods.
How to Setup AirPods & Connect to iPhone or iPad
With new model iPhone devices, setting up AirPods is remarkably easy. You’ll need your iOS device handy, and the AirPods case with AirPods still enclosed in them. The rest is a piece of cake:
Unlock the iPhone you want to pair AirPods to and go to the Home Screen (where all your app icons are visible)
Open the AirPods case, keeping the AirPods inside, and hold it near the iPhone to pair with
Wait a moment for iPhone to find and detect AirPods, then tap on “Connect” when AirPods are found
Tap on “Done” after the AirPods show up on screen
That’s it, you’re AirPods will now be setup and ready to use.
Also noteworthy is that if you use the same Apple ID and iCloud account on multiple devices, the AirPods should be automatically configured to work with those devices too, assuming compatibility anyway.
AirPods Compatibility & Supported Devices
AirPods will work with an iPhone, iPad, iPod touch, Mac, Apple Watch, and Apple TV, assuming they are fairly modern and running compatible system software. You must have Bluetooth as well, since that is how they connect to the device they are paired with. AirPods are compatible with the following devices and software versions:
iPhone, iPad, iPod touch running iOS 10.0 or later
Mac running macOS Sierra 10.12.3 or later
Apple Watch running watchOS 3 or later
Apple TV running tvOS 11 or later
Essentially, AirPods are compatible with all modern versions of Apple system software. If the device is brand new, it will work with AirPods, but even many older devices will work with AirPods assuming they are running a compatible modern system software release shown above.
You can also connect AirPods to an Android phone, tablet, or Windows computer, but the setup process is more like a typical Bluetooth device configuration and does not have the super easy iOS based AirPods setup like offered from Apple.
AirPods didn’t connect to iOS or setup properly? Try this
If for some reason AirPods don’t pair and sync with the iPhone after the above setup process, you may need to hold the setup button on AirPods and then try again. This is also what you’d need to do if you’re setting AirPods up with a different iPhone than what was originally configured with:
Put the AirPods back into the charging case if you have not done so already
Click and hold the Setup button on the back of the AirPods charging case for 18 seconds, or until you see the charging status light flicker orange and then white
Repeat the initial setup process again detailed above
It’s also worth mentioning that though AirPods should ship with the latest on device firmware, it is possible they still need to be updated. You can learn how to update AirPods firmware hereif need be.
That’s it, your AirPods should now be setup and ready to use with your iPhone, iPad, Mac, or other Apple device.
Using AirPods once they’re connected to a device is easy and fun too, you just double-tap the side of either AirPod to trigger Siri, answer a phone call, adjust music, or more.
You can also adjust how each AirPod will respond to a double-tap by adjusting the settings of AirPods through the iPhone or iPad, by opening Settings app > Bluetooth > AirPods, and adjusting the “Left” and “Right” options under ‘Double-Tap on AirPod’ settings section.
Your battery might be making your older iPhone slow. This is because, apparently, iOS system software sometimes slows down older iPhones when the internal battery has degraded to the point where it can no longer sufficiently power the device at the expected performance level.
According to Apple, the throttling of device speed is intended to prevent the iPhone from crashing or shutting down unexpectedly due to a worn batteries diminished capabilities.
Unfortunately, that device speed throttling could have an annoying side effect of making the older iPhone noticeably slower to the end user. This is often noted after new iOS system software releases, though it should be pointed out that sometimes any observed performance degradation irons itself out over time, or can be successfully resolved with various iOS troubleshooting steps and settings adjustments on the impacted device. But, sometimes an older iPhone or iPad just feels persistently slow, and that could very well be due to having an old degraded battery.
This battery and device speed issue has gained considerable attention lately, after a series of iPhone users discovered that system benchmarks were notably underperforming on older iPhone models. For example, a widely tweeted set of screenshots and report from Twitter user @sam_siruomu showed performance benchmarks where an iPhone 6 was under clocking itself down to 600mhz, but after replacing the battery with a new one the speed corrected back to the proper 1400mhz. That anecdotal twitter report has been captured in a screenshot below:
The device benchmarking company Geekbench also seemed to confirm an occasionally observable underperformance of older iPhone models based on referencing their own benchmarking data.
With considerable hubbub generated online, and plenty of related rumors and conspiracies, Apple released a statement to TechCrunch and Buzzfeed that said the following:
“Our goal is to deliver the best experience for customers, which includes overall performance and prolonging the life of their devices. Lithium-ion batteries become less capable of supplying peak current demands when in cold conditions, have a low battery charge or as they age over time, which can result in the device unexpectedly shutting down to protect its electronic components.
Last year we released a feature for iPhone 6, iPhone 6s and iPhone SE to smooth out the instantaneous peaks only when needed to prevent the device from unexpectedly shutting down during these conditions. We’ve now extended that feature to iPhone 7 with iOS 11.2, and plan to add support for other products in the future.”
That statement and admission from Apple is interesting, because there has long been speculation and conspiracy theory that Apple intentionally slows down older iPhone (and iPad) devices with iOS system software updates, but until now most users didn’t know why, they just anecdotally observed it on their devices. That notable performance degradation led to countless theories about why it might happen, along with other theories denying it happens at all and insisting it was imaginary. Well, it turns out that some observed performance decline may directly relate to the older devices battery age and quality.
How this all shakes out remains to be seen, as there are already lawsuits against Appleabout the battery issue, and the topic has also reinvigorated Right-to-Repair advocateswho argue that it’s consumer friendly to be able to easily and reasonably repair your own stuff.
This may all sound bad, but there’s actually good news here. If indeed an iPhone (or iPad) device slowdown is entirely due to an old battery, then replacing the battery should theoretically boost performance back to expectations, much as it did for the Twitter user we cited above, and that has been anecdotally reported as successful elsewhere around the web too.
Of course a notable difficulty here is that iPhone does not typically report that its internal battery is old enough to have degraded device performance, nor does the iPhone have an easily replaceable battery. The former situation is something that could be theoretically addressed in a future iOS software update, with a notification along the lines of “battery has degraded and can no longer support optimal device performance” or something similar, perhaps with a link to battery replacement options. The latter difficulty of not having an easily replaceable battery means you’d either need to get an old worn battery replaced by a competent repair center, or take it upon yourself as a DIY project.
If you do have an older iPhone (say an iPhone 6 or iPhone 6s) that feels unreasonably slow, and you want to see if a battery replacement will restore performance, you’ll need to either contact Apple or an Apple authorized repair center and pay $80 for a battery replacement, or you can get a Do-It-Yourself iPhone battery replacement kit on Amazon for around $40 or so. There’s no guarantee that replacing a battery is going to speed things up and make an older device as snappy as it used to be, but it just might boost performance for some devices under the right set of circumstances.
Although iPhone cases, and even mounting systems, have become completely commoditized over the past several years — to the point where we’ve almost entirely stopped doing full reviews of such products — every so often a refreshing new product comes along that’s different enough to pique out interest, so when we saw MyMe’s new Unity Case and Cradle System, we were intrigued. While the concept of a case-and-mount combo is far from a novel idea, MyMe’s solution has a unique design and aesthetic that we rather liked.
The Unity is the brainchild of award-winning designer Peter Solomon, best known for The Handle electric guitar, and pairs a reasonably protective case with a magnetic cradle that consists of little more than a suction mount on one end and a single metal ball joint on the other. The rear of the case includes a circular magnetic indent that attaches onto the cradle at the ball joint, allowing the encased iPhone to be mounted or oriented in virtually any position or orientation permitted by the laws of physics. Both the case and cradle are available in a fairly wide variety of colors.
MyMe sells the Unity System as a package for $35 that includes both the case and the cradle, however the cases and cradles can also be purchased individually, for $25 and $15, respectively, so you can mix and match if you want additional cradles or want to be able to share a single cradle with multiple family members. The case also includes two flat metallic discs with adhesive tape that can be attached to any flat surface for attaching the iPhone to something like a wall or kitchen cabinet, although you’ll likely only need to use the discs for non-metallic surfaces as the magnet in the case itself is strong enough to attach to metallic surfaces such as a refrigerator.
The Unity case also sports a unique design of concentric circular ridge patterns that surround the central magnetic mounting hole, adding a nice bit of style to the case that also doubles as a grip. Rubber edges at the peak of each ridge also provide some extra grip, but more importantly keep the case from sliding when attached to a metal surface. The case itself provides full button and port coverage, dual-layer construction for shock absorption, and a raised lip for screen protection, although MyMe doesn’t rate the case for impact or drop protection. While it’s certainly more protective than most average shell cases, it definitely doesn’t feel as solid as some of the other cases we’ve recently looked at, many of which are designed specifically with drop protection in mind.
The cradle portion of the system is also available in eight different colors and includes one of the strongest suction cup mounts we’ve seen, allowing to attach very securely to any clean, flat surface, and non-porous surface such as a windshield, mirror, desk, or cabinet. The nature of the metal ball joint and magnetic attachment also means that there’s basically no stress put on the mount when attaching or removing the encased iPhone or moving it around, although the magnet is strong enough that we found that we either needed to pull it off in a rapid motion directly away from the base, or slide a finger around the back to gently separate the case from the ball. In either case, however, the mount stayed very firmly attached to our windshield. It’s a very solid and flexible mount.
We’re pretty impressed with what MyMe has done here with the Unity System — it’s one of the best mounting solutions we’ve seen for the iPhone and it’s very affordably priced. About the only knock against it is that you of course have to use the case to go along with it, and it’s not a highly protective case, making it a tradeoff between having a great and convenient mounting solution and using your preferred case. However, if you like the look of Unity’s case design and are willing to live with the protection compromise, it’s hard to go wrong with the Unity System.
With all the fuss about old, depleted batteries slowing down your iPhones, it might be a good idea to at least check the health of your iPhone’s battery. To do this, you can use a free tool called coconutBattery, an app that digs into your iOS and Mac devices to tell you how old they are, and how strong your battery is compared to when it was new.
CoconutBattery
CoconutBattery is an Mac app that performs a single task — it checks the status of the battery in your Mac, or the battery of any iDevices connected to that Mac. To use it, you just plug your iPhone or iPad into your Mac, and make sure that it trusts the host computer (if you regularly sync your iPhone with your Mac, you can skip the “trust” step. If you don’t, then just follow along with the instructions that will appear on your Mac and iPhone’s screens).
Once connected, you’ll see a window something like this:
All you need to know about your iPhone battery in one place.
That’s the iOS page of the coconutBattery window, and it shows you several pieces of useful info. The top section is basic data about the connected iPhone (or iPad): dater of manufacture, OS version, device model, and the storage space currently used. For more details –serial number, ages in days, and the current kind of charger connected — click on the Device details… button.
Below that is the section we’re interested in: the battery details. Here you will see two bars, hopefully both green. The upper bar shows you the current charge level of the battery (similar to the percentage readout on the iPhone itself), along with the current charge, and the full possible charge capacity in milliAmp hours (mAh).
New vs. old
Below that is a bar showing the “design capacity” vs the current capacity. That is, it shows you how much charge your iPhone’s battery can hold today, vs how much it could hold when it left the factory (the “design capacity” is the official spec for you device — the actual capacity when new could be slightly over or under that number, but it is a good guide).
Thus, you can see just how weak your battery has become over the years. You can also see how many charge cycles the battery has been through.
Works on Mac batteries too
CoconutBattery also works on the Mac.
How to maximize your battery’s lifespan
There are several tips yo can follow to keep you battery healthy for as long as possible. Apple has a support page dedicated to just that, and it’s a great read if you want the truth about batteries from the source. After all, who would know better about battery life and health than Apple, a company obsessed with optimizing battery performance so it can make its devices ever smaller?
Check it out, and maybe you’ll be able to make your current iPhone last a little longer.
If you are running coconutBattery on a Mac with a battery i.e. a MacBook, then you can see this info for your Mac’s battery too. And you can also save the current data in order to keep a record of your batteries’ depletion over time. And finally, there’s a coconutBattery Plus upgrade to let you check iOS batteries wirelessly, and to unlock battery charge notifications, plus advanced viewers for Mac and iOS.
iPhone Tips: How to downgrade your iPhone to older iOS versions
Did an iOS update made your iPhone sluggish? Or you just want to revert back to an older iOS version? Whatever the case, here’s a solution for you.
We know that sometimes our older iPhones would get notifications that we can update to a newer iOS versions just like the latest iPhones. After doing that, the update proved to be too much for our aging iPhones. It’s now slower and not even close to usable.
How to undo an iPhone update
Plug the larger end of the USB cable into the bottom of your phone. Insert the smaller end into the port on your computer. Your computer will automatically recognize your iPhone.
Browse to the “iPhone Software Updates” folder to locate your previous version of iOS. In Mac OS X, open your “Library” folder, then “iTunes,” then “iPhone Software Updates.” In Windows, open the “Start” menu and type “%appdata%Apple ComputeriTunesiPhone Software Updates” into the “Search” box.
Turn off your iPhone by holding the “Power” button at the top right corner of the phone for several seconds. Slide the arrow on your touch screen to power down the phone. Leave it off for five seconds.
Press and hold the “Power” and “Home” button, located at the bottom center on the face of the phone, for 10 seconds. Release the “Power” button after this time, but continue holding the “Home” button to enter Recovery Mode.
Open iTunes if it is not already open. The software will recognize that your phone has entered Recovery Mode and will prompt you to restore it.
Click “iPhone” beneath the “Devices” heading in the left sidebar of iTunes. Press and hold the “Shift” key, then click the “Restore” button in the bottom right of the window to choose which iOS file you want to restore with.
Select the file for your previous iOS version from the “iPhone Software Updates” folder you accessed in Step 2. The file will have a “.ipsw” extension.
Allow the installation to complete. This usually takes about 10 minutes. You will see a confirmation window once installation has finished.
Download and install RecBoot (see Resources). This utility will allow you to quickly end Recovery Mode on your phone and finalize the installation of your previous iOS software.
Open RecBoot and click the “Exit Recovery Mode” button.
iPhone Tips: Fix for touchscreen that’s not working
You want to swipe but your iPhone touchcreen isn’t responding. Your screen isn’t cracked, it’s just not working as expected. Here’s how to remedy that.
Do a Forced Reboot on the iPhone
Next you should try a force reboot of the iPhone, this works to resolve an unresponsive touch screen, and many other issues, for the vast majority of cases:
Hold down the Home button and Power button simultaneously.
Continue holding both buttons until you see the Apple logo appear on the screen then release.
When the iPhone boots back up, hopefully the touch screen will no longer be unresponsive.
Restore the iPhone from a Backup
This requires a computer and USB cable, you’ll be first making a backup to iTunes, then restoring with that backup.
Connect the iPhone to a computer with iTunes
Choose to “Encrypt backup” if you haven’t done so yet, and choose to “Back up to this computer”
Choose “Back up now” and let the process complete, this can take a while
When finished, click on the “Restore” button, choose the backup you just made to restore to
Let the backup restore to the iPhone and try using it as normal
If the iPhone screen continues to exhibit strange freezing and unresponsive touch behavior, your next step is to erase it and set it up as new.
Set Up the iPhone as New with an Erase & Factory Reset
NOTE: Do not do this if you have not made a recent backup. You will lose data if you do this, this erases the iPhone and deletes everything from the iPhone, resetting it to a factory state.
Once the iPhone has been setup as new, don’t restore from a backup quite yet, try to use the iPhone as if it was brand new. If the iPhone works and the touchscreen is responsive as it should be, it suggests there could be a problem with the backup you used to restore earlier.
Contact Apple Support – Last Resort
If you’ve forcibly rebooted the iPhone, you’ve restored from a backup, and you’ve setup the iPhone as new, and the touch screen is still unresponsive, it’s time to call Apple official support or visit a genius bar at an Apple Store.
Any new iPhone is under warranty for a year, and the iPhone 6s and iPhone 6s Plus are new enough that there is no question as to warranty coverage for a potentially defective product. Typically in these situations, if an iPhone is determined to be not functioning properly after all software resets and restores have been attempted, Apple will provide you with a new replacement iPhone, assuming it has not been damaged and otherwise falls within their warranty.