Unseen Water Damage Fix: Samsung Galaxy S25 Ultra! 7 Expert Secrets to Save Your Device
Introduction
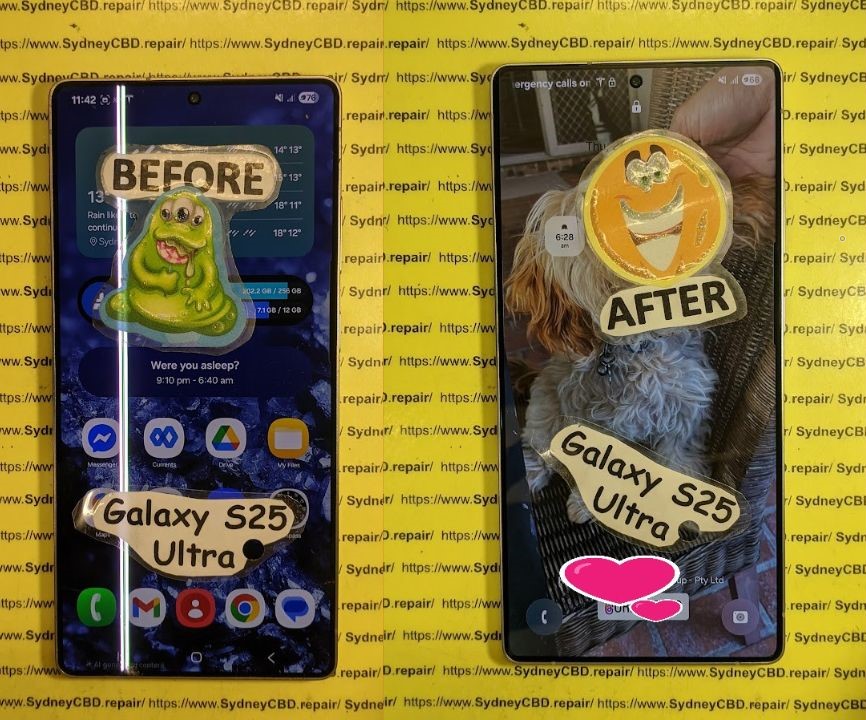
Water and smartphones have never been the best of friends — even when it comes to the most advanced flagship like the Samsung Galaxy S25 Ultra. While Samsung promotes its premium device with an impressive IP68 water-resistance rating, the truth is that unseen moisture can still find its way into delicate internal circuits. Over time, this hidden water damage can quietly corrode connectors, weaken the battery, and cause unpredictable malfunctions.
At Sydney CBD Repair Centre, we’ve seen it all — phones that look perfectly fine on the outside but are silently deteriorating within. This article reveals the unseen side of water damage and how you can identify, fix, and prevent it before it’s too late. Whether your Galaxy S25 Ultra took an unexpected dip or simply absorbed moisture from the air, understanding the signs and solutions could save you hundreds in repair costs — and possibly your data.
Let’s dive deep into the expert-approved ways to restore your Samsung Galaxy S25 Ultra to its peak condition and ensure it stays safe from the hidden dangers of water exposure.
Water damage remains one of the most deceptive phone issues — especially with modern flagships like the Samsung Galaxy S25 Ultra. Despite its premium IP68 waterproof rating, your device can still suffer from unseen moisture intrusion, slowly degrading components over time.
In this guide, we’ll uncover 7 expert secrets for identifying and fixing hidden water damage, straight from the professionals at Sydney CBD Repair Centre, Sydney’s most trusted name in phone repairs for over six consecutive years.
Even with its cutting-edge design and water-resistant features, the Galaxy S25 Ultra isn’t immune to the physics of moisture. Water damage often sneaks in through charging ports, speaker grills, SIM trays, or micro-cracks invisible to the naked eye.
Common Causes of Hidden Moisture Damage
Using your device in the rain or bathroom
Exposure to steam or humidity (e.g., kitchens or saunas)
Quick temperature shifts causing internal condensation
Improper sealing after third-party repairs
While your phone might appear dry, internal circuits could already be corroding.
How Samsung’s IP68 Rating Really Works
Samsung’s IP68 certification guarantees water resistance — not waterproofing. It protects the phone for up to 30 minutes in 1.5 meters of freshwater, but saltwater, soap, or chlorinated water can easily compromise seals. Once damaged, these seals lose effectiveness permanently.
Early Signs of Unseen Water Damage
Recognizing water damage early can be the difference between a quick fix and a costly replacement.
Software Glitches Caused by Moisture
Water can short internal connections, triggering:
Random restarts
Screen flickering
Ghost touches or unresponsive gestures
System lag and erratic battery readings
Corrosion and Battery Problems
Internal corrosion silently eats away at battery terminals and charging ICs. Common symptoms include:
Slow or failed charging
Overheating during use
Battery drain even on standby
Ignoring these warning signs could lead to permanent motherboard damage.
DIY Steps Before Visiting a Repair Centre
Before rushing to a technician, follow these safe, data-preserving steps.
What Not to Do After Water Exposure
❌ Don’t power on your device immediately.
❌ Don’t plug it in or attempt wireless charging.
❌ Don’t use a hair dryer — it spreads moisture internally.
❌ Avoid rice — it’s ineffective and can leave debris.
Drying Techniques That Actually Work
✅ Turn off your phone and remove the SIM card.
✅ Pat dry gently with a lint-free cloth.
✅ Place the device in a silica gel pack (or desiccant bag).
✅ Leave it for at least 24–48 hours.
✅ If available, use isopropyl alcohol to displace residual moisture on circuit boards (by professionals only).
Professional Repair: Inside Sydney CBD Repair Centre’s Process
When at-home fixes fail, expert intervention becomes essential. Here’s how the Sydney CBD Repair Centre restores your Galaxy S25 Ultra to full working order.
Expert Diagnostic Techniques
Technicians use thermal imaging cameras and microscopic inspections to detect corrosion points and trapped humidity. They assess:
Logic board damage
Battery health
Camera lens fogging
Charging port integrity
Genuine Parts & Advanced Equipment
Unlike generic repair shops, Sydney CBD Repair Centre uses Samsung-authorized components and precision reflow tools. This ensures:
Reliable, lasting repairs
No data loss during diagnostics
Restored waterproof sealing
Cost of Water Damage Repairs in 2025
Pricing varies depending on the damage level, but here’s a breakdown of average repair costs in Sydney for 2025:
Repair Type
Estimated Cost (AUD)
Turnaround Time
Water Damage Diagnostic
$89
1–2 hours
Cleaning & Drying
$149–$199
Same day
Board-Level Repair
$250–$400
1–3 days
Component Replacement
$150–$350
Same day
What Affects the Price
Type of water (fresh, salt, chlorinated)
Duration of exposure
Parts requiring replacement
Warranty and After-Service Benefits
All repairs come with a 90-day warranty covering workmanship and parts — another reason customers rate Sydney CBD Repair Centre 5 stars across 2,000+ Google reviews.
How to Prevent Future Water Damage
A few proactive measures can save you hundreds in future repairs.
Protective Gear & Habits
Use IP68-rated waterproof cases during beach or pool trips
Avoid using phones in high-humidity environments
Keep charging ports clean and dry
Regular Checkups & Professional Cleaning
Schedule bi-annual cleanings at professional centers like Sydney CBD Repair Centre. Regular diagnostics ensure seals remain tight and corrosion-free.
FAQs
1. Can the Galaxy S25 Ultra survive water exposure?
It’s water-resistant, not waterproof. Short-term freshwater exposure may be fine, but long-term or saltwater contact causes internal damage.
2. How can I tell if my Samsung phone has water damage?
Check for fogged cameras, unresponsive buttons, or charging issues. You can also look at the Liquid Damage Indicator (LDI) near the SIM tray — it turns red when wet.
3. Will Samsung warranty cover water damage?
No. Water damage is considered user-induced, even with an IP68 rating.
4. Is water damage repair worth it?
Absolutely — if done by a professional. At Sydney CBD Repair Centre, most water-damaged phones are fully recoverable when brought in early.
5. How long does it take to repair water damage?
Same-day service is possible for minor corrosion. Severe damage may take up to 3 days for full recovery.
6. Can rice really dry out my phone?
No. Rice only absorbs surface moisture. It cannot remove internal humidity or prevent corrosion.
Conclusion
Even the mighty Samsung Galaxy S25 Ultra isn’t invincible to unseen water damage. But with quick action and expert help from Sydney CBD Repair Centre, your device can be restored safely and effectively.
Whether you’ve dropped your phone in water or suspect slow corrosion, don’t wait. Visit Sydney CBD Repair Centre, where quality meets reliability — and your Galaxy S25 Ultra gets the professional care it deserves.
Charging Port Fix: When is Motherboard Replacement Needed? (Ultimate 2025 Guide)
Introduction
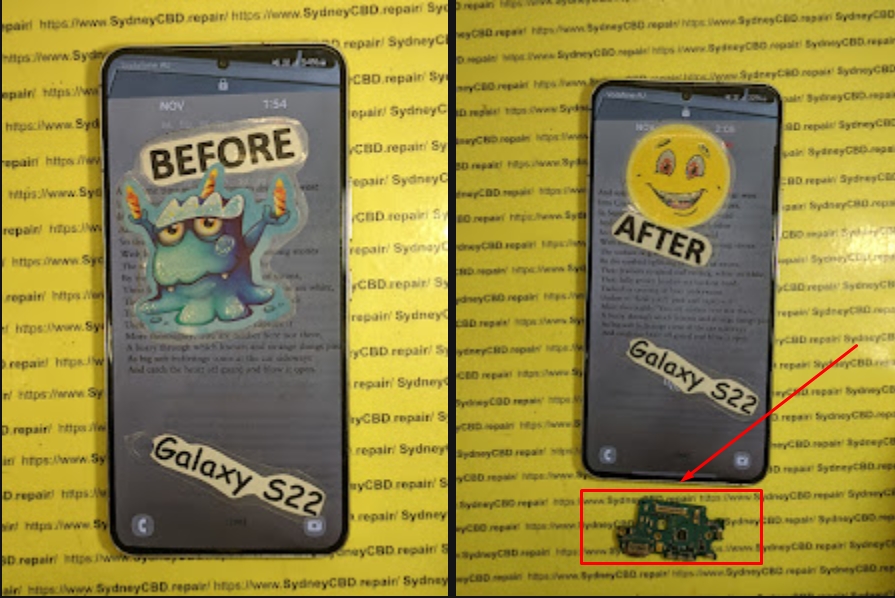
Every smartphone relies on its charging port to stay powered, connected, and functional. It’s one of the most frequently used — and often abused — components in any device. Over time, you might notice your phone charging slowly, refusing to charge altogether, or losing connection unless the cable is positioned “just right.” While these symptoms often point to a faulty charging port, sometimes the underlying problem lies much deeper — within the motherboard, the central hub that manages your phone’s power and data flow.
Understanding when a simple charging port repair is enough and when a full motherboard replacement is necessary can save you hundreds of dollars and prevent unnecessary downtime. In this guide, we’ll explore how to diagnose charging issues accurately, the signs that indicate motherboard failure, cost comparisons between repairs, and expert tips for preventing future problems. Whether you’re a tech enthusiast or an everyday phone user, this comprehensive breakdown will help you make smarter, more confident repair decisions.
When your phone suddenly refuses to charge, the first assumption is often a faulty charging port. But in some cases, the issue runs deeper — straight to the motherboard, the heart of your device. Understanding when a simple charging port fix is enough and when a motherboard replacement becomes necessary can save you time, frustration, and money.
This guide breaks down everything you need to know: from diagnosing charging port issues to identifying signs of motherboard failure, all while highlighting repair options that balance quality and cost.
The charging port serves as the bridge between your power source and your phone’s internal circuitry. It handles not only electricity but also data transfer and accessory connections. Given its constant use, this tiny component experiences significant wear over time.
Communication with diagnostic tools during servicing
Why It’s a Vulnerable Component
Dust, moisture, or frequent plugging can degrade the port’s internal pins. Over time, this leads to loose connections or intermittent charging, making the port one of the most frequently replaced smartphone parts.
Common Signs of a Faulty Charging Port
Before jumping to conclusions about motherboard damage, it’s essential to identify charging port-specific symptoms:
⚠️ Charger only works at a certain angle
🔌 Device doesn’t recognize being plugged in
⚡ Slow or inconsistent charging speed
🔋 “Charging” icon flickers on and off
💡 Cable feels loose or wobbly inside the port
These indicators typically point to port wear, bent pins, or debris accumulation — all fixable issues that don’t require a motherboard replacement.
Causes Behind Charging Port Damage
Charging ports can fail for various reasons — some accidental, others due to gradual deterioration.
Common Causes Include:
Physical Damage: Rough plugging/unplugging or using non-OEM cables.
Moisture or Corrosion: Exposure to humidity or liquid spills.
Dust and Lint Build-Up: Blocks the connector from making solid contact.
Power Surge: Voltage fluctuations damaging internal connectors.
Routine maintenance — such as keeping the port clean and using certified chargers — can prevent most of these issues.
Testing if the Charging Port is the Problem
Before assuming motherboard failure, it’s important to test the charging system step by step.
DIY Methods
Use a different charger and cable
Try charging through a computer USB port
Inspect the port using a flashlight for debris or corrosion
Gently clean the port using compressed air or a toothpick (carefully!)
Professional Diagnosis
Repair technicians use multimeters and diagnostic tools to measure voltage continuity and determine if the fault lies in the port, flex cable, or motherboard IC.
When a Simple Charging Port Repair is Enough
Many cases can be resolved by replacing or re-soldering the charging port module, a cost-effective fix compared to motherboard work.
Scenarios Where Repair is Enough
Physical damage to the connector
Water damage isolated to the port area
No other internal components affected
Phone still boots normally when charged externally
Port replacement typically costs between $40–$120, depending on device brand and model.
Signs That Point to a Motherboard Problem
Sometimes, symptoms that look like charging port failures actually trace back to the motherboard — specifically, its power management IC (PMIC) or charging circuit pathways.
Indicators of Motherboard-Level Issues
Device heats excessively during charging
No charging response even with a new port
Short-circuit detected on power line
Device fails to power on at all
Charging works intermittently despite port replacement
If your repair technician suspects a PMIC or U2 IC failure, the motherboard itself might need component-level repair or full replacement.
Motherboard vs Charging Port: Key Differences
Feature
Charging Port
Motherboard
Function
Physical connector for power/data
Central circuit controlling power and data flow
Common Issues
Bent pins, debris, loose connector
IC failure, short circuit, voltage irregularities
Repair Difficulty
Easy to moderate
Advanced soldering/microsoldering required
Average Cost
$50–$120
$150–$400+
Replacement Time
30–60 minutes
2–5 hours
Understanding these differences helps you make informed repair decisions and avoid unnecessary expenses.
Motherboard Replacement: When and Why It’s Needed
You might need a motherboard replacement if:
Charging circuit or PMIC chip is permanently damaged
Device has suffered severe liquid damage
There’s no power response after port replacement
Burn marks are visible on motherboard components
Micro-soldering attempts have failed
Although costly, motherboard replacement restores your device’s full functionality when repair isn’t feasible.
Pro Tip: Always request a reconditioned original motherboard from a certified repair shop to ensure compatibility and reliability.
Cost Comparison: Charging Port Repair vs Motherboard Replacement
Service Type
Average Cost (USD)
Time Required
Risk Level
Recommended When
Charging Port Repair
$40 – $120
30–60 mins
Low
Physical damage only
Motherboard Repair
$150 – $250
2–3 hrs
Medium
IC or circuit damage
Full Motherboard Replacement
$300 – $500+
3–5 hrs
High
Severe hardware failure
Replacing the motherboard can cost 3–4 times more than fixing the charging port, so thorough diagnostics are crucial before proceeding.
DIY Fixes vs Professional Repair
While DIY fixes are tempting, improper attempts can worsen the damage.
DIY Pros
Low cost
Immediate action possible
DIY Cons
Risk of short circuits
May void warranty
Incomplete diagnosis
Professional repair ensures the device is tested, repaired, and quality-assured, saving you from long-term complications.
How to Choose a Reliable Repair Center
Look for repair centers that offer:
Certified technicians
Warranty on repairs
Genuine replacement parts
Transparent pricing
Positive customer reviews
👉 Example:Sydney CBD Repair Centre — a reputable shop specializing in charging port and motherboard repairs with same-day service options.
Preventing Future Charging Port and Motherboard Issues
Prevention saves you both money and frustration.
Maintenance Tips
Avoid using your phone while charging
Keep the port clean and dry
Use certified chargers and cables
Don’t overcharge overnight
Perform periodic checkups every 6–12 months
Small preventive actions can significantly extend your device’s lifespan.
Real-World Case Studies
Case 1: An iPhone 12 showing no charge after water exposure — solved by replacing the port and cleaning corrosion.
Case 2: A Samsung Galaxy S21 with burnt charging IC — required partial motherboard repair.
Case 3: A Google Pixel 7 with “no charging” error — fixed after connector re-soldering and voltage realignment.
These examples show how accurate diagnostics can mean the difference between a $100 fix and a $400 replacement.
FAQs About Charging Ports and Motherboards
1. Can a damaged charging port affect the motherboard?
Yes. A shorted or corroded port can send irregular voltage to the motherboard, leading to IC failure.
2. How long does charging port replacement take?
Usually under one hour, depending on model and technician experience.
3. Is it worth repairing the motherboard?
If the phone is high-end or new, yes. Replacing the motherboard can extend its life for years.
4. How can I tell if my charging port is dirty or damaged?
Use a flashlight — debris or bent pins usually indicate a port issue.
5. Do wireless chargers bypass a broken charging port?
Yes, but only if the motherboard and wireless charging circuit are still functional.
6. What should I do if my phone doesn’t charge after a port replacement?
Return to the technician — it might be a motherboard-level power IC issue.
Conclusion
A faulty charging port doesn’t always mean disaster — but if problems persist even after repair, the motherboard may be the real culprit. With the right diagnostics, expert repair, and proper maintenance, you can restore your device without unnecessary replacements or costs.
Always choose professional service providers that combine technical skill with transparent pricing and genuine parts. A smart repair today can save you hundreds tomorrow.
David from Sydney CBD Repair Centre – The Best place to fix mobile phones as 6 Years In A Row! Top Mobile Phone Repair In Sydney. More than 2000 Positive Reviews on Google and Same Day Repairs.
📍 Visit us today for:
✓ Same Day Express Repairs
✓ Genuine Parts Guarantee
✓ Professional Technicians
✓ Competitive Pricing
✓ 2000+ 5-Star Google Reviews
✓ 6-Time Award Winner for Best Phone Repairs
✅ Introduction: The Power of DIY Smartphone Repair
In a world where smartphones are essential, even a minor issue can throw your whole day off. But here’s the good news: you don’t always need to rush to a technician for a fix. Many common smartphone problems can be solved right at home with the right tools, guidance, and patience.
Whether your phone’s screen is cracked, the battery is draining faster than ever, or your apps are constantly crashing, this comprehensive DIY repair tutorial will walk you through every major issue—and help you decide when it’s time to get expert help.
Let’s dive into 15 of the most frequent smartphone issues, learn how to troubleshoot them like a pro, and take control of your mobile life again.
Cracked screens are the most common smartphone repair issue worldwide. Whether it’s a minor scratch or a full spiderweb across your screen, dealing with screen damage promptly is crucial—not only for aesthetics but also to prevent internal component damage and injury.
⚠️ Safety First: Handling Broken Glass
Before attempting any repair, make sure to protect yourself:
Turn off the device to avoid short-circuiting.
Use gloves to prevent cuts from shards of glass.
Apply packing tape or a screen protector over the cracks if you’re delaying the repair.
🧰 Tools Needed for Screen Replacement
You’ll need a few essentials:
A heat gun or hairdryer (to loosen adhesive)
Plastic spudger or opening tools
Small Phillips and pentalobe screwdrivers
Suction cup
Replacement screen (make sure it’s compatible with your exact model)
ESD-safe tweezers and gloves
Pro Tip: Always opt for genuine parts to avoid touchscreen sensitivity issues and compatibility errors.
🛠 Step-by-Step DIY Screen Replacement
Follow these general steps. Exact procedures vary by model (e.g., iPhones differ from Samsungs), so check a model-specific video tutorial first.
Power off your phone.
Heat the screen edges gently with a heat gun.
Use a suction cup to lift the screen, then slide a plastic spudger around the edge to loosen the adhesive.
Disconnect battery cable first after removing the backplate or display.
Carefully detach display connectors.
Install the new screen, reconnect cables, and test functionality before sealing it.
Reapply adhesive, close the device, and power on.
Note: If you’re unsure about your skills, seek professional repair. Poor installation can result in a non-functional device or void warranties.
If you’re based in Sydney, check out Sydney CBD Repair Centre — experts in screen replacements using genuine parts and same-day service.
If all else fails, your best bet is a diagnostic test from a certified technician. For Sydney locals, David and his expert team at Sydney CBD Repair Centre offer precise diagnostics and same-day power issue repairs.
🔋 3. Battery Draining Too Fast? Here’s Why
Short battery life is a daily frustration for many users. While some degradation is natural over time, excessive battery drain can be fixed.
🔄 Calibrating Your Battery
Battery calibration helps your phone measure remaining power more accurately.
Use your phone’s Battery Usage settings to spot offenders and limit their background activity.
🔁 When to Replace Your Battery
Look out for these signs:
Swollen battery
Sudden power drops (e.g., 40% to 5%)
Overheating while charging
You can replace most smartphone batteries yourself with the right tools, though newer models make it tricky. If you’re not confident, trust a repair centre like Sydney CBD Repair Centre, which uses original batteries and provides a 90-day warranty.
🔥 4. Phone Overheating – How to Cool It Down
A hot phone isn’t just annoying—it can damage components and reduce battery life. Here’s how to keep it cool.
🔍 Identifying Heat Sources
Common culprits include:
Heavy gaming or video streaming
Charging while using device
Hot environments
App glitches or malware
❄️ Cooling Techniques for Android and iPhone
Close all background apps.
Switch to Airplane Mode to cut down processing.
Remove phone case to let heat escape.
Turn off Bluetooth, GPS, and NFC if not in use.
🛡 Preventative Measures
Avoid long gaming sessions in hot environments.
Keep your software updated.
Avoid third-party chargers and cables.
Don’t leave your phone in direct sunlight (e.g., car dashboards).
If overheating continues, it might be due to internal hardware faults. Professional diagnostics may be necessary.
🐢 5. Slow Performance and Lag Fixes
Nothing’s more frustrating than a slow smartphone—especially when you’ve invested a lot in it. Whether it’s laggy scrolling, delayed app launches, or freezing, these issues are often easy to fix with a few tweaks.
🧹 Clearing Cache and Bloatware
First things first—your phone needs a digital cleanup.
Clear cached data from apps via your phone’s storage settings.
Uninstall or disable bloatware—preinstalled apps you don’t use.
Use tools like Google Files or CCleaner (Android) for regular cleanup.
iPhone users can offload unused apps while retaining their data via Settings > iPhone Storage.
🔄 Software Updates & Factory Reset Tips
An outdated OS can cause compatibility issues, so ensure:
You’re running the latest system version.
You regularly update your apps.
Still lagging? Try a factory reset, but back up your data first:
Android: Settings > System > Reset > Factory data reset
iPhone: Settings > General > Transfer or Reset > Erase All Content and Settings
A reset can eliminate hidden bugs or malware causing sluggishness.
🧠 Upgrading Internal Storage or RAM (for some models)
If your phone allows expandable storage (like many Android models):
Move photos and apps to an SD card.
Delete old backups and files.
For rooted devices, some users opt for virtual RAM increase, but this isn’t for beginners.
For newer flagship devices with non-expandable memory, freeing up space and managing background apps is your best option.
💥 6. Apps Crashing? How to Stop It
Apps crashing randomly? You’re not alone. App instability can stem from various reasons, including bad updates, corrupted cache, or even insufficient memory.
🔄 App Conflicts and Compatibility Issues
If crashes began after installing a new app, there may be a conflict. Try:
Uninstalling the most recent apps.
Disabling unnecessary background apps.
Apps may also misbehave if your OS is outdated or if the app isn’t fully compatible with your phone model.
🔧 Update or Reinstall Troublesome Apps
A quick fix that works:
Go to App Settings > Storage > Clear Cache & Data.
Uninstall and reinstall the app from Google Play or App Store.
This often solves issues caused by corrupted app data.
📲 OS Compatibility Check
Make sure both your app and OS are updated. Developers push updates to match new Android or iOS versions. If your phone is too old, some newer apps may not run properly.
If you’re unsure, a technician at Sydney CBD Repair Centre can help determine if your phone needs a system update or full reset.
🌐 7. Wi-Fi or Data Connection Problems
Struggling with unstable connections or mobile data? It’s a common problem, but often very fixable without heading to a technician.
🧪 Diagnosing Network Settings
Check these first:
Airplane Mode isn’t enabled.
Wi-Fi and Data are turned on.
Router is working (try another device on the same network).
Then:
Forget the network and reconnect.
Restart your phone and router.
🔁 Resetting Network Configurations
For a deeper fix:
Android: Settings > System > Reset > Reset Network Settings
iPhone: Settings > General > Reset > Reset Network Settings
This clears saved Wi-Fi passwords and cellular settings, so have those on hand.
📶 Router vs. Phone Issue
Test with a different Wi-Fi or SIM. If other devices work fine on the same network, it’s your phone. If none do—it’s the router or signal provider.
🔇 8. No Sound or Microphone Not Working
Whether during calls or media playback, sound issues usually stem from hardware blockage or software misconfiguration.
🧼 Cleaning Speaker and Mic Ports
Dust and lint clogging the mic/speaker grill are surprisingly common.
Use a soft toothbrush or compressed air.
Avoid sticking metal objects inside ports.
Pro Tip: If water got in, don’t blow air forcefully—it might push liquid deeper. Let it dry thoroughly first.
⚙️ Software Troubleshooting
Ensure Do Not Disturb isn’t enabled.
Try Safe Mode to see if third-party apps are interfering.
Test mic/speaker via Voice Recorder app or YouTube.
🧩 Replacing Audio Components
If the issue persists after cleaning and software resets, the speaker or mic might be damaged.
Replacement parts are inexpensive.
Many models allow DIY mic/speaker swaps.
Seek expert help for soldered or glued-down components—Sydney CBD Repair Centre offers mic and speaker repair with OEM parts.
📸 9. Camera Not Working or Blurry Images
A smartphone’s camera is one of its most-used features, so any issue here is frustrating. Whether it’s not focusing, crashing, or showing a black screen, here’s how to fix it.
✨ DIY Lens Cleaning Tips
First, clean the lens gently using:
A microfiber cloth
A small dab of lens cleaner
Avoid paper towels or rubbing alcohol (they can scratch)
Sometimes it’s just smudges causing blurriness.
🔧 Resetting Camera App Settings
Go to App Settings > Camera > Clear Cache & Data
Reopen the app and try again
On iPhones, resetting settings via Settings > General > Reset > Reset All Settings can help too.
📷 Replacing Camera Modules
Still blurry or no image?
The camera module may be loose or damaged.
DIY camera replacements are possible on many Android models using a toolkit and YouTube guide.
iPhones require more care due to Face ID and TrueDepth sensors.
Pro Tip: Only trust genuine camera modules—cheap parts often fail quickly.
🖐️ 10. Touchscreen Not Responding? Here’s What to Check
A frozen or unresponsive touchscreen can render your phone almost useless. Luckily, there are several ways to troubleshoot before resorting to a screen replacement.
🧪 Screen Calibration and Sensitivity Settings
For Android:
Use apps like Touchscreen Repair or MultiTouch Tester.
Navigate to Settings > Display > Touch Sensitivity (on supported models).
For iPhone:
Restart the device.
Update iOS to the latest version.
Remove screen protectors or cases that might interfere with touch recognition.
📦 Removing Case or Screen Protector
Sometimes, screen protectors or rugged cases reduce touch sensitivity. Try:
Removing any tempered glass or plastic screen guard.
Testing touch response afterward.
🛠 When to Replace the Digitizer
If none of the above works:
Your digitizer (touch sensor) may be damaged.
This component often comes fused with the display—meaning you may need a full screen replacement.
For safe, same-day service with OEM parts, consider Sydney CBD Repair Centre. Their expert team ensures your touchscreen functions like new.
💧 11. Water Damage Recovery Steps
Water and electronics don’t mix. If your smartphone takes a dive into the sink, toilet, or pool, time is of the essence.
⏱ Immediate Actions After Exposure
Turn off the phone immediately.
Don’t press any buttons—this could push water deeper.
Remove the SIM, SD card, and battery (if removable).
Wipe it dry with a lint-free cloth.
Place the device in a sealed bag with silica gel packets for at least 24–48 hours.
Avoid rice—it’s less effective and can introduce dust or starch particles.
🧰 Disassembling for Drying
If you’re confident:
Open the back cover and unscrew internal components.
Disconnect the battery.
Use isopropyl alcohol (90%+) and a soft brush to clean corrosion.
Let it dry fully before reassembling.
🔧 What Parts May Need Replacing
Common casualties of water damage include:
Battery
Screen/digitizer
Motherboard or charging port
Speakers or mic
Sydney CBD Repair Centre specializes in water-damaged devices and can professionally diagnose and repair these components—with a high success rate.
🧲 12. Charging Port Issues and Fixes
Is your phone not charging properly or showing “Accessory Not Supported”? Your charging port might be dirty, damaged, or loose.
🧼 Cleaning the Port Safely
Turn off your phone.
Use a toothpick or ESD-safe brush to gently remove lint or dust.
Avoid using metal objects or blowing forcefully into the port.
⚙️ Software vs. Hardware Charging Faults
If cleaning doesn’t help:
Test with a new cable and adapter.
Try wireless charging if supported.
Boot in Safe Mode to rule out rogue apps.
If still no charge, your port may be physically worn out or disconnected internally.
🔧 When to Replace the Charging Port
Charging ports wear out over time due to daily plugging/unplugging. For many phones, it’s a standalone module and can be replaced easily. iPhones and USB-C Android phones often require:
Micro-soldering (for integrated ports)
Precision parts alignment
For a reliable and fast fix, Sydney CBD Repair Centre replaces charging ports using original-grade replacements—often within 1–2 hours.
📵 13. SIM Card Not Detected
A “No SIM” or “Invalid SIM” error is common and usually easy to resolve.
🔄 Cleaning and Re-inserting SIM
Power off your device.
Remove the SIM card.
Gently clean it with a microfiber cloth.
Re-insert it properly and restart the device.
🧰 Software Fixes
Try:
Airplane Mode toggle
Network settings reset
Carrier settings update (iPhone)
Still no luck? Try another SIM. If it works, the issue is with your card—not your phone.
🔧 SIM Tray or Reader Replacement
If the SIM reader pins are bent or the tray is damaged, professional repair is needed.
Sydney CBD Repair Centre offers quick SIM tray and reader replacements—restoring full signal functionality without hassle.
⚠️ 14. Error Messages and Boot Loops
Stuck on the Apple logo or Android boot screen? These software errors can often be solved without hardware repair.
🛠 Common Errors and What They Mean
iPhone: “Support.apple.com/iphone/restore” – typically iOS corruption
Android: “No command” or “System UI has stopped” – system crash
🔄 Safe Mode and Recovery Options
iPhone:
Use iTunes or Finder to force restore
Try DFU Mode for deeper-level repair
Android:
Enter Recovery Mode and wipe cache partition
Use ADB (Android Debug Bridge) for advanced troubleshooting
⚙️ When to Flash New Firmware
If system files are corrupt, reinstalling the firmware may help. This requires:
OEM software tools (e.g., Odin for Samsung)
Backup of your data (as it will be erased)
Or, let Sydney CBD Repair Centre handle it for you with data preservation and clean firmware flashing.
🆙 15. Software Update Failed
Failed updates are more than annoying—they can leave your device unusable.
🧰 Identifying the Problem
Common reasons include:
Insufficient storage
Low battery during update
Poor Wi-Fi or interrupted download
Jailbroken/rooted device
🔧 iOS vs. Android Update Fixes
iPhone:
Use iTunes or Finder to restore or update
Clear space by deleting unused apps or media
Android:
Use recovery mode to apply update from ADB or SD card
Flash firmware using tools like Odin (Samsung) or SP Flash Tool (MediaTek)
🧩 Tips for Successful Updates
Charge to 100% before starting
Ensure Wi-Fi is strong and stable
Clear space (at least 5–10 GB recommended)
Avoid jailbreaking or rooting for smoother updates
❓ FAQs
1. Is it safe to repair a phone at home?
Yes, basic repairs like battery or screen replacement are safe if you follow instructions, use the correct tools, and power down your device. However, repairs involving micro-soldering or motherboard components are best left to professionals.
2. What’s the most common smartphone issue?
Cracked screens and battery degradation are the most common. They account for over 50% of repairs handled by shops like Sydney CBD Repair Centre.
3. How long does a typical phone repair take?
It depends on the repair type. Screen and battery replacements take 30–90 minutes. Water damage diagnostics may require up to 48 hours.
4. Does DIY repair void my warranty?
If your phone is under manufacturer warranty, DIY repairs can void it. Using authorized repair services or those that use OEM parts—like Sydney CBD Repair Centre—can protect your device and warranty.
5. What’s the best way to protect my phone?
Use a shock-absorbent case, apply a tempered glass screen protector, avoid overcharging, and handle software updates promptly.
6. My phone has multiple issues. Should I still repair it?
Yes, a professional technician can often bundle repairs. At Sydney CBD Repair Centre, you can get discounted pricing for multiple issues repaired in one visit.
✅ Conclusion: Don’t Panic—Most Smartphone Issues Are Fixable!
Modern smartphones are robust, but not immune to damage. Whether you’re dealing with cracked glass, power issues, water damage, or performance slowdowns—there’s almost always a fix.
DIY repairs can save you money if done right, but for complex issues or guaranteed results, trust experts who have the right tools, parts, and experience.
🔧 Need Reliable Smartphone Repairs in Sydney?
David from Sydney CBD Repair Centre and his expert team have been the trusted choice in mobile repairs six years in a row!
We take pride in delivering exceptional repair services for all major phone brands including Apple, Samsung, Google, and more. Our expert technicians use only genuine parts and offer a 90-day warranty on repairs. Located in the heart of Sydney CBD, we’re your one-stop solution for all mobile device repairs.
Visit us for:
✓ Same Day Express Repairs
✓ Genuine Parts Guarantee
✓ Professional Technicians
✓ Competitive Pricing
✓ 2000+ 5-Star Google Reviews
✓ 6-Time Award Winner for Best Phone Repairs