Apple this week quietly released an update for the Windows version of its iTunes music player. However, rather than adding new features, the update is focused on fixing bugs and security breaches for those who still rely on iTunes.
According to an Apple Support webpage, iTunes 12.12.4 fixes five different exploits that could be used for arbitrary code execution through the music player.
A specific exploit in the Mobile Device Service, which manages the connection between PC and iOS devices, allowed an app to delete files from the computer without permission. Other exploits fixed were related to AppleGraphicsControl, ImageIO, and WebKit.
Apple recommends that Windows users download the latest version of iTunes from the Microsoft Store. However, the app is still available as a separate download through Apple’s website (it requires Windows 8 or later). iTunes on Windows is required to access Apple Music offline and manage iPhone, iPod, and iPad devices.
Of course, since iTunes was discontinued on macOS years ago, the update is not required for Mac users.
iTunes on Windows
Even though Apple Music has its own app on iOS, macOS, and even Android, Windows users still rely on iTunes – which at this point is quite outdated and lacks some features available on other platforms.
Apple Music users on Windows PCs can download some alternative clients such as Cider. However, these apps do not replace iTunes when it comes to restoring iOS devices.
Rumors heard last year that Apple was testing both Music and Podcast apps for Microsoft platforms. The company was even looking for engineers with Universal Windows Platform (UWP) experience. Unfortunately, other details about Apple’s plans for launching an Apple Music app for Windows remain unclear.
Today we are taking a look at how to get your music video on Apple Music. More specifically, the various options and difficulties with regards to independent digital distribution of our music videos and music-related video content to Apple’s streaming platform. We have previously discussed services like TuneCore — one of the better options for getting your music on Apple Music, Spotify, and many others — however, things have evolved in the space since then with TuneCore competitor Distrokid now making waves, but to some degree, options are still somewhat limited when it comes distributing your companion video content. So let’s take a closer look at Apple’s official list of distributor partners, the best options available for independent music makers/content creators, and how to distribute your music video on Apple Music.
How to get your music video on Apple Music
At this point it seems, for the most part, quite straight forward to get your music on Apple Music and other comparable services. Music videos, however, are a slightly more complicated beast for completely indie artists.
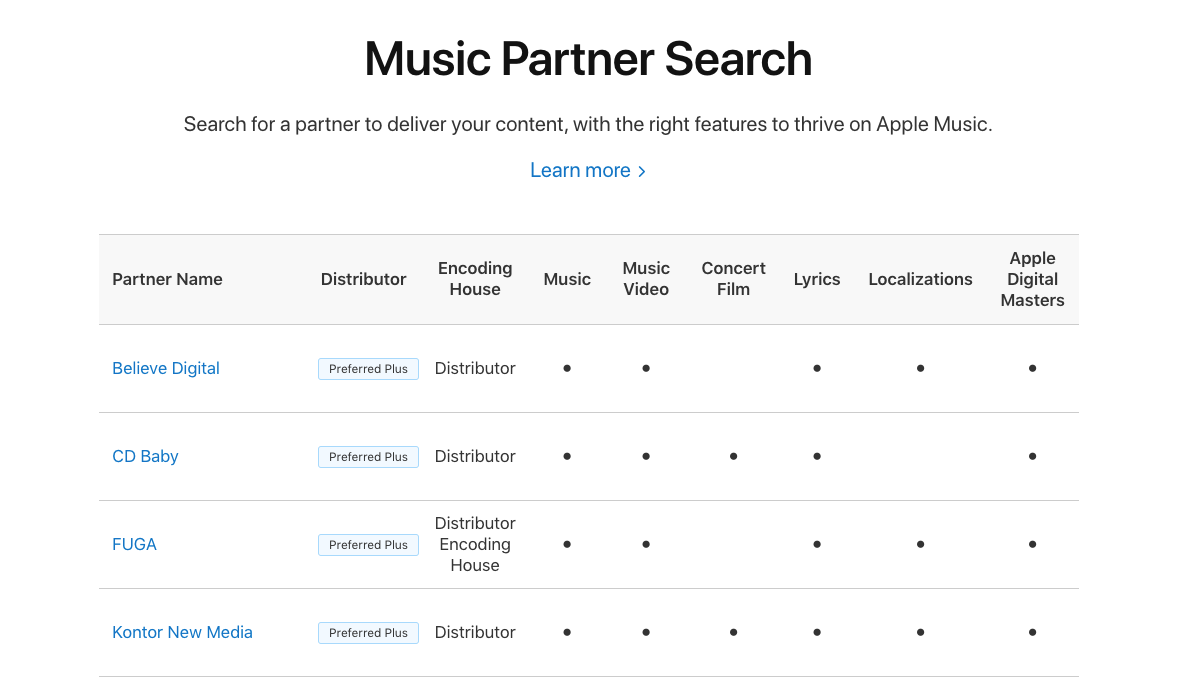
Apple’s Music Partner Search list – Apple Music video distribution
Apple’s official Music Partner Search list is an obvious place to start here, but there really aren’t very many of the officially highlighted services that you can just go sign up for, pay your money, and watch you music video on Apple Music (usually a few weeks later) as far as we can tell. You’ll find loads of them on there that say they do, and that might very well be the case, but it seems as though many of them are really more like a small label you would need to submit your package to before you’re even considered — or something to that effect. And on the other hand, much of the larger, well-known services on the list (TuneCore, Distrokid, etc.) do not support music video distribution.
Which services are the best for distributing music videos to Apple Music?
This leaves independent artists, bedroom producers, and aspiring content creators at a bit of a loss, or in a somewhat confusing mess of options to consider with limited possibilities for personal authorship when it comes to how to get music videos on Apple Music. Parsing through the royalty splits and pricing for each music video distribution avenue, policies/pricing for changes to content after delivery, and understanding video content requirements/limitations for each service, among other things, is already way more than enough for independent creatives to deal with — never mind some of the services on Apple’s list that present a complicated mess of a home page and/or are really only available for folks outside of North America.
So finding a service that’s simple and easy to understand with the details clearly laid out, is invaluable, even despite all of the other monetization considerations here. Some creatives just want to get their content out there to the world and on the biggest platforms in the game, so the ability to just submit content, pay the cash, and go without having to worry about the rest of it is what we are really after here today.
Symphonic music video distribution
And that brings us toSymphonic. Of all the options Apple mentions on its official Partner list, Symphonic appears to be the most straight forward for how to get your video on Apple’s platform. While TuneCore and Distrokid (use this link for 7% off your distribution job)— arguably the two biggest players in the indie music distribution game — don’t offer music video services, Symphonic appears to have a simple submission process that anyone can use.
The usual royalty splits and video spec requirements apply here as expected (no lyric videos on Apple Music anymore, no Facebook uploads unless you have a public official artist page, etc.), but in the end, you fill the forms out, send your cash, and you’re on your way. No need to have a million Spotify plays or a massive Instagram following for the independent distributor to consider you, just pay your cash and get your content out there.
Symphonic has a simple to follow submission process available that walks creatives through the entire process with several tips and details on what is required on your end and what to expect from the various streaming services, including Apple Music. There’s a handy four step checklist you can use to ensure your music video is ready to go as well as some important specifics regarding VEVO and videos featuring content in another language. You can browse through all of these details right here before you lay any cash down and you can review the Symphonic royalty schedule here.
More Apple Music distribution options
Sure, there are loads of options on Apple’s list that will get the job done, but most of them aren’t entirely open services. Popular distributor CD Baby, for example, is listed as supporting music videos but they don’t appear to offer or advertise that service anywhere. Does anyone have any experience paying for distribution with CD Baby and/or the music video situation?
Of the five services on the Partners list denoted as being a “Preferred Plus” option by Apple, CD Baby is the only one that doesn’t look like some kind of music label that has to want to distribute your creations to get your content out to the world or at least require some kind of private communication and submission process that feels like you’re trying to get a record deal or something. The others fall into the label-like side of things or aren’t even in english when you hit the home page.
While there are certainly other ways beyond Symphonic for getting your music video on Apple Music, when it comes to the officially supported options, it does appear to be the easiest way to make it happen at this point.
Apple has discontinued iBooks Author and iTunes U. The former is a free ebook app that allows you to read publications purchased at the iBook Store. The latter provides tools for an instructor to bring a classroom together on the iPad.
Apple has now announced both of these products are being discontinued. iBooks Author will no longer be updated, and iTunes U is being discontinued at the end of 2021. iBooks Author will continue to work, but you’ll need to make preparations to transition to Pages in the near future. Much of the functionality from iBooks Author has made its way into Pages over the past few update cycles. This announcement shouldn’t come as much of a surprise as we never saw iBooks Author transition into Apple Books Author or include a native iPad app. Apple will be included an import function in a future version of Pages.
iBooks Author will no longer be updated, and it won’t be available to new users as of July 1, 2020. If you’ve previously downloaded the app, you can still access it from your App Store purchase history. You can continue to use iBooks Author on macOS 10.15 and earlier, and books previously published to Apple Books from iBooks Author will remain available.
If you have iBooks Author books you’d like to import into Pages, a book import feature is coming to Pages soon. It will allow you to open and edit iBooks Author files (.iba) in Pages.
Apple has also announced that iTunes U will be discontinued at the end of 2021 (not the 2021 school year).
Apple has been hard at work building the next generation of apps for both teachers and students:
Classroom turns your iPad into a powerful teaching assistant, helping teachers guide students through a lesson, see their progress, and keep them on track.
Schoolwork helps teachers save time and maximize each student’s potential by making it easy for teachers to share class materials, get students to a specific activity in an app, collaborate with students, and view student progress.
In addition to Classroom and Schoolwork, Apple also introduced Apple School Manager to enable IT Administrators to easily manage iPads, Macs, Apple TV, Apple IDs, books, and apps, while ensuring data is kept secure and private. Apps such as Pages, Numbers, Keynote, GarageBand, iMovie, Clips, and Swift Playgrounds have education-specific features that are used regularly by teachers and students.
With this in mind, Apple will discontinue iTunes U at the end of 2021. iTunes U will continue to be available to all existing customers through the 2020-2021 educational year.
Much of the content in iTunes U can easily be transitioned into platforms like Apple Podcasts and Apple Books. If you are publishing private content in iTunes U, Apple recommends using Schoolwork going forward. iTunes U will continue to be available to all existing users through the 2020-2021 educational year before it is discontinued at the end of 2021, so if you’re school or university had plans to continue to use iTunes U, you have a full academic year to make plans.
As for iTunes U, Apple will discontinue it at the end of 2021, according to a new support document. The tech giant recommends users move instead to its Classroom, Schoolwork, and Apple School Manager.
Did you know that you could use your iPhone as a remote to control your iTunes library? If you regularly use iTunes on your Windows PC or Mac for listening to music or playing back content purchased from the iTunes Store, this feature will prove to be extremely useful.
Let’s say you’re away from the keyboard and you’re busy doing something else in the next room. You could use your iPhone to switch between songs in your library and continue listening without even having to move. Although this article focuses primarily on the iPhone, you could also use your iPad or iPod Touch to remotely control your iTunes library.
Are you interested in learning how this works, so you can set it up on your iOS device? Then you’re in the right place, because we’ll be discussing how you can set up and use your iPhone or iPad as an iTunes Remote on both the PC & Mac.
How to Setup & Use iPhone as iTunes Remote
In order to successfully connect your iPhone to iTunes on your computer, you need to make sure that both of the devices are connected to the same Wi-Fi network. You’ll also need to download and install the iTunes Remote app from the App Store. Once you’re ready, simply follow the steps below to set up and start using your iOS device as a remote control.
Open the “Remote” app from the home screen of your iPhone, iPad or iPod Touch. It will be indicated by the icon shown below.
Tap on “Settings” at the top-right corner of the screen.
Now, press “Add an iTunes Library” as shown in the screenshot below.
The app will now display a 4-digit code that you need to manually enter in the iTunes desktop client.
When you open iTunes on your computer, you’ll notice a tiny remote app icon right next to the music category, as shown below. Click on it to continue with the setup.
Now, simply type in the 4-digit code and click on done.
iTunes will now indicate that your device has successfully connected and paired with iTunes.
To start using the Remote app, tap on your iTunes Library within the app, which is usually indicated the username that you have on your computer.
Now, you’ll be able to navigate through the menus just like you normally would on iTunes, and control what’s being played back on your computer.
If you followed along you’re now set up to start using your iPhone, iPad or iPod Touch as an iTunes Remote with a Mac or Windows PC.
In addition to being able to control music and video content that’s stored in your iTunes library, you will also be able to edit and create new playlists which will automatically be updated in the desktop client immediately.
Since this is a wireless feature, you might be concerned about any sort of latency issues. However in our testing, the latency was very minimal and wasn’t really noticeable in most cases. That being said, the latency might heavily depend on the Wi-Fi range, so make sure you’re not too far away from the router.
This may be more useful on Windows PC and older Mac system software at this point since the latest versions of MacOS have deprecated iTunes, but the Music app still allows for similar capabilities on Mac.
Speaking of remote control, are you trying to remotely install apps on your iPhone using iTunes? Well, you don’t need iTunes Remote for that, as that’s a completely different capability. You simply need to make sure that you’re logged into the same Apple ID on both your device and iTunes and have the proper setting configured to have that feature work.
Need to archive an iTunes backup of an iPhone or iPad for safe-keeping? Creating an archived backup in iTunes is helpful because it allows you to preserve a specific device backup while still allowing for backing up to iTunes on Mac or PC, without those new backups overwriting the archived backup.
Creating routine backups of iPhone and iPad are important in general, but if you ever plan to try a beta release of system software like iOS public beta or iPadOS public beta, you’ll want to go a step further and archive an iTunes backup as well, since it makes it easier to revert to a prior release (like downgrading iOS 13) if necessary.
How to Archive iTunes Backup of iPhone or iPad on Mac & Windows
This obviously focuses on archiving backups in iTunes, but in MacOS Catalina these same actions are performed in the Finder, where device management occurs, rather than in iTunes.
Open the iTunes application if you have not done so already on Mac or Windows
Optionally, start and complete a new encrypted backup to iTunes if you wish to create a fresh backup to archive then proceed when finished
Pull down the iTunes menu and choose “Preferences”
Go to the “Devices” tab in iTunes Preferences
Under the Device Backups list locate the device backup you want to archive, then right-click on that backup and choose “Archive”
Ensure that the iPhone or iPad backup has been archived by checking for the lock icon and date stamp on the backup name, when finished click on “OK” to exit out of iTunes Preferences
Archiving a backup essentially locks that backup so that it is not overwritten by subsequent device backups made to iTunes.
Again, iCloud has no impact on backups in iTunes. You can backup to both iCloud and iTunes if desired.
Identifying Archived Backups in iTunes
In the device list this is easy to identify because there is a lock icon and a time and date stamp on when the backup was archived.
You can un-archive a backup by right-clicking on it from within the same Devices settings list, and of course you can also delete backups from iTunes there as well.
Remember that in iTunes it’s important to encrypt backups so that all Health data and sensitive data is also backed up, because without the backup encryption feature enabled that data will not be backed up to iTunes. Backing up iPhone or iPad to iCloud is encrypted by default and does not require the manual encryption setting.
Note you can not currently archive iCloud backups, so if you wish to preserve an iPhone or iPad backup you must use iTunes and archive the backup there, or a Mac with at least Catalina and archive the backup there.
For a variety of reasons, an Apple ID may become disabled. Usually this corresponds with an obvious message like “Apple ID Disabled” or “This Apple ID has been disabled for security reasons” or some other notification that you are unable to sign in to the locked Apple ID because it has been disabled. This can be seen when trying to login to an Apple ID on iPhone, iPad, Mac, iCloud.com, or any other place you might attempt to login to an Apple ID. Obviously a disabled Apple ID is a big deal because nearly the entire Apple universe is accessed through an Apple ID, including iCloud, Music, iTunes, App Store, and much more, so you’ll understandably want to regain access to an Apple ID to re-enable it and fix the issue.
If your Apple ID is disabled and you having trouble logging into the account, read on to learn how to troubleshoot and resolve this problem. We’ll cover three different approaches to fix a disabled Apple ID.
How to Fix a Disabled Apple ID
The first method to fix a disabled Apple ID is handled entirely online and is quite easy:
Enter the Apple ID email address of the account that is locked or disabled
Follow the guidance to verify the account and unlock the Apple ID, typically this means either entering a security code sent via text to a phone number, or entering security questions
For most users the above method should work quickly to unlock a disabled Apple ID and regain access to it.
If that fails for whatever reason, or if you don’t have access to the phone number that the security code is being sent to to unlock the Apple ID, then your next option is to contact official Apple Support, which we’ll discuss next.
How to Fix “Apple ID is Disabled” via Apple Support
The next approach to fixing a disabled Apple ID is to work with Official Apple Support:
Choose “Apple ID” as what you want to get support for
Choose “Disabled Apple ID”
Fill in more information and choose the method for which you would like to contact Apple Support for assistance in reactivating a disabled Apple ID account
Option 3: Call Official Apple Support
Another option for unlocking and regaining access to a disabled Apple ID is to call official Apple Support and speak with a support assistance on the phone directly. This can be the best option if the other approaches do not work to fix the problem, or you are unable to follow those online approaches for whatever reason.
You can call official Apple Support directly at 800-MY–APPLE (800–692–7753)
or at 800-APL-CARE (800-275-2273).
Calling Apple is quite fast, you’ll likely spend a short wait time on hold and then an Apple staff member will quickly be able to assist you to regain access to the locked or disabled Apple ID.
This is important: Only call the official Apple Support phone lines for assistance from Apple. Do NOT use any third party website that claims to unlock Apple ID problems and that ask for any personal information or login data or payment details as those are probably scams. Only Apple is able to address and handle issues with an Apple ID, so you will only want to call official Apple support.
If all else fails, you can always create a new Apple ID too, but that’s really not recommended except for an absolute last resort.
Note the above tips are intended for situations where the Apple ID specifically disabled with a “Apple ID has been disabled for security reasons” type of message. If you forgot an Apple ID or password, read here how to recover or reset the Apple ID in that situation. Contacting Apple Support directly can also resolve those type of forgotten info situations too.
If you find yourself continuously forgetting Apple ID login information like which email you used, you might find it helpful to create an @icloud.com email address and then changing your Apple ID to be the @icloud.com email address, that way the email to login to an Apple ID and the iCloud login is all the same account.
It may be obvious to some, but it’s worth pointing out that this is not the same issue as the “iPhone is disabled” message that can appear on an iPhone (or iPad) after many failed login attempts on a device, that’s a separate issue with a completely different solution.
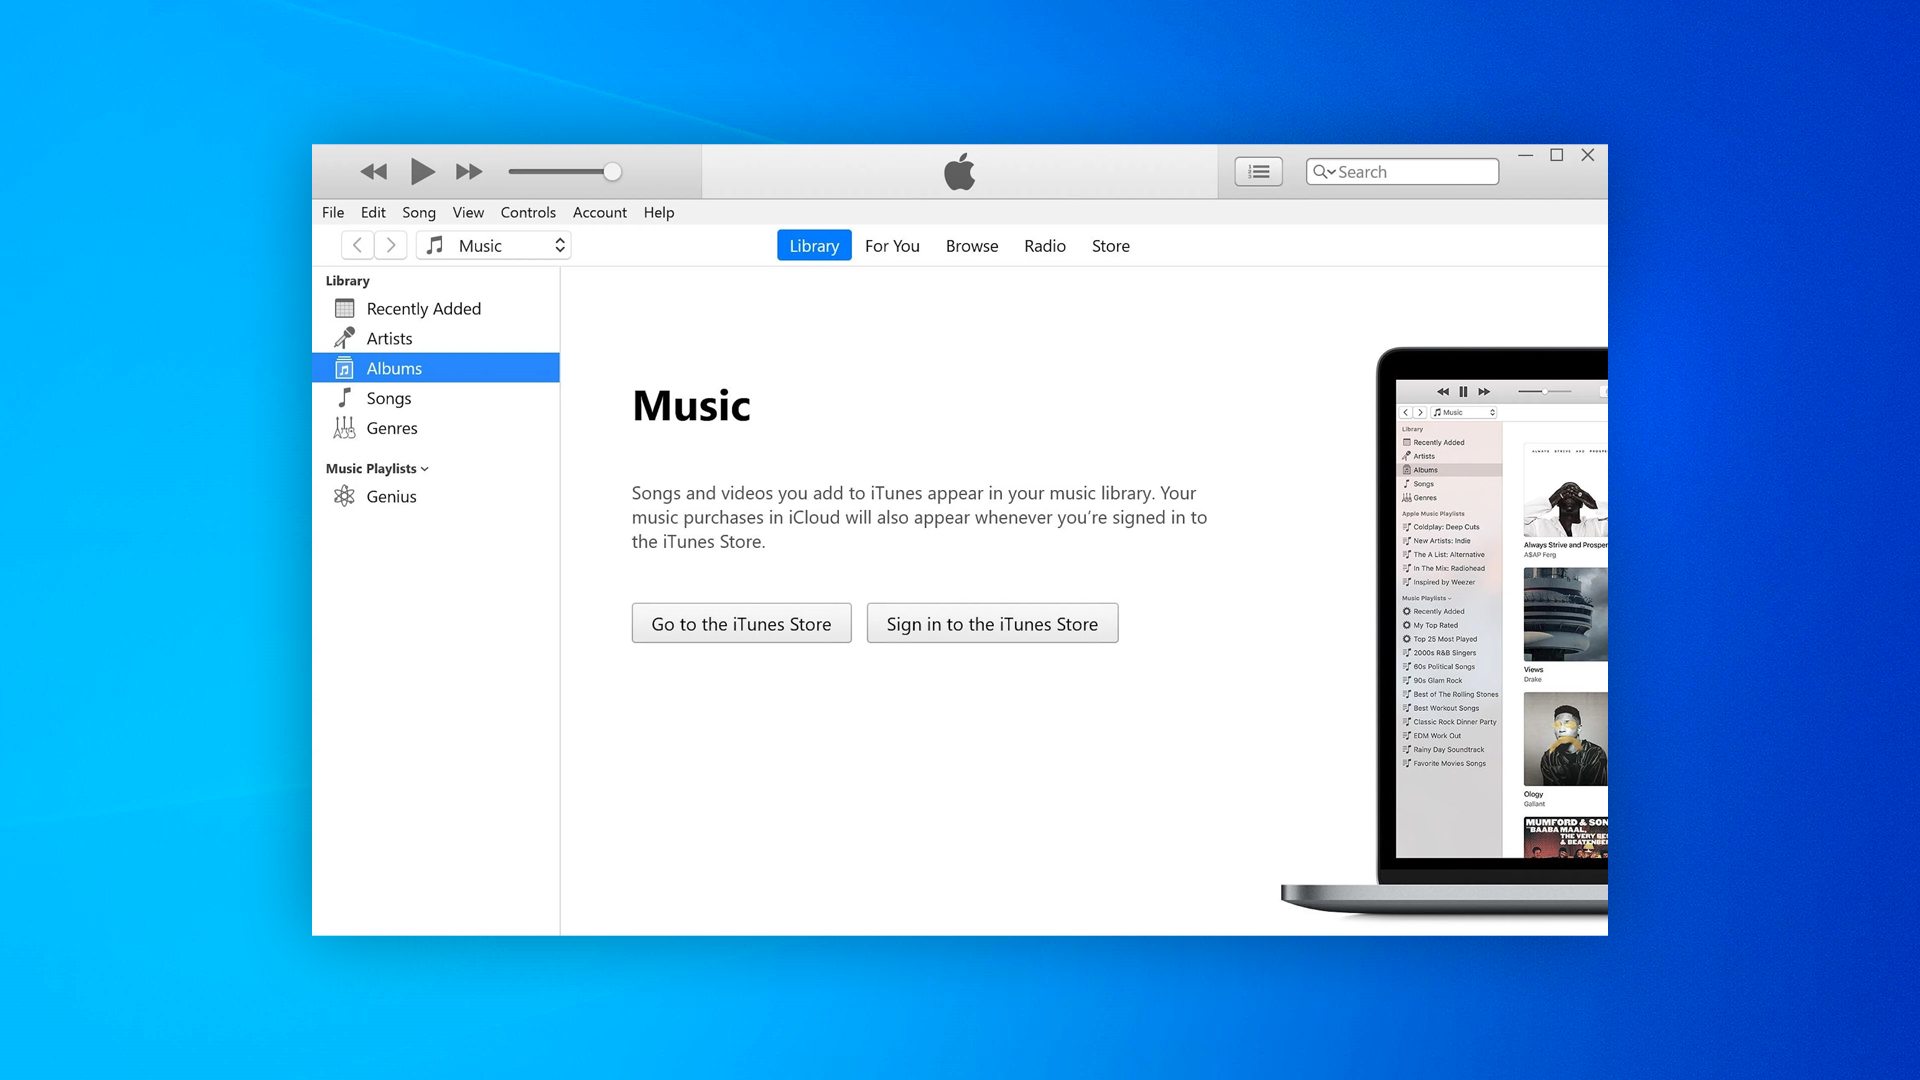
If you open iTunes and expect to access your local music library collection, you might be perplexed when you find that a music library is not immediately visible. Instead, launching modern versions of iTunes goes directly to the iTunes Store. Some iTunes users then attempt to access their iTunes music library by selecting the ‘Music’ dropdown menu but still are unable to find their local music library. Not to worry, if you can’t find your local music collection in iTunes, we’ll show you how to quickly access the local music library in iTunes on the Mac or Windows PC.
Note this tip is for accessing and seeing the full iTunes library within iTunes itself. This is not aiming to access iTunes music files which is discussed here if that’s what your objective is.
How to Access iTunes Music Library in iTunes on a Computer
Open iTunes app
Look near the top of the iTunes window and click on the ‘Library’ button (sometimes this is labeled as “My Music”)
This will switch iTunes to the iTunes Library view rather than the iTunes Store
This may sound obvious to some Mac and Windows PC users, but after visiting with someone recently I learned they were convinced their iTunes Music Library had been deleted or vanished. In fact the iTunes Music Library was still there, but because iTunes opened directly to the Store and they kept using the pulldown menu to try and access Music, they stayed stuck in the iTunes Store and never found their actual music library within iTunes. Basically they were unable to find their iTunes Music because they were looking in the wrong part of the app, so don’t go for that menu item to find a library – the dropdown menu chooses the type of content seen (Music, Movies, etc) rather than the library itself:
This might be a helpful tip for users who rely on iTunes to manage a local music library collection.
A similar difficulty for some iTunes users is when selecting an iPhone or iPad in iTunes, which can be counterintuitive or confusing for some people. Fortunately that is also quite simple. Sometimes simply learning how to do things reveals just how easy it is, even if the task is not initially obvious.
Older versions of iTunes defaulted to launching directly to a users local music library, but that behavior changed with modern iTunes releases which now default to opening directly to the iTunes Store instead.
Remember this is for interacting with an iTunes Library in iTunes itself. If you need to gain access to the actual audio files from iTunes you can follow these instructions to find iTunes files, or you can simply navigate to the iTunes library location as discussed here.
The latest version of iTunes removes the App Store and thus the ability to manage iOS apps on an iPhone or iPad directly through iTunes. Instead, Apple wants users to manage and sync their iOS apps directly on the iOS device itself through the built-in App Store.
The removal of App Store and an Apps section from iTunes has confused some users, and annoyed others. But don’t distress, even if this change can take some adapting, because you can still easily manage apps, sync apps, and redownload apps and access apps through the App Store directly on an iPhone or iPad.
It’ll be helpful to think of the concept of app ‘syncing’ as now more like app re-downloading from the App Store, since syncing apps to and from iTunes is largely gone and instead replaced with redownloading apps if need be over the internet. (I say largely gone because you can still sort of work with .ipa files, more on that below.)
How to Redownload Apps to iPhone or iPad from iOS App Store, Without iTunes
You can download existing and old apps, as well as manage apps directly on the iPhone and iPad by using the App Store Purchased section. The Purchased section of the App Store includes all apps you have ever downloaded or bought before at any time with the Apple ID in use, as long as those apps are still on the App Store. This redownloading iOS app ability has been around for a long time in iOS, but now it is perhaps more important than ever before.
Here is how you can access Purchased and use it to download apps back to your iOS device, note the precise actions are slightly different on iPhone compared to iPad but the general behavior is the same:
Open the App Store app in iOS
Go to the Purchased section of the App Store
For iPhone and iPod touch: Go to “Updates” and then “Purchased”
For iPad: Tap your Apple ID account icon in the corner of the open App Store
On iPad App Store, then tap “Purchased”
Choose the “Not on this device” section
Tap the download icons alongside app names you wish to download to the iPhone, iPad, or iPod touch
This allows you to download and access apps that you have previously downloaded, owned, or purchased at some point, but that are not contained on the current iOS device.
These purchase listings will be different per iOS device, changing from “Not on this iPhone” or “Not on this iPad” depending on what device you are using with the same Apple ID, and depending on what apps are on the active iOS device.
Arranging iOS App Home Screen and Icon Layouts on iPhone and iPad
You can still arrange your iOS home screen as you like it to a custom icon layout, but now it must be done on the iPhone or iPad.
Simply tap and hold on an app icon until all screen icons start to jiggle. Once the icons are jiggling on the iOS screen they can be moved around at will. Use this to arrange the Home Screen of an iPhone or iPad to suit your preferences.
If you drag a jiggling icon to the edge of the screen, continue holding and you can move the app icon to a different Home Screen page.
Removing Unwanted Apps from the iPhone or iPad
Removing apps from an iPhone or iPad is a matter of uninstalling the apps from iOS, the easiest way is by the tap-and-hold and then delete method detailed here.
You can also delete apps from an iOS device through the Settings > General section to manage storage.
Manually Syncing / Copying Apps via IPA Files to iPhone or iPad with iTunes
Interestingly, you can still drag and drop ringtones in .m4r format and iOS apps in .ipa file format into iTunes and to the target iOS device, and they should transfer over to the target iPhone, iPad, or iPod touch.
If you happen to have a .ipa file of an iOS app, you can still manually copy it over to the iPhone or iPad via iTunes by using this drag and drop method. This is sort of like syncing, but it’s really just copying a file over from the local computer to the target iOS device by using iTunes.
Apps stored as .ipa files, if you have any stored on a local computer, can be found within the iTunes Library locations on the Mac and Windows PC and a subfolder for Mobile Applications, typically the path would be as follows for Mac and Windows PC respectively:
IPA file path in Mac OS:
~/Music/iTunes/iTunes Media/Mobile Applications/
IPA file path in Windows 7, Windows 8, and Windows 10:
\My Music\iTunes\iTunes Media\
With an iPhone or iPad connected to the computer via USB, simply drag and drop the IPA file into iTunes onto the iOS device in question through the sidebar.
It’s alway possible this particular IPA file feature will disappear from iTunes in the future with another software update, or that the IPA files stored on a computer will vanish if you don’t copy them elsewhere for backup purposes, so it’s probably wise to not depend on this particular ability too much.
Some users may determine that iTunes 12.7 along with the removal of the App Store and other changes are incompatible with their particular workflow. With a little effort, you can downgrade iTunes 12.7 back to iTunes 12.6 on either a Mac OS computer or Windows PC.
Most people should not downgrade iTunes nor attempt to downgrade, this is really only appropriate for advanced users who must use an earlier version for some particular reason. Before downgrading iTunes 12.7 you should know that you can manage and download apps on iPhone or iPad without iTunes, directly in iOS as detailed here, including manually copying apps to the iPhone or iPad via IPA files.
You should backup your computer before beginning this process. Failure to backup could result in permanent data loss or data removal. Do not skip backing up your computer before beginning.
This process is basically three parts: deleting iTunes, restoring the old iTunes Library file, and then downloading the older version of iTunes and installing it.
How to Downgrade iTunes 12.7 to 12.6 on Mac
Back up your Mac before beginning the iTunes downgrade process. Do not skip backing up your Mac or else you may lose data, apps, music, media, or general functionality.
Back up the Mac if you haven’t done so already
Quit out of iTunes
Now open the Terminal application in Mac OS, found in /Applications/Utilities/ and type the following exactly, then hit return:
cd /Applications/
Now you’ll be in the Applications folder via command line, the next command syntax must be precisely entered to remove iTunes, make sure the syntax is exact:
sudo rm -rf iTunes.app/
Be absolutely certain your syntax reads the same, rm is unforgiving and will delete any file permanently it is pointed at. When certain you are pointing at iTunes.app/ only, hit return and authenticate with an admin password to completely delete iTunes
Now go to the Finder of Mac OS and visit your user ~/Music/iTunes/ folder and locate the file named “iTunes Library.itl” and move it to the Desktop, or another easily found location
Still in ~/Music/iTunes/, now open the folder titled “Previous iTunes Libraries” and find the most recent dated iTunes Library file (these are labeled as whatever date you installed the latest iTunes, for example “iTunes Library 2017-09-12.itl” or similar) and make a copy of that file
Drag the copy of “iTunes Library 2017-09-12.itl” to the ~/Music/iTunes/ folder and rename it to “iTunes Library.itl”
Now go to Apple iTunes Downloads page hereand locate “iTunes 12.6.2” and choose to download that to the Mac
Install iTunes 12.6.2 on the Mac as usual, then launch iTunes once complete
That’s it, you’re now back to the prior version of iTunes.
To avoid downloading iTunes 12.7 again you may want to hide it from the Mac App Store or turn off automatic updates.
How to Downgrade iTunes 12.7 in Windows
Downgrading iTunes 12.7 can be done in Windows as well by uninstalling iTunes and then reinstalling the old version. You’ll still want to restore the old iTunes Library .itl file however.
In Windows, navigate to where your iTunes Media folder is and open “Previous iTunes Libraries” and make a copy of the most recently dated iTunes Library.itl file in that directory
In Windows, open Control Panel > Programs > Programs and Features and go to “Uninstall or change a program”
Choose “iTunes” and choose to Uninstall iTunes 12.7 from the Windows PC
Download and install iTunes 12.6 from Apple using the following links (direct download links to exe files via Apple CDN), get the 32 or 64 bit version appropriate to your Windows installation :
It’s important to not skip the ‘iTunes Library.itl’ file process because if you do not restore the previous iTunes Library file you will get an error message stating “iTunes Library.itl cannot be read because it was created by a newer version of iTunes”. Typically you can override those error messages by rebuilding an iTunes library, but if you can avoid that you may as well.
Thank you for using
Themify Popup
This is a sample pop up. Themify Builder or Builder Lite (free) plugin is recommended to design the pop up layouts.