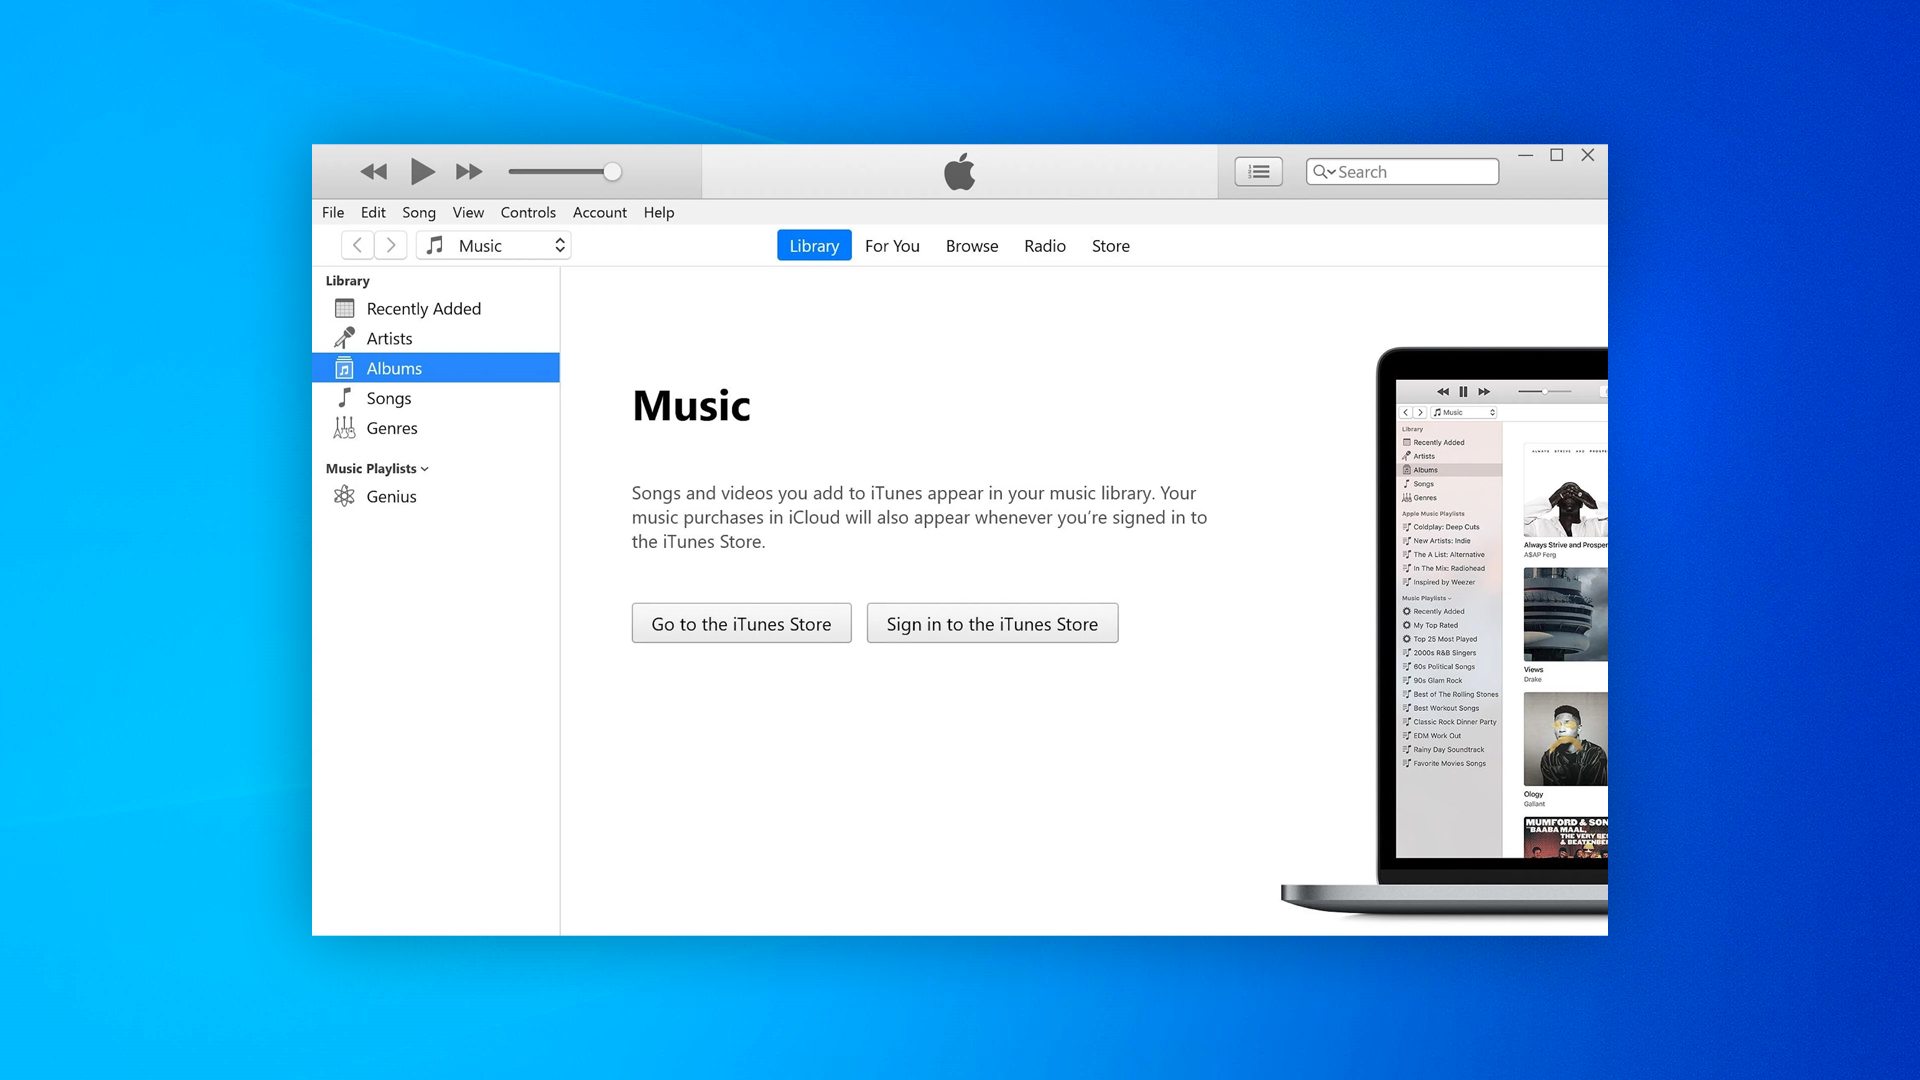
Apple this week quietly released an update for the Windows version of its iTunes music player. However, rather than adding new features, the update is focused on fixing bugs and security breaches for those who still rely on iTunes.
According to an Apple Support webpage, iTunes 12.12.4 fixes five different exploits that could be used for arbitrary code execution through the music player.
A specific exploit in the Mobile Device Service, which manages the connection between PC and iOS devices, allowed an app to delete files from the computer without permission. Other exploits fixed were related to AppleGraphicsControl, ImageIO, and WebKit.
Apple recommends that Windows users download the latest version of iTunes from the Microsoft Store. However, the app is still available as a separate download through Apple’s website (it requires Windows 8 or later). iTunes on Windows is required to access Apple Music offline and manage iPhone, iPod, and iPad devices.
Of course, since iTunes was discontinued on macOS years ago, the update is not required for Mac users.
iTunes on Windows
Even though Apple Music has its own app on iOS, macOS, and even Android, Windows users still rely on iTunes – which at this point is quite outdated and lacks some features available on other platforms.
Apple Music users on Windows PCs can download some alternative clients such as Cider. However, these apps do not replace iTunes when it comes to restoring iOS devices.
Rumors heard last year that Apple was testing both Music and Podcast apps for Microsoft platforms. The company was even looking for engineers with Universal Windows Platform (UWP) experience. Unfortunately, other details about Apple’s plans for launching an Apple Music app for Windows remain unclear.
Apple has discontinued iBooks Author and iTunes U. The former is a free ebook app that allows you to read publications purchased at the iBook Store. The latter provides tools for an instructor to bring a classroom together on the iPad.
Apple has now announced both of these products are being discontinued. iBooks Author will no longer be updated, and iTunes U is being discontinued at the end of 2021. iBooks Author will continue to work, but you’ll need to make preparations to transition to Pages in the near future. Much of the functionality from iBooks Author has made its way into Pages over the past few update cycles. This announcement shouldn’t come as much of a surprise as we never saw iBooks Author transition into Apple Books Author or include a native iPad app. Apple will be included an import function in a future version of Pages.
iBooks Author will no longer be updated, and it won’t be available to new users as of July 1, 2020. If you’ve previously downloaded the app, you can still access it from your App Store purchase history. You can continue to use iBooks Author on macOS 10.15 and earlier, and books previously published to Apple Books from iBooks Author will remain available.
If you have iBooks Author books you’d like to import into Pages, a book import feature is coming to Pages soon. It will allow you to open and edit iBooks Author files (.iba) in Pages.
Apple has also announced that iTunes U will be discontinued at the end of 2021 (not the 2021 school year).
Apple has been hard at work building the next generation of apps for both teachers and students:
Classroom turns your iPad into a powerful teaching assistant, helping teachers guide students through a lesson, see their progress, and keep them on track.
Schoolwork helps teachers save time and maximize each student’s potential by making it easy for teachers to share class materials, get students to a specific activity in an app, collaborate with students, and view student progress.
In addition to Classroom and Schoolwork, Apple also introduced Apple School Manager to enable IT Administrators to easily manage iPads, Macs, Apple TV, Apple IDs, books, and apps, while ensuring data is kept secure and private. Apps such as Pages, Numbers, Keynote, GarageBand, iMovie, Clips, and Swift Playgrounds have education-specific features that are used regularly by teachers and students.
With this in mind, Apple will discontinue iTunes U at the end of 2021. iTunes U will continue to be available to all existing customers through the 2020-2021 educational year.
Much of the content in iTunes U can easily be transitioned into platforms like Apple Podcasts and Apple Books. If you are publishing private content in iTunes U, Apple recommends using Schoolwork going forward. iTunes U will continue to be available to all existing users through the 2020-2021 educational year before it is discontinued at the end of 2021, so if you’re school or university had plans to continue to use iTunes U, you have a full academic year to make plans.
As for iTunes U, Apple will discontinue it at the end of 2021, according to a new support document. The tech giant recommends users move instead to its Classroom, Schoolwork, and Apple School Manager.
Did you know that you could use your iPhone as a remote to control your iTunes library? If you regularly use iTunes on your Windows PC or Mac for listening to music or playing back content purchased from the iTunes Store, this feature will prove to be extremely useful.
Let’s say you’re away from the keyboard and you’re busy doing something else in the next room. You could use your iPhone to switch between songs in your library and continue listening without even having to move. Although this article focuses primarily on the iPhone, you could also use your iPad or iPod Touch to remotely control your iTunes library.
Are you interested in learning how this works, so you can set it up on your iOS device? Then you’re in the right place, because we’ll be discussing how you can set up and use your iPhone or iPad as an iTunes Remote on both the PC & Mac.
How to Setup & Use iPhone as iTunes Remote
In order to successfully connect your iPhone to iTunes on your computer, you need to make sure that both of the devices are connected to the same Wi-Fi network. You’ll also need to download and install the iTunes Remote app from the App Store. Once you’re ready, simply follow the steps below to set up and start using your iOS device as a remote control.
Open the “Remote” app from the home screen of your iPhone, iPad or iPod Touch. It will be indicated by the icon shown below.
Tap on “Settings” at the top-right corner of the screen.
Now, press “Add an iTunes Library” as shown in the screenshot below.
The app will now display a 4-digit code that you need to manually enter in the iTunes desktop client.
When you open iTunes on your computer, you’ll notice a tiny remote app icon right next to the music category, as shown below. Click on it to continue with the setup.
Now, simply type in the 4-digit code and click on done.
iTunes will now indicate that your device has successfully connected and paired with iTunes.
To start using the Remote app, tap on your iTunes Library within the app, which is usually indicated the username that you have on your computer.
Now, you’ll be able to navigate through the menus just like you normally would on iTunes, and control what’s being played back on your computer.
If you followed along you’re now set up to start using your iPhone, iPad or iPod Touch as an iTunes Remote with a Mac or Windows PC.
In addition to being able to control music and video content that’s stored in your iTunes library, you will also be able to edit and create new playlists which will automatically be updated in the desktop client immediately.
Since this is a wireless feature, you might be concerned about any sort of latency issues. However in our testing, the latency was very minimal and wasn’t really noticeable in most cases. That being said, the latency might heavily depend on the Wi-Fi range, so make sure you’re not too far away from the router.
This may be more useful on Windows PC and older Mac system software at this point since the latest versions of MacOS have deprecated iTunes, but the Music app still allows for similar capabilities on Mac.
Speaking of remote control, are you trying to remotely install apps on your iPhone using iTunes? Well, you don’t need iTunes Remote for that, as that’s a completely different capability. You simply need to make sure that you’re logged into the same Apple ID on both your device and iTunes and have the proper setting configured to have that feature work.
Some iPhone 11, iPhone 11 Pro, and iPhone 11 Pro Max users have discovered that iTunes does not recognize the new iPhone connected to a Mac. Instead, launching iTunes with iPhone 11 or iPhone 11 Pro connected via USB cable does nothing, and the iPhone does not show up in iTunes, it does not sync, backup, or appear to exist at all within iTunes. This is understandably frustrating if you rely on iTunes for device management, backing up, and syncing iPhone 11 or iPhone 11 Pro to a computer, so this walkthrough will aim to show you how to fix this problem on a Mac.
This guide is aimed at iPhone 11 and iPhone 11 Pro not showing up in iTunes on MacOS Mojave or MacOS High Sierra. This issue should not appear in MacOS Catalina or later because iTunes no longer exists in those versions of macOS.
How to Get iTunes Working with iPhone 11, iPhone 11 Pro, iPhone 11 Pro Max on Mac
Quit out of iTunes, which is not showing iPhone 11 / Pro / Pro Max
Update iTunes to the latest version by going to the Apple menu and to “System Preferences” and then to “Software Update” and install any available Software Updates for iTunes and MacOS Mojave *
Relaunch iTunes on the Mac
Connect iPhone 11, iPhone 11 Pro, iPhone 11 Pro Max to the Mac with a USB cable as usual
Unlock the iPhone 11 and choose to “Trust” the Mac
Option 1: A pop-up message stating “A software update is required to connect to iPhone – would you like to download and install this update now?” may appear on the screen, if so click on “Install” and skip to step #9
Option 2: If the pop-up message asking to install a software update does NOT appear on screen, go to the Finder then pull down the “Go” menu and choose “Go To Folder” and enter the following folder path exactly:
Launch the application named “MobileDeviceUpdater.app” in that directory
Agree to “Install” when the alert says pop-up message stating “A software update is required to connect to iPhone – would you like to download and install this update now?”
Quit and relaunch iTunes when prompted to finish the update by choosing “Close Application and Install”
iTunes will relaunch and iPhone 11, iPhone 11 Pro, iPhone 11 Pro Max will now be available to backup, sync, and connect to as usual in iTunes
It’s notable that the iTunes software update required is not available in the typical Software Update sections of macOS.
Additionally, the necessary software update prompt does not always appear in iTunes on its own, or it may be hidden behind the primary iTunes screen, or even on another display or Space if you use multiple screens and desktops on the Mac. Nonetheless, it is necessary to install this software update to iTunes in order for the Mac and iTunes to recognize, use, and connect to iPhone 11, iPhone 11 Pro, iPhone 11 Pro Max.
* Recall that you can ignore MacOS Catalina software update if you don’t want to install that system software version on the Mac.
You can also manually download a new version of iTunes from Apple here but you will still need to update it manually through Software Update or the App Store to the latest version, and then run through the same process outlined above to download and install the auxiliary update to get iTunes to recognize the new iPhones, including iPhone 11, iPhone 11 Pro, and iPhone 11 Pro Max.
For what it’s worth, a similar problem can exist in Windows iTunes for trying to get iPhone 11, iPhone 11 Pro, iPhone 11 Pro Max to show up, connect, and sync in iTunes for Windows PC.
Apple iPhone: Transfer content from one iPhone to another using iTunes
iTunes has been the go to solution for restoring and troubleshooting iOS devices like the iPhone. But did you know what it does best? File transfers.
Use iTunes to transfer all your stuff
Use the steps in this section to back up your previous device in iTunes and to transfer the backup to your new device.
If you don’t encrypt your iTunes backup, Health and Activity data from your iOS device or Apple Watch won’t be saved.
Make an iTunes backup of your previous device
Connect your previous device to your computer.
Open iTunes and make sure that you have the latest version.
Select your device.
If you want to save Health and Activity data from your iOS device or Apple Watch, you need to encrypt your backup: Select the box called Encrypt [device] backup and make a memorable password.
Write down your password and store it somewhere safe, because there’s no way to recover your iTunes backups without this password.
If you don’t need to save Health and Activity data, you can make a backup that isn’t encrypted. Just click Back Up Now.
After the process completes, make sure that your backup finished successfully in iTunes Preferences > Devices. You should see the name of your device and the date and time that iTunes created the backup. If you encrypted your backup, you should also see beside your device’s name.
Transfer your SIM card or contact your carrier
If your new device needs a SIM card, here’s what you need to do:
If your carrier gave you a new SIM card, put it in your new device.
If your new device uses the same kind of SIM card as your previous device, transfer the SIM to your new device.
If your new device needs a different kind of SIM card than what you have, or if you aren’t sure, contact your carrier.
Then use the steps below to transfer your iTunes backup to your new device.
Transfer your iTunes backup to your new device
Turn on your new device. A “Hello” screen should appear. If you already set up your new device, you need to erase it before you can use these steps.*
Follow the steps until you see the Apps & Data screen, then tap Restore from iTunes Backup > next.
Connect your new device to the computer that you used to back up your previous device.
Open iTunes on your computer and select your device.
Select Restore Backup. Then choose a backup. Make sure it’s the correct one by looking at the date and size of each. If asked to update to a newer version of iOS, learn what to do.
If you need to restore from an encrypted backup, enter your password when asked.
Wait for the restore process to finish, then complete the rest of the setup steps on your iOS device. If possible, keep your device connected to Wi-Fi and plugged into power after setup. This allows content like your photos, music, and apps stored in iCloud to automatically download back to your device.
* To erase your device, tap Settings > General > Reset > Erase All Content and Settings. This will erase any data that’s currently on your device. After you erase it, your device restarts and the “Hello” screen appears.
Finish up
Learn how to restore your Apple Watch from a backup and pair it with your new iPhone. Or if you normally use iTunes to sync content to your iOS device, connect your device to your computer and use iTunes to sync that additional content.
iPhone Tips: Transfer photos from computer to iPhone without iTunes
By using AnyTrans, you can transfer any photos from your computer to your iPhone. Full instructions shown below so read on.
Do you ever wonder how could you transfer photo files from your computer to your iPhone without even using iTunes? Here’s a trick, just download an app that do exactly that and get it over with. As simple as it is, here’s how to do this job right.
Without iTunes, transfer photos from your computer to your iPhone
AnyTrans is an iOS file transfer that is capable of transferring and managing up to 25 types of files on iPhone iPad and iPod including photos, videos, music, ringtones, audiobooks, messages, contacts, notes, books, Safari bookmarks/history, etc.
What AnyTrans can do:
Transfer photos from Windows or Mac laptop to iPhone 4s/5s/6/6s/SE/7/8/X without erasing.
Copy selected pictures or a folder with photos to iPhone as you need.
Transfer photos from iPhone to laptop or USB flash drive.
Massively delete photos from iPhone, and even iTunes synced photos.
How to use AnyTrans
Open AnyTrans on your laptop and connect iPhone to laptop via USB cable > Choose Device Manager > Go to category management screen > Click Photos.
Click Photo Library.
Click “+” button on the top-right corner > Choose folder and pictures > Click Open to start.
The latest version of iTunes removes the App Store and thus the ability to manage iOS apps on an iPhone or iPad directly through iTunes. Instead, Apple wants users to manage and sync their iOS apps directly on the iOS device itself through the built-in App Store.
The removal of App Store and an Apps section from iTunes has confused some users, and annoyed others. But don’t distress, even if this change can take some adapting, because you can still easily manage apps, sync apps, and redownload apps and access apps through the App Store directly on an iPhone or iPad.
It’ll be helpful to think of the concept of app ‘syncing’ as now more like app re-downloading from the App Store, since syncing apps to and from iTunes is largely gone and instead replaced with redownloading apps if need be over the internet. (I say largely gone because you can still sort of work with .ipa files, more on that below.)
How to Redownload Apps to iPhone or iPad from iOS App Store, Without iTunes
You can download existing and old apps, as well as manage apps directly on the iPhone and iPad by using the App Store Purchased section. The Purchased section of the App Store includes all apps you have ever downloaded or bought before at any time with the Apple ID in use, as long as those apps are still on the App Store. This redownloading iOS app ability has been around for a long time in iOS, but now it is perhaps more important than ever before.
Here is how you can access Purchased and use it to download apps back to your iOS device, note the precise actions are slightly different on iPhone compared to iPad but the general behavior is the same:
Open the App Store app in iOS
Go to the Purchased section of the App Store
For iPhone and iPod touch: Go to “Updates” and then “Purchased”
For iPad: Tap your Apple ID account icon in the corner of the open App Store
On iPad App Store, then tap “Purchased”
Choose the “Not on this device” section
Tap the download icons alongside app names you wish to download to the iPhone, iPad, or iPod touch
This allows you to download and access apps that you have previously downloaded, owned, or purchased at some point, but that are not contained on the current iOS device.
These purchase listings will be different per iOS device, changing from “Not on this iPhone” or “Not on this iPad” depending on what device you are using with the same Apple ID, and depending on what apps are on the active iOS device.
Arranging iOS App Home Screen and Icon Layouts on iPhone and iPad
You can still arrange your iOS home screen as you like it to a custom icon layout, but now it must be done on the iPhone or iPad.
Simply tap and hold on an app icon until all screen icons start to jiggle. Once the icons are jiggling on the iOS screen they can be moved around at will. Use this to arrange the Home Screen of an iPhone or iPad to suit your preferences.
If you drag a jiggling icon to the edge of the screen, continue holding and you can move the app icon to a different Home Screen page.
Removing Unwanted Apps from the iPhone or iPad
Removing apps from an iPhone or iPad is a matter of uninstalling the apps from iOS, the easiest way is by the tap-and-hold and then delete method detailed here.
You can also delete apps from an iOS device through the Settings > General section to manage storage.
Manually Syncing / Copying Apps via IPA Files to iPhone or iPad with iTunes
Interestingly, you can still drag and drop ringtones in .m4r format and iOS apps in .ipa file format into iTunes and to the target iOS device, and they should transfer over to the target iPhone, iPad, or iPod touch.
If you happen to have a .ipa file of an iOS app, you can still manually copy it over to the iPhone or iPad via iTunes by using this drag and drop method. This is sort of like syncing, but it’s really just copying a file over from the local computer to the target iOS device by using iTunes.
Apps stored as .ipa files, if you have any stored on a local computer, can be found within the iTunes Library locations on the Mac and Windows PC and a subfolder for Mobile Applications, typically the path would be as follows for Mac and Windows PC respectively:
IPA file path in Mac OS:
~/Music/iTunes/iTunes Media/Mobile Applications/
IPA file path in Windows 7, Windows 8, and Windows 10:
\My Music\iTunes\iTunes Media\
With an iPhone or iPad connected to the computer via USB, simply drag and drop the IPA file into iTunes onto the iOS device in question through the sidebar.
It’s alway possible this particular IPA file feature will disappear from iTunes in the future with another software update, or that the IPA files stored on a computer will vanish if you don’t copy them elsewhere for backup purposes, so it’s probably wise to not depend on this particular ability too much.
Thank you for using
Themify Popup
This is a sample pop up. Themify Builder or Builder Lite (free) plugin is recommended to design the pop up layouts.