Beyond the Screen: 10 Essential Steps for Replacing the Fragile Back Glass of a Google Pixel 9 Pro
Introduction: Understanding the Pixel 9 Pro Back Glass
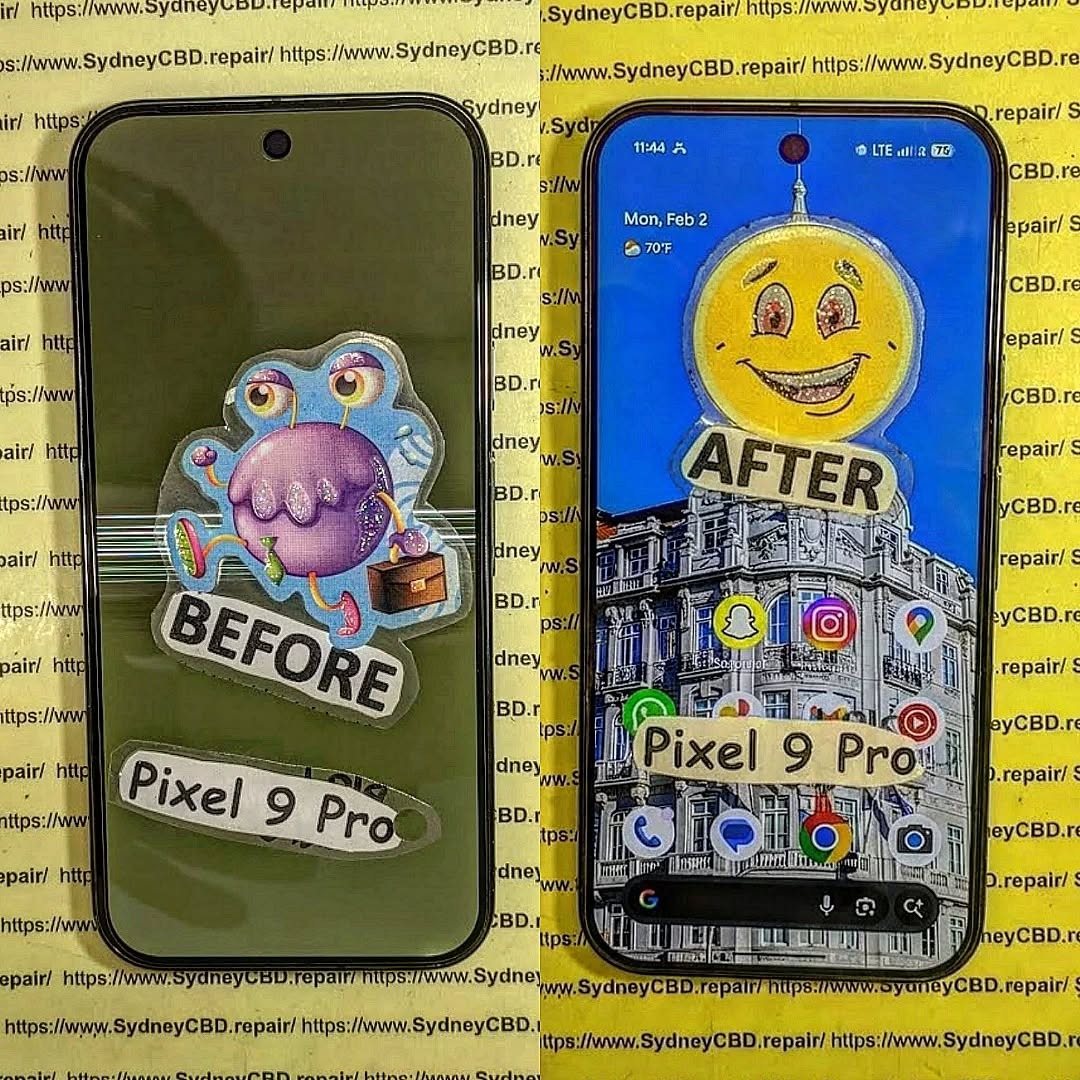
Replacing the back glass of a Google Pixel 9 Pro isn’t just about aesthetics—it’s about preserving the device’s structural integrity and performance. The Pixel 9 Pro’s sleek design is built with premium materials, but this elegance comes with vulnerability. Accidental drops, pressure from pockets, or even minor impacts can leave your back panel shattered. Understanding the intricacies of the back glass is the first step toward a successful replacement.
The back glass not only protects internal components but also contributes to wireless charging functionality. Cracks or damage can interfere with sensors and reduce your device’s efficiency. Whether you’re a DIY enthusiast or planning a professional repair, knowledge of the material and repair process is crucial.
The Pixel 9 Pro’s back panel is crafted from Gorilla Glass Victus 2, which is tougher than previous iterations but still prone to cracking under certain stresses. Designers favor this glass for its premium feel, clarity, and scratch resistance. However, its thinness and rigidity make it susceptible to breaks from drops or uneven pressure.
Before attempting a back glass replacement, ensure you have the right tools. Using improper tools can result in further damage or injury. Commonly used tools include:
Heat gun or iOpener
Suction cups
Plastic picks or spudgers
Precision screwdrivers
Tweezers
Adhesive strips and glue
Lint-free cloth and isopropyl alcohol
Heat Guns vs. iOpener Tools
A heat gun offers faster heating but risks overheating sensitive components. iOpener tools provide controlled, even heat, reducing the chance of internal damage. Always prioritize controlled heat over speed.
Adhesives and Suction Cups
High-quality adhesive ensures the new back panel stays firmly in place, while suction cups help lift glass without cracking. Avoid metal tools directly on glass surfaces.
Step-by-Step Guide to Removing the Broken Back Glass
Removing a broken back panel requires patience. Rushing can lead to further cracks or damage to internal components like cameras and sensors.
Preparing Your Workspace
Work in a clean, dust-free, static-free environment. Organize your tools within easy reach and wear anti-static gloves if possible.
Heating and Loosening Adhesive
Apply gentle heat around the edges using a heat gun or iOpener. Warm adhesive becomes pliable, making it easier to lift the panel. Avoid overheating.
Carefully Lifting the Back Panel
Use suction cups and plastic picks to gently lift the back glass. Work slowly, applying even pressure along the edges. Avoid touching the cameras and fingerprint sensor.
Installing the New Back Glass
Once the old glass is removed, careful installation is crucial for a seamless finish.
Cleaning and Prepping Surfaces
Remove all residual adhesive and clean surfaces with isopropyl alcohol. Ensure no dust particles remain.
Applying New Adhesive
Apply new adhesive strips or glue along the edges. Even distribution ensures a strong bond and prevents lifting over time.
Positioning the New Panel
Carefully align the new glass and press evenly. Avoid sliding it across the surface, which may introduce dust or misalignment. Inspect for gaps or uneven placement.
Testing Functionality Post-Replacement
Before sealing the phone completely, verify all functions:
Cameras capture clear images
Fingerprint sensor works
Wireless charging functions properly
Buttons respond as expected
Common Mistakes to Avoid During Replacement
Applying excessive heat
Using metal tools on glass
Misaligning adhesive
Neglecting post-installation testing
Skipping cleaning of surfaces
DIY vs. Professional Repair: Pros and Cons
DIY Pros: Lower cost, learning experience, immediate solution. DIY Cons: High risk of damage, no warranty, requires patience.
Professional Pros: Warranty, proper tools, reduced risk, fast service. Professional Cons: Higher cost, travel time.
For fragile devices like the Pixel 9 Pro, professional repairs often guarantee safer outcomes.
Cost Analysis: DIY vs. Service Centers
DIY replacement costs range from $40–$80 for adhesive and tools. Professional repairs can cost $200–$350 but include warranty and genuine parts. Choosing a professional service often provides peace of mind, especially for expensive flagship phones.
Maintaining Your Pixel 9 Pro Post-Repair
Use a protective case
Avoid placing the phone face-down on hard surfaces
Apply a tempered glass protector
Keep away from extreme temperatures
Frequently Asked Questions (FAQs)
1. Can I replace the back glass myself?
Yes, with proper tools and patience, but risks include damaging cameras or internal components.
2. How long does a back glass replacement take?
DIY repairs can take 1–2 hours; professional repairs usually under 1 hour.
3. Is the Pixel 9 Pro waterproof after back glass replacement?
Water resistance may be reduced. Professional replacement ensures better sealing.
4. Can cracks affect wireless charging?
Yes, even small cracks can reduce charging efficiency.
5. What’s the best adhesive for back glass replacement?
Use high-quality double-sided adhesive or UV-curable glue recommended for Pixel devices.
6. Where can I find replacement back glass?
Genuine parts are available from authorized repair centers or reputable suppliers.
Conclusion
Replacing the fragile back glass of a Pixel 9 Pro demands precision, patience, and the right tools. Whether opting for DIY or professional repair, understanding the material, proper heating techniques, and adhesive application ensures a successful restoration. By following the steps outlined, you can maintain your Pixel 9 Pro’s elegance, functionality, and longevity.
David from Sydney CBD Repair Centre – The Best place to fix mobile phones as 7 Years In A Row! Top Mobile Phone Repair In Sydney. More than 2000 Positive Reviews on Google and Same Day Repairs.
We take pride in delivering exceptional repair services for all major phone brands including Apple, Samsung, Google, and more. Our expert technicians use only genuine parts and offer 90days warranty on repairs. Located in the heart of Sydney CBD, we’re your one-stop solution for all mobile device repairs.
Visit us for:
✓ Same Day Express Repairs
✓ Genuine Parts Guarantee
✓ Professional Technicians
✓ Competitive Pricing
✓ 2000+ 5-Star Google Reviews
✓ 7-Time Award Winner for Best Phone Repairs
THE INVISIBLE FIX! Replacing Google Pixel 9 Pro Under-Display Ultrasonic Fingerprint Sensors
Introduction
Modern smartphones have transformed security, and the Google Pixel 9 Pro is one of the best examples of this innovation. Instead of relying on a traditional rear-mounted fingerprint scanner, Google integrates an advanced under-display ultrasonic fingerprint sensor beneath the OLED screen. This invisible technology provides quick, secure, and convenient authentication while maintaining the phone’s sleek appearance.
However, despite its impressive engineering, the fingerprint sensor isn’t immune to damage. Drops, liquid exposure, poor-quality screen replacements, manufacturing defects, and improper repairs can all lead to sensor failures. When that happens, many users assume the entire display has failed. Fortunately, that’s rarely the case.
Replacing Google Pixel 9 Pro Under-Display Ultrasonic Fingerprint Sensors requires specialized equipment, technical expertise, and careful calibration. Unlike older fingerprint readers that could simply be unplugged and replaced, modern ultrasonic sensors interact closely with the display assembly and motherboard. Even a small mistake during repair can prevent biometric authentication from functioning correctly.
This guide explains everything you need to know—from understanding how the technology works to recognizing warning signs, comparing DIY and professional repairs, and learning why genuine replacement parts make a significant difference.
The fingerprint scanner inside the Google Pixel 9 Pro is considerably more advanced than earlier generations of biometric readers.
Rather than using a camera to photograph your fingerprint, the ultrasonic sensor emits microscopic sound waves beneath the display. These sound waves bounce back after encountering the unique ridges and valleys of your fingerprint.
The sensor then creates a highly detailed three-dimensional fingerprint map.
Because of this technology, the scanner offers numerous benefits:
Faster unlocking
Better security
Improved recognition accuracy
Excellent performance with wet fingers
Greater resistance to spoofing attempts
Reliable operation in different lighting conditions
Unlike optical fingerprint scanners, ultrasonic technology doesn’t depend on brightness or visible light. This makes it both faster and more secure.
Google carefully integrates this sensor beneath the OLED display, allowing users to unlock the phone without sacrificing screen space or aesthetics.
How Under-Display Ultrasonic Technology Works
At first glance, unlocking your phone seems simple.
Place your thumb on the designated area.
The screen briefly illuminates.
Within milliseconds, the phone unlocks.
Behind the scenes, however, a remarkably sophisticated process takes place.
Step 1: Finger Placement
Your finger touches the designated scanning zone beneath the OLED display.
Step 2: Ultrasonic Pulse
The fingerprint module emits ultrasonic sound waves through the display.
Step 3: Echo Reception
The waves reflect differently depending on the ridges and valleys of your fingerprint.
Step 4: Digital Mapping
Specialized hardware converts these reflections into a secure three-dimensional fingerprint model.
Step 5: Authentication
The encrypted fingerprint is compared against the securely stored biometric template inside Google’s Titan security architecture.
If the fingerprints match, access is granted almost instantly.
This entire process typically takes less than half a second.
Why Google Chose Ultrasonic Instead of Optical Sensors
Several Android manufacturers still use optical fingerprint readers because they’re less expensive to manufacture.
Google’s decision to use ultrasonic technology provides several advantages.
Feature
Ultrasonic Sensor
Optical Sensor
Security
Excellent
Good
3D Mapping
Yes
No
Wet Finger Support
Excellent
Limited
Bright Light Needed
No
Yes
Spoof Resistance
Very High
Moderate
Recognition Accuracy
Excellent
Good
Performance Through Screen Protectors
Better
Variable
Although ultrasonic technology increases manufacturing costs, it significantly improves security and everyday usability.
Common Causes of Fingerprint Sensor Failure
Despite its durability, several issues can cause the fingerprint reader to malfunction.
1. Cracked OLED Display
The most common cause is a cracked screen.
Even if the fingerprint sensor itself remains intact, fractures in the OLED panel can interfere with ultrasonic wave transmission.
2. Low-Quality Screen Replacement
Cheap aftermarket displays frequently lack the precise material properties required for ultrasonic scanning.
Many users discover that after replacing their screen with inexpensive components, fingerprint recognition becomes unreliable or stops working entirely.
3. Water Damage
Although the Pixel 9 Pro offers water resistance, prolonged exposure to moisture can damage sensitive electronic components.
Corrosion may affect:
Sensor connectors
Display flex cables
Motherboard circuits
Calibration circuitry
4. Physical Impact
A severe drop can misalign internal components without visibly damaging the display.
The ultrasonic module relies on extremely precise positioning.
Even slight movement may prevent accurate fingerprint scanning.
5. Manufacturing Defects
Although uncommon, factory defects occasionally appear after months of normal use.
Some issues can be resolved through software troubleshooting, but persistent hardware-related symptoms often require professional diagnosis and replacement.
Diagnosing the Problem Before Repair
A professional technician doesn’t immediately replace the fingerprint sensor. Instead, they follow a structured diagnostic process to determine the root cause and avoid unnecessary repairs.
Visual Inspection
The first step is checking the phone for obvious signs of damage, including:
Cracked or lifting display
Frame distortion from impacts
Evidence of liquid exposure
Damaged display flex cables
Even minor physical damage can affect how ultrasonic waves travel through the display.
Software Testing
Next, technicians verify whether the issue is software-related by:
Checking for Android updates
Testing fingerprint settings
Removing and re-enrolling fingerprints
Running built-in diagnostic tools
Reviewing hardware error logs where available
If the sensor responds normally after software troubleshooting, a hardware replacement may not be necessary.
Hardware Diagnostics
If software isn’t the problem, the device is opened for internal inspection. Technicians examine:
Fingerprint sensor connections
Display assembly integrity
Motherboard connectors
Signs of corrosion or component damage
Using specialized testing equipment helps determine whether the fault lies with the sensor itself, the display assembly, or another internal component.
Proper diagnosis is essential because replacing the wrong part increases repair costs without solving the problem.
Professional Replacement Process
Replacing Google Pixel 9 Pro under-display ultrasonic fingerprint sensors is one of the most delicate smartphone repairs available today. Unlike older fingerprint readers mounted on the back or side of a device, the Pixel 9 Pro’s ultrasonic sensor works as part of a carefully engineered system that includes the OLED display, display adhesive, motherboard, and biometric security software.
Professional repair centres follow a strict workflow to ensure the replacement restores both functionality and reliability.
Step 1: Initial Device Inspection
Before opening the phone, technicians perform a complete inspection to identify any additional problems that could affect the repair.
This includes checking:
Display responsiveness
OLED image quality
Touch sensitivity
Face Unlock functionality
Camera operation
Charging performance
Wireless charging
Speaker and microphone
Network connectivity
Documenting the phone’s condition before disassembly helps ensure no unrelated issues are overlooked.
Step 2: Safe Device Disassembly
The Pixel 9 Pro is sealed with strong waterproof adhesive. Removing the display requires carefully heating the edges to soften the adhesive without overheating the OLED panel.
Specialized repair tools include:
Precision heat pad
Plastic opening picks
Suction cups
Thin pry tools
Anti-static equipment
Precision screwdrivers
Using excessive force can crack the display or damage delicate flex cables, making experience essential.
Step 3: Disconnecting Internal Components
Once the display is lifted, the technician disconnects the battery before working on any internal electronics.
This prevents:
Short circuits
Electrical damage
Accidental component failure
Static discharge risks
Battery isolation is a standard safety procedure for professional smartphone repairs.
Step 4: Removing the Damaged Fingerprint Sensor
The fingerprint sensor is carefully detached from the display assembly.
Technicians inspect:
Connector pins
Ribbon cables
Sensor alignment
Adhesive residue
Display mounting surface
If additional damage is discovered, such as a torn flex cable or damaged display connector, these issues are addressed before installing the new component.
Step 5: Installing the New Sensor
A genuine replacement sensor is positioned with extreme precision.
Even a slight misalignment may cause:
Slow fingerprint recognition
Failed fingerprint enrollment
Intermittent unlocking
Complete sensor failure
Professional repair centres use manufacturer-grade alignment procedures to ensure the ultrasonic waves pass correctly through the OLED display.
Step 6: Calibration
This is one of the most important steps.
Many users don’t realize that installing a new sensor alone isn’t enough.
Calibration ensures:
Fingerprint recognition accuracy
Security compliance
Reliable biometric performance
Proper communication between hardware and software
Without calibration, the phone may detect the sensor but refuse to register fingerprints.
Step 7: Functional Testing
After reassembly, technicians thoroughly test:
Fingerprint enrollment
Unlock speed
Multiple fingerprint registrations
Touch sensitivity
Display brightness
OLED colour accuracy
Face Unlock
Charging
Camera
Speakers
Wireless charging
Only after every function passes inspection is the repair considered complete.
Tools Required for Repair
Professional workshops invest in specialized equipment designed for modern smartphone repairs.
Tool
Purpose
Heat Pad
Softens waterproof adhesive
Precision Screwdrivers
Remove internal screws
Opening Picks
Separate display safely
Suction Cup
Lift OLED screen
Anti-static Mat
Prevent ESD damage
Tweezers
Handle delicate connectors
Adhesive Templates
Restore water resistance
Microscope
Inspect connectors
Calibration Equipment
Verify sensor accuracy
These tools help minimize the risk of accidental damage during the repair process.
Genuine vs Aftermarket Replacement Parts
Choosing the correct replacement component can significantly affect the long-term performance of your Pixel 9 Pro.
Genuine Parts
Advantages include:
Excellent fingerprint recognition
Original performance
Reliable calibration
Longer lifespan
Better compatibility
Manufacturer-quality materials
Disadvantages:
Higher cost
Limited availability
Aftermarket Parts
Advantages:
Lower purchase price
Wider availability
Disadvantages:
Reduced fingerprint accuracy
Inconsistent performance
Potential calibration issues
Lower durability
Variable manufacturing quality
Although aftermarket components may appear attractive due to their lower price, they often result in repeated repairs and user frustration.
Comparison Table: Genuine vs Aftermarket Parts
Feature
Genuine Parts
Aftermarket Parts
Fingerprint Accuracy
Excellent
Variable
Unlock Speed
Fast
Often Slower
Durability
High
Moderate
Compatibility
Excellent
Inconsistent
Calibration Success
Very High
May Fail
Warranty Support
Yes
Depends on Supplier
Overall Reliability
Excellent
Mixed
For a premium device like the Google Pixel 9 Pro, genuine components generally provide the best long-term value.
DIY vs Professional Repair
Many repair videos online make fingerprint sensor replacement appear straightforward. However, replacing an under-display ultrasonic fingerprint sensor involves much more than simply swapping parts.
DIY Repair
Advantages
Lower upfront cost
Learn a new skill
Flexible repair schedule
Disadvantages
Risk of damaging the OLED display
Difficulty maintaining water resistance
Calibration challenges
Potential warranty implications
Need for specialized tools
No professional workmanship guarantee
Professional Repair
Advantages
Experienced technicians
Genuine replacement parts
Proper calibration
Comprehensive testing
Warranty on workmanship
Faster turnaround
Reduced risk of additional damage
Disadvantages
Higher initial cost than DIY
Requires visiting or mailing the device to a repair centre
For most users, professional repair offers greater reliability and peace of mind, especially when dealing with advanced biometric technology.
Repair Cost Factors
The cost of replacing a Google Pixel 9 Pro under-display ultrasonic fingerprint sensor depends on several factors:
Whether the display also requires replacement
Availability of genuine parts
Extent of internal damage
Labour required for disassembly and calibration
Water damage or corrosion repairs
Warranty coverage
Attempting a cheaper repair with low-quality components may save money initially but can lead to additional expenses if the fingerprint sensor fails again.
Preventing Future Fingerprint Sensor Problems
Once your phone has been repaired, a few simple habits can help keep the fingerprint sensor working reliably.
Use a high-quality protective case.
Apply a compatible screen protector.
Avoid exposing the phone to excessive moisture.
Keep the display clean and free from heavy dirt or oils.
Register multiple fingerprints for improved recognition.
Install official software updates.
Avoid low-quality replacement screens.
Seek professional repairs after significant drops.
Regular care can extend the life of both the display and the fingerprint sensor while maintaining fast and accurate biometric performance.
Frequently Asked Questions (FAQs)
1. Why has my Google Pixel 9 Pro fingerprint sensor stopped working?
There are several possible reasons, including a cracked OLED display, physical impact, liquid damage, software glitches, or a faulty fingerprint sensor. In some cases, a low-quality aftermarket screen replacement can also interfere with the ultrasonic fingerprint scanner.
2. Can the fingerprint sensor be repaired without replacing the display?
It depends on the extent of the damage. If only the fingerprint sensor has failed and the OLED display remains fully functional, a technician may be able to replace the sensor independently. However, if the display itself is damaged or affects ultrasonic signal transmission, both components may need replacement.
3. Will my fingerprints still be saved after the repair?
In most cases, existing fingerprint data must be removed and re-enrolled after replacing the fingerprint sensor or display. This ensures the new hardware is properly calibrated and functions accurately.
4. Is it safe to replace the fingerprint sensor myself?
While DIY repair kits are available, replacing an under-display ultrasonic fingerprint sensor requires specialized tools, technical expertise, and proper calibration. An incorrect installation can damage the OLED display or prevent the biometric system from working. For most users, professional repair is the safer and more reliable option.
5. Does replacing the fingerprint sensor affect the phone’s security?
No. When installed and calibrated correctly using compatible components, the replacement sensor maintains the same high level of biometric security designed for the Google Pixel 9 Pro.
6. How long does the repair take?
The repair time depends on the availability of replacement parts and the extent of the damage. In many professional repair centres, fingerprint sensor and display-related repairs can often be completed on the same day, provided the necessary parts are in stock.
7. Will my phone remain water-resistant after the repair?
Professional technicians replace the waterproof adhesive during reassembly to help restore the device’s original sealing. However, no repaired smartphone can be guaranteed to retain its original factory water-resistance rating, so it’s still advisable to avoid unnecessary exposure to liquids.
8. Why doesn’t my fingerprint scanner work after a screen replacement?
One of the most common causes is the use of a low-quality aftermarket display that is not fully compatible with ultrasonic fingerprint technology. Another possibility is that the sensor was not properly aligned or calibrated during the repair process.
9. How can I prevent future fingerprint sensor issues?
You can reduce the risk of future problems by:
Using a quality protective case.
Installing a compatible tempered glass screen protector.
Avoiding exposure to excessive moisture.
Keeping the display clean.
Having repairs performed by experienced technicians using genuine-quality replacement parts.
10. Is professional repair worth the investment?
Yes. Professional repair helps ensure the fingerprint sensor, display, and biometric security system all work together as intended. Using genuine-quality components, proper calibration procedures, and experienced technicians significantly reduces the risk of repeat failures and protects your investment in a premium smartphone.
Conclusion
The Google Pixel 9 Pro showcases some of the most advanced smartphone security technology available today. Its under-display ultrasonic fingerprint sensor delivers fast, accurate, and secure authentication while preserving the sleek design of the device. However, this sophisticated technology also demands precision when repairs become necessary.
Whether the issue stems from accidental damage, a faulty display, water exposure, or normal wear over time, replacing the fingerprint sensor is far more complex than simply swapping a component. Accurate diagnosis, high-quality replacement parts, professional calibration, and thorough testing are all essential to restoring reliable biometric performance.
Although DIY repairs may appear to save money initially, they often carry significant risks, including display damage, failed calibration, and reduced long-term reliability. Choosing an experienced repair specialist ensures your Google Pixel 9 Pro continues to perform as designed, giving you confidence every time you unlock your device.
If your fingerprint sensor has become unreliable or stopped working altogether, don’t wait for the problem to worsen. A professional assessment can quickly determine the cause and provide the most effective repair solution, helping extend the life of your smartphone while maintaining its premium security features.
⭐ 7 Reasons Why Sydney CBD Repair Centre is Sydney’s Trusted Choice for Google Pixel Repairs
When your Google Pixel 9 Pro needs expert attention, choosing the right repair centre makes all the difference. At Sydney CBD Repair Centre, our experienced technicians specialise in advanced Google Pixel repairs, including under-display ultrasonic fingerprint sensor replacements, OLED screen repairs, battery replacements, charging issues, and water damage restoration.
Why customers continue to trust us:
✓ Same Day Express Repairs*
✓ Genuine Quality Replacement Parts
✓ Professional Google Pixel Specialists
✓ Advanced Diagnostic Equipment
✓ 90-Day Repair Warranty
✓ Competitive Pricing
✓ More than 2,000 Positive Google Reviews
✓ Seven-Time Award Winner for Best Mobile Phone Repairs
We understand how important your smartphone is to your daily life. That’s why every repair is performed with precision, care, and attention to detail to restore your device to the highest possible standard.
Whether you’re dealing with a damaged display, a faulty fingerprint sensor, or another hardware issue, our team is ready to help you get back up and running as quickly as possible.
Contact Sydney CBD Repair Centre Today
David from Sydney CBD Repair Centre – The Best place to fix mobile phones as 7 Years In A Row! Top Mobile Phone Repair In Sydney. More than 2000 Positive Reviews on Google and Same Day Repairs.
We take pride in delivering exceptional repair services for all major phone brands including Apple, Samsung, Google, and more. Our expert technicians use only genuine parts and offer 90 days warranty on repairs. Located in the heart of Sydney CBD, we’re your one-stop solution for all mobile device repairs.
Our commitment to excellence has earned us the trust of thousands of satisfied customers. Whether it’s a cracked screen, battery replacement, or water damage repair, we handle it all with professional care and expertise. Walk in today and experience why we’re Sydney’s #1 choice for mobile phone repairs.
Visit us for:
✓ Same Day Express Repairs
✓ Genuine Parts Guarantee
✓ Professional Technicians
✓ Competitive Pricing
✓ 2000+ 5-Star Google Reviews
✓ 7-Time Award Winner for Best Phone Repairs
Sydney CBD Repair Centre – Where Quality Meets Reliability.
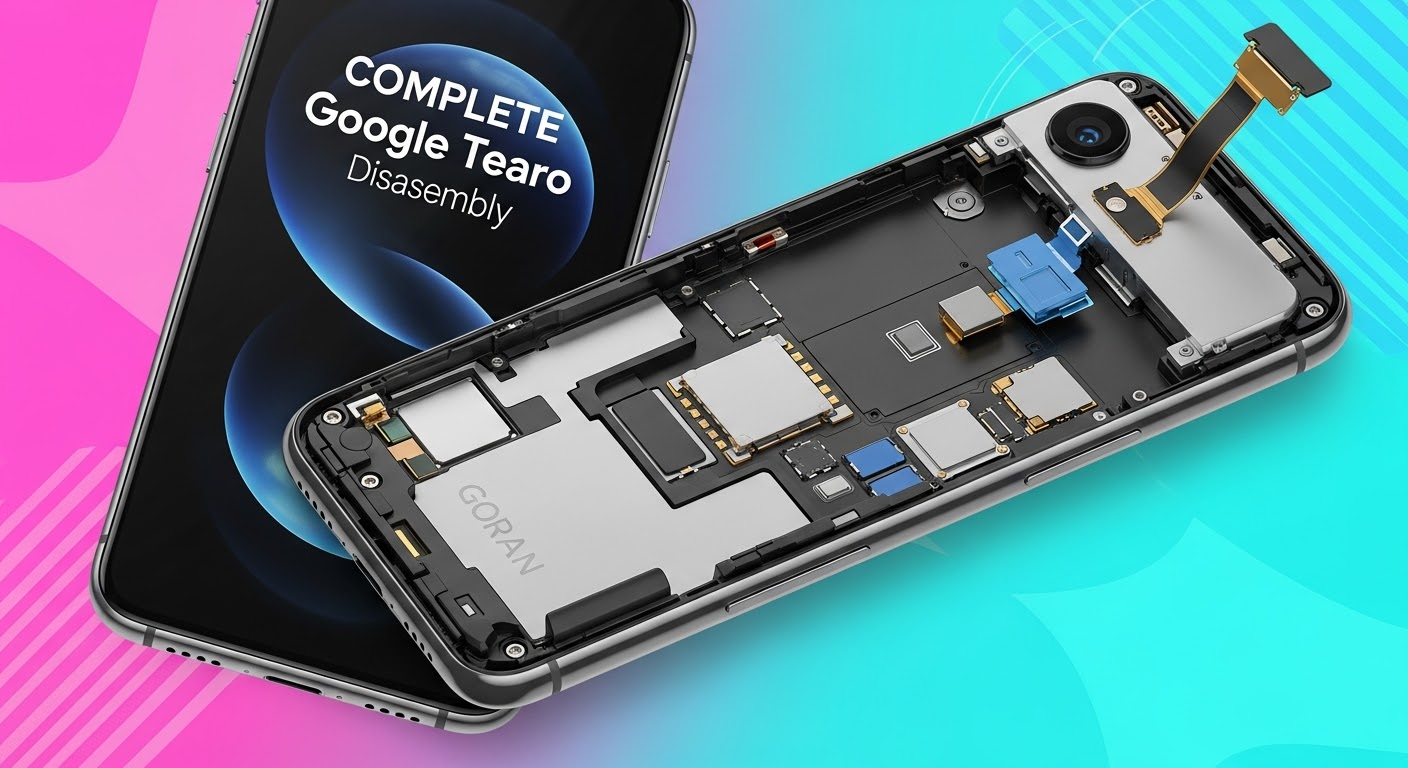
COMPLETE Teardown: Google Pixel 9 Pro Disassembly – Step-by-Step Guide to Unlock the Future of Repairability
Introduction: Why the Google Pixel 9 Pro Teardown Matters
The Google Pixel 9 Pro disassembly isn’t just about curiosity—it’s a deep dive into one of the most advanced Android devices of 2025. Every component, from its OLED display to the custom Tensor G4 chip, reflects Google’s engineering excellence. However, with innovation comes complexity, making repairability an essential topic for tech enthusiasts and phone repair professionals alike.
At Sydney CBD Repair Centre, we believe understanding a device’s structure is key to performing reliable, efficient, and safe repairs. With over 2000 five-star reviews and six consecutive awards for best mobile phone repairs in Sydney, our team leads the way in Pixel repair expertise.
Before you begin any Pixel 9 Pro teardown, preparation is everything. Handling delicate internal parts without the right tools or precautions can lead to irreversible damage.
Essential Tools You’ll Need
Precision screwdriver set (Torx and Phillips)
Plastic prying tools and suction cup
Isopropyl alcohol (90% or higher)
ESD-safe tweezers
Heat gun or iOpener kit
Magnetic screw mat
Anti-static wrist strap
Each of these tools ensures that the repair process is smooth, safe, and efficient—especially when dealing with the strong adhesive Google uses in its latest models.
Safety Guidelines and ESD Protection
Always start by powering off the device completely. Wear an anti-static wrist strap to prevent electrostatic discharge, which can silently destroy sensitive circuitry. Work on a clean, well-lit, and static-free surface.
Step 1: Power Down and Remove the SIM Tray
Begin the teardown by shutting down the Pixel 9 Pro and ejecting the SIM tray using a SIM removal tool. This prevents any electrical contact during the disassembly.
Once removed, store the SIM tray in a safe location—it’s a small but critical part of the reassembly process.
Step 2: Separating the Display Assembly
The Google Pixel 9 Pro display is bonded with durable adhesive to ensure water resistance (rated IP68). Removing it requires precision and patience.
Heat and Pry Techniques for Adhesive Removal
Use a heat gun or iOpener to gently warm the screen edges, softening the adhesive. Carefully insert a plastic pry tool around the perimeter to lift the display. Avoid metal tools—they can scratch the screen or damage the housing.
Disconnecting the Display Cables
Once the display is loose, carefully open the phone from the side, like a book. Disconnect the display ribbon cables connected to the logic board using a spudger tool.
Step 3: Accessing the Battery Compartment
Google’s latest Pixel comes with a high-capacity Li-Po 5050mAh battery that supports 45W fast charging and reverse wireless charging.
Adhesive Pull Tabs and Battery Safety
Lift the graphite film to reveal the adhesive pull tabs beneath the battery. Gently pull each tab at a low angle to release the adhesive without bending or puncturing the cell.
Removing the Wireless Charging Coil
The Pixel 9 Pro includes a Qi-certified wireless charging coil layered above the battery. Remove it carefully to avoid damaging the flex connector.
Step 4: Removing Cameras and Sensor Modules
The camera system is a major highlight of the Pixel 9 Pro, featuring AI-enhanced photography with professional-grade clarity.
Triple Camera Array Breakdown
Main Sensor: 50MP wide-angle with OIS
Telephoto Lens: 48MP periscope with 5x optical zoom
Ultra-Wide Lens: 12MP for macro and wide shots
Each camera module is connected via independent ribbon cables—detach them gently to prevent flex damage.
Front Camera and Face Unlock Module
The front-facing camera and sensor array are integrated into a single module. Unplug the ribbon connector and lift the assembly carefully.
Step 5: Logic Board and Chipset Analysis
At the heart of the Pixel 9 Pro lies the Google Tensor G4 chip, designed for superior AI computation, battery efficiency, and thermal performance.
Key Components: Tensor G4, RAM, and Storage
The logic board houses:
Tensor G4 SoC
12GB LPDDR5X RAM
UFS 4.0 Storage
5G Modem and Wi-Fi 7 module
Cooling System and Heat Dissipation Design
Google has enhanced heat dissipation with a vapor chamber system and layered graphite sheets, improving sustained performance during heavy workloads.
Step 6: Speaker, Vibration Motor, and Connectivity Components
Next, remove the bottom loudspeaker module, USB-C port, and taptic motor. These are secured with Torx screws and minor adhesive.
The vibration motor provides precise haptic feedback—replacing it with a non-genuine part may affect user experience.
Reassembly Tips and Common Mistakes to Avoid
Reassembly is the reverse of disassembly—but attention to detail is crucial:
Reconnect all ribbon cables firmly.
Replace adhesive strips where needed.
Avoid overtightening screws.
Test all components before sealing the device.
A small misalignment can compromise waterproofing, so seal integrity must be checked carefully.
The Google Pixel 9 Pro earns a repairability score of 7/10. While modularity has improved since previous generations, the tightly glued display and battery make DIY repairs tricky.
At Sydney CBD Repair Centre, our certified technicians use genuine parts and precision tools to restore devices to factory condition—without voiding warranty.
Professional Repair vs DIY: Which Is Right for You?
When to Visit a Certified Repair Centre
Broken or unresponsive screen
Battery swelling or overheating
Logic board issues
Water or liquid damage
Benefits of Genuine Parts
Using authentic parts ensures:
Longevity
Compatibility
Safety
Warranty coverage
That’s why customers across Sydney trust Sydney CBD Repair Centre for same-day service and reliable workmanship.
About Sydney CBD Repair Centre: Trusted Pixel Specialists
Located in the heart of Sydney, Sydney CBD Repair Centre has been voted Best Phone Repair Shop in Sydney for six years running. With over 2000 Google reviews and a commitment to 90-day repair warranties, we continue to set the standard in smartphone restoration.
Sydney CBD Repair Centre — Where Quality Meets Reliability.
FAQs
1. Can I replace the Google Pixel 9 Pro screen myself?
Yes, but it requires precision tools and experience. We recommend professional service to avoid damaging internal components.
2. Is the Pixel 9 Pro battery user-replaceable?
No, it’s secured with strong adhesive. A trained technician should handle replacements.
3. How long does a Pixel 9 Pro repair take?
Most repairs at Sydney CBD Repair Centre are completed within the same day.
4. Are third-party parts safe for Pixel devices?
We strongly advise against them. Genuine parts maintain device integrity and performance.
5. Does opening the Pixel 9 Pro void the warranty?
Yes, unless performed by an authorized repair centre like Sydney CBD Repair Centre.
6. Do you offer water damage repair for Pixel phones?
Absolutely. Our team specializes in Pixel water damage recovery and diagnostic services.
Conclusion: The Pixel 9 Pro – Built for Performance, Serviced by Experts
The Google Pixel 9 Pro disassembly reveals a blend of sophisticated engineering and elegant design. While its construction prioritizes durability and performance, it also challenges repair accessibility for untrained users.
That’s where Sydney CBD Repair Centre excels—offering expertise, genuine components, and same-day turnaround to get your Pixel 9 Pro back to its best.
David from Sydney CBD Repair Centre – The Best place to fix mobile phones as 6 Years In A Row! Top Mobile Phone Repair In Sydney. More than 2000 Positive Reviews on Google and Same Day Repairs.
📍 Visit us today for:
✓ Same Day Express Repairs
✓ Genuine Parts Guarantee
✓ Professional Technicians
✓ Competitive Pricing
✓ 2000+ 5-Star Google Reviews
✓ 6-Time Award Winner for Best Phone Repairs
Google’s Pixel phones have never really held up to the competition in regards to using the latest and greatest specs, but the company has been stepping it up in certain areas. After the debut of “Actua” displays on the Pixel 8 series, Google is reportedly looking to use the same Samsung OLED display in the Pixel 9 series as Apple will use in the iPhone 16 Pro.
The Pixel 8 series saw Google jump from lagging well behind in display quality to putting out what was briefly the best smartphone display in the US market. That was thanks to an OLED panel from Samsung, which offered excellent brightness and colors.
According to a new report, Google will again be turning to Samsung for its display.
ETNews reports that Google will utilize an updated “M14” OLED panel from Samsung. The new panel is said to be brighter and have an improved lifespan. According to the report, Google will be utilizing this new generation of OLED panel in the Pixel 9, Pixel 9 Pro, Pixel 9 Pro XL, and Pixel 9 Pro Fold.
Something worth noting, though, is that Google won’t be alone here. The iPhone 16 Pro lineup is also expected to use this same new panel. Apple has, for the past couple of years, been using Samsung’s top-of-the-line displays in its “Pro” iPhones, with the “M12” being used in previous releases. That same generation will still be used in the base iPhone 16 models, but iPhone 16 Pro and Pro Max will both use “M14” like the Pixel.
Google is set to launch the Pixel 9 series on August 13, way ahead of the company’s usual schedule. Apple, meanwhile, is still expected to launch new iPhones in September.
Google announces early August 13 event for Pixel 9 and Pixel Watch 3
Last June 25, 2024 announced that its annual Pixel hardware event will be taking place on August 13. This is incredibly early for 2024 with Made by Google usually taking place in October.
Instead of New York City, Made by Google 2024 is taking place at the company’s headquarters in Mountain View, California. The first two Made by Google events were held in San Francisco before the East Coast shift.
This year’s keynote starts at 10 a.m. PT, with the invite announcement coming 1.5 months before the actual event. Last year, Google announced the event a month before it took place.
The invite is very telling for highlighting Google AI, Android, and Pixel:
You’re invited to an in-person Made by Google event where we’ll showcase the best of Google AI, Android software and the Pixel portfolio of devices.
Meanwhile, we previously reported on a 41mm and 45mm Pixel Watch 3, with renders confirming how it looks like the first two generations. We also reported on Pixel Buds Pro 2.
In addition to announcing the August 13 event, Google today is out with the first Pixel 9 Pro tease.
At store.google.com/us/magazine/google_pixel_9_pro, you’ll find a 12-second video that starts by animating “Google Pixel” with a Gemini-esque color palette leveraged. The text disappears save for “ix” — or the Roman Numeral for 9.
We then see a shimmer show off the perimeter of the device, as well as the camera bar. Featuring three lenses, this is definitely a Pro model in a lighter color.
This Pixel 9 Pro tease ends on August 13, 2024 in Roman Numerals.
The keynote takes place on Tuesday, August 13 from 10 to 11 a.m. PT. As always, there will be a YouTube livestream. In announcing the event, Google has repeatedly mentioned Android, Gemini, and Pixel.
Made by Google will showcase what happens when we bring the best of Google AI and our mobile platform together. Tune in to see the latest exciting updates across Android, Gemini, and the Pixel portfolio of devices.
It comes as Android and Pixel are now part of the same division: Platforms & Devices. The hope is that this leads to an even more integrated software/hardware experience. Meanwhile, Google teased at I/O 2024 that Pixel this year would get Gemini Nano with Multimodality to power experiences like spam call detection.
Google also demoed Gemini Live and the Pixel 9 series might be one of the first devices to get the conversational experience, which is slated to get Astra’s live camera capabilities later this year.
There are also a few references to “magic,” including “Don’t miss the magic” on the Google Store homepage.