Wondering how long an iCloud backup restore to an iPhone or iPad will take to complete? Restoring an iPhone or iPad from an iCloud Backup can take a while, depending on the size of the iCloud backup, and the speed of the internet connection the iOS device is connected to.
If you want to check on the progress of an active iCloud Restore, you can do so in modern versions of iOS.
How to Check Progress of iCloud Restore from Backup on iPhone or iPad
Open the “Settings” app in iOS
Tap on “Your Name” at the top of the Settings
Tap on “iCloud”
Tap on “iCloud Backup”
Locate the data remaining information on the iCloud backup restore process under the ‘Stop’ button to get a rough idea of how much longer the restore will take
The data remaining information will be shown in megabytes (MB) or gigabytes (GB).
It’s best to let the iCloud Restore process complete, however long it may take. Failure to let the iCloud restore from backup process complete can lead to permanent data loss.
Optionally, but not recommended, you can stop an iCloud Restore from backup to an iOS device. Stopping an iCloud Restore can result in data loss and is therefore not recommended unless there is a compelling reason to do so.
While the iCloud Restore process is ongoing, you may notice notably poor battery life on the iPador iPhone as the devices “Ongoing Restore” background activity and downloading of data uses more energy than usual. Letting the iCloud Restore process complete will return the device to normal expected battery performance.
Note that much earlier versions of iOS do not support this feature.
By comparison, checking the restore progress of an iTunes backup restore is much more obvious because the iTunes window has a progress indicator showing the current progress and how long it will take to complete.
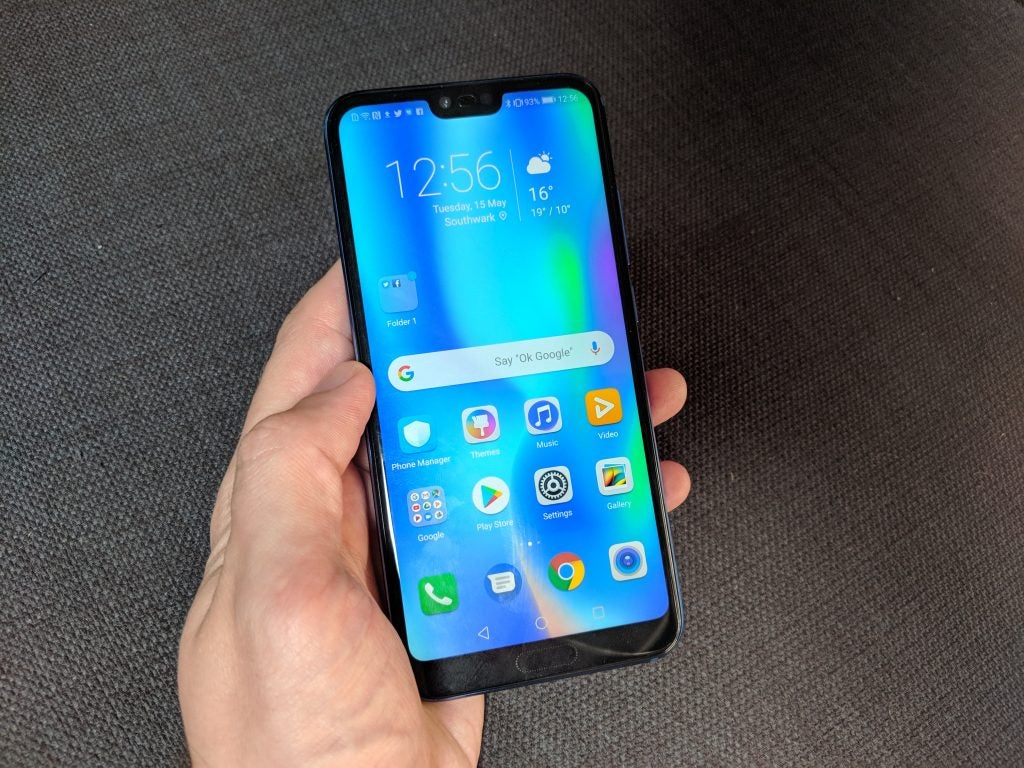
If you liked the look of the Huawei P20 Pro, but didn’t fancy the price, then the Honor 10 is a solid alternative. It packs the same Kirin CPU as the P20, has an excellent FHD+ screen and a premium design that makes it look and feel way more expensive than it is.
Pros
Sleek design
Powerful hardware
Good value
Cons
EMUI Android skin is bloated
Some performance bugs
Key Specifications
5.84-inch 2280p x 1080p FHD+ display
Kirin 970 CPU
4GB RAM
128GB storage
Android Oreo with EMUI
3400 mAh
Rear 24-megapixel and 16-megapixel, f/1.8 dual-camera dual-camera, 24-megapixel front camera
What is the Honor 10?
If you liked the look of Huawei’s uber-swish, triple-camera-packing P20 Pro, then the Honor 10 may well be the phone you’re after.
The Honor 10 is a baby Huawei P20 aimed mid-range phone market. It follows the same tried and tested pattern as the Honor 9, stripping the more expensive aspects of Huawei’s current flagship, while retaining its core design features and hardware to offer a great-value smartphone.
Editors Note: Due to the recent retraction of Huawei’s Android license, future Huawei and Honor phones won’t be able to access Google Play Services and as a result many Android apps including YouTube and Gmail. Both Huawei and Google have confirmed Huawei and Honor phones, like the one in this review, will continue to have access for this time being. Until we know more about the situation we’re leaving the scores on all our Huawei reviews, however as the situation changes we’ll revisit this.
The strategy worked a treat on the Honor 9, which was one of 2017’s best mid-range phones – and it generally still works out for the Honor 10. This phone has a pretty, albeit slightly flashy, mixed metal and glass design, a top-end Kirin CPU and solid battery life.
The only real downside is its slightly buggy EMUI software. However, that’s forgivable given the Honor 10’s cost – you’ll still struggle to do better for the money.
Honor 10 – Design
Honor made a huge deal about the 10’s design during its London launch. Specifically it claims to have achieved the super-polished, ridiculously blue finish by stacking more than 15 layers of glass over each other.
But outside of the ultra-bright colouring, the Honor 10 has a similar mixed metal and glass design to pretty much every other flagship to arrive this year. The phone has metal sides and a shiny 2.5D glass back; were it not for the Honor branding, it could easily be mistaken for a Zenfone 5 or LG G7 ThinQ.
It also has the same ‘notch’ that’s become increasingly common since Apple launched its iPhone X. This is a consequence of the phone’s near-bezel-free design. The notch is a rectangular bump breaking up the top of the screen, where the phone’s front camera is housed.
Android P is set to support using the screen around the notch, but as it stands Honor’s set it to display incoming notifications as well as battery life and network availability. Those who wish to can also turn it off in the phone’s settings leaving a plain black bar.
The only minor difference to those other notched phones is the appearance of a 3.5mm socket, and the absence of a rear-facing fingerprint scanner. Instead Honor’s baked the scanner into the home button just under the screen.
Lack of originality aside, the design is solid and ticks all the right boxes when it comes to functionality. It gives the phone a much more premium feel than your average handset.
Build quality is excellent. The glass back has zero give and a seamless, slightly curved join to the metal sides that makes it comfortable to hold. The bottom fingerprint scanner is also wonderfully reactive, though take Honor’s claims of it being an in-screen scanner with a pinch of salt. The scanner sits at the phone’s bottom, in the same location as the home button. The only difference between it and past handsets is that it’s actually under the glass. It’s also a less essential addition since the Honor 10 has a reliable face unlock feature, which lets you open the phone simply by looking at it after registering your identity to it.
My first issue with the phone’s design is that, like all glass-backed phones, it’s an outright smudge magnet. Within minutes of taking the phone out of the box it was covered in marks. I’m also nervous about dropping it. Though it feels solid, I don’t trust any glass-backed phone to survive even a minor accidental drop scratch- or crack-free without a case.
The more serious issue I have with the design is its slightly lacklustre speaker. This sits on the phone’s bottom and, like most standalone units, is at best functional and a far cry from the boombastic dual-driver setups you’ll find on things like the Razer Phone.
It’s just about good and loud enough for watching the odd YouTube clip and playing a round of PUBG. But max volumes are noticeably lower than on most competing handsets. The low end is also fairly weedy.
Going beyond skin-deep, the 128GB of internal storage will be more than enough for most users.
Honor 10 – Display
The Honor 10’s 5.8-inch IPS display is one of the best you’ll find at this price. Blacks aren’t as deep as on competing AMOLED screens, but colours are nicely calibrated and whites are pristinely clean. Holding it next to the Pixel 2, the Google phone’s whites were horribly yellow by comparison.
Those who prefer cooler or warmer colours can also tweak the colour temperature and contrast in the phone’s settings, though by default I kept it in the out-of-the-box Vivid mode.
Max brightness levels don’t match the quoted 1000 nits brightness of LG’s flagship G7 ThinQ and the Honor 10 isn’t Mobile HDR certified. However, at this price you’ll struggle find a handset that does either, and the screen is more than bright enough. On a sunny day in the park the screen remained legible in everything but direct, very bright sunlight.
The HD+ 2280 x 1080 resolution isn’t noticeably higher than regular FHD, as it’s mainly a move to accommodate the phone’s longer 19:9 aspect ratio. You can get higher-resolution phones at this price point, but I never had any issues with it. Text and icons uniformly look sharp and are readable and in general I had no issues with the Honor 10’s display.
I’m a little less enamoured with the software, however, which I cover in detail on the next page of this Honor 10 review.
Honor 10 – Software
Honor phones use the same EMUI skin as parent company Huawei. In the past EMUI has been a key contributor stopping Honor and Huawei phones from achieving top marks on Trusted Reviews for a variety of reasons.
The first is the sheer number of pointless UI changes and duplicate applications it adds to Android. Key offenses here include removing the app tray and rejigging where certain options sit in the settings menu to the point even seasoned Android users can’t find them straight away.
Being fair to both, the skin has gotten a lot better in recent years and makes it easy for you to do simple things such as re-add the app tray. The settings menu has also been cleared up so it’s now fairly easy to find most options. But the fact is that EMUI is still nowhere near as clean or pleasant to use as vanilla Android.
The UI’s full of duplicate apps for things like music, calendar and email. The company’s also ditched the OS Material Design, replacing the app icons with fairly childish looking equivalents. Since Android Nougat the OS design has been pretty nice and I really wish companies would stop feeling the need to make needless changes like this.
Honor 10 – Performance
EMUI also had a terrible track record for impacting phones’ performance. Early Huawei phones running it were terribly buggy and suffered from serious performance degradation over time, in part because of the Android Skin.
Huawei and Honor have done excellent work addressing these issues over the years, but the Honor 10 does still seem to have a few issues. In general the phone is smooth to use, wonderfully reactive and plays even the most demanding of 3D video games, like PUBG, with zero effort.
But it can on occasion still feel a little buggy. At least once a day I notice a very, very minor chug swapping between menu screens or have an application inexplicably crash. The events aren’t anywhere near frequent enough to be deal breakers, but considering the Honor 10’s powerhouse Huawei Kirin 970, octa-core and more than adequate 4GB RAM, they shouldn’t be happening at all after a week’s use. The CPU is the same one seen in Huawei’s premier P20 and P20 Pro phones.
The Honor 10’s synthetic benchmark scores back up my findings, showing the device is, outside of its minor bugs, a powerhouse performer. You can see how it compares to the P20 and Galaxy S9 in the table below.
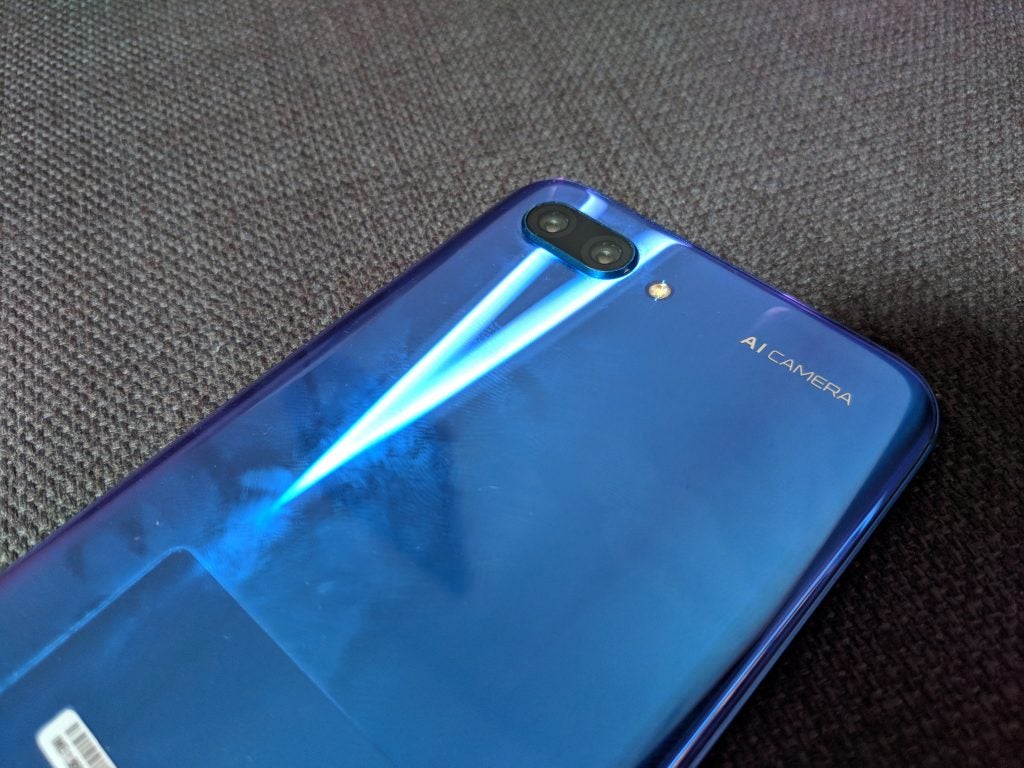
The other benefit of the Kirin chipset is its AI camera features. These work pretty much the same way as on Huawei’s latest P20 phones. Specifically, the features mean the cameras can intelligently optimise their settings to capture “500+ scenarios in 22 categories” in real time.
These features aren’t at all unique to Honor or Huawei. Qualcomm’s been making a similar move via its latest line of Snapdragon CPUs, and you’ll struggle to find a mid-to-top-tier handset that’s not boasting something similar. Even the (expected to be) more affordable Asus Zenfone 5, has a similar camera feature set.
The only differentiator is the addition of Huawei’s “Semantic Image Segmentation technology”, which apparently lets Kirin 970 phones recognise more than one object in photos. I’m not sure I’ve seen a radical improvement in recognition over other Snapdragon AI cameras I’ve tested, but the tech works just fine on the Honor 10’s dual lens rear camera.
The only downside I’ve noticed is that, for people eyeing the Honor 10 as an affordable alternative to Huawei’s P20 Pro, the camera hardware doesn’t match its more expensive sibling on specs. The Honor 10 is completely free of Leica branding and features a regular 24-megapixel and 16-megapixel, f/1.8 dual-camera setup which is a far cry from the insane triple setup you’ll find on the P20 Pro.
Image quality, particularly in low, or awkward mixed lighting conditions isn’t as good as a result. But compared to other £400 the rear camera is pretty darned good.
The AI mode does add a little bit of processing time, but for the most part it does a decent job fixing blemishes, improving contrast and adding minor bokeh effects to photos. If it’s not to your taste the camera also automatically saves a non-optimised version of the photo that you can check just by tapping the top AI icon on the top right of the camera app UI.
This is important as in very bright conditions, I have noticed the AI camera can oversaturate photos’ colours, though being fair, a lot of people I showed the before and afters to actually prefered the optimised version.
The only real issue I’ve noticed with the AI cam is that, when viewing photos blown up on the big screen, it is sometimes possible to spot mistakes in the processing. These are generally basic things, like areas where pixels have been sloppily cloned or the fake bokeh has accidentally blurred a section it shouldn’t have. I only noticed the issues when viewing the images on a 55-inch TV but it is something to be aware of.
Low-light performance isn’t best in class, but it’s still a cut above what you’d find on most £400 phones. Noise can creep in and there’s definitely some pixelation when you look at photos blown up on a big screen, but they’re usually usable for social media.
Video works well enough, though the lack of any form of stabilisation means you’ll want to invest in a tripod before shooting to avoid unwanted wobbling. The only downside is that the mic feels underpowered, so captured sound quality is fairly poor.
For the more vain amongst us, the 24-megapixel is more than good enough for selfies. Image quality is generally more than good enough for sharing on social media, and the addition of lighting and an AI Portrait mode mean you can take a usable selfie, even when shooting in a dingy bar.
Honor 10 – Battery life
The Honor 10’s 3400mAh isn’t the biggest around for a phone this size, but after a week with it, I’ve found it’s more than good enough.
Using the Honor 10 as my main work and personal smartphone, the handset usually lasts between one to two days on a single charge. Regular use entails listening to music on my morning and evening commute, regularly checking my social media and email feeds, playing the odd round of PUBG, constantly browsing the internet and streaming some video to my Chromecast during the evening.
More intensive tasks put a more serious drain on the battery, but overall life still held up well on the Honor 10. Looping streaming video the Honor 10 lost an average of 8-12% of its charge per hour, which is solid for a phone this size.
Playing demanding 3D games, like PUBG and Riptide GP2, the phone lost a heftier 15-22%, but again this is a decent result. Other handsets I’ve tested have lost as much as a quarter of their charge per hour running the same processes.
The only downside is that, during prolonged gaming sessions the Honor 10 did heat up, though not to the point I noticed any CPU throttling.
Sometimes, an iPad Pro must be placed into DFU mode as a troubleshooting step before being able to restore the iPad Pro. DFU stands for Device Firmware Update and DFU mode is basically a lower-level device restore state than regular Recovery Mode for iPad Pro.
Placing an iPad Pro into DFU mode is for advanced users and for specific troubleshooting scenarios where an iPad Pro is unable to recover or restore through regular methods.
This approach for entering into DFU mode covered here applies only to newer iPad Pro devices of the 2018 model year and later, meaning those without a Home button and with Face ID as the primary unlock mechanism, including the iPad Pro with 11″ screen and iPad Pro with 12.9″ screen. Other iPad models with Home button can enter DFU mode with these instructions instead, which uses a different method.
To use DFU mode properly, you’ll need the iPad Pro a USB cable, and a Mac or Windows PC with iTunes, or macOS Catalina.
How to Enter DFU Mode on iPad Pro
Warning: Restoring a device with DFU mode will erase the iPad Pro and may cause permanent data loss. If you do not have a backup of the iPad Pro available you will have no data to restore to the device.
Connect the iPad Pro to the computer by using a USB cable
Open iTunes on the Mac or Windows PC (this is not in MacOS Catalina)
Press the Volume Up button and release it on the iPad Pro
Press the Volume Down button and release it on the iPad Pro
Now press and hold the Power button until the iPad Pro screen turns black, this can take 10-15 seconds or so
While still holding the Power button, now press and hold both the Power and the Volume Down button for another 5 seconds
Release the Power button, but continue to hold the Volume Down button for another 10 seconds
At this point iTunes should pop-up an alert message stating that “iTunes has detected an iPad in recovery mode. You must restore this iPad before it can be used with iTunes”, this indicates the iPad Pro is successfully in DFU mode
After the iPad Pro is in DFU mode it can be restored or updated as necessary.
If on the computer you do not see an “iTunes has detected an iPad in recovery mode. You must restore this iPad Pro before it can be used with iTunes” message, then start the process of entering DFU mode over again. Following the steps exactly is necessary to properly enter DFU mode.
If the iPad Pro screen turns on, or if you see an Apple logo on the iPad Pro, or if you see an iTunes logo on the display of iPad Pro, then the iPad Pro is not properly in DFU mode. If you see the iTunes logo on the screen it likely means the iPad Pro is in Recovery Mode instead, which sometimes is sufficient to restoring a problematic device, but generally people aim to enter DFU mode because Recovery Mode fails.
Usually you can simply restore the device from iTunes or MacOS to whatever the latest available version is, but you can also use firmware to restore from if desired. You can get iOS IPSW firmware files here if needed. To use an IPSW file you must be sure you are using the proper version for the particular device, and it must be actively signed by Apple. You must use an iOS firmware file that is compatible with the iPad Pro model, and the iOS IPSW file must be signed by Apple in order to use and restore from.
How to Exit DFU Mode on iPad Pro
Exiting DFU mode can be achieved by successfully restoring the device, or by rebooting the iPad Pro with the following steps:
Press and release Volume Up button
Press and release Volume Down button
Press and hold the Power button until the Apple logo appears on screen
This effectively force restarts the iPad Pro, causing it to leave DFU mode. Of course if an iPad Pro is ‘bricked’ and must be restored through DFU mode, then exiting DFU mode this way is not going to solve anything because the device must be restored through iTunes or macOS.
Every iPad, iPhone, iPod touch, Apple Watch, and Apple TV can enter into DFU mode (as well as recovery mode), though how to do so depends on the particular device and model. Other DFU mode instructions are as follows:
Ultimately using DFU mode with iPad Pro (or any other device) is rarely needed, because with almost all regular troubleshooting scenarios you can restore an iPad Pro either directly through iTunes, macOS, or by using Recovery Mode.
Rarely, an iPad may get stuck on an Apple logo screen when the device is booting or restarting. Getting stuck on the Apple logo usually happens during a failed software update, whether it was interrupted or incomplete, but it can sometimes happen during restores and during other operations as well.
If an iPad, iPad Pro, iPad Air, or iPad mini is stuck on an Apple logo screen, you can use the tips below to troubleshoot the problem and resolve the issue.
How to Fix an iPad, iPad Pro, iPad Air, iPad Mini Stuck on Apple Logo
This guide will aim to review troubleshooting solutions to resolve an iPad, iPad Pro, iPad Air, or iPad mini that is stuck on a black Apple logo screen. Follow in the order presented, and be sure to use the advice specific to the iPad model, as the troubleshooting steps differ between iPad with Face ID and iPad with Home buttons.
0: Wait! Does the Apple logo screen on iPad have a progress bar?
If the Apple logo screen has a progress bar underneath the Apple logo, then that likely means the device is installing a system software update, or is being restored. In that situation, you will not want to interrupt the system software update process.
If you see the Apple logo screen on an iPad and it has a progress bar underneath the Apple logo, let it sit for a while with the device plugged into a power source.
If a software update is being applied, the iPad will complete the installation and restart itself normally when it has finished.
You may pick up an iPad and notice it’s on the Apple logo screen seemingly out of nowhere if you have automatic iOS / iPadOS software updates enabled on the iPad. Just let the update complete, do not interrupt it.
If the iPad remains unresponsive and stuck on the black Apple logo screen for an extended amount of time, say after an hour or so, it may be stuck and need further troubleshooting. When the iPad is truly stuck on the Apple logo screen, use the troubleshooting tricks below to resolve the issue.
1: Force Restart the iPad
Sometimes simply forcibly restarting the iPad will resolve being stuck on an Apple logo screen. Forcibly rebooting an iPad varies on the iPad model and the iPad model year, use the instructions below depending on the specific iPad, iPad Air, iPad mini, or iPad Pro.
Force Restart iPad Pro 11″ and iPad Pro 12.9″ (2018 and newer)
You can force restart iPad Pro with Face ID (2018 and newer) including the iPad Pro 11″ and iPad Pro 12.9″ models, with the following instructions:
Press and release Volume Up, press and release Volume Down, press and hold Power button until the iPad Pro restarts
Force Restart iPad, iPad Air, iPad mini, and older iPad Pro
You can force restart an iPad with a clickable Home button, including iPad, iPad Air, iPad mini, and older iPad Pro models, with the following instructions:
Hold the HOME button and POWER button concurrently until the device screen turns off to black and back on to an Apple logo screen appears
Occasionally, force rebooting works and the iPad returns to the lock screen or home screen as usual. If not, carry on for more troubleshooting.
2: Update iPad with Recovery Mode (or Restore)
The next troubleshooting trick is to update the iPad using Recovery Mode. Using Recovery Mode requires the use of a computer (Mac or Windows PC) with a modern version of iTunes, and you will need a USB cable to connect the iPad to the computer. Much like force rebooting, entering Recovery Mode varies per iPad model.
Update iPad Pro with Face ID via Recovery Mode
If the iPad has Face ID and no Home button, you can enter Recovery Mode on iPad Pro (2018 and newer) with the following instructions:
Open iTunes on the computer (or Finder if Mac is running Catalina)
Press and hold the Power button and Volume Up button until the “Slide to Power Off” screen appears, then drag that slider to turn OFF the iPad Pro
Next, hold down the POWER button and connect the iPad Pro to a computer with a USB cable. Continue holding the POWER button until iPad is in Recovery Mode
Choose “Update” when the alert message appears on screen
Updating the iPad in Recovery Mode may take a while so be patient and let 20 minutes or so pass. If this is successful, the iPad Pro will update the system software and then reboot itself eventually back and work as normal.
If this fails, you will need to repeat the steps above, but at step 4 choose to “Restore” the iPad instead of ‘update’ (Important note: by restoring the iPad it will reset it as new and erase all data on the iPad, however if you have a backup you can restore from that backup when complete).
Update any iPad with Home button via Recovery Mode
If the iPad has a Home button, you can enter Recovery Mode on iPad, iPad Air, iPad mini, and older iPad Pro with the following instructions:
Open iTunes on the computer (or Finder if Mac is running Catalina)
Press and hold the Power button until the “Slide to Power Off” screen appears, then slide to turn OFF the iPad
Hold down the HOME button while connecting the iPad to a computer using a USB cable
Continue holding the HOME button until the iPad is in Recovery Mode and detected by the computer
Choose “Update” when the alert message appears on screen
Updating the iPad can take a while, give it at least 20 minutes to see if this works. If updating is successful, the iPad will reboot and become usable as usual.
If this fails, you will need to repeat the steps above, but at step 5 choose to “Restore” the iPad rather than update. (Important note: restoring the iPad will erase all data on the iPad and set it up as new, however if you have a backup you can restore from that backup during the setup after restore).
3: Erase & Restore iPad with DFU Mode
If the above Recovery Mode methods fail to resolve the issue, you can try to use DFU mode to restore the iPad or iPad Pro instead. DFU mode is a lower restore method that may work when Recovery Mode fails. Using DFU mode will erase the iPad completely, meaning all data on the iPad will be lost. If you have a backup of the iPad, you can restore the iPad backup to the iPad when DFU restore has finished.
Restoring iPad, iPad Air, iPad mini, older iPad Pro with DFU Mode
You can enter DFU mode on any iPad with a Home button with these instructions:
Connect iPad to a computer (Mac or PC) and launch iTunes (or Finder if Mac is running Catalina)
Hold down the POWER button and the HOME button at the same time, and continue holding both of those buttons for 10 seconds
After 10 seconds, release the POWER Button but continue to hold the HOME button for another 5 seconds
Choose to Restore the iPad with iTunes, this will erase all data on iPad and set it up as new
Connect iPad Pro to a computer and launch iTunes (or Finder if Mac is running Catalina)
Press and release Volume UP, then press and release Volume DOWN, then press and hold the POWER button for 10 seconds
While still holding the Power button, also press and hold Volume DOWN button for another 5 seconds
Release the Power button but continue to hold Volume DOWN for another 10 seconds
When you see an alert on the computer that a device has been detected in recovery mode, choose to Restore to erase the iPad and set it up as new
When the iPad Pro has successfully restored you can either set it up as new or then restore it from an available backup during the setup.
Fortunately getting stuck on a black Apple logo screen is a pretty rare occurrence for iPad, and while the same thing can happen on an iPhone it’s also not particularly common to run into with that device either. Usually the troubleshooting steps outlined above will resolve the issue. Let us know in the comments below what worked to resolve your problem.
Tried all of the above and still stuck on an Apple logo screen? Something else may be going on, so the next best option is to contact official Apple Support or an Apple Authorized Repair Center for further assistance in repairing the iPad, iPad Air, iPad mini, or iPad Pro.
The launch of the Google Pixel 4 is only a few months away, and this year Google started up the hype train extraordinarily early by posting renders of the back of the smartphone four months in advance of its expected release. The front of the phone is still up for speculation, but what we do know is that Google is attempting to up the ante in their screen department. Google takes tremendous pride in their DisplayMate A+ rating of the Pixel 3 XL, even resorting to touting about it as a PR response to display issues (which I’ve also encountered as a canned customer service response). DisplayMate’s review clearly bolstered Google’s ego — here’s my take on the display.
The Future for Pixel Displays — A Preamble
Google is so close to making a smartphone with a display that could be considered among the best. Indoors, the Google Pixel 3 XL display is absolutely stellar with iPhone X(S)-like quality — colors, contrast, viewing angles and all. The silhouette on the front of the device is extremely sleek with a nice flat dark slab that hides the bathtub notch and chin well when the display is off (a result of the high-quality anti-reflection absorption layers), and a display that looks just as well-laminated as the iPhone X-series. Just like Apple, Google decided to use a flexible substrate on a flat screen — which I highly prefer — to achieve the plastered-screen look (hence “Flexible OLED” even though the screen appears flat). If Google implemented its panel’s high brightness mode I would give the Pixel 3 XL display an “A” rating, but Google has to go even further since the competition is boasting 600+ nits display brightnesses. Until Google does so, its displays will always seem lackluster since there are literally dozens of us that actually go outside, where the Pixel phone displays simply appear unpleasantly dim when compared to the competition.
On the opposite spectrum, Google also needs to improve the shadow calibration in their displays. Within some of our native habitats — in the pitch black — the Pixel phone displays have exhibited higher black clipping than most other handsets, making dark scenes a black blotchy mess. The Google Pixel 3 XL has done better than the rest of the Pixel devices in this regard, but it is evident that the issue lies with Google’s calibration. In every Pixel phone’s native wide gamut, there is noticeably less black crush, which suggests a low-breadth LUT or an error in the tone response curve/transformation matrix to sRGB.
To add to the low-brightness nuances, the brightness steps at the low end are jumpy and not smooth. At the minimum brightness, the Google Pixel 3 XL outputs 2.1 nits and jumps up to 3.5 nits at the very next step. This is a 67% increase from the previous step. For reference, it takes approximately a 5% increase or decrease in magnitude for a change in luminance to be noticeable (in subsequent patches), so 67% is a verynoticeable jump. The next step outputs 5.0 nits (43% increase), then 6.4 nits (28% increase), then 8.0 nits (25% increase). This happens for most of the display’s lower brightness range, and it could be annoying for your display to sporadically stutter in brightness when using auto brightness. It also lowers the available range of brightness values to choose from in dim environments; at night time the jump from 2.1 nits to 3.5 nits is pretty large, and you might want a setting in-between.
Next up is color management. I previously wrote a similar segment in my Google Pixel 3 (non-XL) display reviewthat I would like my readers to read since all of it is still relevant. With the Pixel 3 and Pixel 3 XL, Google moved on from defaulting to an accurate color profile and switching over to a new color saturation-expanding “Adaptive” profile. This profile does not have any form of color management, so using this profile doesn’t allow the viewing of photos in other color spaces at any proper fidelity. This is completely counterproductive to Google’s recent announcement that they are bringing wide color photos to Android. In the post, Google explains the importance of color management and color correctness in apps and how to prepare and implement the ideas, all of which would be pointless in the Adaptive profile.
Furthermore, I am fairly certain that the Google Pixel 4 will be the first to debut wide color photography in Android. I caught a hint of this last year during the Pixel 3 XL leaks when I noticed that the photo samples from the leaks had a Display P3 embedded color profile, coming from a dogfood-version of Google Camera. I was disappointed to see it omitted from the release product, but the recent Google wide color photo announcement leaves me no doubt that it is coming with the Google Pixel 4. They just won’t be properly viewable in the Adaptive profile, so I’m curious to see what Google is going to do. Google is also likely implementing an automatic white balance feature similar to Apple’s TrueTone, which suggests at least some focus on the display — be it just a feature — for the next Pixel.
Anyone with an AirPort Express like this one should install the latest security update.
Apple discontinued the AirPort line of wireless routers last year but continues to support them, including efforts to keep out hackers. The US government’s Cybersecurity and Infrastructure Security Agency (CISA) released a statement urging users of networking equipment to install a new firmware patch to block attacks.
Even though Apple stopped selling the AirPort line in 2018, and quit designing new models well before that, there are doubtless many still in use around the world. These should all get the new security patch.
A warning from the US federal government
The CISA’s statement about this update reads:
“Apple has released security updates to address vulnerabilities in AirPort Express, AirPort Extreme, and AirPort Time Capsule wireless routers with 802.11n. A remote attacker could exploit some of these vulnerabilities to take control of an affected system.
“The Cybersecurity and Infrastructure Security Agency (CISA) encourage users and administrators to review the Apple security page for AirPort Base Station Firmware Update 7.8.1 and apply the necessary updates.”
Apple’s own description of this update is couched in general terms, just saying that version 7.8.1 “improves the security of your base station.” The company’s support website has instructions on how to install this firmware update.
This update doesn’t bring any new features, but one released last year surprisingly added AirPlay 2 support to the AirPort Express.
Safari on the Mac can resume stopped downloads and restart failed downloads rather easily. For example, if you were downloading Xcode from Apple but your internet connection was interrupted and the download stopped, you can resume the download where it left off rather than restart the entire download over again. This is a great way to restart and resume incomplete downloads, regardless of the reason the file download failed, was interrupted or otherwise halted, and it’s available in the Safari download manager on Mac OS.
How to Resume Incomplete Downloads in Safari on Mac
From Safari on the Mac, click the Downloads button in the Safari toolbar, it looks like an arrow pointing downwards
Locate the stopped, stalled, or failed download, then click the orange circular arrow button to attempt to restart the download
The file should resume downloading where it was otherwise interrupted
Once the file, archive, image, or whatever else has completed downloading, it will appear in the Downloads folder on the Mac.
Note that Safari defaults to downloading things into the user Downloads folder, but you change the Safari download location on Mac if desired. Thus if you had previously changed the download location, you’d need to find the item there instead.
If you do need to start the download over from scratch, often an easy way to do that is to copy the downloaded files original direct download URL from Safari and simply paste that address back into the URL bar. Note that approach doesn’t always work with randomly generated CDN address downloads however. Similarly, you can find out where a file was downloaded from on the Mac by using Get Info in the Finder on the file, even if the file is only partially downloaded and incomplete.
Some other web browsers also support file download resuming as well, including Chrome, though how you go about resuming downloads in Chrome is different than what is discussed here in Safari.
Huawei has seen its smartphone strategy flipped on its head in recent weeks. Despite its issues with the US trade ban, the Huawei P30 Pro is an incredible device which can compete with the likes of the Samsung Galaxy S10 and many other flagship devices we’ve seen this year. The Huawei P30 Pro goes beyond featuring some of the best hardware packed into a smartphone, including optics which redefine expectations for a smartphone camera. But there’s much more than just the lenses to be impressed by.
Huawei P30 Pro Review: Optical Excellence!
SAMSUNG GALAXY S10 plus VS HUAWEI P30 PRO
Huawei P30 Pro vs Samsung S10 Plus vs iPhone XS Max Camera Test Comparison
Hardware and Design
Huawei has been refining the look of its P-series smartphones over the years, improving its screen-to-body ratio, rounding out the hard edges and delivering a device that’s as good to look at as it is to hold. The first thing you’ll notice about the Huawei P30 Pro is the reduction of the notch found on the Mate 20 Pro in favor of a waterdrop design with a smaller footprint. There are fewer sensors packed into the notch, unavoidable given the reduction in space, but It’s a much cleaner and less intrusive design.
The second thing you’ll notice, which is a less attractive feature, is how the P30 Pro preserves fingerprints. While the glass finish on the rear of the device makes for a premium feeling smartphone, it gets grubby very quickly without a case. It’s not so much of a problem if you carry your device with a case or skin, but running it naked will leave a very smudgy layer of prints.
The camera array on the back of the device is a satisfying vertical arrangement but does protrude so will wobble when used flat on a desk. The aluminum frame feels solid in the hand, with the heft of a premium device at 192g with a profile of 158 x 73.4 x 8.4 mm and IP68 water resistance. I’m a big fan of the glass Huawei uses on the P30 Pro and the quality feel this gives the device, but it also does mean that any drop will likely be fatal so I would recommend using a case.
There’s the standard USB Type-C charging port on the bottom of the device along with the SIM card slot that supports either 2 SIM cards or a single SIM and Huawei’s proprietary micro memory card.
Huawei has kept the external buttons to a minimum with just the volume rocker and a single button on the right-hand side of the device. Rather than include a dedicated button to trigger an assistant, like some OEM’s have, Huawei has embedded a trigger to call Google Assistant in the power button itself. Complimented by a red accent, the textured button will call Google Assistant with a single press and then trigger the power options with a long press. It is quite tough to get to the power menu without triggering Google Assistant; I’m pretty sure during my time with the device I never actually succeeded in turning off the device without the inadvertent trigger, but how often do you turn your device off these days?
The Huawei P30 Pro is certainly a head turner and, in my opinion, the perfect blend of maximum screen real-estate without the need for a pop-up camera or a notch that takes up the entire status bar. The device feels very tall and narrow in comparison to, for example, the Galaxy S10+, which some may prefer. It does make one-handed operation pretty impossible without giant hands, but Huawei has included accessibility features as part of EMUI to help with that.
Display and Specs
With a 6.47-inch display, the P30 Pro has an impressive 88.6% screen-to-body ratio with extremely slim bezels and a subtle chin at the bottom of the device. It’s not quite as impressive as the full-screen display on the OnePlus 7 Pro but then there are no mechanical moving parts to have to deal with. While the display is certainly sufficient, the OLED display provides a 1080 x 2340 resolution, which is a step down when compared with the likes of the S10+. It provides sufficient performance and quality with 398 pixels-per-inch but for those who care about the low-level specs of the display, the P30 Pro cannot compete with the flagship competition. The P30 Pro out of the box comes preset to a zoom level that made the images and text on the device appear massive, which personally I found uncomfortable. It meant that only 5 or 6 emails would appear on the screen at once in the Gmail app. Some may prefer this zoomed in look but I found it a waste of the big screen. Thankfully, Huawei allows you to configure this and reduce the text size and screen zoom but the default setting seems more aggressive than other OEM’s.
The P30 Pro is powered by Huawei’s in-house HiSilicon Kirin 980 using the 7nm manufacturing process and paired with either 6 or 8GB of RAM depending on storage configuration, which comes in 128, 256, or 512 GB options. Throughout our use of the P30 Pro, it handled everything we threw at it without hesitation. The experience was not limited by the hardware but rather Huawei’s aggressive memory management that would close background apps in favor of preserving battery life.
The 4200mAh battery, while not the largest on paper, in practice, is an absolute powerhouse. The P30 Pro could easily achieve 2 days of light-medium use and even heavy use would allow me to reach the evening with 40% left. This is in no small part due to the power management employed by Huawei’s software that sacrifices background flexibility to extend battery life. This preservation is intrusive but completely customizable and could be a trade-off that most are willing to make to get this kind of battery performance.
On the topic of battery, despite only really needing to charge every other day, the P30 Pro has 40W fast-charging for quickly topping up the battery when you’re in a hurry and also features 15W wireless fast-charging. The P30 Pro also features reverse wireless charging, which while a novelty and not really practical for charging any significant battery, such as a smartphone, can be helpful to top-up accessories like Bluetooth headphones.
Huawei has continued its fingerprint implementation of positioning the sensor under the display. The optical sensor is equally as unreliable as other implementations but much more accurate than the ultrasonic sensor on the S10+.
Camera
The Huawei P30 Pro is an impressive device with a spec sheet to support a modern flagship even without considering the camera. However, when the DxOMark-topping optics of the Huawei P30 Pro are brought into the mix, the smartphone is elevated to one of the best of 2019.
The P30 Pro comes equipped with a 40-megapixel f/1.6 27mm wide-angle lens with OIS, a 20-megapixel f/2.2 16mm ultra-wide lens, and the pièce de résistance – an 8-megapixel f/3.4 125mm lens capable of 5x optical zoom and up to 50x digital zoom. All of this is paired with a 3D ToF sensor, dual LED flash, and phase-detection autofocus.
The camera app is packed with Huawei’s AI features, which are capable of automatically detecting scenes to optimize the settings for things like food, animals, HDR, and others. This enables even photographic amateurs to capture amazing shots by not having to fiddle with a ton of camera settings. The app itself is well organized, which allows users to easily switch between the wide-angle modes, as well as engaging the 5x and 10x zoom modes.
Overall, there are very few complaints about the images produced by the P30 Pro. Eagle-eyed viewers would notice that the Huawei image processing often made the images look a bit washed out. Detail, on the other hand, thanks to its excellent sensor capabilities are preserved even at 10x zoom thanks to the AI processing and RYYB sensor. Things become a little unstable as you progress through to the maximum 50x and at that highest zoom setting, the images are relatively unusable without a tripod, and even then don’t expect to preserve much detail. Even so, the capabilities of what the camera on the P30 Pro can do completely change the landscape for smartphone photography across the board.
Software
EMUI has progressed significantly over the years and version 9.1, which is based on Android 9.0, is packed full of features but is a stark departure from a stock Android experience. Many will find the software a steep learning curve with Huawei skinning elements throughout, while others will enjoy the larger fonts, lack of app drawer, and rearranged menus.
Historically, the software has been a stumbling block that would detract from the excellent hardware, but EMUI has evolved and can be managed to no longer make it a deal-breaker. Of course, the elephant in the room means the software on the Huawei P30 Pro is at risk and will cease to function as we know it given recent developments. We’ll keep things short and simple in this section since this landscape is set to drastically change in the coming months.
Conclusion
If camera performance is important to you then the Huawei P30 Pro is a no-brainer. The versatility of the hardware means that the camera is capable of performing and yielding impressive results throughout a number of different scenarios and the AI software doesn’t get in the way, instead, helping the user avoid the need to adjust settings for the optimal shot.
EMUI is a tough learning curve, but its nothing a third-party launcher cannot fix and you soon begin to learn the system. The Huawei P30 Pro takes everything that was good about the Mate 20 Pro and bolts an amazing camera on. Make no mistake, the main talking point about this device is the camera. It does that brilliantly while doing everything else just ok. The battery performance is a strong positive of the P30 Pro but this is at the cost of multitasking and memory management.
The P30 Pro is a well-rounded device that I would have recommended to anyone looking for a flagship device, but the recent sanctions placed on Huawei mean that future and current devices are left in a state of limbo. We will have to see how this plays out and what it means for the wider ecosystem before confidently recommending a Huawei device going forward.
The Bottom Line
An excellent device that takes what was good about the Mate 20 Pro and bolts a game-changing camera on the rear. There are still areas of improvement that could make the P30 Pro even better, but will all be overshadowed by the recent developments with Huawei’s relationship with Google and Android.
Knowing how to put an iPhone 7 Plus or iPhone 7 into Recovery Mode can be valuable knowledge, as it is sometimes necessary for troubleshooting purposes.
Typically the need to use Recovery Mode is limited to troubleshooting some more unusual scenarios like when a device is completely stuck on an Apple logo, or if the screen shows a “Connect to iTunes” screen, but it can be used sometimes for downgrading of iOS versions too.
This tutorial will demonstrate you how to enter Recovery Mode on iPhone 7 and iPhone 7 Plus. This guide also applies to putting iPod touch (7th generation) into Recovery Mode too.
How to Enter Recovery Mode on iPhone 7 Plus & iPhone 7
Be sure you have a backup of iPhone before entering recovery mode, failure to do so may result in permanent data loss.
Press and hold the Side Power button on the iPhone until you see the slide-to-power off screen
Drag the slider to turn off the iPhone
Hold down the Volume Down button while connecting the iPhone to the computer with a USB cable
Continue holding Volume Down button until you see the Recovery Mode screen as you open iTunes on the computer (Mac or Windows, or in macOS Catalina open Finder)
iTunes (or Finder) will detect the iPhone in Recovery Mode
After the iPhone is successfully detected and in Recovery Mode, it can be restored with iTunes (or Mac Finder in 10.15+), or updated.
You can also use IPSW files if needed after an iPhone is in recovery mode.
It’s important to note that putting the iPhone 7 Plus and iPhone 7 into recovery mode is a different process from using Recovery Mode on prior iPhone models, and also from using Recovery Mode on later models. So if you’re accustomed to one method, recall that it can be a unique procedure depending on the actual iPhone model itself.
Sometimes an iPad must be placed into Recovery Mode before it can be restored or updated successfully with a computer. For example, if an iPad gets stuck on a black screen with an Apple logo for a very long time, Recovery Mode can usually remedy that. Typically Recovery Mode is used for a troubleshooting endeavor, but it can also be used for downgrading from iOS beta / iPadOS beta versions as well.
The instructions here will show how to enter Recovery Mode on iPad, iPad Air, iPad mini, and the earlier iPad Pro models with a Home button. Basically if the iPad has a Home button, the instructions detailed here will work to put the iPad into Recovery Mode. However, any newer model iPad Pro without any front buttons and with Face ID instead must use these instructions to enter Recovery Mode instead on iPad Pro 2018 and newer devices.
How to Enter Recovery Mode on iPad, iPad Air, iPad mini, early iPad Pro
To enter Recovery Mode on iPad, iPad Air, iPad mini, and earlier iPad Pro with Home button (2017 and earlier models, this will not work on the modern iPad Pro 2018 and later models), you will need a computer (Mac or Windows PC) with iTunes and a USB cable to connect the device to the Mac or PC with.
First turn the iPad off, do this by pressing and holding the Power button until the Power Off slider appears on the screen and then sliding on that to power it off
Launch iTunes on the computer *
Hold down the Home button while connecting the iPad to the computer with a USB cable
Continue holding the Home button until iTunes (or Mac Finder) shows a message stating that an iPad in Recovery Mode has been detected
After the iPad, iPad mini, or iPad Air has been detected by iTunes (or Finder), it can be restored with iTunes, or updated as usual. If you’re on a beta iOS version, you can also downgrade to the last stable build while in Recovery Mode.
* Use iTunes for MacOS Mojave 10.14 and earlier, and all Windows PC computers will use iTunes too. If the Mac is on MacOS Catalina 10.15 or later, then use the Mac Finder instead of iTunes.
Exiting Recovery Mode on iPad, iPad Air, iPad mini
If you want to exit out of Recovery Mode without performing any action in iTunes, you can do so with a simple force restart of the iPad.
Hold down the POWER button and the HOME button concurrently until the Apple logo appears on the screen, signifying it has been force restarted
After you reboot the device to exit recovery mode, it will boot as normal. Or if it was experiencing difficulty, like getting stuck on the Apple logo screen, it will probably just boot directly back into that if you didn’t actually run through recovery to restore the iPad.
Almost all serious issues with an iPad can be resolved through Recovery Mode, but rarely in some very stubborn cases you may need to put the iPad into DFU mode instead and restore from there. That’s quite rare however, and is really only applicable for when Recovery Mode is not working successfully for a restore or device update.
All iPad, iPhone, and iPod touch models can be placed into Recovery Mode, though the instructions for doing so differs per device.