Wondering which Mac and iPad models support Sidecar? If you’re curious as to whether or not a Mac and iPad is compatible with Sidecar, you’ll find the list of supported devices below to be helpful. Not all Mac and iPad models support the feature, but most new models do.
Sidecar is the helpful new feature introduced in MacOS Catalina 10.15 and iPadOS 13 that allows an iPad to function as an external display for a Mac, with full touch screen support on the iPad as well as the ability you use Apple Pencil. Some MacOS Catalina users have attempted to use Sidecar but found it’s not working on their Mac and iPad combination, perhaps thinking it’s a problem with MacOS Catalinawhen in fact it’s just a matter of system compatibility. So let’s review which devices Sidecar works for.
Sidecar System Requirements for Mac & iPad
Sidecar is only compatible with some of the latest models of iPad and Mac hardware.
iPad Models with Sidecar Support
iPad must be running iPadOS 13 or later, and must be one of the following devices:
iPad Pro (all models, including 9.7″ iPad Pro, 10.5″ iPad Pro, 11″ iPad Pro, 12.9″ iPad Pro, all generations)
iPad Air (3rd generation and newer)
iPad (7th generation and newer)
iPad (6th generation and newer)
iPad mini 5 (and newer)
You might notice that only the iPad models with Apple Pencil support will also support Sidecar (and yes, you can use Sidecar without having an Apple Pencil, just use touch interaction instead).
Macs with Sidecar Compatibility
The Mac must be running MacOS Catalina 10.15 or later, and must be one of the following computers:
MacBook Pro (2016) or newer
MacBook Air (2018) or newer
MacBook (Early 2016) or newer
Mac Mini (2018) or newer
Mac Pro (2019)
iMac Pro (2017) or newer
iMac 27″ (Late 2015) or newer
For Mac, you can confirm that Sidecar is enabled and available on the Mac by going to the System Preferences and checking the Sidecar preferences.
Assuming you meet the system requirements for using Sidecar on Mac and iPad, you must have the two devices with Handoff enabled and within range of one another, and the feature should work and be available.
As you can see, there are various other iPad and Mac models that do not support Sidecar, even if they otherwise compatible with MacOS Catalina and compatible with iPadOS 13. So if you have recently updated your devices to the latest operating systems but find the feature is not available or is not working, perhaps it’s because of a compatibility issue with the hardware not being supported, rather than a problem with the Sidecar feature itself.
You might be asking yourself how to delete apps in iOS 13, now that when you long-press on an app icon you see a contextual menu. The functionality for deleting apps and removing them from an iPhone, iPad, or iPod touch remains in iOS 13 and iPadOS 13, but it’s just slightly different enough than it was before to possibly cause people to wonder how it works, or even if deleting apps is still possible.
Read on to learn how to delete apps in iOS 13 and later on iPhone, iPad, or iPod touch.
How to Delete Apps from iOS 13 & iPadOS 13
Here is how you delete apps in iOS 13 and later on the iPhone or iPod touch, and iPadOS 13 or later on iPad :
From the Home Screen, navigate to the app you want to delete
Tap and hold on the app icon that you want to delete, continue holding until a pop-up menu appears
Continue holding the tap until the pop-up menu vanishes and all the app icons start to wiggle, do not let go of the tap until the icons wiggle
Tap the “(X)” button on the app you want to delete
Tap to confirm that you want to delete the app in question
When finished deleting apps, tap the “Done” button in the corner, or use the Home gesture to stop the apps jiggling
That’s all there is to it, slightly different from before, but not too different.
The main thing to keep in mind with deleting apps from iOS 13 is that you have to keep holding the tap until the icons start jiggling, which is just as it was before except now there’s a little contextual pop-up menu that shows up first. This can be a little confusing at first, but with practice you’ll quickly get the hang of it. Just keep holding on that app icon tap and ignore the contextual popup menu (or choose “Rearrange apps” from that menu), then in a moment the icons will wiggle and you can delete the app as usual.
You can also delete apps by choosing “Rearrange apps” from the pop-up menu that shows up, and likewise you can rearrange apps in iOS 13.x and iPadOS 13.x using the same method by tapping and holding on an app icon until they jiggle and then move the apps around as usual.
The very short video embedded below demonstrates how to delete apps on iOS 13 and later on iPhone, the entire process of deleting an app from start to finish is seconds long as you can see in the video itself :
You can also delete apps directly from within the App Store too now, through the Updates section, allowing you to easily uninstall apps from the same place you installed them from originally. Speaking of the App Store
Some Mac users have reported a variety of problems with MacOS Catalina, ranging from installations getting stuck or taking abnormally long, to problems with some apps not working, to issues with certain printers or accessories no longer working, App Store difficulties, iCloud and Apple ID issues, amongst other nuisances.
While installing and using MacOS Catalina goes fine for most users, that is no solace if you are experiencing problems with a particular Mac and the new MacOS 10.15 release. Below we will discuss a variety of reported issues and problems with MacOS Catalina, and offer various troubleshooting methods to attempt to resolve those difficulties.
Before perusing this guide or attempting any troubleshooting method, be sure to back up your Mac and all data first. Failure to backup data can result in permanent data loss.
MacOS Catalina Won’t Download or Shows “An error occurred while running scripts from the package “RecoveryHDMetaDmg.pkg”
If you are attempting to download MacOS Catalina and it fails with a “An error occurred while running scripts from the package “RecoveryHDMetaDmg.pkg” error message, it may be related to third party firewall, anti-virus, or anti-malware software running on the Mac.
Temporarily disable the third party software that is a firewall, anti-virus, or anti-malware protection, and then relaunch System Preferences to check for the download again and MacOS Catalina should arrive as expected.
Note that some Macs may need to be restarted after third party protection software is disabled, depending on the software and how it works. In that case, after rebooting the Mac return to System Preferences in the Software Update section to download MacOS Catalina as expected.
MacOS Catalina won’t install because “There is not enough free space on Macintosh HD to install”
If you do not have sufficient free disk space available on the Mac hard drive, you will not be able to install MacOS Catalina.
Aim to have at least 15GB freely available to complete the installation of MacOS Catalina.
MacOS Catalina Installation Stalls on “Estimating time remaining…”
A fair number of people have reported that MacOS Catalina installation takes longer to install than they were expecting, or longer to install than prior MacOS installations. A common symptom of this is the Mac is apparently stuck on “Estimating time remaining…” when trying to install MacOS Catalina.
If you see the “Estimating time remaining…” screen when trying to install MacOS Catalina, be patient. It’s unlikely the installer is actually stuck, so just let it sit, and if it’s a MacBook Pro or Air make sure it is connected to a power source.
Let the Mac sit for however long it takes to complete the installation of Catalina, it may take several hours. The Mac will automatically boot into MacOS Catalina when finished installing.
There are mixed reports that the MacOS Catalina installation has taken anywhere from 45 minutes to over 12 hours to complete, how long it takes on a particular machine likely depends on many factors, including computer speed, internet connection speed, the Mac OS version being updated from, and more, thus it’s best to initiate the installation when there is plenty of time available to allow the Mac to complete installation.
MacOS Catalina Installation Stuck on “Less than one minute remaining”
Some users report that installing MacOS Catalina gets stuck on a black screen with an Apple logo and progress bar, stating there is less than a minute remaining to complete the installation.
If you see this screen, let the Mac sit and wait for a substantial amount of time before attempting to intervene.
If the Mac is still stuck on “Less than one minute remaining” after many hours (let it sit overnight if you can), and you have a full backup of your data, try powering down the Mac and then turning it back on again. It may boot directly into the MacOS Catalina setup screen. It also may fail to boot entirely, in which case you’ll need to reinstall MacOS system software with Internet Recovery (you can also try to reinstall MacOS Mojave through regular recovery too), or restore the Mac from a previously made Time Machine backup.
MacOS Catalina Installation Stuck or Fails with “The operation couldn’t be completed. (PKDownloadError error 8.)”
This error has been reported to occur during installation of MacOS Catalina if the internet connection is disrupted or disconnected.
Insure that the Mac has an active wi-fi or ethernet connection and that the internet works as expected, and then try installing MacOS Catalina again.
MacOS Catalina Stuck on “Setting Up Your Mac” Screen After Install
Let it sit for at least several hours, it may resolve itself.
If a after hours pass, force reboot the Mac by turning the computer off, then turning it back on again
Mac Running MacOS Catalina Randomly Crashes & Restarts
Some Mac users are reporting their Mac is crashing and restarting itself, particular when the Mac is left unattended for a period of time.
This random crash/freezing/restarting issue appears to happen more often on newer Macs with T2 security chips, or with Macs with a Radeon Pro Vega GPU, but it has been reported on other Mac models as well.
There are various discussion threads on Apple Support Forums here about this, but there is not yet any clear explanation or solution to this problem.
Reinstalling MacOS Catalina may help.
If any updates come available to MacOS Catalina, be sure to install those right way (ie: MacOS Catalina 10.15.1, 10.15.2, etc), as they may resolve the problem.
Downgrading to MacOS Mojave may also be a workaround to some users, though that is obviously not desirable or practical for many users.
Frequent “Update Apple ID Settings” Requests
Some users have reported a frequent “Update Apple ID Settings” pop-up message, informing them that some services will not be available until they sign-in again. Then after signing in again, the popup returns.
If you encounter frequent “Update Apple ID Settings” alerts, first try restarting the Mac.
If the “Update Apple ID Settings” alert message continues still, back up the Mac (if you haven’t done so already), then go to System Preferences and logging out of the Apple ID, rebooting the Mac, then logging back in again.
Be aware that signing out of an Apple ID may cause issues with synced data over iCloud, including iCloud Documents, iCloud Files, iCloud Photos, and other iCloud syncing.
Persistent iCloud Password Requests
Some users have reported issues with persistent Apple ID and iCloud password requests.
Open System Preferences > go to iCloud settings > and login to iCloud directly.
You may also need to log out and then log back into iCloud via System Preferences, but be aware that doing so can cause issues with iCloud Documents, iCloud Files, and other iCloud syncing.
Some Mac Apps Don’t Work, “App Needs to be Updated” Error Message
Any 32-bit app that has not been updated to 64-bit will not work in MacOS Catalina.
When attempting to launch an app that does not work in MacOS Catalina, you will see an error message stating “(Name) needs to be updated”
This includes many older versions of popular apps like Microsoft Office (Word, Excel, Powerpoint, etc), Adobe Photoshop, Lightroom, and many smaller third party tools and utilities.
Additionally, many popular older Mac games are 32-bit and thus will not work on MacOS Catalina (unless they are updated for 64-bit support, which some developers have already stated will not happen with older software).
The only solution to this is to update the apps to 64-bit versions, or to find alternative applications. Or, more extreme, would be to downgrade from MacOS Catalina, but that’s a sizable hassle.
Printers, Scanners, Accessories Incompatible or Don’t Work with MacOS Catalina
Some users have found that printers, scanners, and other hardware accessories are no longer working after updating to MacOS Catalina.
This may be related to the loss of 32-bit application support, as some older printers and drivers are not updated to 64-bit.
Numerous reports exist of various Brother, Epson, HP, and other printers and accessories are incompatible with MacOS Catalina currently.
A good first step would be to reach out to the manufacturer of the printer, scanner, or hardware accessory and see if new drivers or related software are available with MacOS Catalina compatibility.
If new Catalina compatible drivers are available, install them to regain access to the printer, scanner, or hardware accessory.
Loss of iTunes Causing Issues with Music Playlists
Some users have reported that music playlists created from iTunes are not being imported or included in the new Music app of MacOS Catalina.
This may be a bug, or it could be an issue with the Music app not finding the playlist files from iTunes.
Some users have reported that simply quitting Music app and restarting the Mac has allowed their old iTunes playlists to surface in Music app as expected.
iTunes Removal Causing Issues with XML File Support & Third Party Music Apps
Some users of various music apps have reported that MacOS Catalina does not work with various music production and DJ apps.
This is apparently due to an issue with XML file support being removed from the new Music app.
If you rely on an application which requires iTunes or iTunes XML file support, consider avoiding MacOS Catalina for the time being, or until the apps you rely on are updated to support MacOS Catalina.
You can read more about this specific issue at The Verge if interested.
Mac App Store Showing “No Purchases”
Some Mac users are discovering that MacOS Catalina is not showing their purchased app history.
Sometimes simply rebooting the Mac can resolve this problem.
Otherwise, try logging out of the Mac App Store, quitting the App Store application, relaunching the App Store, then logging back into the Mac App Store again, to regain access to purchases.
Mac App Store Showing “No Updates”
Some users have reported that the Mac App Store is erroneously showing a “No Updates” available message, despite having older versions of apps like iMovie installed that are not working without an update for full 64-bit compatibility.
Quitting the Mac App Store, then rebooting the Mac and relaunching the Mac App Store appears to resolve this problem.
Mac is Hot and Running Slow After Installing MacOS Catalina
This is likely due to the system reindexing files on the drive, and the system toll it takes to perform maintenance tasks that are necessary after reinstalling or updating MacOS system software.
Let this process complete, it may take a while, but the Mac should perform as expected when that background activity has finished.
Safari Can’t Connect to Websites, But Internet Works
Some third party firewall software and anti-virus apps may be causing issues with Safari and other apps accessing websites and the internet in general.
Try disabling those third party firewall and virus tools, then rebooting the Mac to see if the issue is resolved.
Additional MacOS Catalina Troubleshooting Ideas
Depending on the issue, you may want to try a few additional troubleshooting steps like:
Try re-installing MacOS Catalina by rebooting the Mac and holding down Command+R and choosing to “Reinstall MacOS” – this will reinstall the core operating system without changing user files. Be sure to have a full backup fo your Mac before attempting this.
Try resetting SMC
Reset the PRAM on the Mac
MacOS Catalina is Unusable for Me, Help!
If you find MacOS Catalina totally unusable for whatever reason, you have a few options:
Restore the Mac from a previously made Time Machine backup, which is perhaps the easiest and best method of reverting from MacOS Catalina
Reinstalling MacOS via Internet Recovery, which will attempt to reinstall the version of MacOS that came with the Mac
Erase the Mac and restore from Time Machine or a prior backup method to effectively downgrade from MacOS Catalina to the prior version of MacOS you had backed up
Contact official Apple Support for further assistance – Apple support techs and engineers may be able to resolve a problem for you that unaffiliated third party fan sites like this are not able to address
Are all of these problems common?
No, these are not commonly encountered issues with MacOS Catalina.
Perhaps the most common issue that may be experienced by users with MacOS Catalina is that some older apps will not work, because of the loss of 32-bit app support. The other issues discussed here are fairly rare.
If you’re on the fence about whether or not to install MacOS Catalina then don’t assume you will experience any of the issues or problems discussed here. This is intended as a troubleshooting guide for problems that a small number of users are encountering, and by no means is representative of the wider MacOS Catalina user base or experience. You can use this guide to get ready and prepare for MacOS Catalina and download MacOS Catalina as soon as you’re ready for the software update. Or you can skip it for the time being, that’s OK too!
Now that iPadOS 13 (well, 13.1.2) is in the wild, you might be wondering what some of the most compelling features are for the latest and greatest operating system for iPad.
Whether you have an iPad, iPad Pro, iPad Air, or iPad mini, read on to learn some of the new must-know features and tips to try out in iPadOS 13.
1: Try Dark Mode
Dark Mode changes the entire interface of iPadOS to be much darker (unsurprisingly as the name implies) which can make the visual appearance easier on the eyes for some users, and others may just prefer the way it looks in general.
You can change from Dark Mode (and Light Mode) appearance themes at anytime by going to:
Go to Settings > Display & Brightness > Choose “Dark”
Some people may want to use Dark Mode all the time, but otherwise Dark Mode works particularly well when set on a schedule to turn on and off automatically from sunset to sunrise.
2: Get Home Screen Widgets with Today View
The Today section can now be pinned to the iPad Home Screen, letting you get a quick glance on the Home Screen for things like weather, Reminders, upcoming appointments in Calendar, stocks, Shortcuts, and so much more. If it’s a widget available in the Today section, you can now have it always visible on your Home Screen with the latest iPadOS.
Go to Settings > Display & Brightness > Set “Keep Today View on Home Screen” to the ON position
3: Change Home Screen Icon Size
You can now change the size of app icons on the iPadOS Home Screen. Currently there are only two options available; smaller / “More” and “Bigger” / fewer, but if you’ve ever felt like the iPad home screen icons were too small or too big, now you can adjust them.
Go to Settings > Display & Brightness > under Home Screen Layout choose “More” or “Bigger”
4: Use a Mouse with iPad
One of the best features of iPadOS for many power users is the ability to connect a mouse to iPad. This works best with a Bluetooth mouse, though if you have a USB cable and appropriate adapter you can use a USB mouse with iPad now too.
But first you have to enable this feature (be sure the mouse you want to use is in Bluetooth discover mode):
Go to Settings > Accessibility > Touch > AssistiveTouch > Devices > tap on the Mouse to add it to the iPad
5: Learn How to Update Apps
Many users who have updated to the latest iPadOS and iOS releases are wondering how to update apps, or if the ability is no longer available. Updating apps in iPadOS 13 is still done through the App Store, but now it’s tucked into a different section of the app.
Go to App Store > tap your profile icon in the upper corner > scroll down to find available app updates
6: Connect to File Shares & Servers in Files App (Mac, Linux, Windows PCs!)
You can now connect to remote file servers on the same network and browse network shares directly through the Files app. Any SMB share can be connected to:
Files app > tap the triple dots button > choose “Connect to Server” and enter the destination IP and login credentials
7: Access External Storage in Files App
Got a USB storage device, SD card, a USB flash drive or external disk, or some other storage medium you want to access directly from Files app on iPad?
Now you can, just connect it to iPad and it’ll show up in the Files app.
Note you may need a separate Lightning to USB cable to USB-C to USB adapter, depending on what your storage device is.
8: Try the New Image & Video Editing Tools in Photos App
Photos app has revised powerful capabilities for making quick adjustments and edits to images and videos.
Go to Photos app > choose a video or photo > tap “Edit” > make the adjustments as needed to things like Brilliance, Saturation, Brightness, Contrast, Sharpness, Tint, and much more.
9: Take Full Webpage Screenshots
Now you can easily take full screenshots of an entire webpage right from Safari. Here’s how it works:
Go to Safari > open a website (like Sydneycbd.repair ) > take a screenshot as usual > tap “Full Page” at the top of the preview screen
10: Download Files from Safari to iPad iCloud Drive
Now you can easily download files directly from Safari to the iPad and iCloud Drive.
Tap and hold on any linked item you want to download, then choose “Download” and confirm that you want to download the file.
Or, if the file is something like a PDF document that is already open, tap the Share icon (box with an arrow flying out of the top of it), then locate and choose “Save to Files” in the list.
You can find the file(s) you download from Safari on the iPad by opening the Files app, going to “iCloud Drive” and then looking in the “Downloads” folder.
Now that iOS 13 is available to download and install for iPhone and iPod touch, you might be wondering what the best features and tricks for the latest and greatest iOS release are. We’ve rounded up a handful of the most useful features in iOS 13 for iPhone for you to check out, so whether you’ve already installed iOS 13 or are still readying to prepare iPhone for iOS 13, you’ll be able to enjoy some of the best new features available right away.
(Note that some of these iOS 13 features coexist on iPadOS 13 as well, but the focus on this article is iOS 13 on iPhone and iPod touch)
1: Use Dark Mode
Dark Mode is really nice, particularly in the evening hours or if you’re using your iPhone in the dark. When you’re first setting up iOS 13 you’ll go through an option to enable Dark Mode, but you can also turn the feature on at any time through Settings:
Go to “Settings” > “Display & Brightness” > choose “Dark”
Perhaps even more useful is to set Dark Mode to be automatically enabled from Sunset to Sunrise, which is configurable in the same settings screen.
2: Use the New “Swipe to Type” Keyboard Option
The new Swipe to Type keyboard is quite useful for typing quickly, particularly once you get the hang of it. To turn on the new swipe keyboard:
Go to Settings > General > Keyboards > toggle on “Slide to Type”
Then the next time you’re at a place on iPhone where the keyboard is available, try swiping across the keyboard to spell the word you want to type, without lifting your finger. For example if you want to type “taco” then swipe from t, to a, to c, to o, then let go, and “taco” will type all at once. This uses a variety of tricks including predictive text and autocorrect to get the words right and it’s pretty accurate, and seems to get better the more you use it too.
Earlier versions of iOS supported third party keyboards with this feature, and Android has had it for a long time too, but now the swipe gesture keyboard is native on iPhone as well.
3: Reduce Spam Calls with Silence Unknown Callers
Tired of the nonstop spam calls ringing and buzzing on your iphone? Then try the new Silence Unknown Callers feature, which will automatically mute any call from someone not in your Contacts list (this is sort of like a feature version of this workaround approach to block unknown callers which). The callers will still be able to leave a voicemail and will appear in your Recent Calls list, but they won’t bug your phone.
Go to “Settings” > “Phone” > turn ON “Silence Unknown Callers”
Combined with blocking calls and contacts and you should have a lot fewer junk calls coming to your iPhone.
4: Improved & Powerful Photo Editing Abilities
There are many new and powerful photo editing abilities available directly in the Photos app of iOS 13.
Just find a photo you want to apply some edits and adjustments to and tap on Edit to get started.
5: Use Cellular Low Data Mode
Low data Mode helps to reduce data usage on the iPhone, which can be helpful if you’re near your bandwidth allotment for the month or have surpassed the cellular data quota of your data plan.
Go to Settings > Cellular > Cellular Data > and turn on “Low Data Mode”
Note that not all apps will obey this setting, so if you’re trying to conserve bandwidth and cellular data usage you’ll still want to take an active roll in that and not entirely rely on this toggle.
6: Enjoy Quick Wi-Fi Network Changes from Control Center
Want to change wi-fi networks quickly? You don’t need to go to Settings anymore, now you can do it directly from Control Center.
Simply swipe to access Control Center as usual, then tap and hold on the Wi-Fi toggle to access a drop-down menu of available wi-fi networks, which you can then tap to select which to join.
7: Access External Storage via Files App
The Files app now supports external storage devices, like USB hard drives and flash drives. Just connect a USB storage device to the iPhone and you’ll find it available in the Files app.
You’ll need to use a Lightning port to USB adapter to gain access to this ability, but it’s a wonderful functionality to have that many power users have long asked for.
8: Announce Messages with Siri on AirPods
Have AirPods with your iPhone? Then you’ll likely appreciate this new feature which lets Siri announce new messages while your AirPods are being worn.
The first time you setup iOS 13 on iPhone with AirPods you will likely see a notification about this, but if you don’t you can make the change anytime directly by doing the following:
Go to Settings > Notifications > tap “Announce Messages with Siri” > toggle the switch ON to enable
You can even customize who to announce messages from if you don’t want every message to be announced by your Siri virtual assistant.
Bonus Tip: Learn How to Update Apps Again
Many users installed iOS 13 to find the Updates section is missing from the App Store on their iPhone, and some have figured this is a bug or an error – but it’s not. Instead, you may need to relearn how to update apps in iOS 13, which is different from before.
From the App Store, click on your profile picture in the upper right corner, then scroll down to the Updates section. There you can update your iPhone apps in iOS 13 and later.
If you launched Mail app on iPhone or iPad after updating to iOS 13 or iPadOS 13 and now discovered new emails are showing up as “No Sender” and with “No Subject”, then you’re certainly not alone. This appears to be a known bug impacting a fair number of iPhone and iPad users after updating their devices to the various new iOS 13 and iPadOS 13 software releases, including iOS 13, iOS 13.1, iOS 13.1.1, iPadOS 13.1, and iPadOS 13.1.1.
If you’re impacted by the annoying Mail app “No Sender” and “No Subject” email bugs, then read on to learn how you may be able to troubleshoot and resolve the issue.
Troubleshooting “No Sender” & “No Subject” Mail Bugs in iOS 13 & iPadOS 13
The following steps may resolve the Mail bug where new email messages show up as having “No Sender” and the emails also show “No Subject”.
1: Force quit Mail app
First you’ll want to force quit Mail app.
How you do this depends on the iPhone or iPad model and whether or not it has a Home button.
To force quit Mail app on iPhone & iPad models with Face ID and without home buttons, swipe up from the bottom of the screen and hold the swipe until the App Switcher shows up. Navigate to the Mail app and then swipe up on Mail app to push it off the top of the screen to force quit Mail app.
To force quit Mail app on iPhone and iPad models with Home buttons, double-click the Home button to bring up App Switcher, then navigate to Mail app and swipe up on it to push it off the top of the screen to quit.
2: Force Restart iPhone or iPad
Next you’ll want to force restart the iPhone or iPad.
Again how you force restart the device depends on the iPhone or iPad model:
For iPhone 11, iPhone 11 Pro, iPhone 11 Pro Max, iPhone X, iPhone XS, iPhone XR, iPhone XS Max, iPhone 8, iPhone 8 Plus, and iPad Pro (2018 or later): Press Volume Up, press Volume Down, press and hold POWER / WAKE button until you see the Apple logo on the screen
For all iPad models with Home button, iPhone 6s, 6s Plus, iPhone SE: Press and hold Home button and Power button until you see the Apple logo on the screen
After the iPhone or iPad has force restarted and booted back up again, re-open the Mail app and you should find that at least new emails arriving will no longer show up as “No Subject” and “No Sender” in Mail app. Some interim emails may still appear to show as “No Sender” and with “No Subject” however, which appears to show some persistence of the bug for emails that were already downloaded and labeled that way.
3: Update to the latest iOS version
If possible, update to the latest iOS release in Settings app > General > Software Update
Updating to the latest version of iOS available may or may not resolve the Mail app “No Sender” and “No Subject” bug for some users.
For some users, updating from say iOS 13 or iOS 13.1.1 to iOS 13.1.1 may resolve the issue, but for others (like myself) the “No Sender” and “No Subject” bug didn’t appear in Mail app until after updating to iOS 13.1.1. For example, my personal iPhone did not experience the “No Sender” and “No Subject” Mail bug until after I updated to iOS 13.1.1.
Nonetheless, presumably a future iOS update will resolve the “No Sender” and “No Subject” Mail app bugs, so checking for available iOS updates and installing them is always a good idea.
As always, be sure to backup your iPhone or iPad before installing any system software update.
The Huawei Mate 30 takes the core elements of the Mate 30 Pro, but forgoes some of that phone’s top-end features to keep the price down. However, as with all the new Huawei phones you can’t access Google’s services on this handset.
FOR
Premium design
There’s a 5G version
AGAINST
No Google apps
Doesn’t have curved edges
The Huawei Mate 30 is the new entry-level flagship smartphone from the Chinese brand, arriving alongside its more powerful Huawei Mate 30 Pro sibling.
If you’re after Huawei‘s latest and greatest, but don’t have the budget to spring for the Mate 30 Pro, the Mate 30 has many of the same features – and actually has a bigger screen – for a smaller price tag.
However, before we go any further there is a major issue that you need to be aware of: due to ongoing tensions between the US and China, the Huawei ban enforced on Google means the Mate 30 series don’t have access to the search giant’s applications and services.
That means none of Google’s apps are pre-loaded onto the Huawei Mate 30, and the Play Store isn’t accessible on the handset. It means you’ll be forced to use Huawei‘s own app store, the range of apps on which isn’t going to be as wide as the offering from Google.
It’s currently unclear whether you’ll be able to download any of Google’s apps onto the handset via other means, but we’ll update this Huawei Mate 30 preview with more information when we have it.
Huawei Mate 30 release date and price
The Huawei Mate 30 price is €799 (around $880 / £700 / AU$1,300), which gets you 8GB of RAM and 128GB of storage.
While we know the Mate 30 be available in some European markets, Huawei is yet to reveal which countries will get the handset, and there’s a chance it won’t make it to the UK – the company clearly feels the absence of Google services will limit the phone’s appeal in Western markets.
If you’re in the US the likelihood is the Huawei Mate 30 won’t be available there. And, while Huawei has announced that it will be selling the Mate 30 Pro in Australia, it appears the company has no plans to release the regular Mate 30 there. At present, AU pricing and availability details have not been given.
As for the Huawei Mate 30 release date, we’re still waiting to hear when the handset will become available. It’s expected to start releasing in October, but we’ll update you right here as soon as we know.
Huawei Mate 30 design and display
The Huawei Mate 30 design is a step forward from the Mate 20 it succeeds, but it doesn’t do anything particularly new.
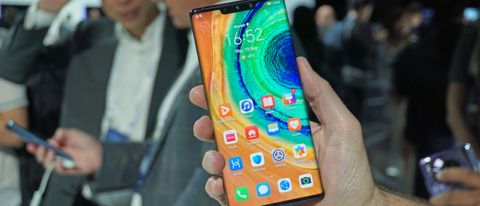
Unlike the Mate 30 Pro with its elegantly curving screen at the sides, the Mate 30 doesn’t feel like a new design at all.
The biggest update looks-wise is on its rear, with the camera bump now a circle (rather than the square on the Mate 20) – a number of other manufacturers have opted for this rounded style of camera housing, and we’ve seen it on the Nokia 7.2, Moto G7, and the yet-to-be-officially-launched OnePlus 7T.
This camera bump is then ringed by a circular design etched into the handset’s glass rear, which Huawei claims is good for repelling fingerprints, although we still found the Mate 30 to be something of a fingerprint magnet.
You’ll find the power and volume keys located on the right of the Mate 30, in a relatively easy to reach location. The handset is also IP68 water and dust resistant.
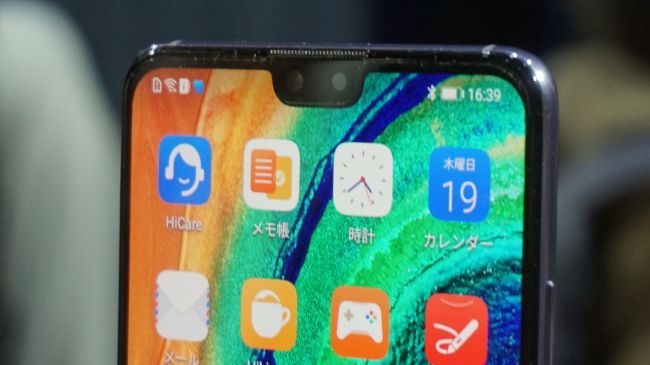
Round the front the handset is dominated by the display, with a small (but not the smallest) notch at the top.
Huawei Mate 30 cameras
We’ve yet to properly test the cameras on the Huawei Mate 30, but the rear array looks to be a solid setup.
This comprises a 16MP f/2.2 ultra-wide snapper, a 40MP f/1.8 super-sensing wide camera, a 8MP f/2.4 telephoto lens and a focus-assist laser.
We quickly tested the camera in our brief hands-on time, and in good lighting it seemed to perform well – it won’t be quite as good as the Mate 30 Pro in this respect, though, as that handset has an additional 40MP ultra-wide camera.
The front-facing camera is a 24MP shooter, which we’ve not yet been able to test, and which sits in the notch at the top of the screen. We’ll be sure to put the Mate 30’s cameras through their paces during our full review.
Huawei Mate 30 performance and specs
The Huawei Mate 30 Pro is running the latest Android 10 software, and it comes with Huawei’s own overlay called EMUI10.
There’s plenty of power packed inside the Huawei Mate 30, with the firm’s flagship Kirin 990 chipset paired with a healthy 8GB of RAM, which should enable the handset to cope with pretty much anything you throw at it.
The standard version of the phone is 4G, but there’s also a 5G-ready variant, although as with all the new Huawei phones it’s currently unclear where this will be available.
Huawei has included a 4200mAh battery inside the Mate 30, which the company believes will last all day from a full charge.
Early verdict
A lot of the features in the Huawei Mate 30 make it look like one of the best smartphones of 2019, but the software lets it down, with the lack of Google apps on the phone making it a difficult device to recommend.
The Huawei Mate 30 Pro is a beautiful phone that comes with all the features you’d want from a handset in 2019, but it doesn’t sport Google’s core services, such as the Google Play Store and that severely hampers what it can do.
FOR
Beautiful design
Lovely curved edges
AGAINST
No Google apps
Expensive
The new Huawei Mate 30 series has just debuted, and there’s no denying the Mate 30 Pro is the shining jewel in the Chinese smartphone brand’s crown.
It features top-end specs, including what looks to be a massively improved camera array in a variety of ways, all packed into a sleek design.
The problem is, it’s not clear in which countries you’ll be able to buy the new phone. Google revoked Huawei’s license to use all of Android’s services on future devices earlier this year, after an executive order in the US by President Trump.
That has had a knock-on effect which means Huawei is unable to offer Google services on its devices. So you won’t be able to access Gmail, YouTube or even the Google Play Store easily on this phone – and Huawei apparently believes this will limit the appeal of its device in certain markets.
Huawei has confirmed it won’t be ranging the Mate 30 series in all areas in Europe, and you won’t be able to get it in the UK. Huawei doesn’t release its phones in the US either. However, Huawei has confirmed that the Mate 30 Pro will be coming to Australia. Pricing and availability has yet to be determined for Australia.
That aside, we’ve taken a look at the technology on offer from Huawei at the company’s launch event in Munich, Germany. So what does the Mate 30 Pro have to offer?
Huawei Mate 30 Pro price and release date
As we’ve already noted, it’s unclear if you’ll be able to buy the Huawei Mate 30 Pro in your home country. There’s always the chance that you’ll be able to import the handset if you can’t buy it through domestic outlets, but getting Google’s services onto the phone is likely to be a complicated process.
The Huawei Mate 30 Pro price is €1,099 (around $1,200 / £970 / AU$1,700), which gets you 8GB of RAM and 256GB of storage. That’s for the 4G version of the phone; Huawei is also offering a 5G variant for €1,199 (around $1,300 / £1050 / AU$1,850).
Design and display
The Huawei Mate 30 Pro feels like a premium smartphone when you first pick it up, and that’s mostly because of its curved display. The screen curves stylishly around the sides of the handset, giving the phone a unique look that reminds us of the Samsung Galaxy S7 Edge.
The 6.53-inch display looks great at first glance, and the quality of the screen seemed to be strong in our initial testing.
The back of the phone is made of glass, and comes in Green, Silver, Purple and Black finishes. There’s also a leather version of the phone, which is made of a vegan-friendly material rather than traditional leather, which comes in Orange or Forest Green.
It’s currently unclear if the leather version will cost more than other variants of the Mate 30 Pro.
The phone is IP68 water and dust resistant, so it’ll be able to take a dip in water without being ruined, and the edges of the phone are made of metal that feels premium.
OS and specs
The Huawei Mate 30 Pro is running the latest Android 10 software, and it comes with Huawei’s own overlay called EMUI10.
In our short hands-on time with the phone this seemed to work smoothly, but it’s important to note that Huawei doesn’t have access to Google’s services on this phone.
That severely limits what the phone is capable of doing, as you’ll be limited to apps provided by Huawei on the device by default, or those offered through Huawei’s own app store.
It’s currently unclear how much will be missing from the device, but it’ll be a big deal for a lot of people outside of China.
In terms of spec, the Huawei Mate 30 Pro is sporting some of the very best, including the recently launched HiSilicon Kirin 990 chipset, which is set to sport enough power to keep up with the top-end Snapdragon and Exynos chipsets from its competitors.
The phone comes with 8GB of RAM and 256GB of storage. The standard version of the phone is limited to 4G connectivity – you’ll have to spend a little extra to get the 5G version.
Camera and battery
Huawei has once again put a lot of focus on the cameras in its Mate series. There are three rear cameras – 40MP f/1.6 wide-angle, 8MP f/2.4 telephoto and 40MP f/1.8 ultra-wide – plus a 3D depth sensor.
All of that makes for a strong camera setup on paper, but we’ve been unable to properly test the camera in our hands-on time so far – we’ll be sure to push the Mate 30 Pro to its limits here and in other areas for our full review.
The front camera on the phone has a whopping 32MP sensor, alongside a time of flight depth sensor.
We’ve yet to be able to test the battery life on the Huawei Mate 30 Pro, but we’d expect it to be strong with its 4500mAh cell inside. There’s fast-charging technology on offer, plus fast wireless charging.
The Huawei Mate 30 Pro looks to be the best phone the company has produced to date, with specs that enable it to go toe to toe with the top phones from Samsung, Apple and others.
Without Google’s core services, however, the Mate 30 Pro is unlikely to impress many outside of China, and it’s going to be hard to recommend without the Google Play Store on board.
How’s your battery life since updating to iOS 13? If you recently updated to iOS 13 and now feel like iPhone battery is worse or draining faster than usual, then you’re probably not alone. Every year, when a new iOS release comes out, with it comes a host of complaints about draining battery and reduced battery life, and with iOS 13 there is no exception with some users who feel their devices battery is much worse than before.
If you think battery life has decreased since updating to iOS 13, read on to learn why this might be, and what you can do about it to improve battery life in iOS 13.
10 Tips to Fix iOS 13 Battery Life Draining Issues
Here are ten tips and tricks to help resolve bad battery life with iOS 13 and ipadOS 13.
1: Just updated to iOS 13 and battery life is worse? Patience!
If you just now updated to iOS 13 (or sometime quite recently) and have discovered battery life is notably worse on an iPhone with iOS 13, there may be a good reason for that and it’s directly related to updating iOS system software, so don’t freak out because this will likely resolve on it’s own.
When you update to iOS 13, iOS will go through a variety of background tasks and maintenance activity, including things like indexing the device with Spotlight, Photos, finalizing restores with iCloud, other iCloud activity, amongst other system-level tasks. Not everyone notices any change in battery as a result of this background activity, but some users may feel like their battery is draining quicker than before.
Not to worry, the solution to this is as simple as can be: plug in the iPhone, iPad, or iPod touch, and wait.
A great time to do this is just plug in your device that just installed iOS 13 and leave it plugged in to charge over night, and make sure it’s connected to wi-fi. Depending on how much stuff is on the iPhone or iPad, usually it only takes a few hours, but sometimes it may take a day or two for things to settle down, particularly if the device is restoring a ton of stuff from iCloud or syncing data from elsewhere.
2: Install New Software Updates to iOS and Apps
iOS 13 came out and was quickly followed by iOS 13.1 which may have been overlooked by some users due to their release proximity to one another, so be sure you check for and install new iOS system software updates when they arrive.
You can check for new iOS updates by going to Settings app > General > Software Update
Likewise, you might want to update apps as well, since some may have bugs that were patched. With iOS 13 and later, you can update apps by going to App Store > Click your profile icon in the corner > Updates
Software updates often contain bug fixes and improvements, and if something like a bug or known issue is impacting battery life it’s likely to be resolved in a future software update.
3: See What’s Consuming iOS 13 Battery Life
You can easily see what apps and activity is using your battery by going to the iOS Settings app:
Open the Settings app and then choose “Battery”
Look through the list to see what apps and services are using battery
You’ll often find that apps that use video or location drain a lot of battery, so things like social networks, video streaming, and games are often high consumers of battery power.
If you see an app that is draining battery but you don’t even use the app, simply deleting the app from iOS 13 is likely reasonable – why keep something you don’t use anyway?
4: Check if Battery is Healthy & Operating Properly
You can check iPhone battery health through Battery settings as well.
Open the Settings app and then choose “Battery”
Go to “Battery Health”
If the battery is not operating at peak performance it may need to be replaced to restore full functionality and expected battery life to the iPhone.
5: Disable Background App Refresh in iOS
Background App Refresh allows apps in the background to stay updated and refresh themselves, but doing so can have a negative impact on battery life because it means that inactive apps can still use resources on the iPhone or iPad.
Open the “Settings” app, then go to “General”
Choose “Background App Refresh” and turn this switch to the OFF position
Disabling Background App Refresh on iPhone or iPad is often used as an easy way to improve battery life on devices, and iOS 13 is no different.
6: Lower the Brightness of the Display
Having the display brightness up very high at or near 100% can look very nice but it also reduces battery life due to increased power consumption. If you’re indoors in particular, lowering screen brightness can make a notable difference in reducing batter drain.
Open the “Settings” app then go to “Display & Brightness”
Adjust the brightness slider to a lower level while still allowing you to see the screen well
How bright or dim you keep your iPhone is going to be different for everyone, so just mess around with it and find what works for you.
You can also access display brightness at anytime through Control Center in iOS 13.
7: Disable Raise to Wake & Tap to Wake
Raise to Wake uses the accelerometer on iPhone to determine if the iPhone is being lifted up and then wakes the screen accordingly, and it works quite well. But having this feature on can also cause the screen to be on more than it may otherwise be for some users, particularly if you walk or jog with your iPhone in your hand.
Open “Settings” and go to “Display & Brightness”
Locate “Raise to Wake” and turn it off
If you have disabled raise to wake and later wish to turn it back on again, it’s just a matter of toggling that same setting back on.
8: Use Low Power Mode on iPhone
Low Power Mode is an excellent feature that reduces activity and power on the iPhone to prolong the battery life, and it can offer a huge boost to battery life on iPhone in iOS 13 and other versions too.
Open the Settings app, then go to “Battery”
Toggle “Low Power Mode” to be ON
When Low Power Mode is on, you’ll notice the battery icon in your iPhone menu bar is yellow in color to indicate so.
9: Disable Unneeded Location Services for Apps
Location Services are undeniably useful but they can use a lot of battery life. Outside of apps like Maps for getting directions, there are tons of other apps that may want your location but don’t actually need it to function, so turning those off can be helpful and may improve battery life in iOS 13 for you:
Open the Settings app, then go to “Privacy”
Choose “Location Services”
Scroll down to the app list an disable location access for apps that do not explicitly require location data for core functionality by tapping on them and choosing “Never” or “While Using the App”
You can also explore the “System Services” section and decide if you want some of those features to access your location or not.
10: Force Reboot the iPhone
Sometimes just forcing the iPhone or iPad to reboot can resolve battery issues, particularly if there’s some errant background app behavior or something else unusual going on. How you force reboot a device depends on the iPhone:
• Force rebooting iPhone XS, iPhone XR,iPhone XS Max, iPhone X, iPhone 8, iPhone 8 Plus: Click the Volume Up button then let go, click the Volume Down button then let it go, now press and hold down the Power button and continue to hold the Power button until the Apple logo appears on the screen. This is how to force restart iPhone X, iPhone XS, iPhone XS Max (and iPhone 11 too).
• Force rebooting iPhone 7, iPhone 7 Plus: Hold down the Power Button and Volume Down button until you see the Apple logo on screen. This action will restart the iPhone 7.
• Force rebooting iPhone 6s, iPhone 6s Plus, iPhone SE: Hold down the Power Button and Home button together until you see the apple logo on the display. That is how to force reboot any iPhone or iPad with a clickable Home button.
Huawei has launched its newest smartphone, the Nova 5T. It’s also the latest member of the Nova 5 series, sporting a 6.26-inch screen, flagship-grade Kirin 980 chipset, and quad rear cameras. Can the Nova 5T establish itself as one of the best smartphones of 2019, just like what the Nova 3 accomplished in 2018?
Comparison
Design and Construction
If the Huawei Nova 5T seems familiar, that is because you have already seen it before. In a way, it’s already in the market, just under a different name – the Honor 20. Yes, the Nova 5T is the Honor 20 but with some changes externally and internally.
On the front, is the 6.26-inch screen with thin bezels that curves on the edges. Placed above it is the earpiece that’s also hiding the notification light. As you might have noticed on the corner is the hole-punch for the 32MP selfie camera. We’ll discuss more of it later. Up top are the secondary microphone and the light and proximity sensor.
On the left is the tray for dual nano-sized SIM cards. While on the right, are the volume rocker, the power/lock button that also doubles as a fingerprint scanner.
Although we’re more accustomed to rear-mounted or in-display fingerprint scanners, I find the side-mounted ones tend to make more sense since your fingers naturally rest on that location when you hold the phone.
Found up top is the secondary microphone and the light sensor, while down at the bottom are the main microphone, USB Type-C port, and the loudspeaker. Sorry guys, there’s no 3.5mm audio port, but Huawei included an adapter in the package.
At the back, we have the protruding camera module that houses three cameras, and the LED flash then placed just beside it is the fourth camera. The glass back, on the other hand, produces a 3D light effect which is different from the Honor 20.
Even with the large screen, the Nova 5T feels compact and premium. The sides and corners are rounded, so it’s easier to grip. The metallic frame is cool to the touch and has a glossy finish which matches the glass panels. I hope that Huawei includes a protective case in the final retail package to protect it from bumps, scratches, and fingerprints.
Display and Multimedia
If you like big screens, the Nova 5T has 6.26-inches of it. It has a Full HD+ resolution which equates to a good 412ppi. You can also adjust the resolution to a lower HD+ if you want to save on power or activate Smart resolution to have the phone adjust it for you.
It uses an IPS panel, so colors are natural with great viewing angles. You can also choose between two color modes: Normal and Vivid, depending on your preference. A screen protector is also pre-installed, which is nice.
Going back to that hole-punch, this can be distracting to some, especially if you’re using apps with important elements in that corner. If you don’t like it, you can hide that hole by activating a toggle inside Settings. It doesn’t look good though, as the effect makes it look like you have an unusually thick bezel at the top.
As for the audio, the single down-firing speaker is loud and crisp. Bass is weak, though, which is expected, but it’s good enough for watching YouTube videos or streaming Netflix. When gaming, make sure to place on an upside orientation so that it doesn’t get muffled by your hand.
Camera
The Nova 5T is equipped with four rear cameras. Looking from top to bottom, we have the 16MP ultrawide, 48MP Sony IMX586 main, and 2MP depth assist. Huawei dropped the telephoto camera in favor of a 2MP macro which is placed outside of the camera module. If you want to zoom, the high-resolution main camera can provide up to 10x digital zoom.
Given the different kinds of lenses, the Nova 5T has become a very versatile shooter. Camera quality is great, especially in bright scenarios. Images are sharp with really vibrant colors and good contrast. However, the AI sometimes can be too aggressive, especially when it applies HDR. It’s okay though as you can still adjust it on your favorite photo editing app.
Low-light performance is also impressive, and there were times that it was able to illuminate the whole scene and apply HDR without having to activate Night Mode. It’s not perfect though, as noise tends to creep in. If you want better quality, that’s when you want to use Night Mode. It’s AI Image Stabilization was proven very capable of handling shakes to minimize blur.
When it comes to video recording, it can shoot at up to 4K resolution at 30 fps. What I like about it is that you can shift from the normal field-of-view to ultrawide, to zoom in one shot. Also, video stabilization is smooth that it looked like we recorded with the help of a gimbal. Watch the sample video below.
OS, UI, and Apps
Running the software department is the Android 9 Pie-based EMUI 9.1, which is also found in Huawei’s most recent devices. The UI is clean and uses multiple home screens to house the apps.
It doesn’t have pre-installed applications aside from the usual Google apps and services, which is good. If you’re a fan of Dark mode, unfortunately, this one doesn’t support it probably because it doesn’t have an OLED panel like some of its more powerful P and Mate cousins.
When it comes to storage, you’re getting 128GB with 110.18GB as usable. That’s still a huge amount but if you’re thinking of expanding it using a microSD card, sad to say that it doesn’t have that capability.
Performance and Benchmarks
Powering the Nova 5T is a HiSilicon Kirin 980 with an octa-core CPU, Mali-G76 MP10 GPU, and 8GB RAM – the same hardware that is powering the Huawei P30 Pro and Mate 20 Pro. If we’re going to classify the Nova 5T, it’s technically a flagship.
As expected, performance is excellent in all tasks, including gaming where GPU Turbo 3.0 shines. It was able to run PUBG Mobile in its highest settings without any loss in fluidity. It can get warm at the back near the cameras, but not to the point of causing any trouble or discomfort.
We performed two sets of benchmarks, one in Normal mode and one in Performance mode, to see how much computing power the Nova 5T can provide when handling basic and heavy tasks.
Normal
Performance
AnTuTu
199490
319526
PC Mark (Work 2.0)
7810
8998
3D Mark SSE
2,144 (OpenGL ES 3.1)
4,275 (OpenGL ES 3.1)
2,243 (Vulkan)
4,363 (Vulkan)
Geekbench
3,293 (Single-Core)
3,356 (Single-Core)
9,511 (Multi-Core)
9,972 (Multi-Core)
5,772 (RenderScript)
8,696 (RenderScript)
AndroBench
787.74 MB/s (Read)
787.74 MB/s (Read)
572.33 MB/s (Write)
572.33 MB/s (Write)
The numbers show the difference in performance. It even topped the scores of the P30 Pro and Mate 20 Pro in our reviews.
Connectivity and Battery Life
When it comes to connectivity, the Nova 5T has dual-SIM support, LTE, WiFi ac, Bluetooth 5.0, NFC, and USB 2.0 Type-C. Again, what’s only missing is the 3.5mm audio port.
The Nova 5T is equipped with a 3,750mAh battery which is a decent capacity although it would have been nicer to have 4,000mAh instead. Despite that, we’re still getting around 9-10 hours of mixed usage. In PC Mark, it got 14 hours and 16 minutes of battery life. While in our video loop test, we got 15 hours of playback. It supports Huawei’s 22.5W SuperCharge, and we were able to replenish the battery in under 2 hours.
Conclusion
Let’s do a quick rundown. The Nova 5T has an attractive and premium design, nice display, good cameras, decent battery life, and excellent performance. If you’re coming from the Nova 3, there’s still plenty of reasons to upgrade to this phone. So, if you’re looking for a flagship-grade Huawei smartphone but don’t have the budget for the P30 Pro, this is the one to get.
Huawei Nova 5T specs:
6.26-inch FHD+ (2340 x 1080) 19.5:9 IPS display, 412ppi
HiSilicon Kirin 980 (7nm) 2.6GHz octa-core CPU
Mali-G76 MP10 GPU
8GB RAM
128GB of storage
48MP F1.8 (main) Sony IMX586+ 16MP F2.2 (ultrawide) + 2MP F2.4 (macro) + 2MP F2.4 (depth)
32MP F2.0 front camera (in-screen)
Dual-SIM
4G LTE
WiFi 802.11 a/b/g/n/ac
Bluetooth 5.0
NFC
GPS, A-GPS, GLONASS, BDS, GALILEO, QZSS
USB 2.0 Type-C
Fingerprint scanner (side-mounted)
Face Unlock
EMUI 9.1 (Android 9 Pie) w/ GPU Turbo 3.0
3,750mAh battery w/ 22.5W SuperCharge
154.25 x 73.97 x 7.87 mm
174 g
Black, Crush Blue, Midsummer Purple
What I liked:
Premium design
Good cameras,
Nice display
Great flagship performance