Want to clear and disable Significant Locations data stored on your Mac? For some quick background, your Mac will attempt to determine what locations are significant to you in order to provide you with location related information for Maps, Photos, Calendars, and with other apps too. These stored places are referred to as “Significant Locations” and can be very helpful for traffic and directions predictions, along with other location related assistance.
Some Mac users may prefer to disable the Significant Locations feature and clear any existing Significant Locations data from the Mac, and this tutorial will show you how to do that.
How to Clear & Disable Significant Locations on Mac
Go to the Apple menu and go to “System Preferences” and then go to the “Security & Privacy” preference panel
Choose the “Privacy” tab and then choose “Location Services”, then click the lock icon in the corner to authenticate and unlock the ability to make changes
Scroll down to find ‘System Services’ and click on “Details”
Locate the ‘Significant Locations’ settings and click on “Details” to see a list of any and all stored significant location data on the Mac
To clear all Significant Locations history, click on the “Clear History” button
Confirm that you want to clear significant locations from the Mac as well as from all other devices signed into the same Apple ID (for example, any other Macs, iPhones, iPads, etc)
Uncheck the box for “Significant Locations” then click on “Done” and exit out of System Preferences as usual
While you’re in the Location Services section of Mac system preferences, you might also decide to manage and control which apps can use location data on Mac. It can also be helpful to show the Location Usage icon in the Mac menu bar to be able to easily determine what an app or service is using your computers location data. If you never use any location specific data or services from the computer whatsoever, you can also completely disable all Location Services on Mac, but that is not recommended for most people.
It’s important to note that Apple says that Significant Locations are encrypted and cannot be read by Apple, so if you’re worried about the feature for any reason related to that, you probably shouldn’t be. Nonetheless there are many privacy and security conscious users out there who would rather minimize their location usage footprint, or even not have any type of location data kept or stored at all, regardless of its purpose.
As with all settings on the Mac, you can always reverse this decision and re-enable Significant Locations on the Mac again. Note that re-enabling significant locations will not bring back any cleared prior significant location data, however.
Some iPad Pro users report the touch screen is unresponsive at random. This can mean sometimes iPad Pro is not responding to any touch at all, or sometimes it may intermittently ignore touches or swipes or gestures, or the screen may appear to stutter or freeze after a touch, or even drop deliberate touches like typing letters on the onscreen touch keyboard of iPad Pro.
If you are experiencing random unresponsive touch screen issues with iPad Pro, try the tips below to see if they can help to improve or resolve the problem for you.
1: Clean the Screen
Before doing anything else, clean the iPad Pro screen. Press the screen lock button so that you don’t accidentally tap on anything you don’t want to, and then you just need a simple cloth and a tiny amount of water.
You can use a lightly damp cloth, don’t use any abrasive chemicals or cleaner products.
Sometimes gunk, grease, or food smudges on the iPad Pro screen can make the screen unresponsive to touch, thus cleaning the screen can be an easy solution to resolve this problem.
2: Remove the Case and/or Screen Protector
Many iPad Pro users use a case with their iPad Pro to protect it, and often those cases either include a screen protector or have a screen protector built in.
Lock the device screen, then try removing the case and screen protector from iPad Pro and seeing if the unresponsive touch screen issue continues.
Oftentimes simply removing an ill-fitting case or screen protector will resolve touch screen issues.
It’s worth pointing out that iPad Pro users with both glass and plastic screen protectors report this issue, so it’s not entirely clear if either type of the screen protector makes the problem any better or worse, or is even related at all, because there are reports of users without screen protectors that also have the randomly unresponsive iPad Pro touch screen issue.
3: Update System Software on iPad Pro
Back up to iCloud (or a computer with iTunes, or both), and then install any system software updates that are waiting on the iPad Pro by going to Settings > General > Software Update.
It’s possible that the intermittently unresponsive touch screen issue is a bug or some other issue specific to some versions of iOS / iPadOS, so updating to the latest version of system software on the iPad Pro may help.
4: Turn on Touch Accommodations
If the iPad Pro screen is still randomly unresponsive to touch, you can try enabling a system setting option called Touch Accommodations.
For iPadOS 13 and later: Go to Settings > Accessibility > Touch Accommodations > turn on “Touch Accommodations”
For iOS 12 and earlier: Go to Settings > General > Accessibility > Touch Accommodations, then turn on ‘Touch Accommodations’
Apparently you don’t need to enable or toggle any other setting within the Toufh Accommodations section, simply turning the feature on can resolve the unresponsive touch screen issue for some iPad Pro users. Thanks to a user on Apple discussions forum for offering this particular suggestion.
5: Turn Off Tap to Wake
Some users report that disabling Tap to Wake has improved their unresponsive touch screen problems on their iPad Pro.
Go to Settings > General > Accessibility > find “Tap to Wake” and turn that OFF
6: Forcibly restart the iPad Pro
Some users have reported that forcibly rebooting the device will temporarily resolve the unresponsive touch screen issue with iPad Pro. If you’re not familiar with the procedure, here’s how you can do this:
Force restarting iPad Pro (new models without Home buttons): Press and release Volume Up, press and release Volume Down, press and hold Power button until you see the Apple logo on the screen.
Force restart older Home button models of iPad Pro: Press and hold the Power button and Home button until you see the Apple logo on screen
When the device boots back up again, the touch screen should be responsive and work as expected again, at least for a while.
7: Have an Apple Pencil? Disconnect and Reconnect it
Curiously, some users have reported that disconnecting and reconnecting the Apple Pencil to their iPad Pro can improve the unresponsive touch screen issue.
Of course if you don’t have an Apple Pencil, this will not be relevant to you.
8: Backup and Restore
Backing up and restoring may resolve the issue as well. I know this is the lamest advice for troubleshooting, but it’s also a step that Apple will require of you before you have a device serviced through warranty programs, so whether you want to do it or not, you should. Just backup your iPad Pro to iCloud or iTunes, then restore it from iTunes, or reset it and restore from backup using iCloud.
Misc other tips to try resolving unresponsive touch screen
issues on iPad Pro
If the touch screen problem only happens in some apps, try deleting those apps and reinstalling them on ipad Pro
Make sure the iPad Pro has sufficient storage available on the device, if the iPad Pro is completely full performance may suffer
Make sure the iPad Pro display is not cracked or damaged
Inspect the entire iPad Pro for physical damage, as any physical damage may impact the performance of the device and would have to be fixed before regular behavior may resume
You can also try some of the other tips and solutions for when iPhone touch screen is not working and there is some crossover between the two, like cleaning the screen, updating system software, and so on.
iPad Pro touch screen still unresponsive randomly? Consider contacting Apple Support
If you have tried all of the above solutions and the unresponsive touch screen problem still persists on your iPad Pro, then you may want to contact official Apple Support directly and have them try and work the issue out with you.
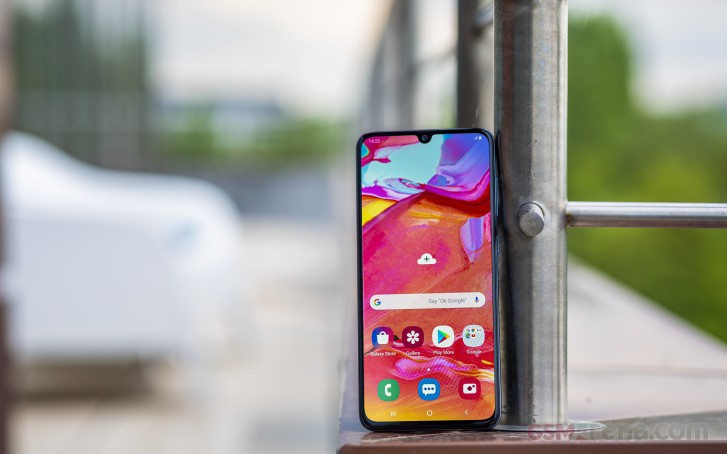
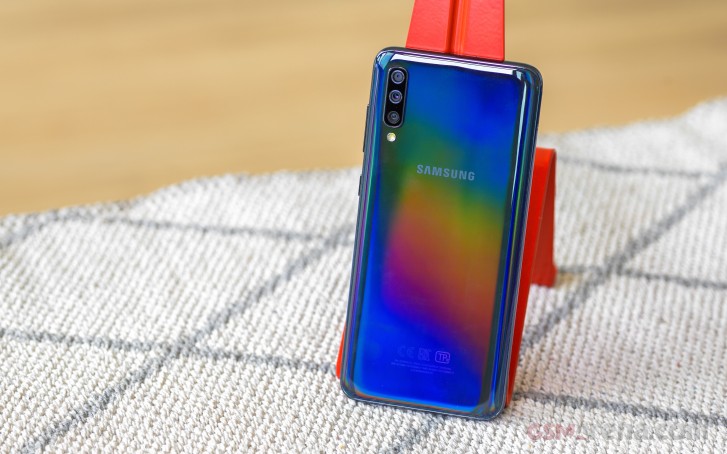
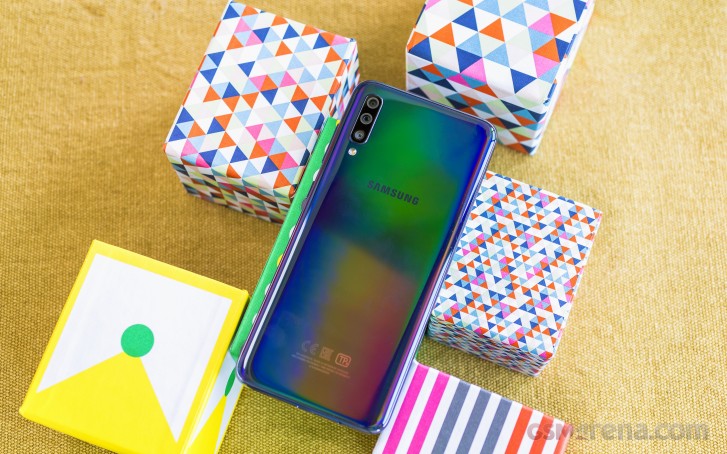
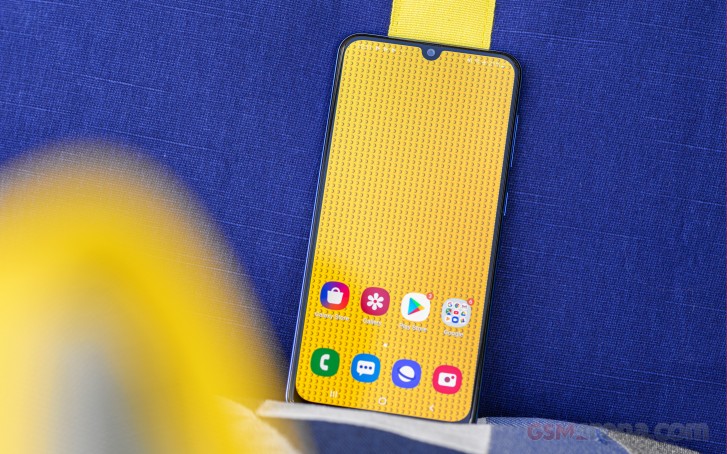
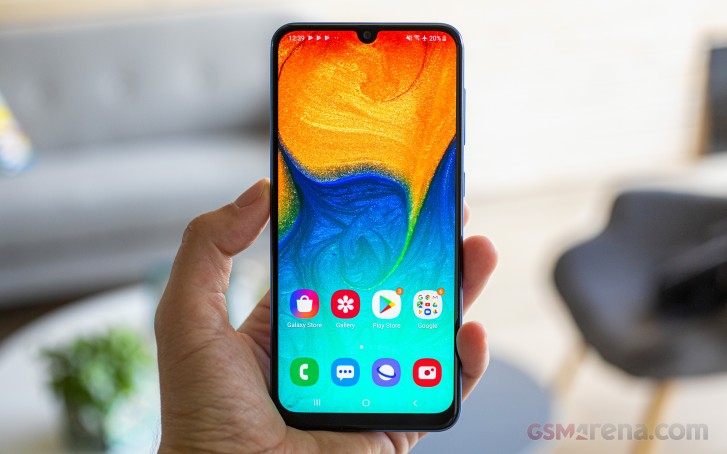
The Samsung Galaxy A70 raises the bar within the new A series – a completely reimagined lineup to lead a full-scale war in the midrange kingdom. And the rule of the Chinese makers is very much threatened, having already seen what the A40 and A50 are capable of.
The Galaxy A series are not what they used to be, thank whoever is in charge. Now they are not only affordable AMOLED-bearers, they are also jam-packed with trendy features and come priced very competitively. In fact, it’s been quite a while since we could recommend a Galaxy amidst midrangers, but now we can easily name a few.
The Galaxy A70 builds on the very balanced tri-eyed mid-ranger Galaxy A50 by enlarging its AMOLED screen and employing a higher-end chipset with a better processor. Then the camera setup on the back might be keeping its logic (wide/ultra-wide/depth) but the main snapper is now a 32MP one and it can capture 4K videos.
Finally, the Galaxy A70 has one beefy 4,500 mAh battery capable of up to 25W fast charging courtesy of USB-PD technology – a departure from the Samsung‘s Adaptive Charging that’s been around since the Galaxy S5.
Indeed, there are a ton of interesting bits within the Galaxy A70, but here are the most important ones.
Samsung Galaxy A70 specs
Body: 164.3 x 76.7 x 7.9 mm, 3D Glasstic back, plastic frame.
Screen: 6.7″ Super AMOLED, 1080x2400px resolution, 393 ppi.
Main camera: Primary: 32MP, f/1.7, PDAF; Secondary: 8MP, f/2.2, 12mm ultra-wide, fixed focus; Depth camera: 5MP f/2.2; LED flash; 1080p@30 video recording.
Selfie camera: 32MP f/2.0, 1080p video
Battery: 4,500mAh; 25W fast charging
Connectivity: Dual-SIM; LTE Cat.12 (600Mbps) download / Cat.6 upload (50Mbps), Wi-Fi a/b/g/n, GPS; Bluetooth 5.0, A2DP, LE, USB-C 2.0.
Misc: Under-display fingerprint reader, down-firing loudspeaker, 3.5mm audio port
The most prominent omission is the ingress protection that was present on all older Galaxy A phones. The new A series has neither dust nor water protection. This is the price for all those cool specs, including the high-end OLEDs. And we will gladly pay it.
Unboxing the Samsung Galaxy A70
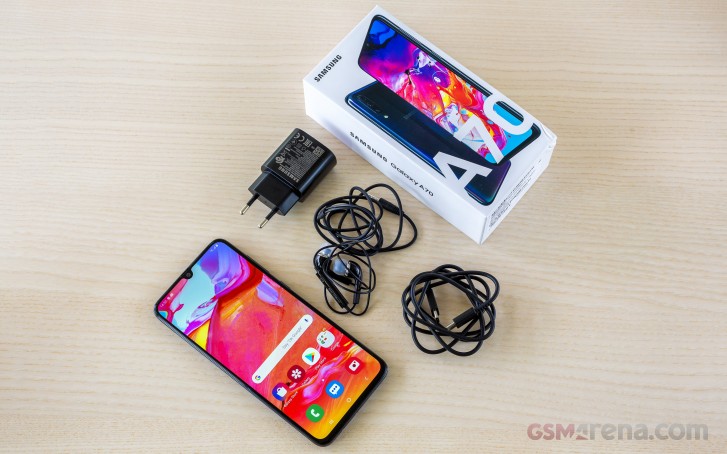
The retail box contains everything your new Galaxy A70 may need but a case. Inside, you will find a 25W-rated USB-PD charger and a USB-C to C cable – this is the first time Samsung uses this combo, but we get the feeling we will continue seeing it onwards.
Finally, Samsung is also bundling an in-ear headset ending on a 3.5mm plug.
Design
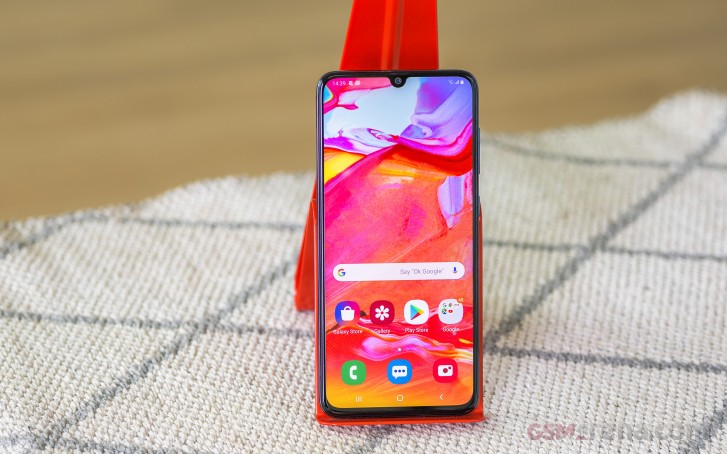
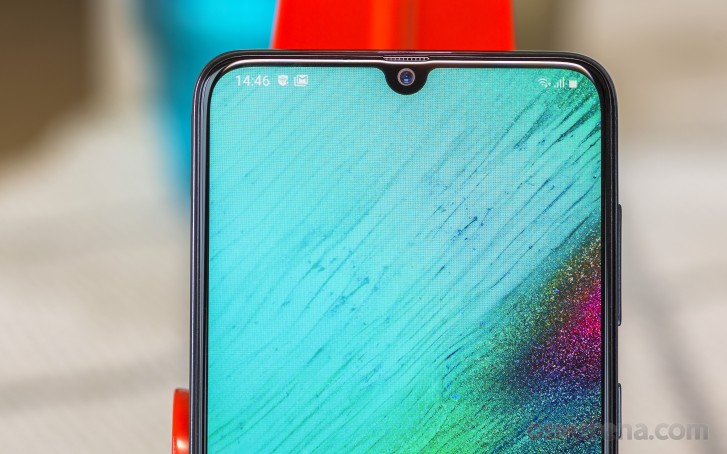
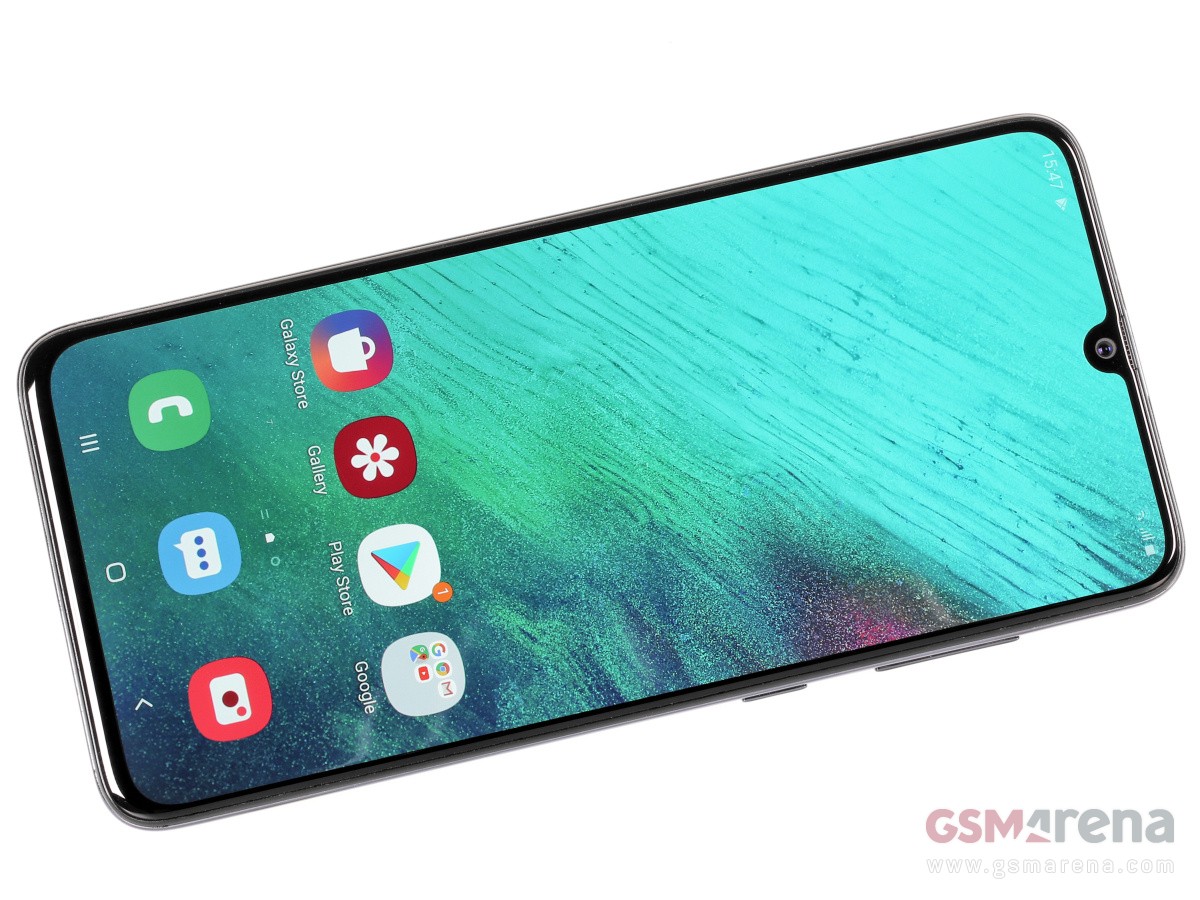
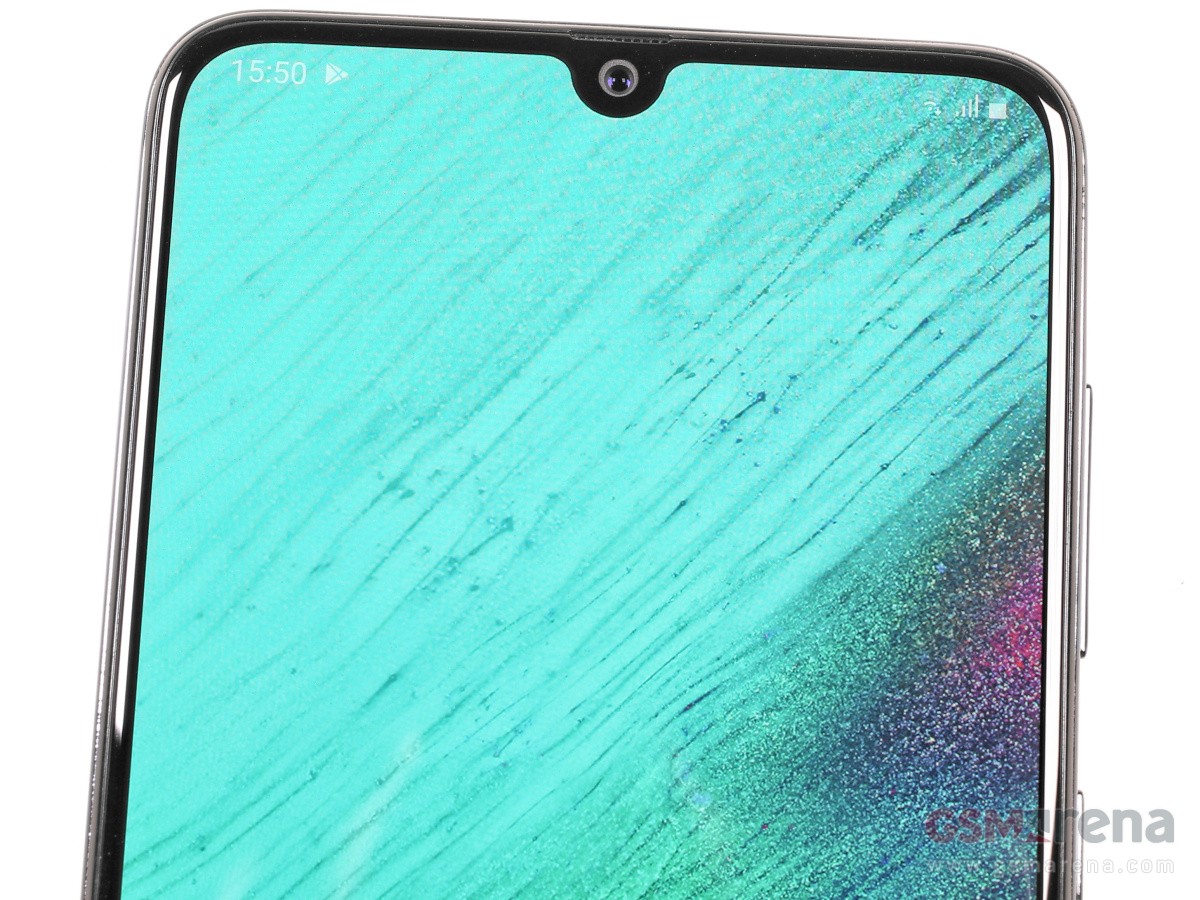
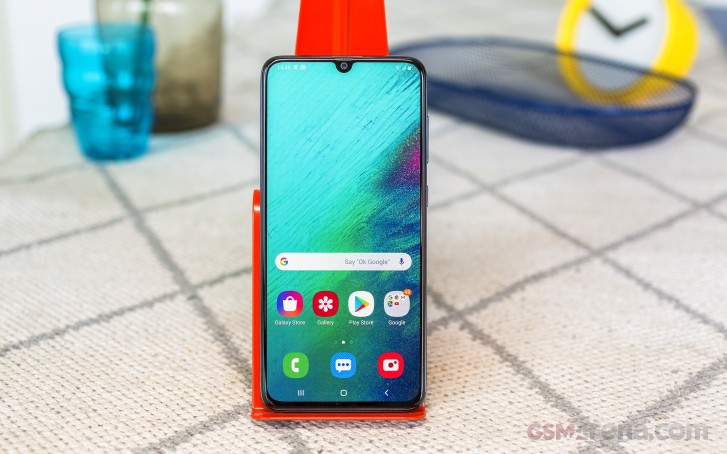
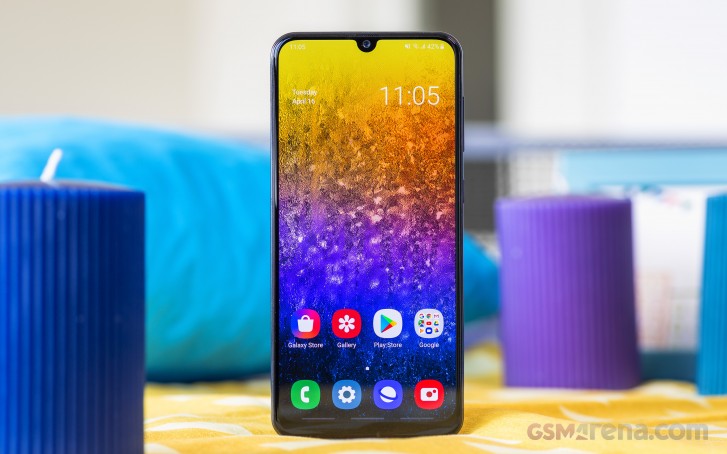
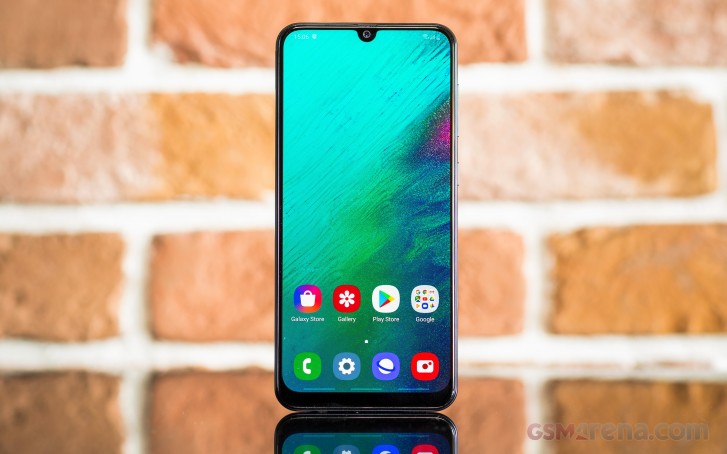
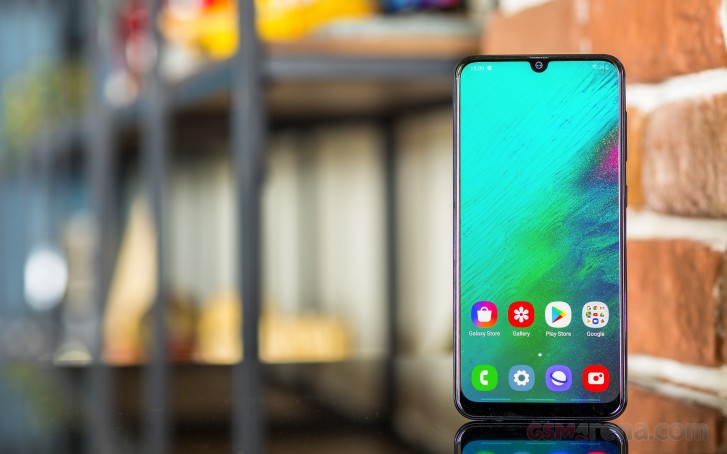
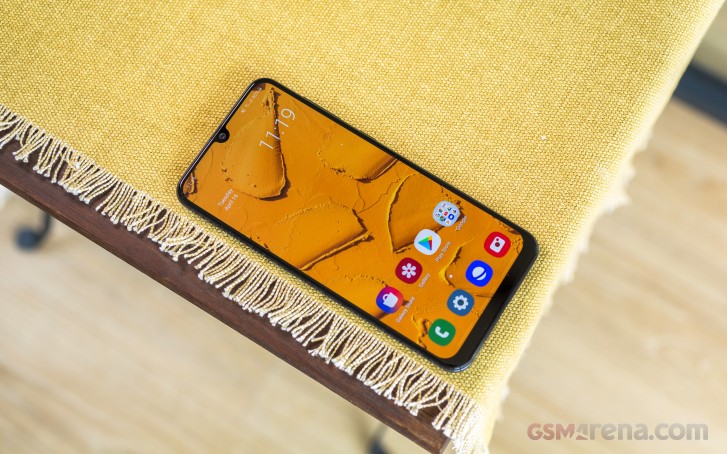
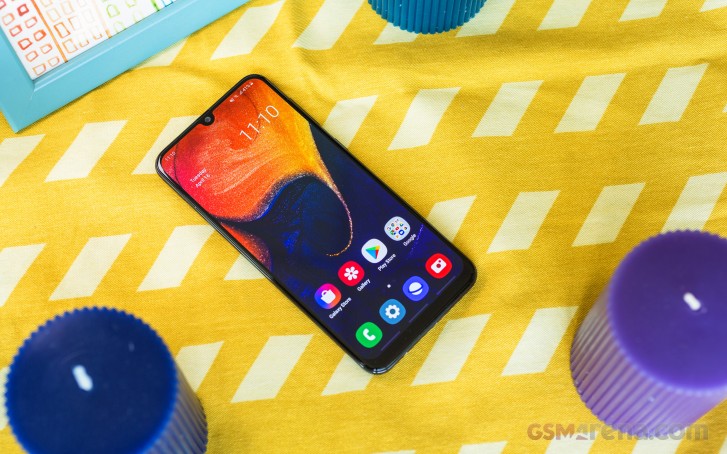
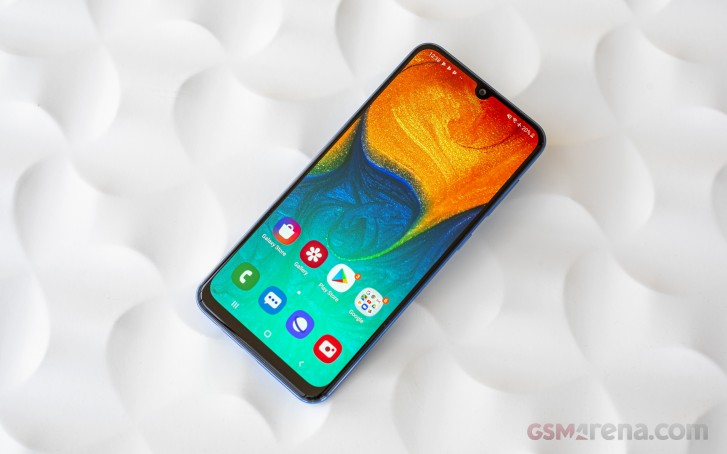
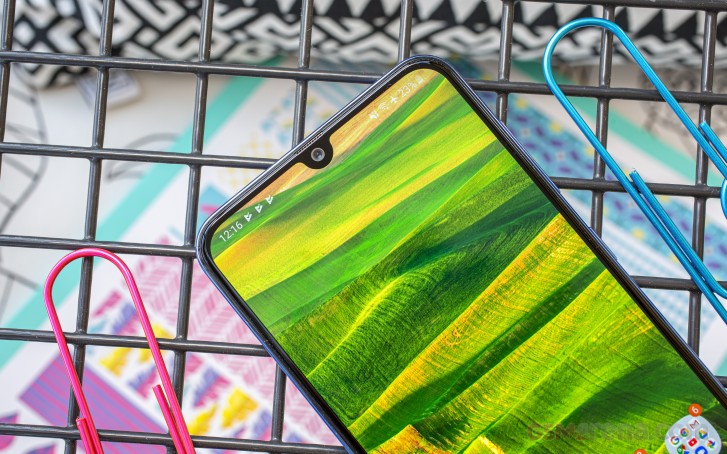
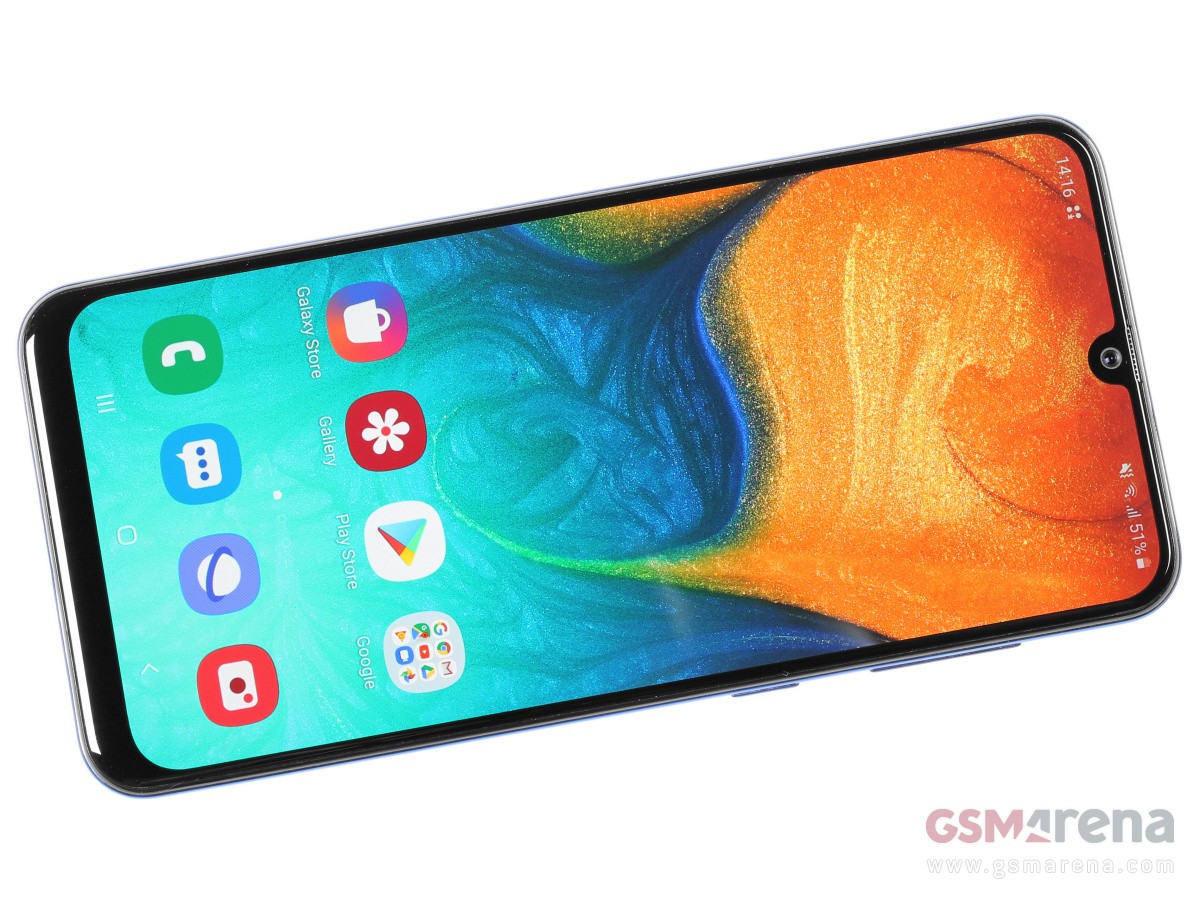
The Galaxy A70 is one of the biggest Galaxies we’ve seen so far, as large as the notch-less Galaxy A80 that’s about to come any day now. The A70 has been built around a 6.7″ Super AMOLED screen with a dewdrop-shaped notch – same size as the behemoth screens on the Galaxy S10+ 5G and the Galaxy A80.
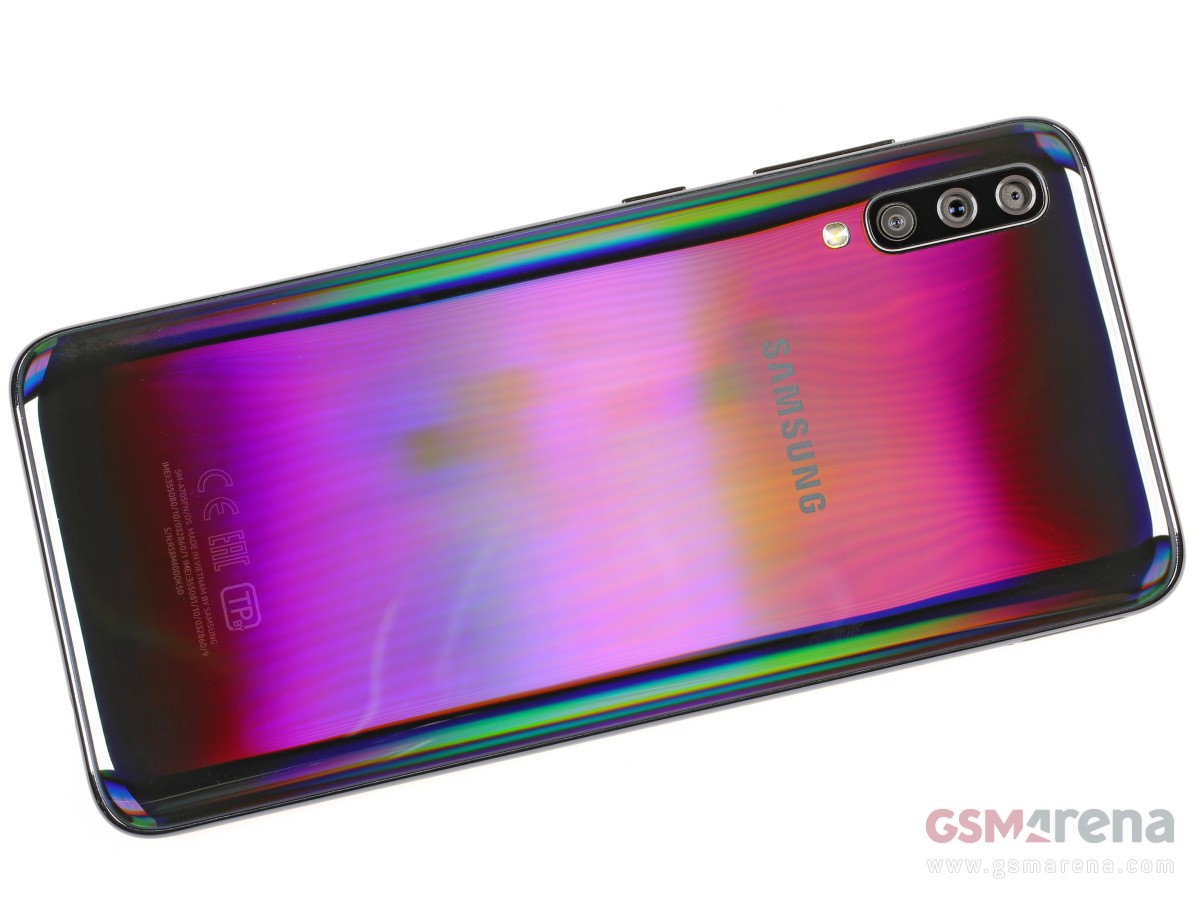
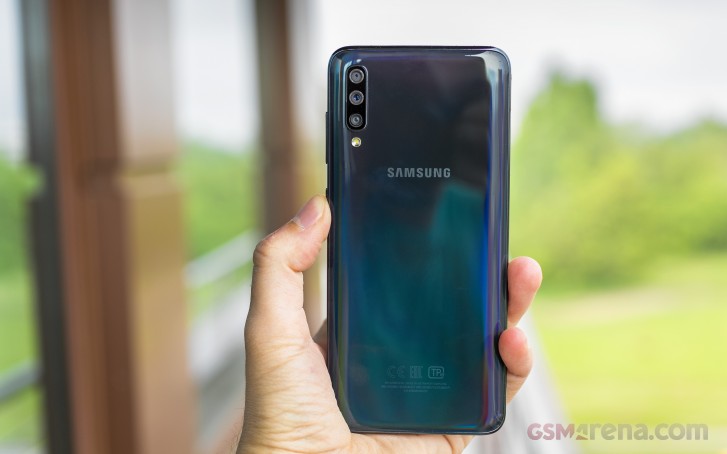
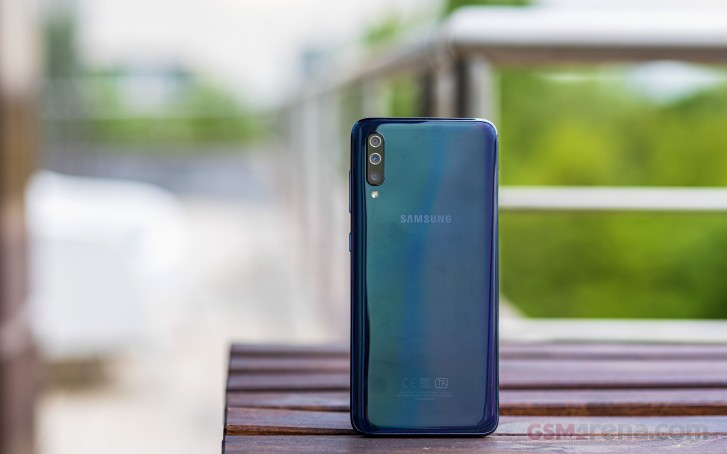
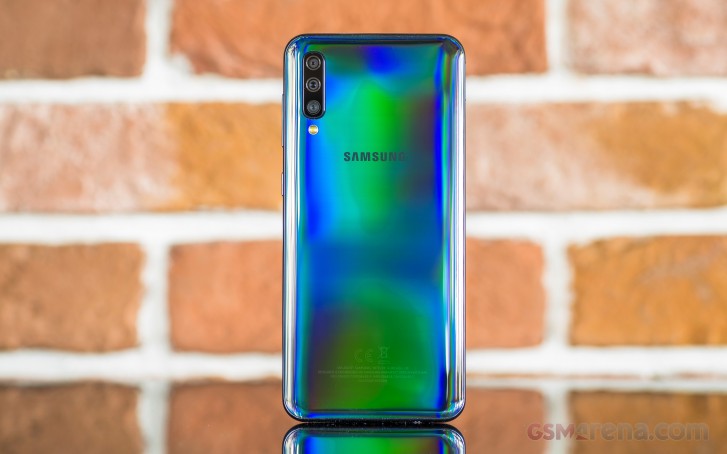
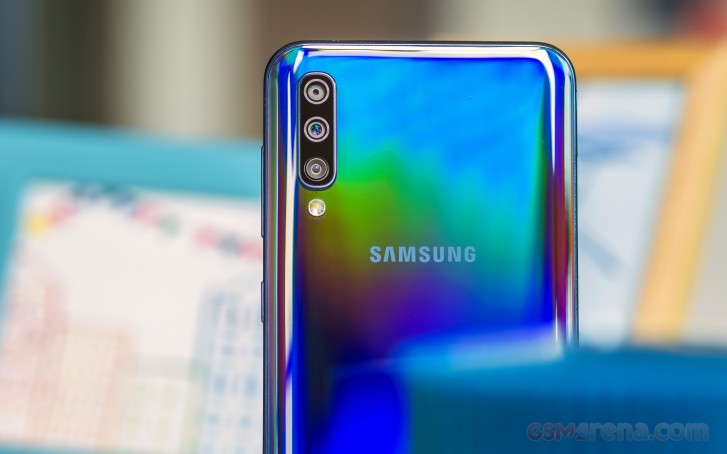
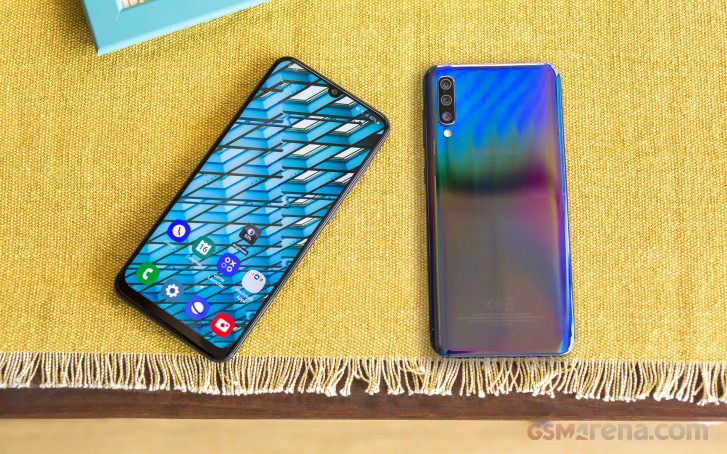
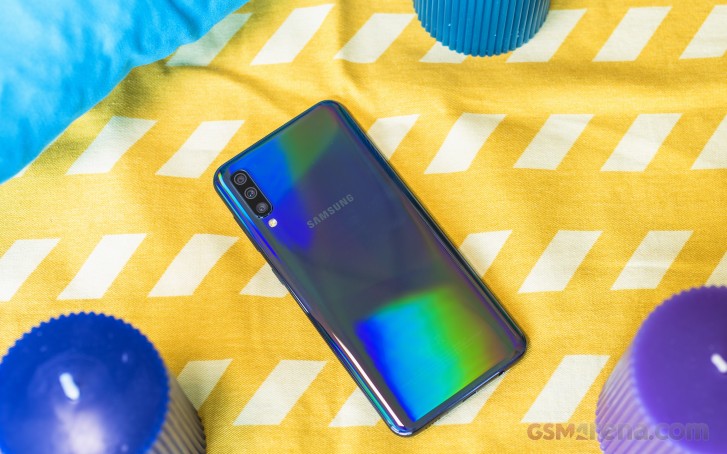
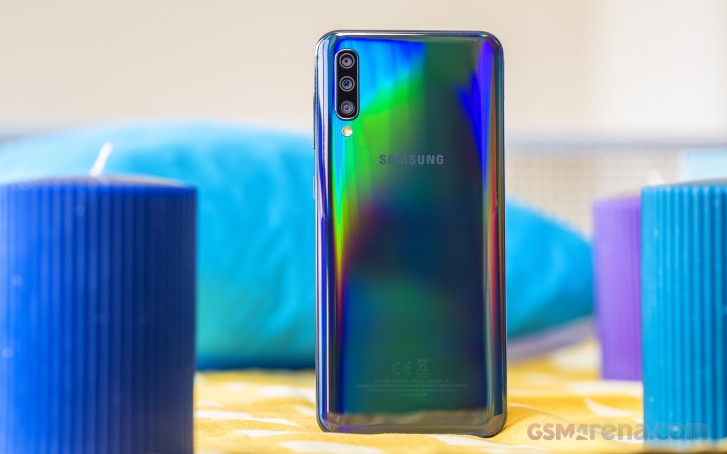
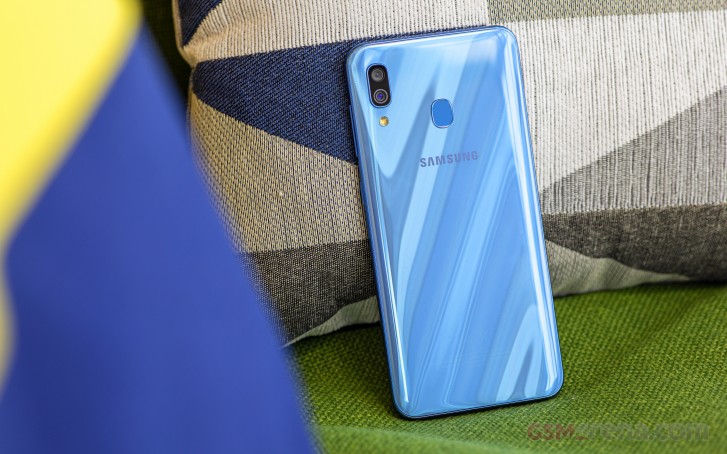
But we’re dealing with an A series device here so the choice of materials is not so premium. Instead of glass, the back is made of shiny plastic which Samsung likes to call ‘3D Glasstic’. The frame is also plastic and not metal. But hey, at least both pieces look that part and you would have a hard time recognizing them for what they are. As the name suggests, the Glasstic material can easily be mistaken for glass, especially with its shifting hues, which are very attractive.
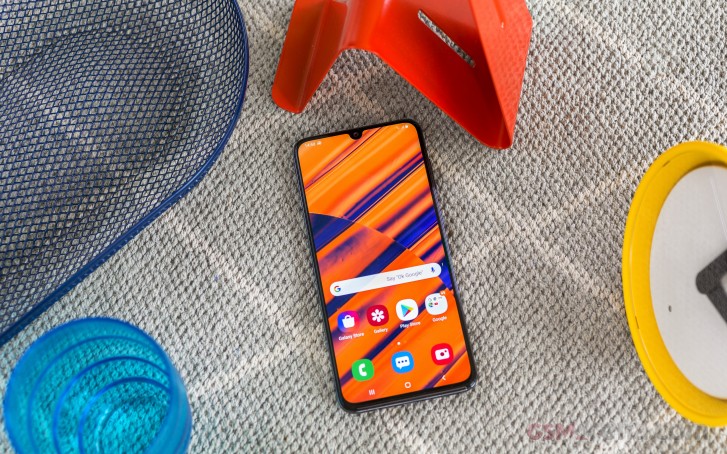
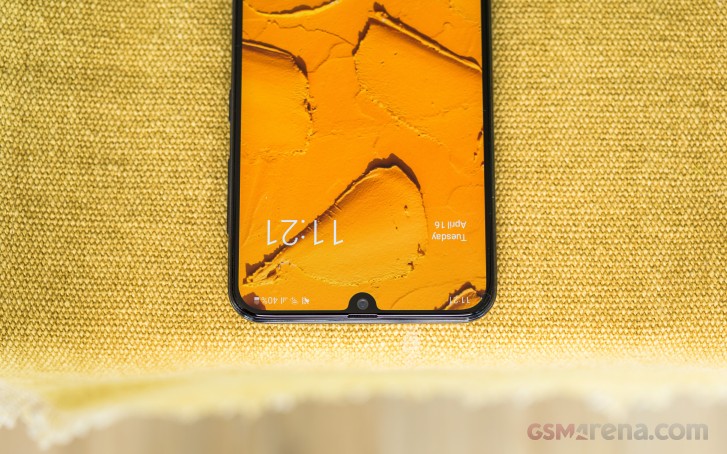
Back to the front. Obviously, it’s mostly screen with bezels as thin as those on the iPhone XS. Inside the notch are a 32MP selfie camera and one barely noticeable earpiece grille just above it. There is no notification LED on the A70.
The front glass doesn’t have the edge curves the recent Galaxy S phones have, and we are glad for that. We are not fans of those, call us old-fashioned, but too many curves completely ruin the grip and don’t let us start on the ghost touch issues. So, yes, the A70 has a flat front, and we like it as it is.
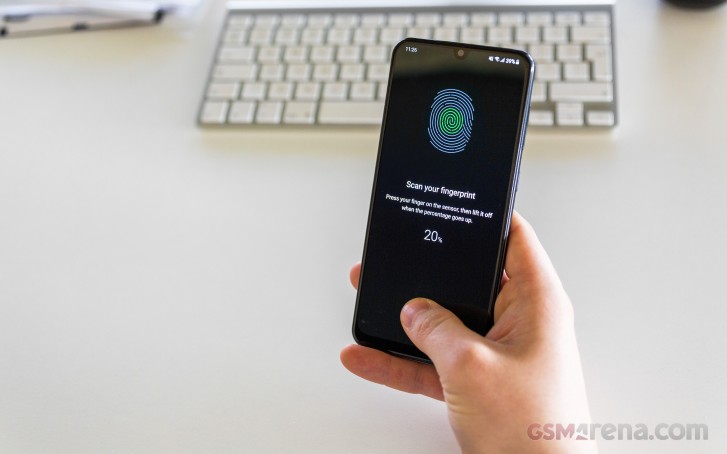
Just like the Galaxy A50 and A80, the A70 has an under-display fingerprint scanner – an optical one. The sensor is around the bottom, making it easy to reach. Its setup is straightforward, and from what we experienced, the thing is mostly reliable. Its accuracy is good and while it takes a second to recognize your finger – it’s not a sluggish process.
You don’t need to wake up the phone, just place your finger around the spot (you will get used to this within minutes) and the sensor will light up immediately and will take you to the homescreen upon a successful recognition. Sure, the experience is not as fast as with the conventional scanners, but it’s acceptable – that is as long as you are applying a proper pressure. Gentle touches won’t do it, and it will take a few tries to get used to it.
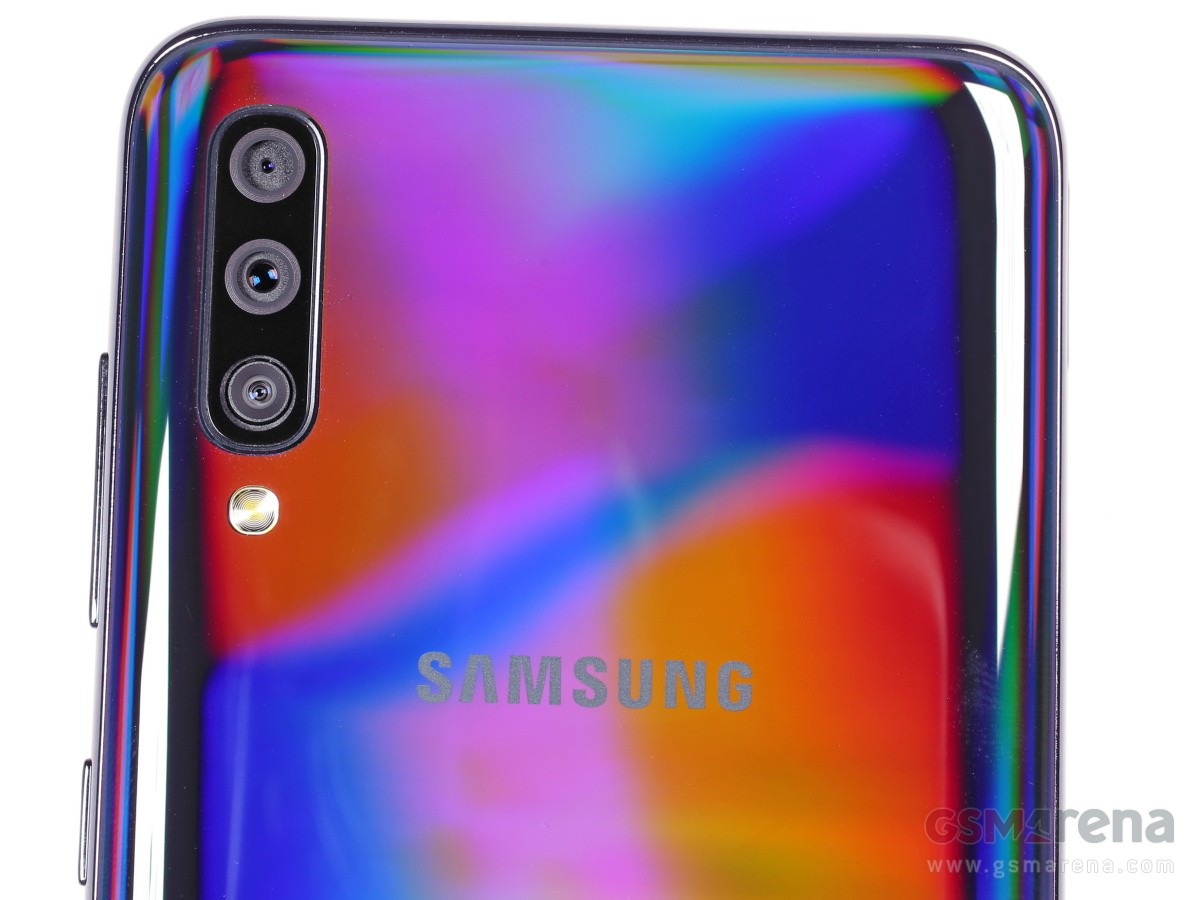
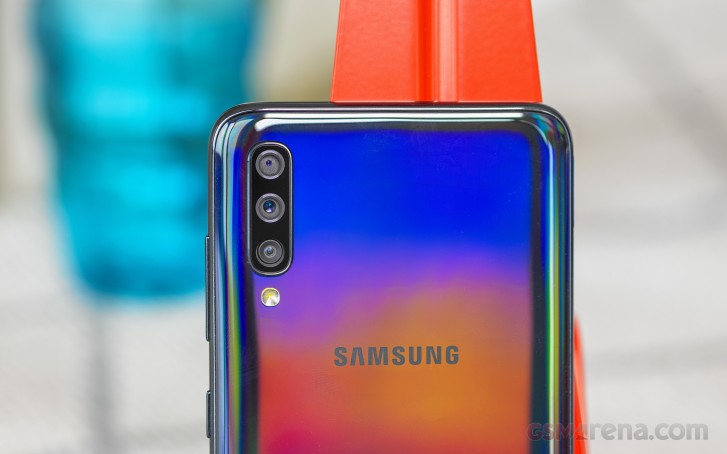
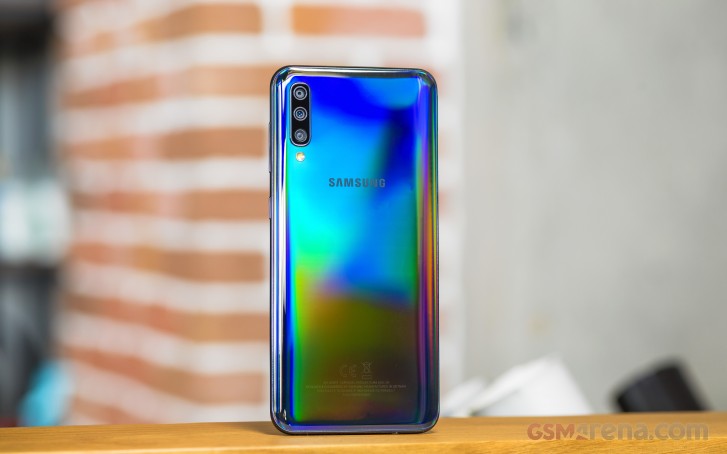
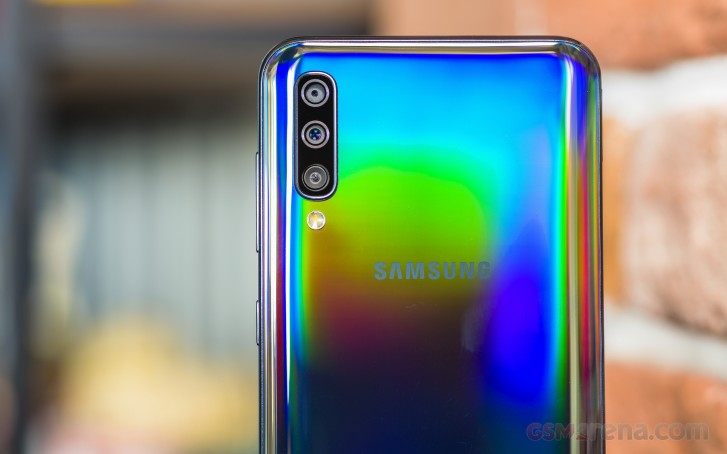
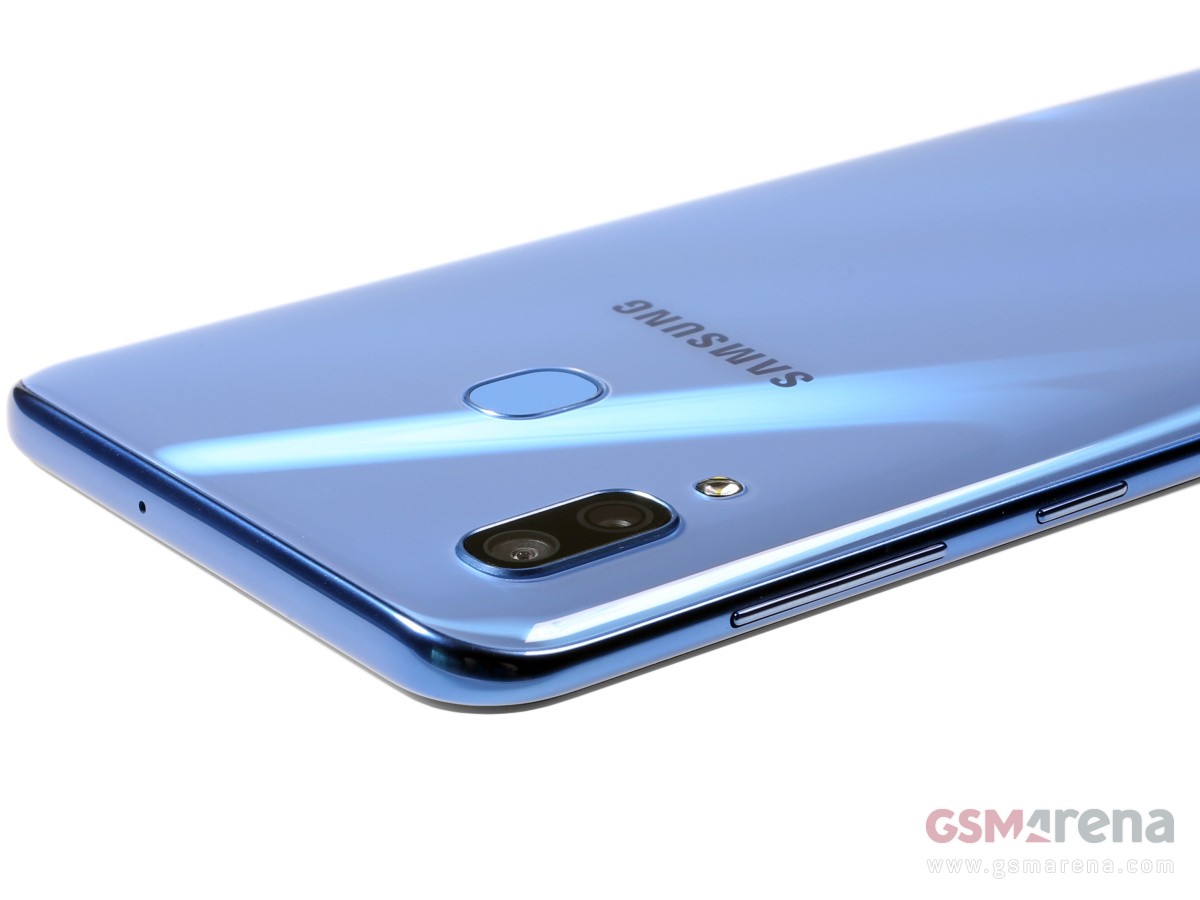
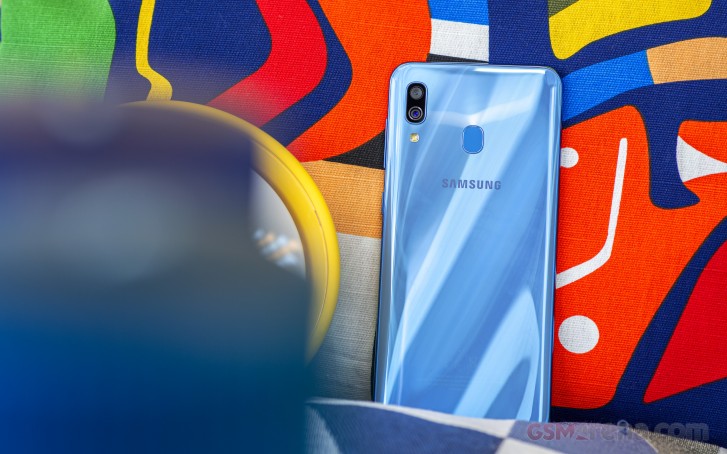
The back of the Galaxy A70 looks stunning thanks to the color-shifting paint job. Depending on the viewing angle, you will see purple, blue, green, or gradients of those three. Samsung calls this chameleon hue Black, but the only time you can see it black-ish is when you are looking at the back at nearly 180-degree angle.
While many other makers are using such gradient paint jobs, Samsung‘s still feels unique and easily recognizable. You can never pinpoint an exact color, and that’s probably the reason why the Koreans called it Black in the end.
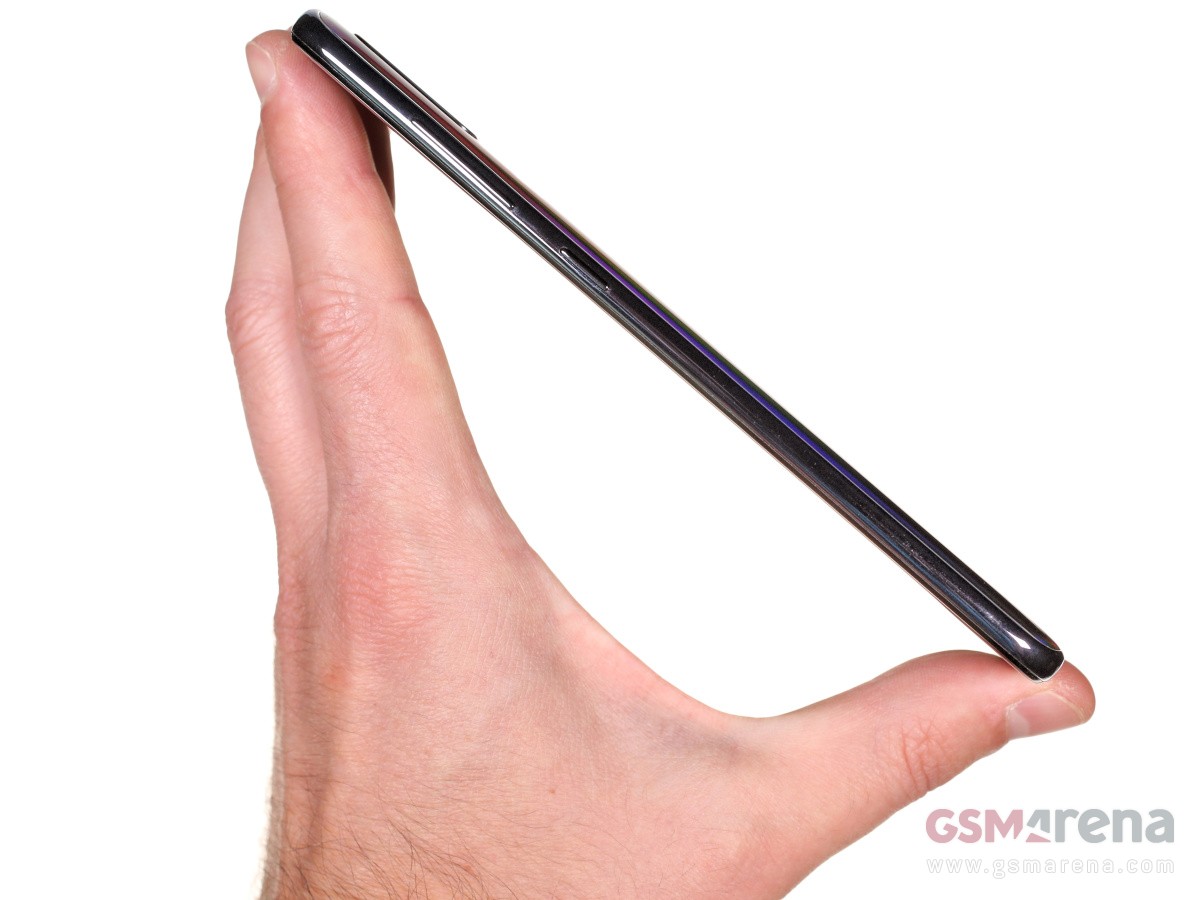
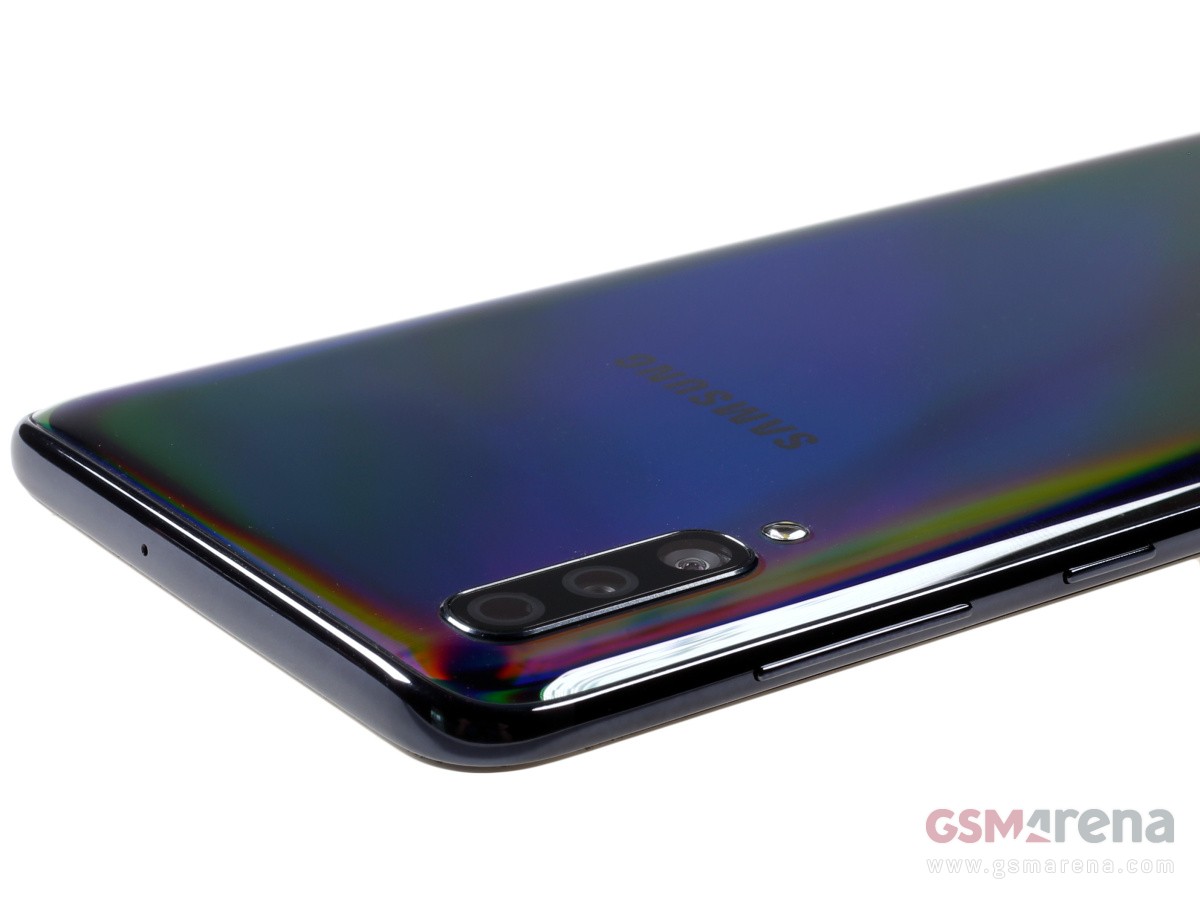
The rear glass is bent towards the long edges as we’ve seen it on many smartphones, which makes the A70 look thinner and prettier. There is no sharp transition to the frame, which has some curves too, and the overall grip isn’t that good.
But while the plastic frame is glossy, Samsung has added something to the paint that makes it sticky, and the grip is quite okay.
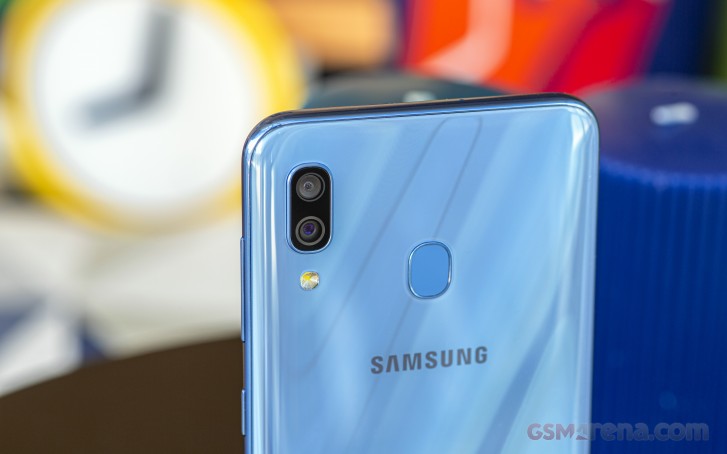
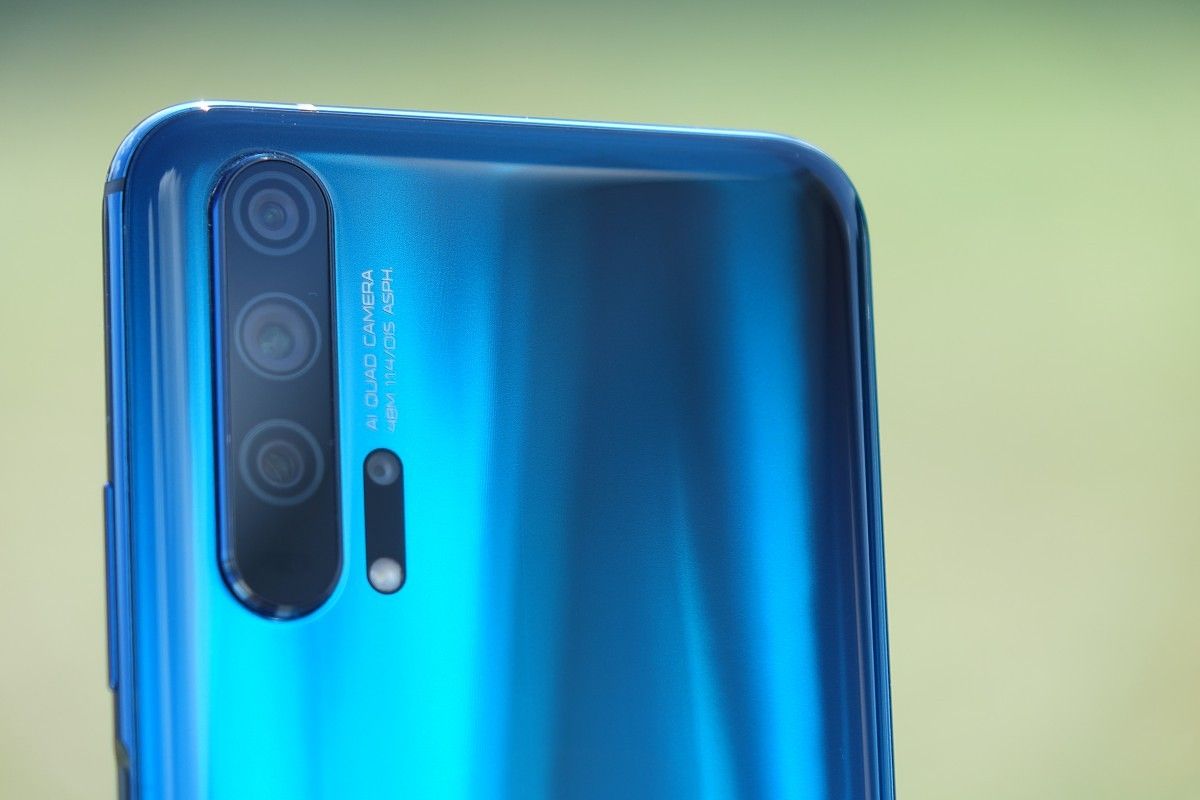
The triple-camera setup on the back is humping by just 1mm or less, and it won’t make the phone wobble on a flat surface. The top snapper is the 5MP depth sensor, followed by the 32MP main camera, and the final one is the 8MP ultra-wide-angle shooter. Outside of the setup sits the single-LED flash.
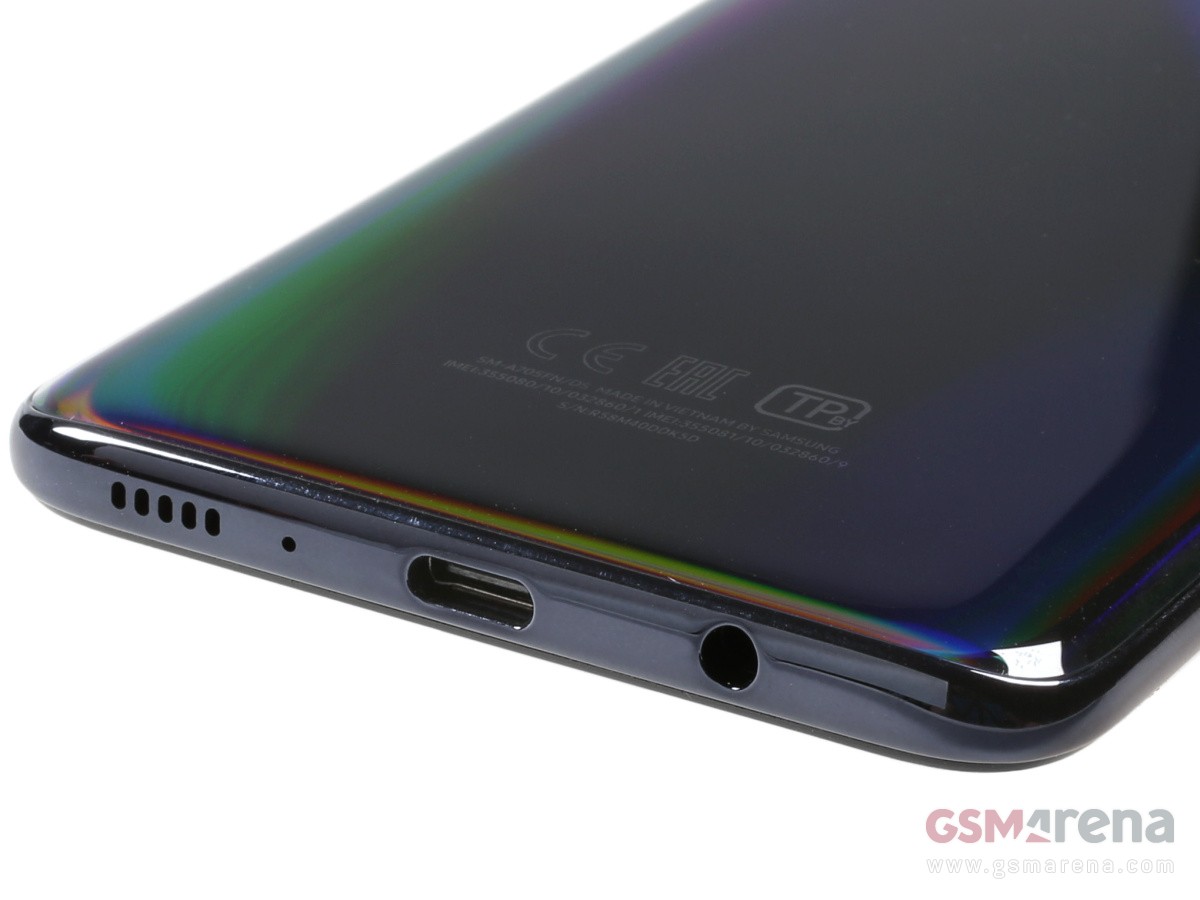
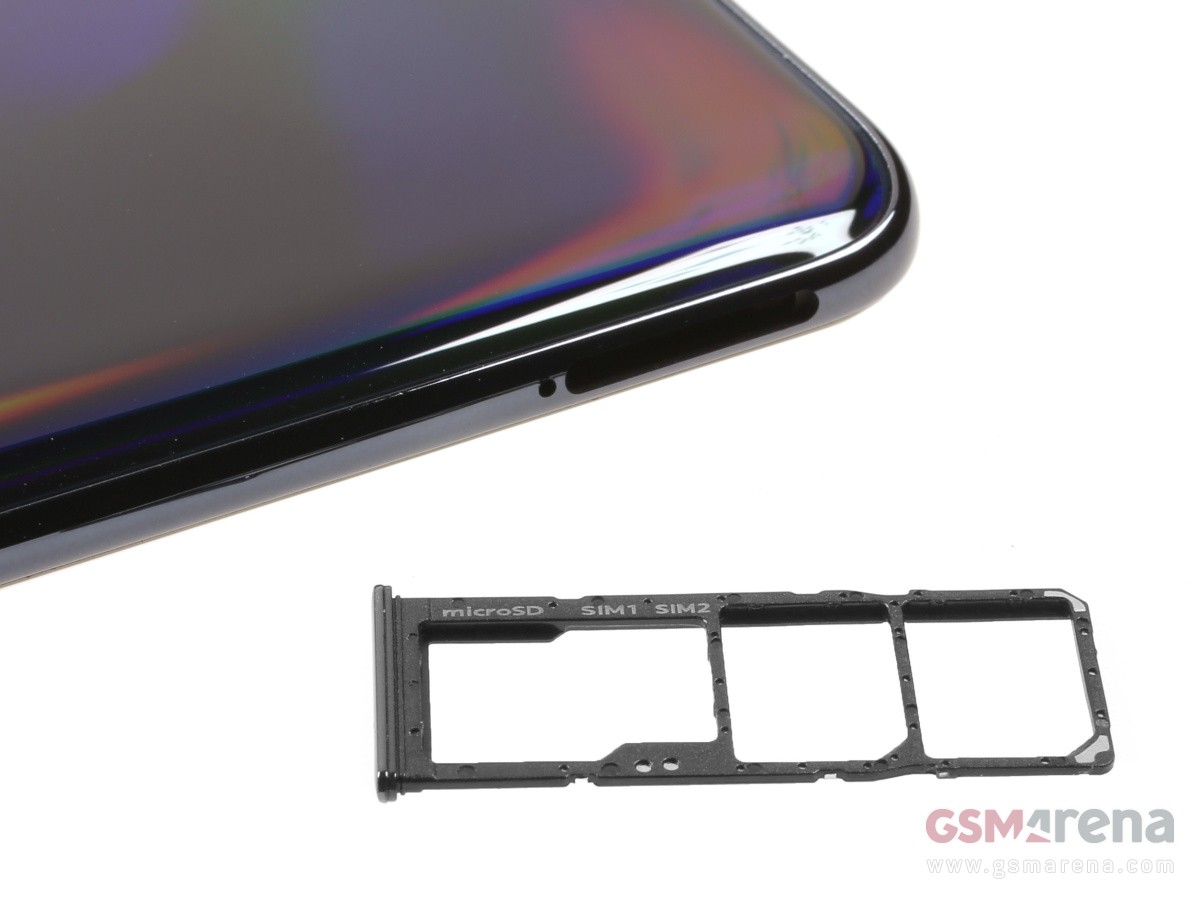
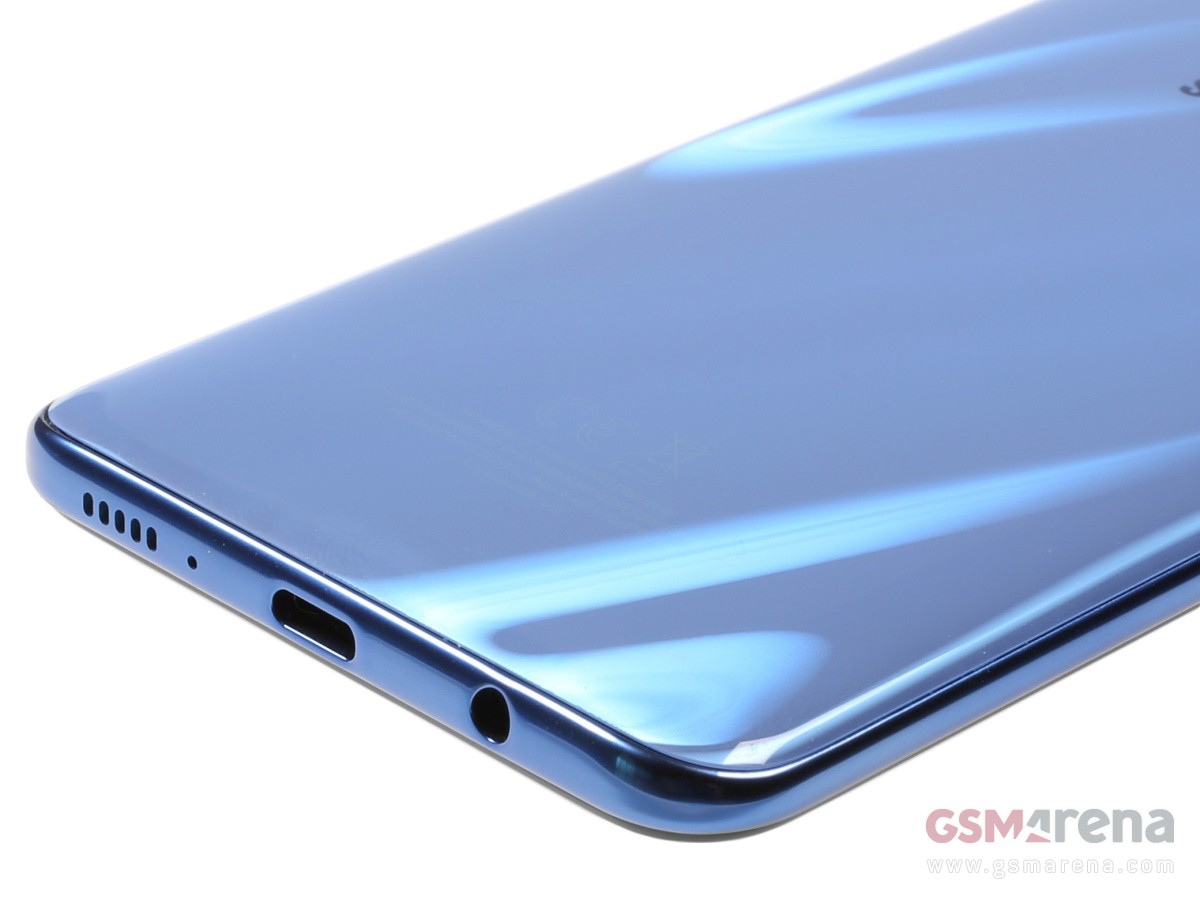
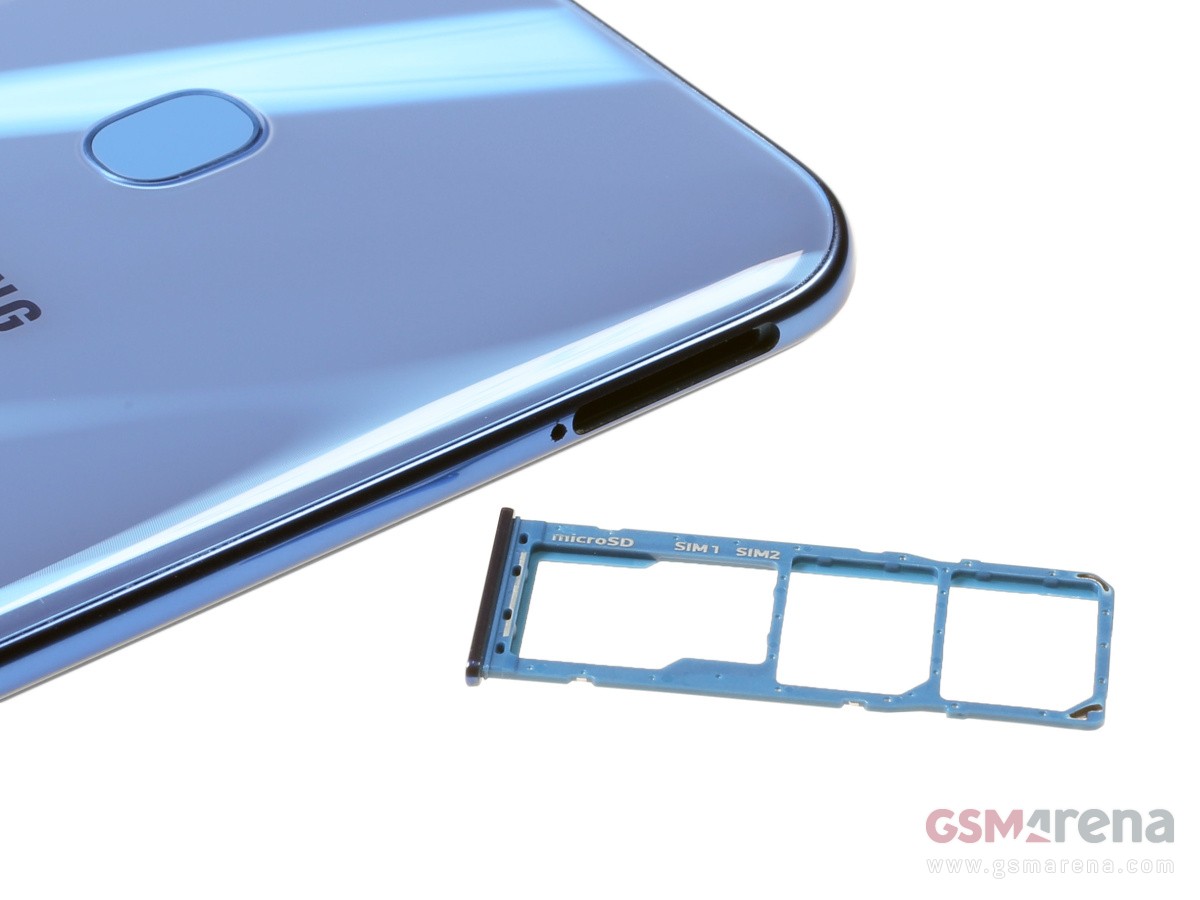
The Galaxy A70 has all the necessities on its sides – there is a tri-card slot on the left, the volume and power keys on the right side, while the audio jack and the speaker grille are at the bottom.
Samsung Galaxy A70 measures 164.3 x 76.7 x 7.9 mm – that’s 6mm taller and 2mm wider than the Galaxy A50. It weighs 183g – that’s 17g heavier than the A50, but the phone does have a larger screen and battery, so nobody should be thinking of it as overweight.
The Galaxy A70 is big and one-handed use is almost impossible, despite the One UI optimizations. But it was never intended to be pocket-friendly but immersive-friendly. And with that 6.7″ AMOLED it sure is shaping to be. On top of that, the A70 is enjoyable when handled as it’s not as slippery as it looks. Plus, the curved sides make it feel somehow smaller in hand, and that’s something.
Display
The Galaxy A lineup has been known for its AMOLEDs (A for AMOLED, get it?) and the Galaxy A70 is no different. But the A70 not only has the cool panel, but it’s also impressively large with a 6.7″ diagonal – the biggest screens on a Galaxy this year and the same size as A80’s and S10+ 5G’s.
The A70 packs the so-called Infinity-U panel, meaning it has a U-shaped cutout at the top for the selfie camera. But notch or not, the Super AMOLED screen is of the usual high-quality we’ve grown to like. We measured about 407 nits of maximum brightness in manual mode, and 607nits in Auto brightness with the ambient light sensor is exposed to bright light.
We also measured a minimum brightness of 1.8nits – a pretty great result.
Display test
100% brightness
Black, cd/m2
White, cd/m2
Contrast ratio
Samsung Galaxy A70
0
407
∞
Samsung Galaxy A70 (Max Auto)
0
607
∞
Samsung Galaxy A50
0
424
∞
Samsung Galaxy A50 (Max Auto)
0
551
∞
Samsung Galaxy A40
0
410
∞
Samsung Galaxy A40 (Max Auto)
0
548
∞
Realme X
0
448
∞
Realme 3 Pro
0.285
508
1782
vivo V15 Pro
0
429
∞
vivo V15 Pro (Max Auto)
0
435
∞
Xiaomi Redmi Note 7
0.358
479
1338
Motorola One Vision
0.39
464
1190
Motorola One Vision (Max Auto)
0.446
486
1090
Huawei P30 Lite
0.39
480
1231
Realme 3 Pro
0.285
508
1782
Nokia 7.1
0.377
490
1300
Nokia 7.1 (Max Auto)
0.465
600
1290
As we’ve come to expect from Samsung Super AMOLEDs, the display on the Galaxy A70 is capable of accurately reproducing different color spaces depending on content and selected display mode. The Natural mode stays accurate to sRGB with an average DeltaE of 1.8, while Vivid adheres to the DCI-P3 color space with an average DeltaE of 3.9. There is no Adaptive mode as before, nor are there the AMOLED Photo and Cinema. The Vivid option do offer manual control over the red, green, and blue hues.
Battery life
The Galaxy A70 has a large 4,500mAh battery inside, an increase over the 4,000mAh cell inside the A50. It supports 25W fast charging thanks to USB Power Delivery, and the provided charger replenishes 42% of the depleted battery in 30 mins.
In our testing, the Galaxy A70 achieved excellent results. We clocked 13+ hours on our Wi-Fi web browsing script and 17+ hours of looping videos in airplane mode. The 3G talk time is over a day and a half – an excellent score as well.
Adding to the mix the very good standby performance the Galaxy A70 posted an overall Endurance rating of 103h.
Speaker
The Galaxy A70 has a single loudspeaker located on the bottom. It scored a ‘Very Good’ mark in our three-pronged test when it comes to loudness, but it’s sound quality is rather average – not as poor as A50’s, but not as rich and clean as the best in the class.
Speakerphone test
Voice, dB
Pink noise/ Music, dB
Ringing phone, dB
Overall score
Samsung Galaxy A40
66.2
68.3
73.6
Good
Realme 3
66.0
71.8
81.2
Good
Samsung Galaxy A70
68.5
69.5
81.7
Very Good
Realme X
67.9
73.5
80.4
Very Good
vivo V15 Pro
65.0
74.1
83.6
Very Good
Samsung Galaxy A50
68.9
71.3
82.7
Very Good
Huawei P30 Lite
71.5
73.8
83.1
Excellent
Motorola One Vision
73.5
71.3
85.8
Excellent
Xiaomi Redmi Note 7
69.8
71.5
90.5
Excellent
Realme 3 Pro
67.5
73.8
90.5
Excellent
Audio quality
The Samsung Galaxy A70 delivered an output of perfect accuracy when hooked to an active external amplifier test as is to be expected from any half decent phone these days. When headphones came into play, we got some intermodulation distortion and an average amount of stereo crosstalk.
Loudness was just above average in both cases so all in all we’d say the audio output won’t win the Galaxy A70 many new fans, but it won’t be held against it either.
Test
Frequency response
Noise level
Dynamic range
THD
IMD + Noise
Stereo crosstalk
Samsung Galaxy A70
+0.03, -0.07
-93.5
93.3
0.0020
0.0079
-92.4
Samsung Galaxy A70 (headphones)
+0.04, -0.40
-88.1
89.0
0.094
0.239
-56.6
Samsung Galaxy A50
+0.03, -0.06
-93.4
93.2
0.0009
0.0082
-92.3
Samsung Galaxy A50 (headphones)
+0.30, -0.12
-92.0
91.9
0.102
0.231
-47.0
Huawei P30 lite
+0.03, -0.01
-94.4
94.2
0.0015
0.0076
-71.2
Huawei P30 lite (headphones)
+0.12, -0.06
-93.6
93.4
0.0032
0.097
-56.8
Sony Xperia 10
+0.04, -0.04
-92.2
91.9
0.0032
0.015
-97.1
Sony Xperia 10 (headphones)
+0.05, -0.03
-96.1
91.6
0.0033
0.024
-56.4
You can learn more about the tested parameters and the whole testing process here.
One UI is the way forward
The Galaxy A70 boots the brand new One UI based on Google’s Android Pie. It premiered on the Galaxy S10 phones a couple of months ago and is shaping as a promising replacement of the previous Samsung Experience UX. Just as expected, it packs heavy customizations and tons of old and new features but presented in a cleaner and simplistic way.
If you’ve used Samsung UX over the past few years, you will probably work your way around easily. However, there are a couple of major revamps that may seem strange or even uncomfortable at first, but we think it’s for the best.
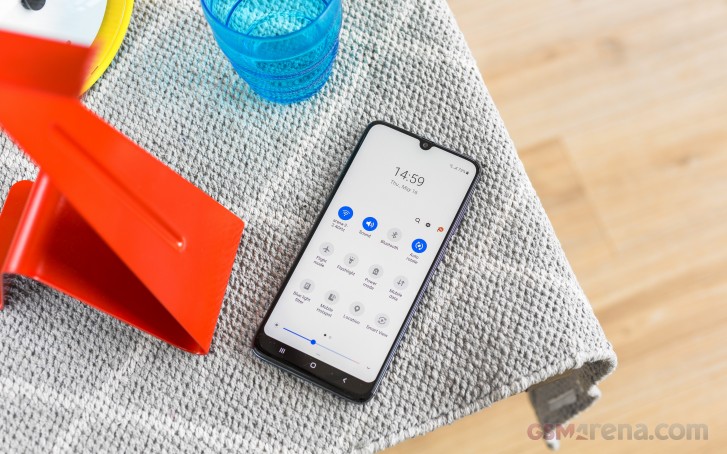
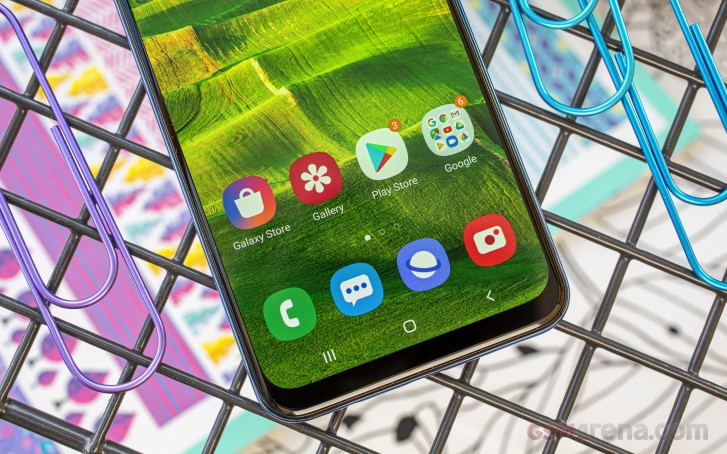
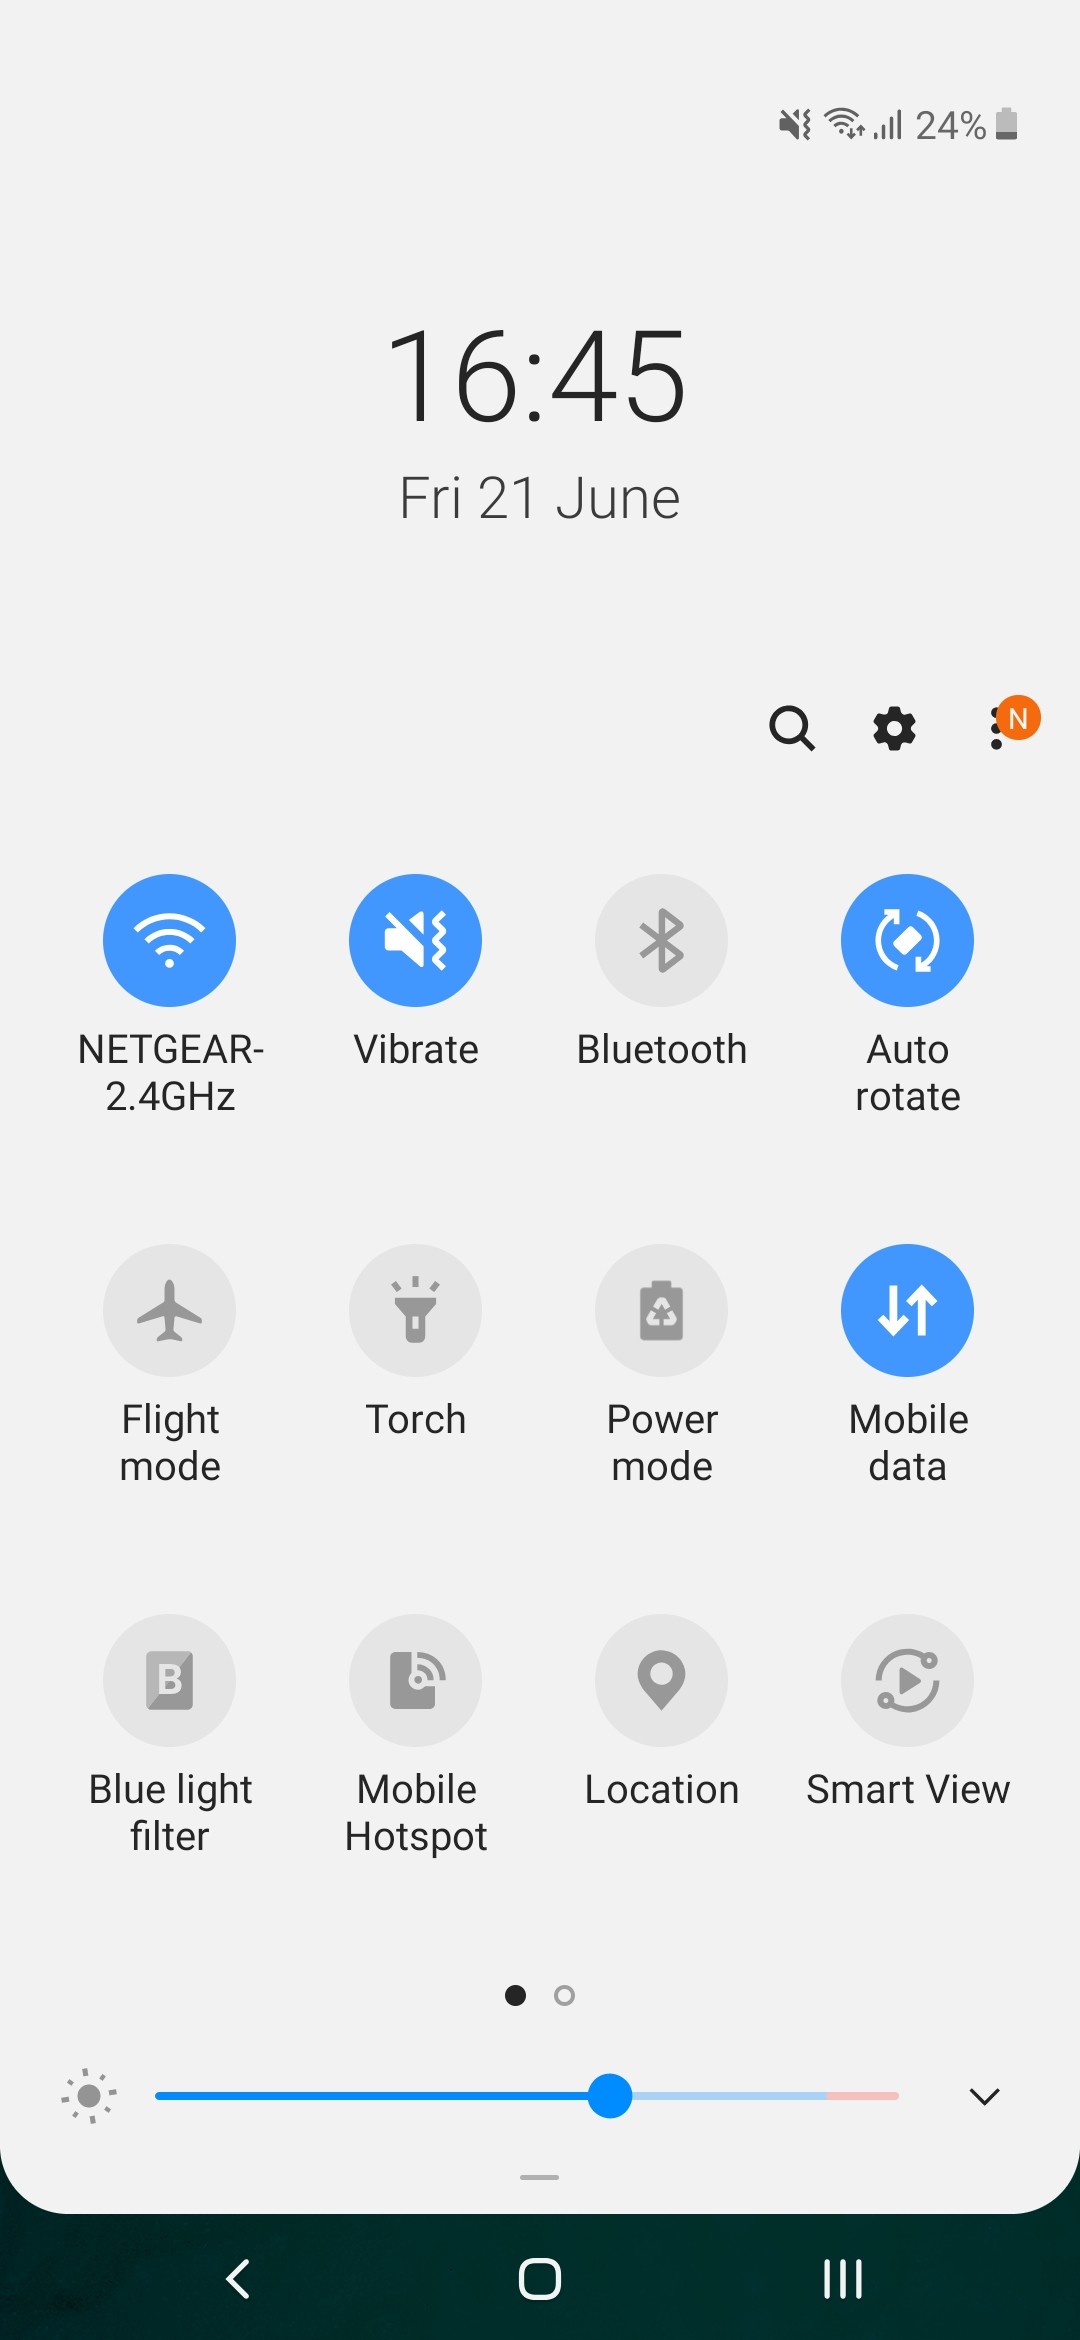
Aside from the colorful new icons that might not be to everyone’s taste (you can swap the default ones with another icon pack), Samsung has implemented numerous changes towards more effective and comfortable one-handed use. Now all system menus, including the drop-down menu with all the quick toggles, are located on the bottom half of the screen, so they are within reach of your thumb. It takes some time getting used to, but we think it’s a pretty smart solution.
Speaking of one-handed use, there are still some small tidbits that Samsung forgot about. For example, the app folders still open in full-screen with the icons placed on the upper half of the display, which means you’ll have to use your other hand to reach them.
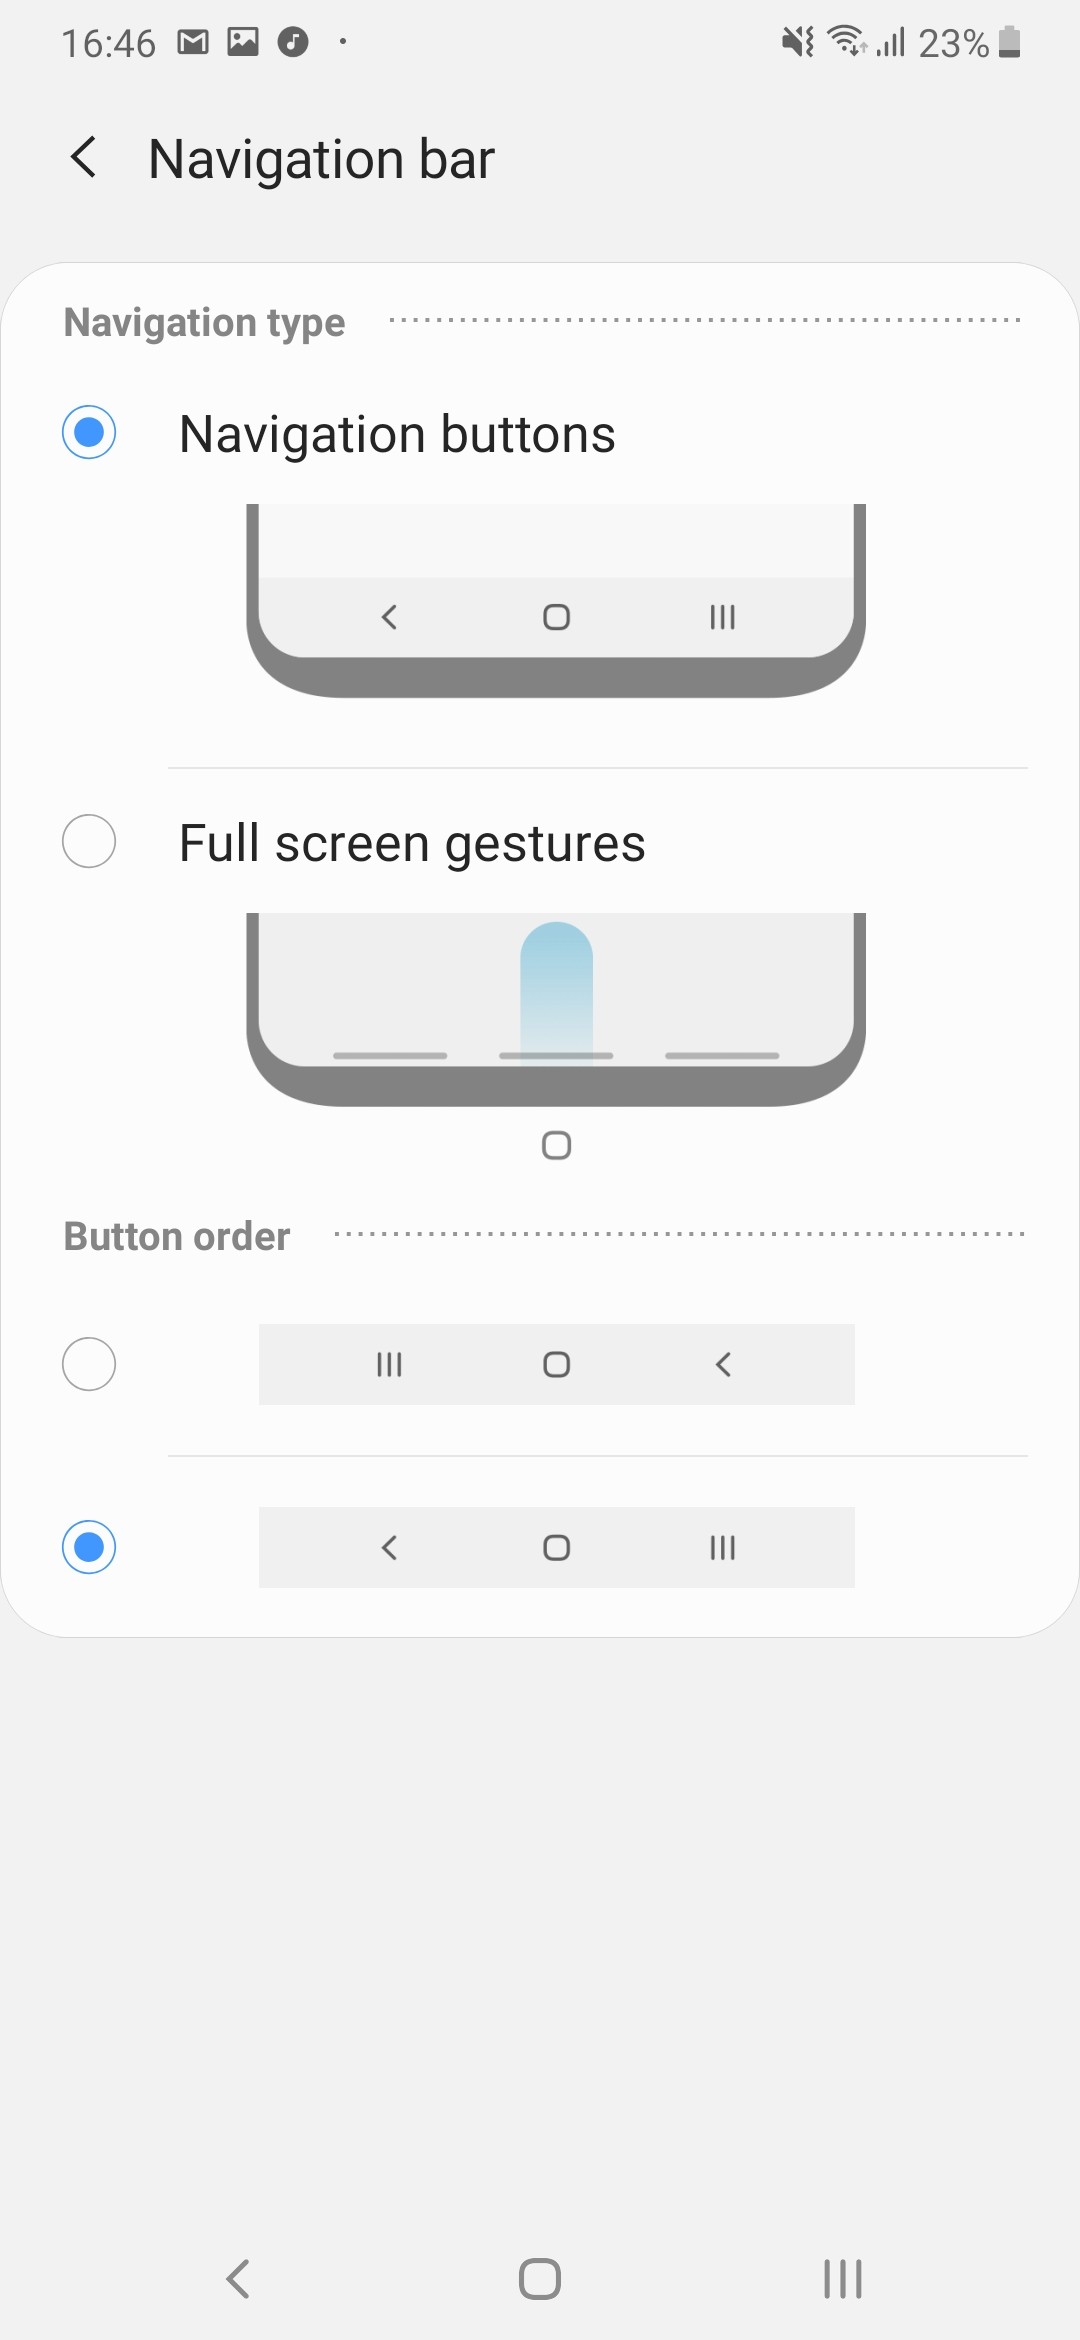
And just like everyone else, Samsung has its own way of implementing Google’s new gesture-based navigation. They work as conventional buttons – swiping from the bottom-left brings out the recent apps menu by default and swiping from the bottom-right takes you a step back. You can swap them in the settings menu, but the home button remains as a single swipe from the bottom-center. If you swipe and hold, it will summon Google’s Assistant.
In the end, Samsung saved a couple of pixels on the bottom, but the gestures still feel half-baked.
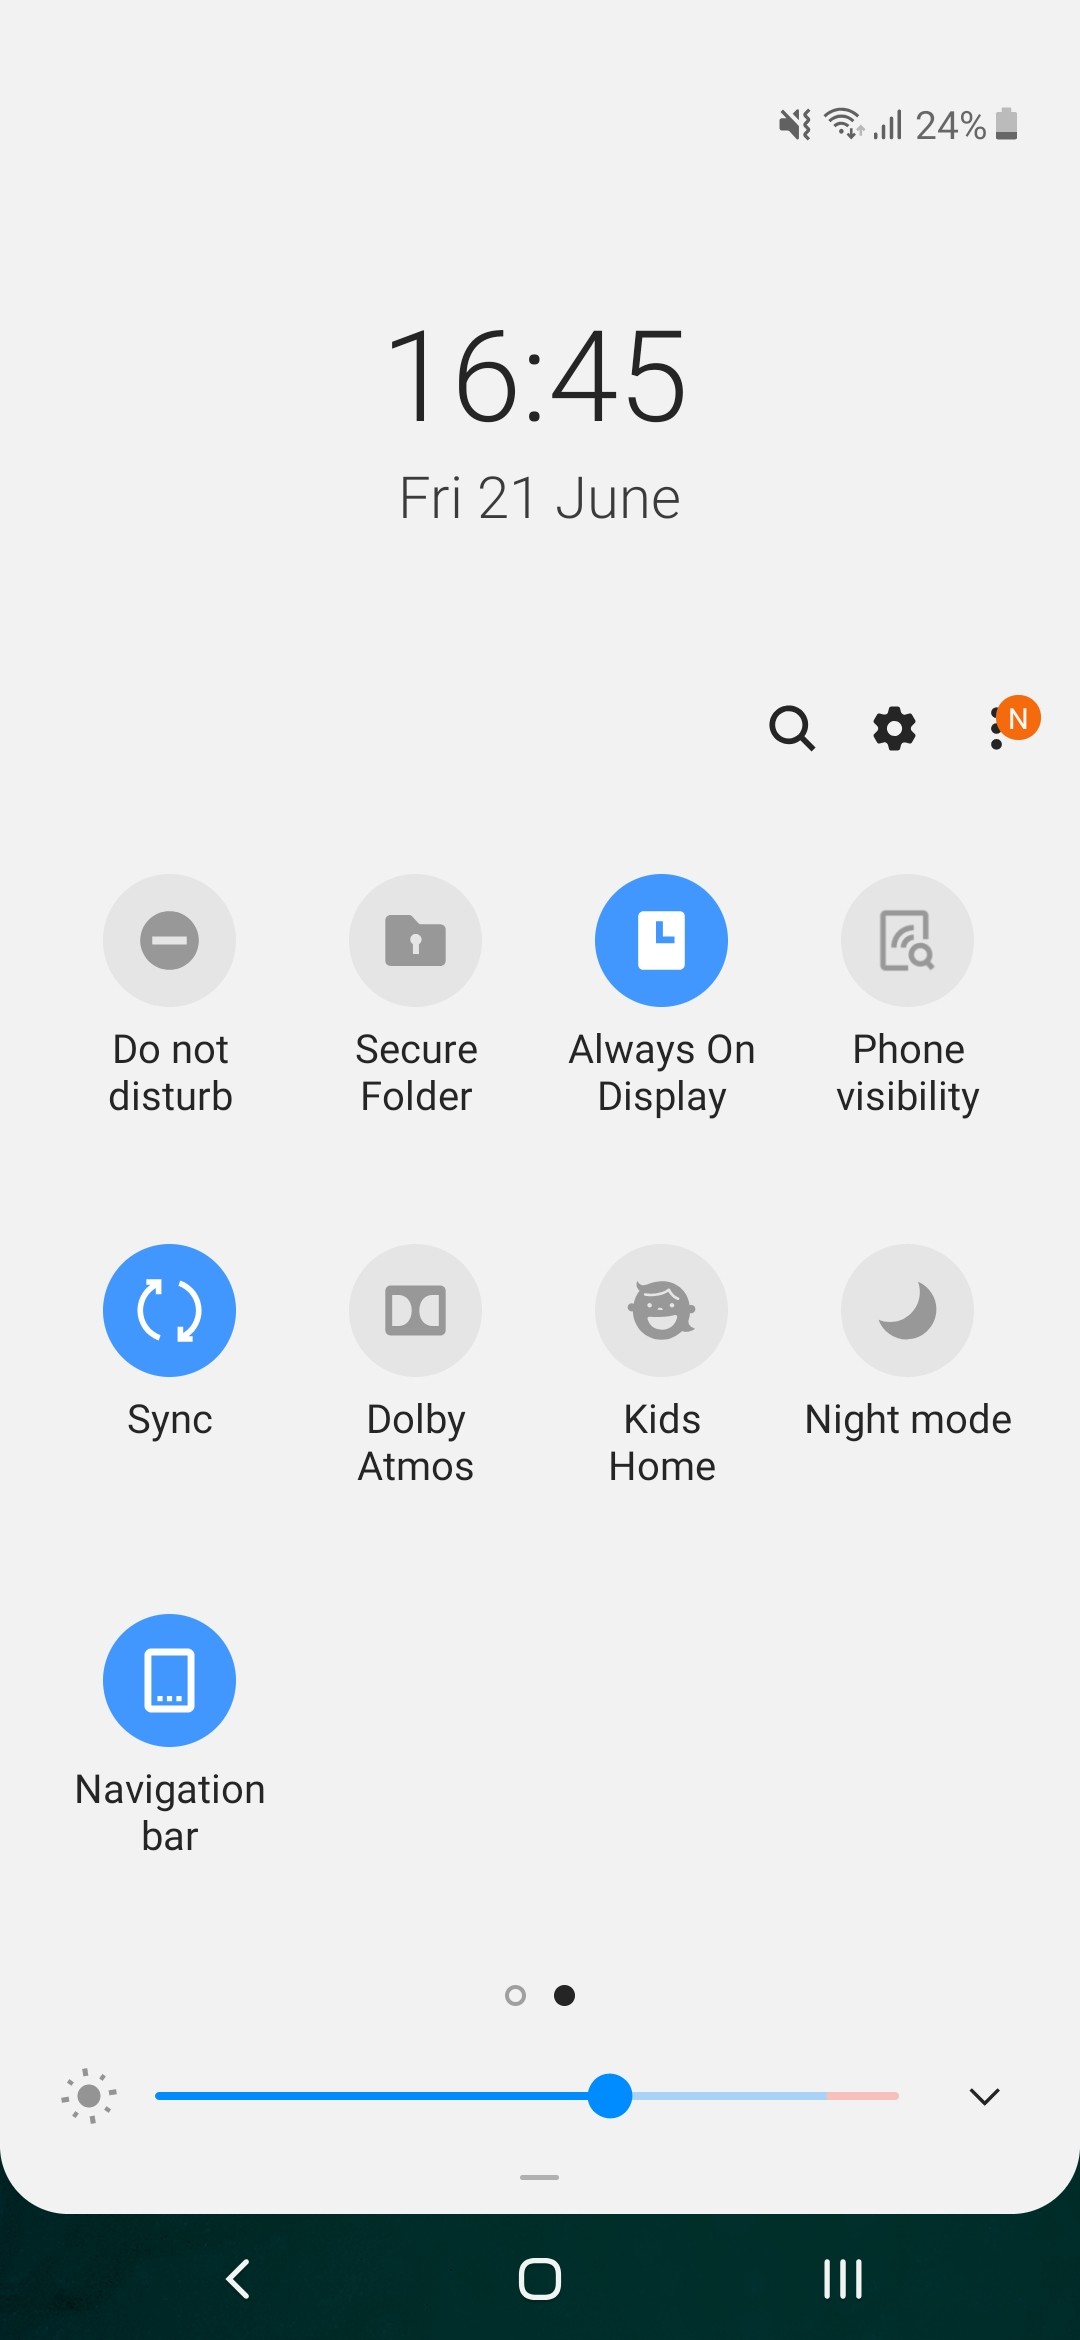
What doesn’t feel half-baked, however, is the Always On Display feature. It gives you plenty of options although not as many as on the Galaxy S10 phones (there is no brightness setting or wallpaper option here). You can choose different clock styles and font colors, what notifications to be displayed, and when the AOD to be shown – on tap, always, or scheduled.
In line with the rest of the UI changes, the general Settings menu has been revamped too. It’s pretty compact, and some of the settings you might be looking for have ended up elsewhere. For example, the Device care sub-menu now accommodates the Battery settings and information, storage and memory management and the security features. Tapping on the Battery icon will open up the familiar battery menu full of settings and adjustments. Aside from the usual info and features which you’d find on pretty much every other Android handset, Samsung has added a couple of additional options.
You have three power modes – Optimized, Medium-power saving and Maximum power saving. Optimized is the default one with performance cranked up to the maximum. In the upper right corner of the battery menu sits another sub-menu giving you more granular control over your power consumption.
Speaking of granularity, the Advanced menu gives you the option to set notifications to pop-up in a small view with which you can interact.
Google’s push for the so-called Digital well-being has reached Samsung‘s One UI too. If you were ever wondering how much time you spend on your phone and which apps you mostly used, the Digital well-being sub-menu would give you the details. It’s cool, but it will probably stay unused by most users.
As before, Samsung‘s own take on the custom Android is full of features and pre-installed apps. We are overwhelmed, and it’s hard to go over every one of them. And besides, there are plenty of carry-overs from the previous software versions. Some users may be annoyed with the heavy customization and set of pre-installed apps, especially if you are coming from a vanilla Android.
For multimedia you have the new Gallery app by Samsung for browsing photos and videos, while Play Music handles well, your music. There is also an FM radio app on board, a proprietary My Files file manager app, Bixby assistant, among others.
And although not perfect, we kind of like where Samsung is going with this. It’s addressing an issue that’s been overlooked for quite some time since the new wave of huge smartphone displays. One-handed operation on the One UI is much more pleasant and comfortable. Oh, and the inclusion of the Night mode was a long-awaited feature for more than just a few users. Only using the phone’s UI as a daily driver will help establish a more objective opinion but we like what we see so far.
Performance and benchmarks
The Samsung Galaxy A70 is only the third smartphone we meet powered by the Qualcomm’s Snapdragon 675 chipset. The SoC has an octa-core CPU with 2x Kryo 460 Gold cores (Cortex-A76 derivative) clocked at 2.0 GHz and 6x Kryo 460 Silver cores (Cortex-A55 derivative) ticking at 1.7 GHz. The GPU inside is Adreno 612.
The SoC is manufactured on the cost-efficient 11nm node but more advanced than most chips from the previous gen 14nm Snapdragon 600-series. The 11nm (11LPP) process has been developed by Samsung as a mixture between the company’s 14nm and 10nm nodes and that may be one of the reasons for opting for this Snapdragon instead of some of the in-house Exynos chips.
The Snapdragon 675 may have just two high-performance A76-derived cores, but those were enough to put it well ahead of the competition that uses A73 cores. The single-core score is amazing, as is the multi-core performance. The Snapdragon 675 offers enough processing superiority over the Galaxy A50’s Exynos 9610 to make a difference.
The GPU scores aren’t that impressive though. The Adreno 612 GPU isn’t bad, not at all, it’s just about 15% less capable than the Exynos 9610’s Mali GPU meaning the cheaper Galaxy A50 is actually better suited for games, at least in theory. Then again 15% or less of a difference won’t be felt in real life scenarios at all, so there is no cause for concern.
Finally, the one-number-to-rule-them-all AnTuTu 7 puts the Galaxy A70 ahead of the competition, but a little bit behind its S675 peers – the vivo V15 Pro and Redmi Note 7 Pro.
The Galaxy A70 has more than enough power punch for its price. It is a very dependable performer thanks to the Snapdragon 675 chip. It’s as great for gaming as it is for daily operations and browsing the social media. The Android OS and One UI are fast and fluid on this hardware, although once you populate apps with personal content you may notice some prolonged loading times.
We didn’t notice any hot points around the Galaxy A70 even when running those benchmarks for longer duration and there was no throttling at all. Overall, the A70 offers great performance for the class and nobody should be experiencing major hiccups.
Another tri-eyed camera
Just like the Galaxy A50, the A70 has a triple camera on its back featuring a larger main sensor. The primary cam is now a 32MP f/1.7 snapper with PDAF, joined by a familiar 8MP fixed-focus, f/2.2 ultra-wide and a 5MP, fixed-focus, f/2.2 depth sensor. There is also a single LED flash around.
The 5MP isn’t a standalone module that you can take actual pictures with – instead, it’s a ‘Depth Camera’, to be used for ‘Live Focus’, in Samsung‘s own terms.
So, the primary shooter has a 32MP resolution sensor behind a fast f/1.7 lens with a focal length that’s reported as 26mm. Then, there is the 8MP sensor behind an f/2.2 aperture lens that delivers a 120-degree field of view. The EXIF data reports 12mm equivalent focal length for this one.
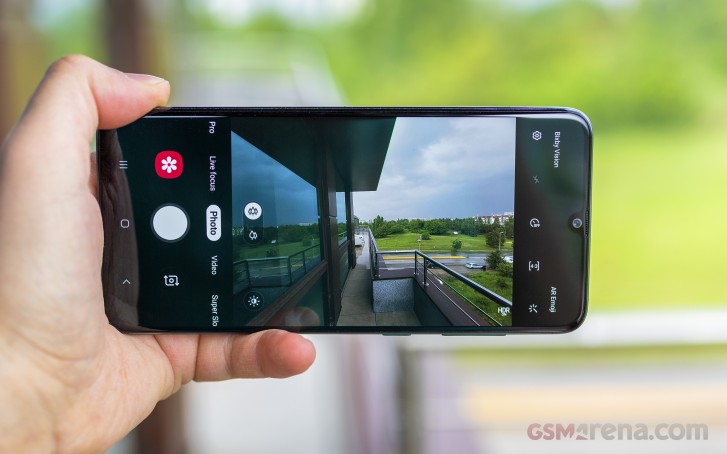
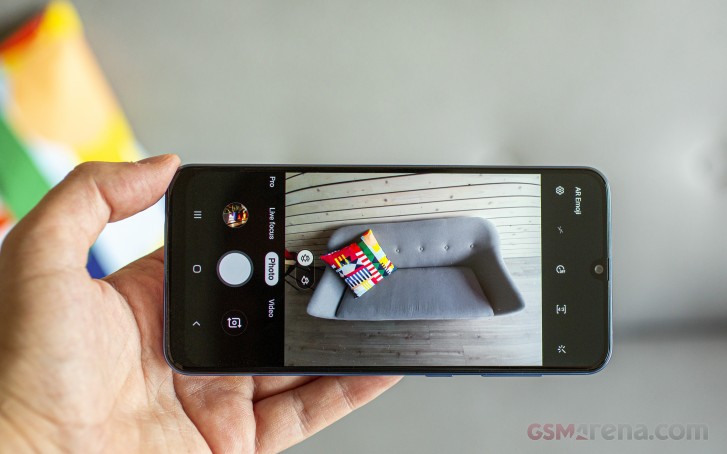
The camera app is very much the same as on any current Samsung, only with more icons in the viewfinder to control which camera is being used. The icon with 3 trees means ultra-wide-angle cam, while 2 trees denote the regular camera.
Basic operation is business as usual with side swipes for cycling through modes and an up/down action for toggling between the rear and front cameras. There’s an AI-powered Scene optimizer mode that should recognize certain types of scenes and adjust parameters accordingly. We kept it off, as it doesn’t make that much of a difference, plus we tend to prefer to add the effects after. The shown modes, as well as their arrangement, can be tweaked in settings.
Live focus mode is present, naturally, with all so many cameras and a dedicated depth sensor. There’s also a Pro mode, but there’s hardly anything pro about it – you can only choose ISO (in the 100-800 range), exposure compensation (-2/+2EV in 0.1EV steps), and white balance (presets, but no light temperature).
Image quality
The Galaxy A70 by default shoots in 12MP, but this can be changed from the aspect settings – 3:4 corresponds to 12MP, while 3:4H means 32MP. When shooting in 32MP you can’t use Auto HDR or any HDR for that matter, and capturing photos takes a second or two, but those are pretty much the only caveats.
Let’s start with the high-res images – this is NOT the default mode, and it takes a couple of seconds for a shot. The detail levels aren’t what you’d expect from the 32MP number though they are not necassarily bad. We already observed a similar thing in previous Samsung mid-rangers such as the last Galaxy A9 and A50.
So, the photos are a bit soft but the processing tries to compensate for that with sharpening. This works to some extent for the foliage but you can notice sharpening halos and jaggies elsewhere.
Still, the colors turned out pretty accurate, the contrast is very good, and the dynamic range rather high even though no HDR was involved.
The A70 camera saves 12MP photos by default using pixel binning, and those shots are much faster to capture. The images aren’t that impressive though – sure, those look sharp and have enough detail, but we’ve seen other midrangers do better with fewer pixels to work with. The colors and contrast are pretty good, though, while the dynamic range is consistently excellent.
The thing is we were able to get slightly better images by just downsizing the 32MP shots on a computer. Maybe the processing algorithm makes a few compromises on the way caused by insufficient hardware resources, or maybe it is something else.
So, while the 12MP default photos excel in colors and dynamic range, but they are just average in detail.
The A70 has the Auto HDR turned on by default. If HDR is involved, the photos often look a bit better with even exposure, and some of the blown highlights get rescued.
The ultra-wide camera produces heavily distorted 8MP images as there is no distortion correction applied. This is hardly an issue as the purpose of the wide-angle snapper is to fit as much as possible into a 4:3 image and that’s the price to pay. Pixel level quality isn’t great, but the colors and contrast are excellent, and the dynamic range is often improved by the Auto HDR without hurting the color presentation of detail levels. Overall, those images should be enjoyed for what they are – exaggerated perspective shots or trick shots on the cheap.
Moving on to low-light performance. The 32MP low-light photos are hardly worth showing. The 12MP shots have a good color saturation, but all highlights are clipped due to the camera’s tendency of overexposing dark scenes. On closer inspection, the level of detail is poor, and the images are way softer than we’d have liked them. We’ve seen much better low-light photos from budget phones, so Samsung must improve in this field for sure.
Using HDR will restore most of the blown highlights and balance the exposure – these at the expense of one extra second needed to snap the photo. The result is far from ideal, but still better than the regular non-HDR photos. We’d say the extra wait is worth it if the closer inspection didn’t reveal rather uneven sharpness across the frame and even extra softness possibly due to the imperfect photo stacking.
There is no Night Mode on the Galaxy A70, so you can’t get anything close to Huawei’s low-light shots. And this is mostly felt in the ultra-wide-angle photos, which are unusable without any software enhancements.
And once you’re done looking at real-life samples, don’t forget to head over to our Photo compare tool to check out how the Galaxy A70 deals with our studio charts.
Portraits
The Galaxy A70 has a standalone 5MP camera to capture depth information and should be producing some good portrait shots. Those are saved in 12MP, and indeed they turned out impressive, especially when coming from a low-tier mid-ranger. The separation is excellent – there are no abrupt transitions. Sure, the photos aren’t perfect, but we’ve seen flagships do way worse and we got more than we hoped for from a budget mid-ranger.
The bad news is that when the light isn’t perfect, the portraits become blurry and the focus is often inaccurate.
Selfies
The Galaxy A70 comes with a high-res 32MP selfie camera, which may or may not be the same as the main 32MP one. If you get the distance right, and if there’s plenty of light – you can get some detailed shots. Colors are spot on too.
Just like the main 32MP snapper, the selfie one shoots in 12MP by default, unless you opt for 32MP. The Auto HDR is available only in the 12MP mode. And if it fires, it rescues blown highlights. Other than that – the images are very detailed and have excellent colors.
By the way, the selfie camera offers normal (wide) and close (zoomed) mode, though with just one front camera, the “zoom” is achieved by cropping the center from the 12MP shot and the result is a “zoomed” 8MP photo. That’s a neat trick we first saw Samsung do with the Galaxy S10 series.
Portrait mode is available on the selfie camera as well, with just the one camera. The portraits are softer than regular selfies, while the subject separation is s mostly good unless you have a pair of headphones on your head, or a cap or if your hair is curly like our Angie’s. Auto HDR works here when needed, too, and does an excellent job.
Video recording
The Galaxy A70 records video up to 4K at 30fps, while both 30 and 60 fps are available at 1080p mode. You can also use the ultra-wide-angle snapper for videos, but it supports only one resolution – 1080p at 30fps. The audio is always recorded in stereo at 256kbps.
Electronic stabilization is not available, though.
The Galaxy A70 captured nicely detailed 4K videos for a mid-ranger, with excellent contrast and dynamic range. The color presentation is accurate and overall – we are happy with what we got.
The A70 excels on 1080p video capture both at 30 and 60 fps – the clips are highly detailed, sharp and with little noise. Dynamic range is good too, and the colors are spot on.
The footage from the ultra-wide-camera doesn’t have award-winning detail, but it’s decent as ultra-wide videos go.
Here’s a glimpse of how the Galaxy A70 compares to rivals in our Video compare tool. Head over there for the complete picture.
The competition
The Galaxy A70 has the largest AMOLED screen on the market right now. Combine that with the very attractive sub €400 price in most markets, and you have a real winner here. Users who value large displays and the immersive experience they offer have scarce options outside Samsung‘s camp.
Xiaomi Mi Max 3 is probably the only offer to beat the Galaxy A70 in terms of screen estate and price, but it’s already a year old, it has a feeble chipset and can’t match the overall camera experience. Still, it’s at least €120 cheaper and doesn’t have a notch (or OLED screen for what’s worth), so maybe you want to check this one out.
Then there is the Galaxy A80, which offers same the size of AMOLED but notch-free. The primary camera is on a motorized pop-up, which also rotates to serve as a selfie shooter. Another upgraded bit is the new Snapdragon 730 chipset, which should be offering flagship-grade performance. Those are some costly features though as the price hikes north of €600, and that’s almost within flagship territory.
Then there is the vivo V15 pro, which has an uninterrupted 6.4″ AMOLED thanks to a pop-up selfie camera and the same Snapdragon 675 chipset. The phone is limited to a couple of markets but has some very nice looks and capable snappers.
Then there is the Galaxy A50, which is about €90 cheaper and yet offers the same experience on a slightly smaller 6.4″ Super AMOLED. If the 6.7″ diagonal isn’t a must, then the A50 is an even better offer altogether.
The Huawei P30 Lite is another exciting proposition with a lower price. It has a smaller 6.15″ LCD screen but offers similar gaming experience and battery longevity. The P30 Lite’s main camera is similar to A70‘s, but it has Huawei’s excellent Night Mode, and that’s a massive advantage camera-wise. Huawei ongoing turmoil shouldn’t affect the P30 Lite much aside from the absence of a future Android Q upgrade.
If Realme X is available in your country, it’s probably the phone you should try before going for the A70. The Realme X has a notch-less 6.53″ AMOLED, the Snapdragon 710 chipset, and similarly capable snappers on both ends (the selfie is a pop-up), though there is no ultra-wide-angle cam. The Realme X is much cheaper, and that’s another reason we are excited about the X.
The verdict
The Samsung Galaxy A70 is a very balanced mid-ranger, and we enjoyed using it. But it all boils down to the fact that A70 is more or less a stretched Galaxy A50. And if 0.3″ difference in the screen diagonal aren’t that of a big deal for you, you can easily save yourself about €100 by going for the A50.
But if every single millimeter of screen estate counts, and you want the biggest Super AMOLED on the cheap, then the Galaxy A70 is your go-to phone. It’s one very capable mid-ranger (we guess we’ve already said that a bunch of times), and its only weakness is the night-time photography.
Pros
Bright, vivid, and large Super AMOLED
Triple card slot, audio jack, FM radio
Excellent battery life, USB-PD fast charging
Dependable performance
Consistently good camera experience in daylight
Very nice selfies
One UI is great
Cons
No ingress protection
Unimpressive low-light camera performance, no Night mode
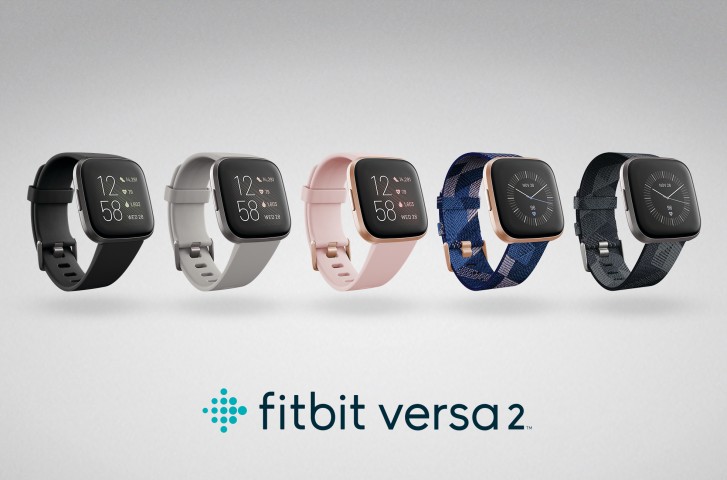
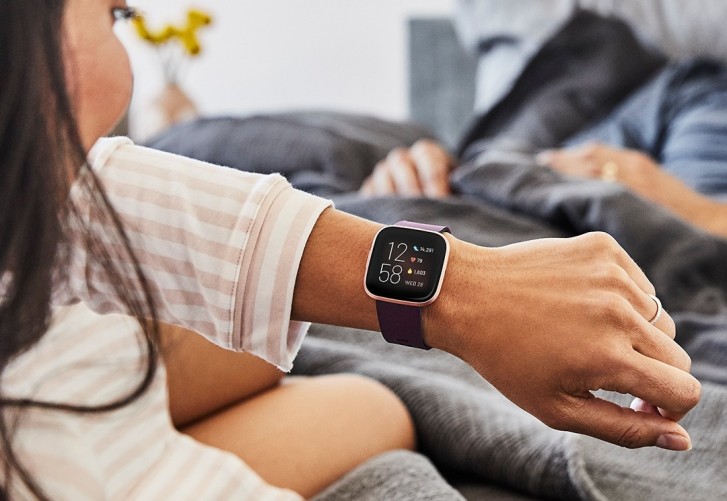
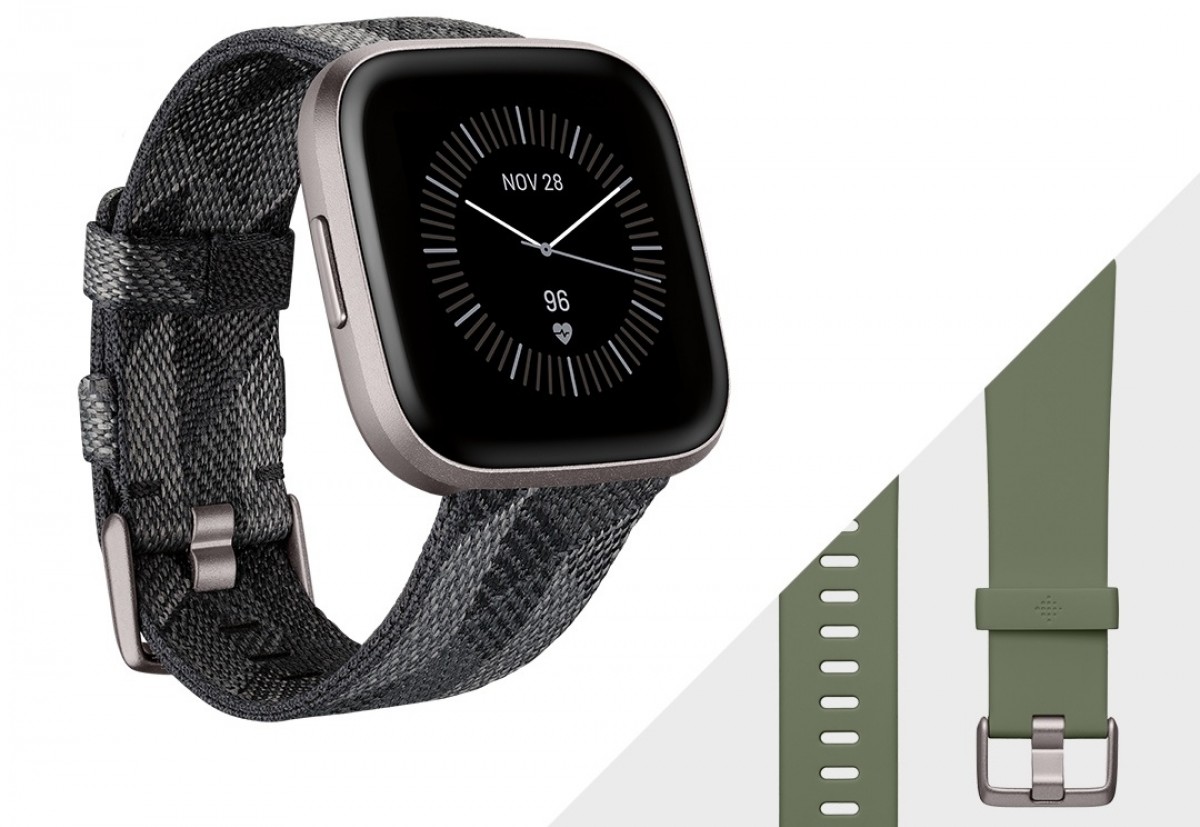
Building up on the success of last year’s Versa smartwatch, Fitbit just announced a worthy successor called the Versa 2. The new version brings several improvements including an OLED display, Amazon Alexa and Spotify integration as well as a faster processor and longer-lasting battery.
Alongside the Versa 2, Fitbit announced a new coaching service called Fitbit Premium. It’s $10 a month or $80 per year and gives you specific guided plans for workouts, calorie intake and weight control.
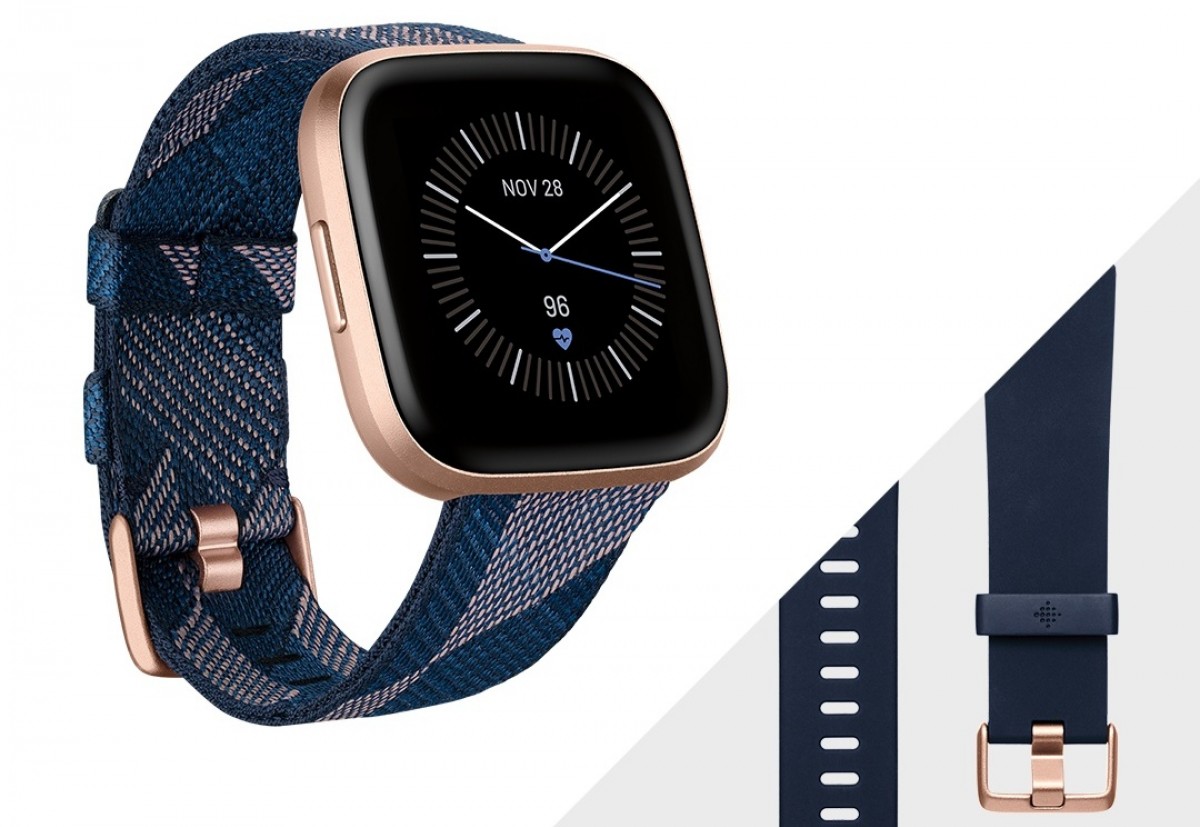
All Versa 2 variants feature an aluminum casing and now come with NFC which alongside Fitbit Pay allows you to use the watch for contactless payments. There’s also 24/7 heart rate tracking and 50M water resistance which means you’re good to track your swimming workouts.
In addition, it features all the standard fitness tracking modes for running, cycling, yoga as well as new sleep tracking modes. The new Sleep Score function adds a detailed breakdown grade of your sleep patterns based on your heart rate.
The device also features an Always-On Display which comes in handy for a quick glance at the time, workout progress and battery life. As far as battery life, Fitbit is promising 5 days on a single charge which is a full day more than its predecessor. The Versa 2 only has a single button on the left side which is programmable. There’s still no built-in GPS so you’ll need to pair your phone to track your runs.
The Fitbit Versa 2 is up for pre-order starting today and will be available in stores starting September 15. Retail for the regular versions is $199 while the special editions which feature an extra woven strap will go for $229.
You can adjust the screen brightness on Apple Watch using two different methods. One approach to increasing or decreasing Apple Watch screen brightness uses the device settings directly, while the other approach to changing screen brightness on the Apple Watch relies on using the paired iPhone. You can use either approach, and we’ll show you how to use both methods to change the screen brightness of an Apple Watch.
How to Adjust Screen Brightness on Apple Watch
This method will adjust screen brightness directly from the Apple Watch:
Open the “Settings” app on the Apple Watch, it looks like a gear icon
Tap on “Brightness & Text”
Tap the lower or higher Brightness buttons to lower or increase Apple Watch screen brightness
Alternatively, you can also tap on the brightness slider and use the hardware Digital Crown hardware dial to adjust screen brightness up or down
While in the “Brightness & Text” settings of Apple Watch, you might also want to increase the text size on shown on the Apple Watch display, or turn on the Bold Text option for text, both of which can make screen text on the device easier to read.
How to Change Apple Watch Screen Brightness from iPhone
This approach to changing the Apple Watch display brightness relies on using the paired iPhone instead:
Open the “Apple Watch” app on iPhone
Choose “My Watch”
Choose “Brightness & Text Size”
Adjust the brightness of the Apple Watch as desired
You can use either the direct method to change screen brightness from the Apple Watch itself, or you can use the method of changing screen brightness indirectly through the paired iPhone. Both approaches will achieve the same effect of either increasing or decreasing the Apple Watch display brightness.
Increasing the brightness is often desirable if you’re using the Apple Watch in bright settings like the outdoors in direct sunlight, but some users may also just prefer the brighter setting in general. Note that using the brightest setting on Apple Watch can result in reduced battery life, just like any other device.
Setting the brightness lower can be helpful if you use Apple Watch as an alarm clock or have it placed in Nightstand mode and want it to be dimmer too. And just like how setting brightness higher can reduce battery life, setting the screen brightness lower can help to prolong battery life of Apple Watch by reducing its power consumption.
The Galaxy A series has become even more diversified this year. Samsung has already introduced the Galaxy A10, A20, A30, A40, A50, A70, and A80 smartphones with the focus being on new AMOLED screens and premium camera skills. And our guest of honor – the Galaxy A50 – has plenty to show of both.
The Galaxy A series has always been comprised of premium midrangers. But Samsung’s strategy for it has come through several transformations. From all-metal phones and water-resistant designs, through a couple of odd experiments, and lately – pioneering trendy features like notched AMOLEDs and ultra-wide-angle snappers.
The Galaxy A50 is a well-rounded smartphone packing as many cool specs as possible. Start with the slim design with the gradient paint job, move to 6.4″ the Infinity-U Super AMOLED screen with a premium fingerprint scanner underneath, then there is a powerful Exynos chip, and a triple camera on the back. The large battery and the latest Android Pie with the clean One UI are hard to miss, too.
The Galaxy A50 is obviously positioned between the lower-tier of As with HD AMOLEDs and less-impressive snappers, and the higher-tier A70 and A80 with larger screens, more powerful chips, and even more premium snappers. And that’s exactly what makes it so special – having the best from both worlds – cool specs on a lower price.
Samsung Galaxy A50 specs
Body: Gorilla Glass 3 front, plastic frame and back;
Screen: 6.4″ Super AMOLED; 19.5:9 aspect ratio; FullHD+ (1080 x 2340 px)
Memory: 4GB of RAM + 64GB storage / 6GB of RAM + 128GB storage; Up to 512GB microSD card support
OS: Android 9.0 Pie; Samsung One UI on top
Battery: 4,000mAh Li-Ion; 15W quick charge
Connectivity: Dual-SIM/ Single-SIM options available; LTE; USB 2.0 Type-C; Wi-Fi a/b/g/n/ac; GPS + GLONASS + BDS; Bluetooth 5.0; NFC
Misc: Single bottom-firing speaker, Under-display fingerprint reader
One notable omission of the 2019 Galaxy A phones is the lack of water-protection. Samsung has changed its mind yet again, and this mid-range lineup won’t feature any ingress protection. Giving something and then taking it away isn’t the best move for sure, but we, and probably Samsung too, hope to the A50 will have enough of niceties to make up for that.
Design
Samsung has invented a whole new word for the design of the new Galaxy A phones – 3D Glasstic. While it may sound pretentious, it’s actually a clever combination of words as the A50 has both glass and plastic on its body and the latter looks more like glass than plastic.
But what’s also important is that the Galaxy A50 looks stunning courtesy of its dazzling paint job. In fact, the back is so shiny and has so much light reflection and refraction that it was almost impossible to get a proper shot of it. All color options – Black, White, Blue (ours), and Coral – display massive flares when exposed to a bit of light.
And this is for what the whole 3D Glasstic term was invented for. It’s not Gorilla Glass, sure, but it made us talk about it, so we can consider it a success.
And while we are at the back, the Galaxy A50 has a triple-camera setup here. Don’t get too excited yet, as it’s far away from Huawei’s trifecta. The A50 has a main 25MP camera, a secondary 8MP snapper with fixed-focus and 13mm ultra-wide-angle lens, and a 5MP sensor for depth information. There is also a LED flash around. The camera is humping just a tiny little bit and thankfully, it doesn’t wobble when put on a flat surface.
The whole front of the A50 is taken by the large 6.4″ Infinity-U Super AMOLED screen. It has a U-shaped notch at the top for the 25MP selfie camera, while the earpiece so thin that’s it is almost invisible above it.
The screen has minimal bezels on its top and longer sides, but there is a noticeable chin at the bottom for the screen controller. The flagship models are currently the only ones not having that chin but the jury is still out whether this is good in usability terms or not.
There is an under-display fingerprint scanner on the A50 and the experience is similar to what we saw on the Galaxy S10 phones. It is positioned around the bottom and is easy to set up, but the experience is equally unreliable. One day it works just fine, the next day it’s a hit and miss between considering our presses too short or too light, or just the opposite. Hopefully, a software fix is on the way for the A50 as well.
Update: June, 2019:Samsung has already released a firmware update that improves the fingerprint scanner experience. Indeed, the sensor is now more responsive and accurate. The while unlocking routine seems to be quicker, as well. And this is also the reason, why the fingerprint scanner was removed from the Cons list at the end of this review.
With a diagonal of 6.4 inches, the screen is a pretty close match to the one on the S10+ size-wise, of course. It also supports HDR10+ and has fancy curved sides. It is 1080p in resolution and has a different aspect with 19.5:9 ratio.
The Galaxy A50 measures 158.5 x 74.7 x 7.7 mm, which makes it almost identical to the S10+ footprint. It weighs 9g less though at 166g.
The frame is made if plastic, just like the back of the A50, and is as glossy and shiny. It’s also very thin on its longer sides. There is a triple-card slot on the left, while power and volume keys are on the right. The essentials are at the bottom – the USB-C and audio ports, as well as the single loudspeaker.
At the end of the day we didn’t really mind the plastic frame on the Galaxy A50. As long as it is reasonably durable, it’s a perfectly fine alternative to the popular “glass sandwich” design.
Handling the Galaxy A50 is a pretty familiar feeling if you have any experience with a recent Samsung phone. The sides taper in a very familiar way and make for a fairly slim edge. It is super prone to fingerprints and smudges, but in spite of all that glossiness, the phone didn’t feel as slippery as it looks and that’s probably a first.
Display
All Galaxy A phones have always had one thing in common and that’s the Super AMOLED screen. The A50 isn’t a combo breaker either and it also packs a large 6.4″ Super AMOLED screen of 1080p+ resolution. The actual pixel count is 2,340 x 1,080 making the aspect ratio quite wide at 19.5:9 and the pixel density is more than enough at 403ppi.
The A50 features the so-called Infinity-U panel, meaning it has a U-shaped notch at the top for the selfie camera. Samsung was one of the few makers to stay away as long as possible from the screen cutouts but eventually it caved in. We guess this makes Sony the last defender of the notch-free screens.
Anyway, notch or not, the Super AMOLED screen is of the usual high-quality we’ve grown to like. We measured about 420 nits of maximum brightness in manual mode and 550nits in auto with the ambient light sensor is exposed to bright light. We measured a minimum brightness of 1.8nits – pretty great result.
Display test
100% brightness
Black, cd/m2
White, cd/m2
Contrast ratio
Samsung Galaxy A50
0
424
∞
Samsung Galaxy A50 (Max Auto)
0
551
∞
Samsung Galaxy A40
0
410
∞
Samsung Galaxy A40 (Max Auto)
0
548
∞
Samsung Galaxy A9 (2018)
0
399
∞
Samsung Galaxy A9 (2018) (Max Auto)
0
606
∞
Samsung Galaxy S10+
0
385
∞
Samsung Galaxy S10+ (Max Auto)
0
793
∞
Xiaomi Redmi Note 7
0.358
479
1338
Huawei Honor 10 Lite
0.344
441
1282
Oppo F11 Pro
0.316
440
1392
Nokia 7.1
0.377
490
1300
Nokia 7.1 (Max Auto)
0.465
600
1290
Motorola Moto G7 Plus
0.332
473
1425
Motorola Moto G7 Plus (Max Auto)
0.469
590
1258
Samsung Galaxy A8 (2018)
0
390
∞
Samsung Galaxy A8 (2018) (Max Auto)
0
590
∞
Sony Xperia 10
0.362
549
1517
Sony Xperia 10 Plus
0.381
583
1530
Xiaomi Mi 9
0
428
∞
Xiaomi Mi 9 (Max Auto)
0
620
∞
As we’ve come to expect from Samsung Super AMOLEDs, the display on the Galaxy A50 is capable of accurately reproducing different color spaces depending on content and selected display mode. The Basic mode stays true to sRGB (average DeltaE of 1.7), AMOLED Photo is for Adobe RGB applications (average DeltaE of 1.8), while AMOLED Cinema adheres to the DCI-P3 color space (average DeltaE of 2.0). Of course, the default Adaptive mode makes no claims for accuracy and posts an average DeltaE of 3.3 against a DCI-P3 target with a maximum deviation of 8.8.
Battery life
The Galaxy A50 has a large 4,000mAh battery inside, quite like them Redmi Notes. It supports 15W charging but we didn’t get a retail box so we can’t provide you with any charging stats.
In our testing, the Galaxy A50 achieved more than respectable results. We clocked north of 12 hours on our Wi-Fi web browsing script and almost 16 hours of looping videos in airplane mode. The 3G talk time is over a day – an excellent score as well.
Adding to the mix the excellent standby performance the Galaxy A50 posted an overall Endurance rating of 98h. And we now know what to expect from any future Exynos 9610-powered smartphone.
Speaker
The Galaxy A50 has a single loudspeaker located on the bottom. It scored a ‘Very Good’ mark in our three-pronged test when it comes to loudness, but the good news stops here. The output is rather poor and lacks big time in the high frequency. So, as far as quality is concerned – the A50 has a loud sound, but not that clean or rich.
Speakerphone test
Voice, dB
Pink noise/ Music, dB
Ringing phone, dB
Overall score
Realme 3
66.0
71.8
81.2
Good
Samsung Galaxy A9 (2018)
69.5
72.4
77.8
Very Good
Oppo F11 Pro
67.6
72.3
80.5
Very Good
Samsung Galaxy A8 (2018)
69.2
70.6
81.6
Very Good
Moto G7 Plus (Music)
70.5
73.6
78.4
Very Good
Samsung Galaxy A50
68.9
71.3
82.7
Very Good
Xiaomi Mi 9
70.1
74.2
81.6
Very Good
Sony Xperia 10
68.7
73.0
87.8
Excellent
Huawei Honor 10 Lite
70.0
73.8
87.0
Excellent
Xiaomi Redmi Note 7
69.8
71.5
90.5
Excellent
Samsung Galaxy S10+
74.4
74.2
83.6
Excellent
Sony Xperia 10 Plus
68.5
73.2
90.7
Excellent
Nokia 7.1
75.6
76.0
81.1
Excellent
Audio quality
The Samsung Galaxy A50 delivered a stellar performance when tested with an external amplifier with high volume levels and perfect clarity marks.
Hеadphones markedly degraded the reproduction accuracy – some intermodulation distortion crept in while stereo crosstalk shot up markedly. The harmonic distortion reading was also a bit worse than usual, adding up to output that’s average at best. On the upside the loudness was just as high as in the first part of the test and certainly among the best in the mid-range market.
One UI and Android Pie
The Galaxy A50 is among the first mid-rangers to come with the brand new One UI based on Google’s latest Android Pie. It premiered on the Galaxy S10 phones a couple of weeks ago, but it’s a promising replacement of the previous Samsung Experience UX. Just as expected, it packs heavy customizations and tons of old and new features but presented in a cleaner and simplistic way.
If you’ve used Samsung UX over the past few years, you will probably work your way around easily. However, there are a couple of major revamps that may seem strange or even uncomfortable at first, but we think it’s for the best.
Aside from the colorful new icons that might not be to everyone’s taste (you can swap the default ones with another icon pack), Samsung has implemented numerous changes towards more effective and comfortable one-handed use. Now all system menus, including the drop-down menu with all the quick toggles, are located on the bottom half of the screen, so they are within reach of your thumb. It takes some time getting used to, but we think it’s a pretty smart solution.
Speaking of one-handed use, there are still some small tidbits that Samsung forgot about. For example, the app folders still open in full-screen with the icons placed on the upper half of the display, which means you’ll have to use your other hand to reach them.
And just like everyone else, Samsung has its own way of implementing Google’s new gesture-based navigation. They work as conventional buttons – swiping from the bottom-left brings out the recent apps menu by default and swiping from the bottom-right takes you a step back. You can swap them in the settings menu, but the home button remains as a single swipe from the bottom-center. If you swipe and hold, it will summon Google’s Assistant.
In the end, Samsung saved a couple of pixels on the bottom, but the gestures still feel half-baked.
What doesn’t feel half-baked, however, is the Always On Display feature. It gives you plenty of options although not as many as on the Galaxy S10 phones (there is no brightness setting or wallpaper option here). You can choose different clock styles and font colors, what notifications to be displayed, and when the AOD to be shown – on tap, always, or scheduled.
In line with the rest of the UI changes, the general Settings menu has been revamped too. It’s pretty compact, and some of the settings you might be looking for have ended up elsewhere. For example, the Device care sub-menu now accommodates the Battery settings and information, storage and memory management and the security features. Tapping on the Battery icon will open up the familiar battery menu full of settings and adjustments. Aside from the usual info and features which you’d find on pretty much every other Android handset, Samsung has added a couple of additional options.
You have three power modes – Optimized, Medium-power saving and Maximum power saving. Optimized is the default one with performance cranked up to the maximum. In the upper right corner of the battery menu sits another sub-menu giving you more granular control over your power consumption.
Speaking of granularity, the Advanced menu gives you the option to set notifications to pop-up in a small view with which you can interact.
Google’s push for the so-called Digital well-being has reached Samsung’s One UI too. If you were ever wondering how much time you spend on your phone and which apps you mostly used, the Digital well-being sub-menu would give you the details. It’s cool, but it will probably stay unused by most users.
As before, Samsung’s own take on the custom Android is full of features and pre-installed apps. We are overwhelmed, and it’s hard to go over every one of them. And besides, there are plenty of carry-overs from the previous software versions. Some users may be annoyed with the heavy customization and set of pre-installed apps, especially if you are coming from a vanilla Android.
For multimedia you have the new Gallery app by Samsung for browsing photos and videos, while Play Music handles well, your music. There is also an FM radio app on board, a proprietary My Files file manager app, Samsung Health app, Bixby assistant, among others.
And although not perfect, we kind of like where Samsung is going with this. It’s addressing an issue that’s been overlooked for quite some time since the new wave of huge smartphone displays. One-handed operation on the One UI is much more pleasant and comfortable. Oh, and the inclusion of the Night mode was a long-awaited feature for more than just a few users. Only using the phone’s UI as a daily driver will help establish a more objective opinion but we like what we see so far.
Performance and benchmarks
The Galaxy A50 is the first smartphone we meet powered by the Exynos 9610 chip designed by Samsung. Contrary on what the model number suggests, the 9610 SoC is part of the mid-range Exynos 7 Series, so you shouldn’t hope for flagship-grade speeds.
Still, the Exynos 9610 seems rather well-packed with processing punch. There is an octa-core processor with four A73 cores running at 2.3GHz and four A53 ones ticking at 1.7GHz. Those should be more than enough to handle even the most demanding tasks today.
Then there is the Mali-G72 MP3 (read tri-core). We’ve already seen three G72 cores in action as part of the Helio P60 and P70 chips, and those turned out to be enough for a balanced gaming experience on a budget.
Finally, the A50 comes with either 4GB or 6GB of LPDDR4x RAM depending on the market and base storage.
And now let’s run some benchmarks, shall we?
As usual, we’ll start our benchmark tests with Geekbench. In single-core performance the Cortex-A73 cores matche the Kryo 260 Gold in the Snapdragon 660 (Redmi Note 7), and beat everything but the Kryo 360 Gold within the Snapdragon 710 (Xiaomi Mi 8 SE).
Multi-core operations are an easy task for the Galaxy A50. It does as well as the S660 chip, close to the S710 performance, while the Helio P70 that has the same CPU configuration is a bit faster because its CPU cores have a higher clock.
The tri-core Mali-G72 is a solid performer – and in this price range it’s among the best GPUs you can get in a 1080p smartphone. It is only beaten by the Adreno 616 within the Qualcomm’s Snapdragon 710 (Mi 8 SE).
The Galaxy A50 is plenty fast for its asking price. It is a very dependable performer thanks to its Exynos 9610 chip. It’s as great for gaming as it is for daily operations and browsing the social media. The Android OS and One UI are fast and fluid on this hardware, although once you populate apps with personal content you may notice some prolonged loading times.
We didn’t notice any hot spots around the Galaxy A50 even when running those benchmarks for longer duration and there was no throttling at all. Overall, the A50 offers great performance for the class and nobody should be experiencing major hiccups whatever the tasks at hand.
A triple-camera on the back
The Samsung Galaxy A50 has a triple camera on its back – the main 25MP PDAF f/1.7 snapper is joined by an 8MP fixed-focus, f/2.2 ultra-wide and a 5MP, fixed-focus, f/2.2 depth sensor. There is also a single LED flash around.
The 5MP isn’t a standalone module that you can take actual pictures with – instead, it’s a ‘Depth Camera’, to be used for ‘Live Focus’, in Samsung’s own terms.
So, the primary camera has a 25MP resolution sensor behind a fast f/1.7 lens with a focal length that’s reported as 27mm. Then the 8MP sensor behind an f/2.2 aperture lens that delivers a 120-degree field of view. The EXIF data reports 13mm focal length.
The camera app is very much the same as on any current Samsung, only with more icons in the viewfinder to control which camera is being used. The icon with 3 trees means ultra-wide-angle cam, while 2 trees denote the regular camera.
Basic operation is business as usual with side swipes for cycling through modes and an up/down action for toggling between the rear and front cameras. There’s an AI-powered Scene optimizer mode that should recognize certain types of scenes and adjust parameters accordingly. We kept it off, as it doesn’t make that much of a difference, plus we tend to prefer to add the effects after. The shown modes, as well as their arrangement, can be tweaked in settings.
Live focus mode is present, naturally, with all so many cameras and a dedicated depth sensor. There’s also a Pro mode, but there’s hardly anything pro about it – you can only choose ISO (in the 100-800 range), exposure compensation (-2/+2EV in 0.1EV steps), and white balance (presets, but no light temperature).
Image quality
The Galaxy A50 by default shoots in 12MP, but this can be changed from the aspect settings – 3:4 corresponds to 12MP, while 3:4H means 25MP. When shooting in 25MP you can’t use Auto HDR or any HDR for that matter, but that’s pretty much the only caveat.
Let’s start with the high-res images. The detail levels aren’t what you’d expect from the 25MP number but that wasn’t a surprise. We already observed similar lack in detail in previous Samsung mid-rangers such as the last Galaxy A9.
So, the photos are overall soft, but you can notice the processing tried to compensate for that with sharpening, but it is often too aggressive and there are noticeable sharpening halos in the pictures.
And now the good news – the colors turned out pretty accurate, the contrast is excellent, while the dynamic range is about the average – quite expected given no HDR mode was involved.
If HDR is involved, the photos often look a bit better with even exposure and some of the blown highlights get rescued. But there are times where the colors are presented unrealistic with a noticeable greenish tint.
The ultra-wide camera produces heavily distorted 8MP images as there is no distortion correction applied. This is hardly an issue as the purpose of the wide-angle snapper is to fit as much as possible into a 4:3 image and that’s the price to pay. Pixel level quality isn’t great, but the colors and contrast are excellent, and the dynamic range is often improved by the Auto HDR without hurting the color presentation of detail levels. Overall, those images should be enjoyed for what they are – exaggerated perspective shots on the cheap.
The 25MP low-light photos from the Galaxy A50 are a huge mess, lacking in detail, noisy, soft, and a bit blurry. We suspect the 25MP wasn’t intended for low-light at all. This is where the 12MP default option actually comes in handy. We suspect the camera does some pixel-binning but only in low-light, and thus produces much better 12MP low-light images. Far from impressive or even competitive, though.
The 12MP shots have very good color saturation although, highlights will get clipped. On closer inspection, the level of detail is underwhelming and there’s prominent noise across the board even for this price range.
There is no Night Mode on the Galaxy A50, so you can’t get anything close to Huawei’s low-light shots. And this is mostly felt in the ultra-wide-angle photos, which are rather abysmal without any software enhancements.
And once you’re done looking at real-life samples, don’t forget to head over to our Photo compare tool to check out how the Galaxy A50 deals with our studio charts.
Portraits
The Galaxy A50 has a standalone 5MP camera to capture depth information and should be producing some good portrait shots. Those are saved in 12MP and indeed they turned out impressive, especially when coming from a low-tier mid-ranger. The separation is excellent, there are no abrupt transitions, and the algorithm is smart enough not to get fooled by objects close to the face. Sure, the photos aren’t perfect, but we’ve seen flagships do way worse and we really got more than we hoped for from a budget mid-ranger.
Selfies
The Galaxy A50 comes with a high-res 25MP selfie camera, which may or may not be the same as the main 25MP one. If you get the distance right, and if there’s plenty of light – you can get some detailed shots. Colors are spot on too.
Just like the main 25MP snapper, the selfie one shoots in 12MP by default unless you opt for 25MP. The Auto HDR is available only in the 12MP mode. And if it fires, it rescues blown highlights. Other than that – the images are very detailed and have excellent colors.
Portrait mode is available on the selfie camera as well, with just the one camera. The portraits are softer than regular selfies, but surprisingly – with the same meticulous subject separation as seen on the regular portrait photos. And HDR works here when needed, too, and does an excellent job.
Video recording
The Galaxy A50 records video up to 1080p at 30fps – no 4K, and no 1080/60 either. Electronic stabilization is available though and it’s always-on – there is no option to turn it off. The bit rate of 1080p videos is average at 17Mbps while audio is recorded in stereo at 256kbps.
Taking in consideration the very windy weather around here that is felt in both picture and sound, the A50 still excels om 1080p video capture – the clips are highly detailed and with little noise. Dynamic range is good too and the colors are spot on. We’d rank the A50‘s 1080p clips among the better ones we’ve seen, not just in its class, but overall.
The footage from the ultra-wide-camera doesn’t have award-winning detail, but it’s decent as ultra-wide videos go.
Electronic stabilization is available on both regular and wide-angle camera and it does a stellar job.
In theory the Exynos 9610’s ISO should support 4K video recording, which however is not available on the A50. We’ve encountered similar oddities with some cheap Redmis, so we suspected we could get 4K clips with a third-party app since Samsung is using a standard camera APIs. So, we just downloaded the OpenCamera app from the PlayStore and bingo! 4K@30fps. So, if you want 4K on the A50, you can have it, in pretty good quality at that.
Competition
This year Samsung has completely revamped its Galaxy A-series and once again shifted their position on the market. The Galaxy A50 is a rather obvious offer meant to keep the budget low yet bring some cool features from the higher-tier devices – like a large Super AMOLED, snappy chip and a multi-camera setup.
And things did turn out for the better – the Galaxy A50 has the looks to impress, a very colorful AMOLED screen with an under-screen fingerprint scanner, a very capable camera on both ends, a gaming-friendly chipset, and a beefy battery that will keep the lights on for quite some time. But the best part – the price of €280 is quite reasonable and competitive.
Compromises had to be made for making such a good deal – the A50 isn’t water-resistant – something the old Galaxy A series has been known for. But that’s probably the only beef a long-time Samsung fan may have with the A50.
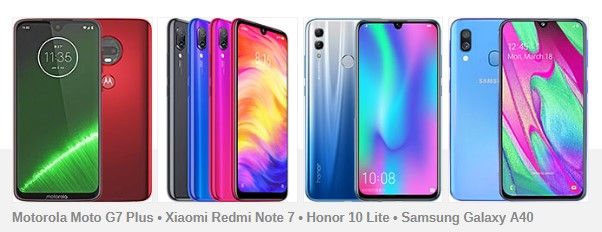
Let’s take a peek at the competition. Motorola is selling the Moto G7 Plus at about the same price, but it’s an inferior phone in every way – the screen is an LCD, the chipset is feeble, the camera – less impressive although it can do 4K, and the battery life was disappointing.
The Redmi Note 7 is at least €60 cheaper, and it is ready to fight back big time. The Xiaomi’s most popular mid-ranger is as stunning and as fast as the A50, while it’s 6.3″ display is of the same resolution, but it’s the IPS LCD kind. It has no wide-angle camera, but it can still excel in photos, and it even offers a Night Mode. If you aren’t all about OLEDs and One UI, you may want to give it a try.
The Honor 10 Lite also impresses with a dazzling body and a large IPS LCD screen, while its Kirin 710 chip is of the same league as the Exynos 9610. The Honor omits a wide-angle snapper but makes up for that with a Night Mode by Huawei. Finally, the Honor 10 Lite costs about €80 less than the Galaxy A50 – probably the biggest reason to check this one out.
And back to Samsung – if the A50 is too large for you, then the A40 is a very good option. It is a very compact and lightweight smartphone, with a 5.9″ nearly bezel-less 1080p AMOLED, a good enough Exynos 7885 chip, and a solid 3,100 mAh battery for that size. The A40 has a dual-camera on the back with a 16MP main snapper and a 5MP ultra-wide cam, it lacks a depth sensor and thus the not-so-accurate portraits. The A40 is a bit cheaper (€40), so there is that.
The Verdict
Samsung got a lot of things right in the Galaxy A50 – the design and color options, the screen, the performance, and the battery life. The still images, while not impressive in detail, are of high-resolution and dependable as long as there’s sufficient light. Nighttime photos turn out with poor dynamic range, fuzzy and noisy. Most of the competitors perform much better in low-light situations. The 1080p videos, on the other hand, are impressive.
The addition of the One UI is welcome on a midranger, and we like the direction where it is going. Yes, the Galaxy A50 isn’t water-resistant as its predecessors, but it excels elsewhere and makes up for all omissions with a very competitive price. We liked it for sure, and we’d recommend checking it out if it fits your budget bracket.
Pros
Solid build and stunning paintjob
Excellent 6.4″ AMOLED
Gaming-friendly Exynos 9610 chip
Versatile camera that does the job well during the day
Great portraits, nice selfies, excellent 1080p videos with stabilization
Dependable battery life
Cons
Lacks water-resistance
The speaker quality is poor
Unsatisfactory low-light camera performance
The detail in the daylight photos could have been higher
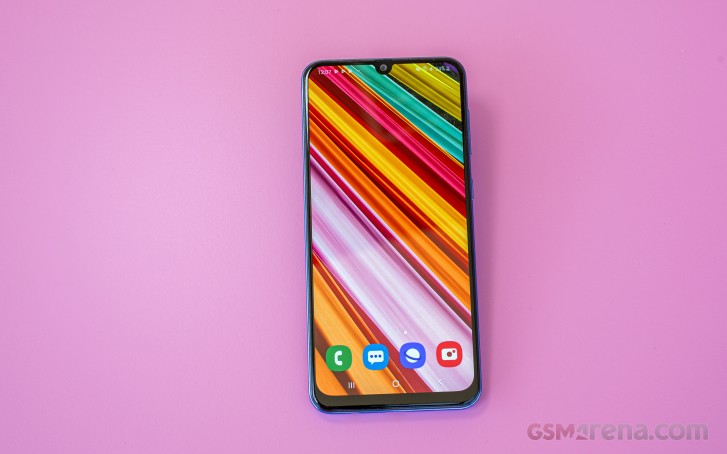
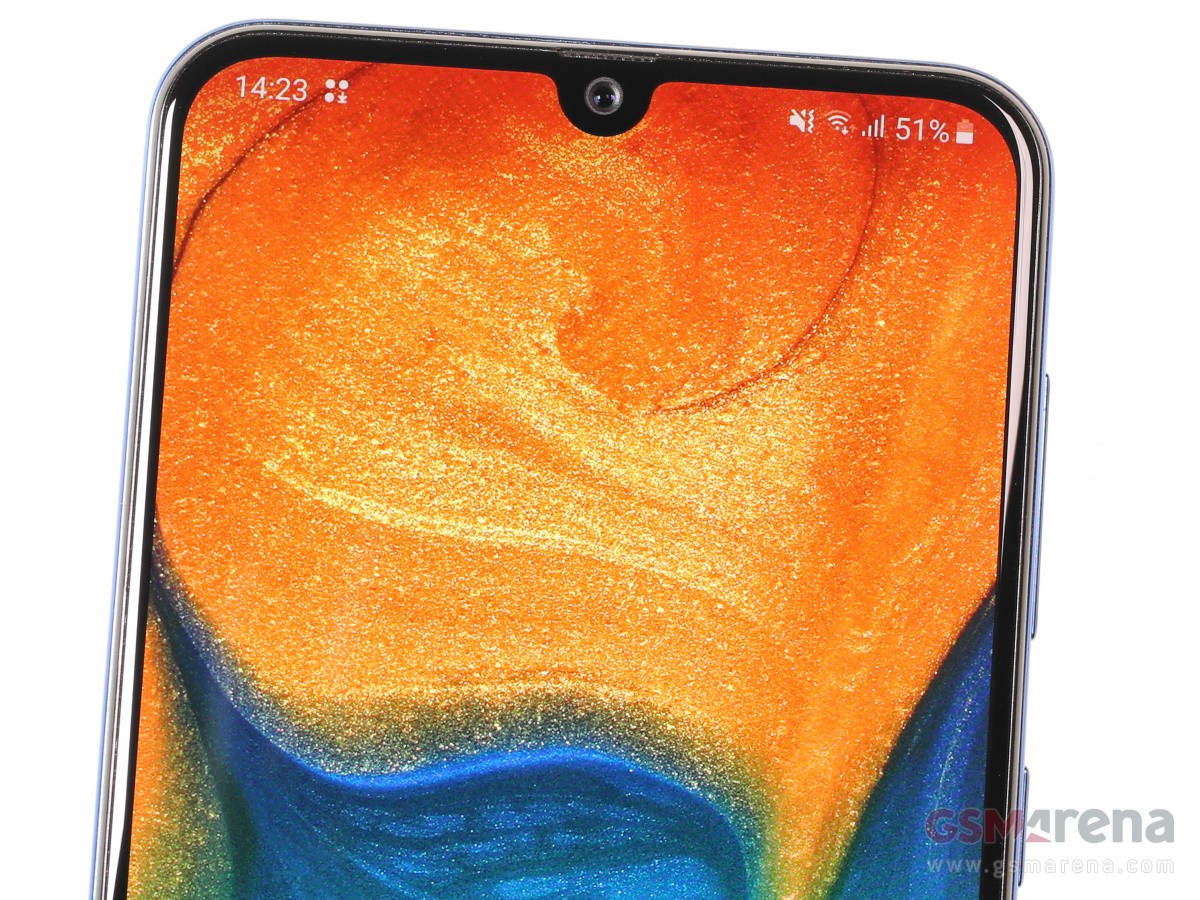
The new Samsung Galaxy A series has proven to be an excellent lineup of offers starting from the budget A10 and going all the way to the upper-midrange A80. We already reviewed a bunch of those As, but we are far from done yet – there are still so many of them left. And today it’s the Galaxy A30‘s turn – an intriguing mixture of A40’s internals and A50’s display.
The Galaxy A (2019) smartphones have a couple of common features, and the A30 is no different – it has a glasstic body, a Super AMOLED screen, and a multi-camera setup on the back that includes an ultra-wide-angle snapper. But this phone is sort of an oddball.
We guess at some point Samsung had this plan to arrange those models by price, but the Galaxy A30 does not fall into the ranks so well as it is more expensive than the A40 model. And it makes sense to be that way since the Galaxy A30 packs a larger AMOLED and a beefier battery compared to the A40.
So, the Galaxy A30 is jam-packed with nice hardware – the 6.4″ Infinity-U AMOLED is among the best screens in the entire midrange class, there is a snappy enough Exynos chipset, a dual-camera on the back, a huge 4,000 mAh battery, and Samsung‘s latest One UI on top of Pie OS.
Samsung Galaxy A30 specs
Body: Gorilla Glass 3 front, plastic frame and back;
Screen: 6.4″ Super AMOLED; 19.5:9 aspect ratio; FullHD+ (1080 x 2340 px)
Memory: 4GB of RAM + 64GB storage / 3GB of RAM + 32GB storage; Up to 512GB microSD card
OS: Android 9.0 Pie; Samsung One UI on top
Battery: 4,000mAh Li-Ion; 15W quick charge
Connectivity: Dual-SIM/ Single-SIM options available; LTE; USB 2.0 Type-C; Wi-Fi a/b/g/n/ac; GPS + GLONASS + BDS; Bluetooth 5.0; FM radio
Misc: Single bottom-firing speaker, rear-mounted fingerprint reader
What’s missing? Just water-resistance. Indeed, water-resistance was the cornerstone for the Galaxy A series, but not anymore. None of the latest A phones comes with ingress protection, but they are not losing any slots or jacks, so it’s a silver lining of a sorts.
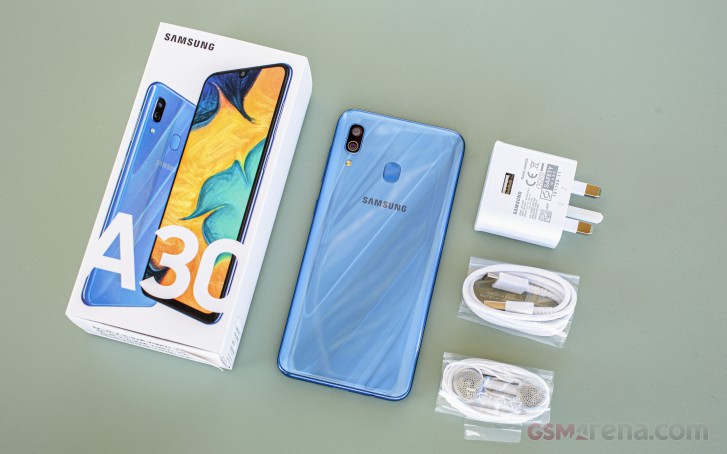
Unboxing the Galaxy A30
The Galaxy A30 retail box contains the usual bunch – a USB-C cable, a rather cheap-looking pair of headphones with a mic, and a charger.
The A30 supports 15W fast charging, Samsung‘s Adaptive Fast Charging to be specific, and get the corresponding charger bundled with each A30.
Finally, there is a factory-applied screen protector on the Galaxy A30. It’s a very thin and rather easy to peel off, but it’s still useful, and we appreciate it.
Design
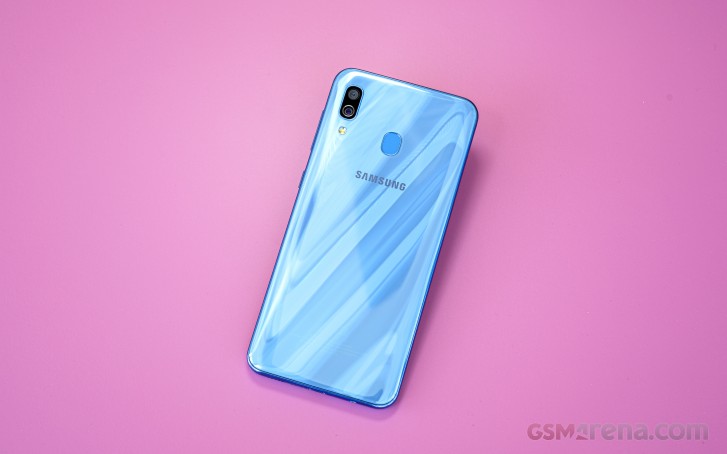
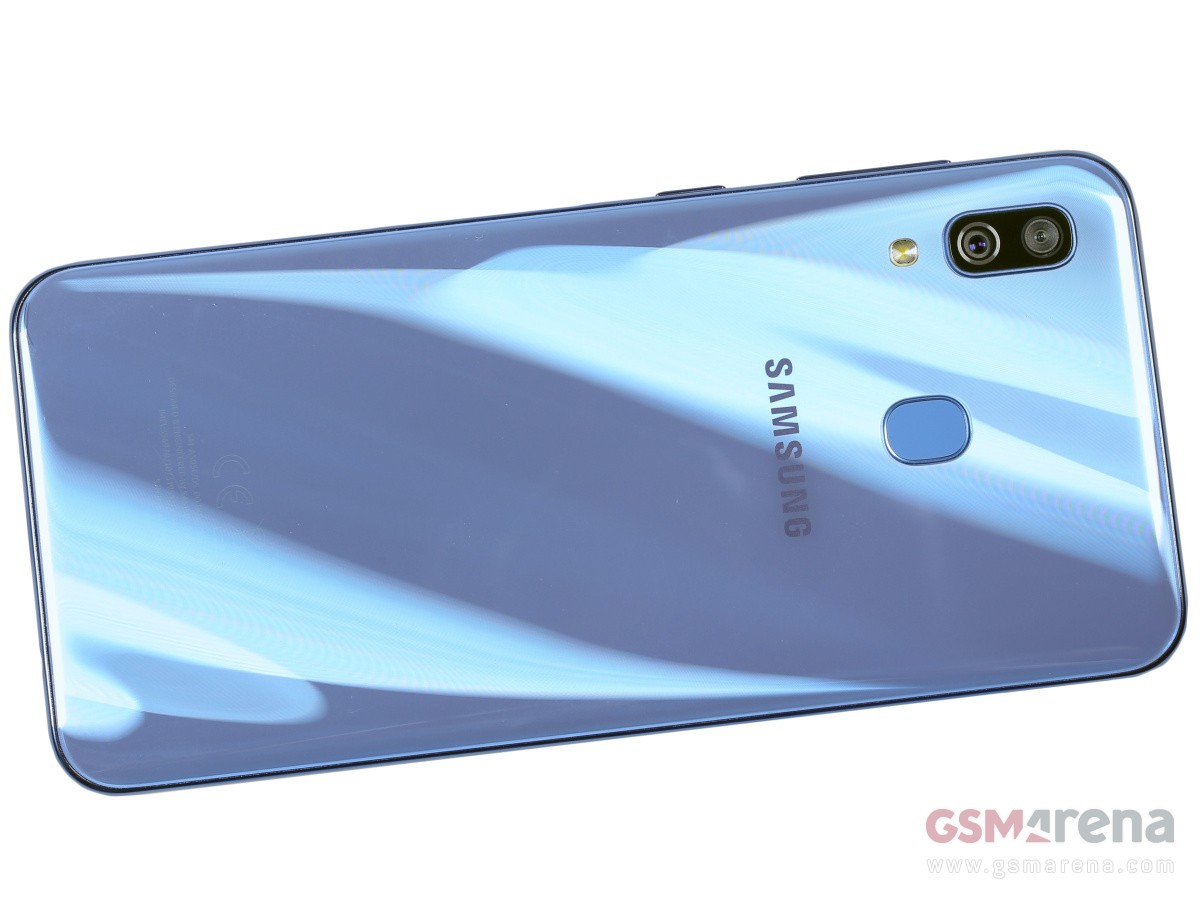
Samsung came up with the Glasstic term to best describe the material used for the backs of its new Galaxy A series, and it contains the rather obvious answer – glass and plastic. Indeed, the Galaxy A30, just like the A40 and the A50, has a body made of those two materials.
Both the frame and back are made of plastic but one that looks more like glass than plastic. If you’ve seen one Glasstic phone, then you’ve seen them all. But if not, then you probably have no idea what exactly Glasstic is, have you?
The screen is covered by a piece of Gorilla Glass 3 by Corning. The A30 has a proper Super AMOLED at its front. And it seems to be the same panel we saw on the Galaxy A50 – a 6.4″ 1080p unit with a U-shaped notch that houses the 16MP selfie snapper.
The earpiece is just above the selfie cam, but it is so small and thin that’s it is almost invisible.
The AMOLED panel is premium hardware, but the high-quality stuff ends with it. The side bezels are tiny, but the chin is pretty big. Then there is this visible screen enclosure between the glass and the frame, which is very sharp around the bottom of the phone. Those are common among the cheap phones though and are not exclusive to the Galaxy.
The frame is very thin, curvy, and glossy, meaning it’s pretty in the few seconds when it’s not covered in fingerprint smudges, and is also hard to get a nice grip on.
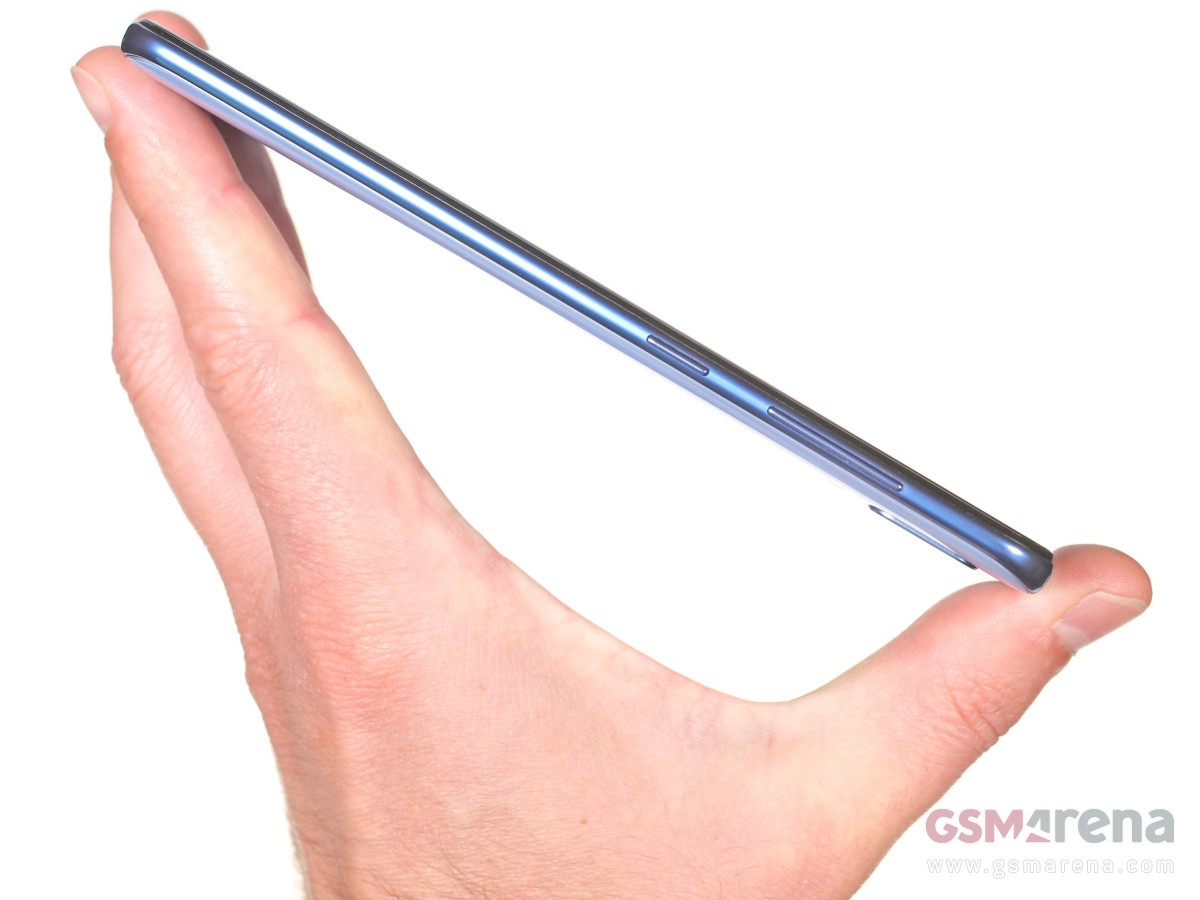
The tri-card slot, the volume and power keys are on the right, while the speaker, USB-C port and audio jack are at the bottom of the Galaxy A30.
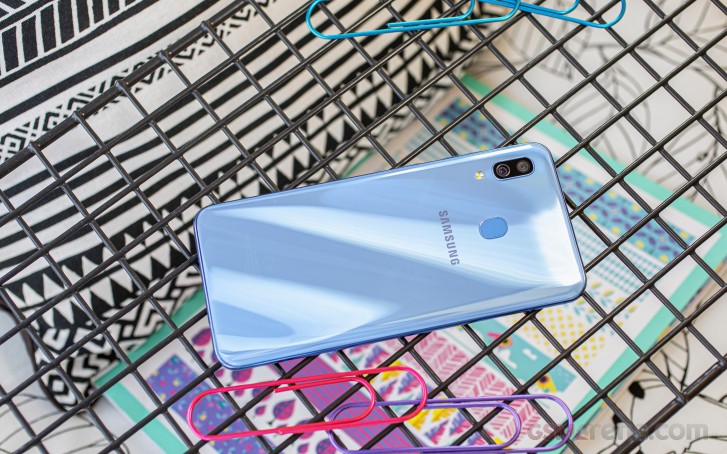
The Glasstic piece covering the back is flashy and dazzling. No matter if you opt for the blue, red, or black model, the color-changing effect be present on all of them. The piece is bent towards the longer sides and this may not be helping the grip but makes up for a thinner profile and a dash of premium feel.
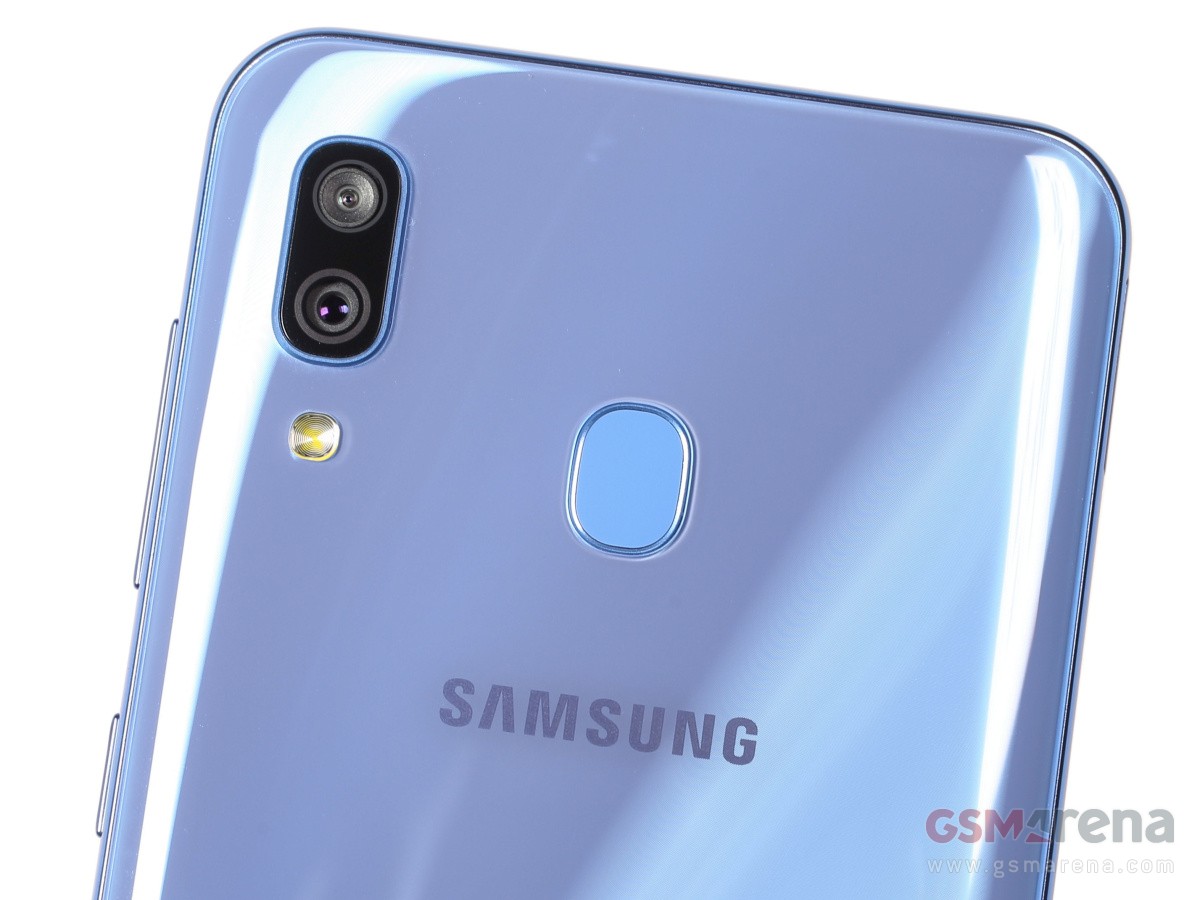
The dual-camera is on the back humping just a tiny little bit and it won’t wobble on a flat surface. The setup has the secondary 5MP ultra-wide snapper on the top and the 16MP main eye at the bottom. A single LED lash sits outside of this tiny hump.
The fingerprint scanner is also on the back and it’s of our favorite kind – always on and blazing-fast. Its recognition is very accurate, too, and performance doesn’t seem to be affected by smudges.
The Galaxy A30 measures 158.5 x 74.7 x 7.7 mm, which is exactly the same as the Galaxy A50. The A30 weighs 165g, a gram less than the A50.
Handling the Galaxy A30 is business as usual. The phone feels more like made of glass than plastic, which is nice but is easy to smudge and eventually it becomes a mess. It’s not as slippery as the looks suggest though, and even if the profile is slim and not that grippy, we didn’t have any major issues while handling it.
Display
Beyond any doubt, the huge Super AMOLED screen is the Galaxy A30‘s main selling feature. It’s the same large 6.4″ Super AMOLED screen of 1080p+ resolution as seen on the A50. The actual pixel count is 2,340 x 1,080, making the aspect ratio quite tall (19.5:9). The pixel density is more than enough at 403ppi.
The A30 has the so-called Infinity-U panel, meaning it has a U-shaped notch at the top for the selfie camera. The screen is of the usual high-quality we’ve grown to like. We measured about 430 nits of maximum brightness in manual mode and 550nits in Auto when the ambient light sensor exposed to bright light. We measured a minimum brightness of 1.9nits.
Display test
100% brightness
Black, cd/m2
White, cd/m2
Contrast ratio
Samsung Galaxy A30
0
433
∞
Samsung Galaxy A30 (Max Auto)
0
548
∞
Samsung Galaxy A40
0
410
∞
Samsung Galaxy A40 (Max Auto)
0
548
∞
Samsung Galaxy A50
0
424
∞
Samsung Galaxy A50 (Max Auto)
0
551
∞
Samsung Galaxy M30
0
437
∞
Samsung Galaxy M30 (Max Auto)
0
641
∞
Xiaomi Redmi Note 7
0.358
479
1338
Huawei Honor 10 Lite
0.344
441
1282
Nokia 7.1
0.377
490
1300
Nokia 7.1 (Max Auto)
0.465
600
1290
Sony Xperia 10
0.362
549
1517
Sony Xperia 10 Plus
0.381
583
1530
Oppo F11 Pro
0.316
440
1392
Realme X
0
448
∞
Motorola Moto G7 Plus
0.332
473
1425
Motorola Moto G7 Plus (Max Auto)
0.469
590
1258
As we’ve come to expect from Samsung Super AMOLEDs, the display on the Galaxy A30 is capable of accurately reproducing different color spaces depending on content and selected display mode. The Basic mode stays true to sRGB (average DeltaE of 1.6), AMOLED Photo is for Adobe RGB applications (average DeltaE of 1.8), while AMOLED Cinema adheres to the DCI-P3 color space (average DeltaE of 2.2). Of course, the default Adaptive mode makes no claims for accuracy and posts an average DeltaE of 3.4 against a DCI-P3 target with a maximum deviation of 9.
Battery life
The Galaxy A30 has a large 4,000mAh battery inside, just like the A50’s. It supports 15W charging, and the supplied charger will refill about 30% of the A30‘s depleted battery in half an hour.
In our testing, the Galaxy A30 achieved some respectable results. We clocked north of 11 hours on our Wi-Fi web browsing script and 14 and half hours of looping videos in airplane mode. The 3G talk time is over a day – an excellent score as well.
Adding to the mix the very good standby performance the Galaxy A30 posted an overall Endurance rating of 92h.
Loudspeaker
The Galaxy A30 has a single loudspeaker located on the bottom. It scored a Below Average mark in our three-pronged test when it comes to loudness, and it is very quiet – it’s been a while since we’ve seen a phone rank this low. The output is okay for the class but won’t impress with rich sound.
Speakerphone test
Voice, dB
Pink noise/ Music, dB
Ringing phone, dB
Overall score
Samsung Galaxy A30
65.9
66.6
68.4
Below Average
Samsung Galaxy M30
65.6
66.2
70.4
Average
Samsung Galaxy M20
67.0
66.8
68.6
Average
Samsung Galaxy A40
66.2
68.3
73.6
Good
Samsung Galaxy M10
66.2
71.7
80.0
Good
Realme 3
66.0
71.8
81.2
Good
Samsung Galaxy A50
68.9
71.3
82.7
Very Good
Sony Xperia 10
68.7
73.0
87.8
Excellent
Realme 3 Pro
67.5
73.8
90.5
Excellent
Xiaomi Redmi Note 7
69.8
71.5
90.5
Excellent
Nokia 7.1
75.6
76.0
81.1
Excellent
Moto G7 Power
75.8
75.2
82.5
Excellent
Audio quality
The Samsung Galaxy A30had a fine performance in the first part of the audio test. With an active external amplifier, it posted excellent scores and had above average volume levels .
While the loudness didn’t suffer when we plugged in headphones, a few of the scores took a hit – most notably the stereo crosstalk and to a lesser extent intermodulation distortion and frequency response. The overall performance was very close to the Galaxy M30, suggesting a shared audio chip, but the A30 comes just behind its sibling likely due to slightly different wiring.
Test
Frequency response
Noise level
Dynamic range
THD
IMD + Noise
Stereo crosstalk
Samsung Galaxy A30
+0.03, -0.05
-93.3
93.0
0.0068
0.012
-88.9
Samsung Galaxy A30 (headphones)
+0.23, -0.25
-90.8
91.2
0.015
0.266
-48.0
Samsung Galaxy M30
+0.03, -0.05
-90.5
90.4
0.0057
0.016
-90.0
Samsung Galaxy M30 (headphones)
+0.26, -0.20
-92.9
92.4
0.095
0.249
-59.1
Sony Xperia L3
+0.07, -0.01
-91.9
91.8
0.0013
0.009
-89.3
Sony Xperia L3 (headphones)
+0.50, -0.50
-90.6
90.8
0.0049
0.392
-52.3
Realme 3
+0.07, -0.04
-93.5
93.4
0.0010
0.0067
-91.6
Realme 3 (headphones)
+0.50, -0.17
-92.1
92.2
0.011
0.401
-52.0
Motorola Moto G7 Play
+0.07, -0.01
-90.0
90.1
0.0019
0.015
-92.9
Motorola Moto G7 Play (headphones)
+0.16, -0.10
-92.3
92.5
0.0069
0.164
-64.8
Android Pie and One UI
The Galaxy A30 comes with the new One UI based on Google’s latest Android Pie. It premiered on the Galaxy S10 phones, and it’s a promising replacement of the previous Samsung Experience UX. Just as expected, it packs heavy customizations and tons of old and new features but presented in a cleaner and simplistic way.
If you’ve used Samsung UX over the past few years, you will probably work your way around quickly. However, there are a couple of major revamps that may seem strange or even uncomfortable at first, but we think the changes are for the better.
Aside from the colorful new icons that might not be to everyone’s taste (you can swap the default ones with another icon pack), Samsung has implemented numerous changes towards more effective and comfortable one-handed use. Now all system menus, including the drop-down menu with all the quick toggles, are located on the bottom half of the screen, so they are within reach of your thumb. It takes some time getting used to, but we think it’s a pretty smart solution.
Speaking of one-handed use, there are still some small tidbits that Samsung forgot about. For example, the app folders still open in full-screen with the icons placed on the upper half of the display, which means you’ll have to use your other hand to reach them.
And just like everyone else, Samsung has its own way of implementing Google’s new gesture-based navigation. They work as conventional buttons – swiping from the bottom-left brings out the recent apps menu by default and swiping from the bottom-right takes you a step back. You can swap them in the settings menu, but the home button remains as a single swipe from the bottom-center. If you swipe and hold, it will summon Google’s Assistant.
In the end, Samsung saved a couple of pixels on the bottom, but the gestures still feel half-baked.
What doesn’t feel half-baked, however, is the Always On Display feature. It gives you plenty of options although not as many as on the Galaxy S10 phones (there is no brightness setting or wallpaper option here). You can choose different clock styles and font colors, what notifications to be displayed, and when the AOD to be shown – on tap, always, or scheduled.
In line with the rest of the UI changes, the general Settings menu has been revamped too. It’s pretty compact, and some of the settings you might be looking for have ended up elsewhere. For example, the Device care sub-menu now accommodates the Battery settings and information, storage and memory management and the security features. Tapping on the Battery icon will open up the familiar battery menu full of settings and adjustments. Aside from the usual info and features which you’d find on pretty much every other Android handset, Samsung has added a couple of additional options.
You have three power modes – Optimized, Medium-power saving and Maximum power saving. Optimized is the default one with performance cranked up to the maximum. In the upper right corner of the battery menu sits another sub-menu giving you more granular control over your power consumption.
Speaking of granularity, the Advanced menu gives you the option to set notifications to pop-up in a small view with which you can interact.
Google’s push for the so-called Digital well-being has reached Samsung‘s One UI too. If you were ever wondering how much time you spend on your phone and which apps you mostly used, the Digital well-being sub-menu would give you the details. It’s cool, but it will probably stay unused by most users.
As before, Samsung‘s own take on the custom Android is full of features and pre-installed apps. We are overwhelmed, and it’s hard to go over every one of them. And besides, there are plenty of carry-overs from the previous software versions. Some users may be annoyed with the heavy customization and set of pre-installed apps, especially if you are coming from a vanilla Android.
For multimedia you have the new Gallery app by Samsung for browsing photos and videos, while Play Music handles well, your music. There is also an FM radio app on board, a proprietary My Files file manager app, Samsung Health app, Bixby assistant, among others.
And although not perfect, we kind of like where Samsung is going with this. It’s addressing an issue that’s been overlooked for quite some time since the new wave of huge smartphone displays. One-handed operation on the One UI is much more pleasant and comfortable. Oh, and the inclusion of the Camera Night mode was a long-awaited feature for more than just a few users.
Performance and benchmarks
The Samsung Galaxy A30 is powered by Samsung‘s Exynos 7904 chipset, which is essentially a downclocked 7885 and we already met it within the Galaxy A40. The SoC packs an octa-core processor with 2x high-performance Cortex-A73 cores clocked at 1.77 GHz and 6x power-efficient and smaller Cortex-A53 cores ticking at 1.59 GHz. For graphically intensive tasks, the Exynos 7904 relies on the Mali-G71 MP2 GPU.
When it comes to memory, the phone comes either with 3GB or 4GB of RAM depending on the model’s base storage – 32GB or 64GB. The one we got for this review has 4GB/64GB.
We kick things off with the usual CPU testing to see where the Exynos 7904 stands. The scores aren’t showing a winner, but nobody really expected a chart-topper. One A73 core ticking at 1.77GHz is powerful enough and would beat any A53 one, while it’s not that far from the A73s clocked at 2.2GHz or similar.
A dual-camera on the back
The Samsung Galaxy A30 has two snappers on its back – the main 16MP PDAF f/1.7 snapper is joined by a 5MP fixed-focus, f/2.2 ultra-wide and there is also a single LED flash around. There is no depth cam on the A30, but it can do portrait photos with defocused backgrounds just fine – Live Focus as Samsung calls the mode.
So, the primary camera has a 16MP resolution sensor behind a fast f/1.7 lens with a focal length that’s reported as 26mm. Then the 5MP sensor behind an f/2.2 aperture lens that delivers a 120-degree field of view. The EXIF data reports 13mm focal length.
The camera app is very much the same as on any current Samsung, only with more icons in the viewfinder to control which camera is being used. The icon with 3 trees means ultra-wide-angle cam, while 2 trees denote the regular camera.
Basic operation is business as usual with side swipes for cycling through modes and an up/down action for toggling between the rear and front cameras. There’s an AI-powered Scene optimizer mode that should recognize certain types of scenes and adjust parameters accordingly. We kept it off, as it doesn’t make that much of a difference, plus we tend to prefer to add the effects after. The shown modes, as well as their arrangement, can be tweaked in settings.
There’s also a Pro mode, but there’s hardly anything pro about it – you can only choose ISO (in the 100-800 range), exposure compensation (-2/+2EV in 0.1EV steps), and white balance (presets, but no light temperature).
Image quality
The photos we snapped with the main camera in broad daylight turned out very good, keeping in mind the A30‘s price. The stills have plenty of fine detail, generally realistic colors, and excellent contrast. The dynamic range is above average and Auto HDR triggers extremely rarely – only in very demanding scenes. That said, just like on the M30, there were instances when it could have helped, and the phone didn’t engage it, so keep an eye on that.
There is some noise in areas of uniform color, and the grass presentation could have been better, but the A30 is a budget phone, and it offers more than enough for its class.
The ultra-wide-angle camera relies on a 5MP sensor with fixed focus. There is no lens correction available, so distorted buildings are expected.
During the day this tiny camera produces pleasant photos, which may not be filled with much detail, but they do have a super-wide field of view. The colors are more popping than what we experienced on the 16MP regular stills, but probably Samsung has tweaked it this way to create livelier images and enough distraction from the inferior quality. And indeed, it does.
The low-light photos from the main 16MP camera are nothing impressive as expected. They do have good color saturation, a step up from the M30’s low-light images, but highlights will get clipped, just like on the other phone. The level of detail is underwhelming, and there’s prominent noise across the board.
There is no Night Mode on the Galaxy A30, so you can’t get anything close to Huawei’s low-light shots. And this is mostly felt in the ultra-wide-angle photos, which are rather abysmal without any software enhancements.
Once you’re done looking at the real-life samples, don’t forget to head over to our Photo compare tool to check out how the Galaxy A30 deals with our studio charts.
Live Focus
The ultra wide-angle camera isn’t used for depth information, so the software does all the heavy lifting and does the edge separation on its own. The Live Focus photos surprised us with very good separation and very smart detection. You can adjust the strength of the bokeh in real time or later on in the gallery with the slider below.
The Live Focus photos are saved in 8MP resolution.
Selfies
The 16MP selfies are soft and average in detail, but they do offer excellent contrast and punchy colors. The Auto HDR fires here more often than not, but it does an excellent job in restoring the clipped highlights.
If you get the distance right, and if there’s plenty of light – you can get some nice shots.
Portrait mode is available on the selfie camera as well, with just the one camera. The portraits are softer than regular selfies, while the edge detection is far worse than on the main camera. The processing tries to mask the defects and artefacts with extra blur, mostly unsuccessful though. The Auto HDR works here when needed and does an excellent job.
Video recording
The main camera can only record up to Full HD at 30fps, and the same goes for the wide-angle unit. There is no electronic stabilization on any of the snappers.
But if you’d like 4K video recording, the good news is that you can download Open Camera or another third-party camera app from Play Store and enjoy 2160p recording. Be aware though, that the snapper is limited to 4K capturing at 20fps and the clips will be choppy.
If all else fails, the 1080p videos (17Mbps bitrate) from the main camera are excellent, if not class leading. Those are highly detailed, with little noise and true-to-life colors. Dynamic range is good too. We’d rank the A30‘s 1080p clips among the better ones we’ve seen, not just in its class, but overall. And their stereo audio is top-notch, too, captured with 256kbps bitrate.
The footage from the ultra-wide-camera doesn’t have award-winning detail, but it’s decent as ultra-wide videos go.
Need to open a VMDK file in VirtualBox? This article will show you how to setup and use a VMDK virtual machine file with VirtualBox. This particular tutorial is demonstrated on a Mac, but using a VMDK with VirtualBox this way should work the same on Windows and Linux too.
VMDK is short for Virtual Machine Disk, and VMDK files can be created by VMWare, VirtualBox, Parallels, and other virtualization software. You may have noticed that you can’t simply open a VMDK virtual machine file directly with VirtualBox, nor can you drag and drop it to launch. Instead you’ll create a new virtual machine and use that as the disk, using the steps outlined below.
How to Open a VMDK File with VirtualBox on Mac, Windows, Linux
Open the VirtualBox application, then choose “New” to create a new virtual machine
Give the new virtual machine a name and set the type, OS version, RAM, and then click to choose “Use an existing virtual hard disk file” and click the folder icon to navigate the file system
Click “Add” to add a virtual hard disk file
Navigate to and select the VMDK file and choose “Open”
Confirm the VMDK drive is selected then select “Choose”
Now choose “Create” to create the new virtual machine using the VMDK file
Click “Start” at the VirtualBox Manager screen to boot the VMDK virtual machine
Once you click Start the virtual machine will boot using the VMDK file you selected as the virtual hard disk file.
VMDK files can be made of just about any operating system, including Windows, Linux, MacOS and/or Mac OS X. The VMDK virtual machine files are often made available or transferred around as pre-built configurations of operating systems, making it easy to use or test the same setup on multiple machines or by multiple people.
This is probably somewhat obvious, but if you move the location of the VMDK file the VirtualBox machine will no longer boot until the VMDK file is located again.
If you’re finished using the VMDK file and the related virtual machine, you can delete that VM from VirtualBox like removing any other VM.
You might be wondering if it’s possible to convert a VMDK file to VHD or VDI or another virtual machine disk format, and the answer is yes though it’s not nearly as easy as converting an ISO to VDI, and instead you’ll have to rely on this free tool from Microsoft that runs in Windows.
Photography is anything but a simple task. Getting good results is part composure, part experience, and part hardware. The mobile phone space has been blowing up over the past few years with fewer and fewer people buying dedicated point and shoot cameras and instead relying on their smartphone. Honor has risen to the task though with the Honor 20 lineup and today we are going to talk about how to get the best out of the Honor 20 Pro and its many camera sensors, techniques to get the best shot, and how Honors Master AI system helps meet that challenge.
If you aren’t familiar with the Honor 20 Pro’s cameras, here is a quick rundown of all the specs. The main sensor is a 48MP Sony IMX586 with Phase Detect and Laser autofocus, Optical and Electronic Image Stabilization, and a bokeh enabling f1.4 lens that brings in significantly more light than competitors F1.8 or F2.0 lens. The second camera is a 3x 80mm f2.4 telephoto lens that also features Phase Detect and Laser autofocus. The third is an ultra-wide 16MP camera and the fourth is an industry-first dedicated Macro camera. The Honor 20 Pro has a vast array of cameras for every situation, so let’s go over some of those common scenarios and how the Honor 20 Pro helps you get your best result
AI Master On vs AI Master Off
The Honor 20 Pro features MagicUI’s AI Master mode to automatically identify and adjust the shot settings for whatever scenario you are in. Take the below examples for instance and see how AI Master has its advantages and disadvantages.
Honor 20 Pro – AI On
Honor 20 Pro – AI Off
Depending on what your desired end result is, you first have to decide if you want to have AI Master enabled or disabled. The above images reflect the changes that AI on and AI off make. While the second image is closer to reality, the AI Master mode does make the flower pop a lot more and adds more yellows and greens. This type of shot would be ideal for Instagram.
Honor 20 Pro – AI On
Honor 20 Pro – AI Off
This second image taken with the wide-angle sensor shows how much more of a difference the AI Master mode makes on panoramic shots. Each of the colors is well beyond what they are in real life, but it does make for a photo you won’t need to retouch for Social Media sharing and does have a WOW-factor.
Honor 20 Pro – AI On
Honor 20 Pro – AI Off
In this final test of AI Master, you can see that it keeps everything very realistic and just applies normal HDR settings to the shot.
Regular and Zoom Vs Macro
As we have discussed, the Honor 20 Pro features both a 3X zoom sensor and a dedicated Macro sensor. Sometimes you might want to get super close on an image and you have a choice, should you use the Macro sensor or get right up and close with the primary one. What about the zoom lens, could you just zoom in on it? See how the below image perspective and feel is changed depending on what lens you use.
Honor 20 Pro – AI On
Honor 20 Pro – 3X
Honor 20 Pro – Macro
The Primary sensor clearly delivers the best all-around shot, but the 3X sensor does a really good job as well. While its colors could use some tuning, thanks to the narrower field of view you get a larger than life feel from the zoomed-in shot. The final image taken with the Macro sensor shows its advantages and disadvantages. You can really get super close on an object and see things you normally couldn’t, but it also doesn’t have the quality of the larger sensors and at 2MP you will not be able to blow up this image to print or see on a larger screen for more details.
Honor 20 Pro – Macro
Honor 20 Pro – Primary
This image though shows the benefits of using the Macro sensor. I could get very close to my subject and still have it in focus whereas the primary sensor could not focus at this close range.
48 Megapixel Ultra Clarity Mode Uses
We’ve already discussed in previous articles the benefits to using the AI Ultra Clarity mode available on the Honor 20 Pro. It is great for large panoramas and areas with little movement. Below you can see a less than ideal scenario where leaving the camera in the 12MP mode is superior.
Honor 20 Pro – 48MP Ultra Clarity
Honor 20 Pro – 12MP
The image on the left was taken using the 48MP Ultra Clarity mode and resized for uploading to the site. You can see that the benefits from stacking the images for the 12MP image are in the detailed shadows and overall image exposure. The 48MP photo does have more detail, but you can see that there is less detail on any moving objects. 48MP Ultra Clarity takes about 6 seconds to shoot and process, so any moving subjects could have blurring due to the process. While this mode is ideal for landscape shots, you won’t want to use it for closeups or objects that are moving.
Honor 20 Pro – Regular
When to Use the Ultra-Wide Angle
One of the most common questions I see asked is when to use the normal wide-angle camera versus the ultra-wide-angle camera. The answer is whenever you want a super wide or tall shot and you are not taking a portrait of a person. The neat thing about wide-angle shots is that you can take them in both landscape and portrait for some neat angles and interesting shots.
Honor 20 Pro – Ultra-Wide
Honor 20 Pro – Regular
Honor 20 Pro – Ultra-Wide
Honor 20 Pro – Regular
Night Mode vs Pro Mode and Regular Mode
The Honor 20 Pro features Honor’s excellent night mode, and that is what we are comparing next. One of the downsides of the night mode is the time to shoot. It can take up to 6 seconds to capture the scene, so you need to have steady hands and no moving objects for the best result. With the last image, I decided to put the phone into night mode, lower the ISO to 400, and shutter speed to 1/10 to capture a really cool nightscape with very little noise.
Honor 20 Pro – Regular Mode
Honor 20 Pro – Night Mode
Honor 20 Pro – Pro Mode
The Honor 20 Pro has one of the most versatile setups available today, and we hope these tips will help you to master the camera and its various settings!
At some point in time you may have installed the popular Malwarebytes tool on a Mac to scan for malware, spyware, ransomware, junkware, and other garbage threats on a Mac, but at some point you may decide you want to uninstall Malwarebytes from the Mac and remove the utility from a computer.
Whether you’re using the free or paid version of Malwarebytes you’ll find that uninstalling it is fairly easy. We’ll cover two methods to remove Malwarebytes from a Mac.
How to Uninstall Malwarebytes from Mac OS the Easy Way
The simplest way to uninstall Malwarebytes from a Mac is to use the apps built-in uninstaller:
Open the Malwarebytes app on the Mac, found in the /Applications folder
Pull down the “Help” menu and choose “Uninstall Malwarebytes”
Choose “Yes” when asked if you want to completely remove Malwarebytes from the Mac
Authenticate with the admin password to uninstall Malwarebytes
How to Remove & Uninstall Malwarebytes by Script (if the Application is Missing, Doesn’t Work, etc)
If for some reason the above easy approach to uninstalling Malwarebytes does not work, or perhaps you already deleted the primary Malwarebytes application and so you no longer have the capability to use the built-in uninstaller function, another is available using a free removal script from Malwarebytes. Here’s how that works:
Launch the “Uninstall MWB” tool from the Downloads folder
Choose “Yes” when asked if you wish to remove all components of Malwarebytes from the Mac
This is the preferred method to remove Malwarebytes from a Mac. It’s easy and it’s relatively fast, and it should remove every component of Malwarebytes from the computer without having to do anything else.
Nonetheless there are other options which may be necessary if the primary application has already been removed, but other Malwarebytes components remain on the system.
When finished, Malwarebytes will have been deleted and all components uninstalled from the Mac.
Many of the components of the app remained which is often the case when simply dragging an app to the Trash does not uninstall everything related to the application. If you’re aiming to remove Malwarebytes from a Mac you can use either approach, but if the application is missing with the built-in uninstall tool then using the uninstaller script will still remove remaining Malwarebytes components from the Mac.
These uninstall methods should work on any semi-modern Mac running any modern version of Mac OS or Mac OS X, though the uninstaller script is valid for 10.10 and later only.
Technically speaking you could also manually remove Malwarebytes but that process is much more cumbersome than simply using the uninstaller tool offered in the application itself, or the uninstaller script available as a download from Malwarebytes. If you do want to manually remove the Malwarebytes app, you’ll be digging around in various user and system folders and searching system files for a variety of plists, extensions, and other components of the app, and other stuff. That’s really only appropriate for very advanced users, and there is little purpose to do so when there are easier uninstall methods.
To be clear, this is not a suggestion, this is simply a tutorial demonstrating how to uninstall Malwarebytes from MacOS. If you use Malwarebytes and find it useful, there’s no reason to stop using it or to remove it from a Mac. And remember that if you remove it because you’re finished using it for now, you can always install Malwarebytes again later if you want to.
As we mentioned before, Malwarebytes is a popular Mac utility and even the free download version will work for scanning and removing malware and junkware from a Mac, but whether or not you use it, or want to remove it, is entirely up to you. It’s generally well regarded and doesn’t carry some of the baggage (and bad headlines) that some other scanning and cleaning utilities out there, so if you’re interested in an malware scanner and removal tool on the Mac it’s a good choice even at the free level. If you are going to install a malware removal tool on the Mac, it’s best to pick just one and don’t overlap them to avoid any issues.