Malwarebytes for Mac is a popular and respected anti-malware tool for Mac that can help to clear a Mac of malware, ransomware, and viruses. While users can follow some simple tips to protect a Mac from viruses and trojans, and MacOS is fairly secure as-is from malware, junk ware, and adware, many Mac users often ask how they can scan their Mac for adware or for viruses. For those who have some concerns about malware on a Mac, using the Malwarebytes app to scan and clear a Mac can offer some additional peace of mind.
This article will show you how to install Malwarebytes on a Mac, and how to use the free version to scan and clean a Mac of any threats.
Note this tutorial will use the free level of the Malwarebytes app, which has the ability to scan and clean any discovered infections from a Mac. If you feel like you want or need enhanced security to proactively protect a Mac from further threats, then you’re welcome to try the paid version on your own.
How to Install Malwarebytes Malware Scanner on Mac to Clean Malware, Viruses, Adware, etc
Go to the user Downloads folder and open the “Malwarebytes” package installer
At the Malwarebytes installer screen, choose Continue and read through the release notes and license terms
Select the drive you wish to install Malwarebytes onto, this is likely the primary boot drive named “Macintosh HD”
Authenticate the installer to let Malwarebytes complete installation
In a moment you’ll be presented with a screen asking where you’re installing Malwarebytes, either Personal / Home or Work
At the next screen, choose “No thanks, I just want to scan” (or sign up for the 14 day free trial if you want to try out the full paid version)
At the Malwarebytes application screen, choose “Scan” to scan the Mac right away for any threats
If any threats or junk is found, Malwarebytes will report it to you on the next screen, otherwise you’ll see a screen saying the Mac is clean and clear
As mentioned before, we’re using the free version here to simply scan and clean a Mac (assuming any malware, bad junk, or unwanted stuff is found), but you’re certainly free to try out the 14 day full protection trial, or sign-up for the complete paid service and unlock the other features of the Malwarebytes app.
If you’re satisfied with the Mac being cleaned and scanned, you can quickly uninstall Malwarebytes from the Mac just by opening the app and pulling down the “Help” menu and choosing to “Uninstall Malwarebytes” and following the steps on screen.
To be perfectly clear, this is not any particular recommendation and we do not have any relationship with Malwarebytes, we just use the tool ourselves to scan Macs for scanning for junkware if the need arises either on our own hardware or someone elses (even back when the app was called AdwareMedic).
“how can I scan my Mac for viruses and malware?” and “how can I clean my Mac from adware or a virus?”,
so these questions are common. Generally speaking, a well secured Mac that has regularly updated system software and apps, and some savviness from the user like not downloading sketchy stuff from untrustworthy dubious websites and not installing browser plugins – is enough to prevent Macs from finding any malware, junkware, adware, ransomeware, or any other nefarious stuff on their Mac, but nonetheless infections can still happen.
Need to convert a Numbers file to an Excel spreadsheet file from iPad or iPhone? This is a common task for many work and educational environments where Excel is commonly used, and fortunately this process is easy to accomplish thanks to the Numbers app Export features.
This article will show you how to convert a Numbers document to an Excel spreadsheet file using an iPad or iPhone, the end result will be an Excel file in XLS / XLSX file format.
Note this is specifically for iPhone and iPad, but if you’re on a desktop or laptop then you can learn how to convert a Numbers file to Excel spreadsheet on Mac too.
How to Convert a Numbers File to Excel File on iPhone & iPad
Open the Numbers app on iPad or iPhone, then open the Numbers file or spreadsheet document you wish to convert
Tap on the (…) three dots button in the top right corner of the screen
Select on “Export” from the menu
Choose to export the file as “Excel” from the export options
Select the method you wish to save or share the converted Excel file as: save to Files app, iCloud Drive, send with AirDrop, send with Email, share with Messages, etc
Repeat this process with other Numbers files to convert them to Excel files as needed
The resulting exported Excel file can be opened by any app that opens Excel documents, whether that’s Microsoft Excel, Google Docs, LibreOffice, StarOffice, or Numbers on iPad, iPhone, or Mac.
Note that if you share the file directly from the Numbers app, say by exporting it as an Excel document and emailing it to someone, the original file will stay in the Numbers app in the Numbers file format. If you want to have physical access to an Excel file on iPad or iPhone, you’ll need to save it locally to the Files app or to iCloud Drive.
As mentioned earlier, if you’re on a Macintosh then you can also convert Numbers files to Excel spreadsheets in Mac OS too using a similar export process. You can even use iCloud.com to convert these documents too, but that’s a topic for another article entirely.
Galaxy Tab S6 enriches the mobile experience by enabling people to express their ideas and get more done.
Samsung Electronics today announced Galaxy Tab S6 – a new tablet that allows people to create and connect, enjoy immersive entertainment, and accomplish their goals wherever they go. Built for those who need to satisfy their curiosity and express their creative flair, the Galaxy Tab S6 lets users do more than they could on any tablet before.
“Today’s inspiration comes at a moment’s notice and creatives and professionals need a device able to keep up with insatiable imaginations while complementing their busy, on-the-go lifestyles,” said DJ Koh, President and CEO of IT & Mobile Communications Division at Samsung Electronics. “Galaxy Tab S6 enables consumers to unlock their creativity, while delivering the top-quality productivity features and advanced technology they have come to expect from Samsung tablets.”
Samsung has unveiled its newest flagship tablet under the Tab S series, the Galaxy Tab S6, that comes with new and updated features.
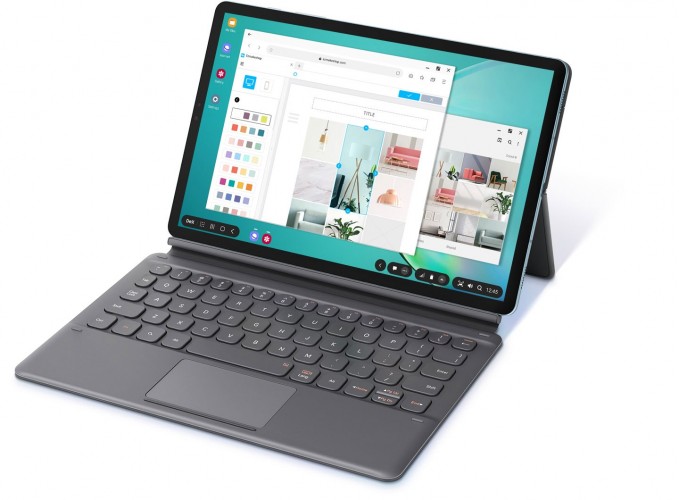
The Galaxy Tab S6 sports a 10.5-inch WQXGA Super AMOLED display, Qualcomm Snapdragon 8150 chipset, 6GB or 8GB of RAM, 128GB or 256GB of storage, 13MP + 5MP dual rear cameras, 8MP front camera, and 7,040mAh battery.
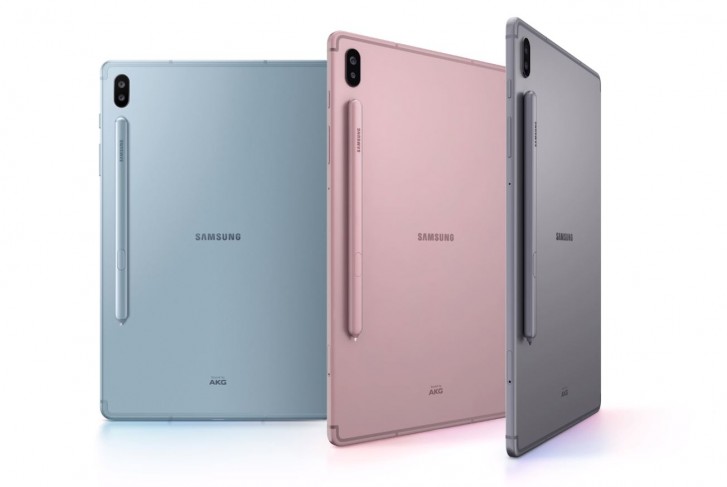
The device also comes with AKG speakers w/ Dolby Atmos, a built-in magnet case for the new S-Pen that has a built-in BLE remote control, Air Gestures, 10 hours of battery life with 10 minutes of charge time.
You can also dock it in the new version of the Samsung DeX or put a Book Cover keyboard for typing purposes.
The Samsung Galaxy Tab S6 is priced at USD 649 for the 6GB + 128GB variant while the 8GB + 256GB costs USD 729
Redesigned S Pen Boosts Creativity and Productivity
Samsung’s signature S Pen began as an instrument for writing and drawing, but it has evolved to become the ultimate creativity and productivity partner. Now with remote control functionality and wireless charging capabilities, S Pen on Galaxy Tab S6 puts even more power and control in users’ hands. With built-in BLE remote control features1 including a gesture function called S Pen Air actions, S Pen lets you intuitively take selfies and videos, or control the multimedia content you create even when the tablet is not in your hands. Plus, S Pen features wireless charging that delivers up to 10 hours of battery life2 after just ten minutes’ charge time.
Galaxy Tab S6 makes taking notes with S Pen a breeze. Handwritten Samsung Notes can be converted to digital text and exported to formats like Microsoft Word with just one click. You can also jot down quick notes or sketches while watching a video on the same screen by adjusting the Samsung Notes’ window transparency—perfect for effortless multitasking.
A new-and-improved version of Samsung DeX3 is also packed into the Galaxy Tab S6, enabling you to seamlessly transition to a PC-like experience, so you can easily multitask and optimize your viewing experience. With a DeX function key added to the Galaxy Tab S6’s new dedicated Book Cover Keyboard, you can launch and close DeX with the tap of a key. The keyboard has been fine-tuned for better functionality, including an S Pen holder, free angle stand, touch pad and new function keys.
Advanced Technology for Everyday Convenience
Galaxy Tab S6 packs new enhancements to its camera, including Samsung’s first dual camera with Ultra Wide camera on a tablet, within a compact 5.7mm slim body that is both lighter and more portable. The Ultra Wide camera allows users to capture the scenery and landscapes just as they see them with a 123-degree field of view, as wide as the human eye. Meanwhile, the Neural Processing Unit lets you take professional photos through enhanced effects to your subjects, so your photos look like they were taken by a pro.
Samsung is also bringing the on-screen Fingerprint Scanner to its tablet for the first time with Galaxy Tab S6, so that accessing your tablet is more convenient than ever. This ease and convenience are further protected by Samsung Knox, Samsung’s defense-grade security platform. Additionally, you can easily wake your Galaxy Tab S6 by tapping on the screen twice, allowing you to log in and start your day quickly.
As a part of Samsung’s Galaxy Ecosystem, the Galaxy Tab S6 becomes a hub of your connected experience to manage your appliances with SmartThings. Together with Bixby, you can easily control your devices via voice commands.
Uncompromised Entertainment
Whether you are enjoying a new game or binge-watching your favorite TV show, Galaxy Tab S6 delivers an amazing viewing experience. Its 10.5” Super AMOLED display, paired with quad speakers sound by AKG and Dolby Atmos®, keeps you immersed in the action.
Galaxy Tab S6 enables high-quality, captivating gaming through a combination of graphics, sounds, and intelligent hardware and software, bolstered by partnerships with leading game platforms like Unity and Unreal Engine. A powerful processor and Game Booster with AI capabilities enhance the gaming experience on Galaxy Tab S6 through optimized FPS, screen lag, loading time and more.
With Galaxy Tab S6, you can enjoy more of your favorite content. You can easily browse Netflix content on the device’s Finder, enjoy your favorite music on Spotify with three months of free Spotify Premium, or watch your favorite YouTube videos ad-free, offline, and on-the-go with four free months of YouTube Premium4.
Galaxy Tab S6 comes in Mountain Gray, Cloud Blue and Rose Blush colors. It will be available in stores and online beginning late August in select markets.
Do you want to turn off the screenshot thumbnails that show up on the Mac screen? You may have noticed that if you take a screenshot on Mac a little screenshot thumbnail preview pops up in the bottom right corner of the display and floats there for a few seconds. You can interact with that little thumbnail to quickly markup a screenshot, but showing those screenshot thumbnails also appears too slow down how long it takes for the actual screen shot file to generate and be available to the file system.
If you want to disable the screenshot thumbnail preview in Mac OS, this article will show you how to do that.
How to Turn Off Screenshot Preview Thumbnails on Mac
From the Finder of Mac OS, go to the /Applications/ folder and then to /Utilities/ and open the “Screenshot.app” application
Click on the “Options” menu in the screenshot toolbar
Uncheck the option for “Show Floating Thumbnail” to disable the screenshot preview
Exit out of Screenshot app when finished
With ‘Show Floating Thumbnail’ disabled, the screenshot previews will no longer appear, and the screenshot that has been snapped will be created and appear almost instantly in the Finder, much like in earlier MacOS versions.
For those who are wondering, the Mac ‘Screenshot’ application takes the place of the “Grab” app in modern MacOS versions, and it has other handy features too that make it easy to change some screenshot options that used to require the Terminal and defaults commands. For example you no longer have to use a defaults write command to change the screenshot file save location, and you can also set a timer and mouse pointer option for screenshots too just like you could in the Grab app. You will still need to use a defaults write command to change the screenshot image file format or screenshot file names however.
How to Re-Enable Screenshot Thumbnail Previews on Mac
Open the “Screenshot.app” application from Spotlight or the Applications/Utilities/ folder
Click the “Options” menu and check the option for “Show Floating Thumbnail” to enable the screenshot preview
Exit out of Screenshot app
With the floating thumbnail option re-enabled, screenshot previews will show up again, and there will be a delay before screenshot files appear in the Finder and to the file system again.
You may have noticed a similar screenshot preview on iPhone and iPad as well, but in the iOS / iPadOS side of things there is currently no method to disable that screenshot preview, as this option remains only on the Mac. Instead on the iPhone and iPad you can simply swipe or push the thumbnail aside to dismiss it, a trick that also works to dismiss the screenshot floating preview on Mac as well.
If you use Waze to navigate you may appreciate having the Waze app be front and center on CarPlay while you’re driving with iPhone. You might even be interested in replacing Apple Maps with Waze if you use the Waze app more than Apple Maps on your CarPlay vehicle.
This article will show you how to use Waze on Apple CarPlay with iPhone as your mapping and driving navigation app.
Requirements for using Waze on CarPlay: the car must have CarPlay compatibility, the iPhone must be running iOS 12 or later, you must have iPhone setup with CarPlay, and the Waze app must be updated to a recent version.
If you don’t yet have the Waze app on iPhone you can download it from the App Store here.
How to Use Waze on CarPlay Instead of Apple Maps
Connect iPhone to CarPlay if you haven’t done so already
Open “Settings” app on iPhone
Go to “General” and then choose “CarPlay”
Select the car with CarPlay
Locate Waze and then tap and hold on the Waze icon to drag it to the primary CarPlay Home screen for fast access
Optional: replace Apple Maps with Waze on CarPlay, by moving the Apple Maps icon to another screen to make Waze icon more prominent on CarPlay display
Exit out of CarPlay settings on iPhone for changes to take effect
Use Waze on CarPlay in the vehicle as usual by tapping on the Waze app on the CarPlay display
With Waze prominently on the CarPlay display, you can easily launch Waze and use it as your preferred mapping application in your vehicle.
If you want multiple maps options to use with CarPlay, you can also use Google Maps with CarPlay, and you can also always use the built-in Apple Maps application.
You might be wondering if it’s possible to make Waze the default maps application on CarPlay or with iPhone, but that is not currently available as a feature. Instead, you’ll have to launch Waze and use it through CarPlay that way.
ou can also ask Siri to find you directions somewhere with Waze by summoning Siri and then saying “Get me directions to Apple Store with Waze” or a similar command, of course specifying your intended destination.
Wondering how to switch back to a mobile site after requesting a desktop site in Safari for iPhone? You may have noticed there’s not a “Request Mobile Site” option in Safari on iPhone and iPod touch, but changing back to the mobile version of a desktop site is quite simple on iPhone with Safari as we’ll show you in this tutorial.
As you likely know, many websites serve a mobile-specific version to smaller screened devices like the iPhone or iPod touch. But sometimes users will use the “Request Desktop Site” feature in Safari for iPhone to view the full version of a website rather than a mobile site. But how do you switch back to the mobile site again? That’s easy, here is all you need to do :
How to Switch from Desktop Site Back to Mobile Site with Safari for iPhone
Returning to the mobile version of a website in Safari on iPhone is simply a matter of closing the tab and opening the website again :
From Safari on iPhone, go to the desktop webpage that you want to view the Mobile Site for
Tap on the Tabs button in Safari and then close that webpages tab while it’s still in Desktop Site view (optionally, you may want to copy the URL first for easy retrieval)
Now open a new Safari tab and go back to the website URL you just closed, it will load automatically in Mobile Site view
Simply closing the Safari tab on iPhone and re-opening the webpage will switch it back to the Mobile Site default view.
Alternatively, you can also delete the specific sites website data in Safari Settings on iPhone and then refresh the website to accomplish the same thing. Doing that will also refresh the webpage into Mobile Site from Desktop Site, as the default user agent on iPhone is for a mobile device.
While we’re obviously focusing on iPhone here, this process is the same on iPod touch and iPad too, though most websites will show an iPad the full desktop version of a website rather than the mobile site anyway.
Currently this is how you switch from the desktop site back to a mobile site, and while it would make a lot of sense for the iOS “Request Desktop Site” option to switch to a “Request Mobile Site” option in the Sharing action menu, for now that feature does not exist. Instead, you’ll want to just close the tab and then open it again to achieve the same result.
This is probably mostly relevant for web workers, but sometimes regular users find themselves having to switch between desktop sites and mobile sites too.
Want to disable Camera access for an app on iPhone or iPad? At any time, you can easily revoke camera access for any application on an iPhone, iPad, or iPod touch. By turning off camera access for an app, that app will no longer be able to use either the front or rear cameras on an iPhone or iPad.
How to Stop Apps from Using Camera on iPhone & iPad
You can prevent apps from being able to access and use the camera on your device by going through the following steps:
Open the “Settings” app on iPhone or iPad
Go to “Privacy” in the settings
Choose “Camera” from the privacy settings list
Locate the app(s) you want to disable camera access for and toggle the setting corresponding to their name OFF to disable camera for that app
Repeat with other apps to turn off camera ability as desired
All apps that have requested camera access on the iPhone or iPad will appear in this list. If an app does not appear in this list, the app has not requested camera access before (or yet).
Obviously some apps will require camera access to function properly, like a video chat app, so be mindful about what apps you disable camera access for and which you allow.
On the other hand, there are many apps that don’t need to access the camera for the app to work at all, they just request camera access for some other reason, and turning off those apps camera access may be beneficial to privacy or security. Think logically about what an app is and what the apps purpose is when deciding what apps to grant camera access to. Does a camera app need camera access? Probably. Does a social network need camera access? Maybe, or maybe not. Does a game need camera access? Probably not. If you never use the camera in a particular app, you can likely turn it off without consequence to that apps functionality. Be discerning!
Similarly, you can also control what apps have microphone access on iPhone and iPad. If you’re going through and auditing app access to camera for privacy or security purposes, you’d probably want to do the same for the microphone too.
Of course once you have taken pictures with the camera, there are apps that also want to access the photos on your iPhone or iPad too. Accordingly, separate from controlling camera access for apps you can also control what apps can access Photos on iPhone and iPad too. You’ll often find apps that want to have photos access that simply don’t need it.
It’s worth mentioning this is not the only time you can manage what apps have camera access on an iPhone or iPad. Usually when you first launch an app that wants to use the camera, a pop-up screen appears on the iPhone or iPad that says the app is requesting camera access. For example if you freshly install Instagram or another camera app you will find this request when you launch the app for the first time. Whether you choose “Allow” or “Disallow” at that screen will control access for that particular circumstance, but beyond that you can always find the apps which have requested camera access in this privacy list within the device Settings. And of course you can then adjust each app individually as to whether you want that app to have access to the device camera or not.
This obviously allows you to manage what apps can access and use the camera on an iPhone or iPad, but you can go further if you’d like to and disable the Camera app itself as well.
LG Electronics (LG) is bringing the exceptional user experience of the G series to customers in more regions with the introduction of the LG G8SThinQ. The LG G8SThinQ is the perfect choice for consumers seeking a premium smartphone, offering many of the stand-out features and technologies applied to the flagship LG G8ThinQ with unique touches that are popular with target consumers. The latest LTE addition to the G series will be available starting this month in select markets in Europe, Latin America, Africa, and the Middle East, among others.
Introduced for the first time on the LG G8ThinQ, the Z Camera utilizes Time-of-Flight (ToF) sensor technology to bring LG G8SThinQ users a choice of convenient and secure biometric recognition options. Hand ID uses the Z Camera’s ability to scan a user’s unique circulatory pattern using infrared light making unlocking the phone in the dark just as accurate as during the day. The same technology comes into play in Face Unlock, which is also extremely accurate and fast due to the Z Camera’s use of infrared light and 3D point clouds to accurately trace the contours and features of the face. The third new feature that utilizes Z Camera is Air Motion, a touchless command interface that allow users to perform various actions without touching the screen.
As the first smartphone manufacturer to offer a triple-lens camera setup with a wide angle lens, LG continues this now widely emulated design with the LG G8SThinQ. The improved camera – with the widest field of view to date at 137˚ – allows users to enjoy continuous zoom capability without any lag or color distortion. The exception camera performance of the G8SThinQ was even recognized by VCX-Forum, a Germany-based ratings organization, which ranked the LG device best among the industry’s current smartphones. On the front the device sports a standard lens and the Z Camera, which supports features such as Portrait and Spotlight to help users raise their selfie game. The addition of the Z Camera’s ability to quickly measure distances helps produce portraits with more depth and feel. Spotlight detects the user’s facial curvature and simulates studio lighting to bring a professional quality and dramatic edge to selfies. With Video Depth Control, videos shot on the LG G8SThinQ benefit from a beautiful bokeh effect that puts the subject in sharp focus against a soft, blurred background. And for users tired of shaky video footage, LG G8SThinQ comes ready with Steady Cam which delivers smooth, clear videos without the use of a gimbal.
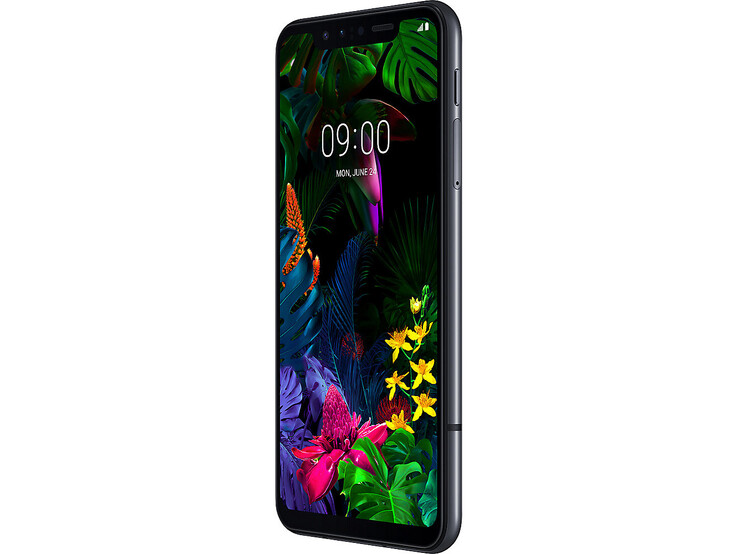
Equipped with Qualcomm® Snapdragon™ 855 Mobile Platform and a vivid 6.2-inch FHD+ FullVision OLED display (2248 x 1080), the LG G8SThinQ is a multimedia powerhouse. The handset also continues LG’s legacy of superior mobile audio, fitted with stereo speakers that deliver a rich, textured performance and immersive surround sound. The LG G8SThinQ continues the company’s tradition of audio excellence with the inclusion of a 3.5mm headphone jack and DAC.
The design of the LG G8SThinQ is all about the user: the stylish, ergonomic smartphone provides easy one-handed operation and oozes understated elegance, features popular with customers in Europe, Latin America, Africa and the Middle East. Complete with 2.5D Corning Gorilla Glass, it has a polished, seamless finish that is both strong and sophisticated and guarantees a comfortable grip. Standard out of the box are 6G RAM, 128GB storage, MIL-STD 810G compliance and IP68 water and dust resistance. The LG G8SThinQwill be available in three compelling colors: sleek and modern Mirror Black, eye-catching Mirror Teal, and alluring Mirror White.
Pricing and details of availability of the LG G8SThinQ will be announced locally.
Key Specifications:
Chipset: Qualcomm® Snapdragon™ 855 Mobile Platform
Display: 6.2-inch 18.7:9 FHD+ OLED FullVision (2248 x 1080)
Memory: 6GB RAM / 128GB
Camera:
– Rear: 13MP Super Wide (F2.4 / 1.0μm / 137˚) / 12MP Standard (F1.8 / 1.4μm / 78˚) / 12MP Telephoto (F2.6 / 1.0μm / 48˚)
– Front: 8MP Standard (F1.9 / 1.12μm / 80˚) / Z Camera (ToF Technology)
Battery: 3550mAh
Operating System: Android 9.0 Pie
Size: 155.3 x 76.6 x 7.99mm
Weight: 181g
Network: 3G / 4G LTE-A
Connectivity: Wi-Fi 802.11 a, b, g, n, ac / Bluetooth 5 / NFC / USB Type-C (USB 3.1 Compatible)
Biometrics: Hand ID / Face Unlock / Fingerprint Sensor
Colors: Mirror Black, Mirror Teal, Mirror White
Other: Air Motion / Stereo Speakers / AI CAM / Google Lens / Google Assistant / IP68 Water and Dust Resistance / HDR10 / Qualcomm® Quick Charge™ 3.0 Technology / MIL-STD 810G Compliance
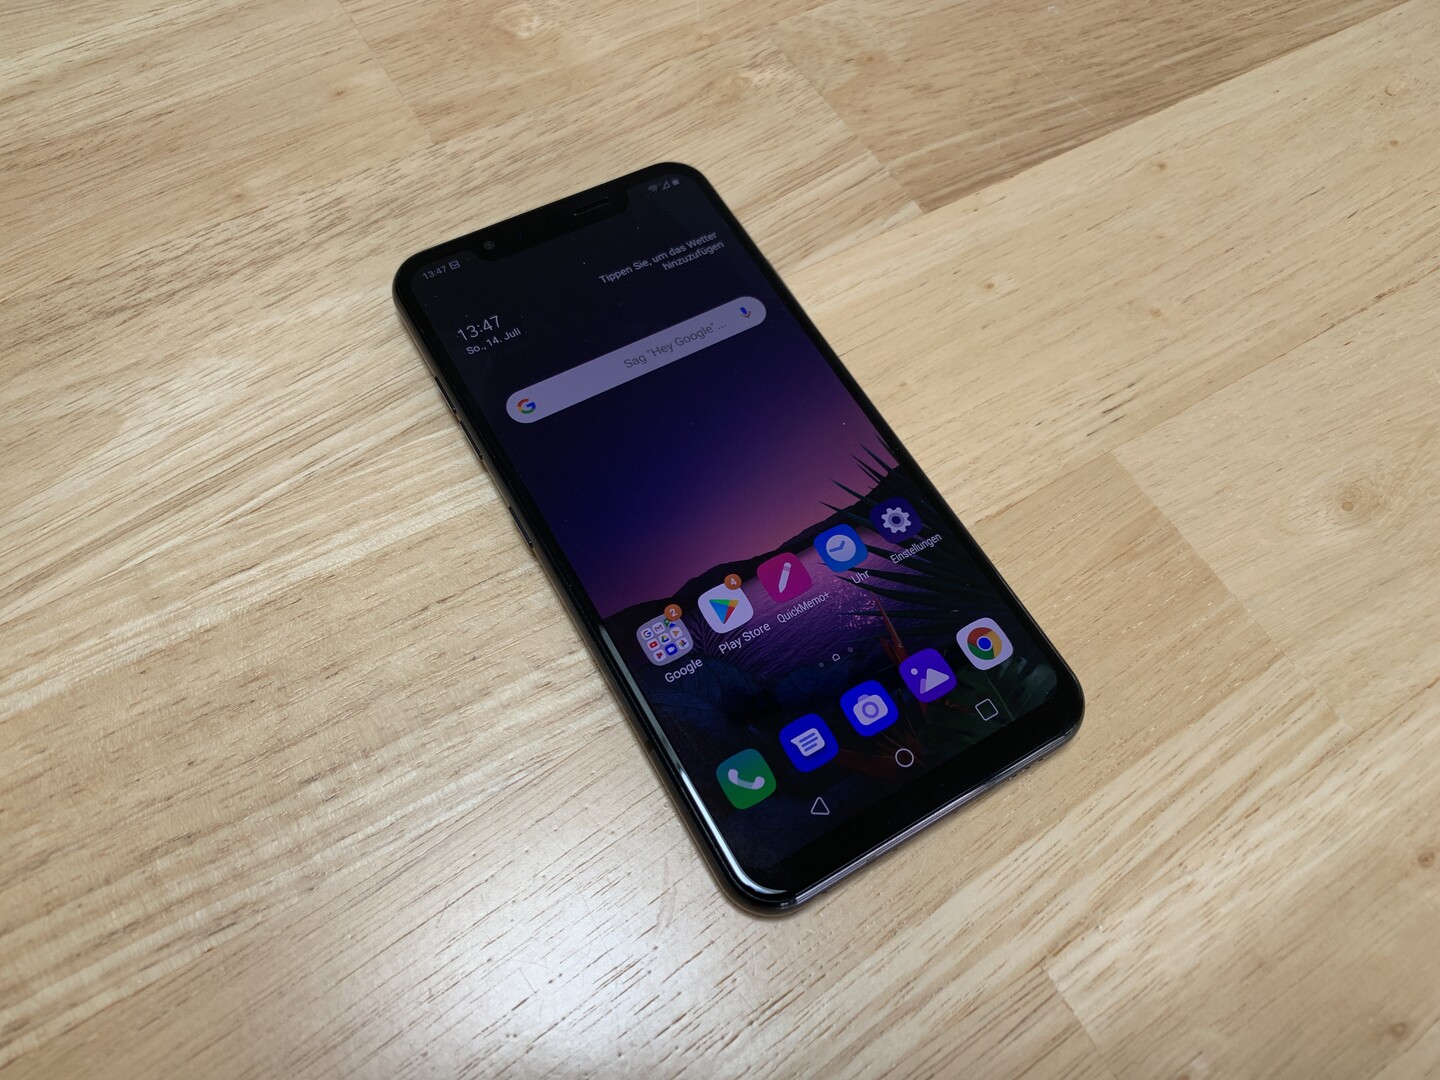
A notch too far. The LG G8S ThinQ has arrived late to the party, but it still brings a flagship SoC, a large OLED display, a ToF camera and a 3,550 mAh battery. The G8S ThinQ may have fancy camera tech, but it is otherwise a fairly run-of-the-mill flagship. However, read on to find out why we still think highly of LG’s latest attempt to disrupt the established order.
LG announced the G8S ThinQ alongside the G8 ThinQ at MWC 2019 in Barcelona back in February. The two devices initially caused a stir because of their innovative time of flight (ToF) cameras, which use infrared to analyse and collect depth-of-field information from a scene before relaying it to the main camera. This can help create more accurate augmented reality (AR) and potentially richer photos. Inexplicably, LG decided against releasing the G8 ThinQ in Europe and has taken until now to bring the G8S ThinQ to market, almost five months after it was originally announced.
So here it is; LG’s flagship G series device for 2019 in Europe. The G8S ThinQ ticks all the basics for a 2019 flagship with its Qualcomm Snapdragon 855 SoC, 6.2-inch OLED screen, several cameras, current LTE and Wi-Fi standards, along with stereo speakers. Oh, and a notch. A huge notch.
The G8S ThinQ is comparatively reasonably priced at launch, with an MSRP of 769 Euros (~US$867). This is more expensive than the Huawei P30, the entry-level OnePlus 7 Pro and the Samsung Galaxy S10e. The latter is pitched as an affordable flagship, underlining just how good value for money the G8S ThinQ is in 2019. Apple’s cheapest smartphone of last year, the iPhone XR, is more expensive than the G8S ThinQ though, as is the Sony Xperia 1. Prices have already started dropping just a few weeks after launch, making the G8S ThinQ even better value for money. We shall compare our review unit against all those devices and its predecessor, the G7 ThinQ.
Case
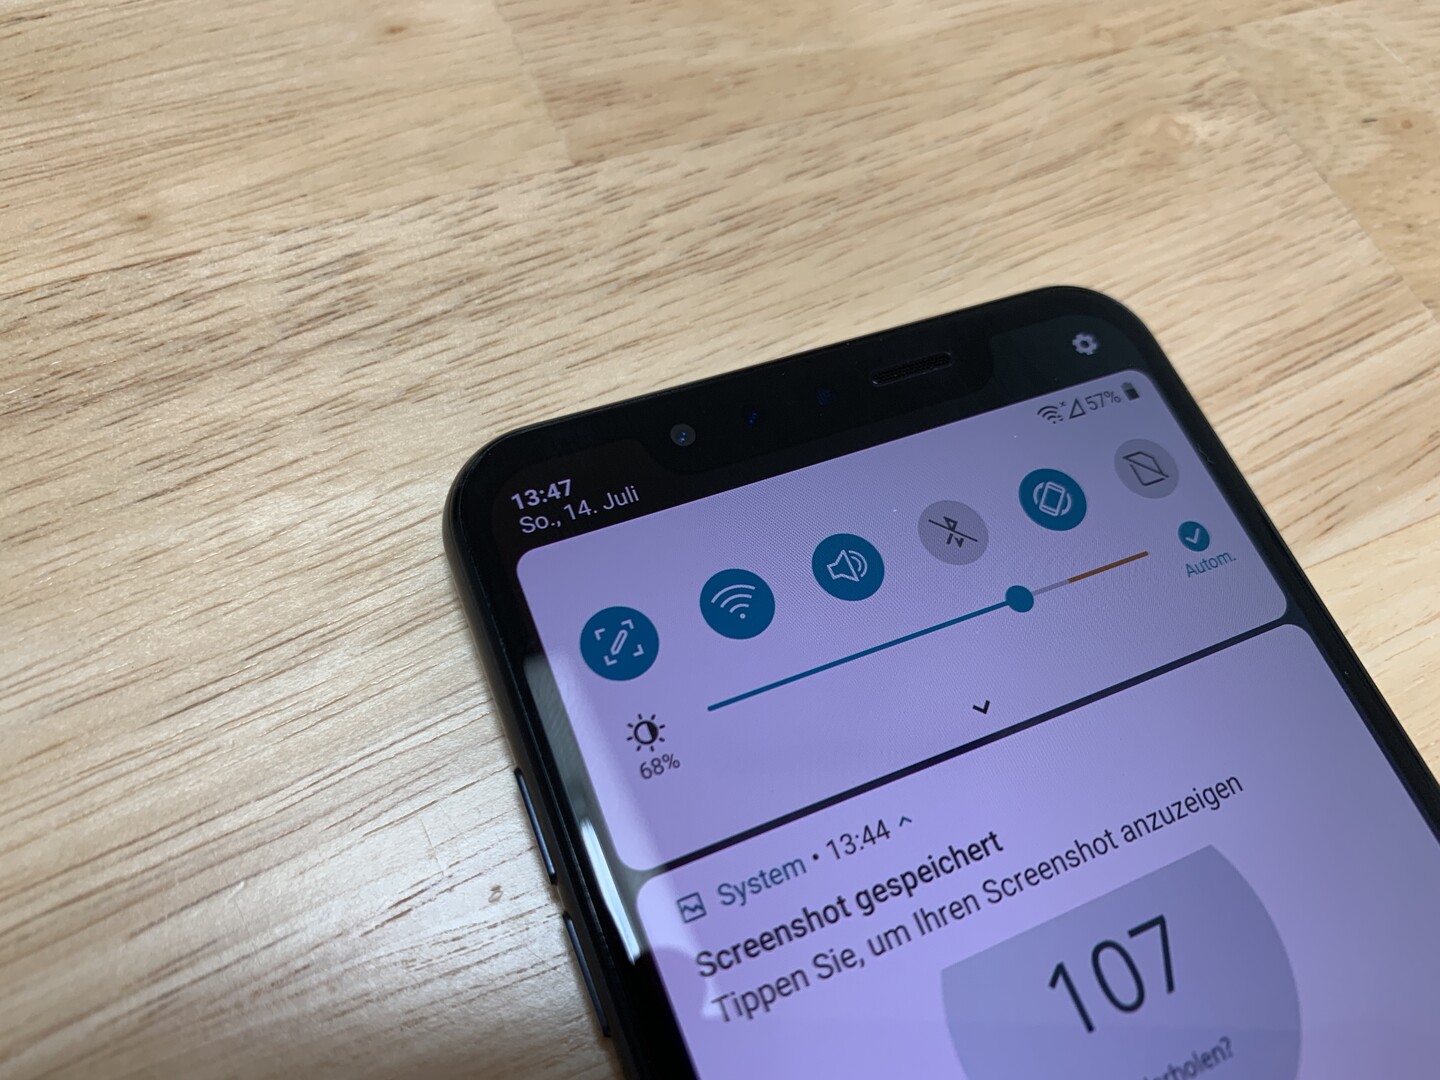
One of the first things that you may notice about the G8S ThinQ is its huge notch. It is not as thick as the one Google opted for with the Pixel 3 XL, but it makes the G8S ThinQ look antiquated next to something like the OnePlus 7 Pro. The notch houses the ToF camera though, so it is not all for show, and the G8S ThinQ still manages an over 80% screen-to-body ratio. It has narrow side bezels too.
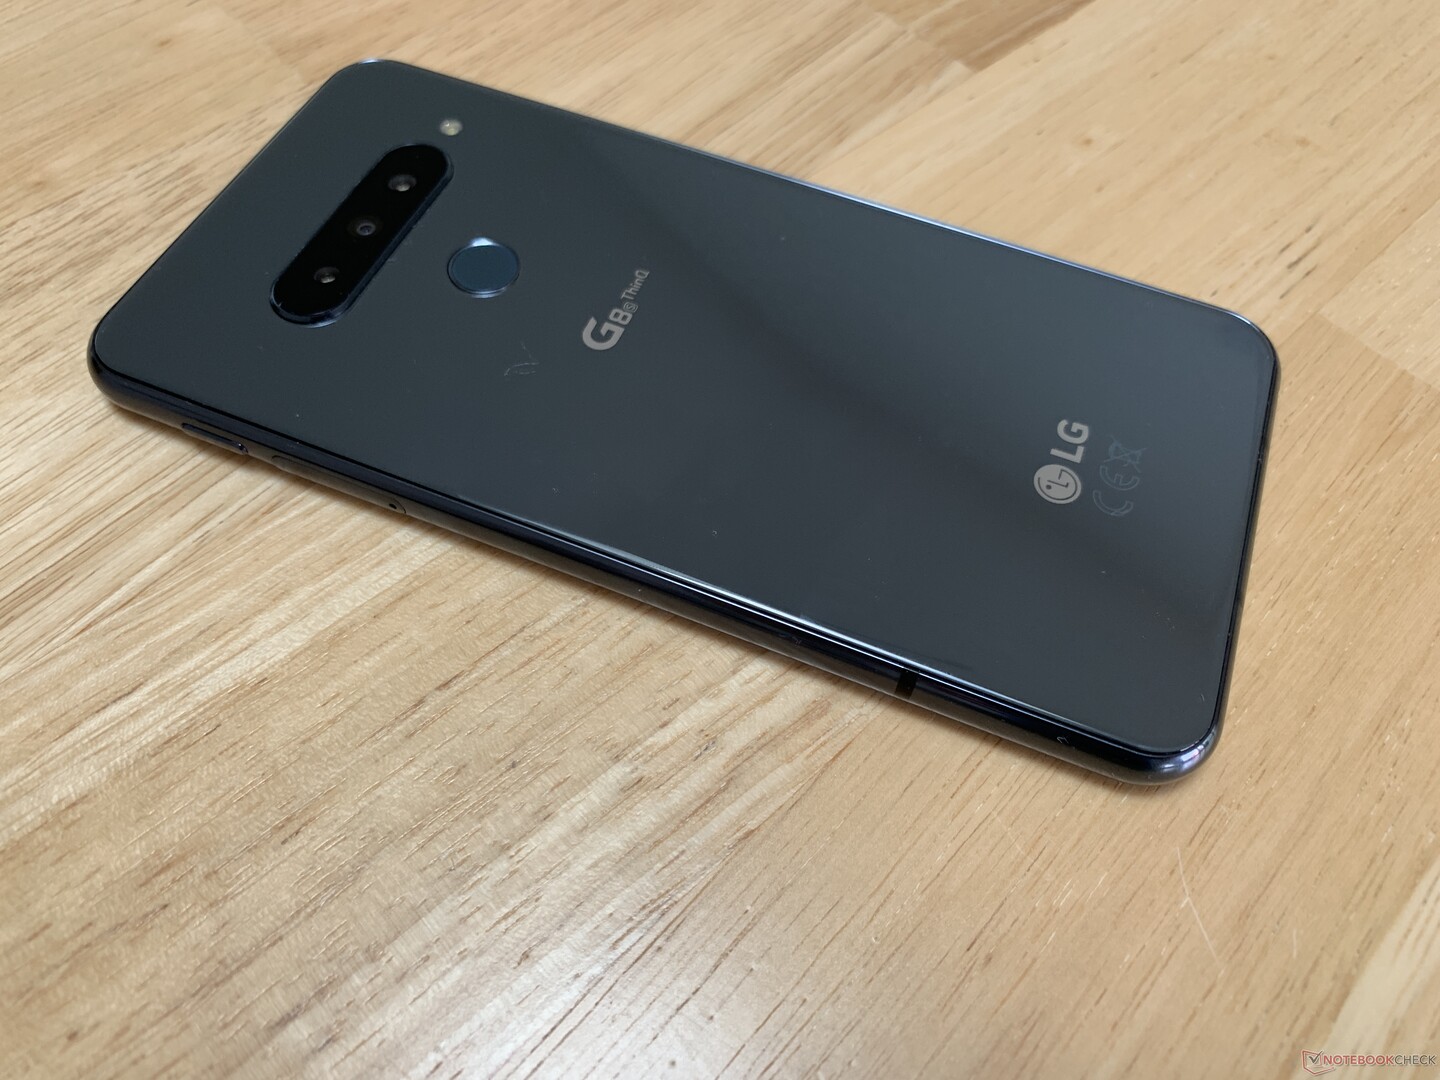
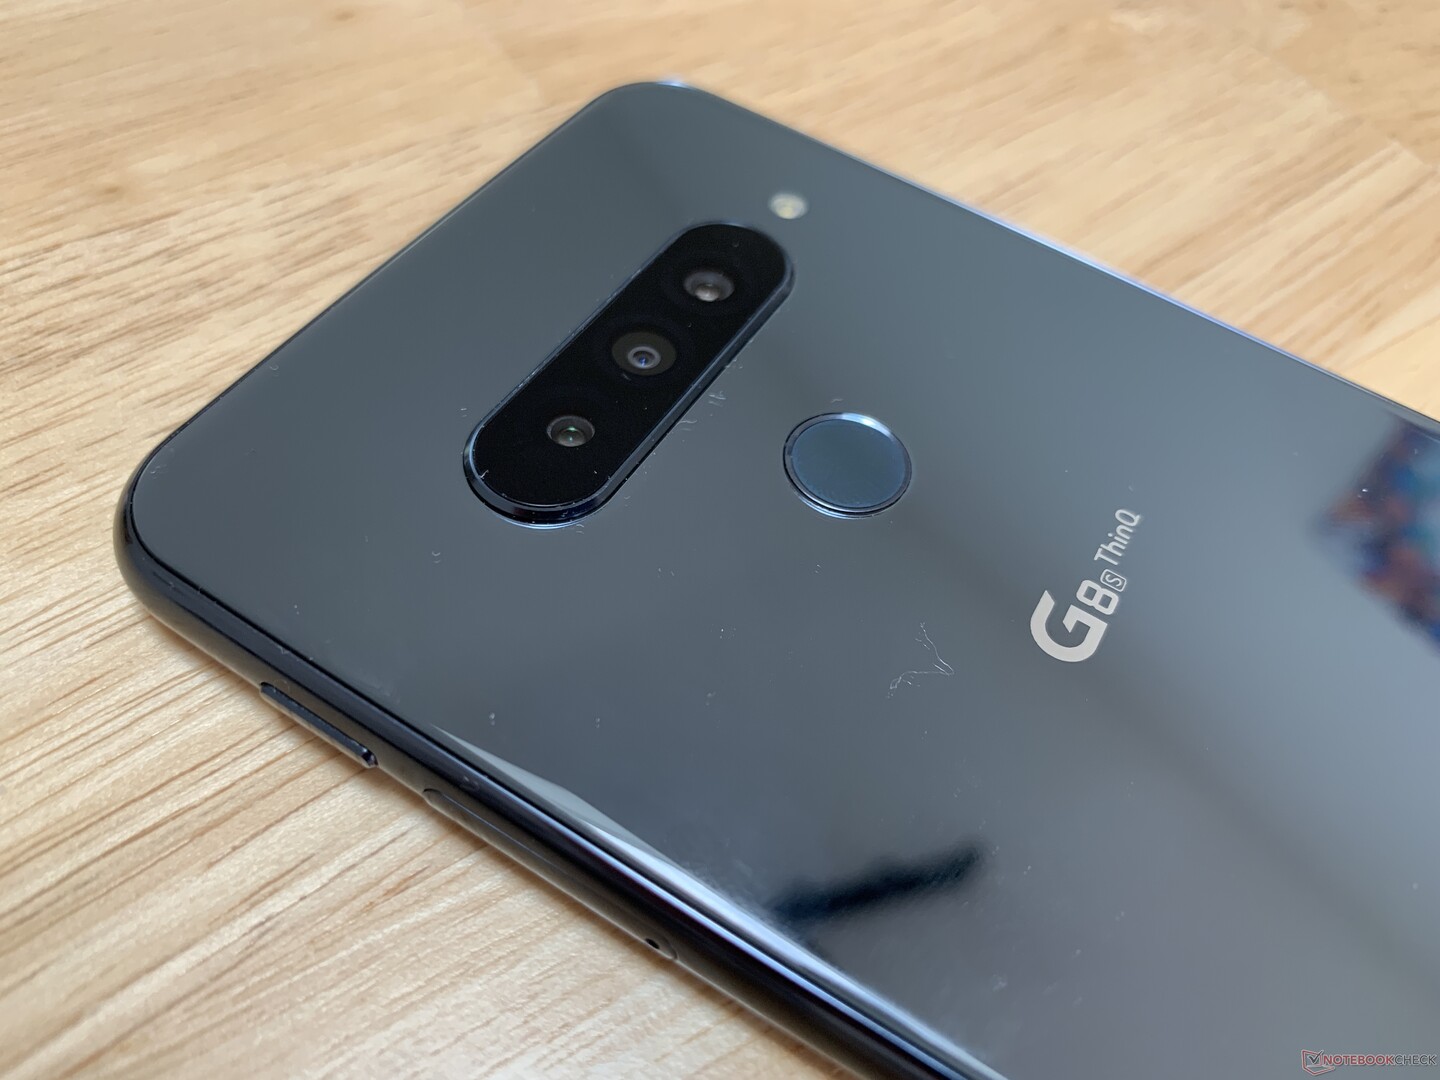
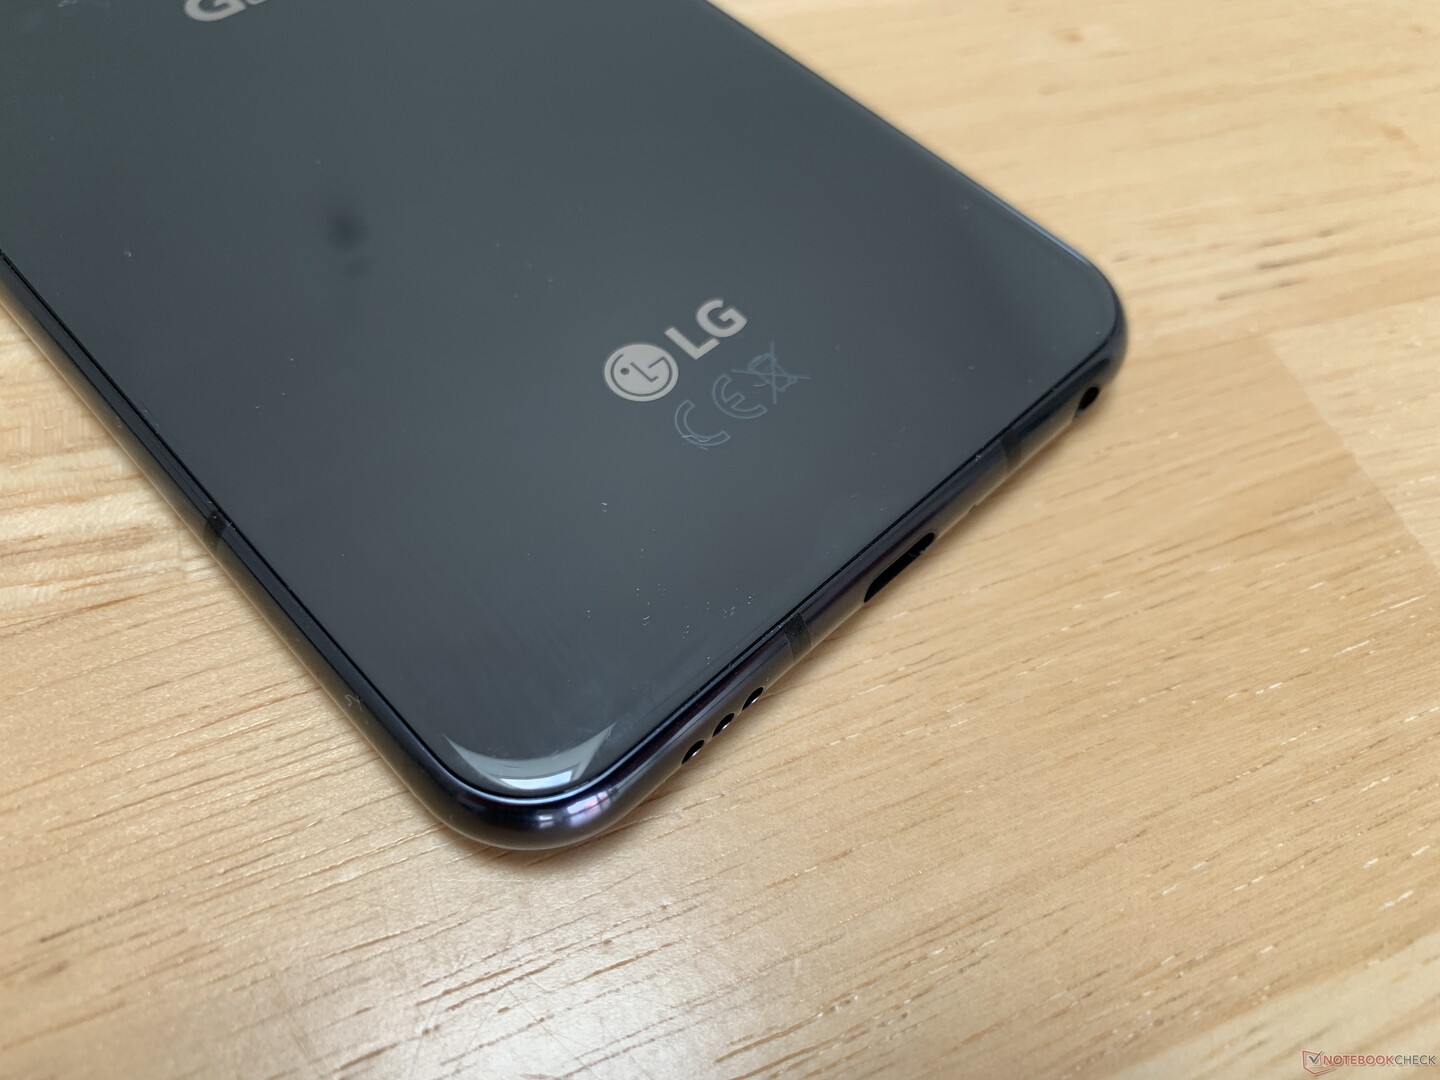
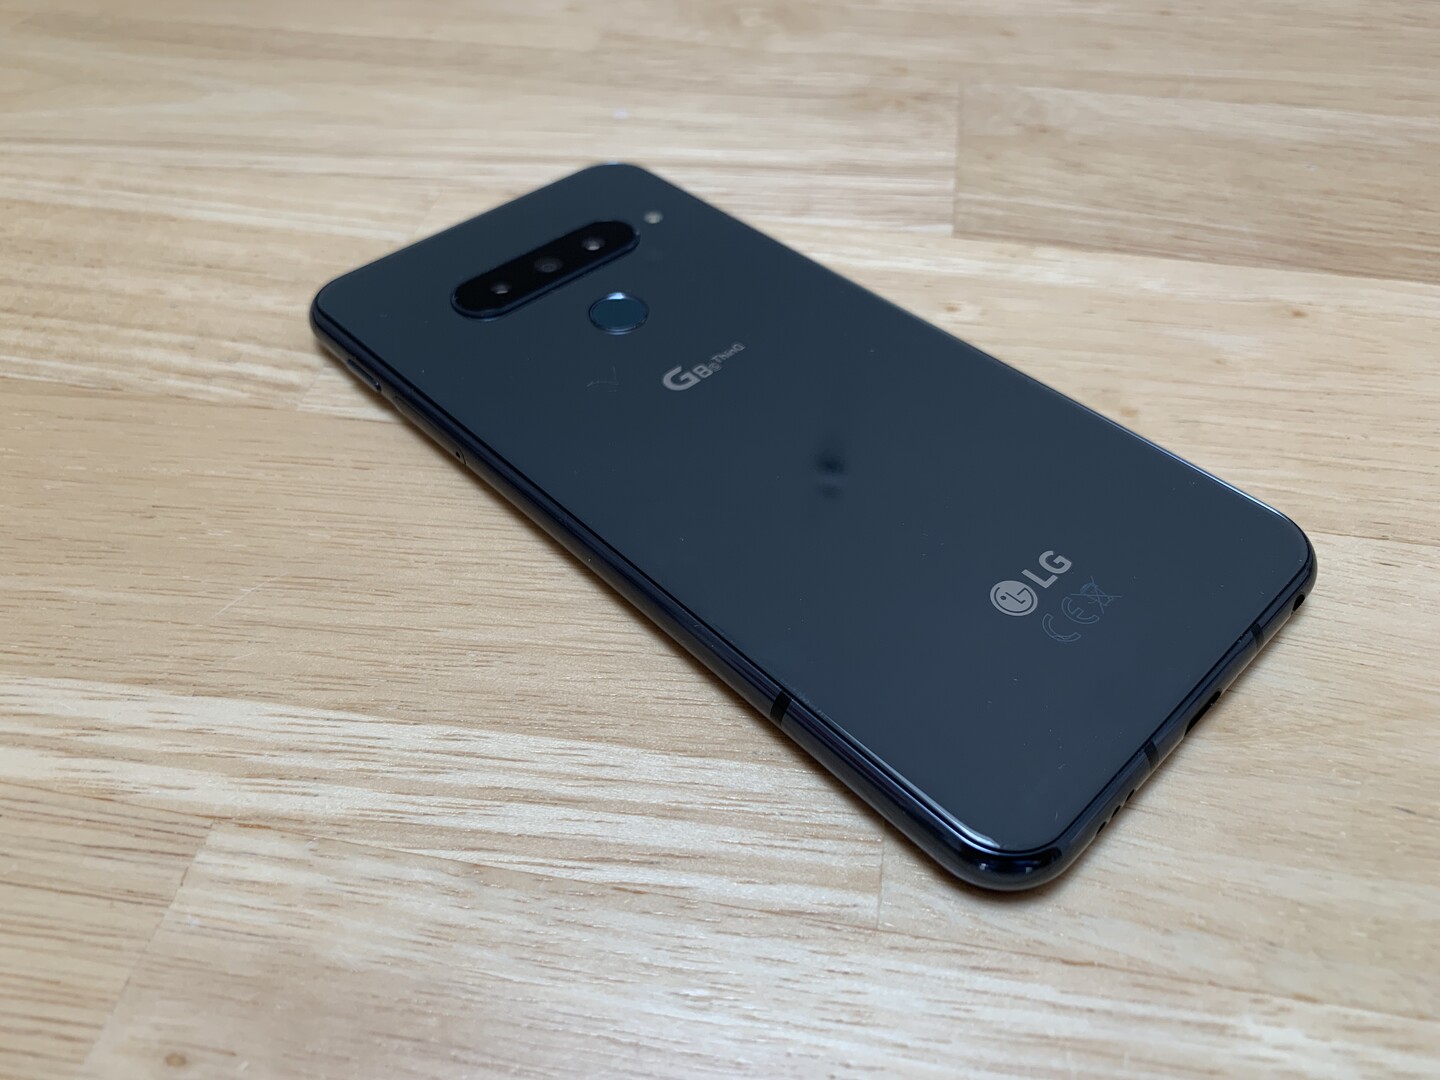
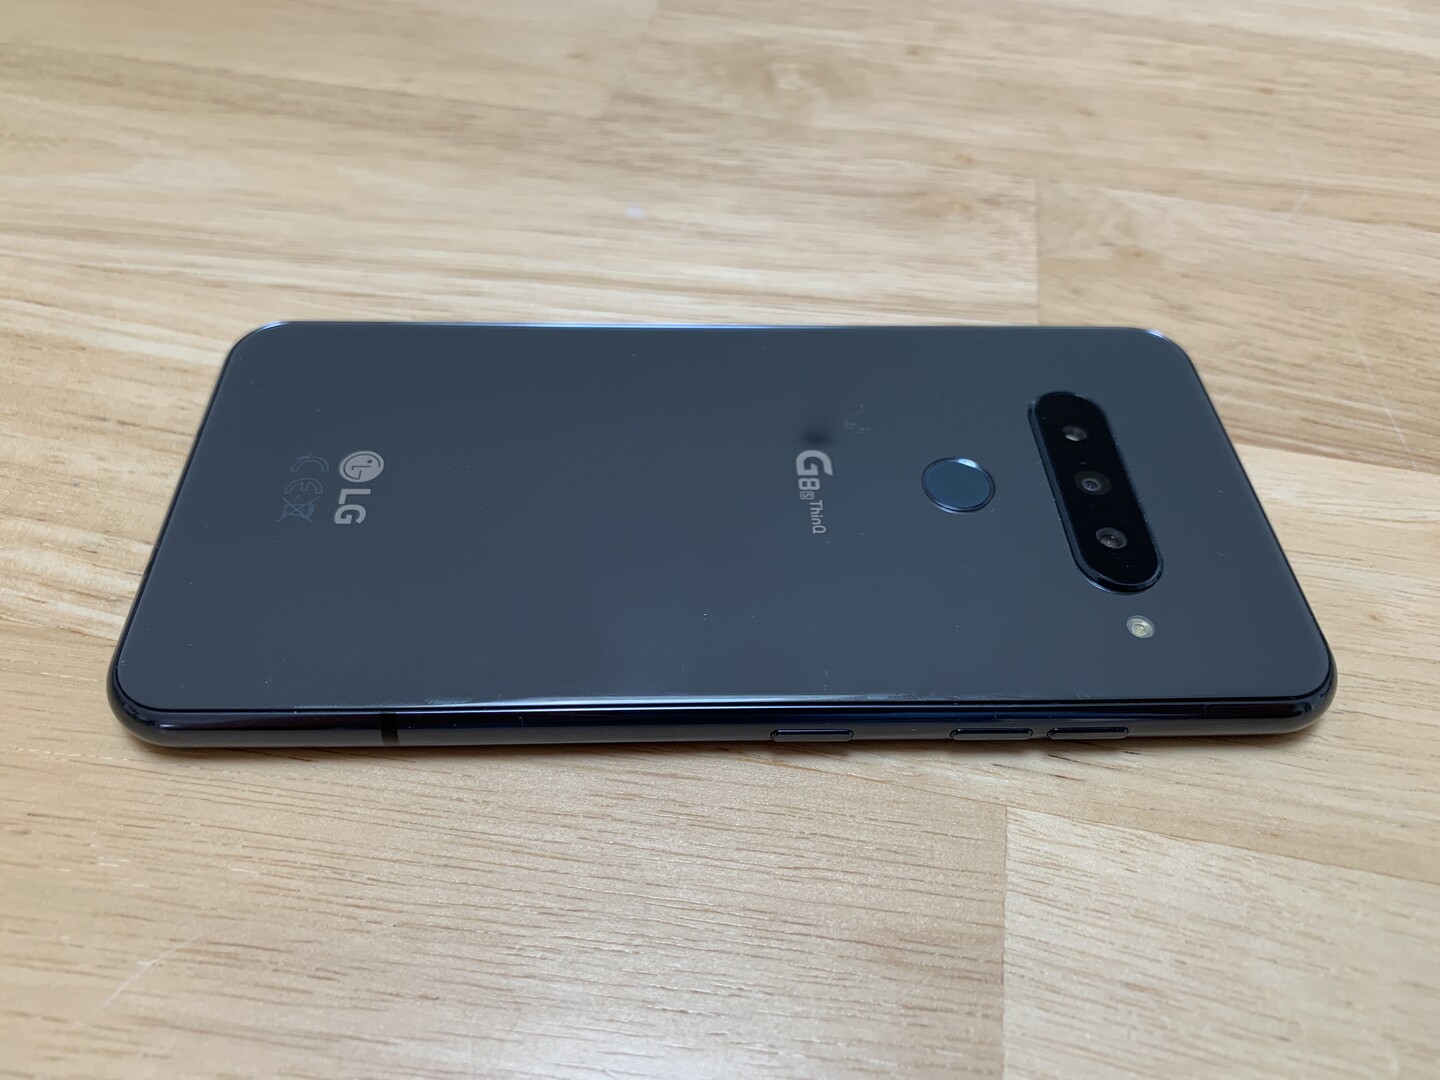
The back of the device has a glossy glass design like many modern flagships, which does not impede the various antennas like a metal back would. The G8S ThinQ does not distinguish itself from other flagships in regard to design, with it being a metal and glass sandwich, but it still looks nice. Currently, LG only sells the device in what it calls Mirror Black, which looks more like a bluish grey than black to our eyes. It will eventually start selling a white version too.
The footprint and weight of the G8S ThinQ puts the device squarely in the middle of our comparison devices. It is not especially compact, thin or light, but it is a nice compromise if you want a phone with a large display but without being as long as the Xperia 1.
Our review unit is well-built, with it withstanding all attempts at bending or twisting. The device is IP68-certified too, meaning that it is dust-tight and water-resistant. It is also MIL-STD-810 compliant, which means it must have successfully passed 14 environmental and climatic tests. However, no independent organisation or agency certifies MIL-STD-810 compliance, so the conditions under which LG tested it are unclear.
Connectivity
The G8S ThinQ comes with 128 GB of UFS 2.1 flash storage and 6 GB of RAM, although you can add up to a 2 TB microSD card should you need more space. The device supports all modern file systems including exFAT, meaning that it can read files that are larger than 4 GB. The G8S ThinQ is a dual-SIM device too, but its second card slot is a hybrid one, forcing you to choose between dual-SIM functionality and microSD card expansion. Moreover, microSD cards can only be formatted as external storage, restricting apps and data to only the 128 GB of internal storage.
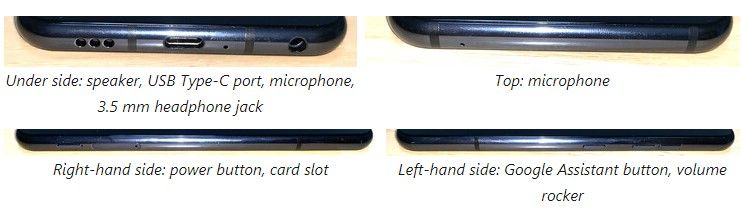
Naturally, the G8S ThinQ supports Bluetooth 5.0 and NFC. The 3.5 mm headphone jack makes a return too, calling into question why other OEMs have chosen to omit it from their recent flagship devices.
Software
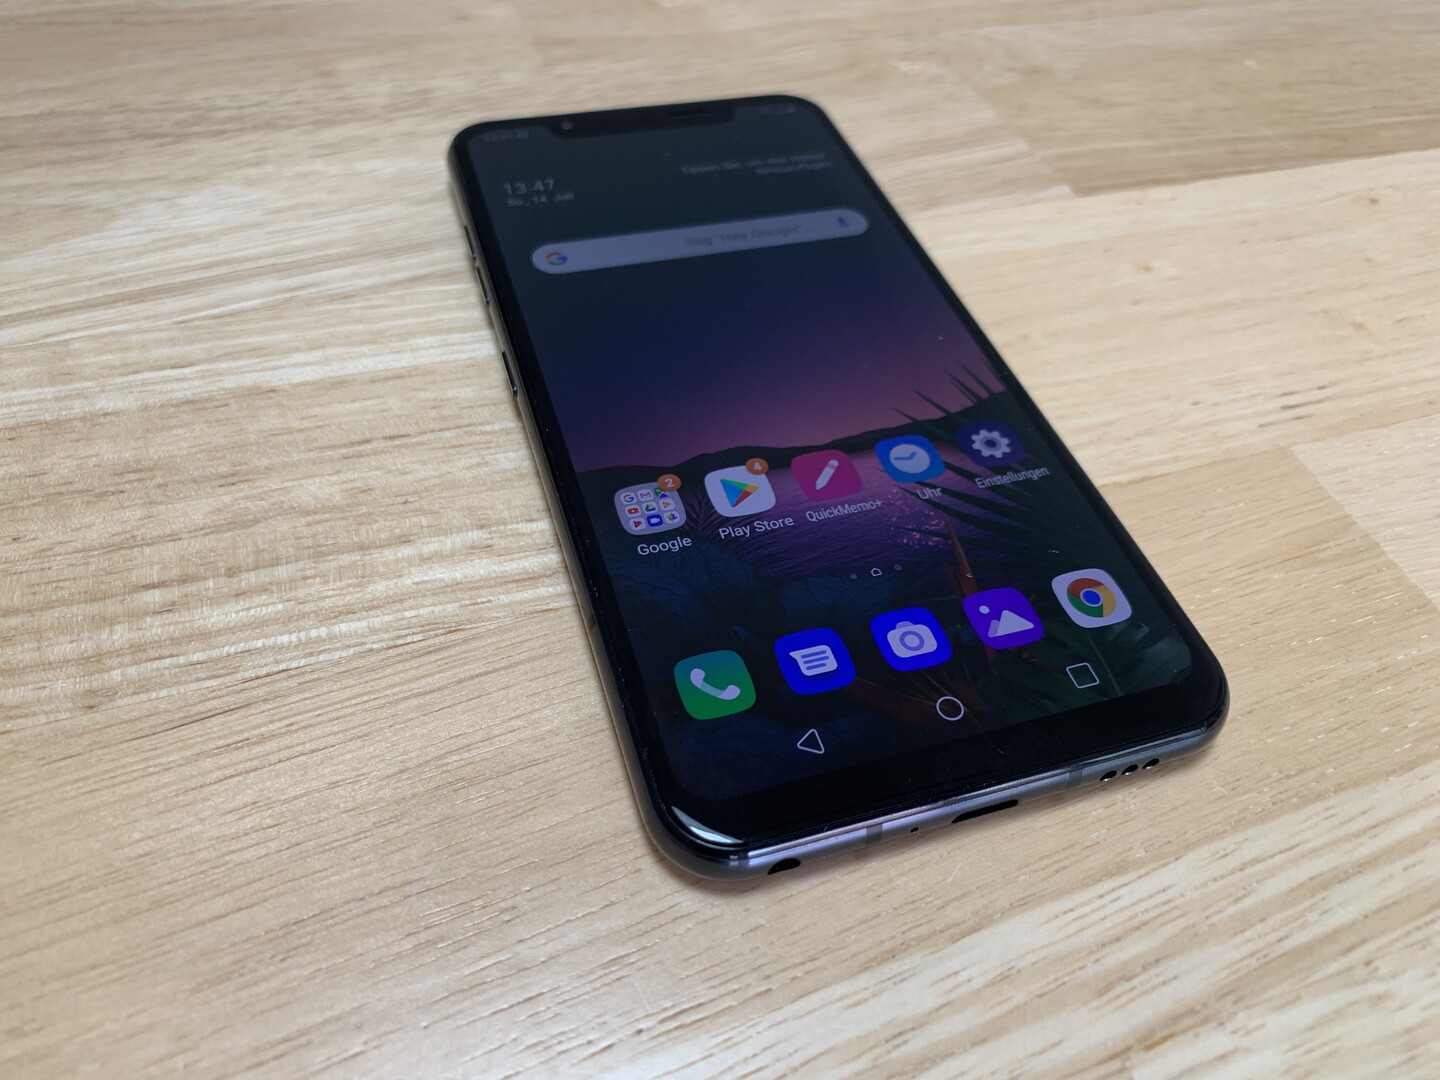
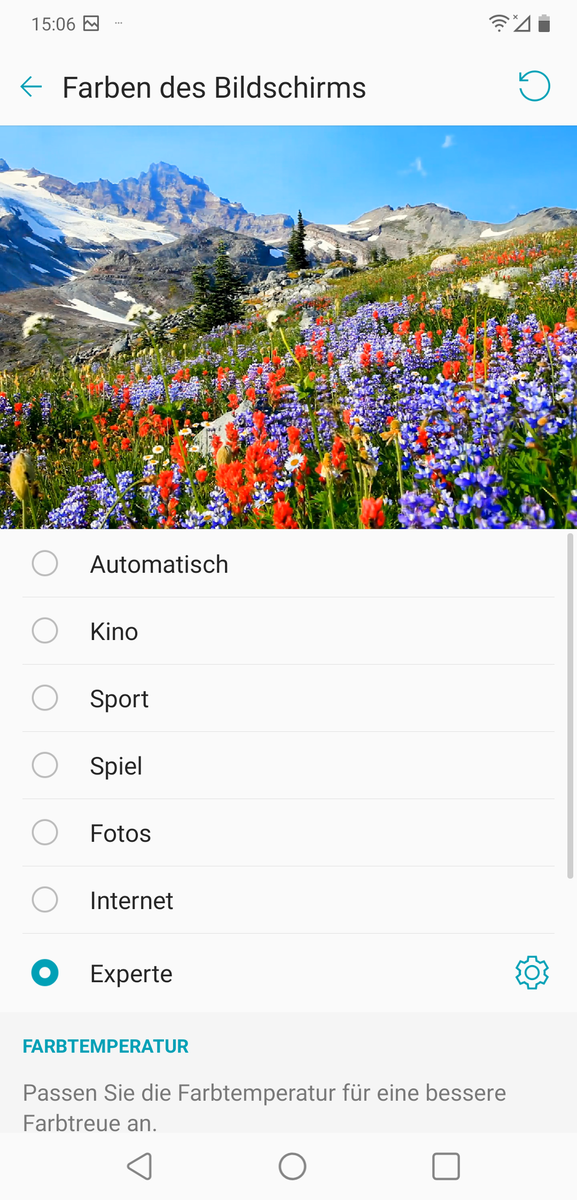
The G8S ThinQ ships with Android 9.0 Pie, atop of which LG adds its skin. The company has made a few minor UI adjustments compared to stock Android and included a few additional settings. We like that LG has put a brightness slider in Quick Settings by default, allowing you to manually adjust the brightness without diving into the settings menu. Incidentally, LG has done a good job at organising Settings, having added some practical options like display colour options.
The G8S ThinQ comes with the standard set of Google apps along with several in-house ones like Smart Doctor and Games Launcher. Unfortunately, we can only disable and not uninstall the preinstalled Amazon Assistant app.
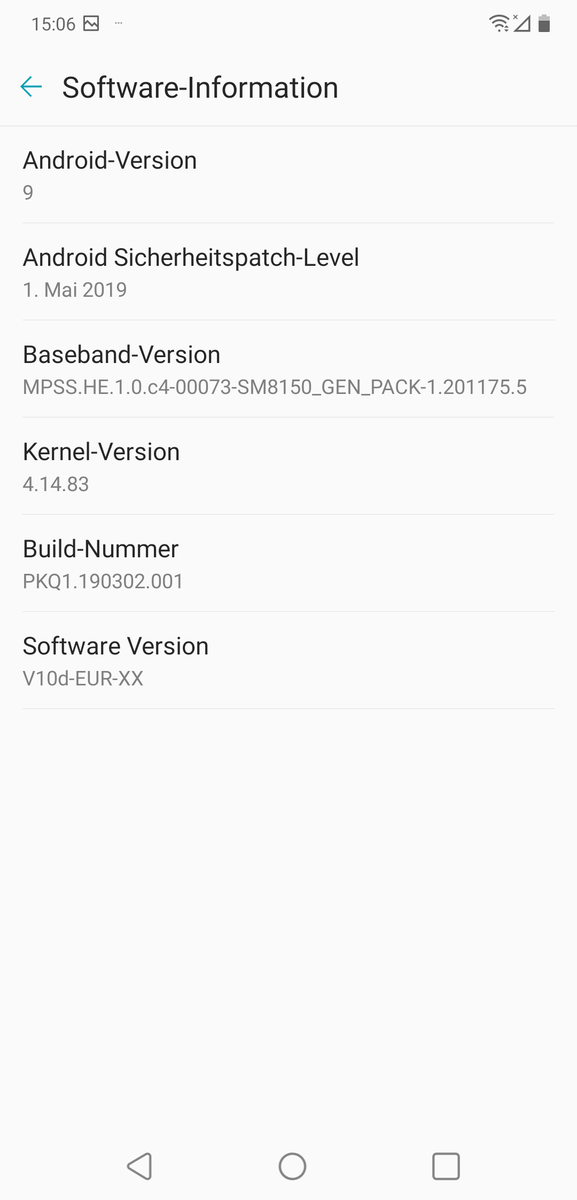
LG had pushed out the May 2019 security patch to our review unit at the time of testing, which was relatively up to date. However, we hope that the company rolls out a new one soon.
Software information
Display colour options
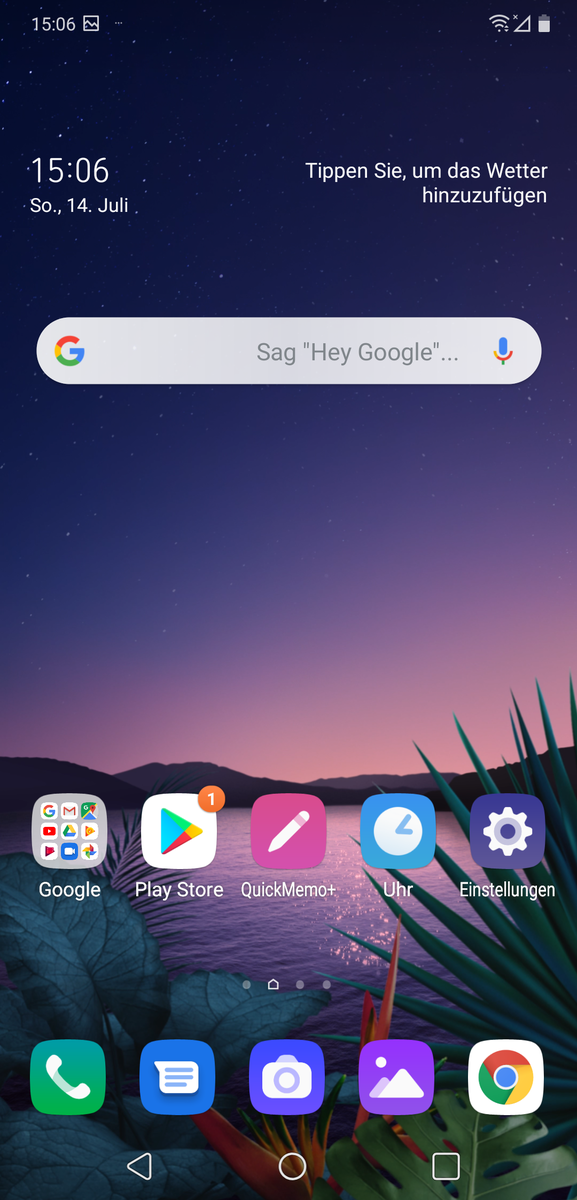
Default home screen
Communication & GPS
The G8S ThinQ supports all modern Wi-Fi standards up to 802.11ac, although some flagships like the Galaxy S10 series support the newer ax standard, also known as Wi-Fi 6. Our review unit fell short of its predecessor in our iperf3 Client Wi-Fi tests with our Linksys EA8500 reference router, but it still averaged over 500 Mb/s with a few fluctuations.
The G8S ThinQ supports plenty of LTE bands too, making it capable of being used on intercontinental trips. The device supports LTE Cat. 20 for up to 2 Gb/s download speeds and 75 Mb/s upload speeds. The former is mighty impressive, although few carriers currently support these speeds. The G8S ThinQ’s upload speeds are rather slow by modern flagship standards though. Our review unit also maintained decent network reception during our tests in a built-up urban area.
The G8S ThinQ uses BeiDou, Galileo, GLONASS and GPS, including A-GPS navigation for location services. Our review unit can maintain a satellite fix with up to four metres accuracy outdoors, which is on par with other modern flagships. Disappointingly, it could not find us indoors even when we stood next to a window, something that even some midrange devices can do.
We also took the G8S ThinQ on a bike ride to compare its location accuracy against our reference bike computer, the Garmin Edge 520. Impressively, our review unit proved more accurate than the Garmin in certain sections of our 14 km bike ride, with it plotting one of the most accurate routes we have ever seen. In short, the G8S ThinQ could replace most consumer-grade navigation devices; it is that accurate.
Telephone Features & Call Quality
LG preinstalls its in-house suite of telephony apps. The apps work well and function like the endless alternatives, although the Phone app opens to the dialler rather than your call history as the Google app does. The Phone app divides call history, contacts and favourites into tabs though, with it also being possible to create contact groups should you wish to do so.
Our review unit has decent, albeit not outstanding call quality. Our test calls never sounded crystal clear, with our call partner sounding better over speakerphone than using just the earpiece. The microphone transmitted our voice well though.
Cameras
LG equips the G8S ThinQ with three rear-facing cameras, with a 12 MP main sensor being supported by a 13 MP wide-angle sensor and a 12 MP telephoto lens. The latter supports optical zoom, while the default camera software allows you to combine shots from all three sensors into one GIF, should you find that useful.
The main rear-facing camera has an f/1.8 aperture and a large pixel diameter of 1.4 microns, theoretically allowing it to process plenty of light even in poorly lit scenes. Our test shots are richly detailed and look excellent in good light, with the 12 MP sensor able to keep up with the flagships like the iPhone XS Max. The main sensor lacks the light sensitivity of its peers though, with bright sunlight looking overexposed and the roof edges in scene 2 coming out a little overshadowed. Overall, the iPhone XS Max takes a much more rounded picture, in our opinion. The sensor retains plenty of details in low light too, while objects also look sharp. However, the scene looks noticeably underexposed, which is a shame. Incidentally, the telephoto and wide-angle lenses also take good pictures.
These cameras are complemented by an unspectacular 8 MP front-facing sensor and a ToF camera, the latter of which being one of the biggest selling points of the G8S ThinQ. As mentioned earlier, the ToF camera uses infrared to create a 3D model of a scene and capture more depth-of-field information than a conventional camera sensor can. Apple uses a different technology for its face recognition and AR emojis, but companies like Tesla use ToF to allow their self-driving cars to map out their surrounding environment. By contrast, the G8S ThinQ uses its ToF camera to help create more accurate bokeh effects, although the differences between the ones captured by our review unit and something like the Pixel 3 XL are minimal. We will also cover the other applications of the ToF camera in the Input Devices & Operation section of this review.
The G8S ThinQ can also record videos in up to 4K at 60 FPS, although the device cannot use its optical image stabilisation (OIS) at these settings. Unfortunately, you must drop the frame rate to 30 FPS if you want to shoot in 4K. The image quality of videos is just as good as photos, and we like that the default camera app can switch between focal lengths while recording. Unfortunately, this looks rather abrupt in recordings, with there being no smooth transition between cameras.
Accessories & Warranty
The G8S ThinQ comes with a pair of headphones, a charger, charging cable and a SIM tool. There is also a silicone case and a cleaning cloth. Currently, LG does not sell any G8S ThinQ specific accessories, but you can buy screen protectors and cases from third-party retailers.
The G8S ThinQ comes with a 24-month limited manufacturer’s warranty. Please see Guarantees, Return Policies and Warranties FAQ for country-specific information. LG preinstalls a remote access app too, which allows its support teams to analyse your device before sending it in for a warranty repair. You must enable this before you can use it though, as it does not come enabled by default.
Input Devices & Operation
The G8S ThinQ comes with an accurate touchscreen, with there also being hardware buttons for volume control and power like almost every smartphone. LG has also included a dedicated Google Assistant button, which cannot be assigned to a different app or command.
The ToF camera can be used to perform air-motion gestures, examples of which you may have seen in G8 ThinQ reviews. We found them intuitive and innovative, but they can be tricky to get right. Basically, you hold your hand a little away from the camera, with a small illuminated bar appearing once the ToF camera has detected your hand. You can then switch tracks, change the volume and take photos, all of which sound great in theory. While it offers a glimpse into the future, the area within which the ToF camera recognises gestures is small, often leading to the device not recognising the movement that you have performed. In short, air-motion gestures are currently a gimmick, but they could eventually revolutionise how people interact with their smartphones.
LG has included a fingerprint sensor on the back of the G8S ThinQ too, which reliably and quickly unlocks our review unit. You can even use the pattern of your veins in your hand to unlock your device, but this does not work as well as the fingerprint scanner does. The G8S ThinQ has facial authentication too, which works better than the vein recognition does. However, it is also slower than the fingerprint scanner at unlocking the device, leaving the latter as the fastest and most reliable way of unlocking the G8S ThinQ.
Display
A major leap for the LG G series is the transition from IPS to OLED screens. The G8S ThinQ has an OLED panel like many modern flagships, which offers better colour accuracy and contrast than the IPS equivalent in the G7 ThinQ.
The change in display technology does have its downsides though. The G8S ThinQ operates natively at 2248×1080, a lower resolution than the 3120×1440 display in the G7 ThinQ. Moreover, our review unit has an average maximum luminosity of 556 cd/m² and is 88% evenly lit, both of which fall far short of the G7 ThinQ. The G8S ThinQ still gets bright by modern flagship standards, but it cannot compete with the G7 ThinQ and its 975 cd/m² bright display.
Another downside of OLED panels is that they use pulse-width modulation (PWM) to regulate their brightness, which can cause eye strain and headaches for some people. The display in our review unit flickers at 235 Hz, a frequency that is low enough to cause health issues for those who are PWM sensitive.
OLED panels can switch off pixels individually though, giving devices like the G8S ThinQ a theoretically infinite contrast ratio and a 0 cd/m² black value. LG has included various presets for adjusting the colour reproduction of the display too, which is a nice touch. You can even set the white balance manually too, should you wish to tinker with how colours look. We included a screenshot of the display options in the Software section of this review, of which Cinema mode is the most colour accurate. CalMAN is not completely reliable at measuring colour spaces, but it does show that the G8S ThinQ comfortably covers all of sRGB and a large portion of DCI-P3.
The G8S ThinQ is easy to use outdoors, with its brightness sensor reacting quickly to changing lighting conditions. The display has a highly reflective finish though, which can impede readability in bright sunlight. Positively, the OLED panel has stable viewing angles, with there being only minor colour distortions at acute angles.
Performance
The G8S ThinQ features a Qualcomm Snapdragon 855 SoC, a staple of 2019 flagships. Our review unit falls short of the OnePlus 7 Pro and Xperia 1 in synthetic benchmarks, but it still holds its own against the Galaxy S10e, the Huawei P30, and its predecessor, the G7 ThinQ. We shall cover why the G8S ThinQ performs worse than its Snapdragon 855-powered contemporaries in the Emissions section of this review.
Overall, the G8S ThinQ has flagship-level performance, and you shouldn’t notice any slowdowns in daily use. System benchmark results like PCMark for Android underline this, with the G8S ThinQ finishing second to the OnePlus 7 Pro in our comparison table.
LG equips the G8S ThinQ with UFS 2.1 flash storage, another staple of modern flagships. Some OEMs like OnePlus have moved onto the faster UFS 3.0 standard, but you will probably only notice the difference in synthetic benchmarks. Our review unit boots and loads apps quickly, with there being no obvious delays or lags in daily use.
The G8S ThinQ has a comparatively slow microSD card reader though, with our Toshiba Exceria Pro M501 reference card only able to average 67.53 MB/s read speeds and 46.7 MB/s write speeds. Only the Xperia 1 has a slower card reader of our comparison devices, with the others averaging at least 60 MB/s in read and write benchmarks.
Games
The Adreno 640 is a capable gaming GPU, as we have covered in our OnePlus 7 Pro, Xiaomi Mi 9 and Xperia 1 reviews. The G8S ThinQ can play most modern games at 60 FPS on high graphics, with Arena of Valor fluctuating between 53 FPS and 61 FPS during our gaming tests. Asphalt 9: Legends only runs at 30 FPS, with our review unit averaging 27.9 FPS on graphics. In short, the Adreno 640 should be sufficiently future-proof for the next few years, especially as it supports a slew of modern APIs.
We also encountered no issues with the touch screen or accelerometer during our gaming tests. Fast-paced games like Temple Run 2 ran smoothly, with there being no input delays even during challenging sections.
Emissions
Temperature
The G8S ThinQ will never feel cool to the touch, with surface temperature on our review unit averaging around 32 °C at idle. However, the device only heats up to 35 °C under load, with only two areas reaching 38 °C.
In short, the G8S ThinQ should not feel uncomfortable in your pocket after a prolonged gaming session.
The low surface temperatures come with their costs though, namely SoC throttling. Frame rates quickly dropped by almost a third during a GFXBench 3.1 battery benchmark, which is extreme throttling by Snapdragon 855 standards.
Speakers
LG equips the G8S ThinQ with true stereo speakers, with the device using its earpiece as a secondary speaker. The speakers reached a maximum of 83.6 dB(A) during our tests, although trebles sound over-emphasised at this volume. Audio sounded noticeably more balanced when we lowered the volume slightly. The G8S ThinQ manages to reproduce a wider range of deep mid tones than its predecessor and even some bass frequencies, which make audio sound pleasantly warm.
The G8S ThinQ also has a 3.5 mm headphone jack, something which sets the device apart from other modern flagships. You could connect external audio equipment via Bluetooth too, with the G8S ThinQ supporting the modern 5.0 standard. Both worked perfectly during our tests and delivered clean-sounding audio.
Power Management
Power Consumption
There are more economical devices than the G8S ThinQ, but our review unit does not embarrass itself compared to its peers. The device consumes between 1.2 W and 2 W at idle, which is not especially concerning. However, we measured the G8S ThinQ consuming between 5 W and 10 W under load, which is about 10% more than we would have expected from a Snapdragon 855-powered device. Only the Galaxy S10e consumes more of our comparison devices, with the G8S ThinQ consuming between 15% and 43% more than its contemporaries.
Battery Life
One saving grace of the G8S ThinQ here may be its battery capacity, which is larger than all but that of the OnePlus 7 Pro and Huawei P30 of our comparison devices. Its 3,550 mAh battery does not last long under sustained load, with the iPhone XR and G7 ThinQ offering over an hour longer between charges if you are pushing the devices hard.
The G8S ThinQ still managed a respectable 11:33 hours in our practical Wi-Fi tests, which suggests that it should easily survive a workday of intensive use and perhaps even two if you use it sparingly. Its quick-charging functionality means that you should need less than 2 hours before having 100% charge again too.
Just as the X6 and X5 became the Nokia 6.1 Plus and Nokia 5.1 Plus globally, the X7 became official globally as the Nokia 8.1. Just like its Chinese counterpart, the Nokia 8.1 boasts of a 6.18-inch PureDisplay Full HD+ panel, along with a Snapdragon 710 processor and dual Zeiss rear cameras. Specs are very identical, except that the Nokia 8.1 is available only in a 6GB/64GB variant, and that it comes with Android Pie out of the box. Being an Android One like all global models, the Nokia 8.1 is guaranteed for two major updates and three years of security updates.
Design and Construction
Sized at 6.1 inches, the Nokia 8.1 is constructed with glass and comes with a frame crafted from Series 6000 aluminum. Due to the glass construction, it does feel premium and sleek when held. The device sits in the mid-range level, but with its Iron Steel colorway, it looks a little more sophisticated than that. The curved edges also allow the device to rest comfortably against the palm.
Up front, the smartphone has a seemingly outdated bar notch. It’s pretty thick, compared to other devices that have been designing their notches to become smaller and smaller. Situated in the bar notch are the front camera, call speaker, and sensors.
Over the rear are the dual cameras, stacked vertically and raised from the back of the phone. With the protruding cameras, the 8.1 definitely won’t lay flat on surfaces. Below the cameras is a fingerprint scanner that’s pretty easy to reach.
On the right side, one can find the power button and the volume rocker. They’re all clicky and are reachable even with small hands.
Located on the left is the SIM card tray. The 8.1 employs a hybrid dual SIM slot; one can use two SIMs or a single SIM card and a micro SD card to expand the device’s storage.
A 3.5mm headphone jack can be found at the top.
The USB-C charging port, speaker grilles, and the microphone can all be found at the bottom.
Display and Multimedia
Nokia has fitted the 8.1 with PureDisplay, something that can also be found on older Nokia smartphones such as the 7.1. According to Nokia, PureDisplay provides higher contrast and has HDR10 support. The PureDisplay technology does give the device’s 6.18-inch screen with a bit of flair; the panel is bright and the viewing angles are great. Color saturation is present as well, although it’s not as excellent as what an AMOLED display would provide. As the 8.1 does have a rather bright display, using it under direct sunlight isn’t an issue at all.
When it comes to audio, the 8.1’s speaker certainly gets loud and fills the room. Surprisingly, audio at the highest level doesn’t sound distorted nor does it sound tinny and eardrum-splitting. The sound is balanced, and one can hear the mids and lows coming through from time to time. A downside though is that the speaker grille is positioned where your palm could cover it easily.
Camera
Located in the bar notch up front is a 20MP shooter, while a set of 12MP + 13MP shooters with ZEISS optics sit on the rear. As mentioned, the rear cameras protrude slightly from the back of the smartphone. Let’s take a closer look into their capabilities.
The ZEISS lenses employed by the 8.1 deliver sharp images, with details and accurate color reproduction in settings with ample lighting. Vibrancy is present as well, and the 8.1 seems to have an automatic scene/subject detection mode in it. This is shown through a small notification right below the camera settings. The detection works fairly well and is able to identify whether you’re taking pictures of plants, people, indoors, outdoors, and such. When it comes to portrait shots, edge detection is modest but it produces detailed images; the smartphone will also notify you if you’re too close or at the perfect amount of distance from the subject.
As for selfies, the images produced using the standard photo mode are good to use on social media. However, there’s a slightly artificial look to the selfies, whether or not the Beauty mode is enabled. Strangely enough, taking selfies using the Portrait mode results in less-vibrant, saturated colors. The edge detection separates the subject from the background nicely, though.
The 8.1 can record up to 720p, Full HD, and UHD 4K video. Video quality is decent, and it offers stabilization as well.
OS, UI, and Apps
The 8.1 runs on Android One, which is a stock version of the Android operating system. Here’s a short explainer if you’d like to know more about Android One. The device has Android 9 straight out of the box. While the device runs on a no-frills Android operating system, we found the UI to be confusing at times. Once you’ve installed a couple of apps, you can swipe right on the home screen to see their respective icons. For a user to see pre-loaded apps and other functionalities of the smartphone, they’d have to draw up the center navigation button.
If you don’t pull up the center button all the way to the top, the screen will first display all the currently active apps. You’d have to pull up the center navigation once more to see every app and functionality installed in the smartphone. User interfaces should always be designed with ease of use in mind; the 8.1’s UI shows the exact opposite of that. Despite the frustrating interface, having stock Android means that the 8.1 doesn’t have bloatware or third-party apps in it.
Performance and Benchmarks
Snapdragon 710 powers up the Nokia 8.1, coupled with Adreno 616 GPU. RAM variants of the smartphone include 4GB or 6GB, with our unit on hand here possessing 6GB. We ran the device through a couple of benchmarks, and here are the results:
The device is definitely capable of handling productivity tasks, multi-tasking, gaming, and the like, running them through in a smooth manner. We tested out Asphalt 9 and PUBG to see the smartphone’s gaming capabilities and we can say that it does not disappoint. Initial gaming didn’t give us any lags or frame drops, but they will happen through an extended gaming session. Still, it’s a pretty decent enough device to game on.
Connectivity and Battery Life
The usual connectivity features such a 4G LTE, Wi-Fi, and Bluetooth are present in the 8.1. GPS is fairly accurate as well and didn’t give us any issues when pinning locations or using the map. AR games are also possible to play using this device. The phone has support for NFC as well, allowing users to pay virtually.
A 3,500mAh battery comes with the 8.1, and support for 18W Fast Charge. PC Mark rated the battery life at 12 hours and 7 minutes. Strangely enough, It takes about 2 hours for the device to get fully charged.
Conclusion
the Nokia 8.1 is a competent smartphone that has the guts to go up against other devices in the mid-range section. It has an impressive display, speedy CPU performance unmarred by lags, modest audio quality, Stock Android, and decent camera quality. Despite the fact that it has an outdated bar notch design, poor speaker location, a frustrating user interface, and seemingly artificial-looking selfies, it can be overlooked when you’ve got a solid performer in your hands.
Priced at $387.85, the Nokia 8.1 is definitely a smartphone that you should go for if you’re looking for a smartphone that has excellent performance and won’t drain your bank account.
Want to use your Apple Watch as an alarm clock? Whether you wear your Apple Watch to bed, or use it in nightstand clock mode, you can set your Apple Watch to function as an alarm clock.
There are a few different ways to add alarms to Apple Watch, we’ll show you various methods to setting an alarm using Siri for both repeating alarms and one-off alarms, as well as using the Apple Watch Alarms app to set an alarm.
How to Add Alarm on Apple Watch with Siri
The easiest way to add an alarm to the Apple Watch is by using Siri. To set a one-time alarm on Apple Watch with Siri:
Summon Siri on the Apple Watch (by using Hey Siri, raise-to-Siri, or holding the rotating dial button), then say “Set an alarm for (time)”
For example, to set an alarm for 5:30 am, you’d say “set an alarm for five thirty A M”.
How to Set Repeating Alarm on Apple Watch with Siri
To set a repeating alarm that goes off every day at the same time, use the following syntax:
Summon Siri on the Apple Watch, then say “Set a repeating alarm for six thirty A M”
A repeating alarm will repeat every day at the same time, so if you want a consistent alarm this is a good way to have one.
How to Set Alarm Clock on Apple Watch with Alarms app
You can also set an alarm clock on Apple Watch by using the Alarms app, this requires multiple steps performed on the watch itself:
Open the Alarms app on Apple Watch then tap on “Add Alarm”
Choose whether you want the alarm to be AM or PM
Next tap on the hour and use the rotating dial button on the Apple Watch to select the hour you want the alarm to go off on
Then tap on the minutes and again use the rotating dial to set the minutes
Tap on the “Set” button to set the alarm
To set the alarm to repeat, tap the alarm time to edit the alarm, then tap the “Repeat” option and adjust accordingly
You can set other customizations to the alarm as well, including changing the name, changing the alarm clock time, and whether or not to allow snoozing of the alarm.
How to Snooze & Stop Alarms on Apple Watch
You can snooze the alarm clock on Apple Watch by pressing the rotating dial button.
You can stop and turn off the Apple Watch alarm by pressing the other flat button on the Apple Watch.
How to Easily Check What Alarm is Actively Set on Apple Watch
Aside from going into the Alarms app and looking at which alarms are active there, there’s another convenient way to easily see what alarms are set on Apple Watch.
When the Apple Watch is placed into Nightstand Mode (sideways on a charger), tap on the screen to see the clock and look for the “Alarm (time)” text directly under the main clock. Optionally you can use a knock on the nightstand to wake the Apple Watch screen and see the alarm that way too.
How to Delete Alarms on Apple Watch
Open the Alarms app on Apple Watch
Tap the alarm you want to delete
Scroll to the bottom of the edit alarm list and tap on “Delete” to remove the alarm
You can delete alarms that were set by Siri or alarms that were added manually, removing the alarm is the same regardless of how it was added and set in the first place.