Xiaomi 15 Ultra Screen Replacement Step By Step Curved OLED Display Repair Guide

Xiaomi 15 Ultra Screen Replacement Step By Step Curved OLED Display Repair Guide: 11 Essential Steps for a Safe Repair
Introduction
The Xiaomi 15 Ultra Screen Replacement Step By Step process is a precision repair that requires patience, suitable tools, and careful handling of the phone’s curved display assembly. Unlike a basic flat-screen replacement, the Xiaomi 15 Ultra uses a flexible 6.73-inch AMOLED panel with a WQHD+ 3200 × 1440 resolution, up to 120Hz refresh rate, and full lamination. Xiaomi also describes the display as an All Around Liquid Display with a wraparound quad-curved design.
That means a cracked screen shouldn’t be treated like a simple piece of glass. The OLED panel, touch layer, frame adhesive, display flex, fingerprint hardware, and surrounding components all need to be protected during the repair.
This guide explains the complete process in practical terms. It is written for trained repair technicians and experienced DIY users who understand that opening a premium smartphone can cause additional damage if the correct procedure isn’t followed.
Important: The exact internal construction, adhesive layout, replacement-part design, and service procedure can vary by production batch and replacement assembly. When possible, compare the procedure with current manufacturer or professional service documentation before beginning.

1. Understanding the Xiaomi 15 Ultra Curved OLED Display
Before starting a Xiaomi 15 Ultra Screen Replacement Step By Step repair, it’s important to understand what you’re working with.
The Xiaomi 15 Ultra features a 6.73-inch AMOLED display with WQHD+ resolution of 3200 × 1440 pixels. Xiaomi lists a 1–120Hz adaptive refresh rate, up to 300Hz touch sampling, DCI-P3 color coverage, and Xiaomi Shield Glass 2.0. The display uses full lamination and a flexible screen construction.
The flexible OLED design provides excellent image quality while allowing the curved display to follow the phone’s frame. However, flexibility doesn’t mean the panel is immune to damage.
Why the Curved Design Matters
A curved OLED display has several areas that need special attention:
- Curved edges are more vulnerable to lifting or bending.
- Display flex cables can be delicate.
- Excessive heat can damage OLED layers.
- Incorrect prying can create pressure marks.
- Poor-quality replacement panels may not reproduce the original viewing experience.
- Improper adhesive can cause uneven seating around curved edges.
The Xiaomi 15 Ultra also has an ultrasonic in-screen fingerprint sensor, making post-installation testing particularly important.
Original Display Specifications
| Feature | Xiaomi 15 Ultra |
|---|---|
| Display type | AMOLED |
| Size | 6.73 inches |
| Resolution | 3200 × 1440 |
| Pixel density | 522 ppi |
| Refresh rate | 1–120Hz |
| Touch sampling | Up to 300Hz |
| Peak brightness | Up to 3200 nits |
| Color depth | 68 billion colors |
| Protection | Xiaomi Shield Glass 2.0 |
| Screen construction | Flexible, fully laminated |
| Fingerprint | Ultrasonic in-display |
These specifications are useful when checking a replacement part. If the new screen behaves noticeably differently, don’t immediately assume the software is responsible. The replacement assembly itself may be the problem.
2. When Does the Xiaomi 15 Ultra Need a Screen Replacement?
Not every damaged display requires the same repair.
A phone with only a scratched outer glass may behave normally, while a phone with a damaged OLED panel can show black areas, lines, flickering, dead pixels, or complete display failure.
Common Signs of Display Damage
A complete screen assembly replacement may be appropriate when you notice:
- Large cracks across the display.
- Black or purple OLED blotches.
- Vertical or horizontal lines.
- Flickering.
- Touch areas that don’t respond.
- Ghost touches.
- Display failure after a drop.
- Severe green, pink, or white tinting.
- Separation between display layers.
- A display that works intermittently.
Glass Damage vs OLED Damage
This distinction is important.
If only the outer glass is damaged but the image and touch functions remain perfect, specialist glass-only refurbishment may sometimes be possible.
However, modern fully laminated OLED assemblies aren’t designed for casual glass replacement. Separating the glass from the OLED requires specialist equipment, optical adhesive, alignment equipment, and controlled refurbishment procedures.
For most standard repairs, replacing the complete display assembly is the more practical approach.
3. Tools and Parts Required
A professional-looking repair starts with the right equipment.
Recommended Tools
Prepare the following:
- Replacement Xiaomi 15 Ultra display assembly.
- Precision screwdriver set.
- Plastic opening picks.
- Suction handle.
- Thin plastic card or opening tool.
- ESD-safe tweezers.
- Spudger.
- Controlled heat source.
- Isopropyl alcohol suitable for electronics cleaning.
- Microfiber cloth.
- Soft protective mat.
- ESD wrist strap or grounded work area.
- Replacement adhesive.
- Magnifying lamp, where available.
- Display testing equipment, if available.
Don’t Use Excessive Force
A common mistake is assuming that more force makes a repair faster.
It doesn’t.
With a curved OLED phone, excessive force can turn a screen replacement into a motherboard, frame, or camera repair.
The better approach is to soften adhesive gradually, work around the perimeter, and constantly monitor the depth and angle of your opening tool.
4. Prepare the Xiaomi 15 Ultra Before Opening It
Preparation can prevent expensive mistakes.
Back Up the Phone
Before opening the handset, back up important:
- Photos
- Videos
- Contacts
- Messages
- Authentication data
- Documents
- WhatsApp or other application data
- Device settings
If the screen is still usable, complete the backup before beginning.
Power the Device Down
Switch the phone off completely.
Don’t work on a powered device unless a documented professional procedure specifically requires it.
A powered battery and exposed connectors increase the risk of electrical damage.
Remove External Accessories
Remove:
- SIM tray
- Case
- Screen protector
- Camera accessories
- Charging cables
- Magnetic accessories
Place small parts in a labeled tray rather than leaving them loose on the workbench.
5. Xiaomi 15 Ultra Screen Replacement Step By Step: Removing the Rear Cover

The first physical stage is gaining access to the internal components.
The Xiaomi 15 Ultra has a premium camera-focused construction with a wraparound frame and curved design.
Step 1: Warm the Rear Cover
Use controlled heat to soften the adhesive securing the rear cover.
The goal isn’t to make the phone extremely hot.
Instead, warm the adhesive sufficiently that the opening tool can separate the bonded surfaces without excessive force.
Step 2: Create a Small Opening
Use a suction handle or suitable opening technique to create a tiny separation.
Insert a thin plastic opening pick.
Avoid pushing the tool deeply into the phone.
Step 3: Work Around the Perimeter
Slowly move around the edges.
Do not rush.
If resistance increases, stop and apply controlled heat again.
Step 4: Lift the Cover Carefully
Once the adhesive has been separated, lift the rear cover gradually.
Don’t yank it away.
Check for any attached components or cables before completely removing the panel.
Place the rear cover somewhere safe where dust cannot settle onto its adhesive surface.
6. Disconnect the Battery Before Continuing
This is one of the most important stages of the repair.
After accessing the internal components, identify the battery connector and disconnect it using an appropriate non-conductive tool.
Why Battery Disconnection Matters
Disconnecting the battery reduces the chance of:
- Short circuits
- Accidental component activation
- Connector damage
- Electrical faults
- Unintended booting during the repair
Never use a metal screwdriver to pry directly against exposed electrical contacts.
Organize the Screws
If screws must be removed, keep them organized by location.
Modern smartphones can use screws with different lengths.
Putting a longer screw into the wrong hole can cause serious internal damage.
A simple magnetic mat with labeled positions can save a lot of trouble.
7. Remove the Damaged Display Assembly
This is the most delicate stage.
The display is bonded to the frame, and the curved edges require additional care.
Step 5: Apply Controlled Heat
Warm the perimeter of the display to soften the adhesive.
Don’t concentrate heat on one location for too long.
Move the heat source evenly.
Step 6: Start at a Suitable Edge
Insert a thin plastic opening pick between the display assembly and frame.
Keep the insertion shallow.
The objective is to separate adhesive, not cut through internal components.
Step 7: Work Around the Curved Edges
This is where patience pays off.
The curved sections can require more careful adhesive separation.
Keep the tool nearly parallel with the display assembly rather than forcing it vertically into the device.
Step 8: Lift the Display Gradually
Once enough adhesive has been released, carefully lift the damaged panel.
Stop if you encounter resistance.
Resistance can indicate remaining adhesive or a connector that hasn’t been released.
Step 9: Disconnect the Display
Once the display assembly is accessible, identify the display connector.
Disconnect it carefully.
Don’t pull on the flexible cable itself.
Use the connector area and an ESD-safe tool.
8. Clean and Inspect the Frame
After removing the old screen, don’t immediately install the replacement.
First inspect the phone.
Look for:
- Bent frame sections
- Broken glass
- Adhesive residue
- Dust
- Corrosion
- Damaged flex cables
- Connector damage
- Missing brackets
- Signs of liquid exposure
The frame must be reasonably clean and flat before installing the new panel.
Cleaning the Adhesive
Remove old adhesive carefully.
Use an appropriate plastic tool first.
A small amount of electronics-safe isopropyl alcohol can help with stubborn residue, but avoid flooding the device.
Don’t scrape the frame aggressively.
A damaged frame may prevent the new display from sitting evenly.
9. Prepare the Replacement OLED Display
Before permanently installing the new display, test it.
This is a critical professional repair habit.
Don’t Remove Protective Films Too Early
Keep protective films on the replacement display while performing initial handling wherever possible.
This reduces fingerprints and accidental scratches.
Inspect the Replacement
Check for:
- Cracks
- Scratches
- Bent edges
- Damaged flex cable
- Missing protective layers
- Uneven frame
- Contamination
- Manufacturing defects
If something looks wrong before installation, stop.
It’s much easier to address a defective component before it’s glued into the phone.
10. Test the Replacement Screen Before Adhesive
This is one of the most important steps in the entire Xiaomi 15 Ultra screen repair.
Connect the replacement display temporarily according to the appropriate service procedure.
Then power the device on.
Test Image Quality
Check:
- Full-screen white
- Full-screen black
- Red
- Green
- Blue
- Grey
- Maximum brightness
- Minimum brightness
- Uniformity
- Dead pixels
- Lines
- Flickering
Test Touch
Open a drawing or touch-testing application.
Move your finger slowly across:
- Top edge
- Bottom edge
- Left edge
- Right edge
- Corners
- Center
Pay particular attention to the curved areas.
A replacement can look perfect while still having a defective touch layer.
11. Install the New Xiaomi 15 Ultra OLED Display
Once testing is successful, prepare the display for permanent installation.
Step 10: Apply Correct Adhesive
Use suitable display adhesive designed for smartphone screen installation.
Avoid excessive adhesive.
Too much adhesive can:
- Squeeze into the frame
- Contaminate connectors
- Create uneven pressure
- Affect buttons
- Make future repairs difficult
Step 11: Position the Display
Align the replacement screen carefully with the frame.
Check the edges before applying pressure.
The display should sit evenly around the entire perimeter.
Step 12: Press Evenly
Apply gentle, even pressure around the perimeter.
Don’t press hard on the center of the OLED panel.
The curved edges need particular attention.
12. Reassemble the Phone
After the replacement display has been seated correctly, reverse the disassembly process.
Reconnect the display and battery connections according to the applicable repair procedure.
Reinstall any brackets and screws in their original positions.
Then reinstall the rear cover with appropriate adhesive.
Check Alignment Before Final Sealing
Look at the phone from multiple angles.
The display should be:
- Centered
- Evenly seated
- Flush with the frame
- Free from visible gaps
- Free from adhesive contamination
If the screen is crooked, don’t try to fix it by forcing one corner down.
Correct the alignment before the adhesive fully sets.
13. Final Display and Touch Testing
The repair isn’t finished simply because the phone turns on.
A proper post-repair test should be systematic.
Display Checklist
| Test | Expected Result |
|---|---|
| Power on | Normal boot |
| Brightness | Smooth adjustment |
| Colors | Uniform |
| Black screen | No abnormal bright patches |
| White screen | No major tint variation |
| Touch center | Responsive |
| Touch corners | Responsive |
| Curved edges | Responsive |
| Auto brightness | Functions normally |
| 120Hz mode | Functions according to software settings |
| Fingerprint | Registers and unlocks normally |
| Front camera | Clear image |
| Proximity sensor | Functions normally |
| Earpiece | Clear audio |
| Charging | Normal |
| Wireless functions | Normal |
Because the Xiaomi 15 Ultra uses an ultrasonic in-display fingerprint sensor, fingerprint performance should be checked after display installation.
If the fingerprint sensor doesn’t behave normally, don’t assume the screen is automatically defective. Connector seating, calibration requirements, software state, or compatibility of the replacement assembly can all be relevant.
14. Common Xiaomi 15 Ultra Screen Replacement Mistakes
Even experienced technicians can make mistakes when rushing.
Mistake 1: Using Too Much Heat
Excessive heat can damage sensitive components and adhesives.
Better approach: Use controlled heat and work gradually.
Mistake 2: Inserting the Opening Pick Too Deeply
A deep opening tool can damage internal components.
Better approach: Keep the tool shallow and close to the adhesive layer.
Mistake 3: Forgetting the Battery
Working around connectors with the battery connected increases risk.
Better approach: Disconnect the battery as soon as the applicable repair procedure allows.
Mistake 4: Installing Before Testing
A defective replacement panel can waste hours if installed before testing.
Better approach: Test the screen before permanent adhesive installation.
Mistake 5: Using Poor Adhesive
Cheap or unsuitable adhesive can produce gaps and uneven pressure.
Better approach: Use a professional-quality adhesive appropriate for the display and frame.
Mistake 6: Ignoring Frame Damage
A bent frame can prevent correct display seating.
Better approach: Inspect the frame before installing the replacement.
Mistake 7: Forgetting Post-Repair Testing
A phone that boots isn’t necessarily fully repaired.
Better approach: Test display, touch, fingerprint, cameras, charging, audio, and sensors.
15. Troubleshooting After Screen Replacement
The Phone Turns On but the Display Is Black
Check:
- Display connector seating.
- Flex cable condition.
- Battery connection.
- Replacement display compatibility.
- Signs of connector damage.
If the original screen works but the replacement doesn’t, the replacement assembly becomes a strong suspect.
Touch Doesn’t Work
Check the display connector first.
Then test whether the problem affects the whole panel or only one area.
A dead strip along an edge may indicate display assembly damage.
Display Has Lines
Possible causes include:
- Defective OLED
- Damaged flex cable
- Poor connector seating
- Physical damage during installation
Do not press harder on the panel to try to remove lines.
Fingerprint Doesn’t Work
Check the display installation and relevant connections.
The Xiaomi 15 Ultra uses an ultrasonic in-screen fingerprint sensor, so compatibility and proper post-repair functionality matter.
Screen Is Not Sitting Flush
Possible causes include:
- Old adhesive remaining on the frame
- Bent frame
- Excess adhesive
- Incorrect replacement assembly
- Misalignment
Remove the cause rather than simply applying more pressure.
16. Protecting Water and Dust Resistance After Repair
The Xiaomi 15 Ultra is rated IP68 under specified laboratory conditions. Xiaomi notes that its water-resistance rating applies to particular tested conditions and shouldn’t be treated as a guarantee against all real-world liquid exposure.
A screen repair involves opening the original factory assembly.
Therefore, you shouldn’t casually assume that a repaired phone retains its original level of water resistance.
Professional technicians should use appropriate replacement seals and controlled assembly procedures where applicable.
Customers should also understand that an aftermarket repair may not restore factory sealing performance.
17. OEM, Genuine, Refurbished, and Aftermarket Screens
The replacement component can have a major effect on the final result.
Genuine Replacement
A genuine replacement is designed to match the manufacturer’s specifications.
Potential benefits include:
- Better compatibility
- Consistent color
- Expected touch performance
- Proper brightness characteristics
- Better fit
Refurbished Original
A refurbished display may use an original OLED panel with a replaced outer glass.
Quality can vary based on refurbishment equipment and workmanship.
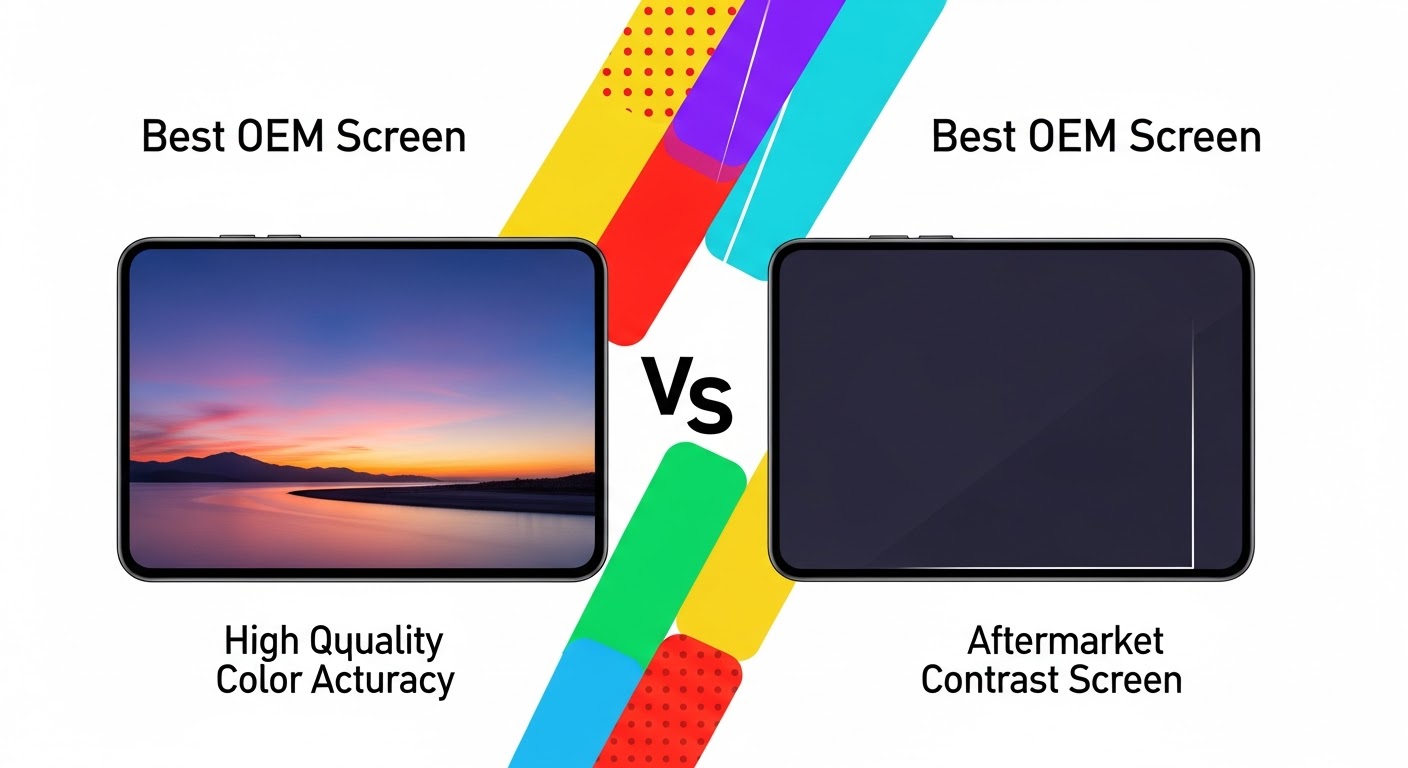
Aftermarket Display
Aftermarket parts can be less expensive, but specifications and quality can differ considerably.
Possible differences include:
- Brightness
- Color accuracy
- Touch sensitivity
- Refresh behavior
- Curved-edge response
- Battery consumption
- Fingerprint compatibility
For a flagship phone like the Xiaomi 15 Ultra, comparing the part specifications before purchase is worthwhile.
18. When Professional Repair Is the Better Option
DIY repairs can be educational, but a premium curved OLED phone isn’t an ideal first repair project.
Professional repair is especially appropriate when:
- The phone contains important data.
- The frame is damaged.
- The display is completely dead.
- Liquid exposure is suspected.
- The connector is damaged.
- You don’t have ESD-safe tools.
- You don’t have controlled heating equipment.
- You need warranty-backed work.
- The replacement part is expensive.
- You need the repair completed quickly.
Xiaomi’s support system provides service-center information, repair options, service tracking, and other after-sales resources.
For official information, consult Xiaomi Philippines Support before deciding how to proceed.
19. Frequently Asked Questions
1. How difficult is a Xiaomi 15 Ultra screen replacement?
It’s a relatively advanced smartphone repair because the device uses a flexible, fully laminated curved AMOLED display. The curved edges and delicate OLED assembly require careful adhesive separation and alignment.
2. Can I replace only the cracked glass?
Sometimes specialist refurbishment can separate and replace damaged glass while retaining a working OLED. However, this requires specialist equipment and isn’t the same as a standard screen replacement.
For most repairs, replacing the complete display assembly is simpler and more predictable.
3. Does the Xiaomi 15 Ultra use an OLED display?
Yes. Xiaomi identifies the display as a 6.73-inch AMOLED panel and states that it uses a flexible screen construction with full lamination.
4. What resolution does the Xiaomi 15 Ultra screen have?
The display has a WQHD+ resolution of 3200 × 1440 pixels and 522 ppi.
5. Does replacing the screen affect the fingerprint sensor?
It can. Because the phone uses an ultrasonic in-display fingerprint sensor, compatibility and correct installation are important. Always test fingerprint registration and unlocking after the repair.
6. Should I test the replacement screen before installing it?
Absolutely. Testing before applying permanent adhesive can save significant time and prevent unnecessary rework.
Test image quality, touch response, brightness, and other relevant functions before final installation.
7. Can a repaired Xiaomi 15 Ultra remain waterproof?
You shouldn’t assume factory water resistance remains unchanged after opening the device. Xiaomi’s IP68 rating is based on specified laboratory conditions, and real-world water resistance can change after repair.
8. Why is my replacement screen darker than the original?
The replacement may use a different panel quality or technology. Check the part’s specifications and compare brightness, color, and viewing behavior before final installation.
9. Why is the curved edge touch not working?
Possible causes include a defective replacement display, connector problems, damaged flex cable, incorrect seating, or an incompatible part.
Test the panel before permanently installing it whenever possible.
10. Should I use genuine replacement parts?
For the most predictable compatibility and performance, genuine parts or high-quality professionally refurbished components are generally preferable. Xiaomi’s own service information emphasizes genuine spare parts in its Xiaomi Care repair offering.
Conclusion

The Xiaomi 15 Ultra Screen Replacement Step By Step process is a detailed repair that demands precision rather than brute force.
The phone’s 6.73-inch flexible AMOLED display, full lamination, curved construction, high resolution, 120Hz refresh capability, and in-display ultrasonic fingerprint technology make it considerably more delicate than a basic flat-screen handset.
The most important principles are simple:
- Back up your data first.
- Power down before opening.
- Use controlled heat.
- Work carefully around curved edges.
- Disconnect the battery where appropriate.
- Test the replacement before permanent installation.
- Keep the frame clean and flat.
- Use suitable adhesive.
- Align the display carefully.
- Test every important function after reassembly.
- Don’t assume factory water resistance is restored after repair.
If you’re experienced with smartphone repairs and have the appropriate equipment, these principles provide a useful framework for the job. If you’re not comfortable working with flexible OLED panels and delicate connectors, professional repair is the safer route.
David from Sydney CBD Repair Centre – The Best place to fix mobile phones as 7 Years In A Row! Top Mobile Phone Repair In Sydney. More than 2000 Positive Reviews on Google and Same Day Repairs.
We take pride in delivering exceptional repair services for all major phone brands including Apple, Samsung, Google, and more. Our expert technicians use only genuine parts and offer 90days warranty on repairs. Located in the heart of Sydney CBD, we’re your one-stop solution for all mobile device repairs.
Our commitment to excellence has earned us the trust of thousands of satisfied customers. Whether it’s a cracked screen, battery replacement, or water damage repair, we handle it all with professional care and expertise. Walk in today and experience why we’re Sydney’s #1 choice for mobile phone repairs.
Visit us for:
✓ Same Day Express Repairs
✓ Genuine Parts Guarantee
✓ Professional Technicians
✓ Competitive Pricing
✓ 2000+ 5-Star Google Reviews
✓ 7-Time Award Winner for Best Phone Repairs
Sydney CBD Repair Centre – Where Quality Meets Reliability.
Call: +61280114119
Website: Sydney CBD Repair Centre