Screen Module vs. Screen Replacement: What’s Best?
Introduction
Cracked or malfunctioning screens are among the most common smartphone problems. When it happens, you usually face two options: screen module replacement or screen-only replacement. But which is the better choice? The answer depends on your phone model, the extent of the damage, and your budget.
At Sydney CBD Repair Centre, we’ve seen thousands of cases where customers struggle to choose between the two. This article will break down the differences, costs, pros, and cons so you can make the best decision for your device.
A screen module replacement means replacing the entire set—glass, touch digitizer, and display panel—as a single unit.
✅ Pros:
Faster and safer repair
Guarantees new display quality
Ideal if touch screen or display is faulty
❌ Cons:
More expensive than glass-only replacement
May not be necessary for minor cracks
Cost Comparison
Repair Type
Typical Cost (AUD)
Best For
Screen-Only Replacement
$120 – $200
Minor cracks, touch still works
Screen Module Replacement
$250 – $450
Severe cracks, display damage, unresponsive touch
💡 Prices vary depending on phone model and part availability.
Which One Should You Choose?
Choose Screen-Only Replacement if your phone only has surface cracks and the display is still fully functional.
Choose Screen Module Replacement if your display shows black spots, discoloration, unresponsive touch, or severe shattering.
Why Professional Repair Matters
While DIY kits are available, screen repairs are delicate and risky without proper tools. A professional repair ensures:
Genuine parts are used
Your phone’s water resistance (if any) is preserved
Proper adhesive and alignment for durability
Conclusion
Both screen-only and screen module replacements have their place. If you’re on a budget and your display is working fine, a screen-only replacement is the smart option. But if your display is faulty or you want a reliable long-term fix, a screen module replacement is worth the investment.
And if you’re in Sydney, trust Sydney CBD Repair Centre—with 2000+ 5-star Google reviews and a 6-time award-winning team, we’ll help you choose the right repair option for your phone.
Sydney CBD Repair Centre – Where Quality Meets Reliability
David from Sydney CBD Repair Centre – The Best place to fix mobile phones as 6 Years In A Row! Top Mobile Phone Repair In Sydney. More than 2000 Positive Reviews on Google and same-day repairs.
We take pride in delivering exceptional repair services for all major phone brands including Apple, Samsung, Google, and more. Our expert technicians use only genuine parts and offer a 90-day warranty on repairs.
✓ Same Day Express Repairs
✓ Genuine Parts Guarantee
✓ Professional Technicians
✓ Competitive Pricing
✓ 2000+ 5-Star Google Reviews
✓ 6-Time Award Winner for Best Phone Repairs
DIY Phone Screen Repair: Is It Worth It? + Must-Know Facts + 7 Risks
With smartphones becoming more advanced and expensive, it’s no wonder users explore alternatives when accidents happen. One of the most common dilemmas? Cracked screens. Many tech-savvy users have asked themselves: “Should I fix my phone screen myself?” On the surface, DIY screen repair promises a cheaper and empowering alternative to professional services. But is it really worth the risk?
In this comprehensive guide, we’ll unpack the process, tools, challenges, benefits, and long-term implications of DIY phone screen repair. Whether you’re holding an iPhone, Samsung, or any Android phone, we’ll help you decide what’s best.
DIY tech culture has exploded in recent years thanks to platforms like YouTube and Reddit. From changing batteries to replacing motherboards, tutorials are everywhere. As device repair kits flood the market and the “Right to Repair” movement gains traction, users now feel more confident about fixing things themselves.
But the truth is, what works in a 10-minute video may not reflect the complexity of real-life repairs.
Here’s why many opt to take matters into their own hands:
Save Money: Professional repairs can be pricey, especially out of warranty.
Curiosity & Skill Building: Some want the satisfaction of fixing things.
Convenience: Immediate need to use the phone—no time for repair shops.
Misinformation: Belief that it’s easier than it really is.
Influence from Content Creators: “If they can do it, why can’t I?”
While these reasons are valid, many don’t account for the possible complications.
Tools and Equipment Needed
Before opening up your phone, you’ll need:
Tool
Purpose
Precision Screwdriver Set
Remove micro-screws
Suction Cup
To gently lift the screen
Plastic Pry Tools
Avoid damaging internal components
Anti-static Wrist Strap
Protect from electrostatic discharge
Heat Gun or iOpener
Soften adhesive under the screen
Replacement Screen
Must match exact model and specs
Magnetic Mat
Organize screws and components
Safety Tip: Never work on a phone that’s powered on or connected to a charger.
Step-by-Step DIY Phone Screen Replacement
⚠️ This is a general guide. Always refer to your phone model’s repair manual.
Power Off Device
Remove SIM Card and Back Cover (if accessible)
Unscrew and Open the Frame
Disconnect Battery First
Gently Remove Screen With Heat & Suction
Unclip Display Connectors
Install New Screen
Reconnect Battery & Components
Power On & Test
Reassemble Carefully
If at any point you feel unsure—pause. Forcing components can cause irreversible damage.
Pros of DIY Phone Screen Repair
Lower Costs (initially)
Sense of Accomplishment
Learn a New Skill
No Waiting or Appointments
For hobbyists or tech lovers, DIY repairs can be a fun challenge. But don’t let enthusiasm override preparation.
Cons of DIY Phone Screen Repair
Voids Warranty
Might Damage Internal Components
Screen Quality Can Vary
Lack of Specialized Tools or Knowledge
Time-Consuming
No Warranty on Workmanship
One slip could turn a cracked screen into a non-functional phone.
Hidden Costs Most DIYers Miss
Buying wrong tools or duplicate parts
Replacing parts more than once
Damaged fingerprint sensors
Loss of waterproofing
Data loss due to improper disconnection
Missed calls or work while waiting to fix it
DIY vs Professional Repairs: Cost Breakdown
Repair Type
DIY Cost (AUD)
Pro Repair Cost (AUD)
iPhone 13
$150–$200 (parts/tools)
$250–$330
Samsung Galaxy S21
$160–$210
$280–$350
Google Pixel 7
$140–$180
$270–$320
Note: Pro repairs usually include warranty and genuine parts.
Safety Risks and Precautions
Electric Shock
Sharp Glass Cuts
Short Circuits
Data Loss
Fire Hazards with Lithium Batteries
Always use protective gear, and don’t attempt repairs on a swollen battery.
Phone Models Not Ideal for DIY
Avoid attempting DIY on these models due to complex build:
Samsung Galaxy Fold / Flip series
iPhones with Face ID (X and up)
Huawei with curved displays
Phones with under-display fingerprint readers
These require professional calibration tools post-repair.
Case Study: Cracked iPhone 13 Repair Gone Wrong
John from Parramatta tried replacing his iPhone 13 screen. He followed a YouTube guide and bought a screen online. But the display had no True Tone support, and he accidentally tore the Face ID cable. In the end, he had to pay double for a proper repair—and lost Face ID permanently.
Why Genuine Parts Matter
Cheap screens can affect:
Touch Sensitivity
Brightness & Color Accuracy
Durability
Face ID/Fingerprint Reader Functionality
Always ask for genuine parts, especially for flagship models.
Environmental Impact of Failed DIYs
Each failed DIY attempt could result in:
More e-waste
Discarded parts and packaging
Shorter device lifespan
Professional repairs often reuse, recycle, or refurbish parts responsibly.
Professional Repair Benefits
Trained Technicians
Access to Genuine Parts
Warranty Coverage (like 90 days at Sydney CBD Repair Centre)
Quick Turnaround
Data Protection Measures
Specialized Tools
You get peace of mind knowing your phone is in safe hands.
FAQs
1. Can I fix a cracked phone screen myself?
Yes, but it requires proper tools, patience, and the right screen. It’s not recommended unless you’re experienced.
2. Will DIY screen replacement void my warranty?
Yes, most manufacturers void warranties if unauthorized repairs are done.
3. Are DIY screen replacement kits reliable?
Some are, but quality varies. Always research reviews and ensure compatibility.
4. How long does it take to replace a screen?
It can take anywhere from 1 to 3 hours for DIYers. Professionals can do it in 30–60 minutes.
5. Is it cheaper to fix a phone or buy a new one?
Repairing is usually cheaper and more environmentally friendly than replacing a device.
6. Where can I get my screen professionally repaired in Sydney?
So, is DIY phone screen repair worth it? For the few with experience, proper tools, and a steady hand—maybe. But for most users, the risks outweigh the rewards. Between possible damage, lack of warranty, and hidden costs, professional repair remains the safest and smartest option.
David from Sydney CBD Repair Centre
The Best place to fix mobile phones 6 Years In A Row! With expert technicians, genuine parts, and a 90-day warranty, we’ve got your back.
🛠️ Visit us: SydneyCBD.repair/locate-us
📞 Call us: +61280114119
💬 Let us help: Cracked screen? Battery issues? Water damage? We fix it all—fast.
The Best Tools and Techniques for Phone Screen Repair – Top 15 Expert Tips for Flawless Results
📱 Introduction
Cracked or shattered phone screens are an unfortunate reality in today’s smartphone world. But whether you’re an aspiring DIYer or a technician, the tools and techniques you use can make or break the repair. In this guide, we’ll explore the best tools and professional tips to ensure your phone screen replacement is a success.
Here are the core tools every screen repair should include:
✅ Precision Screwdriver Set
Modern smartphones use tiny screws like pentalobe, tri-point, and Phillips #000. A quality screwdriver kit allows you to open the device without stripping screws.
✅ Plastic Pry Tools and Spudgers
These non-metal tools help you separate the screen from the frame without damaging internal components.
✅ Suction Cup Tool
Used to gently lift the screen after loosening adhesive. This is especially helpful for iPhones and Samsung models.
✅ Heat Gun or Hair Dryer
Softens adhesive holding the screen in place. A temperature-controlled heat gun is safer for delicate devices.
✅ ESD-Safe Tweezers
Great for handling small components like display cables and connectors without static damage.
✅ Anti-Static Wrist Strap
Protects sensitive internal circuits from electrostatic discharge during the repair process.
✅ Magnetic Work Mat
Keeps screws and components organized, which is essential when reassembling the phone.
✅ Replacement Adhesive Strips
Used to reattach the screen securely and ensure dust/water resistance is maintained.
🧪 Advanced Tools for Professionals
At Sydney CBD Repair Centre, we use state-of-the-art equipment to perform safe and efficient repairs.
🔥 Laser Separator Machine
Used to separate glass from OLED displays without damaging delicate layers—ideal for high-end devices.
🌀 OLED Laminating Machine
Rebonds replacement glass and digitizer to the OLED for a factory-level finish.
📲 Choosing the Right Replacement Screen
Whether you’re using an OEM or high-grade aftermarket screen, compatibility and quality are non-negotiables.
Pro Tip: Always check your phone’s model number and screen technology (LCD vs OLED) before ordering.
🔍 Key Techniques for Safe and Clean Removal
Power off the device before starting.
Use a heat gun to soften the adhesive.
Apply gentle prying motion with a plastic spudger.
Use a suction cup for clean lifting—never use sharp force.
Disconnect battery before removing display connectors.
🧩 Tips for Installing the New Screen Correctly
Test the new screen before sealing the phone back up.
Apply even pressure while connecting ribbon cables.
Use precise adhesive placement for dust resistance.
Avoid over-tightening screws—this can crack new glass.
⚠️ Common Mistakes to Avoid During Repairs
Using metal tools inside the phone
Skipping heat application before prying
Not organizing screws properly
Touching screen internals with bare fingers
Reusing old adhesives
🧑🔧 Should You Attempt DIY or Go to a Pro?
Factor
DIY
Professional
Cost
Lower
Higher
Risk
High
Low
Quality
Variable
Guaranteed
Time
2–4 hrs
30–60 mins
Tools Needed
Yes
No
Warranty
No
Yes (e.g. 90 days at Sydney CBD Repair Centre)
🛡 Safety Precautions to Follow
Wear an anti-static strap
Always power off the phone
Don’t work on a carpeted surface
Keep liquids and magnets away
Watch out for battery punctures
🧠 Professional Tips from Sydney CBD Repair Centre
“We’ve repaired thousands of screens over the past decade. Our advice? Don’t compromise on tools. Cheap kits lead to costly damage. We only use OEM-quality parts, and every repair is backed by our 90-day warranty.”
— David, Head Technician, Sydney CBD Repair Centre
❓ FAQs
1. Can I repair a screen with household tools?
No. Using improper tools like kitchen knives or screwdrivers can severely damage your phone.
2. Is a heat gun necessary?
Yes, especially for iPhones and newer Androids. It helps loosen adhesive without cracking the display.
3. How long does screen replacement take?
DIY can take hours. Professionals like Sydney CBD Repair Centre finish most repairs in under an hour.
4. Are aftermarket tools safe to use?
If purchased from a reputable source, yes. However, cheap kits often break easily and can damage your phone.
5. Do I need adhesive strips to reattach the screen?
Absolutely. Using glue or tape instead can lead to dust ingress and screen separation.
6. Where can I find professional repair help in Sydney?
Screen repair is more than just swapping glass—it’s a technical process requiring precision, the right tools, and a deep understanding of phone internals. Whether you’re a DIY enthusiast or prefer professional help, investing in proper tools or expert service is key to a lasting repair.
📞 Call to Action – Trust Sydney CBD Repair Centre
Don’t risk your phone with untrained hands or cheap tools.
📍 Sydney CBD Repair Centre – Where Quality Meets Reliability
🛠️ Same Day Repairs | 90-Day Warranty | OEM Parts
🌟 2000+ 5-Star Google Reviews | 6-Time Award Winner
Is It Worth Repairing Your Cracked Smartphone Screen? 7 Powerful Reasons Why You Should Consider It
🟦 Introduction: The Cracked Screen Dilemma
A cracked smartphone screen is one of the most common tech mishaps today. Whether it’s from a careless drop or an accidental sit, you’re not alone—millions of people deal with shattered displays each year. But here’s the real question: Is it worth repairing your cracked smartphone screen?
In this comprehensive guide, we’ll explore 7 powerful reasons why fixing your screen might just be the best decision you make for your device, your wallet, and even the planet.
“Fixed my iPhone 13 screen in under 2 hours. Looks and works like new!” – Jenny M.
“Honest, reliable, and much cheaper than Apple. Highly recommended!” – Tom L.
Over 2000+ 5-star Google reviews tell the story.
🟩 Frequently Asked Questions
❓ Is it cheaper to repair a phone or replace it?
Yes—repairs usually cost 50–70% less than a new phone.
❓ Can I still use my phone with a cracked screen?
You can, but you risk further damage and injury from broken glass.
❓ How long does a screen repair take?
At Sydney CBD Repair Centre, most repairs are done same-day.
❓ Will a cracked screen affect resale value?
Yes. Cracks can reduce resale value by up to 40%.
❓ Is screen replacement covered under warranty?
Usually not, unless you have accidental damage coverage.
❓ Does a repaired screen work like a new one?
Yes—when done professionally with genuine parts, performance is restored.
🟦 Conclusion: A Cracked Screen Isn’t the End
So, is it worth repairing your cracked smartphone screen? Absolutely.
From financial benefits and data security to eco-conscious living, repairing offers unmatched value. But only if you choose the right repair centre.
With its unmatched reputation, Sydney CBD Repair Centre is your go-to place for reliable, affordable, and speedy smartphone repairs.
David from Sydney CBD Repair Centre – The Best Place to Fix Mobile Phones 6 Years in a Row!
📍 Visit Us Today: SydneyCBD.repair/locate-us
📞 Call: +61280114119
✅ Same Day Repairs | ✅ Genuine Parts | ✅ 2000+ Reviews | ✅ 90-Day Warranty
DIY Screen Replacement: What You Need to Know – Expert Tips + 12 Common Pitfalls
Introduction to DIY Screen Repairs
Cracked phone screens are frustrating — but paying for a professional fix can be costly. That’s why many tech-savvy users consider DIY screen replacement. But before grabbing a screwdriver and ordering a new screen online, it’s essential to understand what’s involved, what tools you need, and what risks you may face.
This guide will walk you through everything you need to know to decide if DIY repair is right for you — or if you’re better off leaving it to the pros.
To perform a safe and clean screen replacement, gather the following:
Plastic opening tools or guitar picks
Suction cup
Precision screwdriver set (Torx, Phillips, or Pentalobe)
Tweezers
Heat gun or heating pad
Isopropyl alcohol (90% or higher)
Microfiber cloth
Anti-static wrist strap
Magnetic mat (for screws)
Without the right tools, you’re more likely to damage your phone.
Screen Types: LCD vs OLED vs AMOLED – What’s the Difference?
Type
Features
Common Devices
LCD
Cheaper, less vibrant colors
Older iPhones, entry-level Android
OLED
Better colors and contrast, thinner
Mid to high-end smartphones
AMOLED
OLED with active matrix for faster refresh
Samsung Galaxy, Pixel, OnePlus
Using the wrong screen type for your phone can affect display quality and touch responsiveness.
Step-by-Step Guide to DIY Screen Replacement
Step 1: Power Off and Remove SIM Card
Before starting, turn off your device and eject the SIM tray to prevent data loss or short-circuits.
Step 2: Open the Device Safely
Use a heat gun around the edges to soften adhesive. Then use a suction cup and pry tools to lift the screen or back panel — depending on the phone’s design.
Step 3: Disconnect Battery and Display Cables
Always disconnect the battery first. Then gently remove connectors for the screen, fingerprint sensor, and other components.
Step 4: Remove Old Screen
Once disconnected, gently heat and pry the old screen off. Be careful not to damage the frame or internals.
Step 5: Install New Screen and Reassemble
Clean the area with isopropyl alcohol, align the new screen, reconnect all cables, and test before sealing the phone back up.
12 Common DIY Screen Replacement Mistakes to Avoid
Not powering off the phone before disassembly
Using metal tools that can cause short circuits
Applying too much heat or not enough
Damaging flex cables or connectors
Not disconnecting the battery before working
Installing the wrong type of screen
Forgetting to clean the frame
Losing screws or using the wrong ones
Forgetting to test the screen before reassembly
Rushing the process
Neglecting to use an anti-static strap
Over-tightening screws, damaging threads or boards
Signs You’ve Damaged Components During Repair
Screen remains black or flickers
Touchscreen is unresponsive
Phone doesn’t turn on
Battery drains quickly
No signal or Wi-Fi connection
Fingerprint sensor no longer works
If you notice these after a repair, seek professional help immediately.
Using OEM vs Aftermarket Screens: What’s the Difference?
Feature
OEM Screen
Aftermarket Screen
Display quality
Exact match
Often lower brightness or resolution
Touch responsiveness
High
May lag or misregister touches
Compatibility
100% guaranteed
May lack features (e.g., fingerprint)
Durability
Built to last
Cheaper materials, lower lifespan
Price
Higher
Lower, but quality varies greatly
At Sydney CBD Repair Centre, we use genuine OEM parts to maintain device integrity and performance.
Is It Cheaper to Do It Yourself?
It can be, but the savings often come with risks.
Cost Breakdown (DIY)
Estimated
Screen part (aftermarket)
$60–$120
Tools
$30–$100
Time (2–4 hours)
Your time
Risk of error/damage
High
Compare that to a professional repair which usually includes:
OEM screen
Warranty (60–90 days)
Safe and fast turnaround
No risk of voiding your warranty
Why Professional Help Might Be the Smarter Choice
At Sydney CBD Repair Centre, we offer:
Same-day express repairs
Genuine parts guarantee
Highly skilled technicians
90-day warranty
Over 2000 five-star reviews from satisfied customers
We specialize in screen replacements for Apple, Samsung, Google, and more — done right the first time.
It can be if you’re skilled and have the tools, but many people end up causing more damage. For high-end phones, professional repair is safer.
2. How long does a screen replacement take?
DIY takes 2–4 hours. A pro can do it in under 1 hour, depending on the phone.
3. Can I fix a cracked screen without replacing it?
Not really. Glass-only repairs are rare and complex. Most screen replacements include the LCD or AMOLED.
4. Will DIY repairs void my warranty?
Yes, in most cases opening the phone voids manufacturer or carrier warranties.
5. What’s the most difficult part of DIY screen replacement?
Disconnecting flex cables and removing the screen without damaging the frame or motherboard.
6. Is it safe to buy replacement screens online?
Only from reputable sources. Look for OEM parts or high-grade replacements with good reviews.
Conclusion
DIY screen replacement can save you money — but it also comes with risks. If you’re confident, prepared, and have the right tools, it’s doable. But if you’re unsure or working on a valuable phone, professional repair is your safest and most reliable option.
Let the experts at Sydney CBD Repair Centre take care of your device with guaranteed quality and genuine parts.
Phone Screen Repair: Why You Should Always Use Original Parts – Expert Guide + 14 Real Risks of Cheap Replacements
# Introduction
When it comes to phone screen repair, the market is filled with options—but not all parts are created equal.
Choosing between original (OEM) parts and cheaper alternatives might seem like a matter of budget, but it can have long-term consequences for your device’s performance, safety, and even warranty. In this article, we’ll explain why using genuine parts is essential, and how Sydney CBD Repair Centre ensures your phone gets the quality it deserves.
# What Are Original (OEM) Phone Parts?
OEM (Original Equipment Manufacturer) parts are components made by the same company that manufactured the original parts used in your phone. These parts are:
Designed specifically for your phone model
Meet the original factory specifications
Ensure full compatibility and reliability
Often come with a warranty or guarantee
They offer the same performance and durability as the part that came with your new phone.
✅ Perfect fit and finish
✅ True-to-life colors and brightness
✅ Flawless touch response
✅ Preserves water resistance (if resealed properly)
✅ No compatibility issues with updates or security features
✅ Maintains resale value
When it comes to flagship devices like the iPhone 14 Pro, Galaxy S23 Ultra, or Google Pixel 8 Pro, OEM screens ensure your investment is protected.
In extreme cases, aftermarket parts can short-circuit internal components—costing you more in the long run.
# How to Tell if Your Screen is Original or Fake
Look out for these signs:
Indicator
OEM Screen
Aftermarket Screen
Color Accuracy
Sharp and vibrant
Washed out or over-saturated
Brightness
Even and adaptive
Often dull or uneven
Touch Sensitivity
Smooth and responsive
Laggy or jittery
Build
Tight frame fit
Loose or slightly misaligned
Brand Labeling
Often branded
Typically blank or generic
Always ask your repair centre to confirm part authenticity and show packaging if needed.
# Impact on Touch Sensitivity and Display Quality
OEM screens maintain:
Smooth scrolling
Fast, accurate multi-touch
True 120Hz refresh rate (on supported models)
Responsive gestures and swipes
Zero ghost touch or lag
Fake screens often reduce your phone’s performance, especially on gaming or high-refresh displays like those on the Pixel 8 Pro or Galaxy S series.
# What Happens to Face ID and Fingerprint Sensors?
When non-original screens are installed:
Face ID may stop working on iPhones
Fingerprint sensors (especially under-screen ones) can fail
TrueDepth camera alignment can be off
Dynamic Island features or display notches may glitch
Proper OEM integration ensures these features continue functioning just like new.
# Will Aftermarket Screens Affect Battery Life?
Yes. Lower-quality screens can:
Draw more power due to inefficient backlighting
Cause overheating, affecting battery health
Disrupt adaptive brightness features, keeping the screen too bright
OEM parts preserve your phone’s power efficiency and overall system harmony.
# Warranty Concerns: Genuine vs Third-Party Parts
Using non-genuine parts can:
Void your manufacturer warranty
Limit your eligibility for trade-ins or insurance
Compromise your ability to get future repairs
At Sydney CBD Repair Centre, all our screen repairs come with a 90-day warranty and do not void extended coverage if done out of warranty.
# Why Sydney CBD Repair Centre Only Uses Genuine Parts
We believe your device deserves the best. That’s why we offer:
✅ Genuine parts direct from suppliers
✅ Certified repair technicians
✅ No shortcuts, no knockoffs
✅ Same-day express service
✅ Transparent pricing with no hidden fees
🏆 Trusted by over 2000+ satisfied customers and rated the #1 Mobile Repair Centre in Sydney.
# What to Ask Before Getting Your Screen Repaired
Before handing over your phone, ask:
Do you use genuine parts?
What’s the warranty on the screen repair?
Will Face ID or fingerprint still work?
Can I see the new screen before installation?
How long will the repair take?
If a shop can’t answer confidently, look elsewhere.
✅ We welcome questions and offer free assessments at Sydney CBD Repair Centre.
# 6 Frequently Asked Questions
1. Are genuine parts really that different from third-party ones?
Yes. OEM parts match the exact specs of your original screen and perform far better than cheap copies.
2. How do I know if my screen was replaced with a fake?
Lower brightness, poor touch response, and odd display colors are common indicators. Ask for the invoice and packaging info.
3. Can non-original screens damage my phone?
Yes, they can cause overheating, short-circuiting, or software malfunctions over time.
4. Is there a big price difference?
OEM screens cost more upfront but last longer and won’t cause issues—saving you money in the long run.
5. Do you offer a warranty on your repairs?
Absolutely. We provide a 90-day warranty on all screen repairs using genuine parts.
6. How long does a genuine screen replacement take?
Most screen repairs are done within 1–2 hours at our Sydney CBD location.
# Conclusion
When it comes to phone screen repair, cutting corners with cheap parts might save you money today—but it will cost you more in performance, safety, and reliability down the road.
At Sydney CBD Repair Centre, we pride ourselves on using 100% genuine parts, expertly installed by qualified technicians, backed by a solid warranty, and trusted by thousands of customers across Sydney.
David from Sydney CBD Repair Centre – The Best place to fix mobile phones as 6 Years In A Row!
Top Mobile Phone Repair In Sydney. More than 2000 Positive Reviews on Google and Same Day Repairs.
Visit us today for:
✓ Same Day Express Repairs
✓ Genuine Parts Guarantee
✓ Competitive Pricing
✓ 90-Day Warranty
✓ 6-Time Award Winner for Best Phone Repairs
Smartphone Screen Repair: Do-It-Yourself vs Professional
A cracked or malfunctioning smartphone screen can be more than just an inconvenience—it can disrupt your communication, work, and daily routine. When faced with screen damage, many people are torn between fixing it themselves or turning to a professional repair service.
At Sydney CBD Repair Centre, we’ve helped thousands of customers make the smart choice. Here’s a breakdown of DIY vs professional smartphone screen repair, so you can decide what’s right for you.
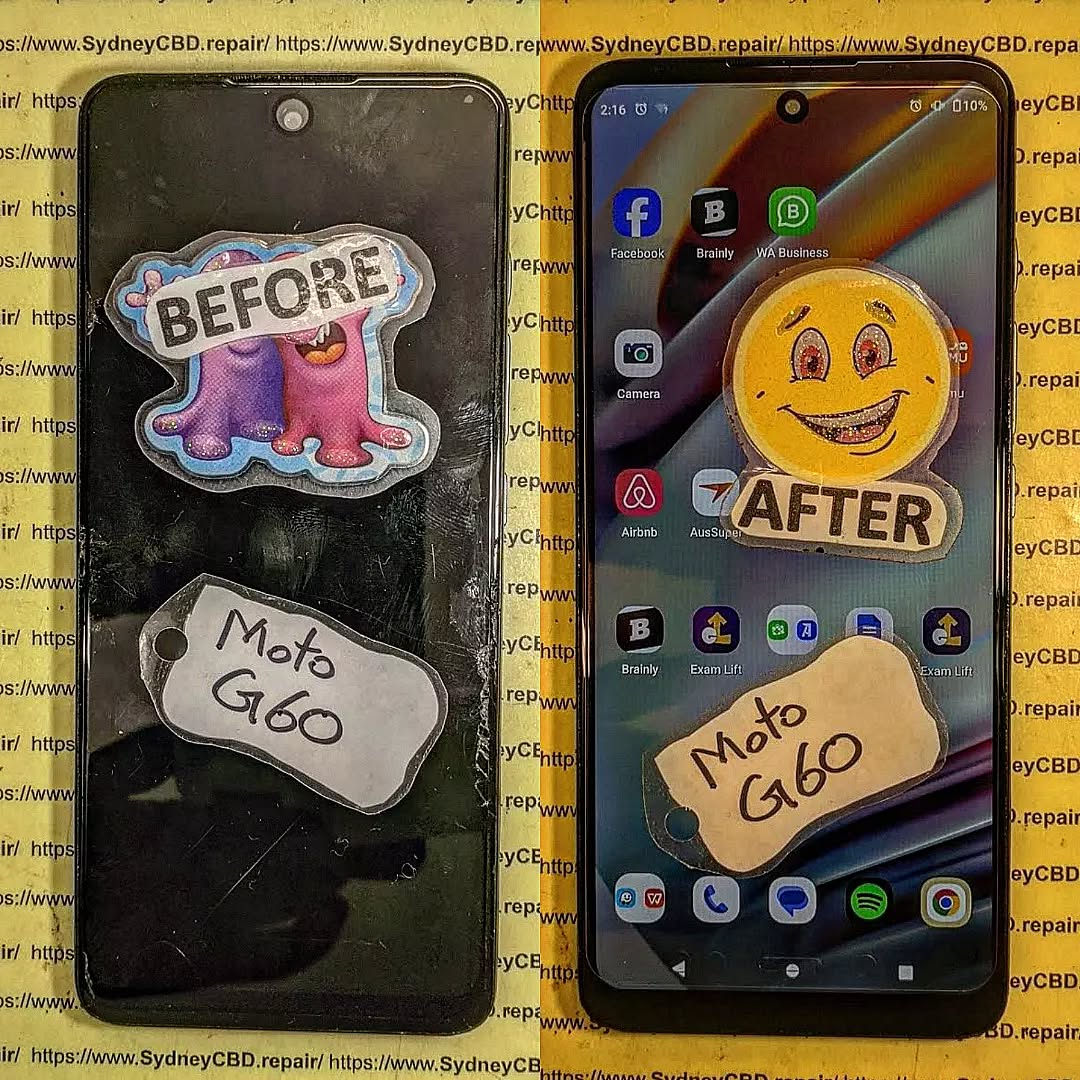
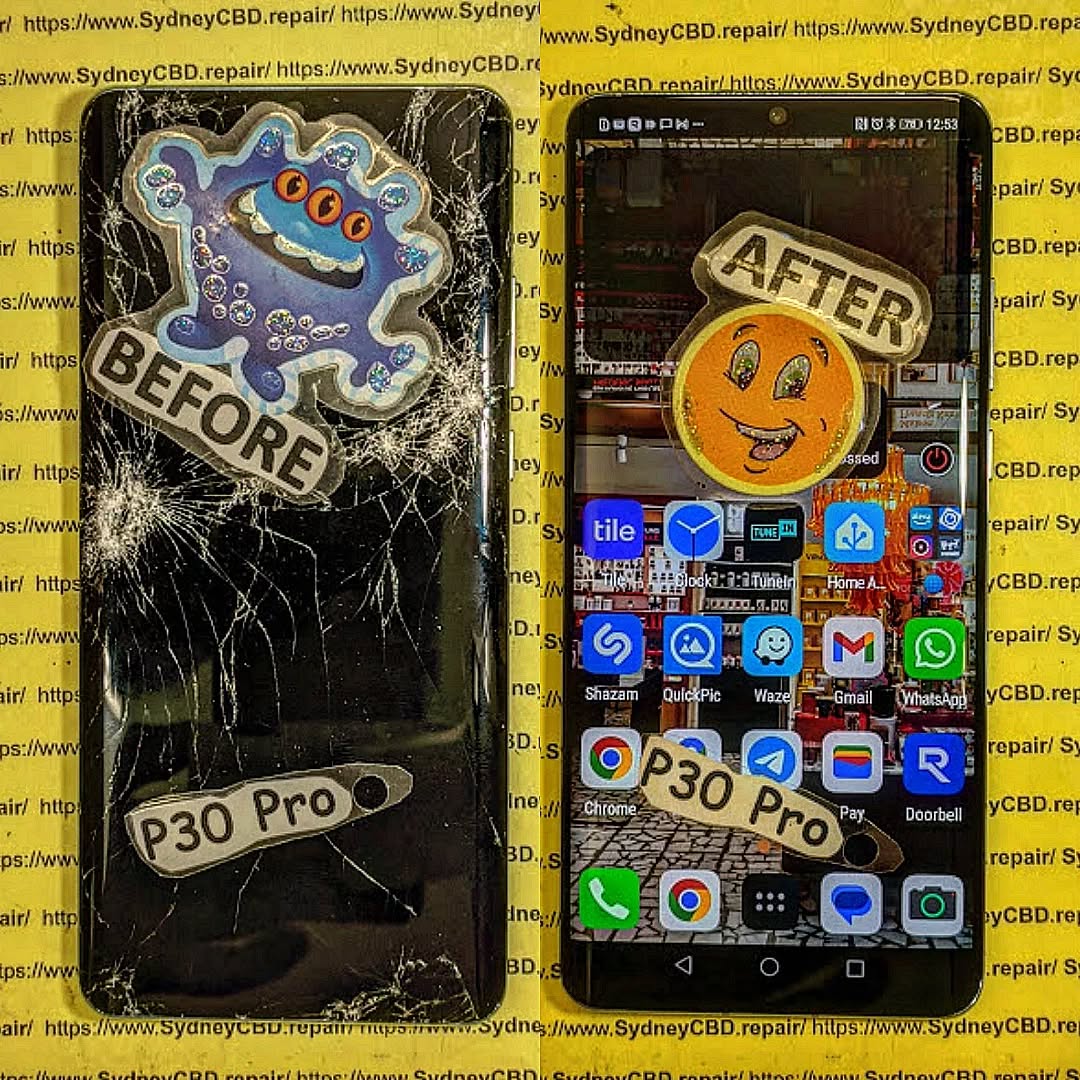
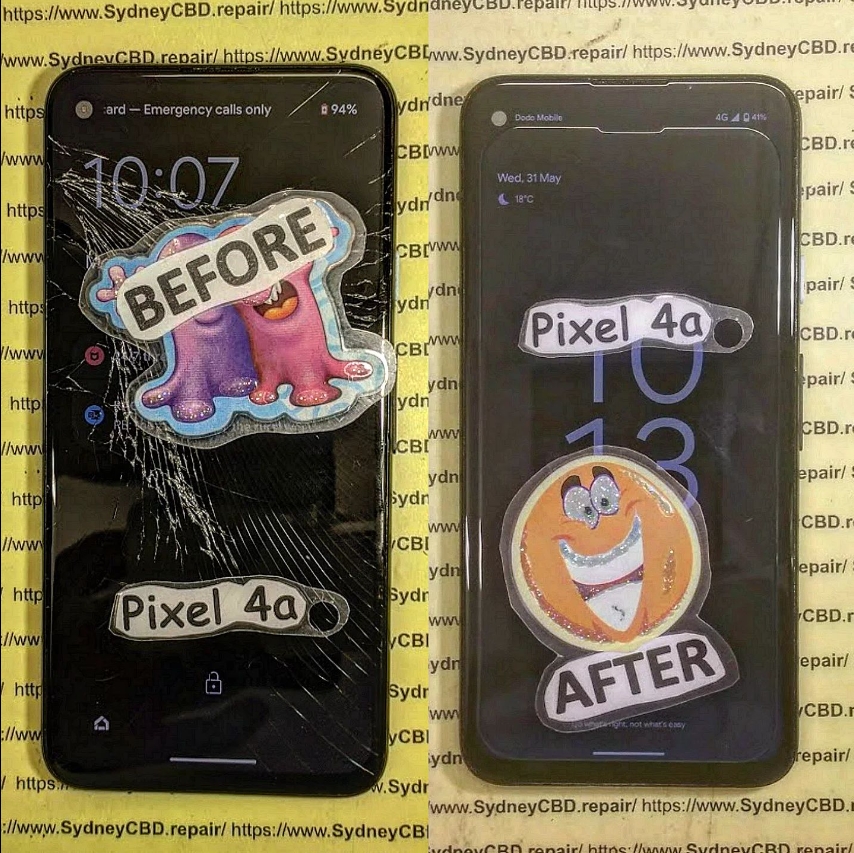
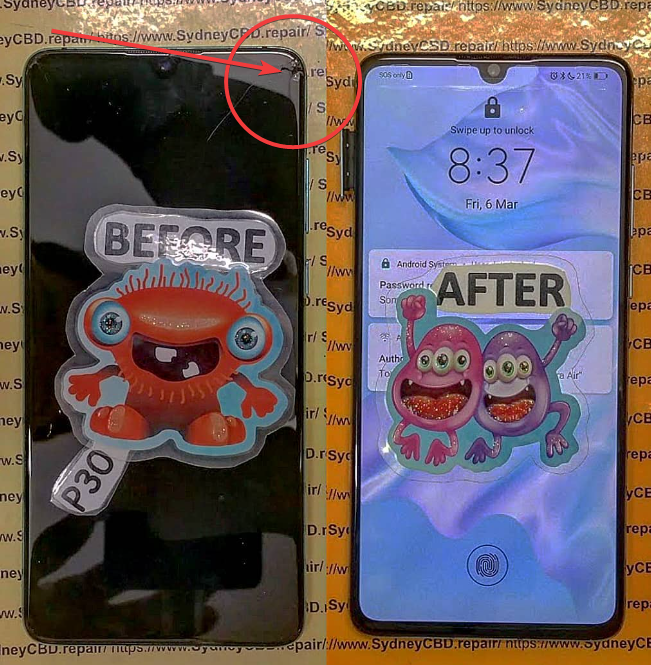
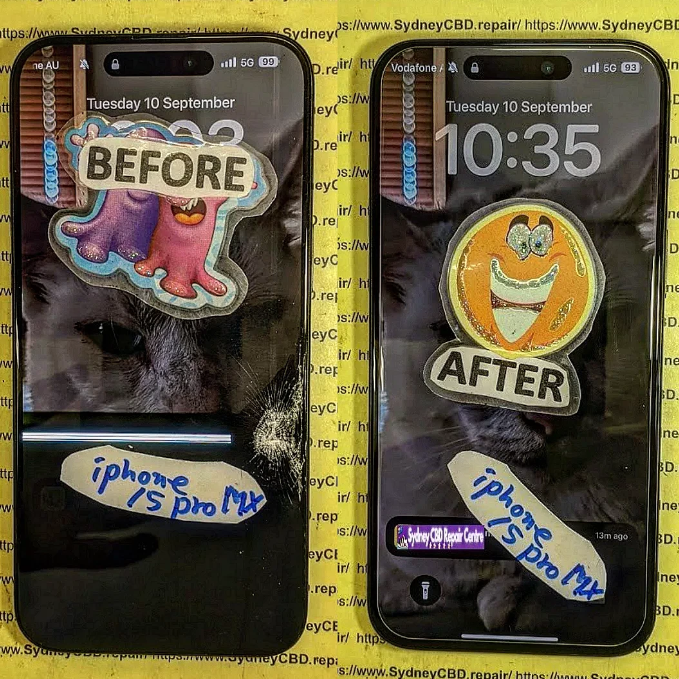
broken-iphone-15-pro-max-screen-before-after.png
🔧 The DIY Route: Is It Worth It?
Do-it-yourself screen repair might sound like a cost-saving option. After all, there are countless YouTube tutorials, affordable toolkits, and aftermarket parts available online.
Pros of DIY Repair
Lower upfront cost (if done right)
Satisfaction of fixing it yourself
Convenient for tech-savvy users
Cons of DIY Repair
High risk of further damage
Mishandling components like the digitizer, battery, or Face ID sensors can lead to more expensive issues.
No warranty or guarantee
Time-consuming and complex
Loss of features like waterproofing, True Tone, or brightness calibration if not reassembled correctly
Limited access to genuine parts
Even the most careful DIYer can run into issues that require a second (or third) repair attempt, potentially costing more than just getting it fixed professionally from the start.
At Sydney CBD Repair Centre, we’re proud to offer expert smartphone screen repairs using genuine parts and industry-grade tools. Whether you use an iPhone, Samsung Galaxy, or Google Pixel, our trained technicians know how to handle delicate components properly.
Benefits of Choosing a Professional Repair
✅ Same-day service for most repairs
✅ Genuine replacement parts used
✅ Warranty coverage (90 days)
✅ Data remains intact
✅ Advanced calibration to restore True Tone, brightness levels, and more
✅ Preserves waterproof integrity (where possible)
Professional repairs aren’t just about fixing the issue—they’re about maintaining your phone’s performance and longevity.
👩🔧 Expertise You Can Trust: Sydney CBD Repair Centre
We’ve been Sydney’s top mobile phone repair destination six years in a row, thanks to our:
📍 Central CBD location
⭐ 2000+ 5-star reviews
🧰 Certified technicians
💯 Commitment to using genuine parts
Whether it’s a shattered iPhone 14 Pro Max screen or a flickering Galaxy display, we have the tools and expertise to fix it fast—and fix it right.
📝 Final Verdict: DIY or Professional?
If you have the tools, time, and confidence, a DIY repair can be a rewarding project. But for most users, especially those with newer models or data concerns, professional repair is the smarter, safer, and more reliable option.
Sydney CBD Repair Centre is your go-to repair destination. We offer same-day repairs, transparent pricing, and customer-first service that ensures your phone is back in your hands—good as new.
DIY Phone Repair: Replacing Only the LCD Screen – What You Need to Know Before You Begin
📱 Introduction
Got a blank screen but an otherwise working phone? If your touchscreen doesn’t display anything or shows weird colours, you may be dealing with a damaged LCD. While full screen replacements are common, some DIYers wonder: “Can I replace just the LCD?”
In this guide, we’ll break down DIY phone repair focused on replacing only the LCD screen. You’ll learn the process, the tools required, and the risks—plus when it’s better to visit professionals like Sydney CBD Repair Centre.
🧠 What is the LCD Screen and Why Replace Only It?
Understanding Phone Display Layers
Most smartphones have three display components:
Glass (Digitizer): The outermost layer you touch
Touch Sensor: Detects finger movement
LCD (or OLED): Displays images, colours, and brightness
If the LCD is damaged but the glass and touch still work, you may be able to replace just the LCD panel.
Many older or mid-range phones (especially LCD-based models) allow for separate replacements.
When Full Screen Replacement is Better
Modern phones (especially iPhones, Samsung AMOLED, or flagship models) use a fused screen assembly. Trying to separate layers often causes more damage. In such cases, it’s safer—and often more cost-effective—to replace the entire screen unit.
🧰 Tools & Materials You’ll Need
Replacement LCD panel (specific to your phone model)
Precision screwdriver set
Plastic pry tools / spudger
Heat gun or hairdryer (for softening adhesive)
Suction cup (to lift screen)
Tweezers
Anti-static wrist strap (recommended)
Microfiber cloth and isopropyl alcohol
Magnetic mat (optional but helpful)
🛠️ Step-by-Step Guide to Replacing the LCD Screen
⚠️ Note: Proceed only if you’re confident and the LCD is not fused. This process varies depending on your phone model.
1. Power Off and Disassemble the Device
Turn off the phone
Remove SIM tray and screws (usually near charging port)
Use a suction cup and pry tool to separate the screen from the frame
Be cautious of fingerprint sensors or ribbon cables
2. Remove the Broken LCD
Carefully detach ribbon connectors using a spudger
Remove any shielding plates or adhesive layers
Gently lift out the damaged LCD panel
3. Install the New LCD Panel
Align the new LCD properly
Reconnect ribbon cables
Secure it back into the frame
Apply new adhesive (if needed)
4. Reassemble and Test the Phone
Put everything back together
Power on the device
Test the display, touch, brightness, and screen responsiveness
⚖️ Pros and Cons of DIY LCD Replacement
✅ Pros:
Lower upfront cost (just parts and tools)
Learn a new skill
Can be done at home (if confident)
❌ Cons:
High risk of permanent damage
No warranty
May void manufacturer or insurance cover
Complex for modern smartphones with fused displays
⚠️ Common Mistakes and How to Avoid Them
Mistake
How to Avoid It
Damaging internal components
Use plastic tools and work gently
Choosing the wrong screen
Double-check model number
Forgetting to disconnect battery
Always remove power first
Skipping re-adhesion
Use new adhesive to avoid loose fit
Not testing before reassembly
Power on to test before closing the phone
👨🔧 When to Call a Professional Instead
You’re not comfortable handling electronics
Your screen is glued or fused
Your phone has multiple issues (e.g., battery, motherboard)
You want a warranty-backed repair
In these cases, save yourself the stress and visit an expert like Sydney CBD Repair Centre.
🌟 Why Sydney CBD Repair Centre is the Smart Alternative
1. Is it really possible to replace only the LCD screen?
Yes—but only if the screen is not fused. Most modern phones use fused assemblies, so this is usually an option for older or budget models.
2. How do I know if my LCD is fused?
Search your phone model online or consult a technician. You can also check teardown videos to confirm.
3. Will replacing only the LCD affect phone performance?
If done correctly with a compatible part, no. But improper installation can cause ghost touch or brightness issues.
4. Is it cheaper to replace only the LCD?
Yes, but it’s harder to do, and not always possible. Whole screen assemblies are often more practical.
5. Can I damage my phone during DIY repair?
Absolutely. Incorrect tools or too much pressure can damage the logic board, battery, or other internal components.
6. Do you offer LCD-only replacement at Sydney CBD Repair Centre?
We always inspect devices first. If only the LCD needs replacing and it’s not fused, we’ll perform the most cost-effective and safest repair.
✅ Conclusion
Replacing just the LCD screen on your phone can be a rewarding DIY project—but it’s not without risks. If your device allows separate LCD replacement and you’re confident in your skills, it may save money. But if you’re unsure, or using a flagship model, professional repair is the best route.
At Sydney CBD Repair Centre, we ensure your device gets top-tier service, fast turnaround, and peace of mind through genuine parts and warranty. Don’t take chances—get it done right the first time.
Thank you for using
Themify Popup
This is a sample pop up. Themify Builder or Builder Lite (free) plugin is recommended to design the pop up layouts.