Microsoft is working to make your and your family’s online experience safer. Today the company is launching its new Defender security dashboard for 365 subscribers. Users on iPhone, Mac, Windows, and Android devices have access to the Microsoft Defender security app that utilizes existing antivirus software or other protections.
Microsoft Defender is simplified online security that meets you and your family where you are by bringing multiple protections together into a single dashboard. It provides online protection across the devices you and your family use. It offers tips and recommendations to strengthen your protection further. And, as you grow your digital footprint by adding family members and devices, Defender grows with you and keeps your defenses up-to-date using trusted technology.
According to The Verge, Microsoft Defender’s features will vary by which platform. For instance, on iPhone and iPad, Microsoft Defender users won’t have antivirus protection. However, they’ll have some phishing protections alongside their dashboard that features alerts for their other devices.
Additionally, the new app includes security alerts for your devices to ensure maximum protection. While not on iPhone, you can also view Microsoft Defender’s cybersecurity tips on your Mac or Windows computer.
This is just the start. As we look forward, we will continue to bring more protections together under a single dashboard, including features like identity theft protection and secure online connection. Microsoft Defender is simplified online security that grows with you and your family to help keep you safe.
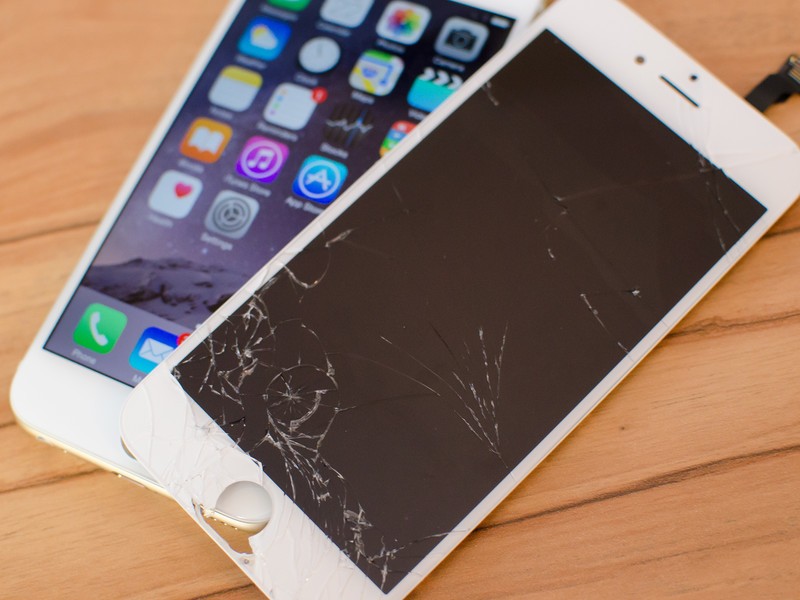
Why go to a repair shop or a manufacturer or the smartphone shop you bought the phone from? When you can do it yourself?
So you have to know if you are an enthusiast or a tech oriented individual. If you own a shop and you fix smartphones for a living, then this video is not for you. However, if you only do screen replacement once or twice a year, then watch out for the risk of DIYing a screen replacement.
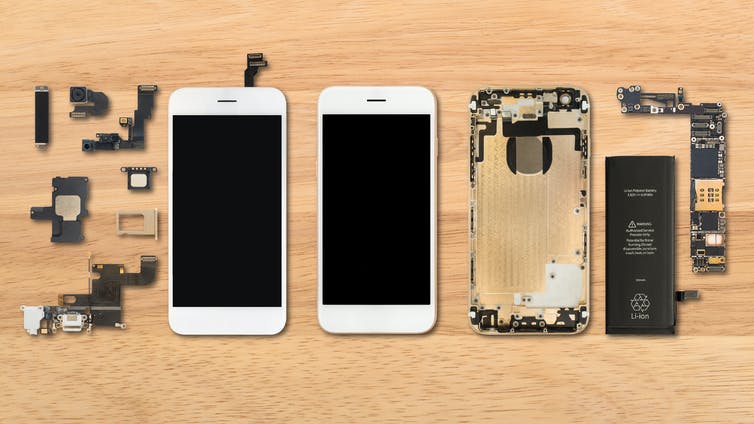
Risk #1: You buy the wrong replacement part.
Think about it, the only places where you can buy these replacement parts is online shops or an actual repair shop that is willing to sell you one.
There will be a risk that you can buy the wrong part from a slightly different model. Whether it’s an iPhone or Android smartphone, you might end up with a half open smartphone that you fixed up in your kitchen counter because you can’t finish it because of a wrong part.
Risk #2: You don’t have the right tools or the knowledge to use them.
If you’ve seen some of our videos, we have a lot of special tools specifically designed to perform an operation. Oftentimes, we create our own tools based on experience.
If you don’t have the right tools to do the job, then you can jeopardise the whole repair by giving your already damaged device more damage. It’s a risk that you have to think about. Remember that a smartphone screen is made up of glass. You still have to be very gentle with it and use non-metallic tools to pry your smartphone open.
Risk #3: You can have complications while disassembling or reassembling the device.
You’ve watched videos on ifixit. you have the tools. You have the right part. But what if somewhere down your screen replacement operation, something came up that was not discussed in the repair video that you watched? What if your smartphone didn’t boot up when you tested it? What will you do?
Complications like these can happen if you don’t know the nuance of fixing a specific smartphone model. What is your smartphone chassis is bent? What will you do? What if you punctured your battery? These complications do happen, folks, so watch out.
Risk #4: You can spend more if you damage other components.
Speaking of complications, one other risk is damage to other components. So you thought that you just have to remove the broken screen and you’re good to go? One wrong move and you can bend your smartphone’s housing. Hashtag, bendgate. You can puncture your battery if you’re not careful too. That’s why no metallic objects should be used when you interact with electrical or glass components of a smartphone. You can also leave scratches on the smartphone’s aluminum body.
Damaging other parts of the smartphone if you’re not careful is a risk.
Risk #5: You don’t know advanced troubleshooting techniques if the smartphone won’t boot up after your screen replacement.
We already discussed this. What if your smartphone required more troubleshooting after you successfully replaced the screen? Do you know how to deal with it? If you’re not sure, just let the pros do it.
Sometimes, when you drop your smartphone and whacked the front display, you can also dislodge some parts inside the smartphone. Or your smartphone just won’t accept the replacement screen. It’s like next level skills that you can only get from years of experience fixing smartphones.
Call us at 8011 4119 if you have smartphone problems, Sydney CBD Repair Centre will fix it for you.
We know very well of the dangers of a battery exploding or instantly dying on you. One is a fire hazard and a health hazard. The other one can let you down on critical situations. So how can you tell that your battery needs to retire and you need to get a new one?
Reason #1: Reduced Battery Life
One of the main reason is when your battery isn’t as lively as it used to be a year ago. It needed a recharge after lunch? It needed one again just after six o’clock. What is going on? Aging. That’s what’s going on. Some lithium ion batteries just lost their capabilities to hold charge after a year. Some batteries are extreme so you might end up with a bad one. Get a new battery installed if you still want to use your old device.
Reason #2: Unexpected Shutdowns
This is worse. You are still at 80 percent and then out goes your smartphone to sleep. What’s going on? Well, your battery is not even registering the accurate charge through it’s controller. This means that it can go from hero to zero in a second. Battery replacement? Sure.
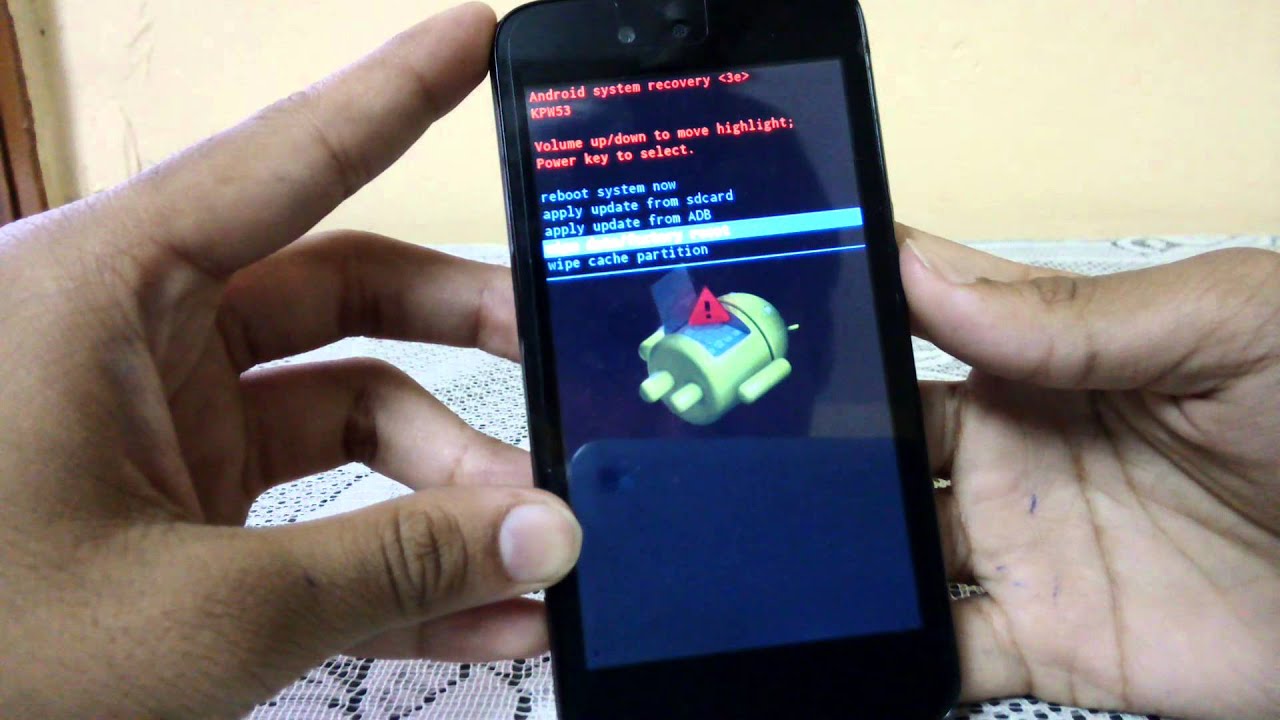
Reason #3: Bootloops
Smartphones are smart. That’s why when they detect that your battery is not supplying enough voltage to start up the device, they immediately retry. And then retry again. And again. You’re in a loop. A boot loop. Some factors can also cause this like corrupted OS or a bad motherboard. However, if you can fix it with a battery replacement, then go for it.
Reason #4: Physical Damage
Need I say more? Your smartphone is literally trying to rip itself apart because the battery pack is bloating. This is dangerous so don’t even attempt to open up your device if you don’t know what you’re doing. It can explode. Go to a repair centre immediately and have this sorted out.
Call us at 8011 4119 if you have smartphone problems, Sydney CBD Repair Centre will fix it for you.
These 5 screen menace could happen to your smartphone too!
In the many years of Sydney CBD Repair Centre operation, we have faced screen issues of all sorts. From the subtle cracks to the totally obliterated smartphone display. We fix all of them. Here are the top 5 most common that we deal with on the daily.
Damage #1: Cracks
We’re pretty sure that you’ve seen a crack before. When you drop something glassy and brittle, it will most likely crack, shatter or disintegrate into smaller pieces. Your smartphone is no different. It will crack when you sit on it the wrong way. It will crack when you drop it on the hard floor. It will crack if you tried to fix it yourself. It will crack if you ran it over with your car. All this Gorilla glass technology and your smartphone’s display won’t last long if you don’t cover it with thick screen protectors. This damage is as old as the first fully glass LCD on the modern smartphone. It’s also the most common so if you cracked yours, then welcome to the club!
Damage #2: Dead Pixels
To be honest this is not that annoying if you’re not really particular on your smartphone’s condition. A dead pixel is not a broken Google smartphone but exactly how it is said – dead/broken pixels. Your smartphone can exhibit a permanent dot where a pixel is not anymore working. It’s unnoticeable if you got one or two of them. However, if you got a big region with dead pixels, then you might need to replace your screen.
Damage #3: Ghost Touch
Ghost touch is when your smartphone screen is moving some of the UI elements totally on its own. This means that the touch mechanism is detecting touches that you didn’t do. Hence, the name ghost touch because it seems like someone unseen is using your smartphone. But there is no ghost involved, fortunately. This is just a faulty touch assembly that picks up taps and drags because some portions of it are permanently pressed down. It can detect this all the time so when you use your smartphone, it seems like it is using your smartphone with a ghost.
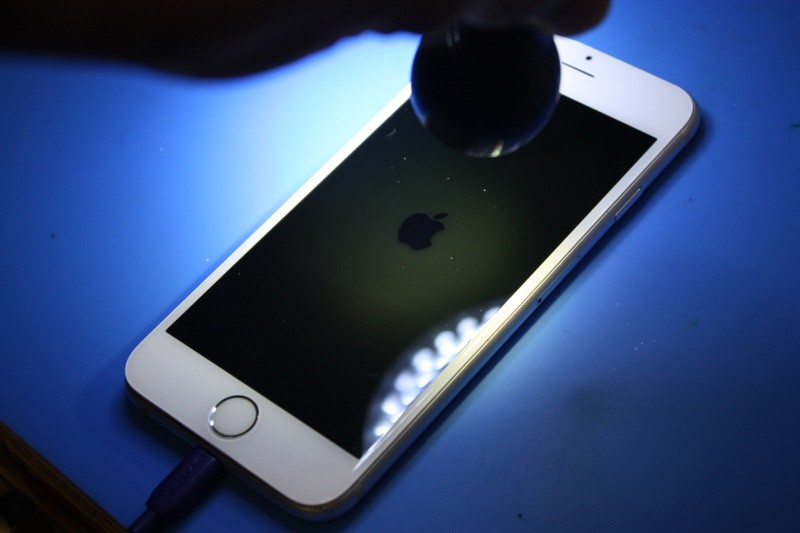
Damage #4: No Backlight
This is a tricky one to diagnose. Your smartphone screen has many layers. There’s the touch assembly, the LCD/LED layer and the backlight, if it is an LCD. What it does is it lights up your screen. DUh? But when it gets busted, you will not see a thing. Seriously. However, if you light up your smartphone with a flashlight, you can see that your smartphone is perfectly working but you just don’t see a thing! Screen replacement is the way to go on this one or maybe a software update. But updating your smartphone is rarely the solution on this hardware problem.
Damage #5: Brightness or Colour Issues
Of course, you can’t complete this list without mentioning the washed out colour problem on some displays. There are also cases of burn-in on some AMOLED display where it retains some images of static UI elements. But this one is stemmed on either a bad smartphone setting or a bad display overall. You can’t ramp up your smartphone’s brightness outdoors or you just don’t see colour accurately like you did before. If tinkering with the settings on your smartphone wouldn’t work, replace the screen mate. We’ll help you with that.
Call us at 8011 4119 if you have smartphone problems, Sydney CBD Repair Centre will fix it for you.
In Sydney CBD Repair Centre, we fix all kinds of devices from smartphones (Android or iOS), tablets, smartwatches, to fitness wristbands. We curated to you the most common device repairs that we do in our shop in Sydney.
Repair #5: Back Cover Glass Replacement
The back of the smartphone is oftentimes the most overlooked part of any device. But have you noticed that lately, these components are coming in glass material? In the early days of the smartphone, these are made out of good ol’ plastic. Now, if you drop your smartphone without a case, you’ll break the back cover. Sometimes, you can patch it with a case even if it’s too late but the beauty derived from these exotic glass material cannot be denied.
You also have to replace it if you still want to use wireless charging that only comes with an all glass smartphone.
Repair #4: Battery Replacement
This repair are for those who owned their smartphones for a very long time. Oftentimes, people go into the shop with their well-used smartphone. It’s scratched up and had other repairs done to it. However, the battery is not cutting it anymore. Dying before sunset. That’s not good for a workhorse of a smartphone. You can’t rely on a battery that needs recharging every six hours. Oh, no no no. So customers come into the shop to revitalise their old device with a brand new lithium pack. This works all the time. Imagine an old companion having a renewed strength in life. Another productive year ahead just by installing a brand new power source. If that’s not practical, I don’t know what is.
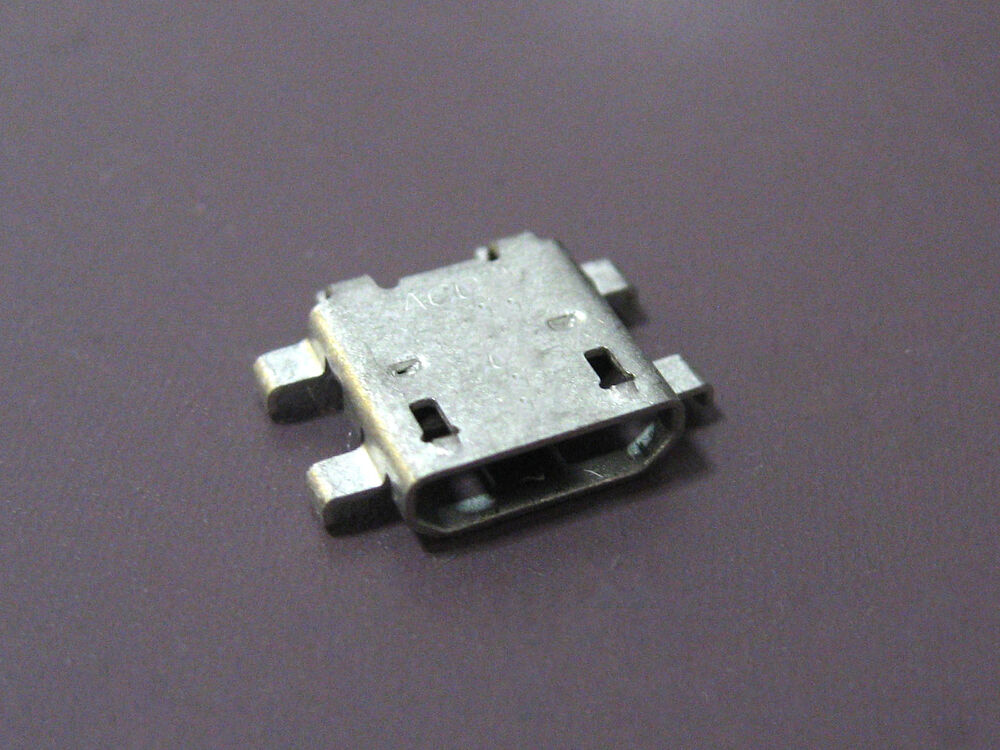
Repair #3: Charging Port Replacement
Here’s a tricky repair to diagnose but pretty easy to fix, a broken charging port. Believe me, this part of your smartphone can be worn out. How? The pulling out of the charger in an awkward angle or the plugging in of a contaminated charging cord? Yes, it can ruin this part and as a result, you can’t recharge your smartphone. Sounds bad? Certainly. But some people mistakenly take this problem as a battery issue or a dead motherboard. No. You just need to get rid of that faulty charging port out of your device, install a new assembly, and you’re good to go. Do you have problems like this? Maybe you just needed a charging port replacement right now.
Repair #2: Camera Outer Glass Replacement
You probably get the jist of this now. All glass parts of a smartphone are vulnerable to breakage. Yes, even the smallest glass portion – the camera glass. If you have a smartphone with a bump for the camera glass, then it can break when you drop the phone at a certain angle. If you have a smartphone with a huge camera patch at the back, it can break. If you have four cameras, then you better have a thick camera case to protect it from impact. The good news is, this is the easiest part to replace. No need to disassemble the entire phone. Just remove the broken glass, pop in a new one and viola, you have a fixed camera outer glass.
Repair #1: Screen Replacement
Our in-demand screen replacement repair service is the most common fix that we do in the shop. Most clients dropped their smartphone with partial, usable screens. Some dropped it and the screen is total-ed. This is the most prominent component of the smartphone and it’s made out of glass. A huge hunk of glass. Once it’s broken, there’s only two things you can do: live with the cracked screen or replace it to restart a new life with a brand new looking smartphone.
Call us at 8011 4119 if you have these problems, Sydney CBD Repair Centre will fix it for you.
Safari on the Mac can resume stopped downloads and restart failed downloads rather easily. For example, if you were downloading Xcode from Apple but your internet connection was interrupted and the download stopped, you can resume the download where it left off rather than restart the entire download over again. This is a great way to restart and resume incomplete downloads, regardless of the reason the file download failed, was interrupted or otherwise halted, and it’s available in the Safari download manager on Mac OS.
How to Resume Incomplete Downloads in Safari on Mac
From Safari on the Mac, click the Downloads button in the Safari toolbar, it looks like an arrow pointing downwards
Locate the stopped, stalled, or failed download, then click the orange circular arrow button to attempt to restart the download
The file should resume downloading where it was otherwise interrupted
Once the file, archive, image, or whatever else has completed downloading, it will appear in the Downloads folder on the Mac.
Note that Safari defaults to downloading things into the user Downloads folder, but you change the Safari download location on Mac if desired. Thus if you had previously changed the download location, you’d need to find the item there instead.
If you do need to start the download over from scratch, often an easy way to do that is to copy the downloaded files original direct download URL from Safari and simply paste that address back into the URL bar. Note that approach doesn’t always work with randomly generated CDN address downloads however. Similarly, you can find out where a file was downloaded from on the Mac by using Get Info in the Finder on the file, even if the file is only partially downloaded and incomplete.
Some other web browsers also support file download resuming as well, including Chrome, though how you go about resuming downloads in Chrome is different than what is discussed here in Safari.
You may have noticed that sometimes you can not power on and boot a MacBook Pro when it doesn’t have a battery installed. Let’s say you had to remove the battery of an older MacBook Pro because it was swelling, or the battery failed for some other reason, but when you go to power on the MacBook Pro, nothing happens. (To be clear, this article is aimed at older MacBook Pro model years, like a 2006, 2007, 2008, 2009, 2010, 2011, back when replacing a battery, hard disk, RAM, was all fairly easy to do by opening the bottom case).
In this situation, if a battery is removed or totally dead and you attempt to start the MacBook Pro, nothing happens – there is no sound, no system boot, no startup chime, nothing. It turns out that some model year MacBook Pro computers will not boot with a simple power button press after the battery has been physically removed or disconnected.
Of course if you happen to have a replacement battery then you can typically just replace the missing battery with a working battery and the MacBook Pro will boot, but that is not always an option. So let’s discuss how to boot an older MacBook Pro when there is no battery present at all.
How to Boot MacBook Pro with No Battery Installed
We are assuming the MacBook Pro has no battery installed in the computer, meaning there physically is no battery installed. Then, when attempting to boot the Mac or pressing the start button, nothing happens. In this case, you can force the MacBook Pro to boot by following these steps:
Unplug the MagSafe power cable
Hold down the Power button for 10 seconds and continue to hold it down
While still holding the Power button, connect the MagSafe power cable to the MacBook Pro and continue to hold the Power button for another 10 seconds
Release the Power button, then press the Power button as usual to power on the computer and boot the Mac
When the MacBook Pro does boot, the fans will be blasting at full speed for the entire time you are using the Mac (resetting SMC or PRAM does not stop the fans running, only replacing the battery will).
Also it appears that the MacBook Pro will reduce its own clock speed in this situation, thereby reducing performance.
The only way to stop the fans from running at full speed and to return the clock speed to regular performance is to install a new battery into the MacBook Pro.
As some experienced this scenario on an old MacBook Pro 2010 model after removing a swollen battery. Once the battery was removed you can press the power button but nothing happens. However, the above method of disconnecting and reconnecting MagSafe while holding the Power button was successful in starting up the Mac – with fans running at full speed and at reduced clock speed however. Nonetheless, Snow Leopard still runs well!
As you can see in the screenshot below, the “No Battery” indicator is visible, but the MacBook Pro is booted and working.
And indeed, this particular MacBook Pro has no physical battery installed as you can see the internals in this picture:
Powering Up a MacBook Pro After Replacing Battery, Logic Board, Hard Drive, RAM, etc too
Apparently the same aforementioned scenario of the MacBook / MacBook Pro not starting up can also unfold when replacing other internal components on these older model year MacBook Pro (2006, 2007, 2008, 2009, 2010, 2011, etc), including replaced logic boards, internal hard drives, RAM, battery, and perhaps other hardware components too.
With some other internal component replacements, sometimes simply plugging in the MagSafe adapter and holding the power button for 10 seconds is enough to cause the MacBook Pro to start.
Also, Check the Power Adapter Wattage
For what it’s worth, in some scenarios where the battery appears dead but is not actually (ie, the charge is long drained but the battery itself isn’t completely useless yet), then you may be able to successfully boot the MacBook Pro with a proper wattage MagSafe power adapter of 85W. These older model year MacBook Pro computers use 85W power adapters, whereas the MacBook and MacBook Air of the same generation used 60W power adapters. Sometimes simply plugging in the proper higher wattage power adapter will allow the MacBook Pro to boot.
This MagSafe power button pressing solution was found on iFixIt forums and it worked for me, so if you’re in a similar scenario with an older MacBook Pro then try it out yourself. If for some reason the above method does not work, the original forum poster does state the following possible workaround involving moving a RAM module to a different slot (if applicable):
“If that doesn’t work then try to remove one RAM memory [module] and switch places and [repeat] the method”
In my case this juggling of the RAM module was not necessary to boot the MacBook Pro (a 2010 model year) without a battery, but that additional tidbit may be valid to you.
This article is obviously aimed at older MacBook Pro hardware, but it may be relevant to other older MacBook models too, including similar model year (2006, 2007, 2008, 2009, 2010, 2011) MacBook and MacBook Air, and perhaps even some newer MacBook Pro models too. By the way, if you’re rocking an older Mac and want to speed it up, check out these tips.
Of course newer model year MacBook (Pro & Air too) hardware does not have user serviceable batteries and in some cases the battery is glued to the top case, so in those situations the ability to end up in a situation where the computer doesn’t have a battery is much less likely, and any troubleshooting scenario is going to be much more extreme requiring a more thorough hardware repair that is far beyond the scope of this particular article. In those situations, take the Mac to a certified Apple Repair Specialist or an Apple Store instead.
Long live the old Macs! Does this qualify for retro status yet? Probably not… give it a bit longer.
Want to toggle Do Not Disturb mode on the Mac with a keyboard shortcut? You can easily enable a custom keyboard shortcut to turn on or off Do Not Disturb mode in MacOS, and we’ll show you how to set it up.
Do Not Disturb mode on the Mac is one of the best features you can use if you want to focus on a task, and not be distracted by the myriad endless notifications and alerts that pop up on the Mac. Enabling and disabling the feature with a keyboard shortcut offers a quick way to toggle the feature off or on as quick as possible and at any time.
How to Set a Do Not Disturb Keyboard Shortcut on Mac
To be able to toggle Do Not Disturb off or on by keyboard shortcut on Mac, you’ll need to enable a keyboard shortcut for it first. Here’s how to do that:
Go to the Apple menu and select “System Preferences”
Go to “Keyboard” and then choose the “Shortcuts” tab
Select “Mission Control” from the Shortcuts options
Locate “Turn Do Not Disturb On/Off” and make sure that is checked to be enabled
Click directly to the right of “Turn Do Not Disturb On/Off” and then press a keyboard shortcut combination to set as the Do Not Disturb keyboard shortcut
In the example here, the keystroke combination SHIFT FN F10 was set as the keyboard shortcut for enabling and disabling Do Not Disturb mode.
You can set any keyboard shortcut you want for this purpose, just make sure it’s unique and does not overlap with another keystroke combination or feature. Applying modifier keys like Shift, Option, Control, FN can be an easy way to avoid conflict with other keyboard shortcuts on the Mac. Whether FN SHIFT F10 works for your particular situation is going to depend on your individual Mac setup.
How to Toggle Do Not Disturb ON or OFF by Keyboard Shortcut on Mac
Once the keyboard shortcut for toggling Do Not Disturb mode is enabled, you can use it at anytime by pressing the keystroke combination you set in the above steps. In the example here, that would be pressing SHIFT FN F10, so therefore toggling the feature would be as so:
Press SHIFT FN F10 to enable Do Not Disturb mode instantly
Press SHIFT FN F10 to disable Do Not Disturb mode immediately
When Do Not Disturb mode is on, all notifications and alerts will not show up on the Mac, but they will still be contained within the Notification Center.
When Do not Disturb mode is off, all alerts and notifications will come through to the Mac as usual, showing up as pop-up alerts in the upper right corner of the screen.
Do Not Disturb mode is one of the most useful features available on the Mac and on the iOS side of things too, where using Do Not Disturb mode on iPhone and iPad can offer some peace and quiet when you’re on the go as well.
If you find yourself toggling this feature on frequently, you might want to set a schedule for Do Not Disturb on Mac to be automatically on at times of your choosing. And if you don’t like the annoying notifications at all then you can precent all notifications on the Mac by setting Do Not Disturb mode in perpetuity to be always enabled using a scheduling trick, which will make it so your Mac is never harangued by the alerts and notifications from everything under the sun.
If you’re a Mac user who relies on iCloud Drive for data syncing and cloud storage, you might appreciate knowing that you can enable an optional iCloud Status indicator in the Mac Finder.
The iCloud Status indicators in Finder can tell you if a file or folder is only in iCloud, on the local Mac, ineligible for iCloud, waiting to upload, transferring, and more. Note these iCloud Status indicators are different from progress indicators, though you can also check the progress of iCloud file uploads and downloads in Mac OS if desired.
How to Enable iCloud Status Indicator for Mac iCloud Folders
Go to the Mac Finder
Navigate to an iCloud Drive folder, or if you use iCloud Desktop and iCloud Documents to there *
Switch the folder to List View (click the List view button, or go to View menu > As List)
Pull down the “View” menu and choose “View Options”
Check the box for “iCloud Status” to enable the iCloud Status indicator for the iCloud Drive folder
Close out of View Options
Once the iCloud Status view option has been enabled, it will be visible as a column in List view. Like other sort columns, you can move it around as desired.
You can also right click on the file list headers and choose to toggle “iCloud Status” from there, which is quicker than going to View Options preference panel.
Note if you disabled iCloud Desktop and Documents folders on MacOS so that your desktop and documents aren’t uploading into iCloud, then this iCloud status indicator feature won’t be available for those directories, and instead will be limited to iCloud Drive. This is signified by the iCloud Status option being grayed out and unselectable.
With the iCloud Status indicators enabled, anytime you are copying files to iCloud Drive from Mac or moving files to iCloud from Mac OS you will see the indicator change for those files. Likewise if there is other activity within the iCloud folders, that will show with the iCloud status indicator as well.
If you frequently put data into iCloud Drive or an iCloud enabled Documents or Desktop folder, you might want to think about adding iCloud Drive to the Mac Dock for quick access. It can also be helpful to watch upload progress of files and folders that are transferring to iCloud from the Mac.
Want to change the tracking speed of the cursor on a Mac? Maybe you want your mouse to move around on the screen faster? Perhaps you want the Mac trackpad to move the cursor slower?
You can manually change the tracking speed of either a mouse or trackpad connected to a Mac, and you can even have different tracking speeds for a mouse as you do for a trackpad, a handy trick for users who have both input methods in use on their Mac.
How to Change Tracking Speed of Mouse / Trackpad Cursor on Mac
Go to the Apple menu in the upper left corner of the display
Choose “System Preferences”
Select “Trackpad” or “Mouse”, depending on which you have or want to adjust the cursor tracking speed for
For changing Trackpad tracking speed: Under the “Point & Click” section, look for “Tracking speed” and adjust the slider on the scale from “Slow” to “Fast” as preferred, the tracking speed changes immediately so you can test the change right away
For changing Mouse tracking speed: Adjust the “Tracking speed” slider on the scale from “Slow” to “Fast” as desired
Close out of System Preferences when finished
What tracking speed you use is almost entirely a matter of personal preference. Some users really like a fast tracking speed, while others prefer a slow speed. You should try out different settings and see which works best for you. Often you’ll find somewhere in the middle of the tracking speed slider options offers a good compromise.
Remember you can change the tracking speed of the cursor for input devices independently from one another. For example, you could have the internal trackpad of a MacBook Pro set to fast tracking speed, but any connected mouse could have a slow tracking speed, or vice versa. To independently change the cursor speeds of different input devices, just connect each input device to the Mac and then go to the “Mouse” settings and then the “Trackpad” settings and adjust each as needed. (Side note; you can also independently control mouse and trackpad acceleration speeds with a third party tool, but that’s a different topic)
Note a separate preference setting exists so that you can also change the scrolling speed of a mouse or trackpad on the Mac, which applies to either gestures for scrolling or to scroll wheels.
Some related helpful tips may be changing the size of the Mac cursor, and if you notice the cursor randomly getting big when you move the mouse or trackpad suddenly and you don’t like that, then you might want to disable Shake To Find on the Mac.