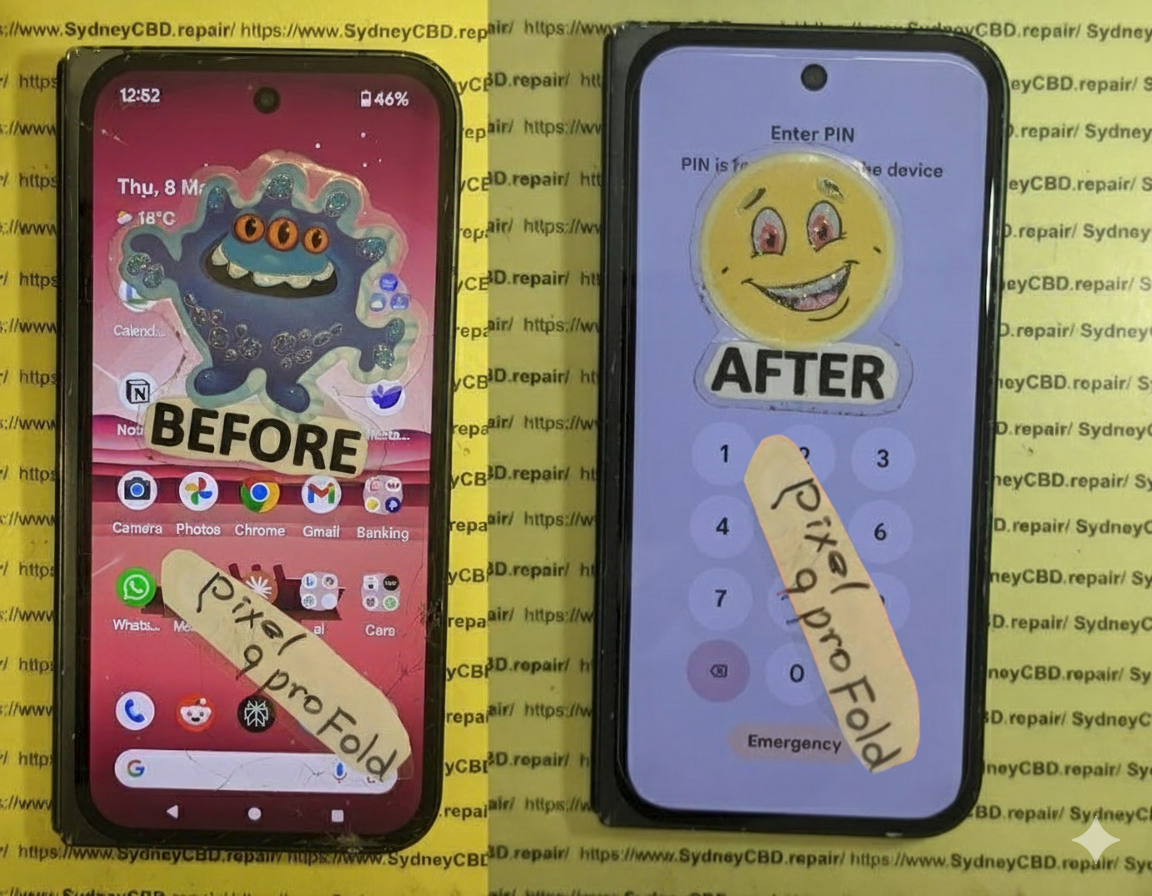
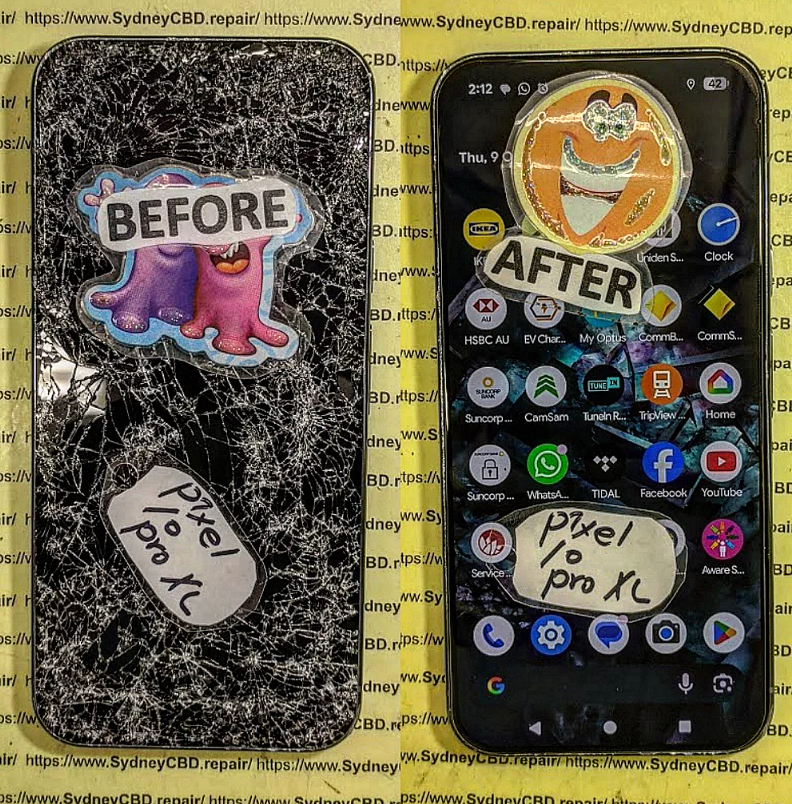
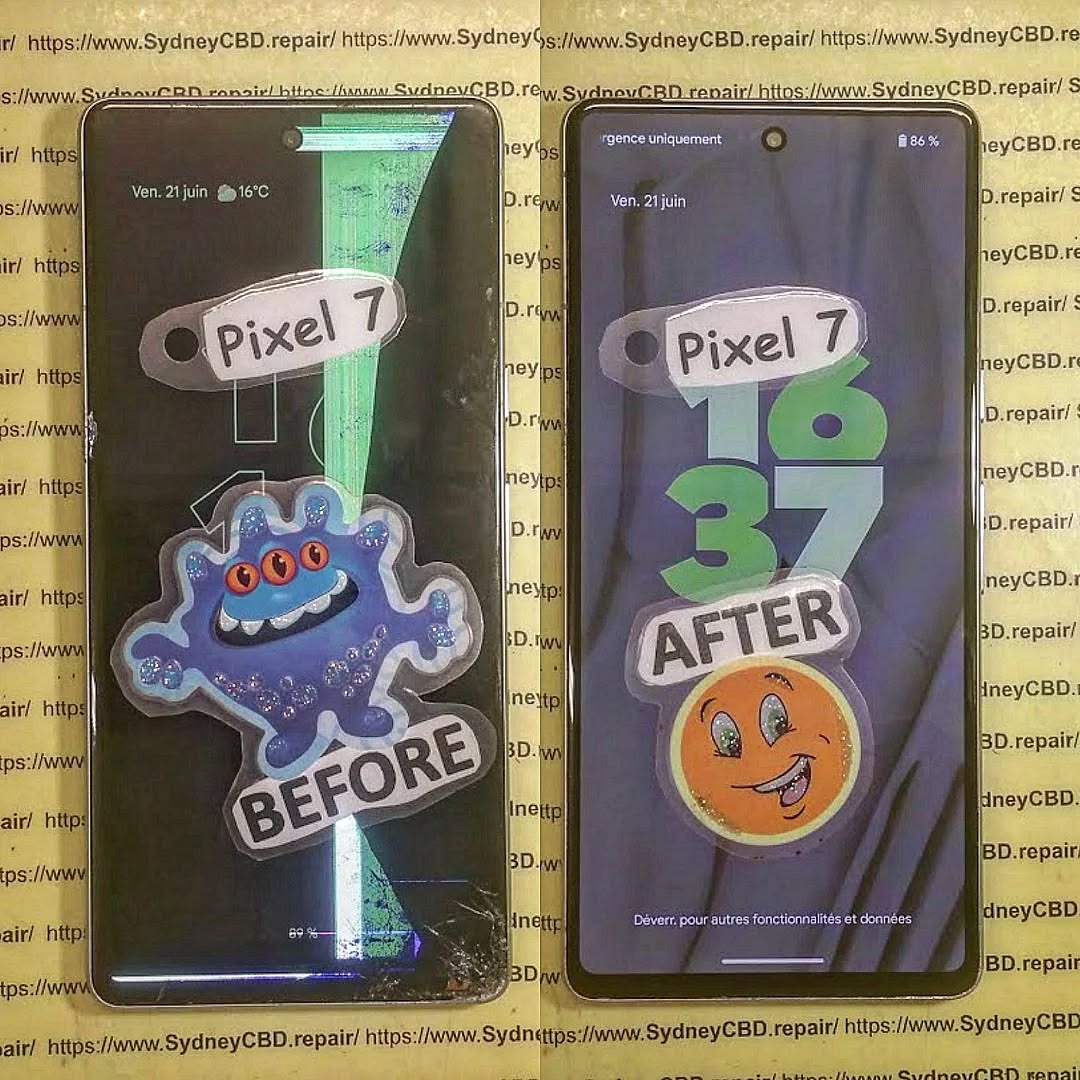
Restoring from Pieces to Perfection Restoring a Smashed Google Pixel Fold Using OEM Parts + 7 Proven Techniques
Introduction
The Google Pixel Fold represents a groundbreaking leap in mobile technology, combining the portability of a smartphone with the expansive experience of a tablet. Its sleek foldable design allows users to multitask, enjoy larger screens for media, and carry advanced technology in a compact form. However, with innovation comes vulnerability. The delicate foldable screen, intricate hinge mechanism, and ultra-thin internal components make the Pixel Fold prone to damage from drops, pressure, or even minor mishandling.
Restoring a smashed Pixel Fold isn’t just about replacing a screen or battery—it’s about understanding the device’s unique engineering, using high-quality OEM parts, and following precise repair techniques to ensure the device functions like new. Whether you’re a DIY enthusiast looking to attempt the repair yourself or considering professional service, knowing the step-by-step process, potential pitfalls, and the importance of genuine parts is essential.
In this comprehensive guide, we’ll explore everything from identifying damage, sourcing the right OEM components, executing meticulous repairs, to preventing future issues. By the end, you’ll have the knowledge and confidence to bring your Pixel Fold back from “pieces to perfection.”
The Google Pixel Fold is a marvel of modern mobile technology, combining a tablet-sized screen with a pocketable form factor. Its foldable design offers versatility, but it also introduces vulnerabilities not seen in standard smartphones. The foldable hinge, ultra-thin OLED display, and flexible internal components are prone to cracking, creasing, or malfunctioning if mishandled. Understanding these weaknesses is the first step toward effective repair.
Unlike traditional smartphones, even minor pressure in the wrong spot can lead to permanent screen damage. Many users overlook hinge care, which can result in misalignment, screen separation, or internal component stress. Being proactive and understanding the Pixel Fold’s unique engineering ensures a higher success rate when restoring a smashed device.
Organized Parts Tray: Avoid losing screws or small components during reassembly.
Preparation is half the battle; rushing increases chances of irreversible damage.
Step-by-Step Guide to Screen Replacement
Replacing the Pixel Fold screen is intricate but achievable with patience and proper OEM components.
Removing the Damaged Display
Power off the device.
Heat the edges gently to soften adhesive.
Use a suction cup and spudger to lift the screen without bending the OLED.
Disconnect ribbon cables carefully to avoid tearing.
Installing the New OEM Screen
Align the new screen precisely with the hinge and frame.
Connect ribbon cables securely.
Test functionality before sealing with adhesive.
Press gently to ensure adhesion without warping.
Battery Replacement and Optimization
A damaged battery can reduce performance even after a screen replacement. When replacing:
Use OEM batteries only.
Avoid bending or puncturing the battery.
Calibrate after installation by charging to 100% and discharging fully once.
Proper battery replacement ensures longer lifespan and prevents overheating.
Repairing Internal Components
Other internal repairs include:
Logic Board Fixes: Address short circuits or flex cable damage.
Camera Replacement: Carefully detach connectors.
Hinge Adjustment: Replace worn bushings or lubricate hinge pins.
Sensor Alignment: Ensure fold detection sensors function properly.
All repairs require OEM parts and patience to avoid cascading failures.
Reassembling the Device Safely
Reassembly involves:
Using correct screws for each component
Applying adhesive only where necessary
Aligning hinge for smooth folding
Checking screen flushness and touch sensitivity
Skipping any step can result in poor fold mechanics or uneven display.
Software Calibration After Repair
Once hardware is restored:
Check touchscreen responsiveness across the fold
Test fold sensors and animations
Update software to the latest patch
Run built-in diagnostics to confirm component integrity
This ensures the device functions as if it were new.
Preventative Tips to Avoid Future Damage
Use a robust foldable case
Apply high-quality screen protectors
Avoid sitting on the device or storing in tight spaces
Keep away from heat and moisture
Schedule routine diagnostics if fold responsiveness declines
These simple steps extend the Pixel Fold’s lifespan dramatically.
Cost Analysis: DIY vs Professional Repair
Factor
DIY
Professional
Cost
Lower upfront but risk of mistakes
Higher but includes warranty
Tools
Must buy precision tools
Provided by technician
Time
Can take hours
Typically same-day or 1-2 days
Risk
High if inexperienced
Low, experts handle delicate parts
Warranty
None if DIY
Usually 90 days+ with OEM parts
While DIY is tempting, professional repair ensures longevity and preserves device value.
FAQ Section
Q1: Can I use non-OEM screens for Pixel Fold repair?
A1: Technically yes, but non-OEM screens can have reduced durability, touch sensitivity issues, and color inaccuracies.
Q2: How long does a Pixel Fold screen replacement take?
A2: With experience, 60–90 minutes. For DIY beginners, allow 2–3 hours.
Q3: Does replacing the battery affect fold performance?
A3: Only if improper handling bends internal components; OEM batteries maintain normal fold mechanics.
Q4: How can I prevent hinge damage?
A4: Avoid placing stress on the fold, keep it free of dust, and consider professional lubrication.
Q5: Is software calibration necessary after screen replacement?
A5: Absolutely. Calibration ensures touchscreen responsiveness and correct fold detection.
Q6: What warranty applies to OEM part replacements?
A6: Typically, professional repairs with OEM parts provide at least 90 days warranty, covering defects and functionality issues.
Conclusion
Restoring a smashed Google Pixel Fold using OEM parts is both feasible and highly recommended. OEM components preserve device integrity, ensure optimal performance, and reduce future maintenance. Whether opting for professional repair or a carefully planned DIY approach, understanding the unique vulnerabilities of the Pixel Fold, using the right tools, and following precise steps can return your foldable device to “as-new” condition. For additional support and genuine parts, visit Google Support.
David from Sydney CBD Repair Centre – The Best place to fix mobile phones as 7 Years In A Row! Top Mobile Phone Repair In Sydney. More than 2000 Positive Reviews on Google and Same Day Repairs.
We take pride in delivering exceptional repair services for all major phone brands including Apple, Samsung, Google, and more. Our expert technicians use only genuine parts and offer 90days warranty on repairs. Located in the heart of Sydney CBD, we’re your one-stop solution for all mobile device repairs.
Our commitment to excellence has earned us the trust of thousands of satisfied customers. Whether it’s a cracked screen, battery replacement, or water damage repair, we handle it all with professional care and expertise. Walk in today and experience why we’re Sydney’s #1 choice for mobile phone repairs.
Visit us for:
✓ Same Day Express Repairs
✓ Genuine Parts Guarantee
✓ Professional Technicians
✓ Competitive Pricing
✓ 2000+ 5-Star Google Reviews
✓ 7-Time Award Winner for Best Phone Repairs
THE INVISIBLE DAMAGE! Google Pixel 10 Pro XL Hidden Internal Structural Repair Showcase – 9 Critical Problems Every Owner Should Know
Introduction
Modern smartphones are built with remarkable engineering. The Google Pixel 10 Pro XL combines premium materials, powerful hardware, and advanced AI features into an elegant design. While its exterior looks strong, many owners don’t realise that a seemingly harmless drop can create hidden internal damage long before cracks appear on the screen.
Invisible structural damage is one of the most misunderstood problems affecting premium smartphones today. A phone may continue functioning for days or even weeks before internal issues begin to surface. Display glitches, charging failures, camera alignment problems, overheating, or unexpected shutdowns can all originate from structural damage hidden beneath the surface.
Professional technicians often encounter devices that appear nearly perfect externally but reveal extensive internal deformation after careful disassembly. This is why Google Pixel 10 Pro XL hidden internal structural repair requires specialised knowledge, precision tools, and genuine replacement parts.
In this repair showcase, we’ll explore what happens inside the device after impact, how technicians diagnose hidden damage, and why expert repairs protect your investment far better than temporary fixes.
Why Invisible Damage Is More Dangerous Than Visible Damage
Visible cracks immediately capture attention. Hidden damage, however, quietly develops beneath the housing where owners cannot see it.
A strong impact can slightly twist the internal aluminium frame without breaking the display glass. Although the change may be measured in fractions of a millimetre, modern smartphones are engineered with incredibly tight tolerances. Even tiny shifts can affect how components fit together.
Some of the most common consequences include:
Misaligned display assemblies
Pressure on the battery
Loose motherboard mounting points
Camera vibration issues
Charging port movement
Damaged antenna connections
Speaker alignment problems
Reduced water resistance
These issues often appear gradually rather than immediately after the accident.
For example, a phone dropped onto a hard concrete surface may still power on normally. Weeks later, the owner notices intermittent touch response, random display flickering, or poor charging performance. The original drop may seem unrelated, but a professional inspection frequently reveals hidden structural deformation.
Invisible damage is dangerous because it continues affecting surrounding components every time the phone experiences heat expansion during charging or regular daily use.
What Causes Hidden Internal Structural Damage?
Several situations can lead to Google Pixel 10 Pro XL hidden internal structural repair becoming necessary.
Accidental Drops
The most common cause is accidental impact.
Even if a protective case absorbs much of the force, energy still travels through the phone’s frame. Depending on how the device lands, stress may concentrate around:
Camera housing
Charging port
Frame corners
Display mounting brackets
Motherboard supports
Premium smartphones contain hundreds of tiny components mounted with microscopic precision. A sudden shock can alter alignment without causing immediate external damage.
Pressure and Bending
Many users accidentally place their phones in back pockets, backpacks, or tight bags where constant pressure slowly bends the frame.
Unlike dramatic drops, bending damage develops over time.
Repeated stress can create:
Slight chassis warping
Internal screw loosening
Display pressure marks
Battery compression
Connector fatigue
Eventually, these problems require professional structural repair before more expensive components fail.
Water Exposure
Water itself doesn’t always create structural damage, but corrosion weakens internal supports and mounting brackets.
Moisture may affect:
Steel shielding
Internal screws
Connector brackets
Adhesive layers
Structural reinforcement plates
As corrosion spreads, components gradually lose stability, leading to additional mechanical failures.
Professional technicians always inspect for corrosion whenever a phone has suffered liquid exposure.
Manufacturing Tolerances and Daily Wear
Although premium devices undergo rigorous quality control, every smartphone experiences thousands of heating and cooling cycles throughout its lifetime.
Charging generates heat.
Gaming generates heat.
Wireless charging generates heat.
Environmental temperature changes also contribute.
These cycles cause materials to expand and contract repeatedly. Combined with accidental impacts, long-term wear can eventually reveal weaknesses that weren’t noticeable when the device was new.
This is why regular professional inspections after significant drops are recommended, even if the phone appears perfectly functional.
Instead of complete failure, owners usually notice small changes that gradually worsen.
Common symptoms include:
Symptom
Possible Structural Cause
Display lifting
Bent frame
Screen flickering
Display connector stress
Random restarts
Motherboard flex
Poor charging
Misaligned USB-C port
Camera won’t focus
Camera bracket movement
Weak signal
Antenna displacement
Clicking sounds
Loose internal mounting
Battery swelling appearance
Frame distortion or battery damage
Some users mistakenly assume these are software problems.
In reality, software updates cannot repair physical deformation inside the device.
Professional diagnostic equipment helps distinguish between hardware faults and software-related issues, preventing unnecessary troubleshooting.
Professional Inspection Process
Before replacing any component, experienced repair technicians perform a comprehensive structural assessment.
Skipping this stage often leads to repeat failures because damaged supporting components remain hidden.
A professional inspection follows a systematic process designed to identify every affected area.
External Examination
The repair begins with careful visual inspection.
Technicians examine:
Display alignment
Camera housing
Rear glass
Frame edges
SIM tray fitment
Button response
Charging port alignment
Tiny gaps around the display often reveal hidden chassis deformation.
Even differences smaller than one millimetre may indicate underlying structural movement.
Lighting magnification helps technicians identify impact points that ordinary inspection would miss.
Internal Diagnostic Testing
After documenting external condition, technicians test every major hardware function before opening the device.
Typical diagnostics include:
OLED display performance
Touch sensitivity
Camera calibration
Face unlock sensors
Charging circuitry
Wireless charging
Battery health
Thermal sensors
Audio components
Microphones
Network performance
Wi-Fi and Bluetooth connectivity
Recording baseline performance allows technicians to verify successful repairs once the structural restoration is complete.
Structural Frame Inspection
Once the device has been safely opened, the most important stage of the Google Pixel 10 Pro XL hidden internal structural repair begins—examining the internal frame. This stage often reveals problems that are completely invisible from the outside.
Technicians carefully remove the display assembly, protective shields, and internal modules to expose the chassis. Using precision measuring tools, they inspect whether the frame remains perfectly flat and whether every mounting point aligns with factory specifications.
Areas receiving special attention include:
Display mounting rails
Camera housing supports
Motherboard screw posts
Battery compartment
USB-C charging port bracket
Speaker housing
Wireless charging coil alignment
Internal antenna mounting points
Even a slight bend can place constant pressure on nearby components. Over time, this pressure may cause ribbon cables to loosen, connectors to wear prematurely, or the OLED display to develop pressure-related issues.
Professional repair isn’t simply about replacing broken parts—it’s about restoring the phone’s original structural integrity.
A successful repair follows a carefully planned sequence. Rushing the process or skipping steps increases the likelihood of future failures.
Step 1 – Safe Device Disassembly
The repair begins by gently heating the adhesive securing the display or rear panel. Controlled heat softens the adhesive without damaging sensitive internal components.
Specialised opening tools are then used to lift the panel safely, avoiding unnecessary stress on the OLED display or frame.
Every screw is removed in order and stored separately, ensuring each one returns to its original position during reassembly.
Step 2 – Disconnecting the Battery
Before touching any internal electronics, technicians disconnect the battery.
This essential safety step helps prevent:
Electrical shorts
Component damage
Accidental power-on
Static discharge risks
Modern smartphones contain highly integrated circuitry, making this precaution critical for protecting the motherboard.
Step 3 – Full Internal Assessment
With the device open, each component undergoes inspection.
Technicians look for:
Bent brackets
Cracked mounting points
Loose connectors
Torn flex cables
Corrosion
Dust or debris
Liquid indicators
Heat damage
This detailed assessment determines whether the repair requires only structural restoration or additional component replacement.
Step 4 – Restoring the Internal Frame
This is the centrepiece of the Google Pixel 10 Pro XL hidden internal structural repair showcase.
If the frame is only slightly deformed, specialised alignment tools may restore it to factory specifications.
If structural damage is extensive, technicians replace the entire chassis instead of attempting temporary repairs.
Replacing the frame ensures:
Proper display fit
Correct motherboard alignment
Accurate camera positioning
Reliable charging port placement
Improved durability
Restored structural strength
Because every internal component depends on the frame, restoring it correctly is essential for long-term reliability.
Step 5 – Replacing Damaged Components
After the structural repair is complete, any affected components are replaced.
Common replacements include:
OLED display assembly
Battery
Charging port
Camera modules
USB-C flex cables
Wireless charging coil
Speaker assemblies
Microphones
Internal antennas
Button flex cables
Only after all damaged parts have been addressed can the phone be safely reassembled.
Step 6 – Precision Reassembly
Reassembly demands the same level of care as disassembly.
Technicians:
Reconnect all ribbon cables
Reinstall shielding
Tighten screws to correct torque
Apply new waterproof adhesive
Refit the display
Clean internal lenses
Remove dust particles
Verify connector seating
Attention to detail during this stage helps maintain the phone’s durability and improves resistance to dust and moisture.
Common Components Replaced During Structural Repairs
Structural damage often affects more than one part. During a professional repair, technicians evaluate every component for hidden wear.
Component
Why It May Need Replacement
OLED Display
Pressure damage or connector stress
Internal Frame
Bent or cracked chassis
Battery
Compression or swelling
USB-C Port
Impact misalignment
Rear Glass
Cracks from frame flex
Camera Module
Misalignment affecting focus
Flex Cables
Torn or stretched during impact
Wireless Charging Coil
Shifted from original position
Speaker Assembly
Broken mounts or distortion
Internal Shields
Bent protective covers
Replacing worn components during the repair helps prevent future issues and reduces the likelihood of repeat disassembly.
Why Genuine Parts Matter
Premium smartphones are designed with tight manufacturing tolerances. Using high-quality, genuine-compatible replacement parts helps preserve the device’s original performance.
Benefits of genuine-quality parts include:
Accurate fitment
Consistent OLED colour reproduction
Reliable touch sensitivity
Stable battery performance
Proper charging compatibility
Improved longevity
Better overall reliability
Lower-quality aftermarket parts may fit physically but can introduce problems such as reduced brightness, poor touch response, faster battery degradation, or inconsistent charging behaviour.
For a flagship device like the Google Pixel 10 Pro XL, investing in quality replacement parts is an investment in long-term performance.
DIY Repair Risks
Online repair videos can make structural repairs appear straightforward, but the reality is far more complex.
The Google Pixel 10 Pro XL contains delicate ribbon cables, precision-mounted cameras, and a high-value OLED display that can be damaged by improper handling.
Common DIY risks include:
Cracking the display during removal
Damaging ribbon cable connectors
Puncturing the battery
Misaligning internal components
Losing water-resistant sealing
Stripping screw heads
Introducing dust beneath the display
Incorrect adhesive application
Additionally, without specialised measuring equipment, it’s nearly impossible to determine whether the internal frame has been restored to factory specifications.
Professional repair technicians rely on experience, precision tools, and established procedures to minimise these risks and deliver dependable results.
When it comes to Google Pixel 10 Pro XL hidden internal structural repair, choosing an experienced repair centre can make the difference between a long-lasting solution and recurring problems. Professional technicians don’t simply replace damaged parts—they restore the entire device to operate as close to factory specifications as possible.
Some of the biggest advantages of professional repair include:
Unlike trial-and-error repairs, professionals follow structured repair procedures developed through years of experience working on premium smartphones.
Tips to Prevent Hidden Structural Damage
Although accidents can’t always be avoided, a few simple habits can greatly reduce the risk of internal frame damage.
Use a Quality Protective Case
A well-designed shock-absorbing case helps distribute impact forces across the phone instead of concentrating them in one corner.
Look for features such as:
Reinforced corners
Raised screen bezels
Camera protection
Certified drop protection
Secure button coverage
Install a Tempered Glass Screen Protector
While a screen protector won’t prevent internal structural damage, it helps minimise scratches and may reduce the severity of impacts to the display glass.
Avoid Carrying Your Phone in Your Back Pocket
Sitting with your phone in your back pocket places continuous pressure on the frame, especially on larger devices like the Google Pixel 10 Pro XL.
Over time, this repeated stress can contribute to subtle frame deformation.
Keep Your Device Away from Excessive Heat
High temperatures can weaken adhesives and accelerate battery wear.
Avoid leaving your phone:
On a car dashboard
In direct sunlight for extended periods
Near heaters
Inside hot vehicles
Seek Inspection After a Major Drop
Even if your phone appears to work normally, a professional inspection after a significant impact can detect hidden problems before they become expensive repairs.
Early diagnosis often saves both time and money.
Why Structural Repairs Require Experience
Modern smartphones are far more complex than earlier generations.
The Google Pixel 10 Pro XL integrates:
Advanced OLED technology
AI-powered camera hardware
Precision antenna systems
Wireless charging components
High-density batteries
Multiple internal sensors
Delicate ribbon cable assemblies
Every component is engineered to fit within extremely small tolerances.
Professional technicians receive ongoing training and use specialised repair equipment to ensure each repair meets high standards of accuracy.
Without proper alignment, even a newly installed display or battery may fail prematurely due to hidden frame distortion.
This is why structural repair is considered one of the most demanding forms of smartphone repair.
Frequently Asked Questions
1. What is hidden internal structural damage?
Hidden internal structural damage refers to bends, cracks, or distortions inside the phone that aren’t immediately visible from the outside. These issues can affect the frame, mounting brackets, connectors, or internal components.
2. Can my Google Pixel 10 Pro XL still work with structural damage?
Yes. Many phones continue operating after an impact. However, hidden damage may gradually lead to charging issues, display problems, camera faults, overheating, or unexpected shutdowns.
3. Can structural damage be repaired?
In many cases, yes. Depending on the severity, technicians may realign the frame or replace the chassis entirely while transferring the original internal components.
4. How long does a structural repair usually take?
Repair times vary depending on the extent of the damage and parts availability. Many repairs can be completed on the same day, while more complex structural restorations may require additional time.
5. Will repairing the frame improve phone performance?
If internal misalignment is causing hardware issues, restoring the frame can improve charging reliability, display performance, camera alignment, and overall device stability.
6. Should I continue using my phone after a hard drop?
It’s best to have the device professionally inspected. Continuing to use a phone with hidden structural damage may place additional stress on sensitive internal components, potentially leading to more extensive repairs later.
Learn More About Smartphone Care
For additional information about maintaining your smartphone and extending its lifespan, visit the official Android Help Center:
It provides practical guidance on device maintenance, troubleshooting, software updates, and general best practices for Android devices.
Conclusion
The Google Pixel 10 Pro XL hidden internal structural repair process highlights an important reality of modern smartphones: the most serious damage isn’t always visible.
A device that looks nearly perfect on the outside may conceal bent internal frames, stressed connectors, displaced cameras, or weakened mounting points. Left untreated, these hidden issues can gradually affect performance, reliability, and the overall lifespan of the phone.
Professional technicians use specialised diagnostic tools, precision repair techniques, and high-quality replacement parts to restore both the structural integrity and functionality of the device. From carefully inspecting the chassis to replacing damaged components and thoroughly testing the finished repair, every step plays a vital role in achieving a dependable result.
If your Google Pixel 10 Pro XL has suffered a significant impact—even without obvious cosmetic damage—don’t ignore the warning signs. Early inspection and professional repair can prevent small issues from developing into costly failures, helping you enjoy your device for years to come.
David from Sydney CBD Repair Centre – The Best place to fix mobile phones as 7 Years In A Row! Top Mobile Phone Repair In Sydney. More than 2000 Positive Reviews on Google and Same Day Repairs.
We take pride in delivering exceptional repair services for all major phone brands including Apple, Samsung, Google, and more. Our expert technicians use only genuine parts and offer 90 days warranty on repairs. Located in the heart of Sydney CBD, we’re your one-stop solution for all mobile device repairs.
Our commitment to excellence has earned us the trust of thousands of satisfied customers. Whether it’s a cracked screen, battery replacement, or water damage repair, we handle it all with professional care and expertise. Walk in today and experience why we’re Sydney’s #1 choice for mobile phone repairs.
Visit us for:
✓ Same Day Express Repairs
✓ Genuine Parts Guarantee
✓ Professional Technicians
✓ Competitive Pricing
✓ 2000+ 5-Star Google Reviews
✓ 7-Time Award Winner for Best Phone Repairs
Sydney CBD Repair Centre – Where Quality Meets Reliability.
Can We Fix It? Reviving a Water Damaged Pixel 9 Pro Fold XL – Amazing 9-Step Recovery Guide
Introduction
Modern foldable smartphones are engineering masterpieces. The water damaged Pixel 9 Pro Fold XL combines a premium folding OLED display, advanced cameras, artificial intelligence features, and sophisticated internal hardware into one slim device. While it offers excellent durability compared to previous generations, liquid exposure remains one of the biggest threats to its lifespan.
Many owners assume that because their phone has an IP rating, it can survive almost any encounter with water. Unfortunately, that’s not true. Even a small amount of moisture can begin damaging sensitive electronic components within minutes. Saltwater, coffee, soft drinks, swimming pools, rain, and even steam can create problems that become worse over time.
The encouraging news is that not every water damaged Pixel 9 Pro Fold XL is beyond repair. Professional technicians equipped with the proper tools, cleaning equipment, and diagnostic systems can often restore devices that appear completely lifeless.
In this guide, we’ll explain exactly what happens inside your phone after liquid exposure, why acting quickly matters, and how professional repair dramatically increases the chances of a successful recovery.
Liquid damage doesn’t simply stop at the surface. Once moisture enters the phone, it begins affecting numerous components simultaneously.
Unlike traditional smartphones, foldable devices contain additional moving parts, flexible display connectors, hinge assemblies, multiple protective seals, and delicate ribbon cables. Every one of these components creates another possible pathway for moisture intrusion.
That makes a water damaged Pixel 9 Pro Fold XL significantly more complicated to repair than older smartphones.
Why Foldable Phones Are More Vulnerable
Although Google’s engineers designed the Fold XL to withstand everyday use, foldable technology naturally introduces additional engineering challenges.
Some vulnerable areas include:
Flexible OLED display connectors
Internal hinge mechanisms
Multiple ribbon cables
Dual battery configuration
Precision adhesive seals
Internal microphones
Speakers
USB-C charging assembly
Water doesn’t need a large opening.
Even microscopic gaps can allow moisture to travel deep into the phone through capillary action.
Once inside, corrosion begins almost immediately.
Water Resistance Doesn’t Mean Waterproof
One of the biggest misconceptions involves IP ratings.
An IP rating means a phone was tested under controlled laboratory conditions using fresh water. Real-world accidents rarely happen under laboratory conditions.
Consider these common scenarios:
Swimming pool chemicals
Ocean saltwater
Soap residue
Rain driven by wind
Coffee spills
Soft drinks
Beer
Sweat during exercise
Humid bathrooms
Each liquid behaves differently.
Many contain minerals or contaminants that greatly accelerate corrosion.
Even if your water damaged Pixel 9 Pro Fold XL initially appears to function normally, hidden corrosion may continue developing over the following days or weeks.
Hidden Damage Often Appears Later
Many customers tell technicians:
“It worked perfectly yesterday.”
That’s actually common.
After liquid exposure, symptoms may appear gradually, including:
Random shutdowns
Display flickering
Green screen
Black screen
Touch failure
Face Unlock issues
Camera fogging
Charging failures
Overheating
Speaker distortion
Battery drain
Corrosion continues spreading long after the original accident unless professionally cleaned.
Your actions during the first half-hour can determine whether your phone requires a simple cleaning or an expensive motherboard repair.
Many well-intentioned DIY attempts actually increase the damage.
Let’s examine what should—and shouldn’t—be done.
Mistake #1: Continuing to Use the Phone
The biggest mistake is assuming:
“It’s still working, so it’s probably okay.”
Using a water damaged Pixel 9 Pro Fold XL while moisture remains inside allows electricity to flow across contaminated circuits.
That causes:
Short circuits
Burned components
Permanent motherboard failure
Damaged display connectors
Battery issues
If liquid has entered the phone, power should be turned off immediately.
Mistake #2: Charging the Device
Many users notice low battery after the accident.
Their first instinct?
Plug it into a charger.
Unfortunately, this is one of the fastest ways to destroy the charging circuitry.
Electric current and moisture are a dangerous combination.
Professional technicians always recommend avoiding:
Wired charging
Wireless charging
Fast charging
Power banks
until the phone has been professionally inspected.
Mistake #3: Putting It in Rice
The “rice trick” has become one of the internet’s most persistent myths.
Rice cannot:
Remove corrosion
Dry moisture trapped beneath chips
Eliminate minerals
Clean contaminated circuits
Prevent oxidation
Instead, rice may introduce dust and starch particles into charging ports and speaker openings.
Professional repair centres never rely on rice.
Instead, they disassemble the phone, remove moisture mechanically, clean affected components using specialised solutions, and inspect every circuit under magnification.
Mistake #4: Using a Hair Dryer
Heat causes several additional problems.
High temperatures may:
Warp the OLED display
Damage waterproof seals
Soften adhesives
Push moisture deeper inside
Harm battery chemistry
Likewise, compressed air can drive water further into connectors instead of removing it.
Gentle drying of the phone’s exterior is fine, but internal drying requires professional equipment.
What You Should Do Instead
If your water damaged Pixel 9 Pro Fold XL has been exposed to liquid, follow these steps immediately:
Turn the phone off.
Disconnect all charging cables.
Remove any protective case.
Dry the exterior with a lint-free cloth.
Keep the device unfolded if possible.
Do not press unnecessary buttons.
Do not attempt charging.
Avoid shaking the device.
Take it to a professional repair technician as soon as possible.
Time is one of the biggest factors affecting successful recovery.
The sooner corrosion is removed, the greater the chance that expensive components can be saved.
Many people believe water damage simply “dries out.”
Unfortunately, electronics don’t work that way.
The real enemy isn’t always the water itself.
It’s what remains behind after the water evaporates.
Minerals, salts, sugars, cleaning chemicals, chlorine, and other contaminants remain on electronic circuits. These residues begin reacting with electricity and metal almost immediately, producing corrosion that slowly destroys microscopic pathways on the motherboard.
For a water damaged Pixel 9 Pro Fold XL, this process can affect nearly every internal system. Because foldable phones use tightly packed components connected by flexible ribbon cables, even a tiny amount of corrosion can interrupt communication between essential hardware.
Professional technicians often discover multiple affected areas from what seemed like a small spill.
Some of the first components inspected include:
Component
Possible Water Damage Symptoms
OLED Inner Display
Flickering, black screen, green tint
Outer Display
Touch issues, display artifacts
Battery
Rapid drain, overheating, swelling
Charging Port
Slow charging, no charging, intermittent connection
Cameras
Foggy lenses, autofocus failure
Speakers
Muffled or distorted sound
Microphones
Poor call quality
Motherboard
Random restarts, complete failure
Flex Cables
Display disconnects, touch failure
The challenge is that these issues don’t always appear immediately. Some develop over several days as corrosion spreads, which is why early professional cleaning remains the best defence against permanent damage.
Professional Diagnostic Process
When a water damaged Pixel 9 Pro Fold XL arrives at a professional repair centre, technicians don’t immediately replace parts. Instead, they follow a structured diagnostic process designed to identify both visible and hidden damage. This careful approach prevents unnecessary repairs and increases the likelihood of restoring the device while preserving valuable data.
Unlike DIY repair attempts, professional diagnostics rely on specialised tools, precision equipment, and years of experience working with delicate foldable smartphones.
Step 1: External Inspection
The first step is a detailed visual inspection.
Technicians check for:
Signs of liquid entry around the SIM tray
Moisture near the USB-C charging port
Speaker and microphone openings
Display abnormalities
Hinge movement
Physical impact damage
Bent frame sections
Cracked glass
These initial observations often provide clues about where the liquid entered the phone.
Step 2: Safe Device Disassembly
Foldable phones are significantly more challenging to open than standard smartphones.
Improper disassembly can damage:
Flexible OLED display
Internal display cables
Waterproof adhesive seals
Hinge components
Battery connections
Professional technicians use specialised heating equipment, precision opening tools, and manufacturer-approved procedures to safely access the internal components without causing additional damage.
Step 3: Internal Moisture Assessment
Once opened, technicians inspect every major component.
Particular attention is given to:
Motherboard
Battery connectors
Display flex cables
Charging circuitry
Camera modules
Wireless charging coil
Hinge assembly
Liquid contact indicators
These indicators help determine how extensively the liquid has spread throughout the device.
Step 4: Microscope-Level Inspection
Many forms of corrosion are invisible to the naked eye.
Professional repair centres use high-powered microscopes to inspect:
Integrated circuits (ICs)
Power management chips
Display connectors
Capacitors
Micro solder joints
Charging ICs
This level of precision allows technicians to locate damaged areas that would otherwise go unnoticed.
Step 5: Ultrasonic Cleaning
One of the most important stages in repairing a water damaged Pixel 9 Pro Fold XL is ultrasonic cleaning.
The motherboard is carefully cleaned using professional electronic-safe cleaning solutions inside an ultrasonic cleaner. This process removes:
Corrosion
Mineral deposits
Salt residue
Dirt particles
Oxidation
Unlike household cleaning methods, ultrasonic cleaning reaches beneath chips and into microscopic spaces where corrosion often hides.
Step 6: Drying and Component Testing
After cleaning, all components are thoroughly dried using controlled equipment.
Technicians then test:
Power rails
Battery voltage
Charging current
Display output
Camera operation
Speaker function
Touch response
Wireless charging
Network connectivity
Wi-Fi and Bluetooth
Only after confirming the integrity of each subsystem will the device be reassembled.
Common Components That May Require Replacement
Not every water-damaged component can be restored through cleaning alone. Depending on the extent of the damage, one or more parts may need replacement.
Component
Possible Repair
OLED Display
Replace if permanently damaged
USB-C Charging Port
Replace charging assembly
Battery
Install a new genuine battery
Cameras
Replace affected camera module
Loudspeaker
Install new speaker
Microphone
Replace damaged microphone
Flex Cables
Replace faulty ribbon cables
Motherboard Components
Microsoldering or IC replacement
Professional technicians always aim to preserve the original hardware whenever possible, especially if replacing it isn’t necessary.
Can Every Water Damaged Pixel 9 Pro Fold XL Be Saved?
One of the most common questions customers ask is whether every water damaged Pixel 9 Pro Fold XL can be repaired.
The honest answer is: not always—but many can be saved.
The outcome depends on several factors, including:
How much liquid entered the phone
The type of liquid involved
Whether the phone remained powered on
How quickly professional treatment began
The extent of corrosion
Whether the motherboard has suffered electrical shorts
Fresh water generally causes less long-term damage than saltwater or sugary drinks, which leave behind conductive residues that accelerate corrosion.
Even phones that appear completely dead may still be recoverable if the damage is addressed promptly.
Factors That Improve Repair Success
Several conditions significantly increase the chances of a successful repair:
The phone was switched off immediately.
It wasn’t connected to a charger after the incident.
No DIY repair attempts were made.
The device was professionally cleaned within 24 to 48 hours.
Corrosion had not reached critical integrated circuits.
These factors can often make the difference between a straightforward repair and an irreparable motherboard failure.
When Repair May Not Be Possible
In some cases, the damage is simply too extensive.
Examples include:
Severe motherboard corrosion
Multiple burned integrated circuits
Delaminated OLED display
Battery thermal damage
Extensive saltwater exposure over several days
Physical damage combined with liquid intrusion
Even in these situations, professional technicians may still be able to recover important data before recommending device replacement.
Repair vs Replacement: Which Is the Better Option?
Deciding whether to repair or replace a water damaged Pixel 9 Pro Fold XL depends on several practical considerations.
Repair Is Often the Better Choice When:
The motherboard is recoverable.
The display remains functional.
Your data is valuable.
The phone is relatively new.
Only a few components require replacement.
Repairing the original device is often more cost-effective than purchasing a brand-new premium foldable smartphone.
Replacement May Be Necessary When:
The motherboard is beyond repair.
Both displays are destroyed.
The repair cost approaches the price of a replacement device.
Multiple critical components have failed simultaneously.
A professional diagnostic assessment provides the information needed to make an informed decision.
Data Recovery Considerations
For many users, the data stored on the phone is more valuable than the hardware itself.
Photos, videos, contacts, business documents, and personal memories can often be recovered if the motherboard can be temporarily restored to working condition.
This is another reason to avoid DIY repair attempts, as they can reduce the chances of successful data recovery.
Professional technicians prioritise data preservation whenever possible before proceeding with more extensive repairs.
Why Professional Repair Matters
Foldable smartphones represent some of the most advanced consumer electronics available today. Repairing them requires specialised tools, technical expertise, and an understanding of their unique internal design.
Attempting to repair a water damaged Pixel 9 Pro Fold XL without the proper equipment can result in:
Torn display cables
Damaged hinge mechanisms
Broken OLED panels
Further motherboard damage
Loss of waterproof sealing
Reduced chances of successful data recovery
Choosing an experienced repair centre gives your device the best opportunity for a full recovery while minimising the risk of additional damage.
Preventing Future Water Damage
While professional repair can often save a water damaged Pixel 9 Pro Fold XL, prevention is always the most cost-effective solution. Foldable smartphones are built with impressive engineering, but no electronic device is completely immune to liquid damage.
By following a few practical habits, you can significantly reduce the risk of expensive repairs.
Keep Your Phone Away from High-Risk Environments
Many liquid damage cases don’t happen because someone drops a phone into a pool. Instead, they occur during everyday activities.
Common situations include:
Using the phone in heavy rain
Placing it beside a sink
Taking it into the bathroom while showering
Leaving it near beverages at cafés or restaurants
Using it around swimming pools
Carrying it during water sports
Avoiding these scenarios whenever possible can dramatically reduce the chances of accidental exposure.
Remember That Water Resistance Changes Over Time
The factory seals that help protect your phone gradually wear down through normal use.
Factors that affect water resistance include:
Daily opening and closing of the foldable hinge
Minor drops or impacts
Exposure to heat
Previous repairs
Normal ageing of adhesive seals
Even if your Pixel 9 Pro Fold XL survived water exposure in the past, it may not provide the same level of protection months or years later.
Use Protective Accessories
Although accessories cannot make your phone waterproof, they can help minimise risk.
Consider using:
A quality protective case
Waterproof pouch for beach trips
Dry bags during boating or hiking
Screen protectors
Dust plugs when appropriate
These accessories add another layer of defence against accidental spills and splashes.
Back Up Your Data Regularly
Even the best repair cannot guarantee data recovery in every situation.
Protect your memories and important files by enabling automatic cloud backups.
Regularly back up:
Photos
Videos
Contacts
Messages
Documents
App data
If the unexpected happens, you’ll still have access to your important information.
Frequently Asked Questions
1. Can a water damaged Pixel 9 Pro Fold XL be completely repaired?
Yes, many devices can be successfully repaired, especially if they are turned off immediately and professionally cleaned before corrosion becomes severe. The outcome depends on the amount of liquid exposure, the type of liquid, and how quickly the phone receives professional attention.
2. Should I put my Pixel 9 Pro Fold XL in rice?
No.
Rice does not remove corrosion or moisture trapped beneath integrated circuits. It may also introduce dust and starch particles into ports and speakers. Professional disassembly and ultrasonic cleaning are far more effective.
3. My phone still works after getting wet. Should I still have it inspected?
Absolutely.
Hidden corrosion can continue developing even if the phone appears normal. A professional inspection can identify and treat problems before they become permanent.
4. How long should I wait before turning my phone back on?
Do not turn it back on until it has been inspected and properly dried by a qualified technician. Powering on a wet device can create electrical shorts that permanently damage the motherboard.
5. Can water damage affect the folding screen?
Yes.
The flexible OLED display, ribbon cables, and display connectors are all vulnerable to liquid intrusion. Damage may appear as flickering, green lines, black screens, or touch issues.
6. Is repairing a water damaged Pixel 9 Pro Fold XL cheaper than replacing it?
In many cases, yes.
If the motherboard and display can be saved, professional repair is often significantly more affordable than purchasing a brand-new premium foldable smartphone.
7. Can my photos and files still be recovered?
Often, yes.
Even if the phone will not power on, experienced technicians may be able to restore the motherboard temporarily or repair specific circuits to recover important data. The sooner the device is professionally assessed, the better the chances of successful recovery.
8. Does Google’s warranty cover water damage?
Generally, accidental liquid damage is not covered under the standard manufacturer’s warranty. If liquid contact indicators have been triggered or corrosion is present, repairs are typically considered out-of-warranty.
Conclusion
A water damaged Pixel 9 Pro Fold XL doesn’t automatically mean the end of your device. Thanks to advances in professional diagnostics, ultrasonic cleaning, and motherboard-level repair techniques, many phones that appear beyond saving can be restored to full working order.
The key is acting quickly. Turning the phone off immediately, avoiding charging, resisting common DIY myths like placing it in rice, and seeking professional assistance as soon as possible can dramatically improve the chances of a successful repair.
Foldable smartphones are among the most sophisticated mobile devices ever created. Their intricate internal design demands specialised tools, technical expertise, and careful handling. Whether the issue is minor moisture exposure or significant liquid intrusion, an experienced repair technician can accurately assess the damage, recommend the most cost-effective solution, and maximise the likelihood of preserving both your device and your valuable data.
If your Pixel 9 Pro Fold XL has suffered water damage, don’t wait for corrosion to spread. Early intervention is often the difference between a straightforward repair and an expensive replacement. Trust skilled professionals who understand the complexities of foldable smartphones and are equipped to return your device to peak performance.
Final Thoughts
Water accidents happen to everyone, but they don’t always have to result in losing your phone. Prompt action, informed decisions, and professional repair services can make all the difference. By understanding the risks, avoiding common mistakes, and prioritising expert diagnostics, you’ll give your Pixel 9 Pro Fold XL the best possible chance of recovery and many more years of reliable use.
David from Sydney CBD Repair Centre – The Best place to fix mobile phones as 7 Years In A Row! Top Mobile Phone Repair In Sydney. More than 2000 Positive Reviews on Google and Same Day Repairs.
We take pride in delivering exceptional repair services for all major phone brands including Apple, Samsung, Google, and more. Our expert technicians use only genuine parts and offer 90 days warranty on repairs. Located in the heart of Sydney CBD, we’re your one-stop solution for all mobile device repairs.
Our commitment to excellence has earned us the trust of thousands of satisfied customers. Whether it’s a cracked screen, battery replacement, or water damage repair, we handle it all with professional care and expertise. Walk in today and experience why we’re Sydney’s #1 choice for mobile phone repairs.
Visit us for:
✓ Same Day Express Repairs
✓ Genuine Parts Guarantee
✓ Professional Technicians
✓ Competitive Pricing
✓ 2000+ 5-Star Google Reviews
✓ 7-Time Award Winner for Best Phone Repairs
Sydney CBD Repair Centre – Where Quality Meets Reliability.
The Step by Step Guide to Replacing the Google Pixel 7 Charging Port Like a Pro: 12 Powerful Steps
Introduction to Replacing the Google Pixel 7 Charging Port
Smartphones have become essential tools in our everyday lives. From work emails to social media, we rely on our devices constantly. However, one common issue many users experience is a faulty charging port. When your device refuses to charge properly, replacing the Google Pixel 7 charging port might be the best solution.
The charging port is a small yet critical component. It connects your charging cable to the phone’s internal power system. Over time, wear and tear, dust accumulation, or accidental damage can cause the port to malfunction.
Fortunately, replacing the Google Pixel 7 charging port is possible with the right tools and a careful approach. While some people prefer professional repair services, many tech enthusiasts enjoy performing repairs themselves. With patience and proper guidance, this repair can restore your phone’s charging functionality.
This step-by-step guide explains everything you need to know about replacing the Google Pixel 7 charging port. We’ll cover symptoms, required tools, preparation steps, and the complete repair process.
By the end of this guide, you’ll understand:
How to identify charging port problems
Tools required for the repair
Step-by-step instructions for replacing the Google Pixel 7 charging port
Common mistakes to avoid
Preventive maintenance tips
Whether you’re a beginner or an experienced technician, this comprehensive guide will help you complete the repair safely and effectively.
Before replacing the Google Pixel 7 charging port, it’s important to confirm the problem actually comes from the charging port. Several symptoms can indicate a damaged or worn-out port.
Understanding these signs will help you avoid unnecessary repairs.
Phone Not Charging Properly
One of the most obvious signs is inconsistent charging. Your phone may charge slowly or stop charging altogether. Sometimes it charges only when the cable is positioned at a certain angle.
This typically indicates physical damage inside the port.
If your phone repeatedly disconnects while charging, replacing the Google Pixel 7 charging port may be necessary.
Loose Charging Cable Connection
Another common issue is a loose charging cable.
When the cable no longer clicks firmly into the port, it means the internal connectors are worn or bent.
Symptoms include:
Cable falling out easily
Charging stops when phone moves
Device only charges with pressure on cable
In these cases, replacing the Google Pixel 7 charging port often restores a secure connection.
Debris or Corrosion in Charging Port
Dust and lint can accumulate inside the port over time. Even small particles can block electrical contact.
Signs of debris include:
Charging works intermittently
Cable doesn’t insert fully
Visible dust in port
Before replacing the Google Pixel 7 charging port, try cleaning the port carefully with compressed air or a soft brush.
However, corrosion or internal damage usually requires replacement.
Proper tools make replacing the Google Pixel 7 charging port significantly easier and safer. Using incorrect tools can damage delicate components inside the phone.
Below are the essential tools recommended by repair professionals.
Recommended Professional Tools
Tool
Purpose
Precision Screwdriver Set
Remove internal screws
Plastic Pry Tool
Safely separate components
Suction Cup
Lift display panel
Tweezers
Handle small parts
Heat Gun or Heating Pad
Soften display adhesive
Replacement Charging Port Module
New part for repair
Many technicians also use magnetic mats to keep screws organized during replacing the Google Pixel 7 charging port.
Safety Equipment
Safety should always come first.
Recommended protective equipment includes:
Anti-static wrist strap
Safety glasses
Heat-resistant gloves
Electrostatic discharge can damage internal circuits. Using anti-static tools helps prevent this during replacing the Google Pixel 7 charging port.
For professional repair guides and toolkits, you can also refer to trusted resources such as https://www.ifixit.com
Preparing Your Device for Charging Port Replacement
Preparation is crucial when replacing the Google Pixel 7 charging port. Skipping preparation steps increases the risk of damaging your device.
Follow these precautions before opening your phone.
Backing Up Your Data
Although this repair focuses on hardware, accidents can happen. Always back up your device before beginning.
Backup methods include:
Google Cloud backup
External storage transfer
Computer backup
Backing up ensures your data remains safe during replacing the Google Pixel 7 charging port.
Powering Off the Device
Always turn off the phone completely.
This prevents electrical shorts when disconnecting internal components.
Steps:
Hold the power button
Tap “Power Off”
Wait for the screen to go dark
Never attempt replacing the Google Pixel 7 charging port while the device is powered on.
Heating the Adhesive
Modern smartphones use strong adhesive to secure the display.
To remove the screen safely:
Heat the screen edges with a heat gun or heating pad
Apply gentle suction using a suction cup
Insert a plastic pry tool to separate adhesive
Be patient during this step. Rushing can crack the display.
Proper heating makes replacing the Google Pixel 7 charging port significantly easier.
Step by Step Guide to Replacing the Google Pixel 7 Charging Port
Now we reach the most important section: the complete procedure for replacing the Google Pixel 7 charging port.
Follow these steps carefully.
Step 1 – Remove the Display
After heating the adhesive:
Attach suction cup near bottom edge
Gently pull upward
Insert plastic opening pick
Slide along edges to cut adhesive
Once loosened, carefully lift the display.
Do not pull too far — display cables remain connected.
Step 2 – Disconnect the Battery
Next, remove internal screws securing the shield covering connectors.
Steps:
Unscrew protective metal plate
Use plastic spudger to disconnect battery
Disconnect display cables
Disconnecting power prevents electrical damage during replacing the Google Pixel 7 charging port.
Step 3 – Remove Internal Components
To access the charging port board:
Remove additional screws
Lift speaker assembly
Detach antenna cables
Remove lower board cover
Carefully store screws and components in order.
Organization makes replacing the Google Pixel 7 charging port much easier during reassembly.
Step 4 – Replace Charging Port Module
Now locate the charging port board.
Steps:
Disconnect ribbon cables
Remove charging board screws
Lift old charging port module
Install the new charging port
Ensure connectors align correctly.
Improper installation can cause charging failure even after replacing the Google Pixel 7 charging port.
Step 5 – Reassemble the Device
Reassembly simply reverses the disassembly steps.
Process:
Reconnect all cables
Replace screws and shields
Reinstall speaker assembly
Reconnect battery
Attach display
Apply new adhesive before sealing the phone.
Careful reassembly ensures success after replacing the Google Pixel 7 charging port.
Testing the New Charging Port
After replacing the Google Pixel 7 charging port, testing is essential.
Follow this checklist:
Power on device
Connect charging cable
Verify charging symbol appears
Test cable stability
Confirm fast charging works
Move the cable slightly to ensure stable connection.
If the device charges normally, your repair was successful.
Common Mistakes During Charging Port Replacement
Even experienced technicians sometimes encounter issues while replacing the Google Pixel 7 charging port.
Common mistakes include:
Skipping Battery Disconnection
This can cause electrical shorts.
Using Metal Tools
Metal tools may damage delicate connectors.
Applying Excessive Heat
Too much heat can damage the display.
Forgetting Screws During Reassembly
Loose components may affect charging performance.
Avoiding these mistakes ensures smoother success when replacing the Google Pixel 7 charging port.
Cost Comparison: DIY vs Professional Repair
Repair Option
Estimated Cost
DIY Replacement
$20 – $60
Professional Repair
$100 – $180
DIY repair saves money but requires patience and tools.
Professional technicians offer warranty and expertise.
Your choice depends on skill level and confidence in replacing the Google Pixel 7 charging port.
Maintenance Tips to Protect Your Charging Port
After replacing the Google Pixel 7 charging port, proper maintenance prevents future damage.
Follow these tips:
Clean Charging Port Regularly
Use compressed air to remove dust.
Avoid Cheap Charging Cables
Poor-quality cables can damage connectors.
Keep Phone Dry
Moisture causes corrosion inside charging ports.
Insert Cable Gently
Forcing cables can bend internal pins.
Maintaining these habits helps extend the life of your device after replacing the Google Pixel 7 charging port.
Frequently Asked Questions
1. How long does replacing the Google Pixel 7 charging port take?
A professional technician usually completes the repair in 45 to 90 minutes. DIY repairs may take longer depending on experience.
2. Can I clean the charging port instead of replacing it?
Yes. If debris is the issue, cleaning may solve the problem. However, internal damage requires replacing the Google Pixel 7 charging port.
3. Is replacing the charging port difficult?
It requires careful handling but is manageable with proper tools and instructions.
4. Will replacing the charging port affect waterproofing?
Yes. Opening the device breaks the factory seal. New adhesive helps restore some protection.
5. Can wireless charging replace a damaged port?
Wireless charging works temporarily, but the best solution is still replacing the Google Pixel 7 charging port.
6. Should I choose professional repair?
If you’re unsure about internal repairs, professional technicians provide safer results.
Conclusion
Charging issues can quickly disrupt your daily routine. Fortunately, replacing the Google Pixel 7 charging port is a practical solution that restores your device’s functionality.
This guide covered everything from identifying charging port problems to completing the repair step by step. With the right tools, careful preparation, and patience, many users can successfully perform this repair themselves.
However, if you prefer peace of mind, professional repair services remain a reliable option.
Whether you choose DIY repair or expert assistance, addressing charging port issues early prevents further damage and ensures your smartphone remains dependable for years to come.
David from Sydney CBD Repair Centre – The Best place to fix mobile phones as 7 Years In A Row! Top Mobile Phone Repair In Sydney. More than 2000 Positive Reviews on Google and Same Day Repairs.
We take pride in delivering exceptional repair services for all major phone brands including Apple, Samsung, Google, and more. Our expert technicians use only genuine parts and offer 90days warranty on repairs. Located in the heart of Sydney CBD, we’re your one-stop solution for all mobile device repairs.
Our commitment to excellence has earned us the trust of thousands of satisfied customers. Whether it’s a cracked screen, battery replacement, or water damage repair, we handle it all with professional care and expertise. Walk in today and experience why we’re Sydney’s #1 choice for mobile phone repairs.
Visit us for:
✓ Same Day Express Repairs
✓ Genuine Parts Guarantee
✓ Professional Technicians
✓ Competitive Pricing
✓ 2000+ 5-Star Google Reviews
✓ 7-Time Award Winner for Best Phone Repairs
THE PRECISION SOLDERING: Fixing A Broken USB-C Port On The New ASUS ROG Phone – 10 Expert Tips
Introduction to ASUS ROG Phone USB-C Port Issues
The ASUS ROG Phone series is known for its robust gaming performance and advanced hardware. But even the best devices can suffer from wear and tear, and one of the most common problems is a broken USB-C port. This issue can manifest as intermittent charging, slow data transfer, or a complete inability to connect to a charger. Understanding why this happens is the first step toward a successful repair.
The USB-C port on gaming smartphones like the ASUS ROG Phone is under constant stress. Heavy usage, frequent plugging and unplugging, and physical impacts can bend pins, loosen solder joints, or damage the port housing. While many users might panic, precision soldering offers a reliable solution to restore your phone without replacing the entire motherboard.
Repairing a USB-C port is delicate work. Incorrect handling can damage surrounding components, leading to more costly repairs. In this guide, we’ll walk you through the tools, techniques, and best practices to safely repair your ASUS ROG Phone’s USB-C port.
Successful precision soldering starts with having the right tools. Here’s a detailed list of equipment you’ll need:
Soldering station with temperature control (recommended: 300–350°C)
Fine-tip soldering iron for precision work
Solder wire (lead-free, 0.3–0.5mm diameter)
Flux pen for clean soldering and strong joints
Tweezers (anti-static)
Magnifying glass or microscope for small component inspection
ESD mat and wrist strap to prevent static discharge
Heat gun or rework station (for loosening stubborn ports)
Isopropyl alcohol and microfiber cloth (for cleaning the PCB)
Multimeter for testing continuity and voltage
Spudger and opening tools for safe disassembly
Using substandard tools can compromise the repair. Investing in a proper soldering station and anti-static equipment ensures reliable and repeatable results.
Before touching the soldering iron, it’s crucial to understand the internal layout of the USB-C port on your ASUS ROG Phone. A USB-C port typically contains 24 pins, each responsible for power, data, or accessory functions.
Pin Layout and Functionality
Pin Number
Function
A1, A12
GND (Ground)
B1, B12
VBUS (Power Supply)
A2, B2
TX/RX Differential Pairs (Data)
A3, B3
Sideband Use / Configuration
Remaining
CC pins, D+, D-, SBU for accessory support
Damage often occurs at VBUS and ground pins, which handle high currents and are physically stressed by heavy cables.
Common Weak Points in USB-C Ports
Bent or broken pins
Cracked solder joints
Loose port housing
Oxidation or debris inside the connector
Recognizing these weak points allows you to diagnose and target repairs effectively.
Power Down: Disconnect the battery before starting.
Anti-Static Measures: Wear an ESD wrist strap and work on a grounded mat.
Ventilation: Soldering produces fumes; ensure a well-ventilated area.
Correct Temperature: Avoid overheating pins to prevent PCB delamination.
Protect Nearby Components: Mask adjacent chips with Kapton tape if necessary.
Neglecting these precautions increases the risk of irreparable damage.
Step-by-Step Guide to Removing the Broken USB-C Port
Disassembly is the most critical stage. Here’s a simplified guide:
Remove Back Cover: Use a heat gun to soften adhesive if necessary.
Disconnect Battery: Prevent accidental short circuits.
Unscrew Mainboard: Carefully store screws in labeled containers.
Locate USB-C Port: Examine for obvious damage.
Apply Flux: Lightly coat solder points to assist removal.
Heat and Remove Port: Use a hot air station to lift the port without stressing the PCB.
Clean Pads: Use isopropyl alcohol and a microfiber cloth.
At this stage, patience is key. Rushing can lift PCB pads, making repair harder or impossible.
Precision Soldering Techniques for USB-C Ports
Choosing the Right Soldering Iron
For USB-C repairs, use a fine-point soldering iron with precise temperature control. Adjustable tips reduce the risk of overheating nearby components.
Flux and Solder Selection
A high-quality flux pen improves solder flow and ensures strong adhesion. Thin lead-free solder wires (0.3–0.5mm) are ideal for small pins. Apply solder sparingly to avoid bridging adjacent pins.
Soldering Steps:
Tin the pads lightly with flux and solder.
Position the new USB-C port carefully.
Hold in place with tweezers and tack one corner pin.
Sequentially solder remaining pins, checking alignment under a magnifying lens.
Clean residual flux with isopropyl alcohol.
Proper technique ensures a durable, electrically sound connection.
Testing the USB-C Port After Repair
After soldering, thorough testing is essential:
Continuity Test: Use a multimeter to check each pin.
Power Test: Connect a charger to confirm charging functionality.
Data Test: Transfer files to ensure proper data lines.
Stress Test: Use the phone under normal load for a few hours to confirm stability.
Failing any test indicates a need for rework before closing the device.
Troubleshooting Common Post-Repair Issues
Even after careful soldering, some problems may appear:
No Power: Check VBUS and GND connections.
Intermittent Charging: Inspect for loose solder joints.
Data Issues: Verify TX/RX differential pairs are correctly connected.
Physical Misalignment: Ensure port is seated flush with the PCB.
Documenting each step helps in identifying root causes quickly.
Preventative Tips to Avoid Future Damage
Maintaining your USB-C port prolongs its life:
Use high-quality, short cables.
Avoid excessive force when plugging/unplugging.
Keep the port clean; use compressed air occasionally.
Consider magnetic adapters to reduce physical stress.
Small habits prevent repeated repairs and preserve device longevity.
When to Consider Professional Repair Services
DIY repairs are rewarding but carry risks. Consider professional help if:
The motherboard pads are damaged.
You lack soldering experience or equipment.
The device is under warranty (to avoid voiding it).
Professional centers like Sydney CBD Repair Centre offer genuine parts, precision tools, and warranty-backed repairs.
Can I fix a USB-C port at home?
Yes, but it requires precision soldering tools, experience, and patience. Mishandling can cause permanent damage.
How long does a USB-C repair take?
Typically 1–2 hours for skilled technicians; DIY may take longer depending on experience.
Will DIY soldering void my warranty?
Yes. Professional repair centers maintain warranty and quality assurance.
What causes USB-C port damage?
Frequent plugging, heavy cables, debris, or physical impact.
Can a broken port affect data transfer?
Absolutely. Misaligned or damaged pins may prevent proper data communication.
Is precision soldering safer than port replacement?
Yes, when done correctly, it preserves the motherboard and reduces cost.
Conclusion
Repairing a broken USB-C port on the ASUS ROG Phone requires patience, the right tools, and precision soldering skills. Following this guide ensures your device regains full charging and data capabilities while minimizing the risk of further damage. For users without soldering experience, professional services provide fast, reliable, and warranty-backed repairs.
Investing in proper techniques and preventative care extends the life of your phone, keeping your gaming experience uninterrupted. Precision soldering is not just a repair—it’s restoring your device to peak performance.
David from Sydney CBD Repair Centre – The Best place to fix mobile phones as 7 Years In A Row! Top Mobile Phone Repair In Sydney. More than 2000 Positive Reviews on Google and Same Day Repairs.
We take pride in delivering exceptional repair services for all major phone brands including Apple, Samsung, Google, and more. Our expert technicians use only genuine parts and offer 90days warranty on repairs. Located in the heart of Sydney CBD, we’re your one-stop solution for all mobile device repairs.
Our commitment to excellence has earned us the trust of thousands of satisfied customers. Whether it’s a cracked screen, battery replacement, or water damage repair, we handle it all with professional care and expertise. Walk in today and experience why we’re Sydney’s #1 choice for mobile phone repairs.
Visit us for:
✓ Same Day Express Repairs
✓ Genuine Parts Guarantee
✓ Professional Technicians
✓ Competitive Pricing
✓ 2000+ 5-Star Google Reviews
✓ 7-Time Award Winner for Best Phone Repairs
THE INVISIBLE FIX! Replacing Google Pixel 9 Pro Under-Display Ultrasonic Fingerprint Sensors
Introduction
Modern smartphones have transformed security, and the Google Pixel 9 Pro is one of the best examples of this innovation. Instead of relying on a traditional rear-mounted fingerprint scanner, Google integrates an advanced under-display ultrasonic fingerprint sensor beneath the OLED screen. This invisible technology provides quick, secure, and convenient authentication while maintaining the phone’s sleek appearance.
However, despite its impressive engineering, the fingerprint sensor isn’t immune to damage. Drops, liquid exposure, poor-quality screen replacements, manufacturing defects, and improper repairs can all lead to sensor failures. When that happens, many users assume the entire display has failed. Fortunately, that’s rarely the case.
Replacing Google Pixel 9 Pro Under-Display Ultrasonic Fingerprint Sensors requires specialized equipment, technical expertise, and careful calibration. Unlike older fingerprint readers that could simply be unplugged and replaced, modern ultrasonic sensors interact closely with the display assembly and motherboard. Even a small mistake during repair can prevent biometric authentication from functioning correctly.
This guide explains everything you need to know—from understanding how the technology works to recognizing warning signs, comparing DIY and professional repairs, and learning why genuine replacement parts make a significant difference.
The fingerprint scanner inside the Google Pixel 9 Pro is considerably more advanced than earlier generations of biometric readers.
Rather than using a camera to photograph your fingerprint, the ultrasonic sensor emits microscopic sound waves beneath the display. These sound waves bounce back after encountering the unique ridges and valleys of your fingerprint.
The sensor then creates a highly detailed three-dimensional fingerprint map.
Because of this technology, the scanner offers numerous benefits:
Faster unlocking
Better security
Improved recognition accuracy
Excellent performance with wet fingers
Greater resistance to spoofing attempts
Reliable operation in different lighting conditions
Unlike optical fingerprint scanners, ultrasonic technology doesn’t depend on brightness or visible light. This makes it both faster and more secure.
Google carefully integrates this sensor beneath the OLED display, allowing users to unlock the phone without sacrificing screen space or aesthetics.
How Under-Display Ultrasonic Technology Works
At first glance, unlocking your phone seems simple.
Place your thumb on the designated area.
The screen briefly illuminates.
Within milliseconds, the phone unlocks.
Behind the scenes, however, a remarkably sophisticated process takes place.
Step 1: Finger Placement
Your finger touches the designated scanning zone beneath the OLED display.
Step 2: Ultrasonic Pulse
The fingerprint module emits ultrasonic sound waves through the display.
Step 3: Echo Reception
The waves reflect differently depending on the ridges and valleys of your fingerprint.
Step 4: Digital Mapping
Specialized hardware converts these reflections into a secure three-dimensional fingerprint model.
Step 5: Authentication
The encrypted fingerprint is compared against the securely stored biometric template inside Google’s Titan security architecture.
If the fingerprints match, access is granted almost instantly.
This entire process typically takes less than half a second.
Why Google Chose Ultrasonic Instead of Optical Sensors
Several Android manufacturers still use optical fingerprint readers because they’re less expensive to manufacture.
Google’s decision to use ultrasonic technology provides several advantages.
Feature
Ultrasonic Sensor
Optical Sensor
Security
Excellent
Good
3D Mapping
Yes
No
Wet Finger Support
Excellent
Limited
Bright Light Needed
No
Yes
Spoof Resistance
Very High
Moderate
Recognition Accuracy
Excellent
Good
Performance Through Screen Protectors
Better
Variable
Although ultrasonic technology increases manufacturing costs, it significantly improves security and everyday usability.
Common Causes of Fingerprint Sensor Failure
Despite its durability, several issues can cause the fingerprint reader to malfunction.
1. Cracked OLED Display
The most common cause is a cracked screen.
Even if the fingerprint sensor itself remains intact, fractures in the OLED panel can interfere with ultrasonic wave transmission.
2. Low-Quality Screen Replacement
Cheap aftermarket displays frequently lack the precise material properties required for ultrasonic scanning.
Many users discover that after replacing their screen with inexpensive components, fingerprint recognition becomes unreliable or stops working entirely.
3. Water Damage
Although the Pixel 9 Pro offers water resistance, prolonged exposure to moisture can damage sensitive electronic components.
Corrosion may affect:
Sensor connectors
Display flex cables
Motherboard circuits
Calibration circuitry
4. Physical Impact
A severe drop can misalign internal components without visibly damaging the display.
The ultrasonic module relies on extremely precise positioning.
Even slight movement may prevent accurate fingerprint scanning.
5. Manufacturing Defects
Although uncommon, factory defects occasionally appear after months of normal use.
Some issues can be resolved through software troubleshooting, but persistent hardware-related symptoms often require professional diagnosis and replacement.
Diagnosing the Problem Before Repair
A professional technician doesn’t immediately replace the fingerprint sensor. Instead, they follow a structured diagnostic process to determine the root cause and avoid unnecessary repairs.
Visual Inspection
The first step is checking the phone for obvious signs of damage, including:
Cracked or lifting display
Frame distortion from impacts
Evidence of liquid exposure
Damaged display flex cables
Even minor physical damage can affect how ultrasonic waves travel through the display.
Software Testing
Next, technicians verify whether the issue is software-related by:
Checking for Android updates
Testing fingerprint settings
Removing and re-enrolling fingerprints
Running built-in diagnostic tools
Reviewing hardware error logs where available
If the sensor responds normally after software troubleshooting, a hardware replacement may not be necessary.
Hardware Diagnostics
If software isn’t the problem, the device is opened for internal inspection. Technicians examine:
Fingerprint sensor connections
Display assembly integrity
Motherboard connectors
Signs of corrosion or component damage
Using specialized testing equipment helps determine whether the fault lies with the sensor itself, the display assembly, or another internal component.
Proper diagnosis is essential because replacing the wrong part increases repair costs without solving the problem.
Professional Replacement Process
Replacing Google Pixel 9 Pro under-display ultrasonic fingerprint sensors is one of the most delicate smartphone repairs available today. Unlike older fingerprint readers mounted on the back or side of a device, the Pixel 9 Pro’s ultrasonic sensor works as part of a carefully engineered system that includes the OLED display, display adhesive, motherboard, and biometric security software.
Professional repair centres follow a strict workflow to ensure the replacement restores both functionality and reliability.
Step 1: Initial Device Inspection
Before opening the phone, technicians perform a complete inspection to identify any additional problems that could affect the repair.
This includes checking:
Display responsiveness
OLED image quality
Touch sensitivity
Face Unlock functionality
Camera operation
Charging performance
Wireless charging
Speaker and microphone
Network connectivity
Documenting the phone’s condition before disassembly helps ensure no unrelated issues are overlooked.
Step 2: Safe Device Disassembly
The Pixel 9 Pro is sealed with strong waterproof adhesive. Removing the display requires carefully heating the edges to soften the adhesive without overheating the OLED panel.
Specialized repair tools include:
Precision heat pad
Plastic opening picks
Suction cups
Thin pry tools
Anti-static equipment
Precision screwdrivers
Using excessive force can crack the display or damage delicate flex cables, making experience essential.
Step 3: Disconnecting Internal Components
Once the display is lifted, the technician disconnects the battery before working on any internal electronics.
This prevents:
Short circuits
Electrical damage
Accidental component failure
Static discharge risks
Battery isolation is a standard safety procedure for professional smartphone repairs.
Step 4: Removing the Damaged Fingerprint Sensor
The fingerprint sensor is carefully detached from the display assembly.
Technicians inspect:
Connector pins
Ribbon cables
Sensor alignment
Adhesive residue
Display mounting surface
If additional damage is discovered, such as a torn flex cable or damaged display connector, these issues are addressed before installing the new component.
Step 5: Installing the New Sensor
A genuine replacement sensor is positioned with extreme precision.
Even a slight misalignment may cause:
Slow fingerprint recognition
Failed fingerprint enrollment
Intermittent unlocking
Complete sensor failure
Professional repair centres use manufacturer-grade alignment procedures to ensure the ultrasonic waves pass correctly through the OLED display.
Step 6: Calibration
This is one of the most important steps.
Many users don’t realize that installing a new sensor alone isn’t enough.
Calibration ensures:
Fingerprint recognition accuracy
Security compliance
Reliable biometric performance
Proper communication between hardware and software
Without calibration, the phone may detect the sensor but refuse to register fingerprints.
Step 7: Functional Testing
After reassembly, technicians thoroughly test:
Fingerprint enrollment
Unlock speed
Multiple fingerprint registrations
Touch sensitivity
Display brightness
OLED colour accuracy
Face Unlock
Charging
Camera
Speakers
Wireless charging
Only after every function passes inspection is the repair considered complete.
Tools Required for Repair
Professional workshops invest in specialized equipment designed for modern smartphone repairs.
Tool
Purpose
Heat Pad
Softens waterproof adhesive
Precision Screwdrivers
Remove internal screws
Opening Picks
Separate display safely
Suction Cup
Lift OLED screen
Anti-static Mat
Prevent ESD damage
Tweezers
Handle delicate connectors
Adhesive Templates
Restore water resistance
Microscope
Inspect connectors
Calibration Equipment
Verify sensor accuracy
These tools help minimize the risk of accidental damage during the repair process.
Genuine vs Aftermarket Replacement Parts
Choosing the correct replacement component can significantly affect the long-term performance of your Pixel 9 Pro.
Genuine Parts
Advantages include:
Excellent fingerprint recognition
Original performance
Reliable calibration
Longer lifespan
Better compatibility
Manufacturer-quality materials
Disadvantages:
Higher cost
Limited availability
Aftermarket Parts
Advantages:
Lower purchase price
Wider availability
Disadvantages:
Reduced fingerprint accuracy
Inconsistent performance
Potential calibration issues
Lower durability
Variable manufacturing quality
Although aftermarket components may appear attractive due to their lower price, they often result in repeated repairs and user frustration.
Comparison Table: Genuine vs Aftermarket Parts
Feature
Genuine Parts
Aftermarket Parts
Fingerprint Accuracy
Excellent
Variable
Unlock Speed
Fast
Often Slower
Durability
High
Moderate
Compatibility
Excellent
Inconsistent
Calibration Success
Very High
May Fail
Warranty Support
Yes
Depends on Supplier
Overall Reliability
Excellent
Mixed
For a premium device like the Google Pixel 9 Pro, genuine components generally provide the best long-term value.
DIY vs Professional Repair
Many repair videos online make fingerprint sensor replacement appear straightforward. However, replacing an under-display ultrasonic fingerprint sensor involves much more than simply swapping parts.
DIY Repair
Advantages
Lower upfront cost
Learn a new skill
Flexible repair schedule
Disadvantages
Risk of damaging the OLED display
Difficulty maintaining water resistance
Calibration challenges
Potential warranty implications
Need for specialized tools
No professional workmanship guarantee
Professional Repair
Advantages
Experienced technicians
Genuine replacement parts
Proper calibration
Comprehensive testing
Warranty on workmanship
Faster turnaround
Reduced risk of additional damage
Disadvantages
Higher initial cost than DIY
Requires visiting or mailing the device to a repair centre
For most users, professional repair offers greater reliability and peace of mind, especially when dealing with advanced biometric technology.
Repair Cost Factors
The cost of replacing a Google Pixel 9 Pro under-display ultrasonic fingerprint sensor depends on several factors:
Whether the display also requires replacement
Availability of genuine parts
Extent of internal damage
Labour required for disassembly and calibration
Water damage or corrosion repairs
Warranty coverage
Attempting a cheaper repair with low-quality components may save money initially but can lead to additional expenses if the fingerprint sensor fails again.
Preventing Future Fingerprint Sensor Problems
Once your phone has been repaired, a few simple habits can help keep the fingerprint sensor working reliably.
Use a high-quality protective case.
Apply a compatible screen protector.
Avoid exposing the phone to excessive moisture.
Keep the display clean and free from heavy dirt or oils.
Register multiple fingerprints for improved recognition.
Install official software updates.
Avoid low-quality replacement screens.
Seek professional repairs after significant drops.
Regular care can extend the life of both the display and the fingerprint sensor while maintaining fast and accurate biometric performance.
Frequently Asked Questions (FAQs)
1. Why has my Google Pixel 9 Pro fingerprint sensor stopped working?
There are several possible reasons, including a cracked OLED display, physical impact, liquid damage, software glitches, or a faulty fingerprint sensor. In some cases, a low-quality aftermarket screen replacement can also interfere with the ultrasonic fingerprint scanner.
2. Can the fingerprint sensor be repaired without replacing the display?
It depends on the extent of the damage. If only the fingerprint sensor has failed and the OLED display remains fully functional, a technician may be able to replace the sensor independently. However, if the display itself is damaged or affects ultrasonic signal transmission, both components may need replacement.
3. Will my fingerprints still be saved after the repair?
In most cases, existing fingerprint data must be removed and re-enrolled after replacing the fingerprint sensor or display. This ensures the new hardware is properly calibrated and functions accurately.
4. Is it safe to replace the fingerprint sensor myself?
While DIY repair kits are available, replacing an under-display ultrasonic fingerprint sensor requires specialized tools, technical expertise, and proper calibration. An incorrect installation can damage the OLED display or prevent the biometric system from working. For most users, professional repair is the safer and more reliable option.
5. Does replacing the fingerprint sensor affect the phone’s security?
No. When installed and calibrated correctly using compatible components, the replacement sensor maintains the same high level of biometric security designed for the Google Pixel 9 Pro.
6. How long does the repair take?
The repair time depends on the availability of replacement parts and the extent of the damage. In many professional repair centres, fingerprint sensor and display-related repairs can often be completed on the same day, provided the necessary parts are in stock.
7. Will my phone remain water-resistant after the repair?
Professional technicians replace the waterproof adhesive during reassembly to help restore the device’s original sealing. However, no repaired smartphone can be guaranteed to retain its original factory water-resistance rating, so it’s still advisable to avoid unnecessary exposure to liquids.
8. Why doesn’t my fingerprint scanner work after a screen replacement?
One of the most common causes is the use of a low-quality aftermarket display that is not fully compatible with ultrasonic fingerprint technology. Another possibility is that the sensor was not properly aligned or calibrated during the repair process.
9. How can I prevent future fingerprint sensor issues?
You can reduce the risk of future problems by:
Using a quality protective case.
Installing a compatible tempered glass screen protector.
Avoiding exposure to excessive moisture.
Keeping the display clean.
Having repairs performed by experienced technicians using genuine-quality replacement parts.
10. Is professional repair worth the investment?
Yes. Professional repair helps ensure the fingerprint sensor, display, and biometric security system all work together as intended. Using genuine-quality components, proper calibration procedures, and experienced technicians significantly reduces the risk of repeat failures and protects your investment in a premium smartphone.
Conclusion
The Google Pixel 9 Pro showcases some of the most advanced smartphone security technology available today. Its under-display ultrasonic fingerprint sensor delivers fast, accurate, and secure authentication while preserving the sleek design of the device. However, this sophisticated technology also demands precision when repairs become necessary.
Whether the issue stems from accidental damage, a faulty display, water exposure, or normal wear over time, replacing the fingerprint sensor is far more complex than simply swapping a component. Accurate diagnosis, high-quality replacement parts, professional calibration, and thorough testing are all essential to restoring reliable biometric performance.
Although DIY repairs may appear to save money initially, they often carry significant risks, including display damage, failed calibration, and reduced long-term reliability. Choosing an experienced repair specialist ensures your Google Pixel 9 Pro continues to perform as designed, giving you confidence every time you unlock your device.
If your fingerprint sensor has become unreliable or stopped working altogether, don’t wait for the problem to worsen. A professional assessment can quickly determine the cause and provide the most effective repair solution, helping extend the life of your smartphone while maintaining its premium security features.
⭐ 7 Reasons Why Sydney CBD Repair Centre is Sydney’s Trusted Choice for Google Pixel Repairs
When your Google Pixel 9 Pro needs expert attention, choosing the right repair centre makes all the difference. At Sydney CBD Repair Centre, our experienced technicians specialise in advanced Google Pixel repairs, including under-display ultrasonic fingerprint sensor replacements, OLED screen repairs, battery replacements, charging issues, and water damage restoration.
Why customers continue to trust us:
✓ Same Day Express Repairs*
✓ Genuine Quality Replacement Parts
✓ Professional Google Pixel Specialists
✓ Advanced Diagnostic Equipment
✓ 90-Day Repair Warranty
✓ Competitive Pricing
✓ More than 2,000 Positive Google Reviews
✓ Seven-Time Award Winner for Best Mobile Phone Repairs
We understand how important your smartphone is to your daily life. That’s why every repair is performed with precision, care, and attention to detail to restore your device to the highest possible standard.
Whether you’re dealing with a damaged display, a faulty fingerprint sensor, or another hardware issue, our team is ready to help you get back up and running as quickly as possible.
Contact Sydney CBD Repair Centre Today
David from Sydney CBD Repair Centre – The Best place to fix mobile phones as 7 Years In A Row! Top Mobile Phone Repair In Sydney. More than 2000 Positive Reviews on Google and Same Day Repairs.
We take pride in delivering exceptional repair services for all major phone brands including Apple, Samsung, Google, and more. Our expert technicians use only genuine parts and offer 90 days warranty on repairs. Located in the heart of Sydney CBD, we’re your one-stop solution for all mobile device repairs.
Our commitment to excellence has earned us the trust of thousands of satisfied customers. Whether it’s a cracked screen, battery replacement, or water damage repair, we handle it all with professional care and expertise. Walk in today and experience why we’re Sydney’s #1 choice for mobile phone repairs.
Visit us for:
✓ Same Day Express Repairs
✓ Genuine Parts Guarantee
✓ Professional Technicians
✓ Competitive Pricing
✓ 2000+ 5-Star Google Reviews
✓ 7-Time Award Winner for Best Phone Repairs
Sydney CBD Repair Centre – Where Quality Meets Reliability.
The restoring of your Samsung Note 20 Ultra Screen, Frame, and Battery Bundle Value Analysis + Powerful 2026 Repair Cost Breakdown
Introduction to Samsung Note 20 Ultra Restoration
The Samsung Galaxy Note 20 Ultra remains one of the most powerful flagship smartphones released in recent years. Even though newer devices have entered the market, this premium phone still delivers exceptional performance, camera quality, and productivity features.
However, like any smartphone, it isn’t immune to damage. Cracked screens, bent frames, and degraded batteries are common issues that arise after years of daily use. Instead of replacing the entire device, many users are now turning to a screen, frame, and battery bundle repair to restore their phone to near-new condition.
This comprehensive repair package tackles three of the most critical components of the device simultaneously. By replacing the display assembly, structural frame, and battery together, technicians can significantly extend the lifespan of the phone while ensuring optimal performance.
In today’s economy, repairing a premium smartphone makes far more financial sense than buying a brand-new flagship device that could cost well over $1,000. A bundle repair approach offers cost savings while preserving the advanced technology already inside your phone.
Moreover, choosing restoration instead of replacement contributes to sustainability. According to the International E-Waste Monitor, millions of tons of electronic waste are generated each year. Repairing devices instead of discarding them helps reduce this growing environmental problem. For more information about global e-waste issues, you can visit the official report here: https://ewastemonitor.info
In this article, we’ll explore the value analysis of restoring your Note 20 Ultra through a screen, frame, and battery bundle repair, including cost breakdowns, benefits, warning signs, and professional repair insights.
By the end, you’ll understand exactly why this repair solution is often the smartest choice for extending the life of your device.
Despite being released a few years ago, the Note 20 Ultra remains one of Samsung’s most capable smartphones. Repairing it instead of replacing it often makes excellent financial and practical sense.
Premium Hardware That Still Competes
The device was built with cutting-edge specifications that remain impressive even today. Some of its standout features include:
A 6.9-inch Dynamic AMOLED display
A powerful Exynos/Snapdragon flagship processor
108MP camera system
S-Pen productivity features
High refresh rate display technology
These components allow the device to continue delivering a smooth and powerful user experience.
When users damage the screen or frame, the internal hardware remains perfectly functional. Repairing those damaged components restores the phone’s usability without sacrificing performance.
In fact, many professionals and power users still prefer the Note series due to its productivity features.
Environmental and Financial Benefits
Repairing a smartphone also brings clear sustainability benefits.
Electronic waste continues to grow worldwide, and smartphones are one of the largest contributors. By repairing devices instead of replacing them, consumers reduce the demand for raw materials and manufacturing resources.
Financially, the difference can be substantial. A new flagship phone can cost over $1,200, while a bundled repair might only represent a fraction of that price.
Repairing the phone allows users to:
Save hundreds of dollars
Maintain familiar software and settings
Avoid unnecessary electronic waste
Extend device lifespan by several years
For many users, these benefits make restoration the logical choice.
A screen, frame, and battery bundle repair is one of the most comprehensive smartphone repair services available.
Instead of replacing a single component, technicians restore several critical parts at once.
Screen Replacement Details
The display assembly is the most fragile component of the phone.
When dropped, the screen may suffer:
Cracks
Dead pixels
Touch malfunction
OLED burn-in
A complete screen replacement typically includes:
AMOLED display panel
Digitizer layer
Protective glass
Display adhesive
Once replaced, the phone regains its original visual clarity and touch responsiveness.
Frame Replacement Importance
The frame acts as the structural backbone of the smartphone.
If the phone experiences a heavy impact, the frame may bend or warp. This can cause several issues:
Screen misalignment
Internal component stress
Poor water resistance
Difficulty fitting replacement parts
Replacing the frame ensures the device regains its structural stability.
Battery Replacement Advantages
Battery degradation is inevitable over time.
After several years of use, lithium-ion batteries begin losing capacity. Users might notice:
Rapid battery drain
Unexpected shutdowns
Slow charging
Device overheating
Installing a new battery restores:
Longer screen-on time
Stable power output
Reliable charging performance
Together, these three repairs significantly rejuvenate the device.
Cost Breakdown of the Bundle Repair
One of the main reasons people choose a bundled repair is the cost advantage.
Replacing each component separately can become expensive due to labor duplication and multiple disassembly processes.
Individual Repair Costs vs Bundle
Below is a simplified comparison.
Repair Type
Typical Cost (Estimate)
Screen Replacement
$350
Frame Replacement
$180
Battery Replacement
$120
Total Individual Repairs
$650
Bundle Repair Package
$480 – $520
By combining the repairs into one service, technicians can reduce labor costs and installation time.
This translates to savings of up to 25–30% for customers.
Long-Term Savings Analysis
When considering long-term value, bundle repairs provide additional advantages.
A newly restored Note 20 Ultra can remain functional for several more years. This spreads the repair investment over a longer usage period.
Instead of purchasing a new phone every two years, users may comfortably extend their upgrade cycle.
Over time, that approach can save thousands of dollars.
Signs Your Note 20 Ultra Needs This Repair
Recognizing early signs of damage can prevent further problems.
Display Damage Symptoms
Look for these warning signs:
Cracked or shattered glass
Flickering display
Black spots or dead pixels
Touchscreen unresponsiveness
These symptoms indicate that the display assembly likely needs replacement.
Frame Distortion Signs
Frame damage may be harder to detect but still affects performance.
Signs include:
Screen lifting from edges
SIM tray misalignment
Phone wobbling on flat surfaces
Buttons feeling misaligned
These problems usually occur after drops or heavy impacts.
Battery Health Warning Signs
Battery deterioration becomes noticeable with daily use.
Common symptoms include:
Phone dying at 20–30% battery
Charging taking longer than usual
Rapid battery drain
Device overheating
If multiple symptoms appear together, replacing the battery becomes essential.
Repair Process Explained
Professional repair technicians follow a precise process to restore devices safely.
Professional Diagnosis
The repair begins with a full device inspection.
Technicians check:
Internal connectors
Logic board condition
Camera alignment
Frame integrity
This step ensures there are no hidden issues before repairs begin.
Component Replacement
Next, the device is carefully disassembled.
The damaged components are removed and replaced with new parts.
Precision tools are used to avoid damaging delicate connectors or internal circuits.
Final Testing and Quality Assurance
After installation, technicians perform extensive testing.
This includes verifying:
Touchscreen responsiveness
Display brightness and color accuracy
Battery charging cycles
Camera and speaker functionality
Only after passing these checks is the device returned to the customer.
Risks of Delaying Repairs
Ignoring damage can lead to larger issues.
For example:
A cracked screen may allow dust and moisture inside.
A bent frame can place pressure on internal components.
A degraded battery can swell and damage the display.
Delaying repairs often results in higher repair costs later.
Addressing problems early helps preserve the device.
DIY vs Professional Repairs
Some users consider repairing their phone themselves.
However, modern smartphones are extremely complex.
DIY repairs carry several risks:
Damaging internal cables
Breaking fragile display panels
Losing water resistance
Voiding warranties
Professional technicians use specialized tools and controlled environments to ensure reliable results.
For high-value devices like the Note 20 Ultra, professional repair is typically the safest option.
How to Maintain Your Repaired Device
After restoring your phone, proper care can extend its lifespan even further.
Here are some helpful tips:
Use a Protective Case
Shock-absorbing cases protect against drops.
Install a Screen Protector
Tempered glass protectors reduce screen damage.
Avoid Extreme Temperatures
High heat accelerates battery degradation.
Practice Smart Charging
Keep battery levels between 20% and 80% when possible.
Schedule Regular Maintenance
Occasional cleaning and inspections help maintain device health.
Frequently Asked Questions
1. Is repairing a Note 20 Ultra worth it?
Yes. The phone still offers flagship-level performance, making repair a cost-effective option compared to buying a new device.
2. How long does the repair take?
Most professional repair centers complete the screen, frame, and battery bundle repair within a few hours or the same day.
3. Will the phone feel like new after the repair?
Replacing these major components significantly improves the device’s appearance, durability, and battery life.
4. Can a damaged frame affect internal components?
Yes. A bent frame can stress internal parts and cause alignment issues with the screen or camera.
5. Does replacing the battery improve performance?
A fresh battery stabilizes power delivery, which can improve device responsiveness and prevent random shutdowns.
6. Is data lost during the repair?
In most cases, professional technicians perform repairs without affecting your data. However, backing up your device is always recommended.
Conclusion
Restoring your Note 20 Ultra through a screen, frame, and battery bundle repair offers a powerful solution for extending the life of your device.
Instead of spending a large amount on a brand-new smartphone, users can restore their existing device to near-new condition at a fraction of the cost.
This repair approach addresses the most common problems—display damage, frame distortion, and battery degradation—while improving both functionality and durability.
Additionally, repairing smartphones contributes to environmental sustainability by reducing electronic waste.
For anyone experiencing cracked screens, bent frames, or poor battery performance, a bundled repair can deliver excellent value.
With professional technicians, high-quality replacement parts, and thorough testing, your device can continue serving you reliably for years to come.
David from Sydney CBD Repair Centre – The Best place to fix mobile phones as 7 Years In A Row! Top Mobile Phone Repair In Sydney. More than 2000 Positive Reviews on Google and Same Day Repairs.
We take pride in delivering exceptional repair services for all major phone brands including Apple, Samsung, Google, and more. Our expert technicians use only genuine parts and offer 90days warranty on repairs. Located in the heart of Sydney CBD, we’re your one-stop solution for all mobile device repairs.
Our commitment to excellence has earned us the trust of thousands of satisfied customers. Whether it’s a cracked screen, battery replacement, or water damage repair, we handle it all with professional care and expertise. Walk in today and experience why we’re Sydney’s #1 choice for mobile phone repairs.
Visit us for:
✓ Same Day Express Repairs
✓ Genuine Parts Guarantee
✓ Professional Technicians
✓ Competitive Pricing
✓ 2000+ 5-Star Google Reviews
✓ 7-Time Award Winner for Best Phone Repairs
The complete restoration of a water damaged Huawei phone’s using ultrasonic cleaning and component replacement + Proven 7-Step Recovery Method
Introduction to Water Damaged Huawei Restoration
Complete restoration of a water damaged Huawei using ultrasonic cleaning and component replacement is not just a repair — it’s a meticulous recovery process designed to bring your device back to life. When liquid enters a smartphone, damage begins almost instantly. Corrosion forms, circuits short out, and critical components fail.
Many users panic. Some try rice. Others attempt to power the phone back on. Unfortunately, these actions often make things worse.
Huawei smartphones, including popular models like the Huawei P30 Pro and Huawei Mate 50 Pro, are advanced devices packed with delicate micro-components. Even minor exposure to moisture can disrupt the motherboard.
However, here’s the good news: with professional ultrasonic cleaning and component replacement, full recovery is often possible.
In this guide, we’ll walk through the proven 7-step recovery method professionals use to restore water damaged Huawei devices safely and effectively.
The first 24–48 hours are critical. Corrosion spreads quickly. According to electronics repair standards and technical insights shared by professional repair communities such as Sydney CBD Repair Centre, immediate internal cleaning significantly increases recovery success rates.
Complete restoration of a water damaged Huawei using ultrasonic cleaning and component replacement works best when corrosion hasn’t permanently eaten through copper traces.
Professional labs use:
Anti-static workstations
Microsoldering equipment
Ultrasonic cleaning tanks
High-powered microscopes
Without proper tools, DIY attempts can cause irreversible motherboard damage.
Step 1: Initial Diagnostic Assessment
The restoration process begins with a full diagnostic test.
Technicians check:
Battery voltage
Short circuits on the logic board
Power management IC status
Charging port condition
Screen integrity
Advanced diagnostic tools measure resistance values across motherboard rails. This identifies which circuits have shorted.
Documentation is essential. Each damaged area is photographed before cleaning begins.
Step 2: Safe Disassembly of Huawei Device
Huawei phones use strong adhesive seals. Opening them requires precision heating tools and thin pry instruments.
Improper opening can:
Crack the OLED screen
Tear fingerprint sensor cables
Damage antenna lines
Professional technicians carefully:
Remove back glass.
Disconnect battery.
Separate motherboard.
Label each component.
This organized method prevents reassembly errors later.
Step 3: Ultrasonic Cleaning Process Explained
Now comes the heart of the process — ultrasonic cleaning.
Why Ultrasonic Cleaning Works
Ultrasonic cleaning uses high-frequency sound waves in a special solution. These waves create microscopic bubbles through a process called cavitation.
When bubbles collapse, they remove:
Corrosion
Mineral deposits
Liquid residue
Oxidation buildup
Complete restoration of a water damaged Huawei using ultrasonic cleaning and component replacement relies heavily on this technology.
The motherboard is submerged in a controlled cleaning solution. Timing is critical. Too long can loosen components. Too short won’t remove corrosion fully.
After cleaning, boards are dried in a temperature-controlled environment.
Step 4: Component-Level Inspection
After ultrasonic cleaning, technicians inspect the motherboard under a microscope.
They look for:
Burned IC chips
Corroded capacitors
Damaged resistors
Broken traces
Advanced microsoldering tools allow precise removal of damaged components.
This stage requires expertise. A steady hand and deep understanding of circuit schematics are essential.
Step 5: Replacement of Damaged Components
If corrosion has destroyed components, replacement is mandatory.
Common replacements include:
Power Management IC (PMIC)
Charging IC
Audio IC
Display drivers
Capacitors and coils
Each component is soldered using:
Hot air rework stations
Lead-free solder
Precision flux
After replacement, circuits are tested again for proper voltage flow.
This is where experience matters most. Guesswork isn’t acceptable.
Step 6: Reassembly and Waterproof Sealing
Once repairs are complete:
New adhesive is applied.
Battery is reconnected.
Screen is tested before sealing.
Waterproof gasket is replaced.
While factory-level IP rating may not be fully restored, high-quality adhesive ensures strong protection.
Step 7: Final Testing and Quality Assurance
Before returning the phone to the customer, technicians perform:
Charging tests
Wi-Fi signal tests
Camera inspection
Speaker and microphone checks
Stress performance tests
Overnight monitoring
Complete restoration of a water damaged Huawei using ultrasonic cleaning and component replacement isn’t finished until all systems pass.
Cost vs Replacement: Is Restoration Worth It?
Here’s a practical comparison:
Factor
Restoration
Buying New
Cost
30–60% of new device
100%
Data Retention
Yes
Often lost
Environmental Impact
Low
High
Turnaround Time
1–2 days
Immediate but costly
For premium Huawei models, restoration is usually more economical.
Preventing Future Water Damage
Let’s be honest — accidents happen. Still, prevention helps.
Tips include:
Use waterproof pouches at the beach.
Avoid charging in humid bathrooms.
Replace worn-out back glass.
Don’t ignore cracked screens.
Store phone away from liquids.
A little caution goes a long way.
Frequently Asked Questions (FAQs)
1. Can a water damaged Huawei phone be fully repaired?
Yes, if corrosion hasn’t destroyed critical circuits. Complete restoration of a water damaged Huawei using ultrasonic cleaning and component replacement offers high success rates when handled early.
2. How long does the restoration process take?
Typically 1–3 days depending on severity.
3. Is ultrasonic cleaning safe for motherboards?
Yes. When performed professionally, it removes corrosion without damaging components.
4. Should I put my Huawei in rice?
No. Rice doesn’t remove corrosion. It only absorbs surface moisture.
5. Will my data be saved?
In many cases, yes. Professional restoration prioritizes data recovery.
6. Is it cheaper than buying a new phone?
Often yes, especially for high-end models.
Conclusion
Complete restoration of a water damaged Huawei using ultrasonic cleaning and component replacement is a powerful, proven solution. Rather than giving up on your device, professional intervention can restore functionality, preserve data, and save money.
With the right tools, experience, and methodical processes, even severely water-damaged Huawei smartphones can return to life.
David from Sydney CBD Repair Centre – The Best place to fix mobile phones as 7 Years In A Row! Top Mobile Phone Repair In Sydney. More than 2000 Positive Reviews on Google and Same Day Repairs.
We take pride in delivering exceptional repair services for all major phone brands including Apple, Samsung, Google, and more. Our expert technicians use only genuine parts and offer 90days warranty on repairs. Located in the heart of Sydney CBD, we’re your one-stop solution for all mobile device repairs.
Our commitment to excellence has earned us the trust of thousands of satisfied customers. Whether it’s a cracked screen, battery replacement, or water damage repair, we handle it all with professional care and expertise. Walk in today and experience why we’re Sydney’s #1 choice for mobile phone repairs.
Visit us for:
✓ Same Day Express Repairs
✓ Genuine Parts Guarantee
✓ Professional Technicians
✓ Competitive Pricing
✓ 2000+ 5-Star Google Reviews
✓ 7-Time Award Winner for Best Phone Repairs
Beyond the Screen repair: How to Replace Any Phone’s Charging Port + 7 Expert Tips
Introduction: Why Charging Ports Fail and How Replacement Helps
Your phone’s charging port is the lifeline connecting it to power and data. Over time, this small component can wear out, become clogged with debris, or suffer damage from accidental drops or water exposure. Knowing how to replace a charging port can save both time and money while keeping your device fully functional. This guide will walk you through everything from identifying symptoms to performing a replacement safely.
A faulty charging port isn’t just inconvenient—it can also lead to battery issues, data transfer problems, or even a completely dead phone. By understanding the causes of failure and the proper replacement techniques, you’ll be better prepared to either tackle the repair yourself or seek professional assistance.
A successful repair requires the right tools. Common items include:
Precision screwdriver set
Plastic pry tools and spudgers
Tweezers
Magnifying glass or lamp
Replacement charging port
Anti-static mat (optional)
Optional Tools for Advanced Repair
Soldering kit
Heat gun
Multimeter
Professional-grade repair mat
Step-by-Step Charging Port Replacement Guide
Step 1: Power Off and Disassemble Your Device
Always power down your device before attempting repairs. Remove the battery if possible and keep track of all screws and components. Using a magnetic mat or labeled container is ideal for organization.
Step 2: Locate and Remove the Faulty Charging Port
Carefully detach any connectors leading to the port. Avoid using excessive force, as motherboards and ribbon cables are fragile. If soldering is required, practice safety precautions and ensure proper grounding.
Step 3: Install the New Charging Port
Align pins and connectors precisely. For soldered ports, heat and solder carefully, avoiding excess flux or heat damage. Ensure the port sits flush and is firmly secured.
Step 4: Reassemble and Test
Reattach all components and power the device on. Plug in a known working charger to confirm the port charges and allows data transfer. Inspect for any wobbling or connectivity issues.
Phone Brand-Specific Considerations
Apple iPhone
Lightning ports are proprietary; using third-party replacements can risk compatibility issues or void warranties. Follow Apple repair guides for best results.
Samsung Galaxy
Most Galaxy devices use USB-C. Ensure replacement ports support fast charging standards. Extra caution is required when handling small internal flex cables.
Google Pixel
USB-C ports are generally easier to replace, but water resistance can be compromised during repair. Replace seals and gaskets carefully.
DIY vs Professional Repair: What You Should Know
DIY repairs save money but carry risks: voided warranties, accidental damage, and safety hazards. Professional repair services, like Sydney CBD Repair Centre, offer:
Same-day express service
Genuine parts
90-day repair warranty
Preventing Future Charging Port Problems
Clean ports regularly with a soft brush or compressed air.
Avoid forcing cables in.
Use protective cases and avoid moisture exposure.
Costs and Timeframes for Charging Port Repairs
DIY Kits: $10–$30 (excluding tools)
Professional Repair: $60–$120 depending on model
Repair Time: 30 minutes to 2 hours, depending on complexity
FAQs on Phone Charging Port Replacement
Q1: Can I Replace a Charging Port Without Professional Help?
Yes, but careful attention to tools, safety, and part quality is crucial. Mishandling can damage your device permanently.
Q2: How Long Does a Charging Port Last?
Typically 2–5 years, depending on usage and care.
Q3: Will Replacing the Charging Port Fix Slow Charging Issues?
Not always. Slow charging can also be caused by cables, adapters, battery health, or software issues.
Q4: Are All Replacement Parts Genuine?
No. Always source from trusted vendors or professional repair shops to avoid counterfeit components.
Q5: Can a Water-Damaged Port Be Repaired?
Sometimes. Corrosion may prevent a simple replacement; cleaning and component replacement may be necessary.
Q6: Is Warranty Still Valid After Replacement?
DIY replacements generally void manufacturer warranties. Professional repairs may offer their own warranty instead.
Conclusion
Replacing a phone charging port can seem intimidating, but with the right tools, step-by-step guidance, and attention to detail, it’s achievable. Always weigh DIY efforts against professional services, especially for high-end devices. Preventative care—like cleaning ports and careful handling—will extend the life of your phone. For reliable, fast, and genuine repairs, professional services like Sydney CBD Repair Centre remain the gold standard.
David from Sydney CBD Repair Centre – The Best place to fix mobile phones as 7 Years In A Row! Top Mobile Phone Repair In Sydney. More than 2000 Positive Reviews on Google and Same Day Repairs.
We take pride in delivering exceptional repair services for all major phone brands including Apple, Samsung, Google, and more. Our expert technicians use only genuine parts and offer 90days warranty on repairs. Located in the heart of Sydney CBD, we’re your one-stop solution for all mobile device repairs.
Our commitment to excellence has earned us the trust of thousands of satisfied customers. Whether it’s a cracked screen, battery replacement, or water damage repair, we handle it all with professional care and expertise. Walk in today and experience why we’re Sydney’s #1 choice for mobile phone repairs.
Visit us for:
✓ Same Day Express Repairs
✓ Genuine Parts Guarantee
✓ Professional Technicians
✓ Competitive Pricing
✓ 2000+ 5-Star Google Reviews
✓ 7-Time Award Winner for Best Phone Repairs
Fixing the Samsung Phone’s Green Line Issue: The Real Professional Solutions for Affected Display Screens + 7 Proven Expert Fixes
Introduction
Fixing the Samsung green line issue has become one of the most urgent concerns for Galaxy users worldwide. If you’ve noticed a thin vertical green streak running down your display, you’re likely dealing with early-stage OLED panel degradation or a developing hardware fault. While the line may start subtly, it rarely fixes itself — and in many cases, it becomes brighter and more permanent over time.
Modern Samsung smartphones, including flagship models in the Galaxy S and Z series, use advanced AMOLED technology. These displays deliver stunning color accuracy, deep blacks, and impressive brightness. However, like all OLED panels, they are sensitive to pixel wear, voltage inconsistencies, and thermal stress. When green subpixels begin to fail or a display driver component malfunctions, the result is often a visible vertical line.
The good news? Fixing the Samsung green line issue doesn’t always mean replacing your entire device. With proper diagnosis and professional repair solutions, most affected screens can be restored efficiently and safely. In this guide, we’ll break down what causes the problem, how to identify whether it’s software or hardware related, and the most reliable repair options available today.
If your screen is showing signs of trouble, acting early can make all the difference. Let’s explore what’s really happening behind that green line — and what you can do about it.
Fixing the Samsung green line issue has become one of the most common repair requests for modern Galaxy devices. If you’ve noticed a thin vertical green line running from the top to the bottom of your screen, you’re not alone. This problem frequently affects premium OLED models such as the Samsung Galaxy S21, Samsung Galaxy S22 Ultra, and Samsung Galaxy Z Flip 5.
While the line may start faint, it often becomes brighter over time. The good news? There are real professional solutions available. In this comprehensive guide, we’ll break down causes, diagnostics, repair options, and prevention strategies — all written in clear, easy-to-understand language.
The Samsung green line issue typically appears as a vertical neon or lime-colored streak. It may be constant or visible only on certain brightness levels.
This issue is primarily hardware-related in most cases. However, software glitches can sometimes mimic similar symptoms. Therefore, proper diagnosis is essential before proceeding with repair.
What Causes Green Lines on Samsung Screens?
There are several possible causes:
OLED Pixel Burn-in
Subpixel degradation
Display driver IC malfunction
Physical impact damage
Water exposure
Manufacturing inconsistencies
In Samsung AMOLED panels, green subpixels degrade differently from red and blue. Because OLED screens generate their own light, any imbalance becomes highly visible.
Commonly Affected Samsung Galaxy Models
Although it can affect many models, technicians often report cases in:
Galaxy S20 Series
Galaxy S21 Series
Galaxy S22 Series
Galaxy Note 20
Galaxy Z Fold and Flip series
Premium OLED displays are more susceptible due to high brightness output and pixel density.
Samsung uses AMOLED (Active Matrix Organic Light Emitting Diode) technology in most flagship devices.
Unlike LCD screens, AMOLED displays do not require a backlight. Each pixel lights up individually.
Pixel Structure and Subpixels
Each pixel consists of:
Red subpixel
Green subpixel
Blue subpixel
When combined, they create full color output.
Why Green Pixels Fail First
Green subpixels are typically more sensitive to voltage fluctuations and heat stress. Over time, they may degrade unevenly, creating a vertical green line.
Additionally:
High brightness accelerates degradation
Always-on display contributes to pixel fatigue
Static images cause uneven wear
Understanding this technical background helps explain why fixing the Samsung green line issue often requires hardware intervention.
Early Warning Signs Before the Green Line Appears
Before a full green line becomes permanent, you might notice:
Flickering at low brightness
A faint vertical shadow
Slight green tint on grey backgrounds
Brightness inconsistency in one column
If caught early, some software recalibration may help. But once the line becomes solid and persistent, it’s usually a panel issue.
DIY Checks: Is It Software or Hardware?
Before booking a repair, try these steps:
Safe Mode Testing
Boot into safe mode to rule out third-party apps.
If the green line remains in safe mode, it’s likely hardware-related.
Software Update & Display Calibration
Update to latest firmware
Reset display settings
Perform factory reset (after backup)
If none of these remove the line, professional repair is required.
Professional Diagnosis Process
Professional technicians follow a structured approach when fixing the Samsung green line issue.
Microscope-Level Inspection
Using magnification tools, experts check:
Pixel uniformity
Burn-in patterns
Panel damage
Display Driver Testing
Technicians also test:
Display connector integrity
Voltage output
Driver IC performance
In advanced labs, thermal imaging is sometimes used to detect abnormal heat distribution.
7 Proven Professional Fixes for Samsung Green Line Issue
Here are the most effective professional solutions:
1. OLED Pixel Recalibration
In rare cases, recalibration software can rebalance subpixel voltage.
2. Display Connector Reseating
Loose connectors may cause line artifacts.
3. Driver IC Replacement
If the display driver chip is faulty, microsoldering repair can resolve it.
4. Partial OLED Repair (Advanced Labs Only)
Some specialized repair centers attempt pixel-line correction using precision tools.
5. Full Screen Replacement (Most Common Solution)
Replacing the AMOLED panel is the most reliable fix.
6. Warranty Claim Assessment
Check manufacturer warranty eligibility.
7. Data-Safe Screen Replacement
Professional labs ensure data integrity during repair.
When fixing the Samsung green line issue, precision matters. Cutting corners can lead to further panel damage.
Frequently Asked Questions
1. Is the Samsung green line issue permanent?
In most hardware cases, yes. It requires screen replacement.
2. Can software updates fix green lines?
Only if the cause is firmware-related. Hardware lines won’t disappear.
3. Does screen replacement delete data?
No. Data remains intact during display repair.
4. Is the issue caused by overheating?
Heat can accelerate pixel degradation but isn’t always the sole cause.
5. Will the line spread over time?
Often, yes. It may become brighter or multiply.
6. Is it safe to continue using the phone?
Yes, but the display quality will deteriorate.
Conclusion
Fixing the Samsung green line issue requires accurate diagnosis and professional solutions. While temporary software steps may help rule out minor glitches, most persistent green lines stem from OLED pixel degradation or driver faults.
The most reliable fix remains professional screen replacement. Acting early prevents further complications and preserves device value.
If you notice early warning signs, don’t ignore them. Addressing the issue promptly ensures better outcomes and long-term performance.
David from Sydney CBD Repair Centre – The Best place to fix mobile phones as 7 Years In A Row! Top Mobile Phone Repair In Sydney. More than 2000 Positive Reviews on Google and Same Day Repairs.
We take pride in delivering exceptional repair services for all major phone brands including Apple, Samsung, Google, and more. Our expert technicians use only genuine parts and offer 90days warranty on repairs. Located in the heart of Sydney CBD, we’re your one-stop solution for all mobile device repairs.
Our commitment to excellence has earned us the trust of thousands of satisfied customers. Whether it’s a cracked screen, battery replacement, or water damage repair, we handle it all with professional care and expertise. Walk in today and experience why we’re Sydney’s #1 choice for mobile phone repairs.
Visit us for:
✓ Same Day Express Repairs
✓ Genuine Parts Guarantee
✓ Professional Technicians
✓ Competitive Pricing
✓ 2000+ 5-Star Google Reviews
✓ 7-Time Award Winner for Best Phone Repairs