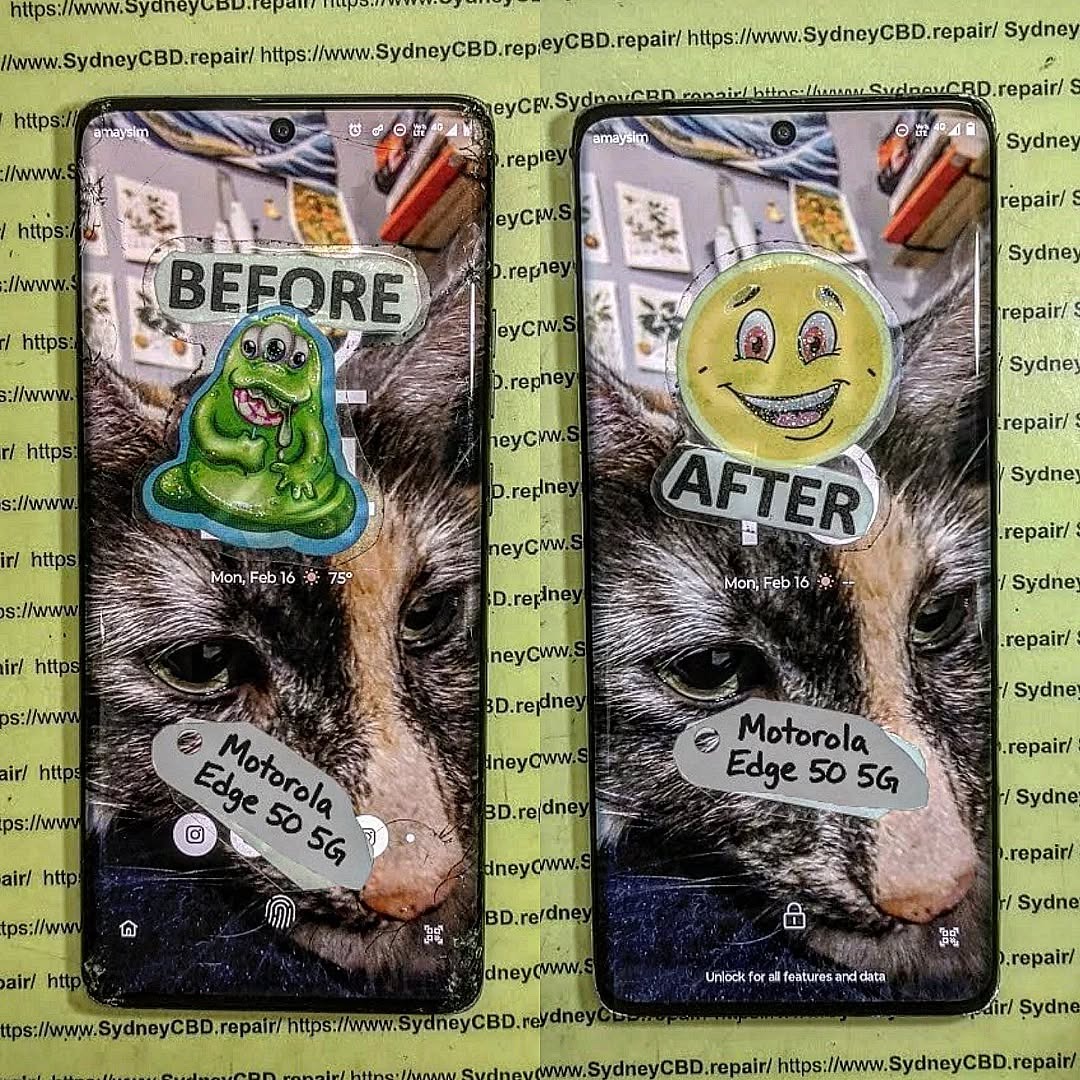
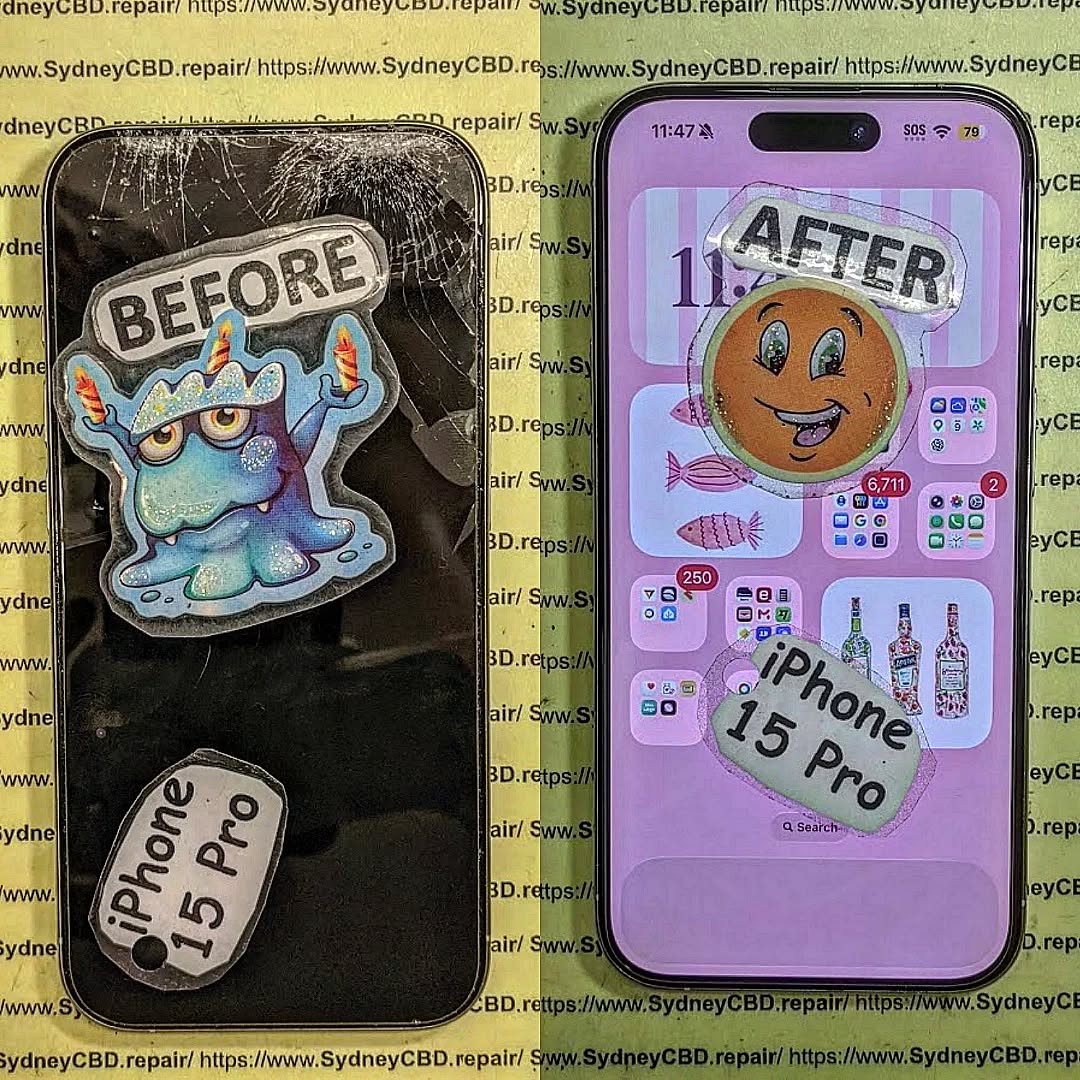
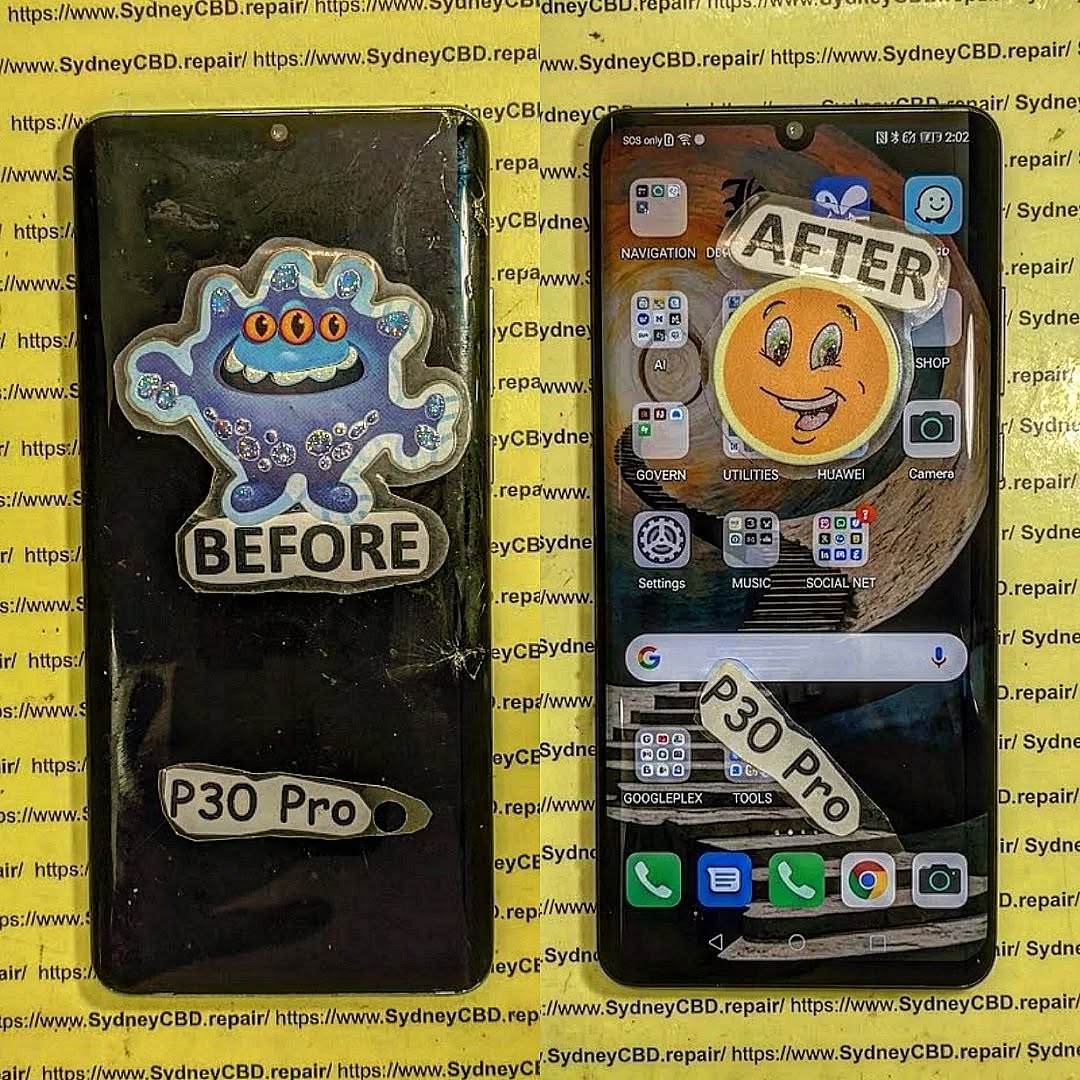
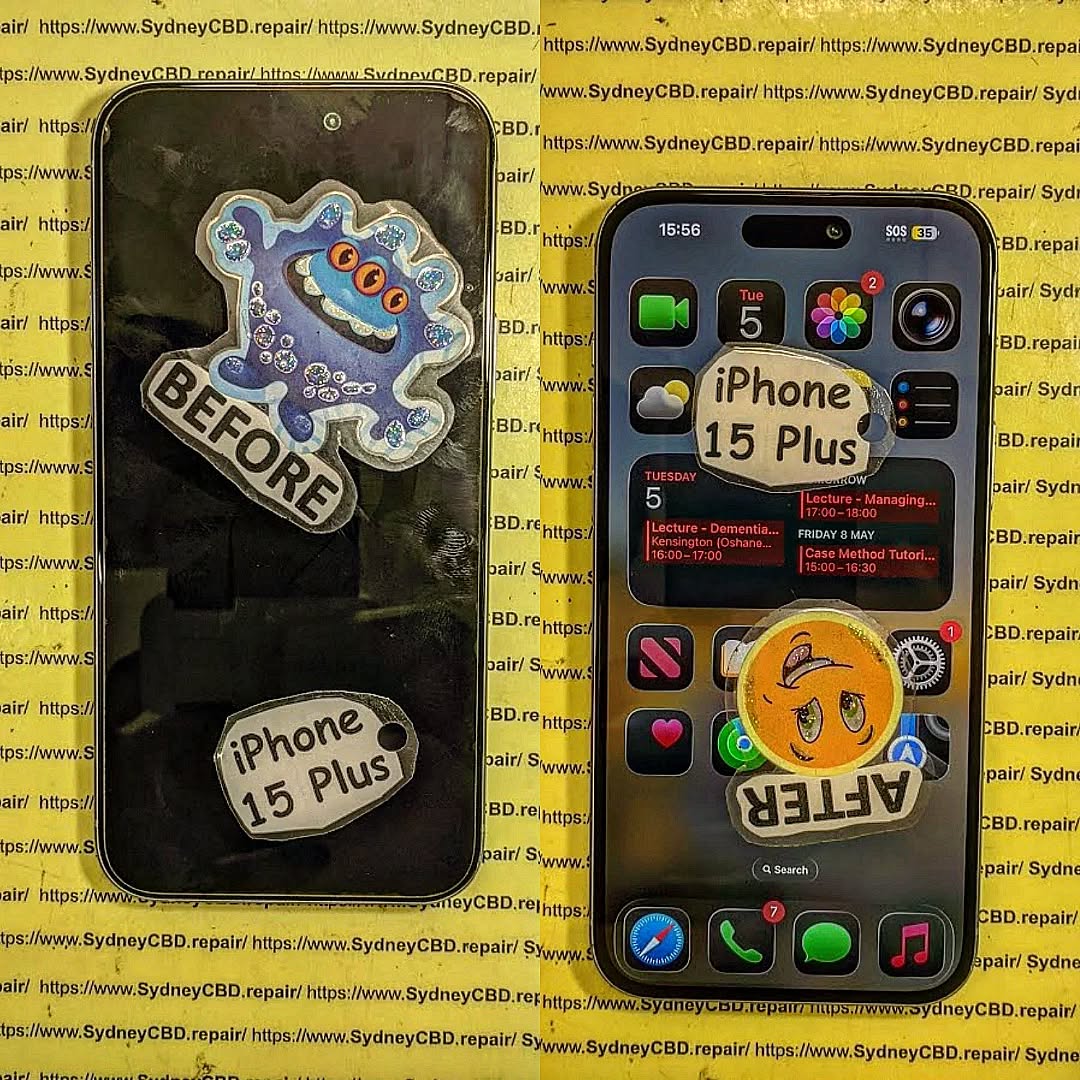
OVERHEATING ISSUE! Removing Swollen Batteries Safely From A Fragile Motorola Edge 50 – Ultimate Guide 7
Introduction to Swollen Batteries in Motorola Edge 50
The Motorola Edge 50 is known for its sleek design, high performance, and ultra-thin construction. However, like many modern smartphones, it’s not immune to one major issue—battery swelling. If you’ve ever noticed your phone bulging, overheating, or separating at the seams, you’re likely dealing with a swollen battery.
Battery swelling isn’t just inconvenient—it’s dangerous. It can lead to screen damage, internal component failure, or even fire hazards if handled incorrectly. That’s why learning how to remove a swollen battery safely is essential, especially for fragile devices like the Edge 50.
In this guide, we’ll walk you through everything you need to know, from identifying the issue to safely removing and replacing the battery. Whether you’re a technician or a DIY enthusiast, this comprehensive resource ensures you stay safe and effective.
The Motorola Edge 50 is designed with compact internal components and strong adhesive seals. While this improves aesthetics and durability, it makes repairs more challenging.
Key fragility factors include:
Thin OLED display
Strong adhesive bonding
Compact internal layout
Delicate flex cables
Risks of DIY Repairs
Attempting battery removal without proper knowledge can result in:
Screen cracks
Motherboard damage
Battery puncture (very dangerous)
Loss of waterproofing
That said, with the right guidance and tools, safe removal is absolutely possible.
Essential Tools for Safe Battery Removal
Recommended Repair Tools
To safely remove a swollen battery, you’ll need:
Heat gun or hairdryer
Plastic pry tools
Suction cup
Isopropyl alcohol (90%+)
Tweezers
Screwdriver set (precision)
Safety Equipment Checklist
Never skip safety gear:
Anti-static gloves
Safety goggles
Fire-resistant surface
Battery-safe container
Preparing Your Workspace
Ideal Environment Setup
Set up a clean, well-lit workspace:
Flat surface
No flammable materials nearby
Good ventilation
Organized tools
Safety Precautions Before Starting
Before you begin:
Power off the phone completely
Discharge battery below 25%
Remove SIM tray
Avoid metal tools near battery
Step-by-Step Guide to Removing a Swollen Battery
Powering Down the Device
Always ensure the device is turned off. This minimizes risk of short circuits.
Opening the Phone Safely
Apply gentle heat to soften adhesive
Use suction cup to lift the back panel
Insert plastic pry tool carefully
⚠️ Avoid forcing it open—this can crack the glass.
Disconnecting Components
Once inside:
Disconnect battery connector first
Remove any shields or screws
Carefully detach flex cables
Removing the Swollen Battery
This is the most critical step.
Apply isopropyl alcohol around battery edges
Gently pry using plastic tools
Never puncture or bend the battery
If resistance is strong, apply more heat and patience.
Handling a Swollen Battery Safely
What NOT to Do
Never:
Puncture the battery
Use metal tools directly
Expose it to heat or flames
Throw it in regular trash
Proper Disposal Methods
Dispose of swollen batteries at:
Certified e-waste centers
Electronics recycling facilities
Authorized service centers
Installing a New Battery
Choosing the Right Replacement
Always use:
OEM or high-quality replacement batteries
Compatible model-specific parts
Trusted suppliers
Reassembly Tips
Reconnect all components securely
Replace adhesive strips
Test before sealing device
Preventing Future Battery Swelling
Charging Best Practices
Avoid overnight charging
Use original chargers
Keep battery between 20–80%
Temperature Management
Avoid extreme heat
Don’t leave phone in cars
Remove case during heavy use
Common Mistakes to Avoid
Rushing the process
Using sharp tools
Ignoring safety precautions
Reusing damaged batteries
Professional Repair vs DIY
DIY repair saves money but carries risks. Professional services offer:
Expertise
Warranty
Proper tools
If unsure, always go pro.
FAQs
1. Is a swollen battery dangerous?
Yes, it can explode or catch fire if mishandled.
2. Can I still use my phone with a swollen battery?
No, stop using it immediately to avoid further damage.
3. How long does battery replacement take?
Typically 30–90 minutes depending on skill level.
4. Can swelling damage other components?
Yes, it can damage the screen, motherboard, and casing.
5. What causes overheating in the Motorola Edge 50?
Heavy usage, poor ventilation, or battery failure are common causes.
6. Is it worth repairing or replacing the phone?
If the device is otherwise functional, repair is usually worth it.
Conclusion
Handling a swollen battery in a fragile phone like the Motorola Edge 50 can feel overwhelming, but with the right approach, tools, and patience, it’s entirely manageable. The key is safety—never rush, never force, and always prioritize proper handling.
By following this guide, you’ll not only protect your device but also ensure your own safety. And remember, when in doubt, seeking professional help is always the smartest move.
External Resource: Learn more about battery safety from the official Consumer Product Safety Commission guidelines.
David from Sydney CBD Repair Centre – The Best place to fix mobile phones as 7 Years In A Row! Top Mobile Phone Repair In Sydney. More than 2000 Positive Reviews on Google and Same Day Repairs.
We take pride in delivering exceptional repair services for all major phone brands including Apple, Samsung, Google, and more. Our expert technicians use only genuine parts and offer 90days warranty on repairs. Located in the heart of Sydney CBD, we’re your one-stop solution for all mobile device repairs.
Our commitment to excellence has earned us the trust of thousands of satisfied customers. Whether it’s a cracked screen, battery replacement, or water damage repair, we handle it all with professional care and expertise. Walk in today and experience why we’re Sydney’s #1 choice for mobile phone repairs.
Visit us for:
✓ Same Day Express Repairs
✓ Genuine Parts Guarantee
✓ Professional Technicians
✓ Competitive Pricing
✓ 2000+ 5-Star Google Reviews
✓ 7-Time Award Winner for Best Phone Repairs
WHY YOUR PHONE VIBRATES BUT HAS NO DISPLAY AFTER A DIY REPAIR + SHOCKING 7 REASONS
Introduction: Understanding the Issue
If your phone suddenly vibrates but has no display after a DIY repair, you’re not alone. This is one of the most common problems people face after attempting to fix their own devices. The phone seems alive—it vibrates, rings, or even receives notifications—but the screen stays black. Frustrating, right?
In many cases, this issue happens because something went wrong during the repair process. Even a tiny mistake—like a loose connector or a damaged cable—can cause the display to stop working entirely.
The good news? Most of these issues are fixable.
This guide will walk you through everything you need to know, from causes to solutions, in a clear and easy-to-understand way.
Even a tiny misconnection can prevent the screen from turning on.
Key signs:
Phone vibrates normally
No flicker or image at all
2. Faulty Replacement Screen
Not all replacement parts are created equal.
Cheap or defective screens may:
Fail immediately
Lack proper compatibility
Have manufacturing defects
Tip: Always use high-quality or original-grade parts.
3. Backlight Circuit Failure
Sometimes the screen is actually working—but you just can’t see it.
This happens when the backlight circuit is damaged.
Test this:
Shine a flashlight on the screen
Look closely for faint images
If you see something, your backlight is the issue.
4. Battery or Power Delivery Issues
After a repair, the battery might:
Be improperly connected
Have insufficient voltage
Be damaged
The phone may still vibrate, but not supply enough power for the display.
5. Short Circuit During Repair
A small mistake—like using metal tools incorrectly—can cause a short circuit.
This can damage:
Display IC
Power lines
Connectors
Unfortunately, this often requires advanced repair.
6. Motherboard Damage
This is more serious.
If the motherboard is damaged:
Display signals won’t reach the screen
The phone may still vibrate
This can happen due to:
Excess heat
Static electricity
Physical damage
7. Software Glitch After Repair
It’s rare—but possible.
Sometimes:
The phone fails to boot properly
Firmware becomes corrupted
A simple restart or software restore may fix it.
How DIY Repairs Can Lead to Display Failure
DIY repairs are great—but they come with risks.
Here’s where things often go wrong:
Improper tools → damage components
Rushing the process → missed connections
Static electricity → invisible damage
Over-tightening screws → pressure damage
Even experienced DIYers make mistakes. That’s just part of the game.
Step-by-Step Troubleshooting Guide
Check Screen Connections
Open the phone carefully
Disconnect and reconnect the display cable
Ensure it clicks into place
Test with Another Screen
If possible:
Try a different display
This confirms if your screen is faulty
Inspect for Physical Damage
Look for:
Bent pins
Torn cables
Burn marks
Force Restart the Device
Try:
Holding power + volume buttons
Waiting for reboot vibration
Shine Light Test
As mentioned earlier:
Use a flashlight
Check for faint display
Tools You Need for Proper Diagnosis
Having the right tools makes a huge difference:
Precision screwdriver set
Plastic pry tools
Anti-static wrist strap
Multimeter
Replacement test screen
Without proper tools, you’re basically guessing.
When to Stop DIY and Seek Professional Help
Let’s be honest—not every problem can be fixed at home.
Stop DIY if:
You suspect motherboard damage
You see burn marks
The phone still fails after multiple attempts
Professional technicians have:
Advanced diagnostic tools
Microsoldering equipment
Experience with complex repairs
Cost Comparison: DIY vs Professional Repair
Repair Type
Cost
Risk Level
DIY Repair
Low
High
Professional Repair
Moderate
Low
While DIY saves money upfront, mistakes can make repairs more expensive later.
Preventing Future Display Issues
Prevention is always better than repair.
Follow these tips:
Use high-quality parts
Work in a clean, static-free environment
Take your time—don’t rush
Watch reliable repair guides
Keep screws organized
Expert Tips from Repair Technicians
Here are some insider tips:
Always disconnect the battery first
Never force connectors
Double-check every connection before closing
Test the phone before sealing it
These small habits can save you big headaches.
FAQs
1. Why does my phone vibrate but has no display after a DIY repair?
This usually happens due to a loose display connector, faulty screen, or backlight issue.
2. Can a black screen be fixed without replacing the display?
Yes, sometimes. If it’s a connection or software issue, you may not need a new screen.
3. How do I know if my screen or motherboard is damaged?
Try a new screen. If it still doesn’t work, the motherboard may be the problem.
4. Is it safe to continue using a phone with no display?
Not really. You risk further damage or data loss.
5. How much does it cost to fix this issue professionally?
It depends, but typically ranges from $50 to $200, depending on the problem.
6. Can software updates fix this issue?
Only if the problem is software-related—which is less common.
Conclusion
When your phone vibrates but has no display after a DIY repair, it can feel like a disaster. But in reality, it’s often a fixable issue.
From loose connectors to faulty screens, most causes are straightforward once you know where to look. The key is to troubleshoot methodically and avoid rushing.
And remember—DIY repairs are great, but knowing when to call a professional can save you time, money, and stress.
David from Sydney CBD Repair Centre – The Best place to fix mobile phones as 7 Years In A Row! Top Mobile Phone Repair In Sydney. More than 2000 Positive Reviews on Google and Same Day Repairs.
We take pride in delivering exceptional repair services for all major phone brands including Apple, Samsung, Google, and more. Our expert technicians use only genuine parts and offer 90days warranty on repairs. Located in the heart of Sydney CBD, we’re your one-stop solution for all mobile device repairs.
Our commitment to excellence has earned us the trust of thousands of satisfied customers. Whether it’s a cracked screen, battery replacement, or water damage repair, we handle it all with professional care and expertise. Walk in today and experience why we’re Sydney’s #1 choice for mobile phone repairs.
Visit us for:
✓ Same Day Express Repairs
✓ Genuine Parts Guarantee
✓ Professional Technicians
✓ Competitive Pricing
✓ 2000+ 5-Star Google Reviews
✓ 7-Time Award Winner for Best Phone Repairs
Glass Only vs Full AMOLED Assembly: When Can You Save Your Screen? 11 Powerful Facts Every Phone Owner Should Know
Introduction
Smartphone screen damage is one of the most common problems mobile users face. Whether you’ve dropped your device on concrete, accidentally sat on it, or experienced pressure damage inside a pocket, a cracked display can be frustrating.
One of the most common questions customers ask repair technicians is: Should I choose a glass only repair or a full AMOLED assembly replacement?
The answer depends on the condition of the screen beneath the glass. Understanding the differences between Glass Only vs Full AMOLED Assembly repairs can help you save money while ensuring your phone performs as expected.
In this comprehensive guide, we’ll explain how smartphone displays work, when a glass-only repair is possible, and when a full AMOLED assembly replacement becomes necessary.
Today’s premium smartphones use sophisticated display technology that combines several layers into a single assembly.
Many flagship devices from brands such as the Apple Inc., Samsung Electronics, and Google feature AMOLED or OLED displays that deliver vibrant colors, deep blacks, and exceptional brightness.
These displays are made of multiple bonded layers working together seamlessly.
What Is Glass Only Repair?
Glass-only repair involves replacing only the top protective glass while preserving the original AMOLED display underneath.
Specialized equipment separates the cracked glass from the display panel, followed by re-bonding a new glass layer using optical adhesive and vacuum lamination technology.
This repair method retains the original factory AMOLED screen.
What Is a Full AMOLED Assembly Replacement?
A full AMOLED assembly replacement involves replacing the complete display module, including:
Front glass
AMOLED display
Touch digitizer
Frame (in some models)
This method installs an entirely new screen assembly rather than salvaging the original display.
To understand Glass Only vs Full AMOLED Assembly, it’s important to know the layers involved.
Outer Glass Layer
The glass is the protective surface users touch daily. It shields the internal display from scratches and impacts.
Common protective materials include:
Gorilla Glass
Ceramic Shield
Tempered glass technologies
Touch Digitizer
The digitizer detects finger movements and touch gestures.
In many modern phones, the digitizer is integrated directly into the AMOLED panel.
AMOLED Panel
The AMOLED panel generates the image you see on-screen.
Features include:
Self-illuminating pixels
Superior contrast ratios
Better battery efficiency
Rich color reproduction
Damage to this layer often determines whether a repair can remain glass-only.
Glass Only vs Full AMOLED Assembly Explained
The debate surrounding Glass Only vs Full AMOLED Assembly repairs often comes down to cost versus necessity.
Major Differences
Feature
Glass Only Repair
Full AMOLED Assembly
Replaces Glass
Yes
Yes
Replaces AMOLED
No
Yes
Retains Original Screen
Yes
No
Lower Cost
Usually
Sometimes No
Repair Difficulty
Higher
Moderate
Factory Display Preserved
Yes
No
Repair Complexity
Glass-only repairs require:
Laser separation machines
Vacuum laminators
Bubble removal equipment
Highly trained technicians
Full assembly replacements generally involve removing and replacing the entire display module.
Although technically simpler, replacement parts can be significantly more expensive.
When Glass Only Repair Is Possible
Glass-only repair can save substantial money when the display underneath remains functional.
Signs the AMOLED Is Still Healthy
You may qualify for a glass-only repair if:
Screen displays images normally
Colors remain accurate
Brightness functions properly
Touch responsiveness is intact
No black spots appear
No green lines are visible
No screen flickering occurs
If these conditions are met, technicians may successfully separate the damaged glass and preserve the original AMOLED.
Common Eligible Devices
Many premium devices support glass-only refurbishment, including:
iPhone Pro models
Samsung Galaxy Ultra devices
Google Pixel Pro devices
Huawei flagship phones
Xiaomi premium smartphones
However, repair feasibility varies by model and damage severity.
When Full AMOLED Assembly Is Required
Unfortunately, not every cracked screen can be saved.
Black Spots and Dead Pixels
A full AMOLED assembly replacement becomes necessary when you notice:
Ink-like black spots
Dead pixel clusters
Bright colored lines
Screen bleeding
Internal cracks
These symptoms indicate physical damage to the AMOLED layer itself.
Once the display matrix is damaged, replacing only the glass won’t solve the problem.
Touch Issues and Display Failure
Other indicators requiring full replacement include:
Unresponsive touch areas
Complete display blackout
Ghost touching
Flickering screens
Severe burn-in combined with cracks
In these situations, the entire display assembly must be replaced.
Cost Comparison
One major reason customers ask about Glass Only vs Full AMOLED Assembly repairs is cost.
Labor and Equipment Costs
Glass-only repair requires advanced machinery and significant technician expertise.
Equipment often includes:
Laser separators
OCA laminators
Vacuum chambers
Bubble removal machines
Although labor-intensive, the repair avoids replacing expensive AMOLED panels.
Long-Term Value
Cost advantages may include:
Repair Type
Typical Cost Range
Glass Only Repair
Lower
Full AMOLED Assembly
Higher
Genuine AMOLED Replacement
Highest
Because AMOLED panels represent the most expensive component, preserving the original screen can dramatically reduce repair costs.
For many flagship phones, customers may save hundreds of dollars through glass-only refurbishment.
Advantages of Glass Only Repair
When applicable, glass-only repair offers several benefits.
Retains Factory Display Quality
The original display remains intact.
Benefits include:
Factory-calibrated colors
Original brightness performance
Manufacturer touch sensitivity
Genuine AMOLED quality
More Affordable
Since the AMOLED panel remains untouched, part costs are significantly reduced.
Environmentally Friendly
Glass-only repair reduces electronic waste.
Instead of discarding an entire display assembly, technicians reuse the functioning AMOLED panel.
Faster Parts Availability
Replacement glass is often easier to source than complete display assemblies.
This can shorten repair timelines.
Advantages of Full AMOLED Assembly Replacement
Although more expensive, full replacement offers important advantages.
Comprehensive Solution
Replacing the entire module eliminates:
AMOLED damage
Touch failures
Display artifacts
Internal cracks
Higher Success Rate
A complete assembly replacement generally has a predictable outcome.
Technicians do not need to separate delicate layers.
Suitable for Severe Damage
When internal display damage exists, full replacement is often the only viable option.
Manufacturer-Level Restoration
Using high-quality parts can restore the device close to original specifications.
Risks and Challenges
Every repair approach carries risks.
Glass Only Repair Risks
Potential challenges include:
AMOLED cracking during separation
Hidden display damage
Re-lamination defects
Dust contamination
This is why technician experience matters significantly.
Full AMOLED Assembly Risks
Possible concerns include:
Higher repair cost
Variable aftermarket part quality
Color calibration differences
Reduced brightness with low-grade replacements
Choosing reputable repair providers helps minimize these risks.
Choosing the Right Repair Provider
Not all repair centers offer true glass-only refurbishment.
Before proceeding, ask:
Do you perform in-house glass-only repairs?
What equipment is used?
Is the AMOLED tested beforehand?
Is a warranty provided?
Are genuine-quality parts available?
A qualified repair specialist should provide transparent answers and realistic expectations.
What to Look For
Choose a repair provider that offers:
Experienced technicians
Professional equipment
Positive customer reviews
Warranty coverage
Clear pricing
For additional information about display technology, visit the official AMOLED technology resource from Samsung Display.
Frequently Asked Questions
FAQ 1: Is glass-only repair as good as replacing the entire screen?
Yes, if the AMOLED panel remains undamaged. The repair preserves the original factory display, often providing excellent results.
FAQ 2: How do I know if my AMOLED is damaged?
Signs include black spots, colored lines, flickering, dead pixels, and display blackout.
FAQ 3: Can every cracked phone screen be repaired with glass-only replacement?
No. The underlying AMOLED panel must be fully functional.
FAQ 4: Is glass-only repair cheaper?
Generally, yes. Since the expensive AMOLED panel is retained, repair costs are often significantly lower.
FAQ 5: How long does glass-only repair take?
Repair times vary depending on the model and technician workload, but many repairs can be completed within the same day or a few business days.
FAQ 6: Does glass-only repair affect display quality?
When performed correctly by skilled technicians, display quality should remain virtually identical to the original factory screen.
FAQ 7: Which repair option lasts longer?
Both repairs can be durable when performed professionally using quality materials and proper installation techniques.
FAQ 8: Should I choose genuine AMOLED replacement parts?
Whenever possible, genuine or premium-quality AMOLED assemblies provide the best color accuracy, brightness, and reliability.
Conclusion
Understanding Glass Only vs Full AMOLED Assembly repairs can help smartphone owners make informed decisions when facing screen damage.
If the AMOLED display remains healthy and fully functional, glass-only repair can offer substantial savings while preserving the original factory screen. However, when internal display damage exists, a full AMOLED assembly replacement becomes the safest and most reliable solution.
The key is obtaining an accurate diagnosis from a reputable repair specialist. By evaluating the screen carefully, you can determine whether your display can be saved or whether a complete replacement is necessary.
Ultimately, choosing the right repair method ensures your device returns to peak performance while protecting your investment for years to come.
David from Sydney CBD Repair Centre – The Best place to fix mobile phones as 7 Years In A Row! Top Mobile Phone Repair In Sydney. More than 2000 Positive Reviews on Google and Same Day Repairs.
We take pride in delivering exceptional repair services for all major phone brands including Apple, Samsung, Google, and more. Our expert technicians use only genuine parts and offer 90days warranty on repairs. Located in the heart of Sydney CBD, we’re your one-stop solution for all mobile device repairs.
Our commitment to excellence has earned us the trust of thousands of satisfied customers. Whether it’s a cracked screen, battery replacement, or water damage repair, we handle it all with professional care and expertise. Walk in today and experience why we’re Sydney’s #1 choice for mobile phone repairs.
Visit us for:
✓ Same Day Express Repairs
✓ Genuine Parts Guarantee
✓ Professional Technicians
✓ Competitive Pricing
✓ 2000+ 5-Star Google Reviews
✓ 7-Time Award Winner for Best Phone Repairs
Are Cheap Replacement Parts Killing Your Phone? Comparing Genuine vs Aftermarket + Shocking Truth Revealed in 2026
Introduction: Why Cheap Replacement Parts Matter More Than You Think
When your phone breaks, the first thing most people search for is cheap replacement parts. It sounds harmless—save money, fix the device, move on. But the truth is more complicated. The choice between cheap replacement parts, genuine components, and aftermarket alternatives can determine whether your phone lasts another 3 years—or dies within 3 months.
In today’s repair market, smartphones are more advanced than ever. That means even small components like screens, batteries, and charging ports are engineered with precision. Replacing them with low-quality alternatives may save money upfront but often leads to hidden long-term costs.
Throughout this guide, we’ll break down how cheap replacement parts compare to genuine and aftermarket options, the risks involved, and how to make smarter repair decisions without wasting money.
Cheap replacement parts are low-cost components manufactured with reduced quality control standards. They are usually produced by third-party factories that do not follow the original manufacturer’s specifications.
In many cases, cheap replacement parts are made using:
Lower-grade materials
Less durable adhesives
Inconsistent quality testing
Non-certified manufacturing processes
This makes them significantly cheaper but also less reliable.
To understand the difference clearly, let’s break it down:
OEM (Original Equipment Manufacturer)
These are parts made by or for the original brand (Apple, Samsung, Google, etc.). They offer the highest compatibility and performance.
Aftermarket Parts
These are third-party parts designed to match OEM specifications. Quality varies widely—some are excellent, others are average.
Cheap Replacement Parts
These are the lowest tier. While they may look similar, they often lack proper calibration and durability.
Why Cheap Replacement Parts Are So Popular
The main reason people choose cheap replacement parts is affordability. Repair shops may also recommend them to offer lower service prices. In price-sensitive markets like mobile repair, this creates strong demand.
However, what many users don’t realize is that saving money today can lead to repeated repairs later.
Material and Build Quality Differences
A genuine screen, for example, includes:
High-refresh display calibration
Scratch-resistant glass
Factory color accuracy
In contrast, cheap replacement parts may have:
Dull color reproduction
Reduced touch sensitivity
Poor lamination quality
Over time, these differences become obvious during daily use.
Compatibility Issues with Cheap Replacement Parts
Phones are not just hardware devices—they rely on software calibration too. Cheap parts often lack proper integration, which leads to:
False touch response
Battery percentage errors
Camera focus issues
Warning messages on modern smartphones
Even though the phone still works, the experience becomes frustrating.
Cost Comparison Table
Part Type
Price
Quality
Lifespan
Genuine
High
Excellent
2–5 years
Aftermarket
Medium
Good–Fair
1–3 years
Cheap Replacement Parts
Low
Poor–Fair
3–12 months
Why Shops Still Offer Cheap Replacement Parts
Repair shops sometimes use cheap replacement parts to stay competitive. Customers often request the lowest price, and businesses respond accordingly.
However, reputable technicians usually warn customers about trade-offs before installation.
H2: Risks and Performance Impact of Cheap Replacement Parts
Battery Risks You Should Never Ignore
One of the most dangerous uses of cheap replacement parts is in batteries. Low-quality batteries may:
Overheat quickly
Drain faster than expected
Swell and damage the phone body
Even pose fire risks in extreme cases
Battery safety is not something to compromise on.
Screen Quality and Touch Issues
Screens made from cheap replacement parts often suffer from:
Reduced brightness
Poor viewing angles
Ghost touch problems
Delayed responsiveness
If you use your phone for gaming or business, this can seriously affect productivity.
Hidden Damage Over Time
The real danger of cheap replacement parts is not immediate failure—it’s slow damage. For example:
Poor charging ports can damage the motherboard
Low-quality screens can strain the GPU
Weak adhesives can reduce water resistance
Over months, these issues accumulate and shorten the phone’s life.
Security and Software Issues
Modern smartphones detect non-original components. This can lead to:
Warning notifications
Disabled features (like Face ID or True Tone)
Reduced system performance
Some cheap replacement parts are not properly recognized by the system at all.
Real-World User Experience
Users often report:
“My battery drains twice as fast after repair.”
“The screen feels laggy compared to before.”
“The phone heats up randomly.”
These complaints are frequently linked to cheap replacement parts.
External Expert Insight
According to repair specialists at iFixit, using low-quality components can significantly reduce device lifespan and reliability: https://sydneycbd.repair/
H2: How to Choose Between Genuine and Aftermarket Safely
Step 1: Understand Your Priorities
Before choosing parts, ask yourself:
Do I want the cheapest option?
Do I need long-term reliability?
Will I keep this phone for years?
If longevity matters, avoiding cheap replacement parts is usually the smarter move.
Step 2: Ask the Right Questions at Repair Shops
A trustworthy technician should be able to explain:
Where the part comes from
Whether it is OEM or aftermarket
Warranty coverage
If they avoid these questions, be cautious.
Step 3: Check Warranty Coverage
Good repair shops usually offer:
30–90 day warranties on parts
Free replacement for defective items
Cheap replacement parts often come with little or no warranty.
Step 4: Compare Price vs Value
Saving $20 today is not worth replacing the same part three times. Always evaluate long-term cost, not just upfront pricing.
Step 5: Look for Signs of Quality Parts
Good indicators include:
Smooth touch response
Accurate colors
No warning messages
Stable battery performance
Step 6: Avoid “Too Good to Be True” Deals
If a repair price is extremely low, it likely involves cheap replacement parts. Quality components simply cannot be that inexpensive.
Step 7: Trusted Repair Practices
Professional repair centers typically:
Test parts before installation
Calibrate components after repair
Use certified suppliers
FAQs About Cheap Replacement Parts
1. Are cheap replacement parts safe for phones?
They can work temporarily, but they often reduce performance and may pose long-term risks.
2. Do cheap replacement parts damage batteries?
Yes, especially low-quality charging components or replacement batteries.
3. How long do cheap replacement parts last?
Usually between 3 months and 1 year depending on usage.
4. Are aftermarket parts better than cheap replacement parts?
Yes, aftermarket parts are generally higher quality and more reliable.
5. Will my phone lose features with cheap replacement parts?
Yes, features like Face ID or True Tone may stop working.
6. Why do repair shops use cheap replacement parts?
To reduce cost and offer cheaper repair options, but it comes with trade-offs.
Conclusion: Should You Risk Cheap Replacement Parts?
Choosing cheap replacement parts might seem like a smart financial decision at first, but the hidden risks often outweigh the savings. From reduced performance to long-term hardware damage, the impact can be significant.
If your goal is to keep your phone running smoothly, investing in genuine or high-quality aftermarket components is the safer choice. Think of it not as spending more—but as protecting your device’s future.
David from Sydney CBD Repair Centre – The Best place to fix mobile phones as 7 Years In A Row! Top Mobile Phone Repair In Sydney. More than 2000 Positive Reviews on Google and Same Day Repairs.
We take pride in delivering exceptional repair services for all major phone brands including Apple, Samsung, Google, and more. Our expert technicians use only genuine parts and offer 90days warranty on repairs. Located in the heart of Sydney CBD, we’re your one-stop solution for all mobile device repairs.
Our commitment to excellence has earned us the trust of thousands of satisfied customers. Whether it’s a cracked screen, battery replacement, or water damage repair, we handle it all with professional care and expertise. Walk in today and experience why we’re Sydney’s #1 choice for mobile phone repairs.
Visit us for:
✓ Same Day Express Repairs
✓ Genuine Parts Guarantee
✓ Professional Technicians
✓ Competitive Pricing
✓ 2000+ 5-Star Google Reviews
✓ 7-Time Award Winner for Best Phone Repairs
Identifying Micro-Fractures: The Hidden Reason Your Phone Screen Randomly Stops Responding + Ultimate Guide to Fix It in 7 Proven Steps
Introduction: Why Your Phone Screen Randomly Stops Responding
If your phone sometimes works perfectly but suddenly freezes or ignores your touch, you might be dealing with something more serious than a software glitch. One of the most overlooked issues is Identifying Micro-Fractures: The Hidden Reason Your Phone Screen Randomly Stops Responding.
These tiny, often invisible cracks inside the display layers can disrupt touch signals without showing obvious external damage. Many users assume it’s just lag or a faulty app, but in reality, it’s often hardware-related.
Understanding Identifying Micro-Fractures: The Hidden Reason Your Phone Screen Randomly Stops Responding can save you from unnecessary repairs, data loss, and frustration. Let’s break it down step by step.
Micro-fractures are extremely small cracks within the display glass or digitizer layer. Unlike visible cracks, these are hidden beneath the surface and often go unnoticed.
When talking about Identifying Micro-Fractures: The Hidden Reason Your Phone Screen Randomly Stops Responding, it’s important to know that these fractures don’t always break the screen outwardly. Instead, they interfere with internal signal pathways.
Layers Affected by Micro-Fractures
A smartphone screen typically includes:
Outer glass layer
Touch digitizer layer
LCD/OLED display layer
Even a small internal break can disrupt touch sensitivity.
Why They Are Hard to Detect
Micro-fractures are tricky because:
They don’t show visible cracks
Touch issues come and go
Restarting the phone temporarily “fixes” it
This makes Identifying Micro-Fractures: The Hidden Reason Your Phone Screen Randomly Stops Responding a challenge for most users.
Your phone screen relies on a grid of electrical signals. Micro-fractures interrupt these pathways, causing delayed or missing touch responses.
Intermittent Touch Failure
A key sign of Identifying Micro-Fractures: The Hidden Reason Your Phone Screen Randomly Stops Responding is inconsistency. The screen might work fine one moment and freeze the next.
Pressure Sensitivity Issues
You may notice:
Certain screen areas not responding
Ghost touches
Random scrolling or tapping
These are all classic symptoms.
Temperature and Stress Effects
Heat or physical pressure can expand the fractures, making the problem worse over time.
Common Causes Behind Hidden Screen Damage
1. Accidental Drops
Even a small drop can create internal stress fractures without visible cracks.
2. Pressure in Pockets or Bags
Sitting on your phone or packing it tightly can trigger hidden damage.
3. Manufacturing Weak Points
Some screens are more fragile due to thinner glass design.
4. Temperature Changes
Sudden heat or cold weakens internal layers.
5. Poor Quality Repairs
Low-quality replacement screens often develop micro-fractures faster.
Understanding these causes is essential for Identifying Micro-Fractures: The Hidden Reason Your Phone Screen Randomly Stops Responding early.
Diagnosis and Professional Repair Insights
How Technicians Detect Micro-Fractures
Experts use specialized tools such as:
Screen pressure mapping
Digitizer testing tools
Microscope inspection
This helps confirm Identifying Micro-Fractures: The Hidden Reason Your Phone Screen Randomly Stops Responding accurately.
Tempered glass helps absorb shock before it reaches internal layers.
Avoid Pressure Stress
Never sit on your phone or keep it under heavy objects.
Keep Away from Extreme Temperatures
Heat and cold both weaken screen integrity.
Use Quality Charging Accessories
Cheap chargers can cause overheating, indirectly affecting the screen.
Regular Device Checkups
Early inspection helps in Identifying Micro-Fractures: The Hidden Reason Your Phone Screen Randomly Stops Responding before it worsens.
FAQs About Micro-Fractures and Screen Issues
1. What are micro-fractures in phone screens?
They are tiny internal cracks that affect touch sensitivity without visible damage.
2. Can micro-fractures fix themselves?
No, they usually worsen over time without repair.
3. Is screen freezing always caused by micro-fractures?
Not always—software issues can also cause it, but hardware should be checked first.
4. How do I confirm micro-fractures at home?
You can only suspect them through symptoms; professional diagnosis is needed.
5. Do micro-fractures spread?
Yes, they often expand with pressure or heat exposure.
6. Is replacement the only solution?
In most cases, yes—especially if the digitizer is affected.
Conclusion
Understanding Identifying Micro-Fractures: The Hidden Reason Your Phone Screen Randomly Stops Responding is crucial for preventing long-term screen failure. These invisible cracks often go unnoticed but can severely affect performance.
By recognizing early symptoms, avoiding physical stress, and seeking timely repairs, you can extend your phone’s lifespan significantly. When in doubt, professional diagnosis is always the safest route.
David from Sydney CBD Repair Centre – The Best place to fix mobile phones as 7 Years In A Row! Top Mobile Phone Repair In Sydney. More than 2000 Positive Reviews on Google and Same Day Repairs.
We take pride in delivering exceptional repair services for all major phone brands including Apple, Samsung, Google, and more. Our expert technicians use only genuine parts and offer 90days warranty on repairs. Located in the heart of Sydney CBD, we’re your one-stop solution for all mobile device repairs.
Our commitment to excellence has earned us the trust of thousands of satisfied customers. Whether it’s a cracked screen, battery replacement, or water damage repair, we handle it all with professional care and expertise. Walk in today and experience why we’re Sydney’s #1 choice for mobile phone repairs.
Visit us for:
✓ Same Day Express Repairs
✓ Genuine Parts Guarantee
✓ Professional Technicians
✓ Competitive Pricing
✓ 2000+ 5-Star Google Reviews
✓ 7-Time Award Winner for Best Phone Repairs
The Hidden Cost of Cheap Repairs: 7 Shocking Reasons Non-Genuine Screens Fail in Six Months
Introduction to Smartphone Screen Repairs
Smartphones have become part of daily life. People use them for work, communication, banking, entertainment, and navigation. So when a screen cracks or stops working, most users want a fast and affordable repair. That’s where cheap screen replacement services often catch attention.
At first glance, low-cost repairs seem like a smart choice. Spending less money today feels practical, especially when premium smartphone repairs can appear expensive. However, there’s a major downside many users don’t discover until months later. Non-genuine screens often fail quickly, creating more problems and higher long-term costs.
Cheap screen repairs may initially restore the appearance of a phone, but they rarely restore full performance and reliability. Many aftermarket displays use lower-quality materials, weak adhesives, and poor manufacturing standards. As a result, problems begin appearing within weeks or months.
Consumers commonly report:
Flickering displays
Touchscreen delays
Random ghost touching
Poor brightness
Battery overheating
Cracked glass from minor drops
The reality is simple. A cheap repair today can lead to multiple repairs tomorrow.
In the mobile repair industry, technicians regularly see devices returning after six months with failing non-genuine screens. In many cases, customers end up paying twice because the first repair did not last.
That’s why understanding the difference between genuine and non-genuine parts matters so much.
Price is often the biggest reason customers choose low-cost repairs. Many people compare quotes online and naturally select the cheapest option available. Unfortunately, repair pricing rarely tells the whole story.
Budget repair shops sometimes reduce costs by using:
Low-grade aftermarket displays
Refurbished damaged panels
Incompatible replacement components
Weak waterproof seals
Cheap adhesives
For customers, the phone may appear “fixed” after installation. The screen turns on, touch works, and the device looks normal. But internally, major compromises often exist.
Here’s why cheap repairs feel tempting:
Reason
Why Consumers Choose It
Lower upfront cost
Saves money immediately
Fast turnaround
Same-day service appeals to busy users
Online advertisements
Discounts create urgency
Lack of technical knowledge
Many users don’t know screen quality differences
Older phones
Users hesitate spending more on aging devices
Still, the initial savings can disappear quickly.
For example, a genuine screen replacement might last years, while a cheap display may fail within six months. Once repeat repairs, data risks, and downtime are added up, the total cost becomes much higher.
Moreover, cheap screens often reduce resale value. Buyers can usually tell when a display is non-genuine due to color distortion, uneven brightness, or poor touch sensitivity.
So although the lower price tag looks appealing, it often hides serious long-term compromises.
A genuine screen is manufactured to meet the original device specifications. These displays are designed to work seamlessly with the smartphone’s hardware, software, sensors, and power management systems.
Genuine screens typically include:
Original OLED or LCD technology
High-quality digitizers
Durable strengthened glass
Factory-grade brightness calibration
Accurate color reproduction
Reliable touch responsiveness
Because they meet manufacturer standards, genuine screens deliver the same user experience as the original display installed in the phone.
Premium repair providers prioritize genuine parts because reliability matters. Genuine displays also reduce the risk of compatibility problems and unexpected system errors.
Common Types of Aftermarket Screens
Not all aftermarket screens are equal. Some are decent quality, while others are extremely poor. Unfortunately, many cheap repair services use the lowest-grade options available.
Common aftermarket screen types include:
Screen Type
Quality Level
Copy LCD
Very low
Soft OLED
Moderate
Hard OLED
Lower durability
Refurbished OEM
Varies
Premium aftermarket
Better but still not original
Low-end copy displays are the most problematic. These screens often use poor materials and inferior electronics. Although they cost less, they fail far more frequently.
Users may notice:
Dull colors
Thick bezels
Delayed touch response
Excessive battery usage
Random blackouts
In short, non-genuine screens rarely match the quality of authentic components.
The Real Reason Cheap Screens Fail Quickly
Inferior OLED and LCD Technology
Display technology plays a huge role in smartphone performance. High-end smartphones rely on advanced OLED and LCD panels engineered for precision and efficiency.
Cheap replacement screens often use outdated or low-grade display technology. As a result, image quality suffers immediately.
Common issues include:
Burn-in problems
Uneven brightness
Poor sunlight visibility
Flickering displays
Dead pixels
The lower manufacturing standards also reduce lifespan dramatically.
Premium OLED screens are carefully calibrated for heat management and energy efficiency. Cheap displays lack this refinement, causing excessive stress on internal components.
That’s one major reason non-genuine screens fail within six months.
Weak Glass Durability
Many cheap displays use fragile glass that cracks easily. Unlike premium strengthened glass, low-cost alternatives lack proper reinforcement.
Even small drops can cause:
Spider cracks
Corner fractures
Touch failure
Display bleeding
Customers often feel frustrated because the phone breaks again after minor accidents that the original screen would likely survive.
Poor Touch Response Components
The touchscreen digitizer is another major weakness in cheap repairs.
A poor-quality digitizer can lead to:
Delayed typing
Ghost touching
Unresponsive gestures
Gaming lag
Scrolling problems
These issues become especially noticeable during gaming, video editing, or multitasking.
Users often blame the phone itself when the real problem is the low-quality replacement screen.
Hidden Problems Caused by Non-Genuine Screens
Battery Drain Issues
One hidden danger of non-genuine screens is increased battery consumption.
Cheap displays are often less power efficient. They demand more energy from the battery to maintain brightness and touch responsiveness.
As a result, users may notice:
Faster battery drain
Reduced screen-on time
Excessive charging cycles
Shorter battery lifespan
Over time, this creates another expensive repair problem.
Overheating Problems
Low-quality displays frequently generate excess heat. Poor internal circuitry can strain the motherboard and battery.
Overheating can cause:
Random shutdowns
Device lag
Performance throttling
Battery swelling risks
Heat is one of the biggest enemies of smartphone longevity. Cheap repairs often worsen this issue significantly.
Signal and Sensor Malfunctions
Modern smartphones rely on delicate sensors integrated near the screen assembly.
Poor replacement screens can interfere with:
Face ID
Fingerprint sensors
Ambient light sensors
Proximity sensors
Auto brightness
This creates frustrating daily problems.
For example, some phones may keep the display active during calls because the proximity sensor no longer functions correctly.
The Financial Cost of Repeated Repairs
Many consumers believe they’re saving money with cheap repairs. Ironically, they often spend far more in the long run.
Consider this comparison:
Repair Option
Initial Cost
Average Lifespan
Long-Term Cost
Cheap aftermarket repair
Low
3–6 months
High due to repeat repairs
Genuine screen repair
Higher
Years
Lower overall
Repeated failures create additional costs like:
Lost productivity
Data risks
Travel expenses
Time without a phone
Multiple repair fees
Additionally, some repair shops offer little or no warranty coverage for cheap parts.
That leaves customers paying again when problems appear.
How Cheap Repairs Affect Phone Performance
Face ID and Fingerprint Sensor Risks
Modern flagship phones use advanced biometric systems. These systems require precise calibration and compatibility.
Cheap replacement screens can interfere with:
Facial recognition speed
Fingerprint scanning accuracy
Security reliability
In some cases, biometric features stop working entirely after poor-quality repairs.
That’s especially common when inexperienced technicians damage sensitive flex cables during installation.
Brightness and Color Accuracy Problems
One of the clearest signs of a non-genuine screen is poor visual quality.
Users often notice:
Yellow tinting
Blue hue distortion
Weak contrast
Reduced brightness
Inaccurate skin tones
These issues affect:
Gaming
Streaming
Photography
Social media editing
Professional work
Genuine displays are calibrated carefully to maintain accurate visual performance.
Cheap replacements usually are not.
Safety Concerns Linked to Low-Quality Screens
Safety is another overlooked issue.
Poor-quality repairs can create serious hazards, including:
Battery punctures
Electrical shorts
Overheating
Fire risks
Low-grade adhesives may also weaken the phone’s structural integrity.
In waterproof devices, cheap repairs often destroy water resistance completely. That means even light moisture exposure can damage internal components.
Consumers should never underestimate the safety importance of proper repairs.
Signs Your Screen Replacement Is Non-Genuine
Many users don’t realize they received a non-genuine display until problems appear later.
Here are common warning signs:
Symptom
Possible Cause
Dim brightness
Cheap LCD/OLED panel
Thick bezels
Poor aftermarket manufacturing
Fast battery drain
Inefficient screen electronics
Ghost touches
Weak digitizer
Screen flickering
Low-quality display controller
Poor viewing angles
Inferior panel quality
Another clue is the repair price itself. If the quote sounds dramatically cheaper than competitors, corners are likely being cut somewhere.
How to Choose a Reliable Repair Service
Questions to Ask Before Repair
Before handing over a smartphone, customers should ask important questions.
Examples include:
Are genuine parts used?
Is there a repair warranty?
How experienced are the technicians?
Will waterproof sealing be restored?
Are diagnostics included?
A trustworthy repair provider answers these questions clearly and honestly.
Importance of Warranty Coverage
Warranty protection shows confidence in repair quality.
Reliable repair shops usually provide warranties because they trust the durability of their parts and workmanship.
Look for:
Written warranty terms
Transparent repair policies
Positive customer reviews
Experienced technicians
Consumers should avoid repair services that refuse warranty coverage.
Why Genuine Parts Save Money Long-Term
Although genuine repairs cost more initially, they usually provide far better value.
Benefits include:
Longer lifespan
Better touch performance
Accurate colors
Improved durability
Reduced battery strain
Stronger resale value
Most importantly, genuine parts reduce the likelihood of repeat repairs.
That means fewer headaches and lower overall ownership costs.
In the long run, quality repairs protect both the device and the user’s investment.
For more information about professional repair standards and genuine parts, visit Apple Support.
Frequently Asked Questions
Why do non-genuine screens fail so quickly?
Non-genuine screens often use low-quality materials and poor manufacturing standards. This leads to touch problems, flickering, overheating, and durability issues within months.
Can cheap screen replacements damage my phone?
Yes. Poor-quality screens can affect battery life, sensors, Face ID systems, and motherboard performance.
Are aftermarket OLED screens safe?
Some premium aftermarket OLED screens are acceptable, but very cheap versions can cause overheating and electrical issues.
How can I tell if my screen replacement is genuine?
Signs include accurate colors, strong brightness, smooth touch response, and proper sensor functionality. Poor visual quality often indicates a non-genuine screen.
Is it worth paying more for genuine parts?
Absolutely. Genuine parts usually last longer, maintain better performance, and reduce repeat repair costs.
Do cheap repairs void waterproofing?
In many cases, yes. Poor installation and weak adhesives often compromise the phone’s water resistance.
Conclusion
Cheap smartphone repairs may appear convenient at first, but the long-term consequences can be costly. Non-genuine screens often fail within six months because of poor materials, weak construction, and inferior electronics.
These low-quality repairs don’t just affect display quality. They can harm battery life, sensors, performance, and overall device reliability.
Consumers who invest in genuine parts usually enjoy:
Better durability
Improved performance
Greater safety
Longer device lifespan
Lower long-term repair costs
Choosing a trusted repair provider is one of the smartest decisions any smartphone owner can make. Quality repairs protect your investment, preserve your user experience, and help avoid expensive repeat failures down the road.
David from Sydney CBD Repair Centre – The Best place to fix mobile phones as 7 Years In A Row! Top Mobile Phone Repair In Sydney. More than 2000 Positive Reviews on Google and Same Day Repairs.
We take pride in delivering exceptional repair services for all major phone brands including Apple, Samsung, Google, and more. Our expert technicians use only genuine parts and offer 90days warranty on repairs. Located in the heart of Sydney CBD, we’re your one-stop solution for all mobile device repairs.
Our commitment to excellence has earned us the trust of thousands of satisfied customers. Whether it’s a cracked screen, battery replacement, or water damage repair, we handle it all with professional care and expertise. Walk in today and experience why we’re Sydney’s #1 choice for mobile phone repairs.
Visit us for:
✓ Same Day Express Repairs
✓ Genuine Parts Guarantee
✓ Professional Technicians
✓ Competitive Pricing
✓ 2000+ 5-Star Google Reviews
✓ 7-Time Award Winner for Best Phone Repairs
Sydney CBD Repair Centre – Where Quality Meets Reliability.
Call : +61280114119
Website: Sydney CBD Repair Centre
📱 Why Your Phone Feels Slow After a Screen Repair: The Truth About Parts + Hidden Performance Issues + 7 Critical Factors
🔍 Introduction to Post-Repair Performance Issues
If you’ve recently had your phone repaired and noticed a lag, you’re not alone. Many users complain that their device feels sluggish or unresponsive after a screen replacement. Naturally, this raises concerns about whether something went wrong.
Here’s the truth: a screen repair shouldn’t slow down your phone—but in many cases, it does.
So what’s going on?
This article dives deep into why your phone feels slow after a screen repair, uncovering the real causes behind performance issues and how to fix them effectively.
At first glance, your phone’s screen may seem like a purely visual component. However, modern smartphones integrate the display deeply with system performance. The touchscreen digitizer communicates directly with the processor, meaning any fault here can impact responsiveness.
A poorly functioning display can:
Delay touch response
Cause ghost touches
Increase CPU workload
⚖️ Hardware vs Software Bottlenecks
When diagnosing why your phone feels slow after a screen repair, it’s crucial to distinguish between:
Type
Cause
Impact
Hardware
Poor parts, bad installation
Lag, overheating
Software
Bugs, corrupted files
Freezing, crashes
Understanding this difference helps you apply the right fix.
As a result, your phone may feel delayed—even if the internal components are fine.
🛠️ 2. Improper Installation
Even with a high-quality screen, poor installation can cause issues such as:
Loose connectors
Misaligned components
Pressure on internal hardware
These mistakes can affect performance immediately after repair.
🔋 3. Battery Damage During Repair
Screen replacements require opening the phone, which exposes delicate components like the battery.
If damaged, your battery may:
Drain faster
Throttle CPU performance
Cause lag spikes
This is a hidden reason why your phone feels slow after a screen repair.
💻 4. Software Glitches After Repair
Sometimes, the issue isn’t hardware at all.
Repairs can trigger:
System bugs
App conflicts
Cache corruption
This can slow down your phone significantly.
📲 5. Touch Digitizer Issues
The digitizer translates touch into commands. If it’s faulty:
Touch becomes inconsistent
Input lag increases
Apps feel slow
Even small delays can make your phone feel sluggish.
🌡️ 6. Overheating Due to Poor Sealing
After repair, improper sealing can lead to:
Dust intrusion
Poor heat dissipation
When your phone overheats, it automatically reduces performance to cool down.
🔄 7. Background Processes Triggered After Repair
Repairs sometimes reset certain system functions, triggering:
App re-indexing
Cloud syncing
Updates
These processes consume resources, slowing your phone temporarily.
🧩 The Role of Genuine vs Aftermarket Parts
🏭 OEM vs Copy Screens
Type
Quality
Performance
OEM (Original)
High
Smooth
Aftermarket
Varies
Often slower
Genuine parts are designed to work seamlessly with your device, while aftermarket screens may not meet the same standards.
⚡ Performance Differences Explained
Using non-genuine parts can result in:
Lower brightness
Reduced touch sensitivity
Slower response times
This directly contributes to why your phone feels slow after a screen repair.
🚩 Signs Your Phone Was Poorly Repaired
Watch out for these warning signs:
Screen flickering
Touch delay
Fast battery drain
Phone overheating
Gaps around screen edges
If you notice any of these, it’s time to get your phone checked.
🛠️ How to Fix a Slow Phone After Screen Repair
💡 Software Fixes
Start with simple solutions:
Restart your phone
Clear cache
Update software
Factory reset (last resort)
🔍 Hardware Checks
If software fixes don’t help:
Inspect screen quality
Check battery health
Visit a professional technician
🛡️ Preventing Slow Performance in Future Repairs
Avoid future issues by:
Choosing reputable repair shops
Asking for genuine parts
Checking warranty options
A little caution goes a long way.
👨🔧 Expert Tips from Repair Professionals
Experienced technicians recommend:
Always disconnect battery before repair
Use calibrated tools
Test device thoroughly post-repair
These steps ensure optimal performance.
❓ FAQs
1. Why does my phone lag after a screen replacement?
Because of low-quality parts, installation errors, or software glitches.
2. Can a screen affect phone speed?
Yes, especially if the digitizer or display quality is poor.
3. Will resetting my phone fix the issue?
Sometimes—if the problem is software-related.
4. Are aftermarket screens bad?
Not always, but cheaper ones often cause performance issues.
5. How do I know if my repair was done properly?
Check for responsiveness, battery health, and screen alignment.
6. Should I go back to the repair shop?
Yes, especially if your phone feels slow after a screen repair.
✅ Conclusion
Experiencing lag after a repair can be frustrating. However, understanding why your phone feels slow after a screen repair empowers you to take action.
Whether it’s poor parts, installation mistakes, or software issues, the solution is often within reach. By choosing quality repairs and staying informed, you can ensure your device runs smoothly—just like it should.
David from Sydney CBD Repair Centre – The Best place to fix mobile phones as 7 Years In A Row! Top Mobile Phone Repair In Sydney. More than 2000 Positive Reviews on Google and Same Day Repairs.
We take pride in delivering exceptional repair services for all major phone brands including Apple, Samsung, Google, and more. Our expert technicians use only genuine parts and offer 90days warranty on repairs. Located in the heart of Sydney CBD, we’re your one-stop solution for all mobile device repairs.
Our commitment to excellence has earned us the trust of thousands of satisfied customers. Whether it’s a cracked screen, battery replacement, or water damage repair, we handle it all with professional care and expertise. Walk in today and experience why we’re Sydney’s #1 choice for mobile phone repairs.
Visit us for:
✓ Same Day Express Repairs
✓ Genuine Parts Guarantee
✓ Professional Technicians
✓ Competitive Pricing
✓ 2000+ 5-Star Google Reviews
✓ 7-Time Award Winner for Best Phone Repairs
TINY BUT TOUGH! iPhone 15 Pro Max Deep Internal Port Cleaning + Ultimate Guide 2026
Introduction to iPhone 15 Pro Max Deep Internal Port Cleaning
The iPhone 15 Pro Max is a powerhouse device—sleek, fast, and built for performance. But even the toughest gadgets can struggle with something as small as dust. That’s where iPhone 15 Pro Max deep internal port cleaning becomes crucial.
Over time, lint, debris, and microscopic particles accumulate inside the USB-C port. While it might seem harmless at first, this buildup can lead to inconsistent charging, overheating, or even permanent hardware damage. So yes—this tiny issue packs a surprisingly tough punch.
In this guide, we’ll walk you through everything you need to know. From identifying early warning signs to performing safe and effective cleaning, you’ll learn how to restore your device’s performance without risking damage.
Unlike older Lightning ports, the USB-C port on the iPhone 15 Pro Max offers faster charging and universal compatibility. It’s a major leap forward—but also slightly more exposed to debris due to its wider opening.
Internal Components Explained
Inside that small port lies a complex system:
Data transfer pins
Power connectors
Protective casing
Micro soldered connections
Because these components are delicate, iPhone 15 Pro Max deep internal port cleaning requires precision—not force.
…then debris is likely interfering with the connection.
Data Transfer Failures
Struggling to connect to a computer? That’s another red flag. Dust can block proper contact between pins, disrupting data flow.
Tools Required for Safe Port Cleaning
Professional vs DIY Tools
Here’s a quick comparison:
Tool Type
Recommended
Risk Level
Anti-static brush
✅ Yes
Low
Wooden toothpick
✅ Yes (carefully)
Medium
Compressed air
⚠️ Limited use
Medium
Metal pin
❌ No
High
What NOT to Use
Avoid:
Paper clips
Needles
Wet cloths
These can short-circuit or physically damage internal components.
Step-by-Step iPhone 15 Pro Max Deep Internal Port Cleaning
Preparation Phase
Before starting:
Power off your device
Remove any cables
Work in a well-lit area
Cleaning Process
Now, let’s get into the actual iPhone 15 Pro Max deep internal port cleaning:
Inspect the port
Use a flashlight to check for debris
Use a wooden pick
Gently loosen compacted lint
Brush it out
Use an anti-static brush to remove particles
Optional air burst
Lightly blow out remaining dust
Post-Cleaning Checks
Plug in your charger
Check for firm connection
Test charging speed
If everything feels snug and stable, you’ve done it right.
Common Mistakes to Avoid
Overcleaning Risks
Believe it or not, cleaning too often can wear out the port. Only clean when necessary.
Using Metal Tools
This is the biggest mistake. Metal conducts electricity and can damage internal circuits instantly.
Professional Cleaning vs DIY
Cost vs Risk
Option
Cost
Risk
Effectiveness
DIY Cleaning
Low
Medium
Moderate
Professional Repair
Higher
Low
High
If your device still struggles after cleaning, it’s best to consult a professional technician.
Preventing Future Port Issues
Daily Maintenance Tips
Keep your phone in a clean pocket
Avoid dusty environments
Use port covers if necessary
Clean lightly every few months
Consistency beats emergency fixes.
Safety Precautions
Avoiding Electrical Damage
Always:
Turn off your device
Avoid liquids
Use non-conductive tools
Skipping these steps can turn a simple clean into an expensive repair.
Impact on Device Longevity
Regular iPhone 15 Pro Max deep internal port cleaning doesn’t just fix problems—it prevents them. A clean port ensures:
Stable charging
Faster data transfer
Reduced wear on cables
In short, it extends your phone’s lifespan significantly.
FAQs
1. How often should I clean my iPhone port?
Every 2–3 months or when you notice charging issues.
2. Can dust really damage my phone?
Yes, buildup can block connections and cause overheating.
3. Is compressed air safe?
Only in short bursts. Too much pressure can push debris deeper.
4. Why is my phone still not charging after cleaning?
There may be internal damage or a faulty charging cable.
5. Can I use alcohol to clean the port?
No. Liquids can damage internal components.
6. Should I visit a repair shop instead?
If unsure or if problems persist, professional cleaning is safer.
Conclusion
The iPhone 15 Pro Max deep internal port cleaning process might seem small, but it plays a huge role in maintaining your device’s performance. With the right tools, careful technique, and a bit of patience, you can keep your phone running like new.
Still, don’t underestimate the risks. If you’re ever in doubt, seeking professional help is always the smarter move.
David from Sydney CBD Repair Centre – The Best place to fix mobile phones as 7 Years In A Row! Top Mobile Phone Repair In Sydney. More than 2000 Positive Reviews on Google and Same Day Repairs.
We take pride in delivering exceptional repair services for all major phone brands including Apple, Samsung, Google, and more. Our expert technicians use only genuine parts and offer 90days warranty on repairs. Located in the heart of Sydney CBD, we’re your one-stop solution for all mobile device repairs.
Our commitment to excellence has earned us the trust of thousands of satisfied customers. Whether it’s a cracked screen, battery replacement, or water damage repair, we handle it all with professional care and expertise. Walk in today and experience why we’re Sydney’s #1 choice for mobile phone repairs.
Visit us for:
✓ Same Day Express Repairs
✓ Genuine Parts Guarantee
✓ Professional Technicians
✓ Competitive Pricing
✓ 2000+ 5-Star Google Reviews
✓ 7-Time Award Winner for Best Phone Repairs
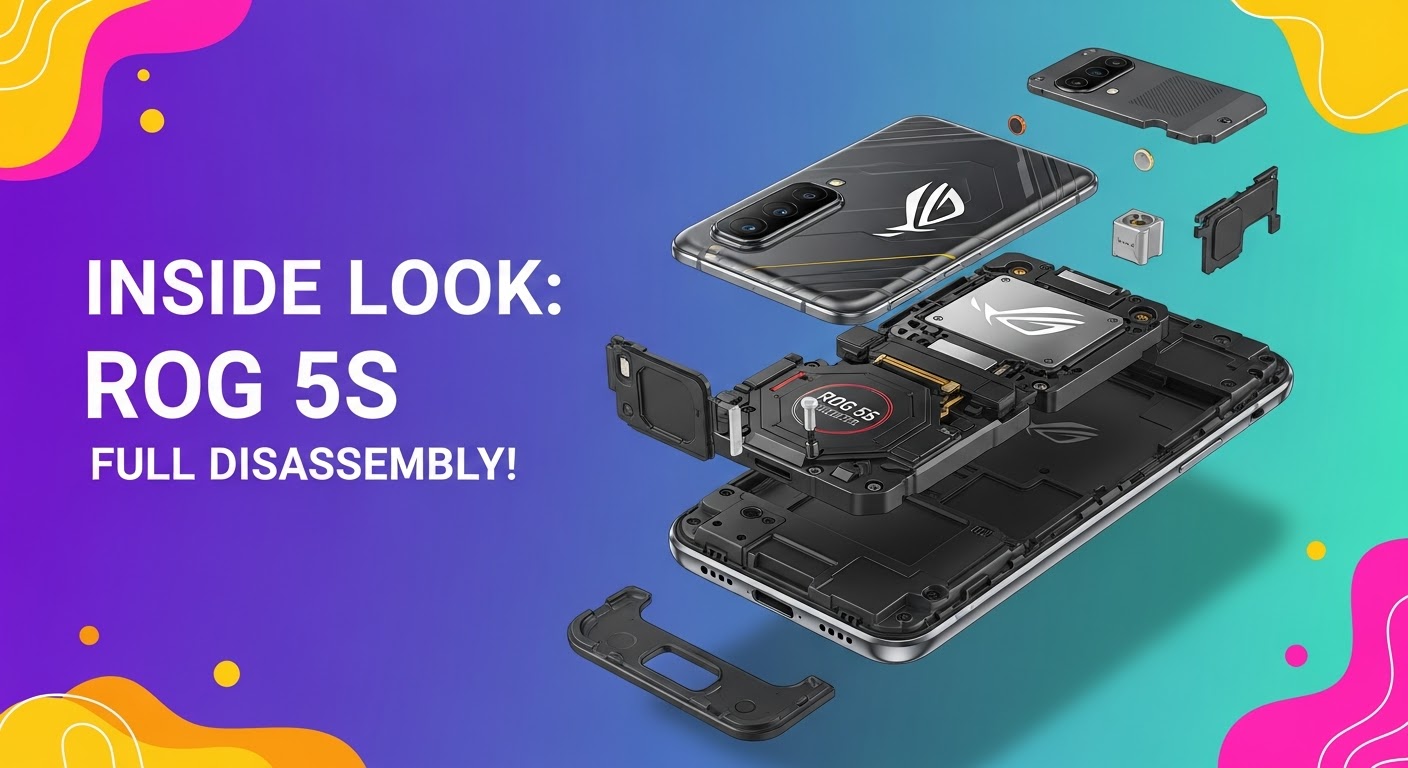
INSIDE LOOK: ROG 5S FULL DISASSEMBLY! Ultimate Step-by-Step Guide for Tech Enthusiasts
Introduction: Why the ROG 5S Stands Out
The ASUS ROG Phone 5S has earned its place as one of the most powerful gaming smartphones in the world. Packed with the Snapdragon 888+ processor, 144Hz AMOLED display, and dual front-facing speakers, it’s a beast built for performance. But when repairs become necessary—like screen replacements, battery issues, or charging port malfunctions—knowing how to disassemble the ROG 5S properly becomes essential.
Before grabbing your screwdriver, remember: this phone’s design is compact, layered, and delicate. Disassembling it requires patience, the right tools, and a steady hand.
To safely open your ROG 5S, gather the following tools:
Precision screwdriver set (Torx and Phillips)
Plastic prying tools and picks
Suction cup
ESD-safe tweezers
SIM ejector pin
Heat gun or hairdryer
Anti-static mat and gloves
Safety Tips and Workstation Setup
Work on a clean, static-free surface.
Disconnect all power sources before opening the device.
Use a magnetic screw mat to track different screw sizes.
Keep the phone components in order for easy reassembly.
Step 1: Removing the SIM Tray and Back Panel
Begin by ejecting the SIM card tray using a pin tool. Then, heat the edges of the back panel gently with a hairdryer for 1–2 minutes to loosen the adhesive.
Handling Adhesive and Heat Application
Use a suction cup to lift the glass slightly, then insert a plastic pick to cut through the adhesive. Work slowly around the frame to avoid cracking the back glass. Do not use metal tools—they can scratch or shatter the surface.
Step 2: Disconnecting the Battery and Motherboard Shields
Once the back panel is off, remove the screws securing the black plastic shields. These protect the motherboard, battery, and connectors underneath.
ESD Safety and Screw Management
Always use an ESD-safe tool when handling connectors. Static electricity can easily damage internal components. Keep screws labeled—ROG 5S uses multiple sizes, and misplacing them can cause reassembly issues.
Step 3: Camera Module and Flash Removal
The ROG 5S features a 64MP Sony IMX686 main sensor, ultra-wide lens, and macro lens. Carefully disconnect their ribbon connectors and lift the camera modules out.
Identifying Camera Components
Main Camera: Large rectangular sensor in the top-left corner.
Ultra-wide Lens: Positioned beside the main camera.
Macro Lens: Small, near the flash module.
Avoid touching the lens surfaces—fingerprints can degrade image quality.
Step 4: Accessing the Motherboard and Daughterboard
Next, detach the ribbon cables connecting the motherboard to the daughterboard (bottom section). These include the charging port flex, antenna cable, and battery connector.
Ribbon Cables and Connectors Explained
Each ribbon cable carries signals between key modules—display, charging, battery, and camera. Handle them gently to avoid tearing the flex.
Step 5: Removing the Cooling System and Fan Assembly
The ROG 5S’s gaming edge comes from its advanced cooling system—a vapor chamber, graphite sheets, and external AeroActive fan support.
Understanding ROG 5S Thermal Design
The cooling design keeps temperatures low during extended gaming. When disassembling, remove thermal paste carefully and store the vapor chamber away from dust and moisture.
Step 6: Speaker and Vibration Motor Extraction
Unscrew and disconnect the loudspeaker assembly from the bottom frame. The ROG 5S features dual front-facing speakers that deliver a surround sound experience.
Audio Module Insights
The vibration motor sits near the bottom, giving tactile feedback during gameplay. Use a plastic spudger to lift it gently from its housing.
Step 7: Display and Frame Separation
If you’re replacing the screen, this is the final step. Warm the display edges, use a suction cup, and carefully separate the AMOLED panel from the frame.
Avoiding Damage to AMOLED Panel
AMOLED displays are thin and fragile—avoid bending or applying pressure. Once separated, clean the frame before installing a replacement screen.
Applying too much heat, which can warp components.
Using metal tools near the battery or display.
Mixing screws from different modules.
Forgetting to disconnect the battery before handling cables.
Best Practices for Reassembly
Follow your disassembly steps in reverse. Reapply adhesive strips where necessary, ensure all connectors are properly aligned, and test before sealing the back panel.
How Sydney CBD Repair Centre Can Help
If you’re not confident in disassembling your ROG Phone 5S, visit Sydney CBD Repair Centre, the #1 mobile repair shop in Sydney—six years in a row!
Our expert technicians specialize in ASUS ROG, Samsung, iPhone, and Google Pixel repairs. We use only genuine parts, offer same-day service, and provide a 90-day warranty on all repairs.
1. Can I open my ROG 5S without professional help?
Yes, but it’s risky. Without the proper tools or knowledge, you may damage sensitive parts like the display or motherboard.
2. What should I do if my ROG 5S won’t power on after reassembly?
Double-check the battery and motherboard connections—loose flex cables are often the culprit.
3. Is the ROG 5S waterproof after disassembly?
No. Once the seal is broken, water resistance is compromised unless resealed professionally.
4. How much does a screen replacement cost in Sydney?
At Sydney CBD Repair Centre, prices are competitive and depend on model and part availability.
5. How long does a professional repair take?
Most ROG 5S repairs are completed same day, thanks to our express service.
6. Are all replacement parts original?
Yes, Sydney CBD Repair Centre uses genuine parts to maintain device integrity and performance.
Conclusion: Is DIY Worth It?
Disassembling your ROG 5S offers great insight into its engineering but requires skill, patience, and precision. For most users, professional repair services—like those from Sydney CBD Repair Centre—ensure a safer, faster, and warranty-backed solution.
Whether it’s a cracked screen, battery issue, or port damage, entrust your phone to the experts who’ve earned over 2000 5-star Google reviews for their reliability and craftsmanship.
David from Sydney CBD Repair Centre – The Best place to fix mobile phones as 6 Years In A Row! Top Mobile Phone Repair In Sydney. More than 2000 Positive Reviews on Google and Same Day Repairs.
📍 Visit us today for:
✓ Same Day Express Repairs
✓ Genuine Parts Guarantee
✓ Professional Technicians
✓ Competitive Pricing
✓ 2000+ 5-Star Google Reviews
✓ 6-Time Award Winner for Best Phone Repairs
The Hidden World of Charging Port Repairs: 10 Essential Insights
Introduction: The Hidden World of Charging Port Repairs
In today’s fast-paced digital world, our smartphones, tablets, and other electronic devices are more than just gadgets—they’re essential tools that keep us connected, productive, and entertained. Yet, despite their importance, one small but crucial component often gets overlooked: the charging port. It’s the lifeline of any device, responsible for transferring power from a charger to the battery. Without it, even the most advanced device becomes essentially useless.
Charging port problems are more common than many people realize. From dust and lint buildup to bent pins, corrosion, or electrical malfunctions, a faulty port can cause slow charging, intermittent power, or complete failure to charge. While some issues can be resolved with simple cleaning or troubleshooting, many require the expertise of trained technicians to restore full functionality.
This article dives deep into the hidden world of charging port repairs. We’ll explore the anatomy of charging ports, common signs of damage, causes, preventive measures, and the difference between DIY fixes and professional repairs. Whether you’re an Apple, Samsung, or Google device user, understanding the intricacies of charging port maintenance can save you time, money, and unnecessary frustration.
By the end of this guide, you’ll be equipped with practical knowledge to protect your devices, identify potential issues early, and ensure your technology continues running efficiently for years to come.
Charging ports are often overlooked but are essential for the functionality of every smartphone, tablet, and other electronic devices. Without a properly functioning charging port, even the most advanced devices are rendered practically useless. While most users take charging for granted, problems with these tiny connectors can lead to major headaches. From loose connections to corrosion caused by moisture, the issues can be as subtle as intermittent charging or as severe as total device failure.
Understanding charging port repairs is vital, especially as device technology continues to evolve. With Apple’s Lightning, Android’s USB-C, and older Micro-USB standards, the diversity of ports requires knowledge of both hardware and software behavior to ensure a successful repair. In this guide, we’ll explore everything you need to know about charging port repairs, from identifying issues and DIY fixes to professional repair services and preventative measures.
Charging ports serve as the primary interface between your device and a power source. These small connectors transfer electrical current and, in some cases, data for synchronization and software updates. Despite their small size, charging ports are complex structures that include multiple pins, metal contacts, and protective casings designed to handle high-frequency usage.
Types of Charging Ports
USB-C: Common in modern Android devices and laptops, USB-C offers fast charging and reversible plug orientation.
Lightning: Apple devices rely on this proprietary port, known for its compact design and durability.
Micro-USB: Older Android devices and accessories often use Micro-USB, which is prone to wear due to less robust construction.
Anatomy of a Charging Port
At a microscopic level, a charging port comprises:
Metal pins: Conduct electricity and facilitate data transfer.
Plastic housing: Protects the pins and aligns the connector.
Solder joints: Connect the port to the device’s motherboard.
Grounding points: Prevent short circuits and maintain electrical stability.
When any of these components fail, your device may refuse to charge or show erratic behavior.
Common Signs of Charging Port Damage
Detecting charging port issues early can prevent expensive repairs. Here are the most common warning signs:
Loose connections: Your cable wiggles or disconnects easily.
Slow charging: Even with certified chargers, the battery charges at a sluggish rate.
Intermittent charging: The device alternates between charging and not charging.
Device not recognizing the charger: No charging indicator or notifications.
Physical Damage
Physical damage often results from rough handling:
Bent or broken pins
Debris accumulation (dust, lint)
Exposure to moisture or liquids
Electrical Malfunctions
Electrical failures can occur without visible damage:
Corrosion from moisture
Short circuits
Faulty internal connections
Causes of Charging Port Failures
Several factors can contribute to charging port damage:
User Negligence
Forcing incompatible cables
Frequent plugging/unplugging
Dropping devices while charging
Environmental Factors
Dust accumulation
Exposure to liquids or humidity
Extreme temperatures causing metal expansion or contraction
DIY Troubleshooting Tips
Before seeking professional help, users can try some safe troubleshooting methods.
Cleaning Techniques
Soft brushes: Remove lint and debris gently.
Compressed air: Blow out dust from the port.
Isopropyl alcohol: Use with caution to clean corrosion.
Repair costs vary by device type and damage severity.
Apple Devices
Lightning port replacement: $100–$250
Common approach: Full port assembly replacement
Android Devices
USB-C or Micro-USB replacement: $80–$200
Samsung, Google, and other brands may have different part availability and costs
Preventive Measures for Longevity
Maintaining your charging port reduces the frequency of repairs.
Cleaning Regularly
Monthly lint removal
Gentle brushing or compressed air
Using Certified Accessories
Original or certified chargers and cables
Avoid cheap, non-certified alternatives
Avoiding Environmental Risks
Keep devices away from water
Avoid dusty or humid locations
Use protective cases when necessary
Upgrading or Modifying Your Device
Sometimes upgrading your charging port is a better long-term investment:
Faster charging ports: Some older devices benefit from USB-C retrofits.
Improved durability: Ports with reinforced pins or water resistance
Professional upgrade ensures device longevity
Case Studies
Samsung Galaxy S21 – Water exposure caused corrosion; professional cleaning and port replacement restored full functionality.
iPhone 12 – Bent pins prevented charging; replaced Lightning port under 90 minutes with warranty.
Google Pixel 6 – Dust accumulation caused intermittent charging; DIY cleaning resolved minor issues, but a professional check ensured safety.
FAQs
Q1: Can I repair a charging port myself?
A: Minor cleaning may be safe, but soldering or replacing ports should be left to professionals to avoid motherboard damage.
Q2: How long does a charging port repair take?
A: Most professional repairs take 30 minutes to 2 hours, depending on device complexity.
Q3: Why does my device charge slowly even with a new charger?
A: A dirty or corroded port can reduce current flow; inspecting and cleaning the port usually solves the problem.
Q4: Are third-party charging ports safe?
A: Only if they are certified; non-certified parts may cause further damage or void warranties.
Q5: What are signs of a damaged port in iPhones?
A: Intermittent charging, slow charge, or failure to sync with a computer.
Q6: How can I prevent charging port corrosion?
A: Avoid moisture, clean regularly, and use protective cases or port covers when necessary.
Conclusion
Charging ports may be small, but they play a crucial role in the daily functionality of your devices. Recognizing signs of damage early, implementing preventive care, and using professional repair services when necessary can save you time, money, and frustration. Whether you are an Apple enthusiast or an Android user, keeping your charging port clean, using certified accessories, and avoiding rough handling will extend your device’s lifespan significantly.
For professional repair in Sydney, visit Sydney CBD Repair Centre for genuine parts, expert technicians, and same-day service.
David from Sydney CBD Repair Centre – The Best place to fix mobile phones as 6 Years In A Row! Top Mobile Phone Repair In Sydney. More than 2000 Positive Reviews on Google and Same Day Repairs.
📍 Visit us today for:
✓ Same Day Express Repairs
✓ Genuine Parts Guarantee
✓ Professional Technicians
✓ Competitive Pricing
✓ 2000+ 5-Star Google Reviews
✓ 6-Time Award Winner for Best Phone Repairs