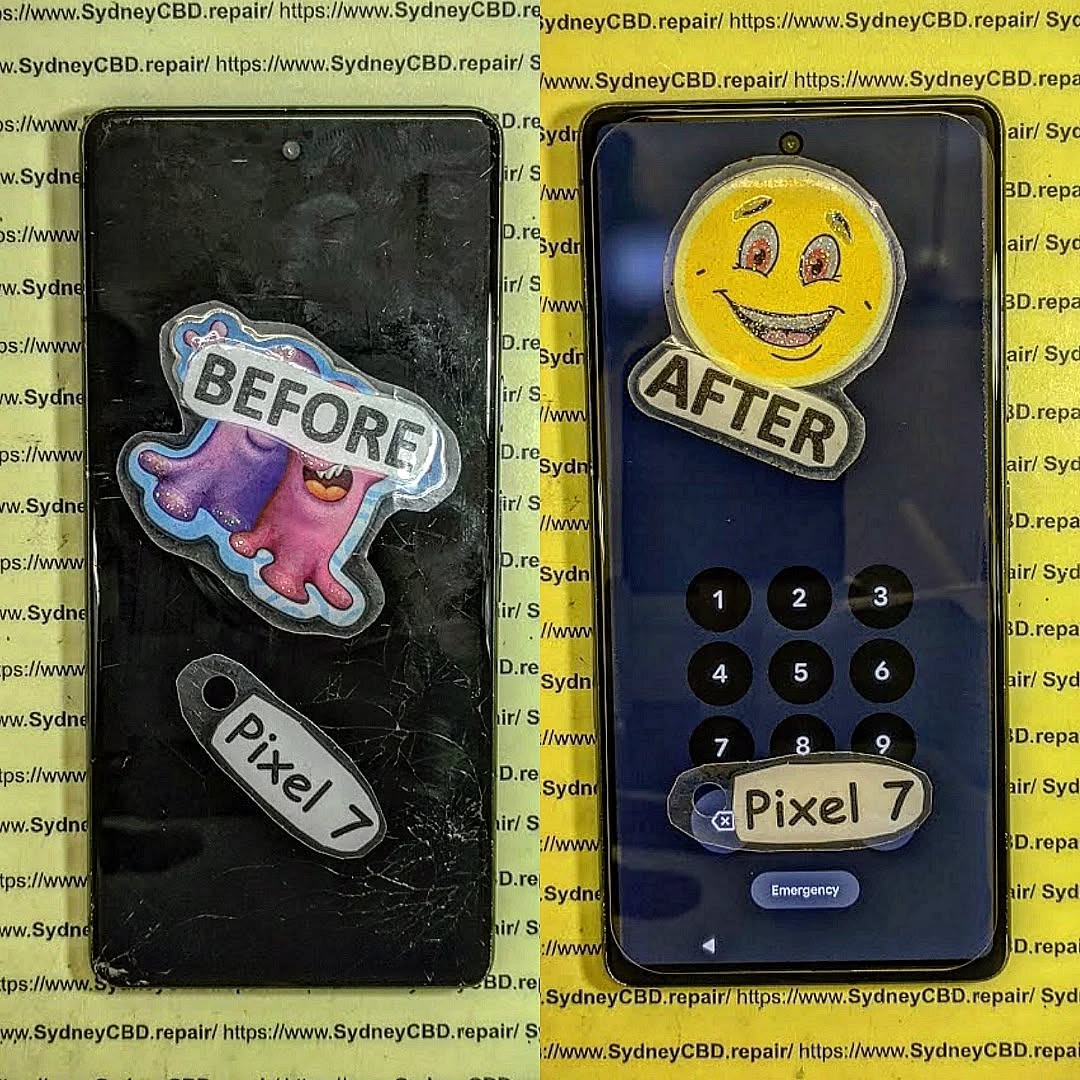
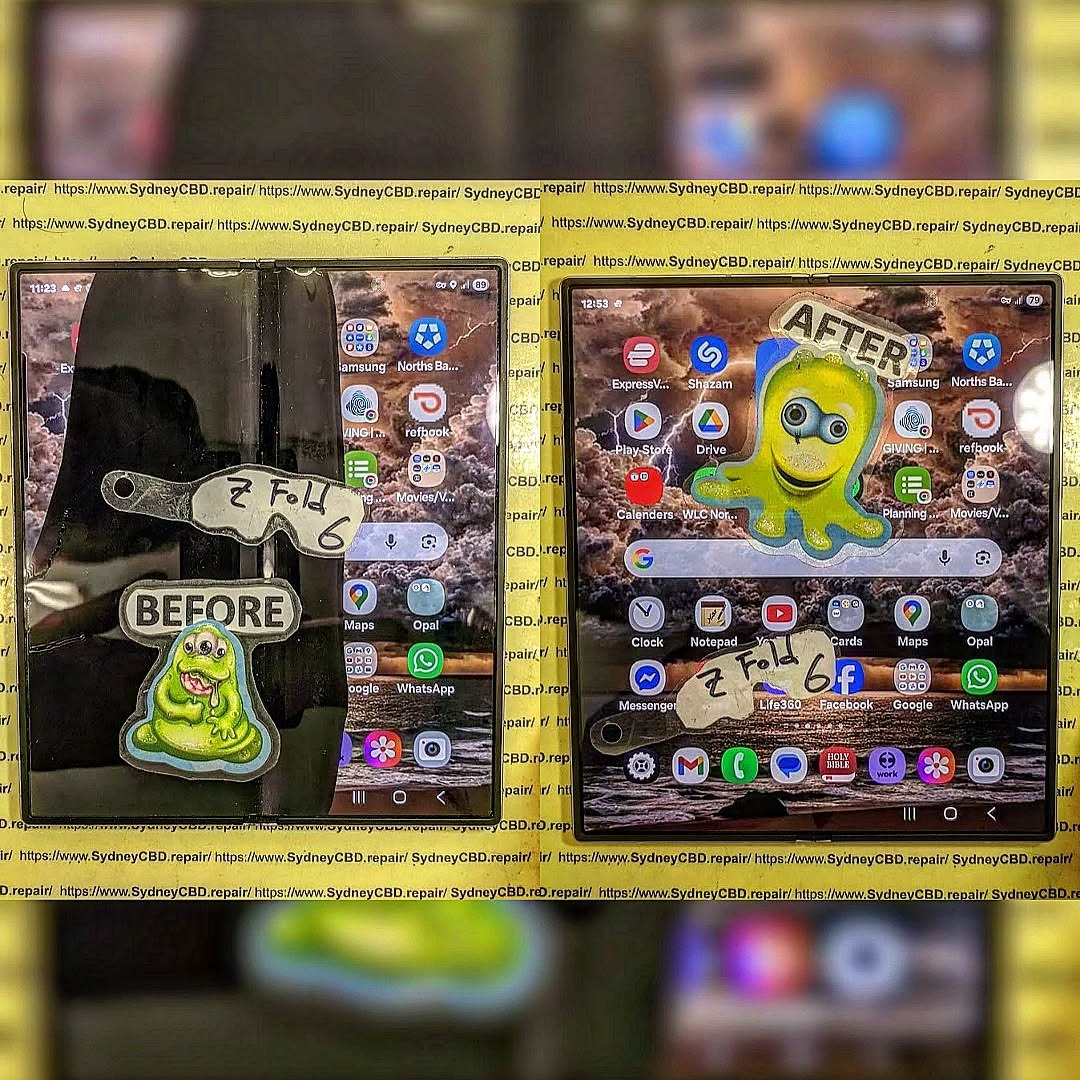
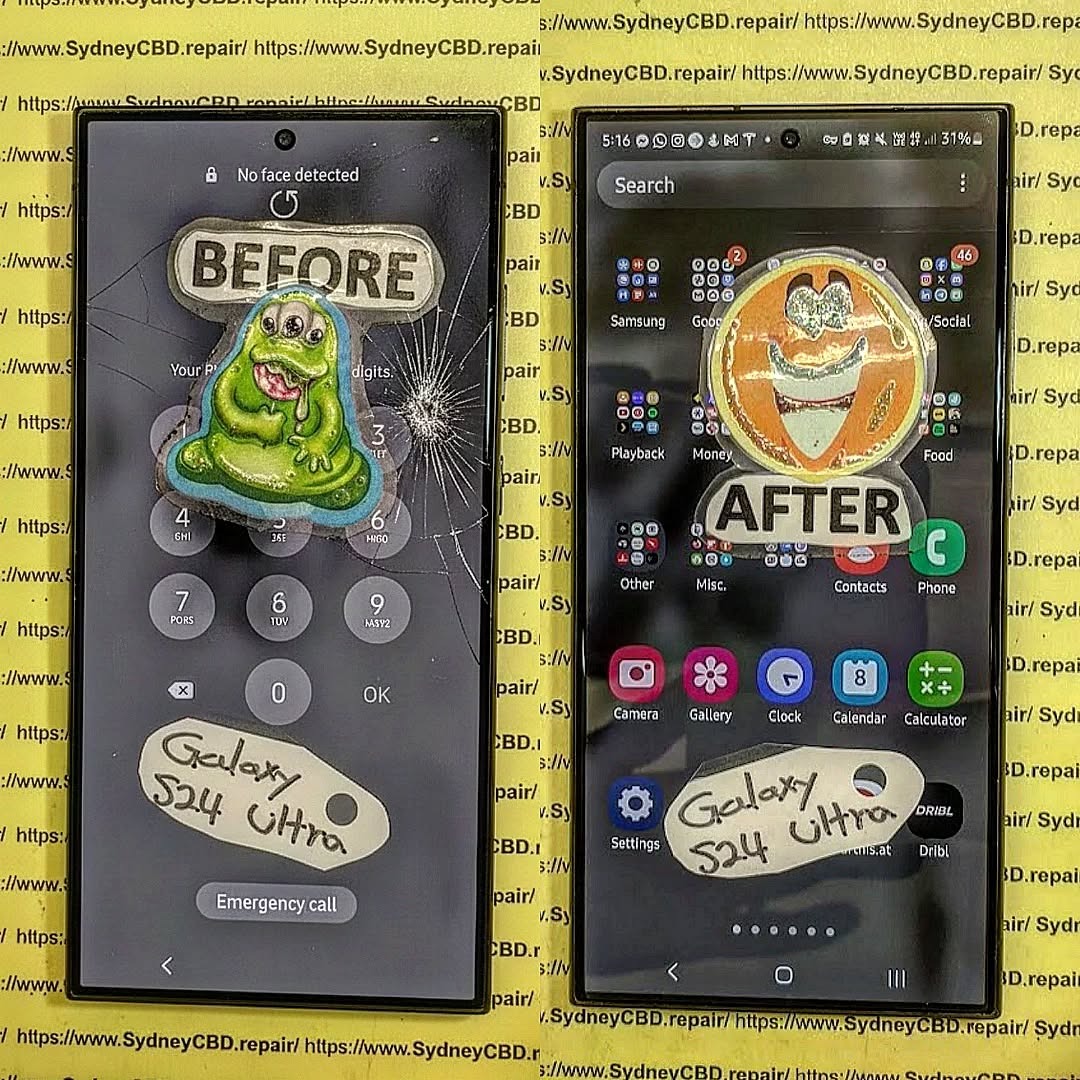
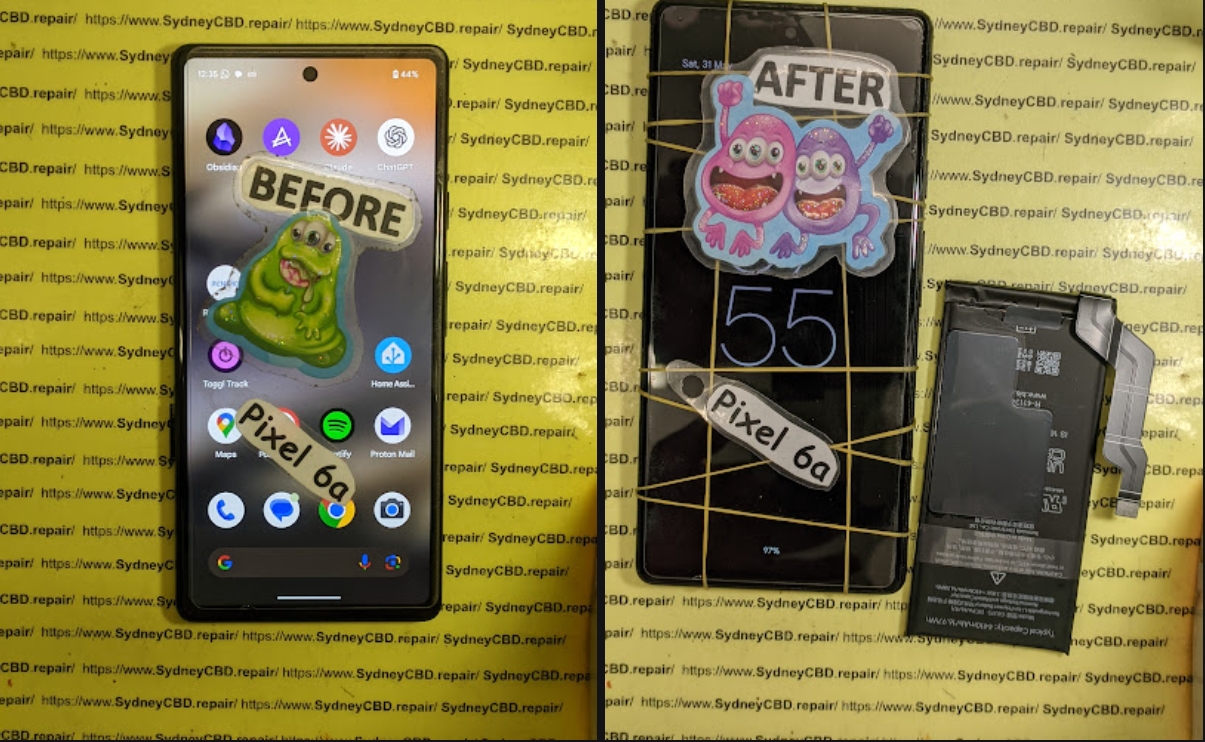
🔋 HIDDEN WEAR AND TEAR! Comprehensive Battery Health Swap For Google Pixel 7 Phone + Ultimate Guide 2026
Introduction to Battery Health
Battery health is one of those sneaky things most users ignore—until their phone suddenly starts dying at 20%. If you’re using the Google Pixel 7, understanding battery health isn’t just helpful—it’s essential.
Modern smartphones rely on lithium-ion batteries, which degrade over time. Even if you take good care of your device, battery capacity naturally declines. That’s just physics doing its thing.
So what’s the solution when your Pixel 7 no longer holds a charge like it used to? A battery health swap—a practical and cost-effective way to restore your device’s performance.
A degraded battery doesn’t just mean shorter screen time—it disrupts your entire routine. Imagine needing to charge your phone twice a day. That’s not just inconvenient; it’s inefficient.
Effects on System Performance
Here’s the kicker: poor battery health can actually slow down your phone.
Devices like the Pixel 7 may reduce performance to prevent crashes when the battery can’t deliver consistent power. So yes, your laggy phone might not be old—it might just be tired.
What is a Battery Health Swap?
A battery health swap refers to replacing your worn-out battery with a new one to restore optimal performance.
Battery Replacement vs Optimization
Optimization: Adjusting settings to extend battery life
Replacement: Physically installing a new battery
Optimization helps temporarily, but replacement solves the root problem.
When Should You Replace?
You should consider a battery health swap if:
Battery health is below 80%
Device shuts down unexpectedly
Charging frequency increases drastically
Tools and Equipment Required
Professional vs DIY Tools
If you’re going DIY, you’ll need:
Heat gun or hair dryer
Plastic pry tools
Suction cup
Isopropyl alcohol
Replacement battery
Professional repair centers, however, use precision tools and controlled environments—reducing risk significantly.
Step-by-Step Battery Swap Guide
Preparation
Power off the device
Remove SIM tray
Heat the back panel to loosen adhesive
Disassembly
Carefully pry open the back panel. Take your time—rushing can crack the glass.
Disconnect internal components like:
Battery connector
Wireless charging coil
Flex cables
Battery Replacement
Remove the old battery using adhesive remover if needed. Install the new battery and reconnect everything securely.
Reassembly
Seal the phone with new adhesive and test functionality before final closure.
Risks and Precautions
Safety Tips
Avoid puncturing the battery
Work in a static-free environment
Don’t use metal tools near circuits
Warranty Considerations
Opening your Pixel 7 may void its warranty. Always check your coverage before attempting a DIY repair.
Benefits of a Battery Health Swap
Performance Boost
A new battery restores:
Faster performance
Stable power delivery
Longer usage time
Extended Lifespan
Instead of buying a new phone, a battery health swap gives your Pixel 7 a second life.
Cost Analysis
DIY vs Professional Repair
Option
Cost
Risk
Quality
DIY
Low
High
Variable
Professional
Moderate
Low
High
While DIY may save money upfront, professional repairs offer peace of mind.
Replacing your battery instead of your entire phone reduces electronic waste. That’s a win for both your wallet and the planet.
❓ FAQs
1. How long does a Pixel 7 battery last?
Typically 2–3 years depending on usage and charging habits.
2. Is a battery health swap worth it?
Absolutely. It’s far cheaper than buying a new phone and restores performance.
3. Can I replace the battery myself?
Yes, but it requires skill and proper tools. Mistakes can damage your phone.
4. How much does a battery replacement cost?
It varies by location, but professional services usually range from $80–$150.
5. Will a new battery improve performance?
Yes, especially if your old battery was degraded.
6. Is it safe to use third-party batteries?
Only if they’re high-quality and certified. Cheap ones can be dangerous.
Conclusion
Battery degradation is inevitable—but dealing with it doesn’t have to be complicated. A battery health swap for your Google Pixel 7 is one of the smartest ways to extend your device’s life, improve performance, and avoid unnecessary upgrades.
Whether you go DIY or trust a professional, the key is acting before the problem gets worse. After all, your phone isn’t failing—it just needs a fresh start.
David from Sydney CBD Repair Centre – The Best place to fix mobile phones as 7 Years In A Row! Top Mobile Phone Repair In Sydney. More than 2000 Positive Reviews on Google and Same Day Repairs.
We take pride in delivering exceptional repair services for all major phone brands including Apple, Samsung, Google, and more. Our expert technicians use only genuine parts and offer 90days warranty on repairs. Located in the heart of Sydney CBD, we’re your one-stop solution for all mobile device repairs.
Our commitment to excellence has earned us the trust of thousands of satisfied customers. Whether it’s a cracked screen, battery replacement, or water damage repair, we handle it all with professional care and expertise. Walk in today and experience why we’re Sydney’s #1 choice for mobile phone repairs.
Visit us for:
✓ Same Day Express Repairs
✓ Genuine Parts Guarantee
✓ Professional Technicians
✓ Competitive Pricing
✓ 2000+ 5-Star Google Reviews
✓ 7-Time Award Winner for Best Phone Repairs
Repairing the Crushed Apple iPhone 17 Pro Max After a High-Speed Highway Drop – Ultimate 7-Step Recovery Guide
📱 Introduction to High-Impact Smartphone Damage
When it comes to Repairing a Crushed iPhone 17 Pro Max After a High Speed Highway Drop, the situation can feel overwhelming. A device falling at high speed onto a highway surface experiences extreme force—far beyond everyday drops. The result? Crushed frames, shattered displays, and potentially damaged internal circuitry.
Modern smartphones like the iPhone 17 Pro Max from Apple Inc. are engineered for durability, but even the most advanced designs have limits. High-speed impact is one of those limits.
Still, here’s the good news: not all hope is lost. With the right tools, proper knowledge, and a methodical approach, even severely damaged devices can often be revived.
These mistakes can turn a repairable phone into a total loss.
💰 Cost Analysis of Repairs
Repair Type
Estimated Cost
Screen Replacement
$$$
Battery Replacement
$$
Logic Board Repair
$$$$
Full Restoration
$$$$+
DIY is cheaper, but professional repair offers reliability.
🆚 Professional Repair vs DIY
DIY Pros:
Cost savings
Learning experience
DIY Cons:
Risk of further damage
No warranty
Professional Pros:
Expertise
Warranty
Faster turnaround
Professional Cons:
Higher cost
❓ FAQs
1. Can a crushed iPhone 17 Pro Max be fully repaired?
Yes, in many cases. It depends on logic board damage.
2. Is it safe to use a damaged phone?
No. Especially if the battery is compromised.
3. How long does repair take?
Typically 1–3 days depending on damage.
4. Will data be lost during repair?
Not always, but backup is recommended.
5. Is repairing worth it?
If repair cost is less than replacement, yes.
6. Can I fix it myself without experience?
It’s possible, but not recommended for severe damage.
🏁 Conclusion
Repairing a severely damaged smartphone may sound intimidating, but Repairing a Crushed iPhone 17 Pro Max After a High Speed Highway Drop is absolutely achievable with the right approach. From careful assessment to precise part replacement, every step matters.
Whether you go DIY or choose professional repair, the key is acting quickly and wisely. With patience and the right tools, even a crushed phone can come back to life.
David from Sydney CBD Repair Centre – The Best place to fix mobile phones as 7 Years In A Row! Top Mobile Phone Repair In Sydney. More than 2000 Positive Reviews on Google and Same Day Repairs.
We take pride in delivering exceptional repair services for all major phone brands including Apple, Samsung, Google, and more. Our expert technicians use only genuine parts and offer 90days warranty on repairs. Located in the heart of Sydney CBD, we’re your one-stop solution for all mobile device repairs.
Our commitment to excellence has earned us the trust of thousands of satisfied customers. Whether it’s a cracked screen, battery replacement, or water damage repair, we handle it all with professional care and expertise. Walk in today and experience why we’re Sydney’s #1 choice for mobile phone repairs.
Visit us for:
✓ Same Day Express Repairs
✓ Genuine Parts Guarantee
✓ Professional Technicians
✓ Competitive Pricing
✓ 2000+ 5-Star Google Reviews
✓ 7-Time Award Winner for Best Phone Repairs
The Samsung Galaxy Z Fold 6: Repairing Inner Screens and Safe Battery Disconnect Methods – Ultimate Guide with 15 Proven Tips
Introduction to Samsung Z Fold 6 Repairs
The Samsung Z Fold 6: Repairing Inner Screens and Safe Battery Disconnect Methods topic has become increasingly important as foldable smartphones grow in popularity. While these devices offer cutting-edge technology, they also present unique repair challenges.
Unlike traditional smartphones, the Samsung Z Fold 6 features a delicate foldable inner display that demands precision and expertise during repairs. Even a minor mistake can lead to further damage or safety risks.
In this guide, we’ll break everything down into simple, easy-to-follow steps. Whether you’re a technician or a curious user, you’ll learn how to handle inner screen repairs and safely disconnect the battery—without guesswork.
The Samsung Z Fold 6 uses an advanced foldable AMOLED display, designed to bend without breaking. It combines ultra-thin glass with flexible polymers, making it both innovative and fragile.
Key characteristics include:
Ultra-thin glass layers
Flexible OLED panels
Sensitive touch digitizer
Hinge-integrated design
Because of this complexity, repairing the inner screen isn’t as simple as swapping out a regular display.
Common Causes of Inner Screen Damage
Inner screen issues usually stem from:
Repeated folding stress
Dust entering the hinge
Accidental drops
Pressure applied to the folded screen
Manufacturing wear over time
Understanding these causes helps prevent repeat damage after repair.
The Samsung Z Fold 6: Repairing Inner Screens and Safe Battery Disconnect Methods process may seem intimidating at first, but with the right approach, it becomes manageable.
By understanding the device’s unique design, using proper tools, and following safe battery practices, you can successfully perform repairs without unnecessary risks.
Still, if you’re ever in doubt, professional help is the safer route. After all, protecting your device—and yourself—is always the top priority.
David from Sydney CBD Repair Centre – The Best place to fix mobile phones as 7 Years In A Row! Top Mobile Phone Repair In Sydney. More than 2000 Positive Reviews on Google and Same Day Repairs.
We take pride in delivering exceptional repair services for all major phone brands including Apple, Samsung, Google, and more. Our expert technicians use only genuine parts and offer 90days warranty on repairs. Located in the heart of Sydney CBD, we’re your one-stop solution for all mobile device repairs.
Our commitment to excellence has earned us the trust of thousands of satisfied customers. Whether it’s a cracked screen, battery replacement, or water damage repair, we handle it all with professional care and expertise. Walk in today and experience why we’re Sydney’s #1 choice for mobile phone repairs.
Visit us for:
✓ Same Day Express Repairs
✓ Genuine Parts Guarantee
✓ Professional Technicians
✓ Competitive Pricing
✓ 2000+ 5-Star Google Reviews
✓ 7-Time Award Winner for Best Phone Repairs
Hidden Dangers of DIY Battery Swaps on Modern Foldable Smartphones: 15 Critical Risks You Must Know
📱 Introduction to Foldable Smartphone Technology
Foldable smartphones are one of the most exciting innovations in modern mobile technology. Devices like Samsung’s Galaxy Z Fold and Flip series have redefined how we use our phones—offering tablet-sized screens in a pocket-friendly form. However, with innovation comes complexity.
Unlike traditional smartphones, foldables rely on intricate hinge systems, flexible OLED displays, and dual battery configurations. This complexity makes even simple repairs significantly more difficult. One of the most commonly attempted repairs—DIY battery swaps on modern foldable smartphones—can quickly turn into a costly and dangerous mistake.
Absolutely. It ensures safety, reliability, and longevity.
🧾 Conclusion
Foldable smartphones are marvels of modern engineering—but they’re not designed for easy DIY repairs. While it may be tempting to attempt a battery replacement yourself, the reality is clear: DIY battery swaps on modern foldable smartphones come with serious risks.
From fragile displays to fire hazards and costly mistakes, the dangers are real and often underestimated. Instead of risking your device—and your safety—it’s wiser to rely on professional technicians who understand the complexity of these advanced devices.
In the end, protecting your investment means knowing when to step back and let the experts handle it.
David from Sydney CBD Repair Centre – The Best place to fix mobile phones as 7 Years In A Row! Top Mobile Phone Repair In Sydney. More than 2000 Positive Reviews on Google and Same Day Repairs.
We take pride in delivering exceptional repair services for all major phone brands including Apple, Samsung, Google, and more. Our expert technicians use only genuine parts and offer 90days warranty on repairs. Located in the heart of Sydney CBD, we’re your one-stop solution for all mobile device repairs.
Our commitment to excellence has earned us the trust of thousands of satisfied customers. Whether it’s a cracked screen, battery replacement, or water damage repair, we handle it all with professional care and expertise. Walk in today and experience why we’re Sydney’s #1 choice for mobile phone repairs.
Visit us for:
✓ Same Day Express Repairs
✓ Genuine Parts Guarantee
✓ Professional Technicians
✓ Competitive Pricing
✓ 2000+ 5-Star Google Reviews
✓ 7-Time Award Winner for Best Phone Repairs
Is Your Phone Repair Worth It Calculating Phone Screen Replacement Value + Ultimate Guide + 7 Smart Factors
Introduction
Is your cracked phone screen worth fixing, or is it time to upgrade? It’s a question millions of smartphone owners ask every year—and the answer isn’t always obvious. With rising repair costs and constantly changing phone prices, understanding phone screen replacement value has never been more important. A damaged screen doesn’t automatically mean your phone is finished, but repairing it without doing the maths can be an expensive mistake.
In this guide, we’ll break down how to calculate phone screen replacement value in a clear, practical way. You’ll learn how repair costs compare to resale prices, how phone age and brand affect value, and when a screen replacement truly makes financial sense. More importantly, we’ll share expert insights used by professional technicians to help you make a confident, informed decision—without the guesswork.
Whether you’re holding onto a premium flagship or a reliable mid-range device, this article will help you decide if repairing your phone is a smart investment or if replacing it is the better move.
When customers ask, “Is my phone screen repair worth it?”, they’re really asking about phone screen replacement value. This value isn’t just about dollars and cents. Instead, it’s a balance of cost, usability, lifespan, and resale potential.
What “Value” Really Means in Phone Repairs
At its core, phone screen replacement value is calculated by comparing:
The cost of the repair
The current market value of the phone
The expected lifespan after repair
If your screen replacement costs $300, but the phone is worth $900 after repair, the phone screen replacement value is strong. On the other hand, spending $250 to repair a device worth only $300 doesn’t make much financial sense.
However, value isn’t always purely financial. For many users, data security, familiarity, and reliability also matter.
Emotional vs Financial Value
Let’s be honest—people get attached to their phones. Photos, apps, and daily routines all live there. While emotional value shouldn’t override logic entirely, it does play a role in determining phone screen replacement value.
That said, professional technicians always recommend grounding decisions in objective repair economics, not just sentiment.
Understanding today’s phone market is essential when calculating phone screen replacement value. Smartphones depreciate quickly, but not evenly.
Depreciation Rates by Brand
Here’s a simplified breakdown:
Brand
Value After 1 Year
Value After 3 Years
Apple iPhone
~75%
~55%
Samsung Galaxy
~65%
~45%
Google Pixel
~60%
~40%
Budget Android
~45%
~25%
Premium brands hold value longer. Therefore, screen replacement on newer iPhones and Samsung Galaxy devices usually delivers better phone screen replacement value.
How Resale Platforms Set Prices
Platforms like eBay, Facebook Marketplace, and trade-in programs evaluate:
Cosmetic condition
Screen quality
Original vs replaced parts
Functional integrity
A professionally replaced genuine screen maintains resale trust, which directly improves phone screen replacement value. According to data shared by reputable refurbishers and sources like GSMArena , phones with documented professional repairs sell faster and at higher prices.
True Cost of Screen Replacement
To calculate phone screen replacement value accurately, you must understand what you’re paying for.
Parts, Labour, and Warranty Breakdown
A professional screen replacement typically includes:
Genuine or premium-grade screen
Skilled labour
Calibration and testing
Warranty (often 90 days or more)
This bundled service ensures reliability. While DIY kits may seem cheaper upfront, they rarely offer long-term value.
Genuine vs Aftermarket Screens
Screen Type
Cost
Durability
Resale Impact
Genuine OEM
High
Excellent
Strong
Premium Aftermarket
Medium
Good
Moderate
Low-Grade Copy
Low
Poor
Negative
Using genuine parts improves phone screen replacement value by ensuring brightness, touch sensitivity, and longevity remain close to factory standards.
When Screen Repair Makes Financial Sense
Not every cracked screen is a deal-breaker. In fact, many repairs deliver excellent phone screen replacement value.
Flagship Phones Under 3 Years Old
If your phone:
Is less than three years old
Has no internal damage
Still receives software updates
Then screen replacement almost always makes sense. Flagship phones are designed to last, and replacing the screen often extends usability by several years.
Mid-Range and Budget Devices
Here, the calculation becomes tighter. If repair costs exceed 40–50% of the phone’s market value, phone screen replacement value declines rapidly. However, if the phone is otherwise flawless, repair can still be justified.
When Screen Repair Is NOT Worth It
Sometimes, walking away is the smarter move.
Multiple Component Failures
If your phone has:
Battery degradation
Charging port issues
Camera or motherboard faults
Then a screen repair alone won’t restore full value. In these cases, phone screen replacement value drops significantly.
Obsolete or Unsupported Models
Phones no longer receiving security updates pose risks. Even with a new screen, the device may be unsafe for banking or personal data, reducing overall value.
How Professionals Calculate Phone Screen Replacement Value
Repair Cost ÷ Post-Repair Market Value = Repair Ratio
If the ratio is under 0.4, the phone screen replacement value is generally considered good.
Risk Assessment by Technicians
Technicians also assess:
Frame integrity
Water damage indicators
History of previous repairs
This risk assessment protects customers from investing in devices unlikely to last.
DIY Repair vs Professional Repair
DIY repairs are tempting, but they rarely maximise phone screen replacement value.
Hidden Risks of DIY
Common DIY issues include:
Face ID or fingerprint sensor failure
Display calibration problems
Loss of water resistance
These issues reduce both usability and resale value.
Warranty and Longevity Factors
Professional repairs typically include warranties, which increase confidence and long-term value. A documented repair from a reputable centre significantly boosts phone screen replacement value.
Environmental and Sustainability Benefits
Repairing instead of replacing isn’t just economical—it’s responsible.
Reducing E-Waste Through Repair
Every repaired phone keeps harmful materials out of landfills. Choosing screen replacement supports sustainability while preserving phone screen replacement value.
Frequently Asked Questions (FAQs)
1. How do I calculate phone screen replacement value quickly?
Compare repair cost to your phone’s resale value. If repairs cost less than 40% of resale value, it’s usually worth it.
2. Does a replaced screen reduce resale value?
Not if it’s professionally installed using genuine parts. In many cases, it improves resale appeal.
3. Are aftermarket screens ever worth it?
Premium aftermarket screens can offer good phone screen replacement value for mid-range phones.
4. Is phone insurance better than screen repair?
Insurance helps, but deductibles can be high. Direct repair is often cheaper.
5. How long does a professional screen replacement last?
With quality parts, it should last as long as the original screen.
6. Can I trade in a phone with a replaced screen?
Yes. Many trade-in programs accept professionally repaired devices.
Conclusion
So, is your repair worth it? When you understand phone screen replacement value, the answer becomes clear. By evaluating repair costs, market value, device age, and long-term usability, you can make confident, informed decisions.
In most cases—especially for newer flagship phones—screen replacement is a smart investment that restores functionality, preserves value, and reduces environmental impact.
David from Sydney CBD Repair Centre – The Best place to fix mobile phones as 7 Years In A Row! Top Mobile Phone Repair In Sydney. More than 2000 Positive Reviews on Google and Same Day Repairs.
We take pride in delivering exceptional repair services for all major phone brands including Apple, Samsung, Google, and more. Our expert technicians use only genuine parts and offer 90 days warranty on repairs. Located in the heart of Sydney CBD, we’re your one-stop solution for all mobile device repairs.
Our commitment to excellence has earned us the trust of thousands of satisfied customers. Whether it’s a cracked screen, battery replacement, or water damage repair, we handle it all with professional care and expertise. Walk in today and experience why we’re Sydney’s #1 choice for mobile phone repairs.
Visit us for:
✓ Same Day Express Repairs
✓ Genuine Parts Guarantee
✓ Professional Technicians
✓ Competitive Pricing
✓ 2000+ 5-Star Google Reviews
✓ 7-Time Award Winner for Best Phone Repairs
The DIY disaster vs. The professional fix: Galaxy S24 Ultra screen replacementShockingly Revealed + 9 Critical Facts
Introduction
The Galaxy S24 Ultra is a powerhouse smartphone built with cutting-edge display technology, premium materials, and precision engineering. So when its screen cracks or fails, many users face a critical decision: attempt a DIY repair or trust a professional technician. At first glance, a do-it-yourself screen replacement may seem like a quick and affordable solution. However, beneath the surface, this repair is far more complex than it appears. In this article, we explore the real risks, costs, and consequences of a DIY disaster versus a professional fix for Galaxy S24 Ultra screen replacement. By breaking down expert insights, real-world scenarios, and long-term outcomes, you’ll gain the clarity needed to protect your investment and make the smartest repair choice with confidence.
The Galaxy S24 Ultra screen replacement conversation must start with an understanding of what you’re actually dealing with. Samsung’s Galaxy S24 Ultra isn’t just another smartphone. It’s a premium flagship device built with cutting-edge display engineering that blends performance, durability, and precision.
What Makes the S24 Ultra Screen So Advanced
The Galaxy S24 Ultra features a Dynamic AMOLED 2X display with adaptive refresh rates up to 120Hz. It uses reinforced glass technology, advanced touch layers, and ultra-thin bonding adhesives. On top of that, the display is tightly integrated with the fingerprint sensor, front camera, and proximity sensors.
Because of this integration, even a minor mistake during a Galaxy S24 Ultra screen replacement can affect multiple components. It’s not like swapping a battery or changing a case. Every millimeter matters.
Why Screen Replacement Is More Complex Than It Looks
Many people assume replacing a screen is just removing glass and snapping a new one on. In reality, the screen is fused with layers that include OLED panels, digitizers, and sensors. These layers require controlled heat, precision tools, and technical experience.
Samsung themselves outline the complexity of modern display repairs through their official support documentation (see Samsung’s official repair guidance for Galaxy devices). This alone should signal caution to anyone considering a DIY attempt.
DIY phone repairs have grown rapidly, thanks to online tutorials and affordable toolkits. However, popularity doesn’t always equal safety or success.
Why People Attempt DIY Repairs
The main motivation is cost. A cracked screen looks like an easy fix, and DIY kits promise savings. Some people also enjoy the challenge or believe they’re technically inclined enough to handle it.
While confidence is great, overconfidence often leads to a DIY disaster vs. professional fix Galaxy S24 Ultra screen replacement scenario that ends badly.
Common Tools and Kits Used
Most DIY kits include suction cups, pry tools, heat pads, and generic replacement screens. Unfortunately, these screens are often aftermarket, not genuine, and may lack proper calibration.
That’s where the trouble starts. The Galaxy S24 Ultra is unforgiving when it comes to low-quality components.
DIY Disaster Scenarios You Should Know
This is where reality hits hard. Many repair centers see the aftermath of failed DIY repairs every single day.
Hidden Damage During Self-Repair
Internal cables can tear easily. One slip can damage the fingerprint sensor or OLED panel connector. Worse still, static discharge can silently damage internal chips without immediate symptoms.
A DIY Galaxy S24 Ultra screen replacement often turns a single problem into multiple expensive ones.
Loss of Waterproofing and Structural Integrity
The Galaxy S24 Ultra is designed with IP-rated water resistance. Once opened without proper resealing equipment, that protection is gone. DIY repairs rarely restore factory-level seals.
That means future exposure to moisture can lead to corrosion, even if the phone looks fine at first.
Professional Galaxy S24 Ultra Screen Replacement Explained
A professional repair isn’t just about skill. It’s about process, tools, and accountability.
Step-by-Step Professional Repair Process
Professionals use temperature-controlled heat plates, anti-static environments, and genuine parts. The screen is removed carefully, connectors are inspected, and the replacement display is installed with precision.
In a professional Galaxy S24 Ultra screen replacement, every step follows manufacturer-recommended procedures.
Quality Control and Post-Repair Testing
After installation, technicians test brightness, touch sensitivity, fingerprint accuracy, and display uniformity. Water resistance seals are reapplied using industrial adhesives.
This level of testing simply isn’t possible at home.
Cost Comparison: DIY vs Professional Fix
At first glance, DIY looks cheaper. But that’s only part of the story.
Short-Term Savings vs Long-Term Costs
DIY kits may save money upfront. However, if something goes wrong, repair costs double or triple. In many cases, professional technicians must undo DIY damage before fixing the original issue.
A professional Galaxy S24 Ultra screen replacement often ends up cheaper in the long run.
Warranty and Resale Value Considerations
DIY repairs void warranties and reduce resale value. Buyers can spot non-genuine screens easily due to color inconsistency or poor brightness.
Professional repairs, especially with genuine parts, help preserve your phone’s value.
Time, Safety, and Peace of Mind
Time isn’t just money. It’s stress, risk, and frustration.
Time Investment and Stress Levels
A DIY repair can take hours, sometimes days. One mistake means starting over. Professional repairs are often completed the same day.
Knowing your phone is in expert hands offers peace of mind you can’t put a price on.
Safety Risks in DIY Repairs
Lithium batteries, sharp glass shards, and heat tools pose real safety risks. Professionals are trained to handle these hazards safely.
Frequently Asked Questions (FAQs)
1. Is DIY Galaxy S24 Ultra screen replacement safe?
Not really. The complexity and risk of damage make DIY repairs unsafe for most users.
2. Will DIY repair affect fingerprint sensor performance?
Yes, improper installation often causes fingerprint sensor failure.
3. Are aftermarket screens reliable?
They usually have lower brightness, poorer color accuracy, and shorter lifespan.
4. How long does a professional screen replacement take?
Most professional repairs are completed within a few hours.
5. Does professional repair restore water resistance?
Professionals can reseal the device close to factory standards.
6. Is professional repair worth the cost?
Absolutely, especially when considering long-term reliability and value.
Conclusion: Making the Smart Choice
When weighing DIY disaster vs. professional fix Galaxy S24 Ultra screen replacement, the answer becomes clear. DIY repairs may look tempting, but the risks far outweigh the savings. Professional repair offers expertise, safety, and lasting results.
Your Galaxy S24 Ultra is a premium device. It deserves premium care.
David from Sydney CBD Repair Centre – The Best place to fix mobile phones as 7 Years In A Row! Top Mobile Phone Repair In Sydney. More than 2000 Positive Reviews on Google and Same Day Repairs.
We take pride in delivering exceptional repair services for all major phone brands including Apple, Samsung, Google, and more. Our expert technicians use only genuine parts and offer 90days warranty on repairs. Located in the heart of Sydney CBD, we’re your one-stop solution for all mobile device repairs.
Our commitment to excellence has earned us the trust of thousands of satisfied customers. Whether it’s a cracked screen, battery replacement, or water damage repair, we handle it all with professional care and expertise. Walk in today and experience why we’re Sydney’s #1 choice for mobile phone repairs.
Visit us for:
✓ Same Day Express Repairs
✓ Genuine Parts Guarantee
✓ Professional Technicians
✓ Competitive Pricing
✓ 2000+ 5-Star Google Reviews
✓ 7-Time Award Winner for Best Phone Repairs
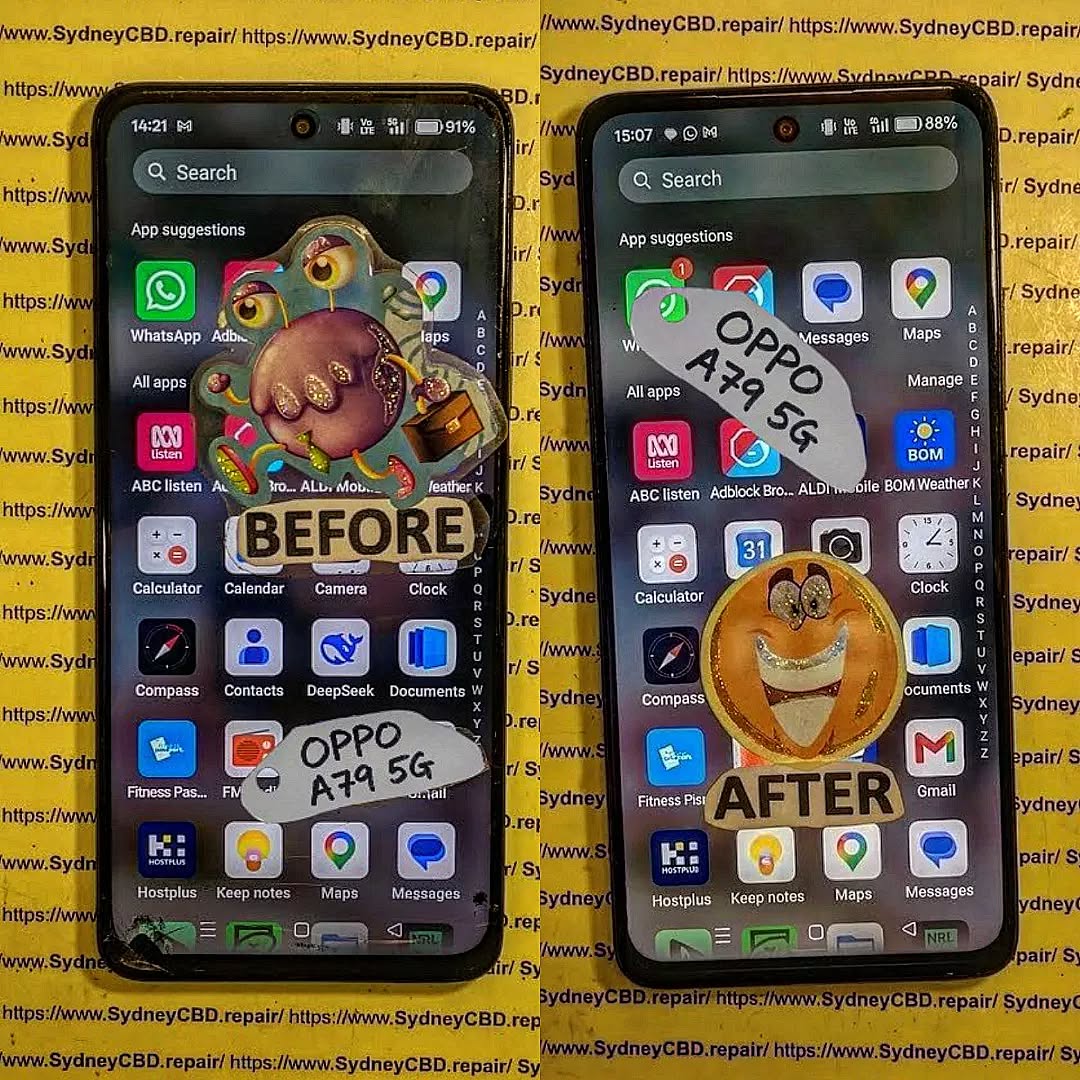
Advanced Disassembly Of OPPO A79 5G For A Seamless Professional Display Replacement: Ultimate 15-Step Expert Guide
Introduction
Replacing a damaged smartphone display isn’t simply about removing broken glass and installing a new screen. Modern smartphones like the OPPO A79 5G are carefully engineered with delicate ribbon cables, waterproof adhesives, sensitive antennas, and tightly integrated internal components. Successfully completing an Advanced Disassembly Of OPPO A79 5G For A Seamless Professional Display Replacement requires technical knowledge, patience, and the right tools.
Professional technicians understand that every repair starts long before lifting the display. Proper diagnosis, careful inspection, battery safety, and organized disassembly all contribute to a successful repair.
In this guide, you’ll discover how professionals approach an OPPO A79 5G screen replacement while minimizing risk to the motherboard, cameras, charging port, battery, and other critical components. Whether you’re an experienced repair technician or simply interested in learning how experts work, this article provides an in-depth look into the entire process.
Before beginning any repair, it’s important to understand how the OPPO A79 5G is built. Manufacturers continue making smartphones thinner while packing in larger batteries, improved cameras, and faster processors. As a result, every internal component is positioned with remarkable precision.
Unlike older smartphones that featured removable back covers and replaceable batteries, the OPPO A79 5G uses industrial-strength adhesive and tightly fitted plastic and metal brackets. This construction enhances durability while making professional disassembly significantly more challenging.
Several internal components deserve special attention during an Advanced Disassembly Of OPPO A79 5G For A Seamless Professional Display Replacement:
OLED/LCD display assembly
Touch digitizer
Battery
Mainboard
Daughterboard
USB-C charging board
Side fingerprint sensor flex
Volume button flex cable
Rear camera assembly
Front camera module
Loudspeaker assembly
Vibration motor
Antenna routing
Interconnecting flex cables
Each component is interconnected. Damaging one ribbon cable can disable multiple phone functions.
Display Assembly
The display is securely adhered to the frame using strong factory adhesive. Removing it requires controlled heat and precise lifting techniques.
Too much force may:
Crack the replacement screen
Damage the frame
Tear display flex cables
Bend the chassis
Professional repair centers carefully soften adhesive before attempting removal.
Battery Placement
The battery occupies most of the phone’s internal space.
Although it appears simple, lithium-ion batteries are sensitive to:
Sharp tools
Excessive bending
Heat exposure
Compression
Punctures
A damaged battery can swell or fail, making safe handling a priority.
Motherboard Layout
The motherboard houses the:
MediaTek processor
RAM
Storage chips
Power management IC
Display connectors
Camera interfaces
RF modules
Technicians disconnect the battery before touching any motherboard connectors to avoid short circuits.
Flex Cable Routing
Modern smartphones rely on flexible printed cables instead of traditional wiring.
These ultra-thin connectors carry signals between:
Display
Battery
Charging board
Cameras
Buttons
Fingerprint reader
Because they’re extremely fragile, professionals disconnect each one using plastic pry tools rather than metal objects.
Essential Tools Required Before Beginning
Professional repairs depend on using the correct equipment. While inexpensive toolkits may seem attractive, quality precision tools greatly reduce the chance of accidental damage.
Precision Screwdriver Set
Different screws secure various components throughout the OPPO A79 5G.
A professional kit typically includes:
Phillips bits
Torx bits
Flat-head bits
Precision handles
Using the wrong driver can strip screw heads, making removal difficult.
Heat Source
Adhesive must be softened before opening the device.
Professionals often use:
Heat pads
Controlled hot air stations
LCD heating plates
Controlled heat prevents frame deformation while loosening adhesive effectively.
Plastic Opening Picks
Plastic picks slide between the display or rear cover and the frame.
They help:
Cut adhesive
Prevent scratches
Reduce cracking risk
Protect internal cables
Metal blades are used sparingly and only by experienced technicians.
Suction Cup
A suction cup creates a small opening after heating.
This gap allows plastic picks to enter without damaging the frame.
Plastic Spudgers
Plastic spudgers safely disconnect ribbon cables.
They’re essential for:
Battery connector removal
Display connector removal
Camera connector removal
Unlike metal tools, they minimize the risk of electrical shorts.
Tweezers
Fine-point ESD-safe tweezers allow technicians to handle:
Small screws
Brackets
Mesh covers
Adhesive strips
Precision improves organization during reassembly.
Isopropyl Alcohol
High-purity isopropyl alcohol helps dissolve stubborn adhesive without damaging electronics when used carefully.
Professionals apply only small amounts around adhesive edges.
Magnetic Project Mat
Keeping dozens of tiny screws organized prevents assembly mistakes.
Professional repair benches frequently use magnetic mats labeled according to each disassembly stage.
Replacement Adhesive
Installing a new display requires fresh adhesive.
Proper adhesive:
Holds the screen securely
Reduces dust entry
Improves long-term durability
Maintains factory appearance
Reusing old adhesive is never recommended.
Anti-Static Equipment
Electrostatic discharge (ESD) can damage sensitive chips.
Repair shops reduce this risk using:
Grounded wrist straps
Anti-static mats
ESD-safe tools
These precautions protect expensive components from invisible electrical damage.
Why Preparation Determines Repair Success
Many repair failures happen before the first screw is removed. Professional technicians follow a structured preparation process to minimize mistakes and protect the device throughout the repair.
Preparation begins with inspecting the phone for existing damage, including bent frames, liquid exposure indicators, cracked back covers, and faulty buttons. Identifying these issues beforehand helps distinguish pre-existing faults from repair-related concerns.
Next, the technician powers the device off completely. This simple step reduces the risk of electrical shorts while disconnecting internal components. If the screen is still responsive, backing up important data is also recommended before any disassembly begins.
The work area should be clean, well-lit, and free of static-generating materials. Organizing tools in advance prevents unnecessary interruptions once the phone has been opened.
Professional repair centers also document the repair with photos during each stage of disassembly. These reference images make reassembly easier and help verify the original placement of cables, brackets, and screws.
Finally, replacement parts should always be inspected before installation. A quality display assembly should be free from scratches, dead pixels, damaged flex cables, or manufacturing defects. Testing the new display before permanently sealing the device saves time and prevents repeat repairs.
By combining careful preparation with the proper tools and techniques, technicians significantly improve the success rate of an Advanced Disassembly Of OPPO A79 5G For A Seamless Professional Display Replacement.
Removing the Back Cover Professionally
One of the most delicate stages in the Advanced Disassembly Of OPPO A79 5G For A Seamless Professional Display Replacement is removing the rear cover without damaging the plastic frame or internal components. Although the OPPO A79 5G features a durable design, its rear panel is secured with strong adhesive that requires patience and precision to separate safely.
Step 1: Apply Controlled Heat
Begin by evenly heating the perimeter of the back cover for approximately two to three minutes. The goal is to soften the adhesive—not overheat the device.
Professional technicians avoid concentrating heat in one area, as excessive temperatures can damage the battery or warp the plastic housing.
Best Practices
Keep the heat source moving continuously.
Avoid overheating the camera module.
Wear heat-resistant gloves if necessary.
Monitor the phone’s temperature throughout the process.
Step 2: Create an Opening
Once the adhesive softens, attach a suction cup near the lower edge of the back cover.
Gently lift while inserting a thin plastic opening pick into the gap.
Avoid using excessive force. If resistance remains high, apply additional heat instead of prying harder.
Step 3: Separate the Adhesive
Carefully slide the plastic pick around the perimeter.
Take extra care near:
Side buttons
Camera housing
Fingerprint sensor flex (if applicable)
Antenna areas
Slow and steady movements greatly reduce the risk of cracking the rear panel.
Step 4: Lift the Rear Cover
Once all adhesive has been released, lift the back cover carefully.
Inspect the adhesive pattern before removing any remaining residue.
Professionals immediately place the cover in a dust-free container to prevent scratches during the remainder of the repair.
Disconnecting the Battery Safely
Battery disconnection is arguably the most important safety step during an Advanced Disassembly Of OPPO A79 5G For A Seamless Professional Display Replacement.
Skipping this procedure significantly increases the risk of electrical shorts and accidental component damage.
Remove Protective Covers
The battery connector is typically protected by a metal bracket secured with several screws.
Technicians:
Remove each screw.
Keep screws organized.
Lift the bracket using plastic tweezers.
Different screw lengths should never be mixed during reassembly.
Disconnect the Battery Connector
Using a plastic spudger, gently lift the battery connector from the motherboard.
Never use:
Metal screwdrivers
Sharp blades
Excessive force
The connector should release with minimal pressure.
Why Battery Isolation Matters
Disconnecting power protects:
Display IC
Charging IC
Motherboard
Cameras
Fingerprint sensor
USB-C board
Professional repair shops never disconnect display cables before isolating battery power.
Accessing Internal Components
Once the battery has been disconnected, internal repairs can proceed safely.
Several components may need temporary removal before the display assembly can be replaced.
Speaker Assembly
The loudspeaker module usually covers important flex cable routing.
Remove:
Retaining screws
Plastic clips
Speaker housing
Inspect for dust accumulation before reinstalling.
Charging Board Flex Cable
Disconnect the flex cable linking:
Mainboard
Charging board
Lift evenly using a plastic pry tool.
Never fold flex cables sharply.
Display Flex Cable
The damaged display remains connected beneath protective brackets.
Professionals remove:
Metal shields
Connector brackets
Protective tape
Only after these have been removed should the display connector be disconnected.
Camera Modules
If necessary, camera modules may be removed temporarily.
Handle carefully to avoid:
Dust contamination
Lens scratches
Flex cable damage
Store cameras inside anti-static containers whenever possible.
Removing the Damaged Display Assembly
Removing the damaged display is the most technically demanding portion of the repair.
The display assembly is firmly bonded to the frame using factory adhesive that must be softened carefully.
Heating the Front Display
Apply controlled heat around the front glass.
Professional technicians maintain moderate temperatures to avoid:
OLED damage
LCD discoloration
Frame warping
Battery overheating
Several heating cycles may be necessary.
Separating the Screen
Insert a plastic opening pick between:
Display glass
Mid-frame
Slowly work around the edges.
Avoid inserting tools too deeply because internal display flex cables may be damaged.
Removing Adhesive
Once loosened, carefully cut through remaining adhesive.
Professionals avoid rushing this stage.
The display should lift naturally after all adhesive has been released.
Cleaning the Frame
Before installing the replacement screen, remove:
Old adhesive
Glass fragments
Dust
Residual glue
Use:
Plastic scraper
Isopropyl alcohol
Microfiber cloth
A clean frame ensures proper adhesion and prevents pressure points beneath the new display.
Professional technicians never permanently seal a new display before verifying that every function works correctly.
Dry Testing the Display
Before applying fresh adhesive:
Connect the new display flex cable.
Reconnect the battery temporarily.
Power on the phone.
Check the display for normal operation.
Test the following:
Brightness
Touch sensitivity
Multi-touch response
Dead pixels
Color consistency
Flickering
Black spots
Ghost touch issues
If any defects are found, disconnect the battery again and replace the faulty display before proceeding.
Applying Fresh Adhesive
Once the display passes all functional tests:
Remove temporary protective films.
Apply high-quality replacement adhesive around the frame.
Ensure even placement with no gaps or overlaps.
Avoid covering microphones, sensors, or speaker openings.
Using fresh adhesive restores the phone’s structural integrity and helps keep dust from entering the device.
Seating the Display
Align the display carefully with the frame before lowering it into position.
Apply light, even pressure around the edges to ensure full contact with the adhesive.
Avoid pressing directly on the center of the display, as excessive force can damage the LCD or OLED panel.
Professional repair shops often use display clamps or rubber bands for 20 to 30 minutes to ensure the adhesive cures evenly without creating pressure points.
Professional Repair Techniques and Best Practices
Experienced technicians follow strict procedures that improve repair quality and reduce the likelihood of customer returns.
Keep Every Screw Organized
Modern smartphones use screws of varying lengths and thread types.
Mixing them can result in:
Damaged motherboard layers
Cracked display assemblies
Loose brackets
Improper grounding
Magnetic project mats or labeled containers are invaluable during complex repairs.
Avoid Fingerprints on Internal Components
Fingerprints on camera lenses or the inside of the display can become visible after reassembly.
Professionals wear nitrile gloves or finger cots and use lint-free cloths to keep components spotless.
Replace Worn Adhesive
Never rely on the original adhesive after opening the phone.
Fresh adhesive ensures:
Better structural support
Improved resistance to dust
Professional cosmetic finish
Longer-lasting repair results
Inspect Flex Cables Carefully
Before final assembly, examine every ribbon cable for:
Tears
Creases
Loose connectors
Bent contacts
Replacing a damaged flex cable before sealing the phone can prevent future failures and unnecessary repeat repairs.
Perform Multiple Functional Tests
Technicians don’t stop after confirming the screen turns on.
A comprehensive post-installation test should include:
Display quality
Touch responsiveness
Charging
Cameras
Speaker
Microphone
Wi-Fi
Bluetooth
Mobile signal
Fingerprint sensor
Proximity sensor
Volume buttons
Power button
Vibration motor
Completing these checks ensures the phone leaves the repair bench functioning as expected.
Reassembling the Device
After successfully installing and testing the replacement display, the next step is careful reassembly. This stage is just as important as disassembly because incorrect screw placement, poorly routed cables, or improperly secured brackets can lead to future failures.
Reconnect Internal Components
Reconnect every flex cable in the reverse order of disassembly. Apply gentle, even pressure until each connector clicks securely into place.
Reconnect the following components:
Display flex cable
Charging board flex cable
Battery connector
Side button flex cable
Fingerprint sensor flex cable (if applicable)
Camera modules
Antenna connectors
Always inspect each connector under good lighting before moving on.
Reinstall Protective Brackets
Metal shields and plastic covers protect delicate motherboard connectors from movement and accidental disconnection.
Ensure:
Every bracket sits perfectly flat.
Correct screws are returned to their original locations.
No cables are trapped beneath brackets.
Overtightening screws can damage threaded inserts or crack plastic mounting points.
Replace the Speaker Module
Position the loudspeaker assembly carefully and tighten all retaining screws evenly.
While the speaker is removed, many professionals also clean:
Dust from the loudspeaker grille
Charging port debris
Microphone openings
Internal frame surfaces
Cleaning during repair improves both appearance and functionality.
Seal the Rear Cover
Remove any remaining adhesive residue from the rear housing.
Apply fresh waterproof-style adhesive around the perimeter before reinstalling the back cover.
Align the cover carefully before applying light, even pressure around all edges.
Professional repair centres often use alignment clamps for approximately 30 minutes to ensure a consistent seal.
Common Repair Mistakes
Even experienced technicians continue refining their techniques because smartphone repairs leave little room for error. Avoiding these common mistakes significantly improves repair quality.
Forgetting to Disconnect the Battery
This is one of the most frequent causes of motherboard damage.
Failing to isolate battery power may result in:
Short circuits
Burned display ICs
Damaged charging circuits
Unresponsive touch functionality
Disconnect the battery before removing or reconnecting any flex cable.
Using Excessive Heat
Heat softens adhesive, but too much can permanently damage internal components.
Excessive temperatures may cause:
Battery swelling
Display discoloration
Plastic frame warping
Camera focus issues
Controlled, even heating is always the safest approach.
Damaging Ribbon Cables
Ribbon cables are among the most fragile components inside the OPPO A79 5G.
Avoid:
Pulling cables at an angle
Folding cables sharply
Using metal tools
Applying excessive force
Replacing a torn flex cable often adds unnecessary repair time and cost.
Reusing Old Adhesive
Old adhesive loses much of its bonding strength once removed.
Fresh adhesive provides:
Better structural support
Improved dust resistance
Professional appearance
Longer-lasting repairs
Skipping this step may result in display lifting or back cover separation over time.
Skipping Functional Tests
Never assume a repair is complete simply because the phone powers on.
Professionals verify:
Display brightness
Touch accuracy
Cameras
Charging
Wi-Fi
Bluetooth
Microphones
Speakers
Fingerprint sensor
Proximity sensor
Auto brightness
Mobile reception
Testing everything before sealing the device helps prevent costly repeat repairs.
Post-Repair Quality Control
Quality control separates professional repairs from rushed workmanship.
Every repaired OPPO A79 5G should undergo a structured inspection before being returned to its owner.
Visual Inspection
Check for:
Even display alignment
Dust beneath the screen
Uniform adhesive bonding
Flush rear cover installation
No cosmetic damage
A professional finish inspires customer confidence.
Functional Testing Checklist
Complete the following checks:
Function
Status
Display
✓
Touchscreen
✓
Front Camera
✓
Rear Cameras
✓
Charging
✓
Speaker
✓
Microphone
✓
Wi-Fi
✓
Bluetooth
✓
Mobile Signal
✓
Fingerprint Sensor
✓
Vibration Motor
✓
Power Button
✓
Volume Buttons
✓
Final Cleaning
Before returning the phone:
Remove fingerprints.
Clean camera lenses.
Polish the display.
Wipe the rear cover.
Remove adhesive residue.
A spotless device reflects professional workmanship.
Frequently Asked Questions
1. How difficult is an OPPO A79 5G display replacement?
It is considered an intermediate to advanced repair. The device contains delicate ribbon cables, strong adhesive, and tightly packed internal components that require specialised tools and careful handling.
2. Can I replace only the broken glass?
In most cases, no. Professional repair centres typically replace the complete display assembly because separating the glass from the display requires specialised equipment and carries a high risk of damaging the panel.
3. Why should the battery be disconnected first?
Disconnecting the battery prevents accidental short circuits and protects sensitive motherboard components while flex cables are removed or reconnected.
4. Does replacing the display affect water resistance?
Opening the device compromises the factory seal. Using high-quality replacement adhesive helps restore resistance to dust and minor moisture, but it may not fully return the phone to its original factory-rated sealing.
5. How long does a professional display replacement usually take?
An experienced technician can often complete the repair in approximately one to two hours, depending on the extent of the damage and whether any additional components require replacement.
6. What tools are essential for this repair?
The most important tools include:
Precision screwdriver set
Plastic opening picks
Suction cup
Plastic spudger
ESD-safe tweezers
Heat source
Isopropyl alcohol
Magnetic project mat
Replacement adhesive
7. Should I repair the display myself or visit a professional?
If you have limited repair experience, seeking professional assistance is usually the safer option. Experienced technicians have the proper tools, genuine-quality replacement parts, and the expertise to reduce the risk of further damage.
Conclusion
Completing an Advanced Disassembly Of OPPO A79 5G For A Seamless Professional Display Replacement requires far more than simply swapping one screen for another. Every stage—from careful preparation and controlled heating to battery isolation, display installation, and final quality testing—plays a vital role in achieving a reliable, long-lasting repair.
Professional technicians follow structured procedures to protect sensitive internal components, preserve the integrity of the device, and ensure every feature functions correctly before the phone is returned to its owner. Investing time in proper disassembly techniques, using quality tools, and performing comprehensive testing significantly reduces the likelihood of repeat repairs and improves overall customer satisfaction.
Whether you’re a repair enthusiast looking to expand your skills or a smartphone owner wanting to understand what goes into a professional repair, following industry best practices is essential. When precision matters, experience, patience, and attention to detail make all the difference.
David from Sydney CBD Repair Centre – The Best place to fix mobile phones as 7 Years In A Row! Top Mobile Phone Repair In Sydney. More than 2000 Positive Reviews on Google and Same Day Repairs.
We take pride in delivering exceptional repair services for all major phone brands including Apple, Samsung, Google, and more. Our expert technicians use only genuine parts and offer 90 days warranty on repairs. Located in the heart of Sydney CBD, we’re your one-stop solution for all mobile device repairs.
Our commitment to excellence has earned us the trust of thousands of satisfied customers. Whether it’s a cracked screen, battery replacement, or water damage repair, we handle it all with professional care and expertise. Walk in today and experience why we’re Sydney’s #1 choice for mobile phone repairs.
Visit us for:
✓ Same Day Express Repairs
✓ Genuine Parts Guarantee
✓ Professional Technicians
✓ Competitive Pricing
✓ 2000+ 5-Star Google Reviews
✓ 7-Time Award Winner for Best Phone Repairs
Sydney CBD Repair Centre – Where Quality Meets Reliability.
WHY YOUR PHONE FLASH STOPPED WORKING: Hidden Dangers of DIY Battery and Screen Repairs + 7 Critical Risks
Introduction
Have you ever tried replacing your phone’s battery or screen yourself, only to find that the flash stopped working afterward? You’re not alone. While DIY repairs can seem like a smart way to save money, they often come with hidden dangers that many users don’t anticipate. From short-circuiting the motherboard to damaging delicate flex cables, even small mistakes can lead to permanent flash failure.
In this article, we’ll uncover the most common reasons why your phone flash stops working after a DIY repair, explore the risks involved with battery and screen replacements, and explain how professional repairs can protect your device. Whether you’re a tech-savvy DIYer or simply curious about safeguarding your phone, understanding these hidden hazards is the first step to keeping your flash—and your entire phone—working perfectly.
By the end of this guide, you’ll know not only why DIY repairs can go wrong but also the preventive measures and professional solutions that can save you time, money, and stress.
If your phone flash suddenly stops working after a battery or screen replacement, you’re not alone. Thousands of DIY enthusiasts unknowingly trigger hidden dangers that compromise their devices. From short-circuiting to flex cable damage, a simple attempt to save money can quickly spiral into costly repairs.
In this guide, we’ll explore why DIY battery and screen repairs often fail, the hidden risks involved, and how professional solutions protect your device. By understanding these hazards, you can safeguard your phone’s flash and extend its lifespan.
A phone’s flash might look simple, but it’s a sophisticated system. It involves more than just the LED; it’s an integration of sensors, battery power, motherboard circuitry, and software calibration.
Components Involved in Flash Functionality
Battery: Supplies stable power for high-intensity LED flashes.
Motherboard: Controls voltage distribution and flash timing.
LED Module: Emits light; sensitive to overheating and current spikes.
Flex Cables & Connectors: Transmit signals; fragile and prone to damage during disassembly.
Common Flash Problems
Overheating from prolonged use or defective batteries
Short circuits caused by misconnected components
Misalignment during screen replacements
Software glitches or incompatible updates
Even minor mishandling during repairs can stop the flash from working entirely.
DIY phone repairs have grown popular thanks to online tutorials and the promise of saving hundreds of dollars. YouTube guides make screen replacement look easy, and battery swaps seem straightforward.
Popular DIY Fixes
Screen Replacement: Replacing cracked glass or digitizers
Battery Swaps: Installing third-party or new OEM batteries
Cleaning Connectors: Removing dust or corrosion from contacts
Tools & Techniques Used
Precision screwdrivers, spudgers, and tweezers
Heat guns or hair dryers for adhesive removal
Suction cups for lifting screens
While DIY can succeed in some cases, the risks are significant, especially for high-tech components like the flash.
Hidden Dangers of DIY Battery Replacements
Swapping a battery might appear harmless, but lithium-ion batteries are volatile. Mishandling them can lead to immediate or long-term damage.
Risk of Short-Circuiting
Even a tiny slip can connect terminals incorrectly, frying flash circuits or damaging the motherboard. Short-circuiting is irreversible in many cases.
Battery Swelling & Fire Hazards
Overcharging, puncturing, or using incompatible batteries causes swelling, heat build-up, or even fire. A swollen battery can press against the flash module, rendering it useless.
Warranty Voids & Software Conflicts
Opening your device usually voids the manufacturer warranty. Additionally, some phones detect third-party batteries and restrict flash operation to prevent damage.
Hidden Dangers of DIY Screen Repairs
Screen replacement might seem easy, but phones are precise machines. A single misstep can disrupt flash performance.
Flex Cable Damage
Flex cables connect the screen and flash circuitry. Pinching, tearing, or improper reconnection disables flash or other functions.
Misalignment & Sensor Disruption
Even a slightly misaligned screen can block the flash sensor, causing inconsistent brightness or failure.
Low-Quality Replacement Parts
Cheap screens often have inferior LED placement or weak adhesive, reducing flash intensity and overall responsiveness.
Chain Reaction Damage Explained
One mistake can trigger a domino effect. For instance, a punctured battery can short the motherboard, which then prevents the flash and other components from functioning.
From Battery to Camera Failure
Battery punctured → motherboard shorted → LED flash damaged → camera sensor affected
Small, hidden damage can manifest days later
The Cost of Multiple Component Failures
DIY may save $100 upfront but could cost $500–$800 when multiple parts fail. Professional repair reduces this risk.
Professional Repair Advantages
Certified technicians provide a safe, precise, and guaranteed repair experience.
Genuine Parts & Precision Tools
Professionals use OEM components and calibrated tools, preventing damage to delicate flash circuits.
Experience in Diagnosing Hidden Damage
Technicians can detect motherboard faults, connector issues, or software misconfigurations that DIYers often overlook. A non-working flash may not even be a battery issue—it could be a flex cable problem.
Preventive Tips to Protect Your Flash
Even without repairs, proper care reduces flash issues.
Safe Charging & Battery Handling
Avoid overcharging and extreme temperatures
Replace batteries at first sign of swelling
Screen Protection & Cleaning
Use tempered glass to prevent pressure on the flash
Clean sensors gently with microfiber cloths
FAQs
Q1: Can a swollen battery permanently damage the flash?
Yes. Swelling can press against flash components, causing physical damage that software updates can’t fix.
Q2: Will replacing the screen fix a non-working flash?
Only if the flash circuitry isn’t damaged. Misaligned screens or damaged flex cables often require professional repair.
Q3: How do I test my flash after DIY repairs?
Use the camera app’s flash mode, test in different apps, or run a flashlight test app to ensure proper intensity and timing.
Q4: Are third-party batteries safe?
They’re often cheaper but may lack proper protection circuits, risking overheating or flash malfunction.
Q5: Can software updates restore a dead flash?
Sometimes updates fix software glitches, but hardware damage cannot be repaired with software alone.
Q6: How much does professional flash repair cost?
Typical repairs range from $80–$250 depending on model and component damage. Certified repairs prevent chain reaction failures.
Conclusion
DIY battery and screen repairs can seem cost-effective, but they carry hidden risks. From short circuits to flex cable damage, even minor mistakes can disable your flash permanently. Professional repair ensures genuine parts, precise handling, and long-term reliability. Coupled with preventive care, you can extend your phone’s life and keep the flash functioning perfectly.
David from Sydney CBD Repair Centre – The Best place to fix mobile phones as 7 Years In A Row! Top Mobile Phone Repair In Sydney. More than 2000 Positive Reviews on Google and Same Day Repairs.
We take pride in delivering exceptional repair services for all major phone brands including Apple, Samsung, Google, and more. Our expert technicians use only genuine parts and offer 90days warranty on repairs. Located in the heart of Sydney CBD, we’re your one-stop solution for all mobile device repairs.
Our commitment to excellence has earned us the trust of thousands of satisfied customers. Whether it’s a cracked screen, battery replacement, or water damage repair, we handle it all with professional care and expertise. Walk in today and experience why we’re Sydney’s #1 choice for mobile phone repairs.
Visit us for:
✓ Same Day Express Repairs
✓ Genuine Parts Guarantee
✓ Professional Technicians
✓ Competitive Pricing
✓ 2000+ 5-Star Google Reviews
✓ 7-Time Award Winner for Best Phone Repairs
The Tech Trends 2026: Future of Smartphone Repair and Modularity – Revolutionary Insights + 10 Key Developments
Introduction to Smartphone Modularity
The smartphone industry is entering a transformative era, with repairability and modularity taking center stage. In 2026, consumers, manufacturers, and repair services are increasingly embracing modular designs and advanced repair technologies, aiming to extend device lifespan, reduce electronic waste, and enhance user experience. This article explores the latest trends, innovations, and insights that will define the future of smartphone repair.
Smartphone modularity refers to devices designed with replaceable or upgradeable components. Unlike traditional smartphones, modular phones allow users to swap batteries, cameras, or screens without replacing the entire device. The concept has been around for over a decade, with early attempts like Google’s Project Ara, but only recent advancements in materials, software, and repair ecosystems have made modular designs practical.
Modular smartphones are gaining attention because they address key consumer pain points: expensive repairs, rapid device obsolescence, and environmental concerns. By 2026, modularity will become an essential feature rather than a niche offering.
Key Takeaways:
Modular smartphones reduce repair costs and downtime.
Users can customize or upgrade components as technology evolves.
Environmental benefits include lower e-waste and fewer discarded devices.
Smartphone repair has evolved from simple screen and battery replacements to sophisticated diagnostics and component-level fixes. Traditional repair models required certified technicians and extensive labor. However, new technologies are streamlining repair processes.
Modern Repair Approaches:
Certified Technician Networks: Professionals trained in modular repairs and AI diagnostics.
Robotic and Automated Repairs: Machines capable of handling micro-components with precision.
Predictive Maintenance: AI tools that forecast potential failures before they occur.
By 2026, repairs will be faster, safer, and more cost-effective, empowering consumers to maintain devices longer.
1. Cost Efficiency: Replacing a single component costs less than buying a new device.
2. Environmental Impact: Modular phones generate less electronic waste and promote recycling.
3. Upgradeability: Users can improve camera quality, battery life, or storage without purchasing a new phone.
4. Extended Device Lifespan: Modular designs slow obsolescence, making phones functional for years.
5. Customization Options: Consumers can personalize devices to match specific needs or aesthetics.
Emerging Repair Technologies
Advanced technologies are reshaping how smartphones are repaired:
AI Diagnostics: Uses algorithms to identify faults with pinpoint accuracy.
Robotic Repairs: Machines capable of micro-soldering and component replacements.
Predictive Maintenance: Monitors device health to prevent breakdowns.
Augmented Reality Guides: Step-by-step repair instructions via AR glasses or apps.
These technologies not only improve efficiency but also enhance user confidence in DIY or professional repairs.
Role of Software in Repairability
Software plays a critical role in modern smartphone repair. Firmware diagnostics, over-the-air updates, and AI-assisted troubleshooting help technicians and users identify and fix problems without invasive disassembly.
Examples include:
OTA Diagnostics: Updates that detect and fix bugs remotely.
AI Repair Assistants: Guides users to solve minor hardware or software issues.
Smart Component Monitoring: Alerts users when a part is failing or nearing end-of-life.
Sustainability and Eco-Friendly Practices
Eco-conscious consumers are driving demand for sustainable smartphones:
Recycling Programs: Manufacturers reclaim old components for reuse.
Biodegradable Materials: New polymers and metals reduce environmental impact.
Extended Lifespan Devices: Modular designs naturally lead to fewer discarded phones.
These practices align with global sustainability goals and appeal to environmentally aware users.
Consumer Trends Driving Modularity
Consumers are no longer content with disposable devices. Key trends include:
Customization Culture: Users want phones tailored to their needs.
DIY Repair Enthusiasm: Rising popularity of user-led fixes and tutorials.
Tech-Savvy Communities: Forums and apps support shared knowledge on modular devices.
These trends ensure modularity and repairability remain central to smartphone innovation.
Regulatory Landscape and Standards
Governments worldwide are enforcing “Right to Repair” laws, which empower consumers and third-party repair shops:
EU and US Initiatives: Mandating access to repair manuals and spare parts.
Industry Certifications: Standardizing repair procedures and component quality.
Such policies make modular devices more viable and trustworthy for consumers.
Global Market Outlook
The modular smartphone market is projected to grow significantly:
North America & Europe: High consumer awareness and repair laws fuel adoption.
Asia-Pacific: Manufacturing hubs benefit from cost-efficient modular production.
Investment Opportunities: Startups and tech giants explore modular ecosystems.
Analysts predict a compound annual growth rate of over 12% for modular smartphone sales by 2030.
Challenges Facing Modular Design
Despite benefits, modularity faces obstacles:
Compatibility Issues: Components must be universally compatible.
Design Complexity: Integrating modularity without bulkiness is challenging.
Consumer Education: Users must understand repair and upgrade options.
Overcoming these challenges is crucial for widespread adoption.
Case Studies of Modular Phones
Fairphone: Known for ethical sourcing and replaceable components.
Google Project Ara (Concept): Early vision for fully modular smartphones.
Moto Z Series: Modularity through attachable “Moto Mods.”
These examples highlight lessons learned and inspire future designs.
Future Predictions
Looking ahead:
AI-powered repairs will diagnose and fix devices autonomously.
Fully modular ecosystems will integrate smartphones, tablets, and wearables.
Extended smartphone lifespans will become standard, reducing e-waste significantly.
FAQs About Smartphone Repair and Modularity
Q1: Are modular smartphones more expensive?
A1: Initial costs may be higher, but long-term savings from repairs and upgrades offset expenses.
Q2: Can I repair a modular smartphone myself?
A2: Yes, with AR-guided tutorials and AI support, DIY repairs are increasingly feasible.
Q3: Are modular phones environmentally friendly?
A3: Absolutely. They reduce e-waste and encourage recycling of components.
Q4: Will all future smartphones be modular?
A4: Likely not all, but modular designs will become mainstream in premium and mid-range segments.
Q5: How do repair shops benefit from modularity?
A5: Shops can offer faster, cheaper, and higher-quality repairs with standardized modules.
Q6: Where can I learn more about modular smartphone trends?
A6: External resources like TechRadar provide detailed reports on innovations in modular design and repairs.
Conclusion
The future of smartphone repair is modular, sustainable, and tech-driven. From AI-assisted diagnostics to user-friendly modular components, 2026 will see devices that are easier to repair, upgrade, and maintain. This shift not only benefits consumers financially but also reduces environmental impact and fosters a culture of innovation. Repairability and modularity are no longer optional—they’re the defining trends of the next generation of smartphones.
David from Sydney CBD Repair Centre – The Best place to fix mobile phones 7 Years In A Row! Top Mobile Phone Repair In Sydney. More than 2000 Positive Reviews on Google and Same Day Repairs.
✓ Same Day Express Repairs
✓ Genuine Parts Guarantee
✓ Professional Technicians
✓ Competitive Pricing
✓ 2000+ 5-Star Google Reviews
✓ 7-Time Award Winner for Best Phone Repairs
The Debunking Repair Myths: What Really Happens When Your Phone Breaks? + 10 Surprising Truths
Introduction: The Rise of Phone Repair Myths
Smartphones are more than just gadgets—they’re essential extensions of our daily lives. Yet, the moment a screen cracks, a battery swells, or water spills, panic sets in. Unfortunately, widespread myths often guide how users react to these issues. Many believe that DIY fixes are always cheaper, non-original parts are just as good, or that a water-damaged phone is doomed. These misconceptions can lead to costly mistakes, prolonged device downtime, and even permanent damage.
This article dives deep into the top 10 repair myths and the real truths behind them. By understanding what actually happens when your phone breaks, you’ll be empowered to make informed decisions and protect your investment.
Many users think that fixing a phone themselves saves money, but the reality is more nuanced.
Hidden Costs of DIY Repairs
DIY repair kits might seem affordable, but hidden costs quickly add up. You’ll need precision tools, replacement parts, adhesives, and sometimes even magnification devices. Mistakes are common, and one wrong move can damage internal components, turning a simple repair into a full replacement scenario.
Warranty Voiding Issues
Opening a phone yourself almost always voids the manufacturer warranty. That means any future issues, even unrelated to your repair, could cost you the full replacement price. Professional repair services ensure devices are fixed without invalidating warranty coverage.
Some believe cheaper third-party components are just as effective. This is far from true.
Risks of Third-Party Parts
Third-party screens or batteries often lack quality controls. A low-quality battery may overheat or swell, while a poorly calibrated display can compromise touch sensitivity. This puts not only the device but also your safety at risk.
How Genuine Parts Extend Device Life
Genuine replacement parts maintain the original performance and longevity of your device. Using OEM components ensures proper battery life, display quality, and functionality, giving you peace of mind and preserving resale value.
Myth 3: Water Damage Means Total Loss
Water exposure doesn’t automatically spell doom for your phone.
Steps Professionals Take to Recover Devices
Expert technicians use specialized drying techniques, ultrasonic cleaning, and board-level repairs to restore functionality. Quick action can often salvage devices that might seem hopeless.
When Water Damage Is Irreversible
In severe cases—such as prolonged exposure to saltwater or corrosion on essential circuitry—repairs may be impossible. However, most spills are recoverable with professional intervention.
Myth 4: Screen Cracks Don’t Affect Function
A small crack may seem harmless, but it can cause hidden damage.
Microfractures and Touch Issues
Cracks create microfractures that can interfere with the digitizer, resulting in unresponsive touch areas or ghost touches.
Long-Term Damage from Cracks
Over time, cracks can worsen, allowing dust and moisture inside, potentially leading to more serious hardware failures and reducing the device’s lifespan.
Myth 5: Battery Replacement Is Complicated
Battery issues are common, but many avoid replacement due to perceived difficulty.
Signs Your Battery Needs Replacement
Look for swelling, sudden shutdowns, poor battery life, or overheating. These are clear indicators that a new battery is needed.
How Technicians Replace Batteries Safely
Professional technicians use safe, structured processes, including disconnecting the old battery carefully, installing genuine replacements, and testing for voltage and capacity. This ensures safety and optimal performance.
Myth 6: All Repairs Take Weeks
Time is a crucial factor, and many believe professional repair is slow.
Same-Day Repair Services
Many repair centers offer same-day service for common issues like screen replacements, battery swaps, or charging port repairs. Professional technicians can often complete tasks in under an hour.
Factors Affecting Repair Time
Complex issues, rare parts, or water-damaged devices may require longer repairs, but transparent service centers will provide accurate time estimates.
Myth 7: Repair Costs Are Always Overpriced
Repairing your device doesn’t have to break the bank.
Why Prices Vary
Costs vary based on brand, part quality, and technician expertise. High-quality services may charge more, but you get reliability and genuine parts.
How to Avoid Overpaying
Compare local repair centers, check reviews, and confirm part authenticity. Avoid “too cheap to be true” services—they often result in repeat repairs.
Myth 8: Software Issues Require a New Phone
Many users panic when their phone freezes, assuming a replacement is needed.
Common Fixes Without Replacement
Software problems are often resolved with system resets, firmware updates, or cache clearing. These fixes save time and money without hardware replacement.
When Device Replacement Is Necessary
If software issues are caused by hardware faults—like a failing motherboard—replacement may be the only solution. Diagnostic services can clarify the problem.
Myth 9: Insurance Covers Everything
Phone insurance provides peace of mind but has limitations.
Typical Insurance Policies
Most policies cover accidental damage but exclude wear-and-tear, unauthorized repairs, or water damage beyond certain limits. Deductibles also apply.
Alternative Solutions
Professional repair centers often provide cost-effective options outside insurance, including warranty-backed repairs using genuine parts.
Myth 10: One Repair Fixes All
A single repair doesn’t always address the root cause.
Importance of Diagnostics
Full diagnostics help identify underlying problems. For instance, a cracked screen may hide battery or motherboard damage that requires attention.
Preventive Maintenance Tips
Regular cleaning, case protection, software updates, and avoiding DIY mishaps help prevent repeated issues and extend your phone’s lifespan.
FAQs
Q1: Can I safely repair my phone at home?
A: Minor fixes like screen protectors are safe, but opening devices can void warranties and risk damage. Professional repair is safer.
Q2: Are third-party batteries safe?
A: Low-quality third-party batteries may overheat or degrade quickly. Always use OEM or certified replacements.
Q3: How long does water damage repair take?
A: Depending on severity, minor water damage can be fixed within hours. Severe corrosion may take days.
Q4: Does insurance cover all phone repairs?
A: Not always. Insurance often excludes wear-and-tear or unauthorized repairs. Review your policy carefully.
Q5: Why is my replacement screen unresponsive?
A: This may occur if the digitizer isn’t calibrated or if a third-party part was used. Genuine parts and professional installation prevent this.
Q6: How often should I replace my phone battery?
A: Typically every 2–3 years, or sooner if you notice swelling, overheating, or rapid battery drain.
Conclusion
Phone repair myths are widespread, but understanding the truth can save money, prevent stress, and extend the life of your device. DIY may seem cheap, but hidden costs, voided warranties, and safety risks make professional services the better option. Genuine parts, diagnostics, and preventive maintenance ensure your phone performs at its best.
For reliable repairs in Sydney, trust Sydney CBD Repair Centre for same-day service, genuine parts, and expert technicians. Avoid myths and ensure your phone stays functional, safe, and long-lasting.
David from Sydney CBD Repair Centre – The Best place to fix mobile phones as 7 Years In A Row! Top Mobile Phone Repair In Sydney. More than 2000 Positive Reviews on Google and Same Day Repairs.
We take pride in delivering exceptional repair services for all major phone brands including Apple, Samsung, Google, and more. Our expert technicians use only genuine parts and offer 90days warranty on repairs. Located in the heart of Sydney CBD, we’re your one-stop solution for all mobile device repairs.
Our commitment to excellence has earned us the trust of thousands of satisfied customers. Whether it’s a cracked screen, battery replacement, or water damage repair, we handle it all with professional care and expertise. Walk in today and experience why we’re Sydney’s #1 choice for mobile phone repairs.
Visit us for:
✓ Same Day Express Repairs
✓ Genuine Parts Guarantee
✓ Professional Technicians
✓ Competitive Pricing
✓ 2000+ 5-Star Google Reviews
✓ 7-Time Award Winner for Best Phone Repairs