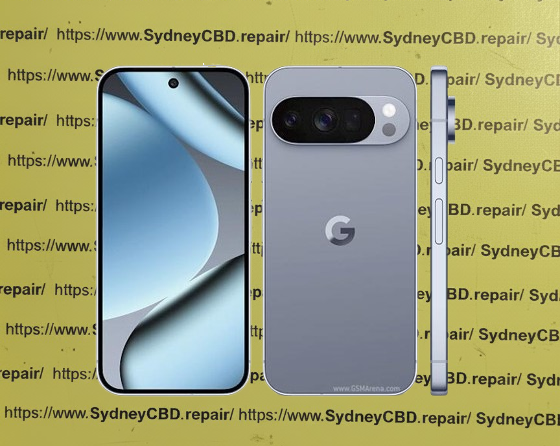
Google Pixel 10 Pro Charging Port: Common Issues & Expert Sydney Fixes + Ultimate Guide
Introduction to Pixel 10 Pro Charging Port Issues
The Google Pixel 10 Pro has become a staple among Android enthusiasts, praised for its advanced features and sleek design. However, like many premium smartphones, it isn’t immune to hardware problems—especially with its charging port. Over time, users may encounter slow charging, connectivity issues, or complete failure to charge. Knowing the causes and solutions for these issues can save both time and money.
A reliable repair service in Sydney can address these problems efficiently, ensuring your Pixel 10 Pro continues to perform at its peak.
One of the most noticeable signs is a device that charges inconsistently or extremely slowly. You may notice that your Pixel 10 Pro only charges when the cable is held at a specific angle.
Device Not Recognizing Charger
Sometimes, the device won’t recognize any charger at all. This may indicate a more severe port or motherboard issue requiring professional attention.
Physical Damage Signs
Visible damage like bent pins, corrosion, or debris lodged inside the port can prevent the phone from charging correctly.
Causes of Charging Port Problems
Dust, Lint, and Debris Accumulation
Small particles can easily accumulate inside the port over time, creating resistance and preventing proper electrical contact.
Water or Liquid Damage
Even small splashes can corrode internal components. Liquid exposure often leads to persistent charging issues if not treated immediately.
Wear and Tear Over Time
Frequent charging cycles and rough handling may cause the port to loosen or the pins to wear out.
Manufacturing Defects
In rare cases, a manufacturing flaw can result in early failure of the charging port.
DIY Troubleshooting Steps Before Professional Repair
Inspecting the Charging Port
Check for obvious debris or damage using a bright light and magnifier. Avoid using metal objects to probe the port, which may cause further harm.
Cleaning the Port Safely
Compressed air or a soft, dry brush can remove lint and dust safely. Isopropyl alcohol wipes are also useful for cleaning corrosion gently.
Using Different Cables and Chargers
Sometimes, the problem lies with the charger or cable. Use certified accessories to test whether the issue persists.
Software Updates and Settings Check
Ensure the device firmware is up-to-date and check battery settings. Occasionally, software glitches can mimic charging port failures.
When to Seek Professional Repair in Sydney
Risks of DIY Repairs
Opening the device or using improper tools can cause permanent damage.
Benefits of Expert Technicians
Certified technicians can perform thorough diagnostics, use genuine replacement parts, and restore full functionality.
Same-Day Repair Options
Sydney repair centers like Sydney CBD Repair Centre offer same-day services, minimizing downtime.
Technicians first assess the device to confirm the port is faulty and rule out battery or motherboard issues.
Disassembly and Component Replacement
The phone is carefully opened, and the defective charging port is replaced with a genuine part.
Testing and Quality Assurance
After replacement, the device undergoes rigorous testing to ensure it charges properly under all conditions.
Maintenance Tips to Prevent Future Issues
Regular Cleaning Routine
Periodic cleaning can prevent lint buildup and prolong the port’s lifespan.
Using Certified Chargers
Third-party chargers may deliver inconsistent voltage, leading to port wear.
Avoiding Moisture and Rough Handling
Always keep the device dry and avoid forceful insertion of cables.
Cost and Time Estimates for Repair
Typical Price Range in Sydney
Charging port repairs usually range between AUD 80–150, depending on parts and labor.
Turnaround Time for Repairs
Most repair centers, including Sydney CBD Repair Centre, offer same-day service.
FAQs
Can I fix a Pixel 10 Pro charging port myself?
While minor cleaning is safe, full port replacement requires professional skills to avoid damage.
How long does a repair take?
Typically 30–60 minutes for same-day repairs at expert centers.
Will repairing the charging port void my warranty?
Using an authorized repair center with genuine parts ensures your warranty remains intact.
What if my Pixel 10 Pro still doesn’t charge after repair?
Technicians will reassess other potential issues like battery or motherboard faults.
How can I prevent future charging issues?
Regular maintenance, using certified chargers, and avoiding moisture exposure are key.
Do you offer warranty on charging port repairs?
Yes, most Sydney-based repair centers provide a 90-day warranty on parts and labor.
Conclusion
The Pixel 10 Pro charging port is a critical component that can encounter issues over time. Recognizing the symptoms early, performing safe DIY troubleshooting, and consulting professional Sydney repair centers ensures that your device remains fully functional. Regular maintenance and care can extend the lifespan of your charging port and avoid repeated repair costs.
David from Sydney CBD Repair Centre – The Best place to fix mobile phones as 7 Years In A Row! Top Mobile Phone Repair In Sydney. More than 2000 Positive Reviews on Google and Same Day Repairs.
We take pride in delivering exceptional repair services for all major phone brands including Apple, Samsung, Google, and more. Our expert technicians use only genuine parts and offer 90days warranty on repairs. Located in the heart of Sydney CBD, we’re your one-stop solution for all mobile device repairs.
Visit us for:
✓ Same Day Express Repairs
✓ Genuine Parts Guarantee
✓ Professional Technicians
✓ Competitive Pricing
✓ 2000+ 5-Star Google Reviews
✓ 7-Time Award Winner for Best Phone Repairs
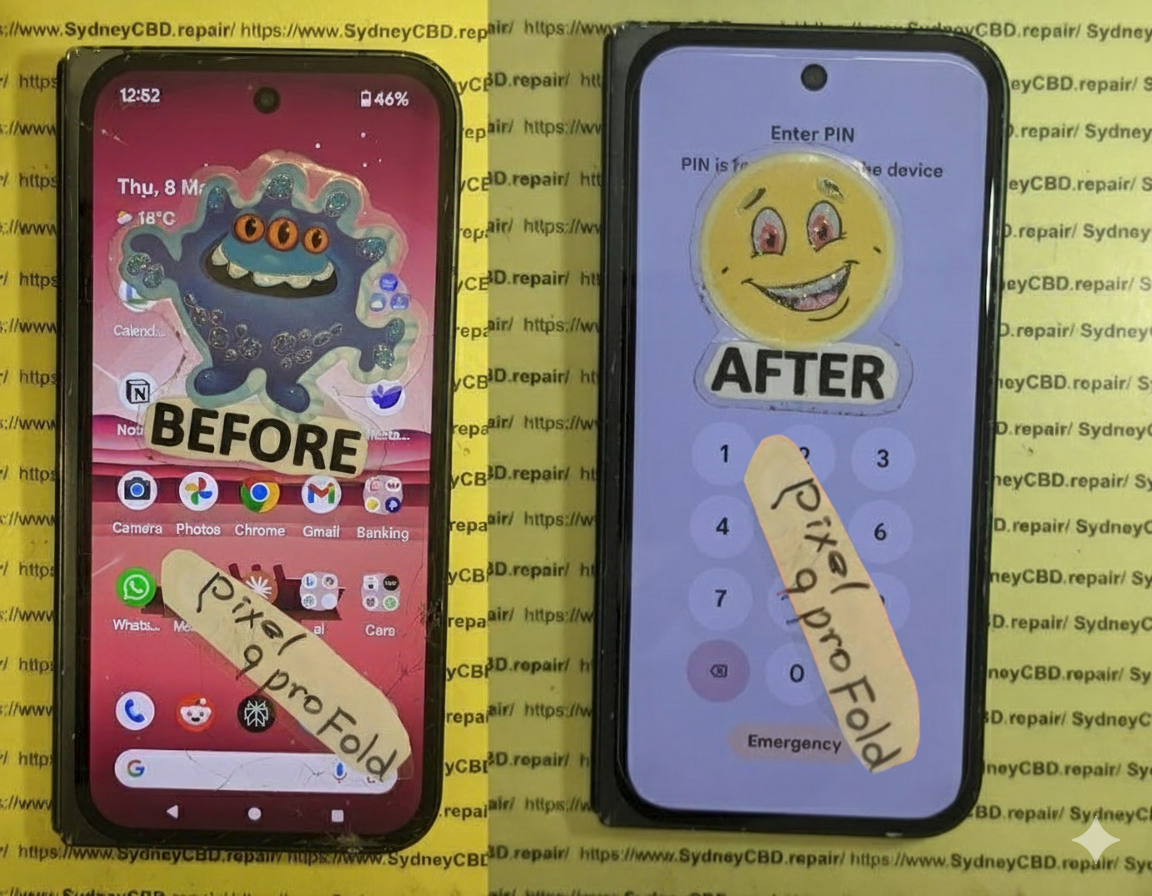
Pixel Fold Phone’s Screen Repair: The unexpected challenges of flexible displays + 7 Key Insights
Introduction: The Rise of Flexible Display Technology
Flexible displays are no longer a futuristic concept—they’re a reality reshaping the smartphone landscape. Devices like the Pixel Fold have popularized foldable technology, combining portability with large-screen experiences. However, this innovation introduces a set of challenges for device repair, particularly when it comes to screen replacement. Unlike traditional rigid displays, foldable screens are delicate, requiring specialized handling, tools, and expertise to maintain optimal functionality.
Pixel Fold users often underestimate the fragility of these devices. While the ability to fold the phone adds convenience, it also increases the risk of damage over time. This guide explores the complexities of Pixel Fold screen replacement, addressing common issues, repair techniques, and preventative measures.
The Pixel Fold utilizes flexible OLED technology, allowing the screen to bend without breaking. Unlike conventional LCDs, OLEDs generate light from individual pixels, eliminating the need for a backlight. This results in thinner, more vibrant displays capable of folding seamlessly. However, this thinness comes at the cost of durability. Even minor mishandling can cause pixel burnout, dead zones, or permanent creases.
Hinge Mechanism and Screen Durability
The hinge is central to the Pixel Fold’s functionality. While it provides smooth folding action, it also subjects the screen to repeated stress. Over time, improper folding or pressure on specific points can weaken the display. Maintaining hinge health and avoiding unnecessary force is crucial to prolonging screen life.
A drop is arguably the most common cause of screen failure. Flexible displays are more prone to cracking from direct impact due to their thin structure. Protective cases reduce risk, but no accessory can fully prevent damage from high-impact drops.
Pressure Points and Folding Stress
Unlike flat smartphones, foldables endure repeated bending stress. Carrying the Pixel Fold in tight pockets or placing objects on the screen can create pressure points, resulting in micro-tears or creases.
Water and Dust Exposure
While many modern devices offer water resistance, foldable phones have more entry points, especially around the hinge. Moisture or dust entering the hinge can damage internal layers of the display and affect touch sensitivity.
Why Pixel Fold Screen Replacement is Tricky
Fragility of Flexible OLED Panels
Repairing a flexible OLED isn’t as straightforward as replacing a rigid screen. The delicate layers, including touch sensors, polarizers, and protective films, require extreme caution to avoid further damage.
Specialized Tools and Techniques Needed
Standard repair tools often aren’t sufficient. Technicians must use specialized clamps, heat guns with precise temperature control, and anti-static equipment to remove and install the new screen without causing warping or short circuits.
Limited Availability of Genuine Parts
Pixel Fold replacement screens are scarce. Using non-genuine parts may compromise performance, display quality, and hinge alignment. Accessing authentic components is essential for a successful repair.
Step-by-Step Pixel Fold Screen Replacement Process
Preparing for the Repair
Before starting, back up all data and power down the device. Work in a clean, dust-free environment and ensure you have all specialized tools ready.
Removing the Damaged Screen
Careful heating of the adhesive and gentle prying are required. Avoid bending the screen excessively. Detach connectors methodically, labeling each to ensure proper reassembly.
Installing the New Flexible Display
Position the replacement screen precisely, reconnect all cables, and apply uniform adhesive. Ensure no dust or debris is trapped under the display.
Testing and Calibration
Power on the device to test touch responsiveness, color accuracy, and hinge operation. Perform calibration if necessary to restore optimal performance.
Tools and Equipment Required for Pixel Fold Screen Repairs
Professional-Grade Tools Overview
Essential tools include:
Precision screwdrivers
Heat guns with adjustable temperature
Anti-static tweezers
Specialized screen clamps
Thin pry tools
Importance of Anti-Static Precautions
Static electricity can permanently damage OLED panels. Using anti-static mats and wristbands prevents unintended short circuits.
Cost Factors for Pixel Fold Screen Replacement
Labor vs Parts Pricing
The cost depends on the complexity of the repair and part authenticity. Genuine Pixel Fold screens are expensive, often exceeding the price of traditional displays.
Warranty Considerations
Always check warranty status before attempting DIY repairs. Unauthorized repairs may void manufacturer coverage.
Tips to Extend the Life of Your Pixel Fold Screen
Proper Handling and Folding Habits
Fold your device gently, avoid sharp bends, and never force the screen to open or close rapidly.
Protective Accessories and Cases
Use custom cases designed for foldables, avoiding tight enclosures that stress the hinge.
Environmental Awareness: Temperature and Humidity
Avoid exposing the device to extreme heat, direct sunlight, or high humidity, which can weaken the flexible display layers.
DIY vs Professional Repair: Risks and Rewards
When to Attempt DIY Repairs
DIY may be considered only if you have experience with fragile electronics and access to genuine parts and professional tools.
Why Professional Repair is Recommended
Expert technicians minimize risk, ensuring proper alignment, calibration, and handling of fragile components. Attempting DIY can easily worsen the damage.
External Resources for Pixel Fold Repair Guidance
Official Manufacturer Support
Refer to Google’s Pixel Support for repair guidelines, official parts, and warranty details.
Community and Repair Forums
Repair communities, like iFixit, provide step-by-step guides, video tutorials, and discussion threads from experienced users.
Frequently Asked Questions (FAQs)
1. How long does a Pixel Fold screen last on average?
With careful handling, the screen can last 3–5 years, though repeated folding increases wear risk.
2. Can I use third-party replacement screens?
Technically yes, but quality may vary, affecting touch sensitivity, color accuracy, and hinge alignment.
3. Will the hinge mechanism be affected after screen replacement?
If replaced correctly with genuine parts, the hinge should function normally. Improper installation can cause misalignment.
4. How can I prevent creasing on my flexible display?
Avoid tight folds, excessive pressure, and store the device in protective cases to prevent permanent creases.
5. What is the turnaround time for professional Pixel Fold repair?
Most repair centers complete the replacement within 1–2 business days, depending on part availability.
6. Are screen replacements covered under warranty?
Warranty coverage varies; accidental damage typically isn’t included. Always check your manufacturer’s warranty terms.
Conclusion: Ensuring Longevity for Flexible Screens
Pixel Fold screen replacement demands precision, patience, and specialized knowledge. By understanding the unique challenges of flexible displays, following preventive measures, and relying on expert technicians when necessary, users can extend the life of their foldable devices. Remember: investing in professional repair ensures quality, reliability, and peace of mind for your high-end device.
David from Sydney CBD Repair Centre – The Best place to fix mobile phones as 7 Years In A Row! Top Mobile Phone Repair In Sydney. More than 2000 Positive Reviews on Google and Same Day Repairs.
We take pride in delivering exceptional repair services for all major phone brands including Apple, Samsung, Google, and more. Our expert technicians use only genuine parts and offer 90days warranty on repairs. Located in the heart of Sydney CBD, we’re your one-stop solution for all mobile device repairs.
Our commitment to excellence has earned us the trust of thousands of satisfied customers. Whether it’s a cracked screen, battery replacement, or water damage repair, we handle it all with professional care and expertise. Walk in today and experience why we’re Sydney’s #1 choice for mobile phone repairs.
Visit us for:
✓ Same Day Express Repairs
✓ Genuine Parts Guarantee
✓ Professional Technicians
✓ Competitive Pricing
✓ 2000+ 5-Star Google Reviews
✓ 7-Time Award Winner for Best Phone Repairs
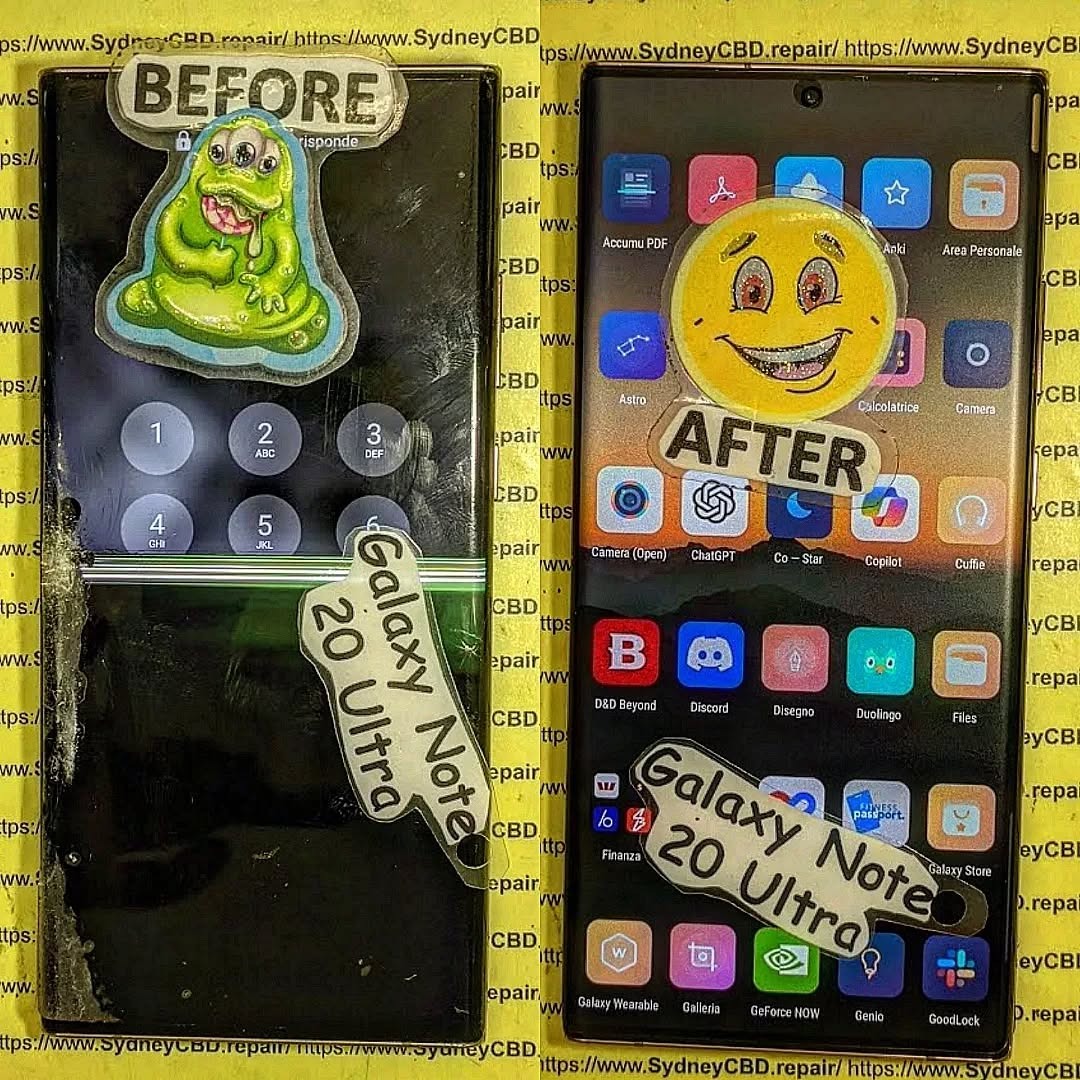
Reviving the Samsung Galaxy Note 20 Ultra: Is Your Older Flagship Worth Repairing? 10 Smart Insights
Introduction
The Samsung Galaxy Note 20 Ultra remains one of the most iconic smartphones of its generation. Launched in 2020, it combined cutting-edge technology, a stunning design, and the productivity-focused S Pen, making it a favorite for professionals, creatives, and tech enthusiasts alike. But as the years go by, even the most robust devices begin to show signs of wear and tear. Cracked screens, battery degradation, and software slowdowns are common issues that many Note 20 Ultra owners face.
So, the big question arises: is it worth repairing an older flagship like the Note 20 Ultra, or should you simply invest in a new device? Repairing your device can save money, extend its lifespan, and even reduce electronic waste, but it requires careful consideration of repair costs, part quality, and the type of issues affecting your phone.
In this guide, we’ll explore everything you need to know about reviving the Note 20 Ultra. From common problems and repair costs to professional repair tips and maintenance advice, this article will help you make an informed decision. Whether you’re contemplating a DIY fix or heading to a certified repair center, we’ll provide insights, tips, and real-world examples to help your device feel almost brand new again.
The Samsung Galaxy Note 20 Ultra remains one of the most revered flagship smartphones of its generation. Released in 2020, this powerhouse combined premium design with top-tier performance. However, as with any older device, time takes its toll. Screens crack, batteries degrade, and software can slow down. If you’re wondering whether reviving the Note 20 Ultra is worth the investment, you’re in the right place. This guide dives deep into repairs, costs, and strategies to get your device running like new again.
The Note 20 Ultra set the bar high in the smartphone market. Featuring a stunning 6.9-inch Dynamic AMOLED 2X display, a powerful Snapdragon 865+ or Exynos 990 processor, and the beloved S Pen functionality, it became a favorite among productivity enthusiasts and tech aficionados alike. Its premium build, featuring Gorilla Glass Victus and a stainless steel frame, promised durability, yet nothing is invincible.
Even years after its launch, the Note 20 Ultra still holds up in terms of performance, camera quality, and display technology. Its combination of features and aesthetic design ensures it remains a device worth considering for repair rather than replacement, especially if you want to extend its life and avoid unnecessary e-waste.
Like all devices, the Note 20 Ultra experiences wear over time. Understanding these issues is key to deciding whether a repair makes sense.
Screen and Display Problems
One of the most frequent problems is a damaged display. The Note 20 Ultra’s AMOLED screen delivers exceptional color and contrast, but it’s susceptible to cracks from drops. Users also report ghost touches or flickering after water exposure. Replacing the display often resolves these issues, restoring both touch responsiveness and vibrant visuals.
Battery and Charging Concerns
Over time, the battery’s maximum capacity naturally declines. This can result in shorter screen-on time and slower charging speeds. Some users encounter fast-charging failures or overheating. Replacing the battery with a genuine Samsung component can bring back original performance levels, sometimes at a fraction of the cost of a new phone.
Water Damage and Internal Corrosion
Despite IP68 water resistance, accidental exposure to water or moisture can occur. Signs include erratic touch input, camera fogging, or device failure. Water damage repair is complex and usually requires professional intervention. Technicians can clean and replace affected internal components to restore functionality.
Repair vs Replacement: Making the Smart Choice
Deciding whether to repair or replace your Note 20 Ultra depends on several factors, including cost, performance, and personal preference.
Financial Considerations
Repairs can range from $150 to $500 depending on the issue. For instance, screen replacement may cost more than battery replacement but is still cheaper than purchasing a new flagship device. Compare the repair cost to current market prices for a refurbished or new equivalent. Often, repair is the economical and sensible route.
Environmental Impact
Repairing your device is an eco-friendly choice. Extending the life of your Note 20 Ultra reduces electronic waste and the carbon footprint associated with manufacturing new devices. For sustainability-conscious users, this factor alone may tip the balance toward repair.
DIY Repairs: What You Can Do at Home
Some minor issues can be handled without professional help, but caution is essential.
Battery Calibration: Reboot and reset battery stats to extend lifespan.
Software Updates: Keep your device updated to prevent slowdowns.
Cleaning: Use isopropyl alcohol and microfiber cloths for ports and surfaces.
DIY repairs can save money, but avoid opening the device for major internal repairs unless you have proper tools and experience.
Professional Repairs: When Expertise Matters
Certain repairs require expertise:
Screen Replacement: AMOLED screens are fragile and expensive.
Water Damage: Internal corrosion requires specialized cleaning.
Motherboard Issues: Only trained technicians should handle.
Certified centers, like Sydney CBD Repair Centre, provide genuine parts, warranties, and professional service. They ensure the device is restored safely, maintaining performance and longevity.
Finding Quality Replacement Parts
Using genuine Samsung components is critical. Aftermarket parts can be cheaper, but they may compromise display quality, touch sensitivity, or battery life. Look for reputable suppliers and certified repair centers to guarantee compatibility and longevity.
Maintaining Your Device After Repair
Once repaired, taking proactive steps prolongs life:
Use a high-quality case and screen protector.
Avoid excessive heat or moisture.
Regularly clear cache and background apps.
Perform battery calibration every few months.
Consistent maintenance ensures that your Note 20 Ultra continues performing optimally.
Software Optimization and Updates
Even with hardware repaired, outdated software can hinder performance. Ensure you:
Install the latest One UI updates.
Remove unused apps and bloatware.
Perform regular system optimization.
Software upkeep complements hardware repairs, making your device feel nearly new.
User Experiences: Stories from the Field
Many users have successfully extended their Note 20 Ultra’s life:
Emma, 32: Replaced battery and screen, regained full-day battery and flawless display.
James, 28: Water damage repair restored camera and touch functionality.
Raj, 40: Opted for professional repair over replacement, saving over $600.
These real-world cases demonstrate the tangible benefits of repair versus replacement.
Frequently Asked Questions
1. How much does a Note 20 Ultra screen replacement cost?
Typically, $300–$500 depending on parts and labor.
2. Can water damage be fully repaired?
Yes, with professional cleaning and component replacement, though success depends on damage severity.
3. Are aftermarket parts safe for repairs?
They can be used, but genuine parts ensure optimal performance and longevity.
4. How long does a battery replacement last?
A new genuine battery usually lasts 18–24 months with proper care.
5. Is repairing environmentally friendly?
Absolutely. It reduces e-waste and energy consumption compared to manufacturing new devices.
6. Can software updates improve an old Note 20 Ultra?
Yes, updates can enhance speed, security, and battery optimization.
Conclusion: Is It Worth It?
Repairing your Note 20 Ultra is often a smart choice. With professional repairs, genuine parts, and regular maintenance, your device can function like new, saving money and supporting sustainability. For owners who value performance and design, revival is not just feasible—it’s rewarding.
David from Sydney CBD Repair Centre – The Best place to fix mobile phones as 7 Years In A Row! Top Mobile Phone Repair In Sydney. More than 2000 Positive Reviews on Google and Same Day Repairs.
We take pride in delivering exceptional repair services for all major phone brands including Apple, Samsung, Google, and more. Our expert technicians use only genuine parts and offer 90days warranty on repairs. Located in the heart of Sydney CBD, we’re your one-stop solution for all mobile device repairs.
Our commitment to excellence has earned us the trust of thousands of satisfied customers. Whether it’s a cracked screen, battery replacement, or water damage repair, we handle it all with professional care and expertise. Walk in today and experience why we’re Sydney’s #1 choice for mobile phone repairs.
Visit us for:
✓ Same Day Express Repairs
✓ Genuine Parts Guarantee
✓ Professional Technicians
✓ Competitive Pricing
✓ 2000+ 5-Star Google Reviews
✓ 7-Time Award Winner for Best Phone Repairs
Water Resistance After Repair Can We Restore Your Phone’s Seal? | Ultimate Truth + 7 Critical Facts
Introduction
Water resistance after repair is one of the most common—and most misunderstood—concerns among smartphone owners today. With modern phones advertised as water-resistant and protected by IP ratings, many users naturally expect the same level of protection to remain intact after a screen replacement, battery change, or internal repair. Unfortunately, that assumption can lead to costly surprises.
Smartphones rely on precision-engineered seals, adhesives, and internal gaskets that are applied under strict factory conditions. Once a device is opened, those original seals are broken. From that point on, water resistance after repair depends on the quality of the repair process, the materials used, and the technician’s expertise. Even then, restoring a phone to its original factory-sealed condition is extremely difficult—if not impossible.
This article explores the reality behind water resistance after repair in clear, practical terms. We’ll explain how water resistance works, what changes when a phone is opened, and whether professional resealing can truly protect your device again. More importantly, we’ll set realistic expectations so you know exactly what level of protection your phone has after repair.
Whether you’ve already had your phone fixed or you’re considering a repair, understanding water resistance after repair will help you make smarter decisions, avoid unnecessary risks, and extend the life of your device. Let’s break down the facts and separate marketing myths from real-world repair outcomes.
Water resistance after repair is one of the most misunderstood topics in mobile phone ownership today. Many users assume that once a phone is repaired—especially after a screen or battery replacement—it will perform exactly as it did when brand new. Sadly, that’s not always true.
Modern smartphones are marvels of engineering. They’re slim, powerful, and increasingly resistant to water and dust. However, that resistance depends on factory-perfect seals that are extremely hard to replicate once broken. So the big question remains: can water resistance after repair really be restored?
The short answer is partially, but never perfectly. In this guide, we’ll walk you through the truth, without fluff. We’ll explain how water resistance works, what changes after a repair, and what you can realistically expect going forward. Let’s dive in.
First things first—water resistance is not waterproofing. There’s a big difference.
When manufacturers advertise water resistance, they’re saying the device can survive limited exposure to water under controlled conditions. That’s it. No phone is designed to live underwater forever.
Water resistance after repair becomes tricky because even brand-new phones aren’t guaranteed against water damage. Over time, seals degrade naturally due to heat, pressure, and everyday wear. Add a repair into the mix, and things get even more complex.
In simple terms, water resistance is a safety buffer, not a promise.
IP Ratings Explained Simply
Most phones today come with an IP rating, such as IP67 or IP68. These ratings define how resistant a device is to dust and water.
IP6X = Dust-tight
IPX7 = Water-resistant up to 1 meter for 30 minutes
IPX8 = Water-resistant beyond 1 meter (manufacturer-defined)
Here’s the catch: IP ratings only apply when the phone leaves the factory. Once it’s opened for repair, that certification no longer officially applies—regardless of how skilled the technician is.
Phone manufacturers use automated machines, lasers, pressure-controlled environments, and proprietary adhesives to seal devices. This process is incredibly precise.
Every button, speaker grill, microphone, and port is protected by internal gaskets and mesh barriers. These components work together to create water resistance.
When discussing water resistance after repair, it’s important to understand that these factory conditions can’t be fully recreated outside manufacturing plants.
Adhesives, Gaskets, and Precision
Adhesives play a massive role in sealing phones. They’re heat-activated, pressure-sensitive, and applied in exact quantities. Even being off by a millimeter can create gaps.
After repair, technicians rely on high-quality replacement adhesives. While these are effective, they’re still applied manually. That human element introduces small variations—tiny, but important.
What Happens to Water Resistance After Repair
Opening the Device: The Seal Is Broken
The moment a phone is opened, its original seal is broken. There’s no way around it.
This doesn’t mean the phone becomes fragile instantly. However, it does mean the original water resistance is compromised. Water resistance after repair now depends on how well the device is resealed.
Screen replacements, battery changes, and charging port repairs are the most common services that affect seals.
Why Water Resistance Is Never “Guaranteed” Again
Even with expert resealing, no repair shop can legally guarantee water resistance after repair. That’s why most warranties exclude liquid damage—even on brand-new phones.
Temperature changes, frame alignment, and microscopic dust particles can all interfere with sealing. So while resistance can be restored to a degree, it’s never exactly the same.
Can Water Resistance After Repair Be Restored?
Professional Resealing Methods
Yes—water resistance after repair can be partially restored when done professionally.
Experienced technicians use:
Manufacturer-spec adhesive seals
Controlled heating plates
Frame alignment tools
Pressure-tested installation methods
These steps significantly improve resistance compared to DIY or low-quality repairs.
At reputable repair centers, resealing is treated as a critical step, not an afterthought.
Limitations Even With Expert Repairs
Still, there are limits.
No re-certification of IP rating
No guarantee against water exposure
Reduced tolerance compared to factory seal
Think of it this way: water resistance after repair is like re-weatherproofing a door. It’ll keep light rain out, but you wouldn’t test it in a storm.
Factors That Affect Water Resistance After Repair
Type of Repair Performed
Not all repairs impact water resistance equally.
High impact:
Screen replacement
Battery replacement
Lower impact:
Camera replacement
Speaker replacement
The more invasive the repair, the greater the effect on water resistance after repair.
Quality of Parts and Adhesives
Cheap parts mean poor sealing. High-quality adhesives are flexible, durable, and designed to withstand heat cycles.
This is why professional repair centers insist on premium materials. It’s not about cost—it’s about long-term reliability.
Technician Skill and Tools
Skill matters. A lot.
Even the best adhesive won’t help if applied incorrectly. Proper curing time, even pressure, and frame inspection are essential.
Water resistance after repair depends as much on who does the repair as how it’s done.
Manufacturer vs Third-Party Repair Reality
Authorized Service Centers
Authorized centers use original parts and follow manufacturer guidelines. However, even they don’t guarantee water resistance after repair.
Surprisingly, their policies often match independent professionals in this regard.
Independent Repair Specialists
Top-tier independent repair centers can match—and sometimes exceed—authorized service quality. The difference lies in transparency.
Good repair shops will clearly explain the limits of water resistance after repair instead of making unrealistic promises.
Myths About Water Resistance After Repair
Let’s clear up a few myths:
Myth: “My phone is waterproof again.” Truth: No phone is ever fully waterproof.
Myth: “IP rating still applies.” Truth: IP certification ends once the device is opened.
Myth: “A case restores water resistance.” Truth: Cases help, but they don’t reseal internals.
Understanding these facts helps set realistic expectations.
Best Practices to Protect Your Phone After Repair
To stay safe after repair:
Avoid water exposure
Don’t test water resistance intentionally
Use protective cases
Keep away from steam and heat
Dry immediately if splashed
Water resistance after repair should be treated as reduced protection, not a feature to rely on.
Frequently Asked Questions (FAQs)
1. Is water resistance after repair the same as factory condition?
No. It can be partially restored but never fully returned to factory condition.
2. Can a phone be re-IP rated after repair?
No. Only manufacturers can certify IP ratings.
3. Does screen replacement affect water resistance after repair?
4. Can adhesive alone restore water resistance after repair?
Adhesive helps, but precision and tools matter just as much.
5. Should I avoid water completely after repair?
Yes, whenever possible. Reduced exposure is safest.
6. Do repair warranties cover water damage?
Almost always no, due to the unpredictability of liquid exposure.
Conclusion
Water resistance after repair is a topic filled with half-truths and assumptions. While professional repairs can restore a degree of protection, no repair can bring your phone back to its original factory-sealed state.
The key is understanding limitations, choosing skilled technicians, and adjusting how you use your device afterward. When you know the facts, you can protect your investment and avoid costly surprises.
David from Sydney CBD Repair Centre – The Best place to fix mobile phones as 7 Years In A Row! Top Mobile Phone Repair In Sydney. More than 2000 Positive Reviews on Google and Same Day Repairs.
We take pride in delivering exceptional repair services for all major phone brands including Apple, Samsung, Google, and more. Our expert technicians use only genuine parts and offer 90days warranty on repairs. Located in the heart of Sydney CBD, we’re your one-stop solution for all mobile device repairs.
Our commitment to excellence has earned us the trust of thousands of satisfied customers. Whether it’s a cracked screen, battery replacement, or water damage repair, we handle it all with professional care and expertise. Walk in today and experience why we’re Sydney’s #1 choice for mobile phone repairs.
Visit us for:
✓ Same Day Express Repairs
✓ Genuine Parts Guarantee
✓ Professional Technicians
✓ Competitive Pricing
✓ 2000+ 5-Star Google Reviews
✓ 7-Time Award Winner for Best Phone Repairs
Why Your Pixel 10 Pro XL Face Unlock Fails After a Screen Replacement: 7 Powerful Reasons You Need to Know
Introduction
Replacing a smartphone screen should restore your device—not introduce new problems. If your Pixel 10 Pro XL Face Unlock fails after a screen replacement, there’s usually a technical reason behind it. This guide explains the causes, repair process, and preventive measures using practical advice from experienced repair professionals.
Modern smartphones are more sophisticated than ever before. The Pixel 10 Pro XL Face Unlock fails after a screen replacement issue has become increasingly common because today’s devices integrate sensitive sensors directly into the display assembly.
Unlike older smartphones that only relied on a front-facing camera, modern Pixel devices combine multiple hardware components and intelligent software to authenticate users quickly and securely. Even a tiny misalignment during repair can interrupt this delicate system.
Many owners become frustrated when they discover their new display looks perfect, yet Face Unlock suddenly refuses to recognize them. Fortunately, this problem is often repairable when the correct diagnostic procedures are followed.
Throughout this guide, you’ll discover:
Why Face Unlock depends on more than the front camera
Common repair mistakes
Signs of poor-quality replacement parts
Professional repair techniques
Preventative maintenance tips
Answers to frequently asked questions
Whether you’re considering repairing your own phone or taking it to a professional technician, understanding these issues can save time, money, and unnecessary stress.
Face Unlock appears simple from the user’s perspective. You pick up the phone, look at the screen, and it unlocks within seconds. Behind the scenes, however, dozens of components work together with remarkable precision.
Hardware Components Involved
Several pieces of hardware contribute to Face Unlock performance.
These commonly include:
Front-facing camera
Ambient light sensor
Proximity sensor
Infrared-related components (depending on hardware configuration)
Display alignment brackets
Flex cable assemblies
Motherboard connectors
Every component must remain perfectly aligned after a repair.
If the replacement display sits only fractions of a millimeter higher than intended, sensors may become partially obstructed. Although invisible to the naked eye, this slight shift can prevent reliable facial authentication.
Professional technicians understand these tolerances and use specialized tools to maintain factory positioning.
Precision Matters
Manufacturers design smartphones with extremely tight engineering tolerances.
The display frame not only supports the OLED panel but also positions:
Cameras
Sensors
Speaker mesh
Microphones
Protective brackets
If one element moves out of place, another component may also shift.
This domino effect explains why some users experience multiple symptoms after a poor-quality repair, including:
Auto-brightness not working
Screen flickering
Proximity sensor failures
Face Unlock errors
Ghost touches
The display itself isn’t always responsible. Instead, incorrect installation may interfere with nearby hardware.
Software Authentication Process
Hardware captures your facial information, but software performs the actual authentication.
Google’s security system analyzes numerous facial characteristics before unlocking the phone.
These include:
Facial contours
Relative eye position
Depth estimation
Lighting consistency
Sensor confidence values
If sensor data appears incomplete or inconsistent, Android refuses authentication as a security precaution.
This explains why Face Unlock often displays messages such as:
“Face not recognized”
“Move phone farther away”
“Clean camera”
“Face Unlock unavailable”
In many cases, the software is functioning correctly—it simply isn’t receiving accurate hardware data.
Security Comes First
Google prioritizes security over convenience.
Rather than allowing unreliable facial recognition, the system intentionally disables Face Unlock whenever it detects abnormal sensor behavior.
This prevents:
False positives
Unauthorized access
Security vulnerabilities
Biometric inconsistencies
Although inconvenient, this design protects personal information stored on the device.
Understanding the root causes helps determine whether the issue is hardware-related, software-related, or simply the result of an installation mistake.
Fortunately, most failures fall into a handful of categories.
Misaligned Sensor Assembly
This is among the most common causes.
During screen replacement, technicians must transfer tiny components from the original display assembly.
These include:
Sensor brackets
Alignment clips
Protective gaskets
Dust shields
Missing even one small bracket can slightly reposition the sensors.
Because Face Unlock relies on precise alignment, even minimal movement may reduce authentication accuracy.
Professional repair centers use alignment fixtures to ensure every transferred component returns to its exact original location.
Damaged Flex Cables
Flex cables are surprisingly delicate.
They carry signals between the display assembly and the motherboard.
Improper handling may result in:
Tiny tears
Internal fractures
Bent connectors
Loose connections
Interestingly, the display itself may continue functioning normally while biometric features fail completely.
This often leads users to believe the software is broken when the underlying issue is actually a damaged cable.
Connector Problems
A connector that isn’t fully seated can produce intermittent issues.
Symptoms may include:
Face Unlock working occasionally
Camera opening slowly
Sensor failures after reboot
Random authentication errors
Experienced technicians inspect connectors under magnification before completing the repair.
Improper Adhesive Installation
Adhesive does much more than hold the display in place.
Factory-installed adhesive also maintains:
Proper spacing
Dust protection
Water resistance
Mechanical stability
Using excessive adhesive can interfere with sensor openings.
Too little adhesive allows slight display movement during daily use.
Both situations may negatively affect Face Unlock reliability over time.
Calibration Problems After Screen Replacement
Even when every cable is connected correctly and the replacement display looks flawless, the Pixel 10 Pro XL Face Unlock fails after a screen replacement issue can still occur because of calibration.
Modern smartphones don’t simply detect whether hardware is present—they also verify that sensors are working within precise factory specifications. After a screen replacement, these sensors may need to be recalibrated to communicate correctly with the operating system.
Professional repair technicians understand that calibration is just as important as installing the new screen.
Why Calibration Is Important
Think of calibration as teaching your phone where every component is located.
Without proper calibration, the device may experience:
Face Unlock errors
Incorrect proximity sensor readings
Auto-brightness problems
Delayed screen wake
Reduced biometric accuracy
Even a perfectly installed display can produce unreliable results if the phone’s software cannot accurately interpret sensor data.
Software Updates Can Affect Face Unlock
Another factor many users overlook is software compatibility.
Google regularly releases Android updates that improve:
Security
Biometric authentication
Camera performance
Display drivers
System stability
If your phone receives a major update shortly after a screen replacement, previously unnoticed hardware issues may suddenly become apparent. The updated software often performs stricter hardware validation, making minor installation faults more noticeable.
Before assuming the replacement screen is defective, it’s worth checking whether a recent system update coincided with the issue.
Original vs Aftermarket Screens
Not all replacement screens are created equal.
One of the biggest reasons the Pixel 10 Pro XL Face Unlock fails after a screen replacement is the quality of the replacement part itself.
While many aftermarket displays function well for basic use, they may differ from genuine parts in subtle but important ways.
Display Compatibility
A high-quality replacement display should closely match the original in terms of:
Feature
Genuine Quality
Poor-Quality Aftermarket
Display thickness
Factory specification
May vary slightly
Sensor cut-outs
Precisely machined
Sometimes oversized or misaligned
Flex cable quality
Premium
Variable
Frame accuracy
Exact fit
May require adjustment
Adhesive placement
Factory design
Inconsistent
Small differences can have a significant impact on biometric performance.
For example, an incorrectly positioned sensor window may partially block the front-facing sensor array. Although the obstruction is almost invisible, it can reduce the accuracy of Face Unlock.
Frame Precision
The display frame is responsible for much more than supporting the OLED panel.
It also positions:
Front camera
Earpiece speaker
Ambient light sensor
Proximity sensor
Face Unlock components
A frame manufactured with poor tolerances can shift these components just enough to affect performance.
Professional repair centres often reject low-quality screens because they know even tiny inaccuracies can lead to customer complaints.
Importance of Professional Installation
Replacing a Pixel 10 Pro XL display isn’t comparable to replacing an older smartphone screen.
Today’s flagship devices contain intricate components that require careful handling and specialized equipment.
Professional technicians follow procedures designed to preserve every sensor and connector.
Specialized Repair Equipment
Experienced repair shops commonly use:
Precision screwdrivers
Anti-static workstations
Display heating equipment
Microscope inspection systems
Professional adhesive applicators
Calibration software
Display testing tools
These tools reduce the risk of accidental damage during repair.
For example, microscope inspection allows technicians to identify bent connector pins that would otherwise be impossible to see with the naked eye.
Experience Matters
Experience is difficult to replace.
An experienced technician knows how much pressure to apply when separating the display, where hidden clips are located, and how to disconnect fragile flex cables safely.
They also understand the warning signs of potential issues, such as:
Torn insulation
Cracked sensor brackets
Loose connectors
Damaged adhesive seals
Misaligned camera modules
This attention to detail significantly improves the chances of restoring full Face Unlock functionality.
Why DIY Repairs Can Be Risky
Repair kits available online often make screen replacement appear straightforward.
However, DIY repairs can introduce problems that aren’t immediately obvious.
Common mistakes include:
Using metal tools near delicate flex cables
Forgetting to reconnect a sensor cable
Damaging waterproof seals
Applying excessive adhesive
Installing low-quality replacement parts
While some users complete successful repairs, others unintentionally create new issues that require professional attention.
In many cases, the cost of correcting a failed DIY repair exceeds the cost of having the repair performed professionally from the start.
Diagnostic Steps Before Repair
Before replacing parts unnecessarily, technicians perform a structured diagnostic process.
Accurate diagnosis saves both time and money.
Software Checks
The first step is ruling out software-related causes.
Typical checks include:
Restarting the device
Installing pending Android updates
Removing and re-registering Face Unlock data
Resetting biometric settings
Testing the front camera
Checking Safe Mode for third-party app interference
If Face Unlock begins working after these steps, no hardware repair may be necessary.
Hardware Inspection
If software appears normal, attention shifts to the hardware.
Technicians inspect:
Front sensor alignment
Flex cable condition
Connector seating
Adhesive placement
Display frame fitment
Camera lens cleanliness
Magnification tools are often used to identify tiny defects that could affect sensor performance.
Functional Testing
Professional repair centres also verify related features, including:
Auto-brightness
Proximity sensor operation
Front camera focus
Earpiece speaker
Screen responsiveness
Testing these systems helps determine whether the issue is isolated to Face Unlock or part of a broader hardware problem.
A thorough diagnosis prevents unnecessary replacements and ensures that any underlying faults are addressed before the device is returned to the customer.
Can Face Unlock Be Repaired?
The good news is that, in many cases, the Pixel 10 Pro XL Face Unlock fails after a screen replacement issue can be successfully resolved. The solution depends on identifying the root cause rather than replacing parts at random.
Professional technicians typically follow a structured repair process to restore Face Unlock functionality while preserving the phone’s overall performance.
Realigning the Sensor Assembly
If diagnostics reveal that the sensor assembly has shifted during the screen replacement, technicians can carefully reopen the device and reposition the affected components.
This process may include:
Reinstalling sensor brackets
Aligning the front camera module
Replacing damaged adhesive
Ensuring proper spacing between the display and sensor array
Verifying all mounting points
Even slight improvements in alignment can restore normal Face Unlock performance.
Replacing Damaged Components
If a flex cable or sensor has been damaged during the repair, replacement may be necessary.
Common replacement parts include:
Front camera flex assemblies
Sensor flex cables
Proximity sensors
Ambient light sensors
Display assemblies (if defective)
Only compatible, high-quality components should be used to maintain reliability and performance.
Software Reconfiguration
Once the hardware is verified, technicians typically:
Update Android to the latest version.
Clear and recreate Face Unlock data.
Test biometric authentication under different lighting conditions.
Verify that all related sensors are reporting correctly.
Perform a final quality inspection before returning the device.
This systematic approach minimizes the chance of recurring issues.
Preventing Face Unlock Problems After Future Repairs
Prevention is always better than correction. Whether you’re replacing a cracked display now or planning future repairs, following a few best practices can greatly reduce the risk of biometric issues.
Choose an Experienced Repair Centre
The quality of the technician is just as important as the quality of the replacement part.
Look for repair centres that:
Specialize in Google Pixel devices
Use premium or genuine-quality replacement parts
Test Face Unlock after installation
Offer a written repair warranty
Have consistently positive customer reviews
An experienced technician understands that a successful repair involves restoring every function—not just replacing the display.
Avoid Low-Quality Parts
Cheap replacement screens can be tempting because of their lower price, but they may introduce problems such as:
Reduced display brightness
Poor touch sensitivity
Incorrect colour reproduction
Sensor misalignment
Face Unlock failures
Investing in quality components often results in a longer-lasting repair and a better overall user experience.
Protect Your Phone
Preventing future screen damage also reduces the likelihood of additional repairs.
Consider using:
A durable protective case
A high-quality tempered glass screen protector
Safe charging practices
Regular software updates
Careful handling around water and hard surfaces
These simple habits can significantly extend the life of your Pixel 10 Pro XL.
Frequently Asked Questions
1. Why did Face Unlock stop working immediately after my screen replacement?
This usually indicates that one or more components involved in facial recognition were disturbed during the repair. Common causes include sensor misalignment, damaged flex cables, or incompatible replacement parts.
2. Can I fix Face Unlock by resetting my phone?
A factory reset is rarely the solution if the problem began immediately after a screen replacement. It’s better to first remove and re-enrol your facial data, install any available software updates, and have the hardware inspected if the issue persists.
3. Does using an aftermarket screen always break Face Unlock?
Not necessarily. Many high-quality aftermarket screens work well when installed correctly. However, poorly manufactured displays or incorrectly fitted frames are more likely to interfere with the sensor system.
4. How can I tell if my repair was done properly?
A professional repair should restore all major functions, including:
Face Unlock
Auto-brightness
Proximity sensor
Front camera
Touch responsiveness
Display quality
If any of these features are not working correctly, the device should be re-inspected.
5. Will Google software updates fix the issue?
Software updates may improve compatibility or correct minor bugs, but they cannot repair damaged hardware or realign misplaced sensors. If the issue is physical, professional servicing is usually required.
6. Should I attempt another DIY repair?
Unless you have the proper tools and experience, reopening the phone may increase the risk of further damage. Modern flagship devices are highly complex, and additional mistakes can make repairs more expensive.
7. How can I reduce the risk of future biometric issues?
Choose an experienced repair provider, insist on quality replacement parts, verify that all phone functions are tested before collection, and protect your device with a quality case and screen protector.
Conclusion
When the Pixel 10 Pro XL Face Unlock fails after a screen replacement, the problem is rarely random. In most cases, it results from sensor misalignment, damaged flex cables, calibration issues, or the use of low-quality replacement parts.
Understanding how Face Unlock works helps explain why replacing the display requires far more precision than many people realise. Every component surrounding the front camera and sensor array must be transferred, aligned, and tested with exceptional care.
Fortunately, most Face Unlock issues can be resolved through accurate diagnosis and professional repair techniques. Choosing an experienced repair centre, using quality replacement parts, and ensuring that all biometric functions are tested before returning the phone can save considerable time, frustration, and expense.
If your Pixel 10 Pro XL has recently undergone a screen replacement and Face Unlock no longer functions correctly, don’t ignore the issue. Early inspection often prevents minor problems from developing into more complex repairs.
For additional information about Google Pixel devices and Android security features, visit the official Android website: https://www.android.com/
Final Thoughts
A successful screen replacement should restore your Pixel 10 Pro XL to full working order—not leave essential features disabled. By prioritising quality workmanship and proper diagnostics, you can enjoy reliable Face Unlock performance, excellent display quality, and the confidence that your device is functioning exactly as intended.
David from Sydney CBD Repair Centre – The Best place to fix mobile phones as 7 Years In A Row! Top Mobile Phone Repair In Sydney. More than 2000 Positive Reviews on Google and Same Day Repairs.
We take pride in delivering exceptional repair services for all major phone brands including Apple, Samsung, Google, and more. Our expert technicians use only genuine parts and offer 90days warranty on repairs. Located in the heart of Sydney CBD, we’re your one-stop solution for all mobile device repairs.
Our commitment to excellence has earned us the trust of thousands of satisfied customers. Whether it’s a cracked screen, battery replacement, or water damage repair, we handle it all with professional care and expertise. Walk in today and experience why we’re Sydney’s #1 choice for mobile phone repairs.
Visit us for:
✓ Same Day Express Repairs
✓ Genuine Parts Guarantee
✓ Professional Technicians
✓ Competitive Pricing
✓ 2000+ 5-Star Google Reviews
✓ 7-Time Award Winner for Best Phone Repairs
Sydney CBD Repair Centre – Where Quality Meets Reliability.
FIRST IN AUSTRALIA! Samsung Galaxy S26 Ultra Full Screen Restoration Process Revealed: Ultimate 10 Expert Insights
Introduction
The Samsung Galaxy S26 Ultra Full Screen Restoration Process Revealed is more than simply replacing a broken display. Modern flagship smartphones feature advanced AMOLED technology, integrated fingerprint scanners, AI-powered touch recognition, adaptive refresh rates, and highly durable protective glass. Restoring these sophisticated devices requires technical expertise, precision equipment, and genuine replacement components.
A cracked screen isn’t always just cosmetic. In many situations, impact damage can affect the OLED display, touch digitizer, fingerprint sensor, frame alignment, and even internal connectors. While some users continue using their phones despite visible cracks, delaying repairs may allow moisture, dust, and additional stress to worsen the damage.
Professional repair technicians follow a systematic restoration process that ensures every component is inspected, cleaned, repaired, and tested before the phone is returned to its owner. This approach restores not only the appearance of the phone but also its functionality, durability, and reliability.
Throughout this guide, you’ll discover exactly how professionals restore Samsung’s latest flagship device, why genuine components matter, and what separates expert repair shops from inexperienced technicians.
Samsung continues pushing smartphone display technology forward with every Ultra model. The Galaxy S26 Ultra features one of the most advanced smartphone screens available, delivering exceptional brightness, vibrant colors, and outstanding responsiveness.
Its display combines several technologies into one compact assembly.
AMOLED Display Technology
The AMOLED panel delivers:
Rich contrast
Deep black levels
Excellent outdoor visibility
Smooth animations
Power-efficient operation
HDR support
Adaptive refresh rates
Unlike traditional LCD panels, AMOLED displays illuminate individual pixels independently. This allows for remarkable picture quality while consuming less power during dark-mode usage.
However, this advanced technology also means repairs demand greater care. OLED panels are extremely thin and can crack internally even when the outer glass appears relatively intact.
Professional technicians use specialized tools designed specifically for OLED handling to prevent additional damage during restoration.
Gorilla Glass Protection
Samsung’s flagship devices are engineered for durability.
The strengthened front glass helps resist:
Everyday scratches
Minor drops
Pocket wear
Key abrasion
Surface impacts
Even so, no smartphone glass is indestructible.
A drop onto concrete, tiles, asphalt, or metal edges can easily shatter the protective layer, requiring complete display replacement.
Fortunately, professional restoration returns the phone to nearly factory condition when quality replacement parts are used.
Although Samsung builds premium devices, accidents remain the leading cause of screen damage worldwide.
Accidental Drops
The majority of repairs begin with a simple accident.
Common scenarios include:
Phone slipping from pockets
Falling off desks
Dropping during selfies
Falling while exiting vehicles
Children accidentally throwing devices
Even protective cases cannot absorb every impact.
The force may damage:
Outer glass
OLED panel
Display flex cables
Touch digitizer
Internal frame
Professional diagnosis determines the full extent of hidden damage.
Pressure Damage
Pressure damage develops gradually.
Examples include:
Sitting on the phone
Carrying it in a back pocket
Heavy bags compressing the device
Objects pressing against the display
Unlike impact damage, pressure often causes:
Green lines
Pink lines
Black spots
Touch failures
Flickering displays
Because these issues originate inside the OLED layer, replacing only the outer glass isn’t enough.
Complete screen restoration becomes necessary.
Water Exposure
Although flagship Samsung devices include water resistance, no waterproof seal lasts forever.
Previous repairs, accidental drops, or worn adhesive can reduce protection.
Water intrusion may damage:
Display connectors
OLED circuitry
Charging circuits
Internal sensors
Cameras
Technicians always inspect for moisture indicators before installing replacement components.
Ignoring liquid damage may result in future failures, even after installing a new display.
Professional Diagnosis Before Repair
One of the biggest differences between professional repair centers and inexperienced workshops is diagnosis.
Replacing parts without understanding the root cause often leads to repeat repairs.
Experts spend considerable time inspecting the device before beginning any restoration.
External Inspection
The repair begins with a complete visual examination.
Technicians look for:
Bent frames
Cracked rear glass
Camera damage
Housing separation
Missing screws
Previous repair attempts
Every observation helps determine whether additional components require replacement.
Display Function Testing
Even badly cracked displays provide valuable diagnostic information.
Technicians evaluate:
Test
Purpose
Touch Response
Detect dead zones
Brightness
OLED health
Color Accuracy
Panel integrity
Fingerprint Sensor
Biometric functionality
Refresh Rate
Display performance
Adaptive Brightness
Sensor verification
Multi-touch
Digitizer testing
These tests establish a repair baseline before disassembly begins.
Internal Frame Inspection
After opening the phone, professionals inspect the internal structure.
Common findings include:
Bent midframes
Loose connectors
Broken brackets
Torn flex cables
Dust contamination
Corrosion
Battery swelling
Repairing these issues before installing a new screen significantly improves long-term reliability.
Rather than rushing the job, experienced technicians ensure every component is properly aligned, cleaned, and secured. This careful preparation minimizes the risk of future display failures and helps the Samsung Galaxy S26 Ultra perform as intended after restoration.
Samsung Galaxy S26 Ultra Full Screen Restoration Process Revealed
The Samsung Galaxy S26 Ultra Full Screen Restoration Process Revealed isn’t simply about swapping a damaged display for a new one. Professional technicians follow a detailed workflow that minimizes risk and ensures every feature works exactly as it should after the repair.
From preparation to final testing, every step requires patience, precision, and specialized equipment.
Preparing the Device
Before any repair begins, technicians prepare a clean, static-free workstation equipped with professional repair tools.
Typical equipment includes:
Precision screwdrivers
Plastic opening picks
Suction cups
Heat pads or controlled heating equipment
Anti-static wrist straps
Fine-tip tweezers
Display adhesive
Cleaning solutions
Magnification equipment
The device is then powered off completely to protect sensitive internal components from electrical damage.
Whenever possible, customers are encouraged to back up important files before leaving their phone for repair. While professional repairs rarely affect stored data, creating a backup is always a smart precaution.
Softening the Display Adhesive
Samsung secures its displays using industrial-strength adhesive that creates an excellent seal against dust and moisture.
Rather than forcing the display loose, technicians gently warm the edges of the phone using calibrated heating equipment.
This controlled heat:
Softens the adhesive
Reduces stress on the OLED panel
Prevents frame damage
Makes removal safer
Using too much heat can permanently damage nearby components such as the battery, cameras, or wireless charging coil. That’s why professional repair centers carefully monitor temperature throughout the process.
Removing the Damaged Screen
Once the adhesive has softened, the damaged display is lifted carefully using specialized tools.
Technicians work slowly around the perimeter to avoid:
Tearing display flex cables
Damaging antenna lines
Scratching the frame
Cracking internal components
Even if the display is already shattered, removing it carefully protects the expensive hardware underneath.
The display connector is disconnected only after the phone is safely opened and internal shielding has been removed.
Cleaning the Frame
After the damaged screen is removed, attention shifts to the phone’s frame.
Old adhesive, dust, and tiny glass fragments are completely removed.
The frame is inspected for:
Warping
Bends
Hairline cracks
Sharp edges
Loose brackets
A perfectly clean frame ensures the replacement display sits flush without gaps.
This step is often overlooked in low-cost repairs but plays a major role in the durability of the finished repair.
Inspecting Internal Components
With the phone open, technicians perform another round of inspections.
Components checked include:
Component
Inspection Purpose
Battery
Swelling or impact damage
Charging Port
Bent pins or corrosion
Cameras
Alignment and cleanliness
Wireless Charging Coil
Physical damage
Speaker Assembly
Dust or moisture
Vibration Motor
Secure mounting
Motherboard
Connector integrity
If hidden damage is discovered, customers are usually informed before the repair continues.
This transparent approach helps prevent unexpected issues after the phone is reassembled.
Installing the New Display
The replacement display is never installed immediately after unboxing.
Instead, professionals first perform a temporary connection test.
This confirms:
OLED image quality
Touch responsiveness
Fingerprint scanner compatibility
Brightness
Refresh rate
Display calibration
Only after passing these checks is the screen permanently installed.
Fresh waterproof adhesive is then applied evenly around the frame.
Proper alignment is essential because even slight positioning errors can affect:
Touch sensitivity
Display sealing
Side button operation
Camera alignment
Dust resistance
Experienced technicians carefully position the display before applying uniform pressure to achieve a factory-like finish.
Why Genuine Replacement Parts Matter
One of the most important factors in any flagship phone repair is the quality of the replacement display.
Although aftermarket screens are widely available, not all offer the same level of performance.
High-quality genuine or premium-grade replacement parts typically provide:
Accurate color reproduction
Smooth scrolling
Excellent brightness
Reliable touch sensitivity
Better durability
Proper fingerprint scanner support
Improved longevity
Lower-quality displays may appear acceptable initially but can develop issues over time such as:
Reduced brightness
Poor viewing angles
Slower touch response
Increased battery consumption
Display flickering
Color inconsistency
For premium devices like the Galaxy S26 Ultra, investing in quality replacement components helps maintain the phone’s flagship experience.
Adhesive Quality Is Just as Important
Many people focus only on the display itself.
However, the adhesive used during installation is equally critical.
Professional-grade adhesive helps:
Secure the display firmly
Reduce dust entry
Improve structural strength
Restore the original fit
Enhance long-term durability
Inferior adhesive can loosen over time, causing the screen to lift from the frame and increasing the risk of future damage.
Quality Control Testing
Installing the display is only part of the restoration process.
Professional technicians perform extensive testing before returning the device.
A complete quality inspection typically includes:
Display Testing
Technicians verify:
Uniform brightness
Color accuracy
Dead pixel inspection
Refresh rate performance
Auto brightness
Touch Testing
Every section of the display is checked for:
Multi-touch functionality
Gesture navigation
Swipe accuracy
Edge sensitivity
Palm rejection
Fingerprint Sensor Verification
Modern Samsung phones feature under-display fingerprint sensors.
Following installation, technicians ensure:
Fast recognition
Accurate enrollment
Reliable unlocking
Consistent performance
If necessary, fingerprint registration is repeated to maximize accuracy.
Camera Testing
Because the device has been opened, cameras are tested for:
Focus speed
Image clarity
Lens cleanliness
Optical stabilization
Front camera quality
Charging Tests
Technicians also verify:
Wired charging
Wireless charging
Fast charging compatibility
USB data transfer
This confirms that no internal connectors were disturbed during the repair.
Final Cosmetic Inspection
Before the repair is completed, the phone receives one final inspection.
Professionals check:
Display alignment
Adhesive finish
Button operation
Speaker openings
SIM tray fit
Camera alignment
Overall cleanliness
The goal is to return the phone looking and functioning as close to factory condition as possible.
By combining careful workmanship, premium replacement parts, and thorough quality control, professional technicians ensure that the Samsung Galaxy S26 Ultra Full Screen Restoration Process Revealed delivers reliable, long-lasting results rather than a temporary fix.
Repair vs. Replacement: Which Option Makes More Sense?
After learning about the Samsung Galaxy S26 Ultra Full Screen Restoration Process Revealed, many owners wonder whether repairing the phone is worth it or if upgrading to a new device is the better option.
For most users, a professional screen restoration is the more economical and environmentally friendly choice. The Galaxy S26 Ultra is a premium flagship smartphone built with cutting-edge hardware, including a powerful processor, advanced camera system, generous storage options, and a brilliant AMOLED display. If only the screen is damaged, replacing the display can restore nearly all of the phone’s original functionality.
However, there are situations where replacing the entire device may be the smarter investment.
Repair Is Usually Recommended When:
The screen is cracked but the motherboard works perfectly.
The phone powers on normally.
Face recognition and fingerprint functions still operate.
Cameras and charging functions remain unaffected.
There is no significant water damage.
The repair cost is considerably lower than purchasing a new flagship phone.
Replacement May Be Better When:
The motherboard has suffered severe impact damage.
Repair costs approach the price of a replacement device.
The device has experienced repeated unsuccessful repairs.
A trusted technician can provide an honest assessment after inspecting the phone, helping you choose the most cost-effective solution.
How to Protect Your Samsung Galaxy S26 Ultra After Repair
Once your phone has been professionally restored, taking a few preventive measures can significantly reduce the chances of future damage.
Use a High-Quality Protective Case
A premium protective case absorbs impact during accidental drops.
Look for features such as:
Shock-absorbing corners
Raised screen bezels
Reinforced edges
Anti-slip grip
Certified drop protection
While no case can guarantee complete protection, quality cases greatly reduce the risk of serious damage.
Install a Tempered Glass Screen Protector
A tempered glass protector acts as the first line of defense against scratches and minor impacts.
Benefits include:
Reduced scratching
Improved resale value
Easier cleaning
Additional impact protection
Lower repair costs after minor accidents
Replacing a worn screen protector is far less expensive than replacing another OLED display.
Avoid Extreme Temperatures
Modern smartphones are designed to operate within specific temperature ranges.
Avoid:
Leaving the phone inside hot vehicles
Direct sunlight for extended periods
Freezing environments
Rapid temperature changes
Extreme heat may weaken adhesives, while excessive cold can make glass more brittle.
Keep the Charging Port Clean
Dust and pocket lint accumulate over time.
Instead of using sharp metal objects, gently clean the charging port using:
A soft brush
Compressed air (used carefully)
Professional cleaning services
Keeping the port clean helps maintain reliable charging and data connectivity.
Handle Water Resistance Carefully
Even though flagship Samsung phones offer water resistance, it should never be considered permanent.
Water-resistant seals naturally age over time and may be affected by drops or previous repairs.
To maximize protection:
Avoid unnecessary water exposure.
Dry the phone immediately if it becomes wet.
Do not intentionally submerge the device.
Have damaged seals replaced during professional repairs.
Frequently Asked Questions
1. How long does a Galaxy S26 Ultra screen replacement usually take?
Most professional repair centers can complete a standard screen replacement on the same day, provided replacement parts are available and no additional internal damage is found.
2. Will replacing the screen erase my data?
In most cases, no. A screen replacement does not require deleting your photos, contacts, or applications. However, backing up important data before any repair is always recommended.
3. Can a cracked screen become worse over time?
Yes. Small cracks often spread with continued use. Dust, moisture, and repeated pressure can also damage the OLED panel beneath the glass, leading to display failure or touch issues.
4. Why should I choose genuine replacement parts?
Genuine or premium-quality parts generally provide better brightness, color accuracy, touch responsiveness, durability, and compatibility with features such as the under-display fingerprint scanner.
5. Is the phone still water-resistant after a screen replacement?
Professional technicians use high-quality adhesive to help restore the device’s seal. However, no repair shop can guarantee that the phone will retain the exact same factory water-resistance rating. It is still wise to avoid unnecessary exposure to water.
6. How can I tell if my screen needs replacement instead of just the glass?
If you notice any of the following, a complete display replacement is often required:
Black spots
Green or pink lines
Flickering
Dead pixels
Touchscreen not responding
Display not turning on
A professional diagnostic inspection can confirm the extent of the damage.
Final Thoughts
The Samsung Galaxy S26 Ultra Full Screen Restoration Process Revealed demonstrates that restoring a premium smartphone is far more involved than simply installing a new display. Every stage—from diagnosis and careful disassembly to frame preparation, genuine component installation, and comprehensive quality testing—plays a vital role in achieving a dependable, long-lasting repair.
Choosing an experienced repair provider helps ensure that your Galaxy S26 Ultra maintains its exceptional display quality, smooth touch performance, and overall reliability. Skilled technicians, premium replacement parts, and rigorous testing can often restore the device to a condition that feels remarkably close to new.
With proper care, a protective case, a quality screen protector, and timely maintenance, your repaired phone can continue delivering flagship performance for years to come.
For additional information about Samsung device care and support, visit the official Samsung Support website: https://www.samsung.com/support/
Conclusion
Investing in a professional screen restoration is often the smartest way to extend the life of your Samsung Galaxy S26 Ultra. Rather than replacing an otherwise excellent smartphone, expert repairs preserve your investment, reduce electronic waste, and restore the premium user experience you expect from a flagship device.
Whether your screen has suffered a minor crack or significant display damage, following the proper restoration process ensures the best possible outcome. Always choose experienced technicians who prioritize quality workmanship, genuine parts, and thorough testing to keep your device performing at its best.
David from Sydney CBD Repair Centre – The Best place to fix mobile phones as 7 Years In A Row! Top Mobile Phone Repair In Sydney. More than 2000 Positive Reviews on Google and Same Day Repairs.
We take pride in delivering exceptional repair services for all major phone brands including Apple, Samsung, Google, and more. Our expert technicians use only genuine parts and offer 90 days warranty on repairs. Located in the heart of Sydney CBD, we’re your one-stop solution for all mobile device repairs.
Our commitment to excellence has earned us the trust of thousands of satisfied customers. Whether it’s a cracked screen, battery replacement, or water damage repair, we handle it all with professional care and expertise. Walk in today and experience why we’re Sydney’s #1 choice for mobile phone repairs.
Visit us for:
✓ Same Day Express Repairs
✓ Genuine Parts Guarantee
✓ Professional Technicians
✓ Competitive Pricing
✓ 2000+ 5-Star Google Reviews
✓ 7-Time Award Winner for Best Phone Repairs
Sydney CBD Repair Centre – Where Quality Meets Reliability.
The Great Charge: Fixing common USB-C port issues on your OPPO Phone’s – Ultimate 2026 Guide
Introduction: Why USB-C Ports Matter
The USB-C port is the lifeline of your OPPO device. From charging your phone to transferring important files, a fully functional USB-C port is crucial for daily use. Unfortunately, it’s also one of the most vulnerable parts of the phone. A small misalignment, debris, or poor-quality accessory can disrupt your device’s charging and data performance.
Many users report symptoms like slow charging, intermittent connection, or complete failure to charge. Recognizing these early signs is essential to prevent further damage that could affect the motherboard or battery. This guide will walk you through diagnosing, repairing, and preventing USB-C port issues, combining professional insights with practical DIY solutions.
A loose port can feel physically unstable when a cable is inserted. This is often caused by frequent plugging/unplugging or accidental drops. Symptoms include inconsistent charging or connection, and if left untreated, it can damage internal circuits.
Charging Errors and Slow Charging
Some OPPO users notice “Charging rapidly” messages disappearing, or their phones taking hours to charge. These errors may stem from software glitches, dirt inside the port, or a worn-out port connector.
Data Transfer Failures
Even if your device charges normally, your data transfer may fail. Broken pins or debris can interrupt the connection, preventing file syncing with computers or other devices.
First, look closely at the USB-C port using a flashlight. Common issues include lint accumulation, bent pins, or visible corrosion. Even small debris can interfere with charging or data transfer.
Software Diagnostics
OPPO offers built-in diagnostic tools to check hardware performance. You can access these via Settings > About Phone > Diagnostics. Third-party apps can also help identify USB port failures.
Testing with Multiple Cables and Chargers
Sometimes, the problem isn’t the port itself. Try using different cables and chargers, preferably OPPO-certified accessories, to rule out faulty wires or incompatible chargers.
DIY Solutions for USB-C Port Issues
Cleaning the USB-C Port
Carefully use a soft brush, toothpick, or compressed air to remove dirt. Avoid using metal objects that could bend pins. This often resolves charging problems caused by debris.
Restarting and Software Reset
A soft reset or clearing cache can fix minor software-related USB-C issues. Go to Settings > System > Reset options and select Reset Network Settings or Restart Phone.
Replacing Cables or Chargers
Always use certified accessories. Cheap or third-party cables can fail to deliver proper voltage and even damage your port over time.
Professional Repair Options
USB-C Port Replacement
If DIY fixes don’t work, professional repair may be needed. Technicians can replace the port entirely, restoring full functionality. Costs vary depending on OPPO model.
Motherboard Repair Solutions
In severe cases, port damage may extend to the motherboard. Advanced repairs are required here, which only certified professionals should attempt.
Warranty Considerations
Check if your OPPO warranty covers USB-C issues. Some third-party repairs may void the warranty, so professional guidance is important.
Preventing Future USB-C Issues
Proper Plugging and Unplugging
Always insert and remove cables gently. Avoid sideways force, which can loosen or damage the port.
Using Quality Accessories
OPPO-certified chargers and cables reduce the risk of slow charging and port wear.
Keeping Your Device Clean
Regularly inspect and clean the port to prevent dirt buildup and corrosion.
FAQs
Q1: Why is my OPPO USB-C port not charging at all?
A1: It could be due to debris, a damaged port, or a software glitch. Try cleaning the port and using a different charger. If the problem persists, professional repair may be required.
Q2: Can I fix a wobbly USB-C port myself?
A2: Minor looseness caused by dirt may be fixed with careful cleaning. For structural damage, only a certified technician should handle the repair.
Q3: Why does my OPPO charge slowly sometimes?
A3: Slow charging can be caused by non-certified cables, a dirty port, or software issues. Always use OPPO-certified accessories and clean the port.
Q4: Will USB-C port replacement affect my warranty?
A4: If replaced by an authorized service provider, your warranty is safe. Unauthorized repairs could void it.
Q5: How often should I clean my USB-C port?
A5: A gentle inspection and cleaning every 2–3 months can prevent most common issues.
Q6: Can software updates fix USB-C problems?
A6: Yes, some charging issues are software-related and may be resolved by updating your device or performing a factory reset.
Conclusion
Maintaining a fully functional USB-C port on your OPPO is crucial for charging and data transfer reliability. By understanding common problems, performing careful DIY maintenance, and seeking professional repairs when necessary, you can extend your device’s lifespan. Preventive habits like using certified accessories and gentle handling ensure your OPPO charges efficiently for years to come.
For more details on OPPO support and USB-C troubleshooting, visit OPPO Official Support.
David from Sydney CBD Repair Centre – The Best place to fix mobile phones as 7 Years In A Row! Top Mobile Phone Repair In Sydney. More than 2000 Positive Reviews on Google and Same Day Repairs.
We take pride in delivering exceptional repair services for all major phone brands including Apple, Samsung, Google, and more. Our expert technicians use only genuine parts and offer 90days warranty on repairs. Located in the heart of Sydney CBD, we’re your one-stop solution for all mobile device repairs.
Our commitment to excellence has earned us the trust of thousands of satisfied customers. Whether it’s a cracked screen, battery replacement, or water damage repair, we handle it all with professional care and expertise. Walk in today and experience why we’re Sydney’s #1 choice for mobile phone repairs.
Visit us for:
✓ Same Day Express Repairs
✓ Genuine Parts Guarantee
✓ Professional Technicians
✓ Competitive Pricing
✓ 2000+ 5-Star Google Reviews
✓ 7-Time Award Winner for Best Phone Repairs
Choose between Screen Only vs Full Frame Assembly: Which Display Part Should You Buy? (7 Powerful Insights)
Introduction to Screen Repairs
When it comes to smartphone repair, one of the most common issues users face is a cracked or malfunctioning display. Whether you’re fixing devices from Apple Inc. or Samsung Electronics, the big question often comes down to this: Screen Only vs Full Frame Assembly — which one should you buy?
This decision isn’t just about cost. It affects repair difficulty, durability, time, and overall success. In this guide, we’ll break it all down in simple terms so you can confidently choose the right option.
Screen Only vs Full Frame Assembly: Key Differences
Cost Comparison
Screen Only: Cheaper upfront
Full Frame: More expensive but saves labor
Installation Difficulty
Screen Only: Advanced skill required
Full Frame: Beginner-friendly
Repair Time
Screen Only: 1–3 hours
Full Frame: 30–60 minutes
Which Option Is Best for DIY Repairs?
If you’re doing repairs at home, here’s the reality:
Screen only repairs demand professional tools like laminators and heat plates
Full frame assemblies are plug-and-play
👉 Recommendation: Go with full frame assembly if you’re not experienced.
Which Option Is Best for Repair Shops?
Professional repair centers often choose based on:
Customer budget
Device model
Availability of parts
High-volume shops may prefer:
Screen only → for higher profit margins
Full frame → for faster turnaround
Compatibility with Popular Brands
Apple Devices
Devices from Apple Inc. often have tightly integrated designs.
Screen only repairs are tricky due to Face ID components
Full frame is safer for newer iPhones
Samsung Devices
Samsung Electronics phones often feature curved AMOLED displays.
Screen only repairs are complex
Full frame is commonly preferred
Other Android Brands
Brands like Xiaomi, Oppo, and Vivo:
More flexibility in repair
Screen only can be viable
Tools Required for Each Type
Screen Only Tools
Heat gun or separator
OCA laminator
Vacuum separator
UV curing machine
Full Frame Tools
Screwdrivers
Pry tools
Adhesive strips
Common Mistakes to Avoid
❌ Buying low-quality screens
❌ Not testing display before installation
❌ Using excessive heat
❌ Ignoring compatibility
Cost Breakdown Table
Repair Type
Parts Cost
Labor Cost
Total
Screen Only
Low
High
Medium
Full Frame
High
Low
Medium-High
When Should You Choose Screen Only?
Choose screen only if:
You’re a skilled technician
The frame is in perfect condition
You want to maximize profit
When Should You Choose Full Frame Assembly?
Choose full frame assembly if:
You want a quick repair
Frame is bent or damaged
You’re a beginner
Environmental Impact of Repairs
Interestingly, screen only repairs are more eco-friendly:
Less material waste
Reduced manufacturing demand
However, full frame assemblies reduce failed repairs, which also matters.
🔗 Helpful External Resource
For more repair insights, visit:
👉 https://www.ifixit.com (trusted repair guides and tools)
❓ FAQs
1. What is better: screen only vs full frame assembly?
It depends. Screen only is cheaper but harder. Full frame is easier but more expensive.
2. Can beginners do screen only repairs?
Not recommended. It requires professional tools and skills.
3. Why is full frame more expensive?
It includes the frame and pre-installed components, increasing manufacturing cost.
4. Is screen only repair durable?
Yes, if installed correctly. Poor installation can reduce lifespan.
5. Which repair is faster?
Full frame assembly is significantly faster.
6. Do repair shops prefer screen only or full frame?
It depends on business model—profit vs speed.
Conclusion
Choosing between Screen Only vs Full Frame Assembly ultimately comes down to your skill level, budget, and repair goals. If you’re experienced and want to save money, screen only is a solid choice. However, if you value speed, ease, and reliability, full frame assembly is the way to go.
In today’s fast-paced repair environment, many professionals lean toward full frame assemblies for consistency and efficiency. Still, both options have their place—and understanding the difference gives you a major advantage.
David from Sydney CBD Repair Centre – The Best place to fix mobile phones as 7 Years In A Row! Top Mobile Phone Repair In Sydney. More than 2000 Positive Reviews on Google and Same Day Repairs.
We take pride in delivering exceptional repair services for all major phone brands including Apple, Samsung, Google, and more. Our expert technicians use only genuine parts and offer 90days warranty on repairs. Located in the heart of Sydney CBD, we’re your one-stop solution for all mobile device repairs.
Our commitment to excellence has earned us the trust of thousands of satisfied customers. Whether it’s a cracked screen, battery replacement, or water damage repair, we handle it all with professional care and expertise. Walk in today and experience why we’re Sydney’s #1 choice for mobile phone repairs.
Visit us for:
✓ Same Day Express Repairs
✓ Genuine Parts Guarantee
✓ Professional Technicians
✓ Competitive Pricing
✓ 2000+ 5-Star Google Reviews
✓ 7-Time Award Winner for Best Phone Repairs
Inside the Lab Recovering Memories from a Snapped Samsung Galaxy Z Flip 7 Ultimate Guide: 11 Powerful Recovery Secrets
Introduction
A snapped foldable phone looks like the end of the road. Many people believe that once a Samsung Galaxy Z Flip 7 breaks across its hinge, every treasured photo, family video, business document, and personal message disappears forever.
Fortunately, that’s not always true.
Inside the Lab Recovering Memories from a Snapped Samsung Galaxy Z Flip 7 reveals how professional technicians carefully inspect, repair, and recover valuable information from devices that appear beyond saving. Modern smartphones contain sophisticated storage chips and advanced encryption, making recovery challenging—but not impossible.
The key is acting quickly and avoiding mistakes that can permanently damage the remaining hardware.
Whether your phone suffered a severe drop, accidental crushing, or hinge failure, understanding the recovery process can dramatically improve your chances of retrieving irreplaceable memories.
Instead of carrying cameras, notebooks, wallets, and computers separately, we keep almost everything inside one device. Losing that information can be devastating.
Typical data stored on today’s Galaxy Z Flip 7 includes:
Family photographs
Wedding videos
Business contacts
Banking records
Work documents
Authentication apps
Medical information
School assignments
Voice recordings
Important conversations
For many users, these files are worth far more than the phone itself.
Replacing damaged hardware is relatively straightforward. Replacing years of memories simply isn’t possible.
That’s why professional laboratories focus first on preserving the data before considering cosmetic repairs.
Recovering data starts with understanding how the phone is built.
Samsung’s newest foldable devices are engineering masterpieces packed into an incredibly compact frame. Every millimetre inside the phone is carefully utilised.
Unlike traditional smartphones, foldables introduce additional engineering complexity because they must bend thousands of times throughout their lifetime.
Foldable Display Technology
The Galaxy Z Flip 7 features an ultra-thin flexible OLED display supported by multiple protective layers.
These include:
Component
Purpose
Ultra Thin Glass
Provides rigidity
Flexible OLED
Produces images
Touch Digitizer
Detects touch input
Protective Film
Reduces scratches
Display Cable
Transfers signals
When the phone snaps, these layers rarely fail in the same way.
Sometimes the display dies instantly.
Other times, only the touch function stops working while the motherboard continues operating normally.
This distinction becomes critical during data recovery.
Internal Memory Layout
One of the biggest misconceptions is that photos are stored inside the screen.
They’re not.
Your memories actually reside inside a dedicated NAND flash memory chip mounted directly onto the logic board.
That storage chip contains:
Android operating system
User photos
Videos
Downloads
Applications
Settings
Documents
As long as this storage remains intact—and encryption keys are available—there may still be an opportunity for successful recovery.
Security and Encryption
Modern Samsung smartphones use powerful security features.
These include:
Hardware encryption
Secure boot
Knox security
Trusted execution environments
User authentication
These protections are excellent for privacy but add another layer of complexity during recovery.
Unlike older phones, technicians cannot simply remove the memory chip and read its contents using standard equipment.
Instead, recovery usually requires restoring enough functionality for the original processor and security hardware to decrypt the stored information.
This is why professional expertise is so valuable.
What Happens When a Galaxy Z Flip 7 Snaps in Half
A foldable phone rarely experiences just one type of damage.
Instead, several failures often occur simultaneously.
Understanding these failures helps explain why successful recovery depends on careful diagnostics rather than guesswork.
Physical Damage
The most obvious issue is structural damage.
The hinge absorbs tremendous force during an accident.
Possible damage includes:
Broken aluminium frame
Torn flexible cables
Cracked OLED panel
Detached battery connectors
Bent internal brackets
Loose motherboard mounting points
Interestingly, severe cosmetic damage doesn’t always mean the storage chip has failed.
Many seemingly destroyed phones still contain fully functional data.
Electrical Damage
Physical breaks often create electrical problems.
Examples include:
Short circuits
Damaged power rails
Burned charging circuits
Failed battery protection ICs
Broken display power lines
Even a tiny short circuit can prevent the phone from starting.
Professional technicians use laboratory-grade power supplies to monitor current consumption during diagnostics.
This allows them to identify hidden electrical faults without risking further damage.
Motherboard Damage
The motherboard is the heart of every smartphone.
When a Galaxy Z Flip 7 bends unexpectedly, microscopic solder joints beneath integrated circuits may crack.
These invisible fractures can interrupt communication between:
CPU
Memory
Storage
Power management chips
Charging controller
Display controller
Repairing these faults requires advanced board-level repair techniques using microscopes and precision soldering equipment.
Rather than replacing the entire motherboard—which would result in data loss—experienced technicians work to restore the original board whenever possible.
Inside a Professional Data Recovery Laboratory
Recovering information from a snapped Samsung Galaxy Z Flip 7 involves much more than replacing a screen.
Professional laboratories combine advanced electronics expertise with specialised diagnostic equipment to maximise recovery success.
The process begins with a careful visual inspection before any power is applied to the damaged device. Technicians examine the frame, hinge, display cables, battery connectors, and motherboard for signs of impact, corrosion, or electrical failure. Every detail matters because powering a severely damaged phone too soon can sometimes worsen the damage.
Next comes microscopic inspection. High-powered microscopes allow engineers to identify tiny cracks in solder joints, damaged integrated circuits, or torn flex cables that are invisible to the naked eye. Foldable devices contain densely packed components, making precision essential.
Another critical tool is a laboratory power supply. Instead of connecting the original battery immediately, technicians use controlled power sources that limit voltage and current. By observing how much power the phone draws, they can often pinpoint faulty circuits before beginning repairs.
Throughout the recovery process, professionals document each step, ensuring that repairs are systematic rather than experimental. This disciplined approach significantly increases the likelihood of recovering irreplaceable photos, videos, contacts, and documents while protecting the integrity of the device.
In the next part, we’ll explore the specialized equipment used in professional recovery labs, the first actions you should take after a Galaxy Z Flip 7 breaks, common recovery challenges, and the advanced board-level techniques experts rely on to retrieve priceless memories.
Inside a Professional Data Recovery Laboratory
Recovering data from a snapped Samsung Galaxy Z Flip 7 requires a combination of technical expertise, specialized tools, and patience. Every damaged phone presents a unique challenge, so technicians follow a structured workflow to maximize the chances of success.
Unlike a standard phone repair, data recovery places the highest priority on preserving the original motherboard and storage components. Cosmetic repairs can wait—saving priceless memories comes first.
Specialized Diagnostic Equipment
Professional repair laboratories invest heavily in equipment designed specifically for board-level diagnostics and data recovery.
Some of the most commonly used tools include:
Equipment
Purpose
Stereo Microscope
Inspects microscopic damage
Hot Air Rework Station
Removes and reinstalls components
Micro Soldering Station
Repairs damaged solder joints
Laboratory Power Supply
Safely powers damaged devices
Thermal Camera
Detects overheating components
Multimeter
Measures voltage and continuity
Oscilloscope
Analyses electrical signals
Ultrasonic Cleaner
Cleans boards affected by contamination
These tools allow technicians to diagnose faults that would otherwise remain hidden.
For example, a thermal camera may reveal an integrated circuit heating excessively due to an internal short circuit. Without this equipment, locating the fault could take hours—or even days.
Clean Working Environment
Foldable smartphones are packed with extremely delicate components.
Dust, static electricity, and moisture can all interfere with repairs.
Professional laboratories maintain clean workspaces that reduce contamination and protect sensitive electronics.
Technicians also wear anti-static wrist straps to prevent electrostatic discharge (ESD), which can permanently damage integrated circuits without producing any visible signs.
Although smartphones are not repaired inside hospital-grade clean rooms, maintaining a clean, organized workspace dramatically improves repair quality.
When a Samsung Galaxy Z Flip 7 suffers catastrophic damage, people often assume technicians simply remove the memory chip and copy the data. In reality, modern smartphones are far more sophisticated than older mobile devices.
Today’s Samsung phones use advanced encryption that ties the storage chip to the original processor and security hardware. This means the memory chip alone is usually unreadable if removed from the motherboard.
Why Chip-Off Recovery Isn’t Always Possible
Years ago, “chip-off recovery” was a common solution for damaged phones. Technicians could desolder the NAND flash memory and read its contents using specialized programmers.
Modern Galaxy devices are different because they rely on:
Hardware-backed encryption
Secure Boot
Samsung Knox security
Device-specific encryption keys
Trusted Execution Environment (TEE)
These security measures protect users from unauthorized access. They also mean that successful data recovery often depends on repairing the original motherboard rather than transplanting components.
Temporary Restoration for Data Extraction
Professional technicians frequently perform temporary repairs instead of full device restoration.
Examples include:
Repairing broken power circuits
Replacing damaged display connectors
Installing temporary displays
Rebuilding cracked PCB traces
Replacing failed charging components
Once the phone boots successfully, technicians immediately create secure backups of:
Photos
Videos
Contacts
Messages
Documents
Voice recordings
Application data (where possible)
Only after customer data has been safely copied do they consider additional repairs.
Protecting Customer Privacy
Recovering memories also means protecting sensitive personal information.
Professional repair laboratories should follow strict privacy procedures throughout the recovery process.
Good privacy practices include:
Secure handling of customer devices
Password confidentiality
Limited technician access
Encrypted backup storage
Secure deletion of temporary recovery files
Customer authorization before accessing data
Trust is essential in every data recovery project.
Customers often entrust technicians with years of personal memories, confidential work files, and financial information. A reputable repair centre treats this responsibility with the highest level of professionalism.
Success Rates Explained
One of the most common questions customers ask is:
“Can my data actually be recovered?”
The honest answer depends entirely on the type of damage.
Damage Type
Typical Recovery Outlook
Broken display only
Excellent
Damaged hinge
Very High
Torn flex cables
High
Battery failure
Very High
Charging circuit damage
High
Motherboard fracture
Moderate to High
Water damage
Variable
Fire damage
Low to Moderate
Every device is unique.
Even phones that appear beyond repair sometimes contain fully recoverable data, while devices with only minor visible damage may have suffered severe internal electrical failures.
This is why professional diagnostics are always the first step before making assumptions.
Preventing Future Data Loss
Although professional recovery can be remarkably successful, prevention remains the best strategy.
Simple habits can greatly reduce the risk of permanent data loss.
Enable Automatic Cloud Backups
Cloud storage provides an additional layer of protection.
Regular backups ensure your memories remain safe even if the device is severely damaged.
Consider backing up:
Photos
Videos
Contacts
Documents
Calendar events
Notes
Automatic synchronization removes the need to remember manual backups.
Handle Foldable Phones Carefully
Foldable smartphones contain moving parts that deserve extra care.
Good habits include:
Closing the phone gently
Avoiding excessive pressure
Keeping debris away from the hinge
Using a quality protective case
Avoiding extreme temperatures
These simple steps can significantly extend the lifespan of the device.
Repair Damage Promptly
Small problems often become larger ones.
A damaged hinge, cracked display, or swollen battery should be assessed by professionals before additional failures occur.
Delaying repairs may reduce the chances of successful data recovery if another accident happens.
Professional Recovery vs DIY
Many online videos promise easy smartphone recovery techniques.
Unfortunately, these demonstrations rarely reflect real-world foldable phone repairs.
Professional laboratories offer several advantages:
DIY Attempt
Professional Recovery
Limited tools
Advanced laboratory equipment
Higher risk of damage
Controlled diagnostic procedures
No board-level experience
Skilled micro-soldering technicians
Possible permanent data loss
Focus on preserving original data
No warranty
Professional workmanship
When irreplaceable memories are involved, professional expertise is often the safest choice.
Learn More About Mobile Security
For additional information about Android security and device protection, visit the official Android Security website:
This resource explains how Android protects user information through encryption, verified boot, and ongoing security updates.
Frequently Asked Questions
1. Can photos be recovered from a snapped Samsung Galaxy Z Flip 7?
Yes, in many cases. If the motherboard and encrypted storage remain functional—or can be temporarily repaired—professional technicians may be able to recover photos, videos, and documents.
2. Will replacing the motherboard preserve my data?
Usually not. The original motherboard contains the processor and encryption keys linked to the stored data. Replacing it typically results in the loss of locally stored information.
3. Should I keep trying to turn my phone on?
No. Repeated power attempts may worsen electrical damage. It’s safer to have the device professionally diagnosed before applying power again.
4. Does a broken screen mean my files are gone?
Not necessarily. A damaged display often prevents access to the phone, but the internal storage may still be intact. Many recoveries begin with replacing or temporarily bypassing the damaged display.
5. Can water damage reduce recovery chances?
Yes. Corrosion can spread quickly after liquid exposure, damaging electrical circuits. Prompt professional assessment usually offers the best chance of preserving data.
6. How long does professional data recovery take?
The timeline depends on the complexity of the damage. Simple repairs may take only a few hours, while advanced board-level work can require several days.
7. Is recovering data from a foldable phone harder than from a regular smartphone?
Generally, yes. Foldable devices contain more delicate flex cables, complex hinge assemblies, and tightly packed internal components, making diagnostics and repairs more challenging.
Conclusion
Inside the Lab Recovering Memories from a Snapped Samsung Galaxy Z Flip 7 demonstrates that severe physical damage does not always mean precious memories are lost forever. Modern foldable smartphones combine innovative engineering with advanced security features, creating both opportunities and challenges for professional data recovery.
Successful recovery depends on preserving the original motherboard, understanding Samsung’s encryption system, and performing meticulous board-level diagnostics using specialized laboratory equipment. Every repair requires patience, technical expertise, and a commitment to protecting customer privacy.
Most importantly, acting quickly after an accident can significantly improve recovery outcomes. Avoid unnecessary charging, refrain from attempting complex DIY repairs, and seek assistance from experienced technicians who prioritize data preservation before hardware replacement.
With the right approach, even a severely damaged Samsung Galaxy Z Flip 7 may still hold years of irreplaceable memories waiting to be recovered.
David from Sydney CBD Repair Centre – The Best place to fix mobile phones as 7 Years In A Row! Top Mobile Phone Repair In Sydney. More than 2000 Positive Reviews on Google and Same Day Repairs.
We take pride in delivering exceptional repair services for all major phone brands including Apple, Samsung, Google, and more. Our expert technicians use only genuine parts and offer 90days warranty on repairs. Located in the heart of Sydney CBD, we’re your one-stop solution for all mobile device repairs.
Our commitment to excellence has earned us the trust of thousands of satisfied customers. Whether it’s a cracked screen, battery replacement, or water damage repair, we handle it all with professional care and expertise. Walk in today and experience why we’re Sydney’s #1 choice for mobile phone repairs.
Visit us for:
✓ Same Day Express Repairs
✓ Genuine Parts Guarantee
✓ Professional Technicians
✓ Competitive Pricing
✓ 2000+ 5-Star Google Reviews
✓ 7-Time Award Winner for Best Phone Repairs
Sydney CBD Repair Centre – Where Quality Meets Reliability.
Can You Fix It for Less? 10 Proven Ways to Repair Your Samsung Galaxy Z Flip 6 Without Samsung Prices
Introduction: Why Z Flip 6 Repairs Can Be Costly
Repairing the Samsung Galaxy Z Flip 6 can feel like a wallet-busting experience. Foldable displays, delicate internals, and proprietary parts make replacement expensive, especially through official Samsung channels. But it doesn’t mean you’re doomed to pay sky-high prices. With smart strategies, you can repair your Z Flip 6 without breaking the bank, keeping it functional and stylish for years.
The Samsung Galaxy Z Flip 6 is sophisticated, which also makes it prone to a few predictable issues. Knowing them helps in making cost-effective repair choices.
Screen Damage and Foldable Display Issues
Foldable phones are inherently delicate. Scratches, creases, or cracks in the foldable display are common. While Samsung charges premium prices for OEM replacements, certified repair shops often offer the same quality at a fraction of the cost.
Repair tips:
Use tempered glass protectors specifically designed for foldable screens.
Avoid DIY replacements unless you have proper tools.
Check for warranty coverage before opting for out-of-pocket repair.
Battery Drain and Charging Problems
Battery issues can cripple your device. Swelling or fast-draining batteries are often caused by prolonged usage or software mismanagement.
Repair tips:
Replace the battery with genuine or high-quality third-party alternatives.
Avoid cheap batteries—they can damage your device.
Perform software optimizations to prolong battery life.
Water Damage and Internal Corrosion
Even a splash can lead to long-term damage due to corrosion. Immediate action can save hundreds.
Repair tips:
Turn off your phone and remove the SIM/memory card immediately.
Avoid charging until fully dried.
Seek professional ultrasonic cleaning for severe damage.
DIY vs Professional Repair: What You Need to Know
Repairing your Z Flip 6 at home can be tempting. But understanding the risks and limitations is crucial.
Safety Precautions for DIY Repairs
Use anti-static gloves to avoid component damage.
Follow online tutorials cautiously—missing steps can worsen damage.
Invest in precision tools: screwdrivers, spudgers, heat guns.
When to Seek Professional Help
Some issues, like display replacement or water damage, are better left to experts. Professional repair reduces risk of voiding warranty and ensures genuine parts are used.
Choosing Affordable Repair Services
Knowing where to take your device can save a fortune.
Local Repair Shops vs Official Samsung Service
Samsung: High cost, guaranteed genuine parts.
Local shops: 30-50% cheaper, some may use OEM parts.
Online Repair Services and Mail-In Options
Convenient for busy users.
Compare reviews and warranty policies.
Avoid no-name services—they often reuse parts.
Essential Tools and Replacement Parts
For DIY enthusiasts or pros, having the right tools and parts is essential.
Sourcing Genuine vs Third-Party Parts
Genuine: Expensive, ensures full compatibility.
Third-Party: Affordable, but quality varies—research reviews.
Screen replacement: Professional alignment is crucial.
Battery replacement: Disconnect power fully to avoid short circuits.
Water damage: Professional ultrasonic cleaning yields the best results.
Software fixes: Regular updates, factory resets, and safe mode troubleshooting.
Maintaining Your Z Flip 6 After Repair
Use protective cases and screen guards.
Avoid overcharging or draining the battery fully.
Regularly clean ports to prevent corrosion.
Frequently Asked Questions (FAQ)
1. Can I replace my Z Flip 6 screen at home?
Yes, but it’s risky due to the foldable design. Professional repair is recommended.
2. How much does a battery replacement cost outside Samsung?
Typically 40-60% less than official service, depending on the shop and battery quality.
3. Does water damage void the warranty?
Often, yes. Avoid DIY attempts if under warranty.
4. Are third-party parts reliable?
Some are high-quality, but research is key. Reviews and certifications matter.
5. How long will my repaired Z Flip 6 last?
With proper maintenance, another 2–3 years is achievable.
6. Can I insure my repaired Z Flip 6?
Yes, but notify the insurer of previous repairs for accurate coverage.
Conclusion
Repairing your Samsung Galaxy Z Flip 6 doesn’t have to drain your wallet. By understanding common issues, weighing DIY versus professional services, sourcing affordable parts, and practicing proper maintenance, you can extend the life of your device affordably and safely. With the right approach, high-quality repair is accessible without paying Samsung prices.
David from Sydney CBD Repair Centre – The Best place to fix mobile phones as 7 Years In A Row! Top Mobile Phone Repair In Sydney. More than 2000 Positive Reviews on Google and Same Day Repairs.
We take pride in delivering exceptional repair services for all major phone brands including Apple, Samsung, Google, and more. Our expert technicians use only genuine parts and offer 90days warranty on repairs. Located in the heart of Sydney CBD, we’re your one-stop solution for all mobile device repairs.
Our commitment to excellence has earned us the trust of thousands of satisfied customers. Whether it’s a cracked screen, battery replacement, or water damage repair, we handle it all with professional care and expertise. Walk in today and experience why we’re Sydney’s #1 choice for mobile phone repairs.
Visit us for:
✓ Same Day Express Repairs
✓ Genuine Parts Guarantee
✓ Professional Technicians
✓ Competitive Pricing
✓ 2000+ 5-Star Google Reviews
✓ 7-Time Award Winner for Best Phone Repairs