Foldable Phone Fix: Is Your Z Flip’s Inner Screen Repairable? Ultimate Truth + 7 Expert Facts
Introduction to Foldable Phone Screens
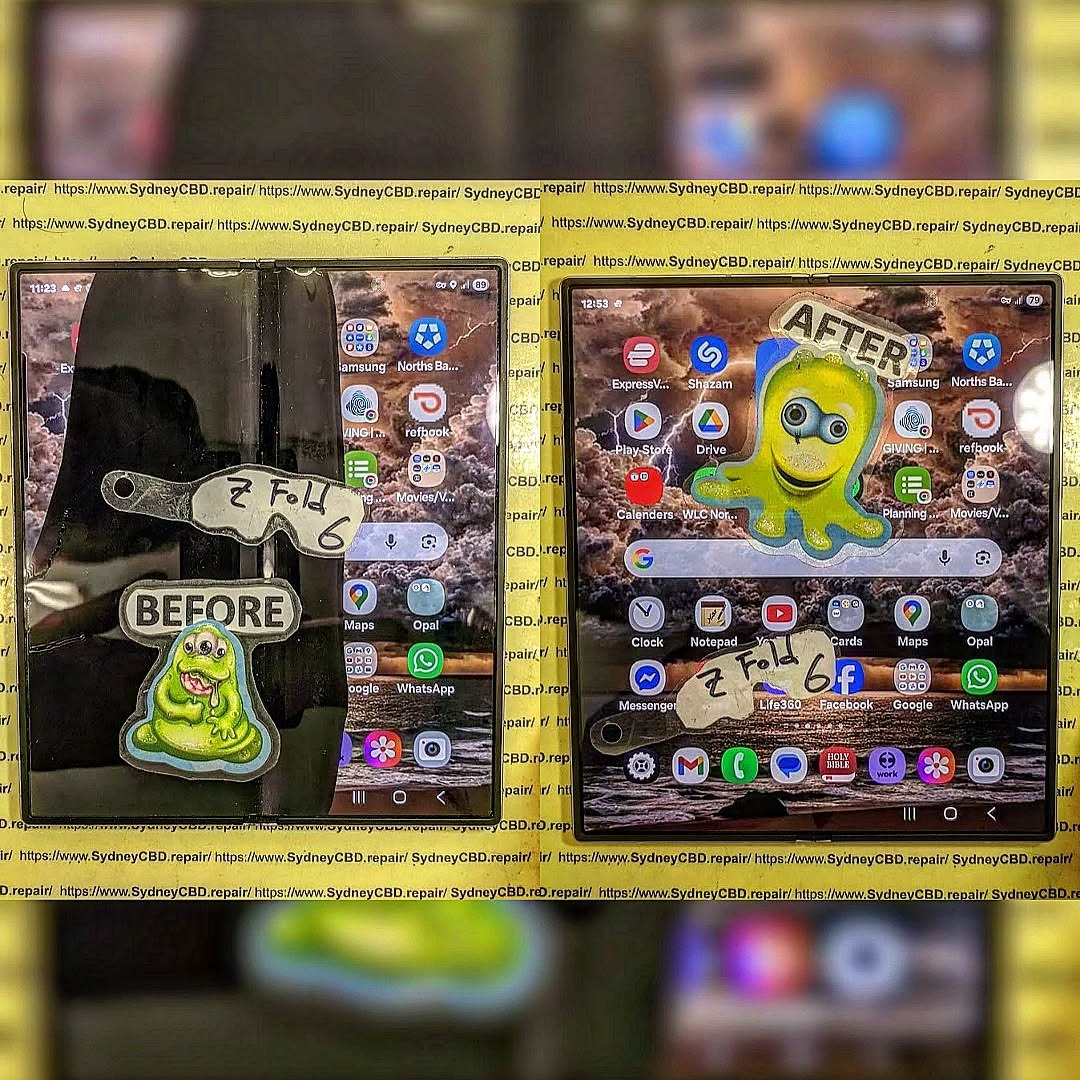
Foldable phones feel like the future in your pocket. They’re sleek, clever, and honestly pretty fun to use. The Samsung Galaxy Z Flip, in particular, has won people over with its compact design and flexible inner display. However, that same innovation brings a big question when things go wrong: is your Z Flip inner screen repairable?
The short answer is yes—but it’s not always simple. The Z Flip inner screen repair process is very different from fixing a standard smartphone display. Because the screen bends, it’s thinner, more delicate, and bonded with specialized layers. Still, repairs are possible, and in many cases, they’re successful when done by experienced technicians.
Understanding how foldable screens work helps set realistic expectations. Unlike traditional glass screens, the Z Flip’s inner display uses ultra-thin glass combined with flexible OLED technology. This allows it to fold, but it also means damage can happen from pressure, debris, or repeated stress over time.
In this guide, we’ll walk you through everything you need to know. We’ll cover whether a Z Flip inner screen repair makes sense, how repairs are done, what they cost, and how to avoid future issues. The goal is simple: give you clear, honest information so you can make a confident decision.
The inner screen isn’t just another display. It’s engineered to bend thousands of times. That means it has layers for flexibility, touch sensitivity, and image quality—all working together. When one layer fails, the entire display can be affected.
Common Causes of Inner Screen Damage
Most Z Flip inner screen repair cases come down to a few common causes:
This is the question everyone asks first. The good news is that Z Flip inner screen repair is possible in most scenarios. However, the repair path depends on where you go and whether your device is still under warranty.
Manufacturer Repair Policies
Samsung does offer official repairs for foldable screens. These repairs use genuine parts and follow factory standards. You can learn more through Samsung’s official support resources such as . Manufacturer repairs tend to be reliable, but they can be costly once the warranty expires.
Warranty vs Out-of-Warranty Repairs
If your phone is under warranty and the damage isn’t caused by misuse, you may pay little or nothing. Out-of-warranty Z Flip inner screen repair costs more because the entire display assembly often needs replacement.
Third-Party Repair Options
Independent repair centers also offer Z Flip inner screen repair. These shops can be more affordable and faster. The key is experience. Foldable phones are not beginner-friendly devices.
Pros and Cons of Independent Repairs
Pros
Lower cost
Faster turnaround
Personalized service
Cons
Warranty may be affected
Quality depends on technician skill
Repair Process Explained Step by Step
Understanding the repair process removes a lot of stress. A proper Z Flip inner screen repair follows a careful, methodical approach.
Diagnostic and Assessment
Technicians start with a full inspection. They check for dead pixels, touch issues, hinge alignment, and frame damage. This step confirms whether a full replacement is needed or if partial solutions are possible.
Replacement vs Refurbishment
In most cases, the inner screen is replaced as a single unit. Refurbishment is rare due to the screen’s layered design.
Parts Quality and Compatibility
Using high-quality parts is critical. Inferior components can cause touch issues or early failure. That’s why reputable shops focus on OEM-grade or genuine parts for every Z Flip inner screen repair.
Costs, Timeframes, and What to Expect
Let’s talk numbers—because that’s usually the deal-breaker.
Typical Repair Costs
Z Flip inner screen repair costs are higher than standard phones. Prices vary by model and region, but they’re often comparable to replacing a premium flagship display.
Factors That Change the Price
Model generation
Extent of damage
Parts availability
Labor expertise
Repair Time and Data Safety
Most repairs take one business day. Data is usually safe, but backing up is always smart. A professional repair shop will advise you clearly before starting.
How to Prevent Future Inner Screen Damage
After investing in a Z Flip inner screen repair, prevention matters.
Daily Use Best Practices
Keep the screen clean before folding
Avoid pressing the center crease
Close gently—no snapping
Accessories That Actually Help
Official protective cases
Screen protectors designed for foldables
Dust-resistant pouches
Frequently Asked Questions (FAQs)
1. Can a cracked Z Flip inner screen be repaired?
Yes, a cracked display can be fixed through full screen replacement.
2. Is Z Flip inner screen repair worth it?
If the phone is otherwise in good condition, absolutely.
3. Will repairs affect the fold crease?
A proper repair restores normal folding and crease appearance.
4. How long does a repair last?
With quality parts, it should last as long as the original screen.
5. Does repair void my warranty?
Third-party repairs may affect warranty status.
6. Can I prevent hinge-related damage?
Yes, by keeping dust away and folding gently.
Conclusion
So, is your Z Flip inner screen repairable? Yes—and in many cases, it’s a smart move. While foldable phones are more complex, experienced technicians can restore them reliably. Whether you choose a manufacturer or a trusted independent repair center, understanding the process helps you protect your investment and enjoy your foldable phone longer.
David from Sydney CBD Repair Centre – The Best place to fix mobile phones as 7 Years In A Row! Top Mobile Phone Repair In Sydney. More than 2000 Positive Reviews on Google and Same Day Repairs.
We take pride in delivering exceptional repair services for all major phone brands including Apple, Samsung, Google, and more. Our expert technicians use only genuine parts and offer 90days warranty on repairs. Located in the heart of Sydney CBD, we’re your one-stop solution for all mobile device repairs.
Our commitment to excellence has earned us the trust of thousands of satisfied customers. Whether it’s a cracked screen, battery replacement, or water damage repair, we handle it all with professional care and expertise. Walk in today and experience why we’re Sydney’s #1 choice for mobile phone repairs.
Visit us for:
✓ Same Day Express Repairs
✓ Genuine Parts Guarantee
✓ Professional Technicians
✓ Competitive Pricing
✓ 2000+ 5-Star Google Reviews
✓ 7-Time Award Winner for Best Phone Repairs
DIY Disaster vs. Pro Fix: When Should You Attempt a Phone Repair? (Ultimate Guide + 7 Critical Truths)
Introduction: The Temptation of DIY Phone Repair
Let’s face it—smartphones are expensive. So when your screen cracks or your battery starts acting funny, the idea of a DIY phone repair can feel pretty tempting. A quick YouTube tutorial, a cheap repair kit, and boom—you think you’ve saved yourself a bundle.
However, here’s the catch: modern smartphones aren’t built like they used to be. What looks simple on video can quickly turn into a costly DIY disaster. Therefore, knowing when to attempt a phone repair yourself and when to call a professional makes all the difference.
This guide breaks it all down clearly, honestly, and without fluff.
Smartphones today are slim, powerful, and packed with advanced technology. Unfortunately, that also makes phone repair far more complex.
Key challenges include:
Sealed designs with strong adhesives
Fragile OLED and AMOLED displays
Integrated components that are hard to isolate
Water-resistant seals that are easy to break
In other words, one wrong move can turn a small issue into a major repair nightmare.
What Is DIY Phone Repair?
DIY phone repair means attempting to fix your device without professional assistance. People usually do this at home using online tutorials and third-party tools.
Common DIY Phone Repair Types
Some popular DIY phone repair attempts include:
Screen replacement
Battery replacement
Charging port cleaning
Speaker or microphone fixes
While some of these are relatively simple, others can spiral out of control fast.
Pros of DIY Phone Repair
Cost Savings and Convenience
The biggest draw of DIY phone repair is cost. Repair kits often seem cheaper than professional services, and you avoid service wait times.
Benefits include:
Lower upfront cost
Immediate action
Learning a new skill
No appointment needed
That said, these benefits only hold up if the repair goes smoothly.
Here’s where reality kicks in. DIY phone repair comes with serious risks that many people underestimate.
Common problems include:
Damaging internal components
Losing water resistance
Voiding manufacturer warranties
Using low-quality or incompatible parts
Data loss or security issues
According to professional repair experts, over 40% of failed DIY repairs end up costing more to fix afterward than the original professional service would have. That’s a tough pill to swallow.
When DIY Phone Repair Makes Sense
Simple Fixes You Can Safely Try
Not all DIY phone repair attempts are bad ideas. In fact, some minor fixes are generally safe if you’re careful.
Good DIY candidates include:
Cleaning charging ports
Replacing phone cases or screen protectors
Software troubleshooting
Replacing SIM trays
If the repair doesn’t require opening the phone or handling sensitive components, DIY can be reasonable.
When Professional Phone Repair Is the Better Choice
Complex Repairs That Require Experts
Professional phone repair is strongly recommended for:
Screen replacements
Battery replacements in sealed phones
Water damage repairs
Motherboard issues
Face ID or fingerprint sensor problems
Professionals use specialized tools, genuine parts, and proven processes. More importantly, they know what not to touch.
At first glance, DIY looks cheaper. However, once you factor in mistakes, tool purchases, and repeat repairs, professional phone repair often delivers better long-term value.
Warranty, Data Safety, and Long-Term Value
DIY phone repair almost always voids manufacturer warranties. That’s a big deal, especially for newer devices.
Professional repair shops typically offer:
Repair warranties
Data protection procedures
Quality assurance testing
Genuine or OEM-grade parts
So while DIY may save money today, professional phone repair protects your investment tomorrow.
Environmental and Ethical Considerations
Interestingly, professional phone repair is often more environmentally responsible. Repair centers properly recycle parts, manage e-waste, and extend device lifespans.
DIY repairs, on the other hand, often result in:
Unused broken parts
Shortened device life
Increased electronic waste
Choosing professional phone repair supports sustainability while keeping your device running longer.
Expert Insights from Professional Technicians
Experienced technicians agree on one thing: most DIY disasters are preventable.
According to industry professionals:
“People usually come in after a DIY attempt has already damaged the phone further. At that point, the repair becomes more expensive and sometimes impossible.”
Expert phone repair isn’t just about tools—it’s about training, experience, and knowing the device inside out.
Frequently Asked Questions (FAQs)
1. Is DIY phone repair safe?
It can be safe for minor, non-invasive fixes. However, complex repairs carry high risks.
2. Does DIY phone repair void my warranty?
Yes, in most cases, opening your phone voids the manufacturer warranty.
3. Is professional phone repair worth the cost?
Absolutely. Professional phone repair ensures reliability, safety, and long-term value.
4. Can DIY phone repair damage my data?
Yes. Incorrect handling can cause data loss or security vulnerabilities.
5. Are third-party phone repair parts reliable?
Quality varies. Many DIY kits use low-grade components that fail quickly.
6. What’s the most common DIY phone repair mistake?
Screen replacement errors—damaged connectors and broken displays are very common.
Conclusion: Making the Smart Choice
DIY phone repair isn’t always a bad idea—but it’s not always a smart one either. Simple fixes? Go ahead. Anything complex? Think twice.
When it comes to protecting your data, your investment, and your peace of mind, professional phone repair often wins hands down. In the long run, choosing expertise over experimentation saves time, money, and frustration.
David from Sydney CBD Repair Centre – The Best place to fix mobile phones as 7 Years In A Row! Top Mobile Phone Repair In Sydney. More than 2000 Positive Reviews on Google and Same Day Repairs.
We take pride in delivering exceptional repair services for all major phone brands including Apple, Samsung, Google, and more. Our expert technicians use only genuine parts and offer 90days warranty on repairs. Located in the heart of Sydney CBD, we’re your one-stop solution for all mobile device repairs.
Our commitment to excellence has earned us the trust of thousands of satisfied customers. Whether it’s a cracked screen, battery replacement, or water damage repair, we handle it all with professional care and expertise. Walk in today and experience why we’re Sydney’s #1 choice for mobile phone repairs.
Visit us for:
✓ Same Day Express Repairs
✓ Genuine Parts Guarantee
✓ Professional Technicians
✓ Competitive Pricing
✓ 2000+ 5-Star Google Reviews
✓ 7-Time Award Winner for Best Phone Repairs
Why Your Local Shop Failed: Fixing a Botched Pixel 9 Pro Repair – 9 Powerful Lessons Every Owner Must Know
Introduction
The growing popularity of Google’s flagship smartphones has led to an increase in demand for Pixel 9 Pro repair services. While many local repair shops promise quick fixes and affordable prices, not all technicians possess the expertise needed to handle sophisticated modern devices. Unfortunately, a poorly executed Pixel 9 Pro repair can create more problems than it solves.
When a repair goes wrong, users often experience new hardware failures, battery issues, display malfunctions, and even data loss. The good news is that most botched repairs can be corrected by experienced technicians who understand Google’s advanced hardware and software architecture.
This article explores why repair failures happen, how to identify them, and what professional repair centres do to restore devices properly.
The Google Pixel 9 Pro represents one of the most advanced Android smartphones available today. It combines premium materials, powerful processors, advanced AI features, and sophisticated camera systems.
As device ownership grows, so does the demand for Pixel 9 Pro repair services. Common repair requests include:
Cracked OLED screens
Battery replacements
Charging port repairs
Camera repairs
Water damage restoration
Back glass replacement
Because of the device’s complexity, even a seemingly simple repair requires specialized tools and expertise.
Why Modern Smartphones Are Harder to Repair
Today’s smartphones contain:
High-density circuit boards
Delicate flex cables
Precision adhesive systems
Biometric security components
Advanced thermal management systems
A technician lacking experience with Pixel devices can easily damage internal components during disassembly or reassembly.
A botched Pixel 9 Pro repair occurs when a repair introduces new faults, leaves existing problems unresolved, or compromises the phone’s functionality.
These issues often appear immediately after collection from a repair shop, although some may take days or weeks to become noticeable.
Common Mistakes Made by Inexperienced Technicians
Several repair errors occur frequently.
Incorrect Screen Installation
Improper screen installation may lead to:
Dead pixels
Touchscreen unresponsiveness
Screen lifting
Light leakage
Display flickering
Damaged Flex Cables
The Pixel 9 Pro contains numerous delicate flex cables connecting:
Cameras
Battery
Charging assembly
Display
Antennas
A torn cable can disable major device functions.
Improper Adhesive Application
Excess adhesive can:
Interfere with sensors
Affect wireless charging
Reduce water resistance
Cause display separation
Poor Quality Replacement Parts
Many repair failures stem from cheap aftermarket components.
Low-quality parts often cause:
Component
Potential Issue
Display
Poor brightness and colour
Battery
Rapid degradation
Charging Port
Intermittent charging
Camera Module
Autofocus failures
Back Glass
Poor durability
Warning Signs After a Failed Pixel 9 Pro Repair
Recognizing the signs of a bad Pixel 9 Pro repair early can prevent further damage.
Display Problems
A damaged or poorly installed display may show:
Green tinting
Flickering
Ghost touches
Black spots
Reduced brightness
These symptoms often indicate installation mistakes or inferior replacement screens.
Battery Issues
Battery-related symptoms include:
Overheating
Rapid battery drain
Random shutdowns
Slow charging
Swollen battery
These problems require immediate inspection.
Connectivity Failures
Connectivity issues can appear after internal damage during repair.
Watch for:
Weak Wi-Fi signals
Bluetooth failures
GPS inaccuracies
Mobile network dropouts
NFC malfunctions
Many of these functions rely on small connectors that are easy to damage during servicing.
Why Local Repair Shops Sometimes Get It Wrong
Not every repair business has the necessary training to perform advanced Pixel 9 Pro repair procedures.
Lack of Specialized Training
Google devices differ significantly from other Android phones.
Technicians must understand:
Pixel hardware layouts
Google diagnostic tools
Component pairing systems
Calibration requirements
Without proper training, repair quality can suffer.
Inadequate Diagnostic Procedures
Many budget repair shops skip diagnostic testing to save time.
Professional technicians perform:
Pre-repair inspection
Functional testing
Component verification
Post-repair validation
Quality assurance checks
Skipping these steps often leads to unresolved issues.
Cost-Cutting Measures
Some repair providers reduce costs by:
Using low-grade parts
Rushing repairs
Avoiding calibration procedures
Reusing damaged adhesives
Ignoring quality control
While these shortcuts may increase profits, they often result in customer dissatisfaction.
Professional Assessment of a Damaged Repair
When correcting a failed Pixel 9 Pro repair, experts begin with a comprehensive evaluation.
Internal Hardware Inspection
Technicians inspect:
Flex cable integrity
Connector damage
Battery health
Board-level faults
Water damage indicators
Microscopic inspection tools often reveal issues invisible to the naked eye.
Software and Calibration Testing
Modern smartphones require software verification after hardware replacement.
Tests include:
Display calibration
Touch sensitivity
Camera functionality
Biometric authentication
Charging performance
Comprehensive diagnostics ensure all systems function correctly.
How Experts Fix a Botched Pixel 9 Pro Repair
Repairing someone else’s mistakes often requires significantly more work than performing the original repair properly.
Replacing Damaged Components
Corrective repairs may involve replacing:
Damaged displays
Torn flex cables
Faulty batteries
Charging assemblies
Camera modules
In severe cases, motherboard repairs may also be necessary.
Restoring Factory-Level Performance
Professional repair centres focus on returning the device to original operating standards.
This includes:
Accurate component installation
Proper adhesive application
Full system testing
Thermal performance verification
Battery optimization
The goal is to ensure the phone performs as intended by the manufacturer.
The Importance of Genuine Parts
One of the most critical aspects of successful Pixel 9 Pro repair work is the use of quality replacement components.
Benefits include:
Better reliability
Improved compatibility
Longer lifespan
Enhanced safety
Consistent performance
Genuine or premium-grade parts reduce the likelihood of repeat failures.
Quality Parts Versus Cheap Alternatives
Feature
Genuine Parts
Low-Quality Parts
Durability
Excellent
Poor
Compatibility
High
Variable
Performance
Consistent
Inconsistent
Warranty Support
Available
Limited
Safety
High
Potential Risk
Investing in quality components often saves money in the long run.
Risks of Delaying Corrective Repairs
Ignoring a failed Pixel 9 Pro repair can create serious consequences.
Potential risks include:
Further hardware damage
Battery swelling
Data loss
Motherboard failure
Increased repair costs
For example, a loose display connector can eventually damage the motherboard if left unchecked.
Financial Impact
Delaying repairs frequently leads to:
More extensive damage
Additional replacement parts
Longer repair times
Reduced device value
Addressing problems early remains the most cost-effective solution.
How to Choose a Reliable Repair Centre
Selecting the right provider significantly reduces the risk of future Pixel 9 Pro repair problems.
Certifications and Experience
Look for repair centres that offer:
Experienced technicians
Specialized training
Modern diagnostic equipment
Transparent repair processes
Professional facilities
Experience matters, particularly when handling premium smartphones.
Warranty and Customer Reviews
A reputable repair centre should provide:
Written warranties
Positive customer feedback
Clear pricing
Repair documentation
Post-repair support
Researching customer reviews can provide valuable insight into service quality.
Questions to Ask Before Booking
Consider asking:
Do you use genuine-quality parts?
What warranty is included?
How long will the repair take?
Are diagnostics performed before repair?
Have you repaired Pixel devices before?
These questions help identify trustworthy providers.
Preventing Future Repair Problems
Prevention remains the best strategy.
To avoid future repair issues:
Use protective cases
Install tempered glass protectors
Avoid unauthorized repair providers
Back up data regularly
Address minor damage promptly
Routine care extends device lifespan and reduces repair frequency.
Smart Maintenance Tips
Here are some additional recommendations:
Avoid extreme temperatures
Keep charging ports clean
Use certified chargers
Update software regularly
Monitor battery health
Simple habits can significantly improve long-term reliability.
Frequently Asked Questions
1. How do I know if my Pixel 9 Pro repair was done incorrectly?
Common signs include touchscreen issues, battery drain, display flickering, connectivity problems, and overheating after the repair.
2. Can a botched Pixel 9 Pro repair be fixed?
Yes. Most repair mistakes can be corrected by experienced technicians using proper diagnostic procedures and quality replacement parts.
3. Is it safe to keep using a phone after a failed repair?
Not always. Continuing to use a damaged device may worsen existing issues and increase repair costs.
4. Why are genuine parts important for Pixel 9 Pro repair?
Genuine-quality parts provide better compatibility, reliability, safety, and overall performance compared to low-cost alternatives.
5. How long does corrective Pixel 9 Pro repair usually take?
Repair times vary depending on the damage. Minor corrective work may take a few hours, while complex repairs can require several days.
6. Can a bad repair affect water resistance?
Yes. Improper adhesive application or incorrect assembly can compromise the phone’s original sealing and reduce water resistance.
7. Should I return to the original repair shop?
If the shop offers a valid warranty and has a good reputation, returning may be reasonable. However, if confidence has been lost, seeking an independent expert assessment is often the safer option.
8. Can data be recovered after a failed repair?
In many cases, yes. Professional technicians can often recover data even when hardware issues are present, provided the storage system remains intact.
Conclusion
A failed Pixel 9 Pro repair can be frustrating, expensive, and disruptive. However, understanding the warning signs and seeking professional assistance quickly can prevent further damage and restore your device to optimal performance.
The most common causes of repair failure include inexperienced technicians, poor-quality parts, inadequate testing, and rushed workmanship. Fortunately, expert repair centres possess the skills, tools, and diagnostic procedures required to correct these issues effectively.
When choosing a repair provider, prioritize experience, transparency, quality parts, and warranty support. By doing so, you’ll significantly reduce the risk of future problems and ensure your Pixel 9 Pro continues to perform at its best for years to come.
For additional information about Google Pixel devices and support resources, visit the official Google Pixel Support page.
David from Sydney CBD Repair Centre – The Best place to fix mobile phones as 7 Years In A Row! Top Mobile Phone Repair In Sydney. More than 2000 Positive Reviews on Google and Same Day Repairs.
We take pride in delivering exceptional repair services for all major phone brands including Apple, Samsung, Google, and more. Our expert technicians use only genuine parts and offer 90days warranty on repairs. Located in the heart of Sydney CBD, we’re your one-stop solution for all mobile device repairs.
Our commitment to excellence has earned us the trust of thousands of satisfied customers. Whether it’s a cracked screen, battery replacement, or water damage repair, we handle it all with professional care and expertise. Walk in today and experience why we’re Sydney’s #1 choice for mobile phone repairs.
Visit us for:
✓ Same Day Express Repairs
✓ Genuine Parts Guarantee
✓ Professional Technicians
✓ Competitive Pricing
✓ 2000+ 5-Star Google Reviews
✓ 7-Time Award Winner for Best Phone Repairs
Samsung Galaxy Z Fold 6 Inner Screen Replacement and Biometric Sensor Calibration: 15 Essential Facts for a Flawless Repair
Introduction
The Samsung Galaxy Z Fold 6 Inner Screen Replacement and Biometric Sensor Calibration process is one of the most advanced smartphone repair procedures available today. Foldable smartphones represent cutting-edge technology, combining the functionality of a tablet and a phone into a single device. However, their sophisticated design also means repairs require specialized expertise.
When the inner display becomes damaged, replacing it isn’t as straightforward as changing a standard smartphone screen. The repair must be performed carefully to protect the folding mechanism, maintain display quality, and ensure biometric systems continue functioning correctly.
Furthermore, biometric sensor calibration is an essential step after many repairs. Without proper calibration, features such as fingerprint recognition and secure authentication may not operate as intended.
This guide explores every aspect of Samsung Galaxy Z Fold 6 Inner Screen Replacement and Biometric Sensor Calibration, helping device owners understand what to expect from the repair process and how to maintain their investment afterward.
1. How long does a Samsung Galaxy Z Fold 6 inner screen replacement take?
Most professional repairs are completed within several hours to one business day, depending on parts availability and calibration requirements.
2. Is biometric sensor calibration always necessary?
In many cases, yes. Calibration ensures that fingerprint and security systems operate correctly after repairs involving internal components.
3. Can I replace the inner screen myself?
Due to the complexity of foldable devices, DIY repairs are generally not recommended. Specialized tools and expertise are required.
4. Will replacing the screen affect waterproofing?
Professional repair centers use proper sealing methods to restore device protection as closely as possible to factory standards.
5. How can I prevent future screen damage?
Use protective cases, avoid excessive pressure, keep the hinge clean, and handle the device carefully during opening and closing.
6. Are genuine replacement parts important?
Absolutely. Genuine components help maintain display quality, durability, compatibility, and long-term reliability.
7. Does screen replacement improve device performance?
If display-related issues were affecting usability, replacing the screen can restore normal functionality and enhance the user experience.
8. What happens if biometric calibration is skipped?
Users may experience fingerprint recognition failures, authentication errors, or reduced security feature functionality.
Conclusion
The Samsung Galaxy Z Fold 6 Inner Screen Replacement and Biometric Sensor Calibration process is far more sophisticated than a standard smartphone repair. The foldable display, flexible architecture, and integrated security systems require specialized expertise, professional tools, and meticulous attention to detail.
By choosing an experienced repair provider, using genuine parts, and ensuring proper biometric sensor calibration, users can restore their Galaxy Z Fold 6 to optimal condition. Regular maintenance and careful handling will further extend the lifespan of the repaired device, helping owners continue enjoying the innovative features that make foldable smartphones so unique.
For additional information about Samsung devices and support resources, visit the official Samsung Support.
David from Sydney CBD Repair Centre – The Best place to fix mobile phones as 7 Years In A Row! Top Mobile Phone Repair In Sydney. More than 2000 Positive Reviews on Google and Same Day Repairs.
We take pride in delivering exceptional repair services for all major phone brands including Apple, Samsung, Google, and more. Our expert technicians use only genuine parts and offer 90days warranty on repairs. Located in the heart of Sydney CBD, we’re your one-stop solution for all mobile device repairs.
Our commitment to excellence has earned us the trust of thousands of satisfied customers. Whether it’s a cracked screen, battery replacement, or water damage repair, we handle it all with professional care and expertise. Walk in today and experience why we’re Sydney’s #1 choice for mobile phone repairs.
Visit us for:
✓ Same Day Express Repairs
✓ Genuine Parts Guarantee
✓ Professional Technicians
✓ Competitive Pricing
✓ 2000+ 5-Star Google Reviews
✓ 7-Time Award Winner for Best Phone Repairs
Sydney CBD Repair Centre – Where Quality Meets Reliability.
Call : +61280114119
Website: Sydney CBD Repair Centre
DIY or Pro? When to Replace Your Phone Screen vs. Buying New – 9 Smart Decisions to Save Big
Introduction: The Real Cost of a Cracked Screen
A cracked display is one of the most common smartphone issues worldwide. Whether you own an iPhone, Samsung Galaxy, or Google Pixel, screen damage can happen in seconds. The big question then becomes simple but powerful: should you replace your phone screen or buy a new device altogether?
This decision isn’t always easy. On one hand, replacing a screen can be cost-effective. On the other, buying a new phone may offer better performance and longevity. In this comprehensive guide, we’ll explore both sides so you can confidently decide when to replace your phone screen and when upgrading is the smarter move.
Smartphone screens today aren’t just glass panels. They’re sophisticated assemblies combining touch sensors, display technology, and protective layers.
OLED vs LCD: What’s Inside Your Phone?
Most premium smartphones use OLED displays, including devices from Apple Inc. and Samsung Electronics. OLED screens offer vibrant colors and deep blacks, but they’re more expensive to repair.
LCD screens, commonly found in budget models, are cheaper to replace but less visually dynamic.
When deciding whether to replace your phone screen, knowing your display type helps estimate repair costs accurately.
Why Screen Repairs Are More Complex Today
Modern devices integrate fingerprint sensors, facial recognition modules, and ultra-thin bezels. For example, newer iPhones feature Face ID systems embedded within the display assembly. This makes DIY repairs riskier and professional services more valuable.
Sometimes, repairing your phone is the clear winner.
Minor Cracks and Functional Displays
If your phone still works perfectly—touch sensitivity intact, no display bleeding—then choosing to replace your phone screen is usually the smartest move. A cracked glass layer doesn’t necessarily mean internal damage.
Repairing it can restore the phone to near-new condition at a fraction of replacement cost.
High-End Devices Worth Repairing
Premium devices such as the iPhone 14 Pro or Samsung Galaxy S23 Ultra often justify screen replacement due to their high resale value and advanced specifications.
If your phone is less than three years old and still receiving software updates, repairing makes financial sense.
Warranty and Insurance Considerations
If your phone is covered under AppleCare+ or Samsung Care+, screen replacement fees are significantly reduced. In such cases, it’s almost always better to replace your phone screen rather than buy new.
When Buying a New Phone Makes More Sense
However, repair isn’t always the best route.
Severe Internal Damage
If your phone has water damage, motherboard failure, or multiple broken components, repair costs can approach the price of a new device.
In these cases, investing in a new smartphone may provide better long-term reliability.
Outdated Software and Hardware
Phones older than five years often stop receiving updates. For example, older models no longer supported by Google may face security risks.
If performance is already sluggish, replacing the screen won’t solve underlying issues.
Repeated Repair History
If you’ve replaced the screen more than once, structural integrity may be compromised. At that point, upgrading is usually smarter.
DIY Screen Replacement: Pros and Risks
Many users consider fixing their phones at home to save money.
Tools Required
Precision screwdriver kit
Heat gun or hairdryer
Pry tools
Replacement adhesive
Compatible screen assembly
DIY kits are widely available online.
Common Mistakes
However, DIY repairs carry risks:
Damaging internal cables
Losing water resistance
Voiding warranty
Using low-quality parts
Without proper training, you might end up paying more in the long run.
Professional Screen Repair: Why Expertise Matters
Choosing a professional repair center ensures precision and peace of mind.
Genuine Parts vs Aftermarket
Reputable repair centers use genuine or OEM-grade parts. This preserves brightness, touch response, and durability.
Aftermarket parts may look similar but can reduce display quality.
Warranty and Service Guarantees
Professional repair shops often provide warranties. This added protection makes the decision to replace your phone screen far less risky.
For industry standards and consumer protection guidelines, you can refer to the Australian Competition and Consumer Commission: https://www.accc.gov.au/
Cost Comparison Table: Repair vs Replace
Scenario
Average Repair Cost
New Phone Cost
Recommended Choice
Minor crack, premium phone
$200-$400
$1500+
Repair
Major damage, old phone
$400+
$800
Replace
Insurance-covered repair
$50-$150
$1200
Repair
Repeated failures
$300+
$900
Replace
Environmental Impact: Repairing for Sustainability
Choosing to replace your phone screen instead of buying new reduces electronic waste. Manufacturing new smartphones consumes rare earth materials and energy.
By repairing, you extend your device’s life and reduce your carbon footprint. It’s a win-win.
FAQs
1. Is it worth it to replace your phone screen?
Yes, especially if the phone is less than three years old and functions properly.
2. How long does professional screen repair take?
Most reputable centers offer same-day service, often within 1–2 hours.
3. Does screen replacement affect performance?
If done professionally using genuine parts, performance remains unchanged.
4. Can I replace my phone screen myself?
Technically yes, but it carries risks including warranty voidance and internal damage.
5. How do I know if internal damage exists?
Signs include screen flickering, dead pixels, overheating, or battery drain.
6. Will replacing the screen restore water resistance?
Professional repair centers can reseal devices, but factory-level waterproofing may not be fully restored.
Conclusion: Making the Smart Financial Choice
In the end, deciding whether to replace your phone screen or buy new depends on cost, device age, and overall condition. Minor damage on a relatively new phone? Repair it. Multiple issues on an outdated model? Consider upgrading.
Either way, making an informed choice saves money and reduces stress.
David from Sydney CBD Repair Centre – The Best place to fix mobile phones as 7 Years In A Row! Top Mobile Phone Repair In Sydney. More than 2000 Positive Reviews on Google and Same Day Repairs.
We take pride in delivering exceptional repair services for all major phone brands including Apple, Samsung, Google, and more. Our expert technicians use only genuine parts and offer 90days warranty on repairs. Located in the heart of Sydney CBD, we’re your one-stop solution for all mobile device repairs.
Our commitment to excellence has earned us the trust of thousands of satisfied customers. Whether it’s a cracked screen, battery replacement, or water damage repair, we handle it all with professional care and expertise. Walk in today and experience why we’re Sydney’s #1 choice for mobile phone repairs.
Visit us for:
✓ Same Day Express Repairs
✓ Genuine Parts Guarantee
✓ Professional Technicians
✓ Competitive Pricing
✓ 2000+ 5-Star Google Reviews
✓ 7-Time Award Winner for Best Phone Repairs
iPhone 17 Pro Max Complete Disassembly: 17 Powerful Insights Into Apple’s Newest Internal Security Screws
Introduction
The iPhone 17 Pro Max complete disassembly has become one of the most talked-about topics in the repair industry. Apple continues to refine its internal engineering, and this year’s flagship device introduces a fresh layer of security hardware designed to make unauthorized repairs more difficult. At the same time, these changes also improve durability, structural integrity, and long-term reliability.
For repair technicians and tech enthusiasts alike, understanding the internal structure of the iPhone 17 Pro Max is essential. Apple has packed the phone with upgraded thermal systems, advanced camera modules, tighter waterproofing seals, and a new generation of proprietary internal security screws.
Interestingly, Apple’s latest approach balances repairability with security. While some components are easier to access, other areas are heavily protected with layered shielding and hidden fasteners. Consequently, technicians now need specialized tools and more patience than ever before.
In this guide, we’ll walk through the entire iPhone 17 Pro Max complete disassembly process, explain the purpose behind Apple’s newest screws, and discuss how professionals safely repair this premium smartphone.
Apple has always used proprietary screws in its devices. From pentalobe screws to tri-point fasteners, the company continuously evolves its internal hardware.
This time around, the iPhone 17 Pro Max introduces reinforced micro-security screws inside critical repair zones. Apple appears focused on three key goals:
Improving structural rigidity
Preventing accidental component damage
Enhancing repair authentication security
These screws are strategically placed around the logic board, battery connectors, and camera assemblies.
Benefits of Apple’s New Screw Design
Feature
Benefit
Smaller screw heads
More internal space
Hardened alloy materials
Increased durability
Deep recessed mounting
Improved tamper resistance
Multi-layer threading
Stronger hold during drops
Because of these modifications, repair shops now require updated screwdriver sets specifically designed for the iPhone 17 series.
Repairing modern smartphones isn’t just about opening screws anymore. The iPhone 17 Pro Max contains sensitive lithium-ion batteries and delicate flex cables that can tear easily.
Important Safety Steps
1. Power Down the Device
Always turn the phone off completely before starting.
2. Remove the SIM Tray
The SIM tray must be removed to avoid damaging the frame during opening.
3. Discharge Battery Below 25%
A lower battery charge reduces fire risks.
4. Use ESD Protection
Electrostatic discharge can permanently damage logic board components.
Furthermore, excessive heat during opening may weaken OLED layers, so controlled heating is essential.
Step-by-Step Opening Procedure
Opening the iPhone 17 Pro Max requires patience because Apple’s adhesive system is stronger than previous generations.
Heating the Display Adhesive
Apply moderate heat around the perimeter for approximately two minutes. This softens the waterproof adhesive.
Removing the Bottom Screws
Apple still uses external pentalobe screws near the USB-C port. However, internal screws now vary in shape and depth.
Lifting the Display
Use a suction cup carefully near the bottom edge. Slowly insert an opening pick to separate the display.
Important Warning
The display opens from the side because multiple flex cables remain attached on the opposite edge.
Rushing this process can permanently damage the OLED panel.
Understanding Apple’s New Screw Architecture
One of the most fascinating aspects of the iPhone 17 Pro Max complete disassembly is Apple’s internal screw layering strategy.
Apple now combines:
Tri-point screws
Micro Torx screws
Hybrid security screws
Shield-mounted recessed screws
These screws are positioned to isolate high-risk repair zones.
Why This Matters
This structure helps:
Reduce accidental punctures
Maintain board compression
Improve water sealing
Limit unauthorized part swapping
Repair technicians now spend more time organizing screws because even tiny placement errors can damage the motherboard.
Display Assembly Removal Process
The display assembly is incredibly thin yet highly durable.
Disconnecting the Battery First
Before touching any display cables, disconnect the battery connector.
This prevents electrical short circuits.
Removing Display Shields
Several layered metal shields cover the display connectors. These shields use Apple’s newest internal security screws.
Technicians must remember exact screw placement because lengths vary dramatically.
Flex Cable Risks
The display contains:
OLED flex
Touch digitizer cable
Face ID cable
Ambient light sensor cable
Even slight tearing can disable critical functions permanently.
Battery Adhesive and Battery Extraction
Apple continues using stretch-release adhesive tabs for the battery.
However, the adhesive is now stronger and more heat-resistant.
Battery Removal Steps
Remove lower speaker assembly
Access adhesive pull tabs
Pull slowly at low angles
Apply alcohol if adhesive snaps
If tabs break, technicians must carefully pry the battery without puncturing it.
Why Apple Changed the Battery Layout
The redesigned battery compartment improves:
Heat dissipation
Drop protection
Structural balance
As a result, the device feels sturdier during daily use.
Logic Board Layout and Shielding
The logic board inside the iPhone 17 Pro Max is one of Apple’s most compact designs ever.
Multi-Layer Board Engineering
Apple uses stacked board technology to maximize space efficiency.
Internal Components Include
Component
Function
A19 Pro chip
Main processor
RAM modules
Multitasking
NAND storage
File storage
Power IC
Voltage regulation
RF modules
Cellular communication
The board is protected with thick EMI shielding plates.
Advanced Shield Removal
Removing these shields requires extreme precision because nearby solder points are vulnerable.
Additionally, Apple added thermal transfer pads beneath major chips to improve cooling.
Camera System Teardown
The camera module is massive compared to earlier iPhone generations.
Triple-Lens Camera System
The iPhone 17 Pro Max features:
Wide sensor
Ultra-wide sensor
Tetraprism telephoto lens
Each camera is individually stabilized.
Internal Protection Features
Apple surrounds the camera housing with reinforced brackets and foam dampeners.
This reduces vibration damage during drops.
LiDAR Scanner Placement
The LiDAR system now integrates deeper into the frame structure for better alignment accuracy.
Consequently, replacing rear camera components requires more recalibration steps.
Thermal Management Improvements
Heat control is one of Apple’s biggest upgrades this year.
Vapor Chamber Cooling
Reports from the iPhone 17 Pro Max complete disassembly indicate Apple improved thermal performance dramatically.
The cooling system includes:
Graphite sheets
Copper transfer layers
Vapor chamber elements
Thermal gel interfaces
These features help maintain gaming performance and camera processing stability.
Benefits for Daily Users
Improved thermals lead to:
Better sustained performance
Longer battery lifespan
Reduced overheating
More stable charging speeds
This engineering upgrade is particularly important for intensive AI-powered tasks.
USB-C Port and Charging Assembly
Apple continues refining its USB-C implementation.
Port Construction
The charging assembly includes:
USB-C connector
Microphone modules
Waterproof gaskets
Antenna routing brackets
The port itself is reinforced with thicker anchor points.
Repair Challenges
USB-C repairs are still delicate because nearby board traces are extremely small.
Improper soldering can destroy charging functionality permanently.
Speaker and Haptic Engine Analysis
The speaker system inside the iPhone 17 Pro Max delivers richer sound due to redesigned acoustic chambers.
Speaker Assembly Features
Apple enlarged:
Resonance chambers
Bass channels
Vibration dampeners
As a result, audio quality feels fuller and clearer.
Taptic Engine Improvements
The Taptic Engine is slightly larger and mounted with reinforced brackets.
This design minimizes movement during drops and improves long-term reliability.
Face ID and Sensor Flex Considerations
Face ID repairs remain among the most difficult smartphone repairs in the industry.
Fragile Sensor Arrays
The sensor flex includes:
Infrared camera
Dot projector
Flood illuminator
Damaging any component may permanently disable Face ID.
Why Apple Locks Face ID Components
Apple uses hardware pairing for security and biometric protection.
Therefore, many Face ID repairs require advanced microsoldering expertise.
Repairability Score and Technician Challenges
The iPhone 17 Pro Max complete disassembly reveals a mixed repairability experience.
Areas That Improved
Easier display access
Better battery compartment organization
Improved modular speakers
Areas That Became Harder
New internal security screws
Stronger adhesives
Increased software pairing
Professional repair shops now rely heavily on specialized equipment and repair databases.
Genuine Parts vs Aftermarket Components
Choosing replacement parts significantly affects repair quality.
Genuine Parts Advantages
Genuine Parts
Aftermarket Parts
Better OLED quality
Lower brightness
Accurate colors
Inconsistent calibration
Improved durability
Variable lifespan
Better waterproof fit
Possible sealing gaps
Using authentic components also reduces compatibility issues.
Water Resistance Restoration After Repair
One major concern after disassembly is restoring water resistance.
Adhesive Replacement
Technicians must install new waterproof adhesive seals after every opening.
Important Reality Check
Even with proper sealing, repaired devices may not fully match factory waterproof ratings.
Therefore, users should still avoid exposing repaired phones to excessive moisture.
Common Mistakes During iPhone 17 Pro Max Complete Disassembly
Many DIY repairs fail because of avoidable mistakes.
Frequent Errors
Incorrect Screw Placement
Using the wrong screw can puncture the motherboard.
Excessive Pry Force
This often damages OLED panels or flex cables.
Battery Punctures
Lithium-ion batteries can ignite if bent or pierced.
Improper Adhesive Removal
Poor adhesive cleanup prevents proper resealing.
Patience and organization are absolutely essential during any repair.
Professional Repair Recommendations
Although online teardown videos make repairs look easy, professional repair work requires training and experience.
Why Professionals Matter
Certified technicians offer:
Proper diagnostics
Safe battery handling
Correct waterproof resealing
Advanced microsoldering
Genuine-quality replacement parts
Additionally, professional repair centers maintain specialized tools designed specifically for modern Apple devices.
Frequently Asked Questions
Is the iPhone 17 Pro Max difficult to repair?
Yes. The device uses advanced adhesives, security screws, and paired components that increase repair complexity.
Can I replace the battery myself?
Technically yes, but battery replacement requires careful adhesive removal and proper safety procedures.
What are Apple’s new internal security screws?
They are proprietary fasteners designed to improve structural rigidity and limit unauthorized repairs.
Does opening the iPhone 17 Pro Max remove waterproofing?
Yes. Opening the device breaks the factory waterproof seal, which must be replaced carefully.
Can Face ID be repaired after damage?
Some Face ID repairs are possible, but many require advanced microsoldering and specialized calibration tools.
Are aftermarket screens safe to use?
Some aftermarket screens work adequately, but genuine-quality displays usually provide better brightness, color accuracy, and durability.
Why are screw placements so important?
Different screw lengths can damage sensitive internal layers if installed incorrectly.
Conclusion
The iPhone 17 Pro Max complete disassembly showcases Apple’s relentless focus on engineering refinement, durability, and internal security. From its sophisticated cooling system to its reinforced camera structures and proprietary internal screws, the device reflects a growing trend toward tightly integrated smartphone design.
While certain repair areas have improved, the newest internal security screws and advanced component pairing systems create fresh challenges for technicians. Consequently, successful repairs now depend heavily on proper tools, technical expertise, and careful organization.
For users, the takeaway is simple: modern flagship smartphones are marvels of engineering, but repairing them safely requires skill and experience. Whether you’re a repair enthusiast or a professional technician, understanding Apple’s newest internal architecture is essential for navigating the future of smartphone repair.
Thanks for reading this comprehensive guide on the iPhone 17 Pro Max complete disassembly and Apple’s newest internal security screws. Staying informed about modern smartphone engineering helps users make smarter repair decisions and protect their devices for the long term.
David from Sydney CBD Repair Centre – The Best place to fix mobile phones as 7 Years In A Row! Top Mobile Phone Repair In Sydney. More than 2000 Positive Reviews on Google and Same Day Repairs.
We take pride in delivering exceptional repair services for all major phone brands including Apple, Samsung, Google, and more. Our expert technicians use only genuine parts and offer 90days warranty on repairs. Located in the heart of Sydney CBD, we’re your one-stop solution for all mobile device repairs.
Our commitment to excellence has earned us the trust of thousands of satisfied customers. Whether it’s a cracked screen, battery replacement, or water damage repair, we handle it all with professional care and expertise. Walk in today and experience why we’re Sydney’s #1 choice for mobile phone repairs.
Visit us for:
✓ Same Day Express Repairs
✓ Genuine Parts Guarantee
✓ Professional Technicians
✓ Competitive Pricing
✓ 2000+ 5-Star Google Reviews
✓ 7-Time Award Winner for Best Phone Repairs
Mail-In Repair Masterclass: Safely Shipping Your Broken Z Fold 6 to Sydney – 11 Powerful Expert Tips
Introduction
The rise of foldable smartphones has changed the mobile industry forever. Devices like the Samsung Galaxy Z Fold 6 deliver cutting-edge technology, powerful multitasking, and sleek designs. However, these premium phones are also more delicate than traditional smartphones. When damage happens, many owners choose mail-in repair services to get professional help quickly and safely.
Shipping a broken foldable phone might sound risky at first. After all, the device contains flexible OLED panels, advanced hinges, and fragile internal components. Yet with the right preparation and packaging methods, mail-in repair can be secure, convenient, and surprisingly fast.
In this detailed guide, you’ll learn how to safely ship your broken Z Fold 6 to Sydney for repair while avoiding common mistakes that could cause additional damage.
Mail-in phone repair services have become incredibly popular across Australia. People living outside major cities often don’t have access to professional foldable phone repair specialists nearby. Instead of travelling long distances, users can securely package their damaged device and send it directly to a trusted technician.
There are several reasons why mail-in repairs continue gaining momentum:
Convenience from home
Access to specialised technicians
Faster turnaround times
Availability of genuine replacement parts
Better pricing compared to local providers
Foldable devices require highly skilled technicians because the repair process is much more complex than standard smartphones. That’s especially true for the Samsung Galaxy Z Fold 6.
Additionally, many repair centres in Sydney now offer same-day assessment and rapid turnaround for mail-in customers. This reduces downtime and keeps customers connected.
Foldable phones are engineering marvels, but they also contain delicate parts that require careful handling.
Foldable Screen Vulnerabilities
The inner folding display is ultra-thin and flexible. Unlike traditional glass screens, foldable panels can suffer from:
Creasing
Dead pixels
Touch sensitivity failure
Internal OLED bleeding
Pressure damage
Even minor shipping pressure can worsen existing damage if the phone isn’t packed properly.
Hinge Mechanism Risks
The hinge is another critical component. Dust intrusion, impact damage, and improper handling may lead to:
Stiff folding
Misalignment
Grinding noises
Failure to fully open or close
Because of this complexity, professional repair services are strongly recommended.
Common Reasons People Mail Their Z Fold 6 for Repair
Many customers send their foldable phones to Sydney due to specific repair issues.
Here are the most common problems:
Problem
Symptoms
Cracked inner screen
Black spots, flickering
Broken outer display
Touch failure
Faulty hinge
Phone won’t fold smoothly
Water damage
Overheating, random shutdowns
Battery issues
Fast drain, swelling
Charging failure
Intermittent charging
Dead motherboard
No power
These repairs often require specialised tools and premium replacement parts.
Choosing a Trusted Repair Centre in Sydney
Not every repair shop is equipped to handle foldable devices.
Experience and Certifications
Before shipping your device, look for repair centres with:
Proven foldable repair experience
Positive customer reviews
Certified technicians
Transparent pricing
Professional diagnostic procedures
An experienced technician understands the risks involved in handling foldable OLED technology.
Genuine Parts and Warranty
Always ask whether the repair centre uses genuine or premium-grade parts. Cheap aftermarket components may lead to poor display quality or reduced durability.
A trustworthy repair provider should also offer warranty coverage on repairs.
Preparation is essential before sending your device.
Backing Up Your Data
Always back up your phone before repair. Use:
Samsung Cloud
Google Drive
External SSD
Computer backup software
Although professional repair centres handle devices carefully, data protection is ultimately the owner’s responsibility.
Removing SIM and Accessories
Before packing the device:
Remove your SIM card
Remove memory cards
Take off the case
Remove accessories
Disconnect chargers
This prevents loss during transit.
Disabling Security Locks
Disable features like:
Samsung Find My Mobile
Google Factory Reset Protection
Passcodes if requested by technicians
This allows diagnostic testing after repair.
Best Packaging Methods for Foldable Phones
Proper packaging is the most important step in safe shipping.
Recommended Packaging Materials
Use high-quality materials including:
Bubble wrap
Foam padding
Rigid cardboard box
Packing tape
Zip-lock bag for accessories
Avoid using paper envelopes or thin satchels.
Step-by-Step Packing Process
Follow these steps carefully:
Power off the phone completely
Fold the device gently
Wrap it in microfiber cloth
Add multiple bubble wrap layers
Place into a snug inner box
Add foam around the box
Place inside larger outer box
Seal securely with tape
The double-box method provides excellent impact protection.
Shipping Options Available in Australia
Several shipping providers operate nationwide.
Express Post vs Courier Services
Australia Post Express is popular because it’s affordable and trackable. However, private couriers may offer:
Faster delivery
Better insurance
Signature confirmation
Real-time tracking
Choosing the right service depends on your budget and urgency.
Insurance and Tracking Importance
Never ship a foldable phone without tracking.
Insurance is also strongly recommended because the Samsung Galaxy Z Fold 6 is an expensive premium device.
Keep records of:
Tracking number
Photos before shipping
Packaging photos
Shipping receipt
These documents help protect you if problems arise.
What Happens After Your Device Arrives
Once your phone reaches the repair centre, technicians typically perform:
Physical inspection
Diagnostic testing
Repair quotation
Customer approval
Repair process
Quality control testing
Return shipping
Professional centres usually contact customers before starting major repairs.
This transparent process gives customers confidence and clarity.
Repair Timeframes and Expectations
Repair times vary depending on the issue.
Repair Type
Typical Time
Outer screen replacement
2–4 hours
Inner foldable screen
1–2 days
Hinge repair
1–3 days
Water damage cleaning
2–5 days
Motherboard repair
3–7 days
Shipping times should also be considered when planning repairs.
Most reputable repair centres provide status updates throughout the process.
Costs Involved in Mail-In Z Fold 6 Repairs
Foldable repairs are more expensive than regular smartphones because of:
Premium components
Specialised labour
Complex assembly
OLED technology
Hinge engineering
Factors affecting cost include:
Extent of damage
Parts availability
Labour intensity
Water exposure severity
Although pricing may seem high, professional repair is still significantly cheaper than replacing the entire phone.
Risks of DIY Shipping Mistakes
Many customers unintentionally cause further damage while preparing devices for shipping.
Common mistakes include:
Using oversized boxes
Insufficient padding
Shipping while powered on
Including loose accessories
Forgetting waterproof bags
Poor sealing methods
These errors can result in:
Additional screen cracking
Internal component damage
Moisture exposure
Lost accessories
Taking extra time to package correctly can save hundreds of dollars.
Benefits of Professional Mail-In Repair Services
Professional mail-in repair offers several advantages.
Convenience
Customers can arrange repairs from home without visiting a store physically.
Expert Foldable Repairs
Specialists understand foldable engineering and use proper tools.
Quality Assurance
Professional centres perform post-repair testing to ensure reliability.
Warranty Protection
Many repairs include warranty coverage for peace of mind.
Faster Turnaround
Experienced technicians can complete repairs efficiently.
For busy professionals and regional customers, mail-in repair is often the most practical solution.
How to Protect Your Z Fold 6 After Repair
After receiving your repaired device, taking preventive measures can extend its lifespan.
Recommended protection tips include:
Use a premium protective case
Avoid dust-heavy environments
Keep liquids away
Open and close gently
Avoid extreme temperatures
Use certified chargers
Apply quality screen protection
Foldable devices require careful handling, but good habits can significantly reduce future repair costs.
Frequently Asked Questions
Is it safe to ship a broken Z Fold 6 by mail?
Yes, it’s generally safe if the phone is packaged properly using bubble wrap, double boxing, and tracked shipping services.
Should I insure my foldable phone shipment?
Absolutely. The Samsung Galaxy Z Fold 6 is a high-value device, so insurance provides financial protection during transit.
How long does mail-in repair usually take?
Most repairs are completed within 1–5 business days after the device arrives, depending on the damage severity.
Can water-damaged Z Fold 6 phones still be repaired?
In many cases, yes. Immediate professional cleaning improves the chances of successful repair.
Will my data be safe during repair?
Professional repair centres handle devices carefully, but backing up your data beforehand is strongly recommended.
What’s the safest packaging method?
The safest method involves wrapping the device in microfiber cloth, bubble wrap, and placing it inside double boxes with foam padding.
Is genuine screen replacement important?
Yes. Genuine-quality screens maintain original display quality, touch responsiveness, and folding durability.
Conclusion
Mail-in repair services have transformed the way Australians repair premium foldable smartphones. Sending your damaged Samsung Galaxy Z Fold 6 to a trusted Sydney repair centre can save time, reduce stress, and restore your device professionally.
The key to successful shipping lies in preparation. Back up your data, remove accessories, package carefully, and choose tracked shipping with insurance. Most importantly, work with experienced technicians who understand foldable phone technology.
When handled correctly, mail-in repair is a secure and efficient solution for even the most delicate smartphone repairs.
David from Sydney CBD Repair Centre – The Best place to fix mobile phones as 7 Years In A Row! Top Mobile Phone Repair In Sydney. More than 2000 Positive Reviews on Google and Same Day Repairs.
We take pride in delivering exceptional repair services for all major phone brands including Apple, Samsung, Google, and more. Our expert technicians use only genuine parts and offer 90days warranty on repairs. Located in the heart of Sydney CBD, we’re your one-stop solution for all mobile device repairs.
Our commitment to excellence has earned us the trust of thousands of satisfied customers. Whether it’s a cracked screen, battery replacement, or water damage repair, we handle it all with professional care and expertise. Walk in today and experience why we’re Sydney’s #1 choice for mobile phone repairs.
Visit us for:
✓ Same Day Express Repairs
✓ Genuine Parts Guarantee
✓ Professional Technicians
✓ Competitive Pricing
✓ 2000+ 5-Star Google Reviews
✓ 7-Time Award Winner for Best Phone Repairs
Sydney CBD Repair Centre – Where Quality Meets Reliability.
Call : +61280114119
Website: Sydney CBD Repair Centre
Five Common Mistakes That Destroy Your Smartphone Screen During Simple DIY Repairs – 5 Costly Errors You Must Avoid
Introduction
Smartphone repair videos are everywhere these days. A quick search online can make almost any repair look simple. Because of that, many people try fixing cracked screens, replacing batteries, or opening their phones at home. While some repairs seem easy, one small mistake can permanently destroy a smartphone screen.
Modern smartphones are extremely delicate. Devices from Apple, Samsung, and Google use advanced OLED and AMOLED technology that can crack, burn, or fail with very little pressure. Even experienced DIY enthusiasts sometimes damage screens accidentally during repairs.
The truth is simple. A repair that starts as a budget-friendly project can quickly become a costly mistake. That’s why understanding the five common mistakes that destroy your smartphone screen during simple DIY repairs is so important.
Modern smartphone displays are engineering masterpieces. They combine:
Thin glass layers
OLED or LCD panels
Touch-sensitive digitizers
Flexible ribbon cables
Pressure-sensitive adhesives
Because manufacturers want thinner phones, screens are now more delicate than ever before.
For example, OLED displays found in premium smartphones can fail even without visible cracks. A tiny bend in the panel may cause:
Green lines
Black spots
Touch failure
Flickering
Complete display loss
Additionally, modern curved-edge displays are especially vulnerable during DIY repairs. Many people underestimate how little force is needed to damage them.
According to Sydney CBD Repair Centre, improper opening methods remain one of the leading causes of accidental repair damage.
At first, DIY repairs seem cheaper. However, mistakes often increase the final cost dramatically.
Here’s a simple comparison:
Repair Situation
Average Cost
Simple battery replacement
Low
Damaged OLED during repair
Very High
Torn flex cable
Moderate to High
Motherboard damage from poor tools
Extremely High
Many users buy cheap repair kits online without realizing the risks involved. One wrong move can turn a $50 repair into a $500 replacement.
Furthermore, DIY mistakes may void manufacturer warranties or reduce water resistance protection.
Mistake #1 – Using the Wrong Tools
The first major mistake is using improper tools during smartphone repair.
People often use:
Kitchen knives
Metal screwdrivers
Razor blades
Cheap plastic picks
Low-quality suction cups
Unfortunately, these tools can easily damage the screen.
Cheap Pry Tools and Metal Objects
Metal tools are particularly dangerous. They can:
Crack the display internally
Scratch OLED layers
Slice ribbon cables
Damage the frame
Cause battery punctures
Even slight slips may permanently destroy the smartphone screen.
Professional technicians use:
Anti-static tweezers
Plastic opening cards
Controlled heat pads
Precision screwdrivers
ESD-safe mats
These specialized tools reduce the chance of accidental screen damage.
How Proper Tools Protect Screens
Professional-grade tools distribute pressure evenly. That matters because OLED screens are extremely pressure-sensitive.
For instance, using a thin plastic card instead of a metal blade can prevent:
Corner cracks
Internal display bruising
Frame warping
Good tools also improve safety and efficiency.
Mistake #2 – Applying Too Much Pressure
Another common mistake that destroys your smartphone screen during simple DIY repairs is excessive pressure.
Many people assume screens are durable because they use strong glass like Gorilla Glass. However, the internal display underneath remains fragile.
OLED and AMOLED Screen Sensitivity
OLED displays are thin and flexible. They don’t tolerate twisting or pressure well.
Symptoms of pressure damage include:
Purple ink spots
Flickering
Random lines
Dead pixels
Black screen issues
Sometimes the damage doesn’t appear immediately. A phone may work for several hours before the display suddenly fails.
Pressure Points That Crack Displays
The most dangerous pressure areas include:
Near the fingerprint sensor
Curved screen edges
Display connector regions
Corners of the panel
Technicians avoid pressing directly on the center of the screen during removal.
Instead, professionals carefully loosen adhesive using controlled heat and gradual lifting techniques.
Mistake #3 – Ignoring Heat Management
Heat is essential during smartphone repair because adhesive holds many devices together. However, excessive heat can destroy the display.
This is one of the biggest DIY repair mistakes people make.
Overheating Adhesive
Many users use:
Hair dryers
Heat guns
Open flames
Industrial heaters
That’s risky because smartphone displays are heat-sensitive.
Excessive heat may cause:
OLED burn damage
Touchscreen failure
Glue separation
Battery swelling
Screen discoloration
Some adhesives soften at relatively low temperatures. Too much heat weakens the display permanently.
Safe Heat Application Techniques
Professional technicians use temperature-controlled heating systems.
Best practices include:
Applying moderate heat gradually
Moving heat evenly
Avoiding concentrated hot spots
Monitoring battery temperature
Using specialized heat pads
Patience is critical during repairs.
Rushing the process often leads to cracked or dead screens.
Mistake #4 – Disconnecting Components Incorrectly
Modern smartphones contain delicate internal connectors. Disconnecting them incorrectly can destroy both the screen and motherboard.
This mistake is especially common during battery replacements.
Battery Safety Concerns
Before disconnecting display cables, technicians always disconnect the battery first.
Failing to do so may cause:
Electrical shorts
Display failure
Component burnout
Sudden sparks
Lithium-ion batteries are also dangerous when punctured or bent.
According to Samsung Support, damaged lithium batteries should never be reused after physical impact.
Ribbon Cable Damage
Display ribbon cables are incredibly fragile.
Common DIY mistakes include:
Pulling connectors sideways
Using metal tools
Tearing flex cables
Improper reconnection
Once damaged, these cables usually require full screen replacement.
Unfortunately, many users don’t notice the damage until reassembly.
Mistake #5 – Buying Low-Quality Replacement Parts
Cheap replacement screens often create serious long-term problems.
People frequently purchase ultra-cheap screens from unreliable marketplaces. While the price may seem attractive, quality issues are common.
Genuine vs Aftermarket Screens
Genuine displays usually provide:
Better brightness
Accurate colors
Stronger glass
Improved touch response
Reliable durability
Aftermarket screens vary dramatically in quality.
Some low-quality screens suffer from:
Poor touch sensitivity
Weak adhesive
Screen flickering
Fast battery drain
Early failure
How Fake Screens Fail Quickly
Inferior replacement screens may fail within weeks.
Common warning signs include:
Random ghost touches
Green tint
Uneven brightness
Screen separation
Dead zones
Professional repair shops typically source high-grade parts from trusted suppliers to avoid these problems.
Common Warning Signs After DIY Repair
Sometimes screen damage isn’t immediately obvious.
Watch for these warning signs:
Symptom
Possible Cause
Green vertical lines
OLED pressure damage
Touchscreen lag
Poor connector seating
Black spots
Internal display crack
Flickering
Damaged flex cable
Overheating
Battery or motherboard issue
Weak brightness
Low-quality replacement panel
If you notice these issues after repair, stop using the device until it’s professionally inspected.
When to Stop and Seek Professional Help
DIY repairs aren’t always worth the risk.
You should strongly consider professional help if your phone has:
Curved OLED displays
Water damage
Bent frames
Face ID issues
Under-display fingerprint sensors
Severe screen cracks
Premium smartphones are especially difficult to repair safely.
For example, repairing modern foldable phones requires advanced training and specialized equipment.
Best Practices for Safe Smartphone Repair
If you still want to attempt DIY repairs, follow these safety tips carefully.
Use Proper Tools
Invest in:
Precision screwdrivers
Plastic pry tools
Anti-static equipment
Magnetic project mats
Work Slowly
Rushing causes mistakes.
Always:
Read repair guides fully
Watch trusted tutorials
Organize screws carefully
Avoid distractions
Protect the Battery
Disconnect the battery before touching internal components.
Never puncture or bend lithium-ion batteries.
Buy Quality Parts
Avoid suspiciously cheap components.
Research suppliers carefully before ordering replacement screens.
Test Before Sealing
Before final assembly:
Connect the screen
Power on the phone
Test touch response
Check brightness
Verify cameras and sensors
This helps catch problems early.
Why Professional Repair Shops Succeed
Professional technicians rely on:
Advanced training
Specialized tools
Controlled environments
Experience with delicate devices
Repair shops also perform waterproof resealing, calibration, and pressure testing after repairs.
That extra attention significantly reduces the risk of future problems.
Moreover, trusted repair centers typically provide warranties for parts and labor.
That peace of mind matters.
Frequently Asked Questions
1. Can a smartphone screen break internally without visible cracks?
Yes. OLED and AMOLED displays can suffer internal damage from pressure, bending, or heat even if the outer glass looks fine.
2. Is DIY screen replacement worth it?
It depends on the device and your experience level. Older phones may be easier to repair, but premium smartphones are extremely delicate.
3. Why does my screen show green lines after repair?
Green lines usually indicate OLED damage caused by pressure, heat, or connector issues during the repair process.
4. Are cheap replacement screens reliable?
Some are acceptable, but many low-cost screens have poor brightness, touch response, and durability compared to genuine parts.
5. Can heat damage my smartphone battery?
Yes. Excessive heat during repair may cause battery swelling, reduced lifespan, or safety hazards.
6. How do professionals avoid screen damage?
Professionals use controlled heat, precision tools, anti-static protection, and careful repair procedures developed through training and experience.
7. Does opening a phone reduce water resistance?
Yes. Most phones lose part of their original waterproof sealing once opened unless properly resealed with professional-grade adhesive.
Conclusion
DIY phone repair can be rewarding, but it also carries serious risks. The five common mistakes that destroy your smartphone screen during simple DIY repairs often happen because people underestimate how delicate modern devices really are.
Using the wrong tools, applying too much pressure, overheating components, mishandling connectors, and installing poor-quality replacement parts can permanently damage a smartphone.
Fortunately, careful preparation and proper techniques can reduce those risks significantly.
If a repair feels beyond your skill level, seeking professional help is often the smarter and cheaper option in the long run. Protecting your smartphone screen is far easier than replacing a destroyed OLED display later.
David from Sydney CBD Repair Centre – The Best place to fix mobile phones as 7 Years In A Row! Top Mobile Phone Repair In Sydney. More than 2000 Positive Reviews on Google and Same Day Repairs.
We take pride in delivering exceptional repair services for all major phone brands including Apple, Samsung, Google, and more. Our expert technicians use only genuine parts and offer 90days warranty on repairs. Located in the heart of Sydney CBD, we’re your one-stop solution for all mobile device repairs.
Our commitment to excellence has earned us the trust of thousands of satisfied customers. Whether it’s a cracked screen, battery replacement, or water damage repair, we handle it all with professional care and expertise. Walk in today and experience why we’re Sydney’s #1 choice for mobile phone repairs.
Visit us for:
✓ Same Day Express Repairs
✓ Genuine Parts Guarantee
✓ Professional Technicians
✓ Competitive Pricing
✓ 2000+ 5-Star Google Reviews
✓ 7-Time Award Winner for Best Phone Repairs
Screen With Frame vs Without: Making the Best Repair Part Choice – 9 Powerful Insights You Need
Introduction
Smartphone repairs have become more common than ever. Cracked screens, touch issues, dead pixels, and display flickering are problems many users face daily. However, when replacing a damaged display, one major question often appears: should you choose a screen with frame or a screen without frame?
The difference may sound small, but it can greatly affect repair quality, durability, cost, and even water resistance. Many customers don’t realize that choosing between these two repair parts can influence how long the phone lasts after repair.
In this guide, we’ll explain everything about screen with frame vs without so you can make the best repair decision for your smartphone.
Modern smartphones are built with tightly integrated components. The display assembly often includes the LCD or OLED panel, digitizer, adhesive layers, and sometimes the phone frame itself.
What Is a Screen With Frame?
A screen with frame is a replacement display that already comes attached to the phone’s middle housing or chassis. In simple terms, the new display is pre-installed into a replacement frame.
This means technicians can transfer internal parts such as:
Battery
Motherboard
Cameras
Charging port
Speakers
into the new frame assembly.
A screen with frame replacement is commonly used for premium devices because it reduces installation complexity and improves alignment accuracy.
What Is a Screen Without Frame?
A screen without frame includes only the display panel and digitizer assembly. The technician must remove the broken screen from the original frame and glue the new display onto the existing housing.
This process usually requires:
Heat application
Precision adhesive work
Careful cleaning
Alignment expertise
A frameless display is generally cheaper, but the repair process is more difficult.
Choosing between a screen with frame or without frame isn’t just about price. It directly affects the repair outcome.
Impact on Repair Quality
A screen with frame often delivers more consistent repair quality because the display is factory-aligned. This reduces risks like:
Uneven fitting
Screen lifting
Pressure spots
Adhesive gaps
On the other hand, a screen without frame depends heavily on technician skill.
Impact on Repair Cost
One major reason customers choose frameless screens is lower cost. Since the replacement part excludes the housing, suppliers can sell it at a lower price.
However, labor costs may increase because installation takes longer.
Impact on Device Durability
Durability matters after repair. A properly installed screen with frame generally offers:
Better structural support
Improved rigidity
Reduced flex damage
Meanwhile, poorly installed frameless screens may become loose over time.
Advantages of Screen With Frame Replacements
For many repair professionals, screen with frame replacements are considered safer and more reliable.
Easier Installation Process
The installation process is significantly simpler.
Technicians only need to move internal components into the new housing. This avoids risky glass separation and adhesive alignment work.
Benefits include:
Benefit
Explanation
Faster repair
Less adhesive preparation
Better alignment
Factory-fitted display
Lower risk
Reduced chance of damaging OLED
Cleaner finish
Professional appearance
This is especially important for expensive OLED displays found in flagship smartphones.
Better Structural Alignment
Modern phones use ultra-thin bezels and precision mounting points. Even tiny alignment mistakes can cause display pressure damage.
A screen with frame reduces those risks because the display is already mounted accurately.
This helps preserve:
Button alignment
Camera positioning
Speaker mesh placement
Internal component spacing
Lower Risk of Damage During Repair
OLED panels are extremely fragile. During frameless installation, technicians may accidentally:
Bend the display
Apply uneven pressure
Damage flex cables
Crack the OLED layer
Using a screen with frame lowers these risks considerably.
For this reason, many repair shops prefer framed assemblies for premium devices like the Apple iPhone 15 Pro and Samsung Galaxy S24 Ultra.
Advantages of Screen Without Frame Replacements
Although more difficult to install, frameless displays still offer several advantages.
Lower Component Cost
The biggest advantage is price.
A screen without frame typically costs less because it excludes:
Middle housing
Side rails
Structural components
Buttons and brackets
Budget-conscious customers often prefer this option.
For older devices, a frameless repair may make more financial sense.
Eco-Friendly Repair Approach
Reusing the original frame can reduce electronic waste.
Instead of replacing the entire housing assembly, only the damaged display panel gets replaced.
This repair method supports sustainability by minimizing discarded materials.
Ideal for Skilled Technicians
Experienced repair technicians often prefer frameless screens because they can preserve the original housing.
Benefits include:
Keeping original serial stickers
Retaining factory frame color
Maintaining original side buttons
Preserving original fitment
However, this requires advanced repair skill.
Comparing Repair Difficulty
Repair complexity is one of the most important considerations when discussing screen with frame vs without.
Professional Repair Perspective
Professional repair shops usually evaluate:
Repair time
Risk level
Device value
Part availability
For expensive flagship devices, many technicians recommend framed assemblies because the repair is more predictable.
For mid-range phones, frameless repairs may be acceptable.
DIY Repair Perspective
DIY users should be careful.
Installing a frameless display can be difficult because it involves:
Adhesive removal
Heat management
Precision alignment
Clamp pressure control
Mistakes can permanently damage the display.
A framed assembly is generally more beginner-friendly.
Common Problems During Screen Replacement
Even professional repairs can face complications.
Adhesive Issues
Poor adhesive application can cause:
Screen lifting
Dust intrusion
Weak bonding
Water resistance failure
This issue is more common with frameless displays.
Frame Warping
Bent or warped frames create fitting problems.
If the original housing is damaged after a drop, installing a frameless display may not solve the issue.
The display could:
Sit unevenly
Develop pressure spots
Crack again quickly
In such cases, a screen with frame is often the better option.
Dust and Water Resistance Problems
Modern phones use adhesive seals for limited water resistance.
A poorly installed frameless screen may reduce protection against:
Moisture
Humidity
Dust particles
According to Apple Support and Samsung Support, water resistance can decrease after repairs if sealing procedures aren’t properly followed.
Which Option Is Better for Different Phone Brands?
Different manufacturers have different repair challenges.
Apple iPhone Repairs
Apple iPhones often use strong adhesive and precision calibration systems.
Framed assemblies are commonly preferred for:
Faster installation
Better Face ID alignment
Reduced OLED risk
For devices like the Apple iPhone 14 Pro Max, using a screen with frame can simplify the repair process.
Samsung Galaxy Repairs
Samsung OLED displays are extremely delicate and expensive.
Because curved OLED panels are fragile, many technicians use framed assemblies for devices like the Samsung Galaxy S23 Ultra.
However, experienced refurbishing specialists may still use frameless panels.
Google Pixel Repairs
Google Pixel devices often have tightly integrated adhesives.
For the Google Pixel 8 Pro, framed assemblies may reduce repair complications.
Cost Comparison Table
Below is a general comparison between the two repair approaches.
Feature
Screen With Frame
Screen Without Frame
Part Cost
Higher
Lower
Labor Time
Faster
Slower
Installation Difficulty
Easier
Harder
Risk of Damage
Lower
Higher
Structural Support
Better
Depends on frame
Water Resistance
More reliable
Technician-dependent
DIY Friendly
Yes
No
Repair Finish
Cleaner
Skill-dependent
How Repair Shops Decide Which Part to Use
Professional repair centers usually assess several factors before choosing parts.
These include:
Device condition
Customer budget
Frame damage
Screen availability
Repair urgency
Water resistance concerns
For example, if a phone frame is bent after a drop, replacing only the screen may not work properly.
A full framed assembly could provide a safer long-term solution.
Many premium repair centers also prefer framed assemblies because they help reduce warranty returns.
Important Questions to Ask Before Repair
Before approving a screen replacement, ask the repair shop these questions:
Is the replacement screen original quality?
Display quality varies greatly between aftermarket suppliers.
Will water resistance be restored?
Not all repair shops reseal phones correctly.
Is the frame damaged?
If the original frame is bent, a frameless screen may fail quickly.
Does the repair include warranty?
A quality repair shop should provide warranty coverage.
In many cases, yes. A screen with frame usually offers easier installation, better alignment, and lower repair risk.
Why is a frameless screen cheaper?
A frameless screen excludes the housing assembly, reducing manufacturing cost.
Can water resistance remain after repair?
It depends on the repair quality. Proper adhesive sealing is essential.
Is a frameless repair safe?
Yes, when performed by an experienced technician using proper tools and adhesives.
Which option is best for OLED phones?
Framed assemblies are often preferred for OLED devices because they reduce installation risk.
Can DIY users replace frameless screens?
It’s possible, but difficult. Beginners are more likely to damage the display during installation.
Conclusion
Understanding screen with frame vs without is important before repairing any smartphone. While both options can restore a damaged device, the best choice depends on budget, repair quality expectations, and device condition.
A screen with frame usually provides:
Easier installation
Better structural integrity
Lower repair risk
Cleaner final results
Meanwhile, a screen without frame can offer:
Lower repair cost
Reduced electronic waste
Original housing preservation
Ultimately, choosing the correct repair part helps ensure your smartphone remains reliable, durable, and visually appealing after repair.
When dealing with premium smartphones, professional installation and quality parts matter more than ever. Taking shortcuts may save money initially, but poor repairs often lead to additional damage later.
David from Sydney CBD Repair Centre – The Best place to fix mobile phones as 7 Years In A Row! Top Mobile Phone Repair In Sydney. More than 2000 Positive Reviews on Google and Same Day Repairs.
We take pride in delivering exceptional repair services for all major phone brands including Apple, Samsung, Google, and more. Our expert technicians use only genuine parts and offer 90days warranty on repairs. Located in the heart of Sydney CBD, we’re your one-stop solution for all mobile device repairs.
Our commitment to excellence has earned us the trust of thousands of satisfied customers. Whether it’s a cracked screen, battery replacement, or water damage repair, we handle it all with professional care and expertise. Walk in today and experience why we’re Sydney’s #1 choice for mobile phone repairs.
Visit us for:
✓ Same Day Express Repairs
✓ Genuine Parts Guarantee
✓ Professional Technicians
✓ Competitive Pricing
✓ 2000+ 5-Star Google Reviews
✓ 7-Time Award Winner for Best Phone Repairs
Is Your Phone Truly Waterproof? 7 Powerful Truths About Professional Pressure Testing After Every Screen Repair
Introduction
Modern smartphones are packed with advanced technology, sleek designs, and impressive durability features. One of the most advertised features today is water resistance. Brands like Apple, Samsung, and Google proudly market devices with IP67 or IP68 ratings. However, many users misunderstand what these ratings actually mean.
A phone may resist water under controlled laboratory conditions, but that doesn’t guarantee permanent protection in real-world use. In fact, after a cracked screen replacement, battery repair, or frame adjustment, your phone’s original waterproof seal can be compromised. That’s where professional pressure testing becomes essential.
Many repair shops skip this important step. Others use low-quality adhesives that weaken the device’s resistance to moisture and dust. As a result, customers unknowingly carry phones that are vulnerable to water damage.
Professional pressure testing after every screen repair helps confirm whether the device still maintains proper sealing integrity. It’s one of the most important procedures in modern phone repair, especially for expensive flagship devices.
In this article, you’ll discover how waterproofing works, why repairs affect it, and how pressure testing protects your investment.
The term “waterproof” is commonly used in marketing, but technically, most smartphones are only water-resistant. There’s a major difference.
A truly waterproof device would be completely immune to water damage under all conditions. Smartphones don’t meet that standard. Instead, they rely on tightly sealed components, adhesives, and rubber gaskets to reduce water intrusion.
Over time, those protective materials naturally wear down due to:
Heat exposure
Daily charging
Drops and impacts
Aging adhesives
Previous repairs
Frame bending
Dust contamination
Even normal use can weaken a phone’s resistance. A single drop onto concrete may create tiny frame distortions that reduce sealing performance.
That’s why manufacturers usually state that liquid damage isn’t covered under warranty, even on water-resistant models.
The Reality of Water Resistance
Water resistance is temporary. It can decrease gradually without obvious signs. Many people only discover the issue after their device suddenly stops working from moisture exposure.
This is especially important after screen repairs because opening the device breaks the factory adhesive seal.
IP ratings help consumers understand a device’s resistance to solids and liquids.
What Does IP Mean?
IP stands for “Ingress Protection.” The numbers after it indicate protection levels.
Rating
Dust Protection
Water Protection
IP67
Complete dust protection
Immersion up to 1 meter
IP68
Complete dust protection
Deeper immersion under specific conditions
For example:
iPhone 15 Pro carries an IP68 rating.
Samsung Galaxy S24 Ultra also features IP68 protection.
However, these tests are performed in controlled lab environments using fresh water. Real-life situations involve:
Salt water
Chlorinated pools
Soap residue
Steam
Pressure changes
Hot water
These conditions affect seals differently and can cause unexpected damage.
Why IP Ratings Don’t Last Forever
Manufacturers design phones with adhesive barriers around:
Displays
Charging ports
Buttons
Speakers
Camera modules
When technicians open the phone during repairs, these seals are disturbed. Without proper resealing and pressure testing, the IP rating may no longer be reliable.
How Screen Repairs Affect Waterproof Seals
A cracked screen repair involves separating the display from the frame. During this process, the original adhesive must be removed.
Unfortunately, factory adhesives are engineered with precise pressure, heat, and machine-controlled installation methods. Replicating this exactly in a repair environment is difficult.
Key Risks During Repair
Improper repairs can lead to:
Uneven adhesive application
Tiny frame gaps
Dust contamination
Weak corner sealing
Loose display fitting
Even a microscopic opening can allow moisture to enter the device.
Why Professional Tools Matter
Professional technicians use:
Precision adhesive cutters
Heated separation equipment
Industrial-grade waterproof adhesive
Alignment clamps
Pressure testing machines
Cheap repair shops may skip several of these steps to reduce costs.
As a result, customers end up with phones that look repaired externally but have lost much of their water resistance internally.
Why Professional Pressure Testing Matters
Pressure testing verifies whether the phone maintains proper sealing after repair. It’s one of the most overlooked yet critical parts of quality smartphone servicing.
Without testing, there’s no reliable way to confirm waterproof integrity.
What Pressure Testing Actually Does
Professional pressure testing simulates pressure changes to detect air leaks in the phone enclosure.
If air escapes from the device, it usually indicates:
Seal failure
Improper adhesive bonding
Frame warping
Loose components
This test allows technicians to identify problems before water damage occurs.
Benefits of Pressure Testing
Pressure testing provides several important advantages:
Confirms sealing quality
Detects invisible gaps
Reduces future liquid damage risk
Improves customer confidence
Maintains repair standards
Protects expensive components
Many premium repair centres now perform pressure testing after every major repair.
The Science Behind Pressure Testing
Pressure testing works by measuring pressure stability inside a sealed environment.
Some machines create vacuum pressure while monitoring tiny changes in air movement. Others use positive pressure systems.
How the Process Works
Typical steps include:
The phone is placed inside the testing chamber
Pressure levels are adjusted
Sensors monitor leakage rates
Software analyzes sealing integrity
Results indicate pass or fail
The process usually takes only a few minutes but can save customers thousands of dollars in potential damage.
Why This Is Better Than Water Testing
Some people wrongly assume dipping a phone in water is a valid test.
It isn’t.
Direct water testing can permanently damage devices if sealing is weak. Pressure testing is safer because it detects leaks without exposing the phone to liquids.
Common Mistakes After DIY Screen Repairs
DIY repair kits have become increasingly popular online. However, restoring waterproof protection at home is extremely difficult.
Common DIY Problems
Many self-repairs involve:
Low-quality adhesive strips
Dust trapped inside the frame
Incorrect heating temperatures
Poor alignment
Missing waterproof gaskets
Even experienced hobbyists struggle to achieve factory-level sealing.
Why You Should Avoid Cheap Adhesives
Budget adhesives may initially feel secure, but they often weaken quickly under:
Heat
Humidity
Daily flexing
Charging temperatures
Over time, gaps develop around the display edges.
That’s why professional repair centres invest in premium adhesive systems designed specifically for each model.
Signs Your Phone Lost Water Resistance
Many users don’t realize their phone’s seal has failed until internal damage occurs.
Warning Signs to Watch For
Be cautious if you notice:
Foggy camera lenses
Moisture under the screen
Reduced speaker volume
Random touchscreen issues
Charging port corrosion
Face recognition failures
These symptoms may indicate water intrusion.
Small Damage Can Become Major Damage
Moisture doesn’t always destroy a phone immediately. Sometimes corrosion develops slowly over weeks or months.
Yes, opening the phone breaks the original factory seal. Professional resealing and pressure testing are necessary to restore water resistance properly.
Can all repair shops perform pressure testing?
No. Many low-cost repair shops don’t own professional pressure testing equipment because the machines are expensive.
Is an IP68 phone completely waterproof?
No. IP68 means water-resistant under controlled conditions, not permanently waterproof in every situation.
How long does pressure testing take?
Most professional tests take only a few minutes, depending on the device and repair complexity.
Can water resistance wear out over time?
Yes. Heat, drops, aging adhesives, and previous repairs can weaken water resistance gradually.
Is pressure testing safer than water testing?
Absolutely. Pressure testing checks seal integrity without exposing the phone to potentially damaging liquids.
Should I trust cheap waterproof adhesive kits online?
Be careful. Many low-cost kits use poor-quality adhesives that don’t provide reliable long-term sealing.
Conclusion
Water resistance is one of the most misunderstood smartphone features today. While modern devices are impressively durable, their protective seals can weaken over time, especially after repairs.
Professional pressure testing after every screen repair is one of the best ways to ensure your phone remains protected against moisture and dust intrusion. It provides measurable verification, identifies hidden sealing problems, and helps extend the life of your device.
Choosing a qualified repair centre that uses proper adhesives, professional equipment, and experienced technicians makes a huge difference in long-term reliability.
When it comes to protecting expensive smartphones, pressure testing isn’t just an optional extra — it’s an essential part of professional repair quality.
David from Sydney CBD Repair Centre – The Best place to fix mobile phones as 7 Years In A Row! Top Mobile Phone Repair In Sydney. More than 2000 Positive Reviews on Google and Same Day Repairs.
We take pride in delivering exceptional repair services for all major phone brands including Apple, Samsung, Google, and more. Our expert technicians use only genuine parts and offer 90days warranty on repairs. Located in the heart of Sydney CBD, we’re your one-stop solution for all mobile device repairs.
Our commitment to excellence has earned us the trust of thousands of satisfied customers. Whether it’s a cracked screen, battery replacement, or water damage repair, we handle it all with professional care and expertise. Walk in today and experience why we’re Sydney’s #1 choice for mobile phone repairs.
Visit us for:
✓ Same Day Express Repairs
✓ Genuine Parts Guarantee
✓ Professional Technicians
✓ Competitive Pricing
✓ 2000+ 5-Star Google Reviews
✓ 7-Time Award Winner for Best Phone Repairs
Sydney CBD Repair Centre – Where Quality Meets Reliability.
Call : +61280114119
Website: Sydney CBD Repair Centre