The Android Phone Battery Dilemma: Why Battery Replacements Are Critical Now – Shocking Truths & 7 Key Facts
Introduction
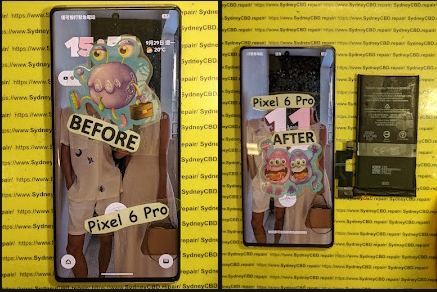
The Android phone battery dilemma is becoming impossible to ignore. As Android devices grow more powerful, thinner, and feature-packed, their batteries are under constant strain. From high-refresh-rate displays to 5G connectivity and demanding apps, modern usage habits are pushing phone batteries far beyond what they were originally designed to handle. As a result, many users experience rapid battery drain, sluggish performance, and unexpected shutdowns far sooner than expected.
What makes this dilemma more urgent is that battery degradation often goes unnoticed until it disrupts daily life. Users may assume their phone is “old” or blame software updates, when in reality, a worn-out battery is the root cause. Ignoring this issue doesn’t just reduce convenience—it can impact performance, safety, and long-term device reliability.
This article explores why Android battery replacements are critical now, how aging batteries affect your phone’s performance and lifespan, and why timely replacement is often the smartest, most cost-effective solution. Whether you’re a casual user or rely on your phone for work, understanding this issue can help you extend your device’s life and avoid unnecessary upgrades.
The Android phone battery dilemma has quietly become one of the biggest issues facing smartphone users today. While screens get brighter and processors get faster, batteries are still limited by chemistry. Simply put, batteries wear out. Yet many users ignore this fact until their phones become unreliable.
These days, Android phones are expected to do everything—stream, game, navigate, and work all day. Unfortunately, most batteries weren’t designed to keep up with that level of demand for years on end. As a result, battery replacement is no longer optional; it’s essential.
In this article, we’ll break down why the Android phone battery dilemma matters now more than ever, how it impacts performance and safety, and what smart users can do about it. Let’s dig in.
Every modern Android phone relies on a lithium-ion battery. These batteries store energy by moving lithium ions between electrodes. Over time, that movement causes wear. Each charge cycle slightly reduces the battery’s total capacity.
Most Android batteries are rated for around 500 full charge cycles. After that, capacity drops noticeably. This is where the Android phone battery dilemma begins. The phone still works, but not like it used to.
In practical terms, a degraded battery means:
Shorter screen-on time
Slower charging
Sudden shutdowns
Even if the phone looks fine on the outside, the battery inside may be struggling.
Why Android Batteries Degrade Faster Today
Modern Android phones consume more power than ever. High-resolution displays, always-on connectivity, and background apps all drain energy constantly. Add fast charging into the mix, and batteries age even faster.
Because of this, the Android phone battery dilemma has accelerated. Phones that once lasted three or four years now show battery issues in under two. That’s not bad design—it’s the cost of progress.
One of the least understood aspects of the Android phone battery dilemma is performance throttling. When a battery can’t deliver stable power, the system slows the processor to prevent crashes.
That means:
Apps open slower
Games stutter
Multitasking becomes frustrating
Many users blame software updates, but the real issue is battery health. A simple replacement can restore performance almost instantly.
Safety Risks of Old Android Batteries
Ignoring battery issues isn’t just inconvenient—it can be dangerous. Old batteries can swell, overheat, or leak. In extreme cases, they may even catch fire.
Signs of danger include:
Bulging screens
Phones getting hot while idle
Burning smells
At this stage of the Android phone battery dilemma, replacement isn’t just smart—it’s critical.
Why Android Battery Replacements Are More Important Than Ever
5G, High Refresh Rates, and Power Demand
Today’s Android phones are power-hungry. Features like 5G, 120Hz displays, and AI processing drain batteries quickly. Even light users feel the impact.
This is why the Android phone battery dilemma has become unavoidable. Old batteries simply can’t keep up with modern usage patterns.
Software Updates vs. Battery Health
Android updates improve security and features, but they also increase power demands. A weak battery struggles to support updated software, leading to lag and instability.
Instead of replacing the whole phone, replacing the battery often solves the problem at a fraction of the cost.
For more technical insight into battery degradation, you can also review this resource from Android Authority (external reference for educational purposes).
Signs Your Android Phone Battery Needs Replacement
Physical and Performance Warning Signs
Recognizing the Android phone battery dilemma early can save you time and money. Watch out for:
Battery draining unusually fast
Phone shutting down above 20%
Charging stuck at certain percentages
Phone heating during basic tasks
If you notice two or more of these signs, battery replacement should be your next step.
DIY vs. Professional Android Battery Replacement
Risks of DIY Battery Repairs
DIY battery replacement videos are everywhere, but they hide the risks. Modern Android phones are tightly sealed. One slip can damage the screen, motherboard, or charging port.
Common DIY mistakes include:
Puncturing the battery
Using non-genuine parts
Losing water resistance
In the context of the Android phone battery dilemma, DIY often creates bigger problems than it solves.
Benefits of Professional Replacement
Professional technicians use proper tools, genuine batteries, and tested procedures. This ensures:
Safe installation
Restored performance
Warranty protection
In many cases, professional replacement can make your Android feel brand new again.
Environmental and Financial Benefits of Battery Replacement
Sustainability and E-Waste Reduction
Replacing a battery instead of a whole phone significantly reduces electronic waste. From an environmental standpoint, it’s the responsible choice.
Financially, it’s a win too. Battery replacement costs far less than buying a new device. The Android phone battery dilemma doesn’t require an expensive solution—just a smart one.
Frequently Asked Questions (FAQs)
1. How long does an Android phone battery usually last?
Most last 2–3 years before noticeable degradation begins.
2. Can a battery replacement really improve performance?
Yes. Many performance issues are directly tied to battery health.
3. Is it safe to keep using a swollen battery?
No. Swollen batteries pose serious safety risks and should be replaced immediately.
4. Are third-party batteries reliable?
Only if they’re high quality and installed professionally. Cheap batteries often worsen the problem.
5. Does fast charging ruin Android batteries?
Fast charging increases heat, which accelerates wear over time.
6. Is battery replacement better than upgrading phones?
In most cases, yes—especially if the phone still meets your needs.
Conclusion
The Android phone battery dilemma isn’t hype—it’s reality. As phones become more powerful, batteries wear out faster. Ignoring the issue leads to poor performance, safety risks, and unnecessary upgrades.
Battery replacement is the simplest, smartest solution. It restores speed, improves reliability, and extends the life of your device. In today’s Android ecosystem, replacing your battery isn’t just critical—it’s essential.
David from Sydney CBD Repair Centre – The Best place to fix mobile phones as 7 Years In A Row! Top Mobile Phone Repair In Sydney. More than 2000 Positive Reviews on Google and Same Day Repairs.
We take pride in delivering exceptional repair services for all major phone brands including Apple, Samsung, Google, and more. Our expert technicians use only genuine parts and offer 90 days warranty on repairs. Located in the heart of Sydney CBD, we’re your one-stop solution for all mobile device repairs.
Our commitment to excellence has earned us the trust of thousands of satisfied customers. Whether it’s a cracked screen, battery replacement, or water damage repair, we handle it all with professional care and expertise. Walk in today and experience why we’re Sydney’s #1 choice for mobile phone repairs.
Visit us for:
✓ Same Day Express Repairs
✓ Genuine Parts Guarantee
✓ Professional Technicians
✓ Competitive Pricing
✓ 2000+ 5-Star Google Reviews
✓ 7-Time Award Winner for Best Phone Repairs
Fixing The Black Screen of Death: Why Your Modern Smartphone’s Won’t Turn On – 11 Powerful Solutions That Actually Work
Introduction
Modern smartphones are incredibly powerful. They’ve replaced cameras, laptops, gaming systems, wallets, and even TVs for many people. However, despite their advanced technology, one issue still terrifies smartphone owners everywhere: the Black Screen of Death.
You press the power button, but nothing happens. No vibration. No logo. No charging symbol. Just a cold, lifeless black screen.
It’s frustrating, stressful, and sometimes expensive.
Thankfully, not every black screen problem means your phone is permanently dead. In many cases, there are practical solutions that can bring your device back to life. Understanding the real reasons behind the issue can also help you avoid future failures.
In this detailed guide, we’ll explore why your smartphone won’t turn on, what causes the black screen of death, how to troubleshoot the issue safely, and when it’s time to seek professional repair services.
The Black Screen of Death refers to a smartphone that appears completely unresponsive. The display remains black even though the phone may still have internal power.
Sometimes the device vibrates, rings, or receives notifications while the screen stays dark. Other times, the entire phone becomes non-functional.
This problem affects almost every major smartphone brand, including:
Before diagnosing the problem, it’s important to identify the warning signs associated with the black screen of death.
Typical Symptoms Include
Symptom
Possible Cause
Black display with vibration
OLED/display failure
Phone won’t charge
Battery or charging IC issue
Boot loop
Software corruption
Overheating before shutdown
Motherboard failure
Flickering display
Damaged flex cable
Random shutdowns
Battery degradation
Green or purple lines
OLED damage
No response to buttons
Power IC malfunction
These symptoms often appear gradually before total failure occurs.
Why Modern Smartphones Suddenly Stop Turning On
Today’s smartphones are thinner, more powerful, and more fragile than ever before. Several internal components work together perfectly until one critical failure disrupts the entire system.
Battery-Related Failures
The battery is one of the most common reasons behind the black screen of death.
Lithium-ion batteries naturally degrade over time. After hundreds of charging cycles, the battery may fail to provide stable voltage to the motherboard.
Common battery-related causes include:
Swollen batteries
Deep discharge
Charging IC failure
Low-quality chargers
Extreme heat exposure
A severely drained battery may also prevent the phone from booting entirely.
Display and OLED Damage
Modern OLED displays are stunning, but they’re delicate.
Sometimes the phone is still functioning normally internally, but the display itself has failed. This creates the illusion of a dead device.
Signs of OLED failure include:
Green flashes
Purple lines
Flickering brightness
Partial image display
Touch still working while screen stays black
Foldable smartphones are especially vulnerable because flexible OLED panels experience repeated stress over time.
Software Corruption
Software bugs can also trigger the black screen of death.
Failed updates, corrupted apps, or operating system crashes may prevent the device from booting correctly.
Common software triggers include:
Interrupted firmware updates
Malware infections
Rooting or jailbreaking
Storage corruption
Incompatible applications
Fortunately, software-related black screen problems are often repairable without hardware replacement.
Water and Moisture Damage
Even water-resistant smartphones aren’t fully waterproof.
Moisture can enter through:
Cracked screens
Damaged seals
SIM tray gaps
Charging ports
Once liquid reaches the motherboard, corrosion may begin almost immediately.
Interestingly, many phones continue working temporarily before suddenly developing the black screen of death days later.
Motherboard and Power IC Issues
The motherboard acts as the brain of the smartphone.
When key components fail, the device may stop powering on completely.
Common motherboard issues include:
Burned capacitors
CPU separation
Power management IC failure
NAND storage damage
Short circuits
Unfortunately, motherboard repairs are among the most complex smartphone repair procedures.
First Things to Do Before Panicking
Seeing a black screen can feel alarming, but don’t rush to assume the worst.
Before visiting a repair center, try these simple steps:
Leave the phone charging for 30 minutes
Use an original charging cable
Remove phone cases or accessories
Try a force restart
Inspect for physical damage
Check if the phone vibrates
Sometimes the solution is surprisingly simple.
Step-by-Step Troubleshooting Guide
Now let’s go deeper into practical troubleshooting methods.
Force Restart Your Device
A force restart can clear temporary software crashes.
iPhone Force Restart
For newer iPhones:
Press Volume Up
Press Volume Down
Hold the Side Button
Samsung Force Restart
Hold Power + Volume Down
Wait 10–15 seconds
This method often restores frozen devices instantly.
Check the Charging Port
Pocket lint and debris can block charging connections.
Use:
A flashlight
Soft brush
Wooden toothpick
Avoid using metal objects because they can damage the charging pins.
Try Another Charger
Cheap or damaged chargers frequently cause power issues.
Use:
Certified cables
Original adapters
Wireless charging (if supported)
If the phone responds to wireless charging but not USB charging, the charging port may require repair.
Use Recovery Mode
Recovery mode can restore corrupted operating systems.
For Android devices:
Power off device
Hold Power + Volume Up
Select Recovery Mode
For iPhones:
Connect to a computer and enter recovery mode through iTunes or Finder.
Connect to a Computer
A computer may still detect a phone with a black screen.
If detected, immediately:
Back up data
Update firmware
Restore operating system
This step can save important files before further failure occurs.
iPhone Black Screen Problems Explained
iPhones commonly experience black screen problems after:
iOS updates
Hard drops
Battery degradation
Water exposure
On OLED iPhones, display connector damage is especially common after impact.
In some cases, the device still powers on normally, but the display backlight or OLED panel no longer functions.
Popular affected models include:
iPhone 13 Pro Max
iPhone 14 Pro
iPhone 15 series
Older iPhone X models
Apple’s tightly integrated hardware design improves performance but also increases repair complexity.
Samsung and Android Black Screen Problems
Samsung and Android phones experience black screen issues for different reasons.
Common Android-specific causes include:
AMOLED burn-in
System crashes
Faulty firmware
Third-party launcher conflicts
Overheating
Samsung foldable devices also experience stress damage near hinge areas.
Meanwhile, gaming phones can suffer overheating-related motherboard failure due to heavy processing loads.
Android phones vary greatly in repairability depending on manufacturer design.
Can Water Damage Cause the Black Screen of Death?
Absolutely.
Water damage remains one of the biggest causes of smartphone failure worldwide.
Even a few drops of liquid can create serious electrical shorts inside modern smartphones.
Common Liquids That Cause Damage
Liquid
Damage Severity
Fresh water
Moderate
Salt water
Severe
Coffee
Severe
Soft drinks
Severe
Alcohol
Moderate
Humid air
Mild but dangerous
The biggest mistake users make is trying to charge a wet phone.
Electricity combined with moisture accelerates corrosion dramatically.
Instead:
Turn off the device immediately
Do not charge it
Seek professional cleaning quickly
Time matters enormously after liquid exposure.
Professional Repair vs DIY Repair
DIY repair videos are everywhere online. However, modern smartphone repairs require specialized tools and experience.
DIY Repair Risks
Face ID damage
Fingerprint sensor failure
Battery puncture
Waterproof seal loss
Flex cable tearing
Professional technicians use:
Thermal cameras
Microsoldering stations
Diagnostic power supplies
Microscope inspection tools
These tools help identify precise failures without unnecessary part replacement.
How Repair Technicians Diagnose Dead Phones
Professional diagnosis follows a systematic process.
Step 1: External Inspection
Technicians check for:
Cracks
Water indicators
Burn marks
Bent frames
Step 2: Power Consumption Testing
Special equipment measures current draw behavior.
Different current patterns indicate different faults.
Step 3: Display Testing
Technicians connect test screens to verify OLED functionality.
Step 4: Board-Level Diagnosis
Microscope inspection identifies:
Corrosion
Short circuits
Damaged IC chips
Step 5: Functional Testing
After repair, the device undergoes:
Charging tests
Camera tests
Signal tests
Thermal monitoring
This ensures long-term reliability.
Preventing the Black Screen of Death
Prevention is always cheaper than repair.
Best Practices for Smartphone Health
Avoid Cheap Chargers
Low-quality chargers can damage charging IC components.
Keep Your Phone Cool
Heat is one of the biggest enemies of smartphone longevity.
Even tiny cracks allow moisture intrusion over time.
The Future of Smartphone Reliability
Smartphones continue evolving rapidly.
Manufacturers are introducing:
Stronger glass
Better thermal management
Improved waterproofing
Advanced battery technology
However, ultra-thin designs still create repair challenges.
Consumers increasingly expect devices that are:
Durable
Repairable
Sustainable
The growing “Right to Repair” movement is also pushing manufacturers toward easier repair access.
Learn more about repairability advocacy through iFixit.
Frequently Asked Questions
Why is my phone screen black but still vibrating?
This usually indicates display failure rather than total phone failure. The motherboard may still be functioning normally.
Can a dead phone be repaired?
Yes. Many black screen issues are repairable depending on the damaged component.
Does water damage always destroy phones?
Not always. Fast professional cleaning can prevent permanent motherboard corrosion.
Why won’t my phone charge after getting wet?
Moisture may trigger charging port protection or create internal short circuits.
Is replacing the motherboard worth it?
It depends on the phone’s value and data importance. High-end devices are often worth repairing.
Can software updates cause the black screen of death?
Yes. Corrupted firmware installations can prevent proper booting.
How long should I charge a completely dead phone?
Leave it charging for at least 30 minutes using a certified charger before troubleshooting further.
Conclusion
The black screen of death can feel catastrophic, but many smartphones are repairable with proper diagnosis and professional care.
Modern devices are incredibly complex, combining fragile OLED displays, high-density batteries, and advanced motherboards into ultra-thin designs. As a result, failures can occur from drops, water exposure, software corruption, or simple wear and tear.
The key is acting quickly and avoiding common mistakes like forcing the device to charge after water exposure or attempting risky DIY repairs without experience.
By understanding the warning signs, troubleshooting carefully, and seeking expert repair when necessary, you can often restore your smartphone and protect your valuable data.
Most importantly, preventative care goes a long way. Quality chargers, protective cases, regular backups, and prompt repairs can significantly extend your device’s lifespan.
Your smartphone may seem dead today, but with the right approach, there’s a very good chance it can be brought back to life.
David from Sydney CBD Repair Centre – The Best place to fix mobile phones as 7 Years In A Row! Top Mobile Phone Repair In Sydney. More than 2000 Positive Reviews on Google and Same Day Repairs.
We take pride in delivering exceptional repair services for all major phone brands including Apple, Samsung, Google, and more. Our expert technicians use only genuine parts and offer 90days warranty on repairs. Located in the heart of Sydney CBD, we’re your one-stop solution for all mobile device repairs.
Our commitment to excellence has earned us the trust of thousands of satisfied customers. Whether it’s a cracked screen, battery replacement, or water damage repair, we handle it all with professional care and expertise. Walk in today and experience why we’re Sydney’s #1 choice for mobile phone repairs.
Visit us for:
✓ Same Day Express Repairs
✓ Genuine Parts Guarantee
✓ Professional Technicians
✓ Competitive Pricing
✓ 2000+ 5-Star Google Reviews
✓ 7-Time Award Winner for Best Phone Repairs
The Google Pixel 10 Pro phone mysterious camera module failure: Shocking Truths & 7 Critical Fixes
Introduction to the Pixel 10 Pro Camera Issue
The Google Pixel 10 Pro’s mysterious camera module failure has become one of the most talked-about smartphone issues in recent months. Known for its AI-powered photography and clean Android experience, the Pixel lineup has always set high expectations. However, as early adopters and repair professionals started noticing a pattern, concerns began to grow.
At first, the issue appeared isolated. A few users reported blurry images, camera app crashes, or total camera blackout. But over time, reports increased, pointing to a deeper, hardware-linked concern. Still, there’s good news. This problem is diagnosable, repairable, and—most importantly—avoidable with the right knowledge.
In this article, we’ll break down everything you need to know in clear, Grade-7-friendly language. We’ll explore causes, symptoms, fixes, and prevention tips while keeping things practical and optimistic.
A smartphone camera module isn’t just a lens. It’s a compact system made up of:
Image sensors
Optical lenses
Autofocus motors
Optical image stabilization (OIS) components
Flexible ribbon connectors
All these parts must work in perfect sync. If one element fails, the entire camera experience can suffer. That’s why the Google Pixel 10 Pro camera module failure often feels sudden and severe.
What Makes the Pixel 10 Pro Camera Unique
The Pixel 10 Pro uses advanced AI image processing, powered by Google’s custom Tensor chipset. Features like real-time HDR, computational zoom, and AI noise reduction push the camera hardware harder than most phones.
While impressive, this tight hardware-software integration also means there’s less margin for error. When something goes wrong, the system notices immediately—and sometimes shuts down the camera to prevent further damage.
Users affected by the Google Pixel 10 Pro’s mysterious camera module failure often report:
Camera app not opening
Rear camera showing a black screen
“Camera unavailable” error messages
Severe shaking or clicking sounds from the camera
Blurry or unfocused images
These symptoms usually worsen over time, especially if ignored.
Regions and Usage Patterns Most Affected
Interestingly, higher failure rates appear among:
Heavy camera users (social media creators, vloggers)
Devices exposed to frequent heat (gaming, hot climates)
Phones used without protective cases
Repair centers in Australia, the US, and parts of Southeast Asia have all reported similar trends, suggesting this is not a region-specific defect.
Root Causes Behind the Mysterious Camera Module Failure
Hardware Design Challenges
The Pixel 10 Pro’s slim design leaves little room for heat dissipation. Over time, internal heat can stress delicate camera components.
Heat Management and Component Stress
Excessive heat can:
Warp lens housings
Damage autofocus motors
Loosen solder points on connectors
Once this happens, camera failure becomes only a matter of time.
Software and Firmware Conflicts
Not all causes are physical. Some failures are triggered by software updates that conflict with camera firmware.
AI Processing and Camera Drivers
The Pixel’s AI camera stack relies on constant driver communication. When updates don’t install cleanly, the system may fail to recognize the camera module—even if the hardware is still intact.
Impact of Camera Failure on Daily Use
Photography and Video Limitations
For many users, the camera is the phone. Losing it means:
No video calls
No document scanning
No social media content creation
That’s a big deal, especially for professionals and students.
Resale Value and Consumer Confidence
A Pixel 10 Pro with camera issues loses significant resale value. Buyers often avoid devices with known hardware problems, even if repaired, unless serviced by a trusted repair center.
Diagnosis: How Professionals Identify Camera Module Failure
Visual and Software Diagnostics
Technicians begin with:
Safe mode testing
Camera API checks
Visual inspection of lens movement
These steps help separate software glitches from true hardware failure.
Advanced Repair Bench Testing
Professional workshops use:
Known-good camera modules
Microscopic inspection
Thermal imaging tools
This level of diagnosis ensures accurate repairs without unnecessary part replacement.
Repair vs Replacement: What Are Your Options?
Cost Comparison Table
Option
Pros
Cons
Camera Module Repair
Lower cost, faster
Not always possible
Full Camera Replacement
Long-term fix
Higher cost
Device Replacement
Brand new phone
Most expensive
In most cases, replacing the camera module solves the Google Pixel 10 Pro camera module failure completely.
Data Safety and Warranty Considerations
Professional repairs protect your data and often include warranties. Always choose a repair center that offers at least a 90-day repair warranty for peace of mind.
Preventive Measures to Avoid Camera Module Failure
Best Usage Practices
You can reduce risk by:
Avoiding prolonged overheating
Using protective cases
Not force-closing the camera during updates
Small habits make a big difference.
Importance of Timely Software Updates
Install updates promptly, but only after backing up your data. Google often releases patches that improve camera stability and thermal management.
Frequently Asked Questions (FAQs)
1. Is the Google Pixel 10 Pro camera failure common?
It’s not universal, but it’s common enough to be recognized by repair professionals.
2. Can software updates fix the camera issue?
Sometimes. If the failure is software-related, updates may help. Hardware failures require repair.
3. Will Google replace the camera module under warranty?
If your device is under warranty and shows no physical damage, Google may cover it.
4. How long does camera module replacement take?
Typically 1–2 hours at a professional repair center.
5. Is it safe to keep using the phone with a failed camera?
Yes, but ignoring the issue could worsen internal damage over time.
6. Where can I learn more about Pixel hardware design?
You can explore Google’s official hardware insights at an external resource like Android Authority: https://www.androidauthority.com
Conclusion and Final Thoughts
The Google Pixel 10 Pro’s mysterious camera module failure may sound alarming, but it’s far from the end of the road. With proper diagnosis, professional repair, and smart usage habits, most users can restore their device to full functionality.
Technology keeps evolving, and so do repair solutions. Staying informed is your best defense. Whether you’re a casual user or a power photographer, understanding this issue puts you one step ahead—and keeps your Pixel performing at its best.
David from Sydney CBD Repair Centre – The Best place to fix mobile phones as 7 Years In A Row! Top Mobile Phone Repair In Sydney. More than 2000 Positive Reviews on Google and Same Day Repairs.
We take pride in delivering exceptional repair services for all major phone brands including Apple, Samsung, Google, and more. Our expert technicians use only genuine parts and offer 90days warranty on repairs. Located in the heart of Sydney CBD, we’re your one-stop solution for all mobile device repairs.
Our commitment to excellence has earned us the trust of thousands of satisfied customers. Whether it’s a cracked screen, battery replacement, or water damage repair, we handle it all with professional care and expertise. Walk in today and experience why we’re Sydney’s #1 choice for mobile phone repairs.
Visit us for:
✓ Same Day Express Repairs
✓ Genuine Parts Guarantee
✓ Professional Technicians
✓ Competitive Pricing
✓ 2000+ 5-Star Google Reviews
✓ 7-Time Award Winner for Best Phone Repairs
Australia’s Phone Graveyard: Reviving Huawei Phone’s Forgotten Flagships from Water Damage + Ultimate Guide 2026
Introduction
Australia has a curious problem: a silent graveyard of Huawei smartphones abandoned after accidental water exposure. These devices, once prized flagship models, now sit idle in drawers or landfill. For tech enthusiasts and repair professionals, these water-damaged phones present a unique opportunity. Restoring them requires both technical skill and the right parts—but the rewards are impressive, saving owners hundreds on replacements.
Huawei’s P and Mate series, known for sleek design and powerful cameras, still hold value. Yet, many Australians assume water damage is irreversible. This article explores step-by-step strategies to bring these forgotten flagships back to life, including professional repair techniques, software recovery, and long-term preventive care.
Huawei has been a leader in smartphone innovation, producing devices like the P30 Pro, Mate 20 Pro, and P40 series. These phones stood out with:
Leica-branded cameras capable of professional-grade photography
High-performance Kirin processors
Advanced battery and charging technologies
In Australia, Huawei phones gained a niche but loyal following. Unfortunately, water exposure—often accidental—led many users to abandon these devices prematurely. Understanding the design and engineering of these models is crucial before attempting any repair.
Full disassembly: Removing motherboard, camera, and connectors.
Ultrasonic cleaning: Gentle cleaning of corrosion without damaging components.
Moisture drying: Low-heat ovens or desiccant chambers to remove trapped water.
Technicians carefully document each step to avoid mistakes and ensure proper reassembly.
Battery and Screen Revival Strategies
Water can make batteries dangerous:
Swelling prevention: Swollen batteries must be replaced.
Screen revival: Minor water stains may clear after cleaning; damaged displays often require replacement.
Repair experts weigh replacement vs. restoration, prioritizing safety and performance.
Logic Board and IC Repair Solutions
Logic boards bear the brunt of water damage:
IC-level repairs: Replace corroded chips or connectors.
Soldering techniques: Professional soldering restores circuit continuity.
Success rates: Modern Huawei boards are complex, requiring trained technicians.
Such repairs are delicate but can save devices that otherwise appear lost.
Software Recovery After Water Damage
Even after hardware repair, software may fail:
Boot loops: Common after short circuits.
Data recovery: Professional tools can restore photos, contacts, and messages.
System restore: Huawei cloud backups and recovery modes help revive the device.
Maintaining a software-first mindset ensures the phone functions fully post-repair.
Preventive Measures for Future Damage
Avoid repeat water damage with these tips:
Waterproof cases: Premium options like LifeProof or Spigen.
Humidity sensors: Some Huawei models alert users to moisture ingress.
Lifestyle adjustments: Avoid carrying phones in bathrooms or near open water.
Prevention is cheaper than repair and extends device life significantly.
Cost vs Value Analysis of Huawei Repairs in Australia
Repair costs vary:
Repair Type
Average Cost (AUD)
Notes
Screen Replacement
150–300
Depending on model
Battery Replacement
80–150
OEM parts recommended
Logic Board Repair
250–500
Complex, may not guarantee 100% recovery
Data Recovery
100–250
Cloud or local backups optional
Often, repairing a water-damaged phone is more cost-effective than buying a new flagship, especially with data retention in mind.
Case Studies: Successful Huawei Water Damage Resurrections
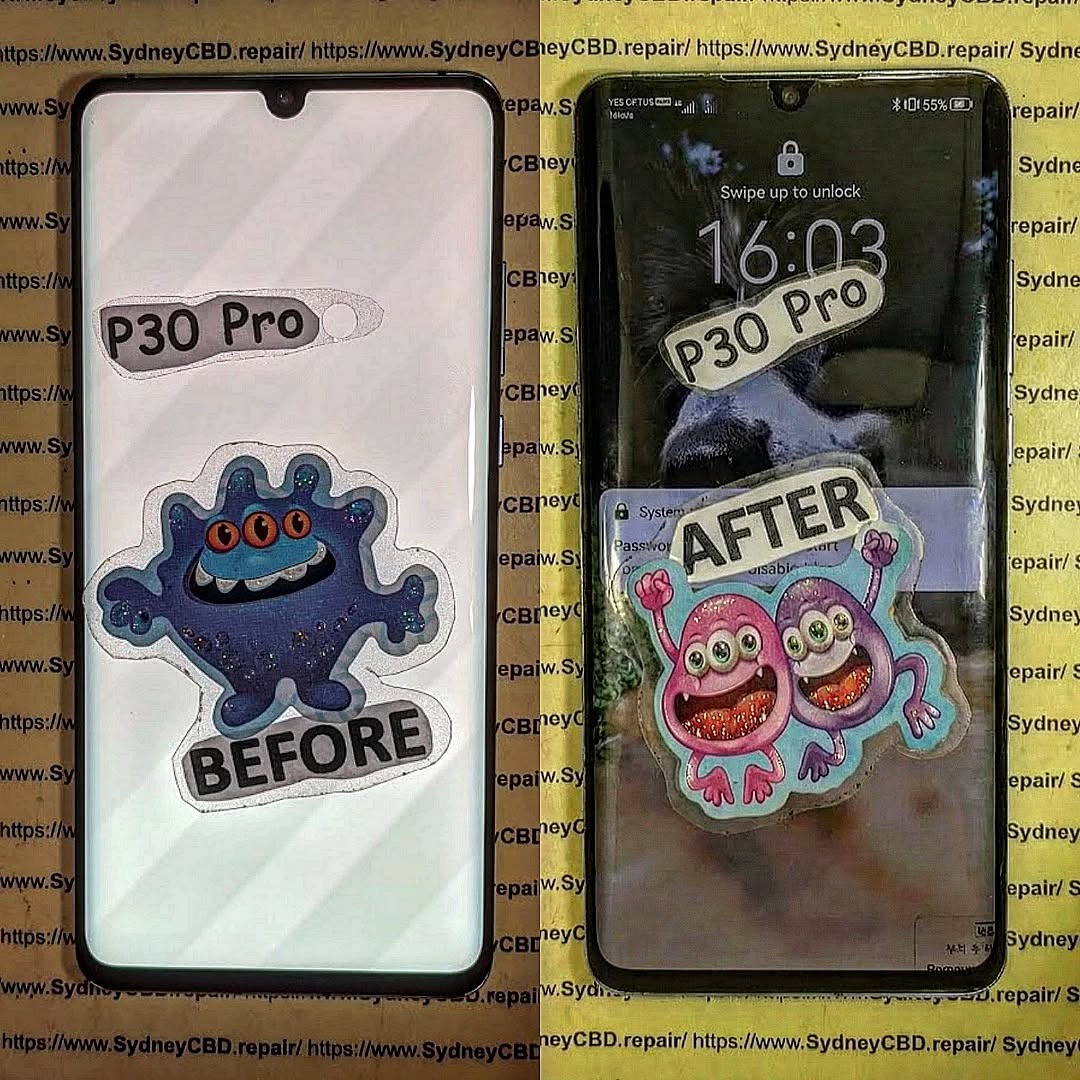
Case Study 1: Huawei P30 Pro survived a pool accident; after ultrasonic cleaning and battery replacement, full functionality was restored.
Case Study 2: Mate 20 Pro dropped in rain; logic board repair and screen replacement returned device to 95% original performance.
These examples show that professional care can resurrect even severely damaged phones.
FAQs About Huawei Water Damage Repairs
Q1: Can all Huawei water-damaged phones be fixed? A1: Not always. Success depends on severity, model, and time before repair.
Q2: How long does water damage repair take? A2: Typically 1–3 days for minor damage; complex logic board repair may take up to a week.
Q3: Will my data be safe? A3: Professional technicians prioritize data recovery, but severe damage may result in some loss.
Q4: Is DIY repair safe? A4: Generally not. Improper handling may worsen damage and void warranties.
Q5: Do repairs come with warranty? A5: Reputable repair centers provide 90-day warranties on parts and labor.
Q6: How much does water damage repair cost in Australia? A6: Costs vary by model and damage severity; range typically AUD 100–500.
Conclusion and Expert Advice
Water-damaged Huawei phones in Australia aren’t necessarily lost causes. With prompt professional assessment, genuine parts, and proper repair techniques, even severely damaged devices can return to full functionality. Owners save money, preserve data, and extend device life.
For Australians struggling with water-damaged Huawei flagships, expert repair is the best investment. For more guidance and professional service, visit Sydney CBD Repair Centre.
David from Sydney CBD Repair Centre – The Best place to fix mobile phones as 7 Years In A Row! Top Mobile Phone Repair In Sydney. More than 2000 Positive Reviews on Google and Same Day Repairs.
We take pride in delivering exceptional repair services for all major phone brands including Apple, Samsung, Google, and more. Our expert technicians use only genuine parts and offer 90days warranty on repairs. Located in the heart of Sydney CBD, we’re your one-stop solution for all mobile device repairs.
Visit us for:
✓ Same Day Express Repairs
✓ Genuine Parts Guarantee
✓ Professional Technicians
✓ Competitive Pricing
✓ 2000+ 5-Star Google Reviews
✓ 7-Time Award Winner for Best Phone Repairs
Charging Port Issue: Can We Save This iPhone 17 Pro Max from the Charging Port Catastrophe? Ultimate Repair Guide #7
Introduction
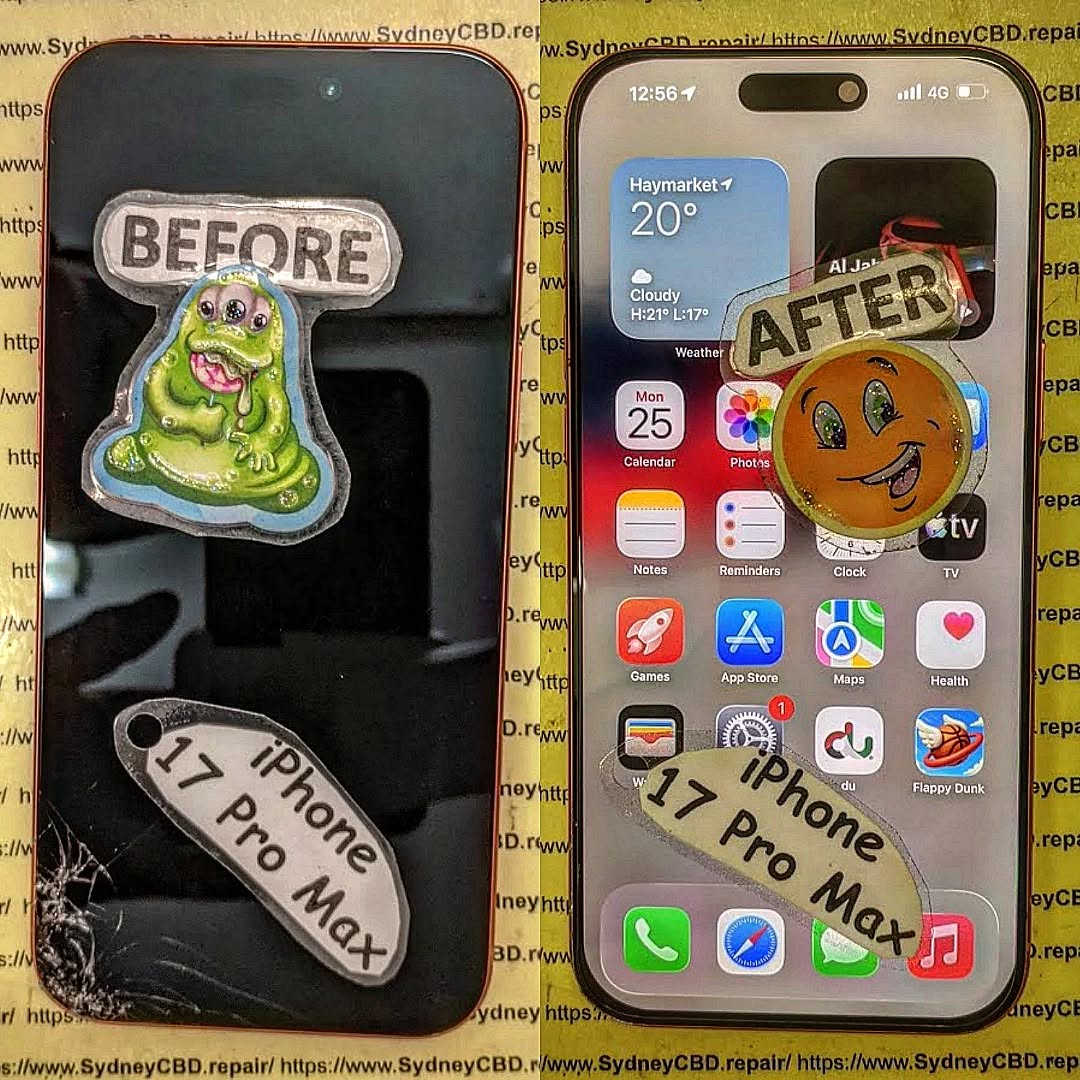
The iPhone 17 Pro Max is Apple’s most advanced smartphone yet—sleek, powerful, and packed with cutting-edge technology. But even the best devices can stumble. One of the most alarming issues users face is a full-blown charging port failure. When your phone refuses to charge, panic sets in fast. After all, no power means no phone.
So, can we save this iPhone 17 Pro Max from a charging port catastrophe? The good news is yes—in most cases, the device can be rescued with the right approach, proper diagnostics, and expert care. This guide breaks everything down in plain English, so you’ll know exactly what’s going on and what to do next.
We’ll explore why charging ports fail, how professionals handle iPhone 17 Pro Max charging port repair, and what you can do to prevent the problem from happening again. Let’s dig in.
Charging issues don’t just appear out of thin air. They build up over time, often showing subtle signs long before total failure.
What Makes the iPhone 17 Pro Max Charging Port Unique
Apple refined the USB-C port in the iPhone 17 Pro Max to support faster data transfer and improved power efficiency. However, this compact design also means tighter tolerances. Dust, lint, moisture, or minor connector damage can quickly disrupt charging.
Unlike older models, the port integrates closely with the logic board. That means a simple issue can feel catastrophic—even when it’s repairable.
Early Warning Signs You Shouldn’t Ignore
Catching problems early can save you time and money. Watch out for:
Phone only charges at a certain angle
Charging cable feels loose
Slow or intermittent charging
Device heats up while charging
“Accessory not supported” warnings
If you notice any of these, it’s time to act.
Why Charging Port Failures Are Increasing
Modern smartphones are used harder than ever. From streaming and gaming to constant charging, the port takes a beating.
Environmental Factors
Dust in pockets, beach sand, humidity, and accidental spills all play a role. Even tiny debris can block proper contact between the cable and port pins.
User Habits
Let’s be honest—using cheap cables, yanking cords out, or charging while gaming doesn’t help. These habits accelerate wear and tear.
Here’s the optimistic truth: most charging port issues are fixable. The key is accurate diagnosis.
Diagnostic Process Used by Professionals
At a professional repair centre, technicians don’t guess. They test.
A proper diagnosis includes:
Visual inspection under magnification
Port continuity testing
Cable and power adapter verification
Logic board power flow analysis
This process determines whether the issue is debris-related, port damage, or something deeper.
DIY Fixes vs Professional Repair
DIY cleaning with a toothpick or compressed air can help—but it’s risky. One slip can damage delicate pins.
Professional iPhone 17 Pro Max charging port repair offers:
DIY Fix
Professional Repair
Temporary results
Long-term solution
Risk of damage
Safe, controlled process
No warranty
Warranty included
Sometimes saving a few dollars upfront leads to bigger costs later.
Tools and Technology Used in Modern Repairs
Certified repair centres use:
Microsoldering stations
ESD-safe tools
OEM-grade components
Precision heating systems
These tools allow safe removal and replacement without harming surrounding components.
Genuine vs Aftermarket Parts
Using genuine or high-quality OEM-equivalent parts ensures:
Proper power delivery
Long-term durability
Compatibility with iOS updates
Apple itself recommends authorised repair practices (see Apple’s official guidance here: https://support.apple.com).
Preventing Future Charging Port Disasters
Once your phone is fixed, prevention becomes the name of the game.
Best Charging Practices
Simple habits go a long way:
Use certified cables
Avoid charging in dusty or humid environments
Don’t bend the cable while plugged in
Remove the charger gently
These steps reduce mechanical stress on the port.
Cleaning and Maintenance Tips
Routine maintenance helps:
Inspect the port monthly
Use a soft brush or air blower
Keep pockets and bags lint-free
Avoid metal objects at all costs—they’re a recipe for disaster.
When to Seek Professional Help
If cleaning doesn’t help or the problem keeps coming back, don’t wait. Ongoing charging issues can damage the battery or logic board, turning a small repair into a major one.
Frequently Asked Questions (FAQs)
Is iPhone 17 Pro Max charging port repair expensive?
Costs vary, but most repairs are far cheaper than replacing the device. Early intervention keeps prices down.
Can water damage affect the charging port only?
Yes. Even minor moisture exposure can corrode port pins while the rest of the phone seems fine.
How long does a professional repair take?
In most cases, same-day service is possible—often within an hour.
Will my data be safe during repair?
Yes. Charging port repair doesn’t involve data removal.
Can wireless charging replace a faulty port?
It’s a temporary workaround, not a fix. Data transfer and fast charging still rely on the port.
Is it safe to keep using a phone with charging issues?
Not really. It can worsen damage and affect internal components.
Conclusion
So, can we save this iPhone 17 Pro Max from a charging port catastrophe? Absolutely. With proper diagnosis, expert repair, and smarter usage habits, your device can be fully restored—and stay that way.
Charging port problems are frustrating, but they’re rarely the end of the road. Acting early, choosing professional iPhone 17 Pro Max charging port repair, and following preventative tips can keep your phone running smoothly for years to come.
David from Sydney CBD Repair Centre – The Best place to fix mobile phones as 7 Years In A Row!
Top Mobile Phone Repair In Sydney. More than 2000 Positive Reviews on Google and Same Day Repairs.
We take pride in delivering exceptional repair services for all major phone brands including Apple, Samsung, Google, and more. Our expert technicians use only genuine parts and offer 90 days warranty on repairs. Located in the heart of Sydney CBD, we’re your one-stop solution for all mobile device repairs.
Our commitment to excellence has earned us the trust of thousands of satisfied customers. Whether it’s a cracked screen, battery replacement, or water damage repair, we handle it all with professional care and expertise. Walk in today and experience why we’re Sydney’s #1 choice for mobile phone repairs.
Visit us for:
✓ Same Day Express Repairs
✓ Genuine Parts Guarantee
✓ Professional Technicians
✓ Competitive Pricing
✓ 2000+ 5-Star Google Reviews
✓ 7-Time Award Winner for Best Phone Repairs
Cracked Phone Screen, Dead Battery: Double Repair, Double Trouble? ⚡ 9 Shocking Truths You Must Know
Introduction
In today’s fast-paced digital world, smartphones have become an essential part of daily life. From managing work and staying connected to capturing memories, we rely on our devices more than ever. That’s why encountering a cracked screen, dead battery problem can feel like a double blow. One moment your phone slips from your hand, and the next you’re dealing with shattered glass and a battery that barely lasts the day.
While a cracked screen and a failing battery may seem like separate issues, they’re often closely connected. Physical impact, internal stress, and increased power consumption can cause these problems to appear together, creating what many users see as “double trouble.” Unfortunately, ignoring one issue while fixing the other usually leads to higher repair costs and reduced phone performance over time.
This article takes a clear, practical look at why cracked screen, dead battery problems happen so frequently, how they affect your device, and what smart repair decisions can save you time and money. Whether you’re deciding between repair or replacement, or simply want to prevent future damage, this guide will help you make informed, confident choices about your smartphone’s health.
A cracked screen, dead battery scenario is more common than most phone owners realize. At first glance, a shattered display and a battery that won’t hold charge may seem unrelated. However, they’re often two sides of the same coin. When a phone is dropped, exposed to pressure, or overheats, both the screen and battery can suffer simultaneously.
Phones today are compact powerhouses. Everything is tightly packed. So when one component fails, stress transfers quickly to others. In many repair cases, technicians discover battery damage only after opening a phone for screen replacement. That’s why ignoring either problem can snowball into bigger, more expensive repairs later.
What’s more, users often keep using their phone despite visible cracks or battery warnings. That’s understandable—we’re attached to our devices. Still, continuing to use a damaged phone can accelerate internal wear. In short, a cracked screen isn’t just cosmetic, and a dead battery isn’t just inconvenient.
Most cracked screens result from drops. That same impact can jolt the battery, loosening connectors or damaging battery cells. Even if the phone keeps working, micro-damage may already be done.
Pressure and Heat Build-Up
A cracked display can compromise the phone’s seal. Dust and moisture sneak in, forcing the battery to work harder. Over time, heat builds up, and battery health declines rapidly.
Power Drain from Touch Malfunctions
When a screen is cracked, ghost touches or unresponsive areas can occur. The phone repeatedly tries to process faulty inputs, increasing power consumption. That extra strain drains the battery faster than usual.
Common User Behaviors That Cause Double Damage
Many users unknowingly worsen a cracked screen, dead battery issue through daily habits:
Continuing to charge overnight with a damaged screen
Using cheap, uncertified chargers
Ignoring overheating warnings
Carrying phones in back pockets or tight bags
These behaviors add pressure to already weakened components. Over time, what could’ve been a simple screen repair turns into a battery replacement too.
How a Cracked Screen Impacts Battery Health
A cracked screen does more than affect visibility—it changes how the phone behaves internally.
Increased Power Consumption
Damaged displays often need more power to maintain brightness or register touch input. That means the battery works overtime, shortening its lifespan.
Short Circuits and Power Leakage
Cracks can expose internal layers of the screen. This exposure increases the risk of electrical leakage, which drains the battery even when the phone is idle.
Heat Retention
Phones rely on intact screens to dissipate heat properly. Once cracked, heat gets trapped, and batteries hate heat. According to general lithium-ion battery research (see insights from sources like Battery University: https://batteryuniversity.com), heat is one of the biggest enemies of battery longevity.
Dead Battery Symptoms You Should Never Ignore
A failing battery rarely dies suddenly. It sends warnings first.
Rapid Power Drain
If your phone drops from 40% to 10% in minutes, that’s a red flag—especially after screen damage.
Unexpected Shutdowns
Phones shutting down at 20–30% battery often indicate internal battery cell damage.
Battery Swelling
In severe cases, batteries swell, pushing against the cracked screen. This is dangerous and should be addressed immediately.
Ignoring these signs doesn’t save money—it usually costs more in the long run.
Repair or Replace? Making the Smart Decision
When facing a cracked screen, dead battery situation, many people ask: Should I just replace the phone?
Cost Comparison: Single vs Double Repairs
Scenario
Approximate Cost
Outcome
Screen only
Moderate
Short-term fix
Battery only
Moderate
Performance improves
Screen + Battery
Cost-effective bundle
Phone feels new
New Phone
High
Data transfer hassle
In most cases, repairing both components together is cheaper than buying a new device. Plus, bundled repairs often come with warranties.
Professional Repair vs DIY Risks
DIY repair videos make it look easy. However, modern smartphones are complex.
Why Certified Technicians Matter
Professional repair centers use calibrated tools, genuine parts, and proper sealing methods. That ensures:
Correct battery calibration
Screen pressure alignment
Waterproofing restoration
DIY repairs often lead to loose connections, further battery drain, or even complete device failure.
Preventing Future Cracked Screen, Dead Battery Issues
Prevention is always better than cure.
Practical Protection Tips That Work
Use tempered glass and quality cases
Avoid extreme temperatures
Replace batteries every 18–24 months
Don’t ignore small cracks—they spread
Simple habits can extend your phone’s life by years.
Frequently Asked Questions (FAQs)
1. Can a cracked screen really cause battery problems?
Yes. A cracked screen increases power consumption, heat retention, and internal stress, all of which degrade battery health.
2. Is it safe to keep using a phone with a cracked screen and dead battery?
Not recommended. It increases the risk of sudden shutdowns, data loss, and battery swelling.
3. Should I replace the battery when fixing a cracked screen?
Often, yes. Combined repairs are cost-effective and restore optimal performance.
4. How long does a combined repair usually take?
At professional centers, most screen and battery replacements are completed the same day.
5. Will repairing both parts make my phone feel new again?
In many cases, absolutely. Users often report better performance, battery life, and responsiveness.
6. Is professional repair better than upgrading my phone?
If the phone is less than 3–4 years old, professional repair is usually the smarter choice.
Conclusion: Double Trouble or Smart Opportunity?
A cracked screen, dead battery situation might feel like double trouble at first. However, with the right approach, it’s an opportunity to restore your phone’s performance without the high cost of replacement. Addressing both issues together saves time, money, and frustration.
Phones are investments. Treating them with timely, professional care ensures they serve you longer and better. Instead of waiting for complete failure, act early—and smartly.
David from Sydney CBD Repair Centre – The Best place to fix mobile phones as 7 Years In A Row! Top Mobile Phone Repair In Sydney. More than 2000 Positive Reviews on Google and Same Day Repairs.
We take pride in delivering exceptional repair services for all major phone brands including Apple, Samsung, Google, and more. Our expert technicians use only genuine parts and offer 90 days warranty on repairs. Located in the heart of Sydney CBD, we’re your one-stop solution for all mobile device repairs.
Our commitment to excellence has earned us the trust of thousands of satisfied customers. Whether it’s a cracked screen, battery replacement, or water damage repair, we handle it all with professional care and expertise. Walk in today and experience why we’re Sydney’s #1 choice for mobile phone repairs.
Visit us for:
✓ Same Day Express Repairs
✓ Genuine Parts Guarantee
✓ Professional Technicians
✓ Competitive Pricing
✓ 2000+ 5-Star Google Reviews
✓ 7-Time Award Winner for Best Phone Repairs
Cracked rear camera glass? How it affects your phone photos and our fix – 7 Expert Facts
Introduction
A cracked camera glass might look like a small cosmetic issue, but don’t be fooled. That tiny fracture can seriously affect your phone photos, your device’s lifespan, and even your privacy. Many people keep using their phone with cracked camera glass, assuming the camera itself is fine. Unfortunately, that’s rarely the case.
In the first moments after the damage, photos may still look “okay.” However, over time, cracked camera glass allows dust, moisture, and light distortion to creep in. As a result, image quality drops, autofocus struggles, and night photos become almost unusable. Simply put, cracked camera glass is a problem that only gets worse if ignored.
In this in-depth guide, we’ll explain exactly how cracked camera glass affects your phone photos, why quick repair matters, and how our professional fix restores your camera to like-new condition. We’ll also break down costs, risks, and common myths so you can make an informed decision with confidence.
Phone cameras have evolved into highly sophisticated systems. While the lens and sensor do the heavy lifting, camera glass plays a critical protective and optical role.
What Is Camera Glass Made Of?
Modern smartphones use strengthened glass, often sapphire-infused or chemically hardened, to protect the camera lens. This glass is designed to be scratch-resistant and clear. However, despite its strength, a single drop at the wrong angle can crack it.
Once cracked, the glass no longer provides a smooth, uninterrupted surface. Even hairline cracks bend and scatter light before it reaches the camera sensor. That’s why cracked camera glass almost always affects photo quality, even if the lens underneath seems untouched.
How Camera Glass Protects Internal Components
Camera glass isn’t just about image clarity. It acts as a seal that keeps out dust, moisture, and debris. When cracked, that seal is broken. Over time, contaminants settle directly onto the lens or sensor, causing permanent damage.
This is one reason manufacturers and professional repair centres strongly recommend fixing cracked camera glass quickly. It’s not just about photos—it’s about protecting the entire camera module.
The most obvious sign of cracked camera glass is a decline in photo quality. However, the problems are often subtle at first.
Blurry Images and Focus Issues
Cracked camera glass interferes with autofocus. The camera struggles to determine focal points because light enters unevenly. As a result, images appear soft, unfocused, or slightly hazy.
You might notice:
Photos take longer to focus
Close-up shots look smeared
Text appears unreadable in images
These issues tend to worsen over time as cracks spread or collect debris.
Light Refraction, Glare, and Distortion
Cracks act like tiny prisms. They refract light in unpredictable ways, causing glare, flares, or strange lines across photos. This is especially noticeable in bright conditions or when shooting toward light sources.
If you’ve ever wondered why your photos suddenly look washed out or overexposed, cracked camera glass is often the culprit.
Night Photography Problems
Night mode relies on precise light capture. Even minor cracks scatter low light, confusing the sensor. The result? Grainy, dark, or ghosted images. In low-light conditions, cracked camera glass can render advanced camera features almost useless.
Hidden Risks of Ignoring Cracked Camera Glass
While poor photo quality is frustrating, the hidden risks are far more serious.
Dust, Moisture, and Long-Term Damage
Once cracked, camera glass allows microscopic dust and moisture inside. Over weeks or months, this can:
Permanently damage the camera sensor
Cause internal corrosion
Lead to complete camera failure
In coastal or humid environments, moisture damage accelerates quickly. This turns a simple camera glass replacement into an expensive full camera repair.
Impact on Resale Value
Phones with cracked camera glass lose significant resale value. Buyers and trade-in programs often treat camera damage as major, even if the phone works. Fixing cracked camera glass before selling or upgrading can dramatically improve resale returns.
Can Software Fix Camera Issues Caused by Cracks?
Many users hope a software update or camera reset will fix the problem. Unfortunately, that’s a myth.
Myths vs Reality
Myth: A camera app update can fix blurry images
Reality: Physical cracks cause optical distortion, not software errors
Myth: Cleaning the lens externally is enough
Reality: Dust enters through cracks and settles inside
Software can’t correct physical damage. The only real solution for cracked camera glass is professional repair.
Professional Camera Glass Repair: How It Works
Professional repair is the safest and most effective solution.
Diagnostic Process
At Sydney CBD Repair Centre, technicians begin with a full camera inspection. This checks whether damage is limited to the cracked camera glass or if the lens or sensor is affected.
This step ensures you don’t pay for unnecessary repairs.
Replacement vs Full Camera Module Repair
If the crack is caught early, only the camera glass needs replacement. This is faster and more affordable. However, if dust or moisture has damaged the camera itself, a full module replacement may be required.
Professional repair restores:
Sharp focus
Accurate colours
Proper night mode performance
Most importantly, it reseals the camera, preventing future damage.
For general phone camera technology reference, you can also explore resources like GSMArena’s camera guides, a trusted industry source: https://www.gsmarena.com/
DIY Camera Glass Repair: Is It Worth the Risk?
DIY kits are widely advertised, but they come with serious risks.
Common DIY Mistakes
Shattering the glass further during removal
Damaging the camera lens underneath
Improper sealing, allowing moisture in
In many cases, failed DIY repairs lead to full camera replacement, costing far more than professional repair would have initially.
Cost, Time, and Warranty Considerations
Professional cracked camera glass repair is typically affordable and fast. Most repairs are completed the same day and include warranty coverage for peace of mind.
Factor
Professional Repair
DIY Repair
Time
Same day
Several hours
Risk
Low
High
Warranty
Yes
No
Photo Quality
Restored
Uncertain
Frequently Asked Questions (FAQs)
1. Can cracked camera glass really affect photo quality?
Yes. Even small cracks distort light, causing blur, glare, and focus issues.
2. Is it safe to keep using my phone with cracked camera glass?
Short-term use may be possible, but long-term risks include moisture damage and camera failure.
3. How long does camera glass repair take?
Most professional repairs are completed the same day.
4. Will my photos look normal after repair?
Yes. If repaired early, photo quality is fully restored.
5. Is camera glass repair expensive?
It’s significantly cheaper than replacing the entire camera module.
6. Does repair come with a warranty?
Reputable repair centres provide warranty on parts and labour.
Conclusion
Cracked camera glass is more than a cosmetic flaw. It directly affects photo quality, exposes your phone to internal damage, and lowers resale value. While it may seem minor at first, the problem compounds over time.
The good news? Professional cracked camera glass repair is fast, affordable, and highly effective. By acting early, you protect your phone, restore image quality, and avoid costly future repairs.
If you rely on your phone camera for memories, work, or social media, fixing cracked camera glass isn’t optional—it’s essential.
David from Sydney CBD Repair Centre – The Best place to fix mobile phones as 7 Years In A Row! Top Mobile Phone Repair In Sydney. More than 2000 Positive Reviews on Google and Same Day Repairs.
We take pride in delivering exceptional repair services for all major phone brands including Apple, Samsung, Google, and more. Our expert technicians use only genuine parts and offer 90days warranty on repairs. Located in the heart of Sydney CBD, we’re your one-stop solution for all mobile device repairs.
Our commitment to excellence has earned us the trust of thousands of satisfied customers. Whether it’s a cracked screen, battery replacement, or water damage repair, we handle it all with professional care and expertise. Walk in today and experience why we’re Sydney’s #1 choice for mobile phone repairs.
Visit us for:
✓ Same Day Express Repairs
✓ Genuine Parts Guarantee
✓ Professional Technicians
✓ Competitive Pricing
✓ 2000+ 5-Star Google Reviews
✓ 7-Time Award Winner for Best Phone Repairs
NO MORE BLINKING! Fixing Flickering Issues On Samsung Galaxy Z Flip 6 Screen – Ultimate 10-Step Professional Repair Guide
Introduction
Screen flickering on a foldable phone can quickly turn a premium device into a frustrating experience. If your Samsung Galaxy Z Flip 6 display randomly flashes, flickers, dims, or behaves unpredictably, you’re not alone.
This comprehensive guide explains everything you need to know about fixing flickering issues on Samsung Galaxy Z Flip 6 screen, including common causes, professional repair methods, DIY troubleshooting, and preventative maintenance. Whether you’re a smartphone owner or simply curious about foldable display technology, this guide will help you understand the problem from an expert’s perspective.
The Samsung Galaxy Z Flip 6 represents one of Samsung’s most advanced foldable smartphones. Its flexible AMOLED display offers vibrant colors, deep blacks, and smooth animations. However, like every sophisticated piece of technology, it isn’t completely immune to problems.
One issue that concerns many users is fixing flickering issues on Samsung Galaxy Z Flip 6 screen. Screen flickering can appear suddenly or develop gradually over time. Sometimes the display flashes only when brightness changes. In other cases, the entire screen rapidly blinks, making the phone difficult—or even impossible—to use.
The symptoms vary depending on the underlying cause. Some owners notice:
Random screen flashing
Green or white flickering
Black screen with occasional image flashes
Display brightness constantly changing
Flickering after unfolding the device
Touchscreen remaining functional while the display flashes
Screen working normally for several minutes before flickering begins
Because foldable phones use flexible OLED panels connected by delicate ribbon cables, diagnosing these issues requires more than simply replacing a screen. Every repair should begin with careful testing to determine whether the problem is software-related or hardware-related.
Modern foldable displays contain multiple precision-engineered layers, including:
Component
Function
Flexible OLED Panel
Produces the image
Ultra Thin Glass
Protects the OLED
Polarizer
Improves visibility
Digitizer
Detects touch input
Display Flex Cable
Transfers display signals
Display Driver IC
Controls pixels
Mainboard Connectors
Connect display to motherboard
Each component must function perfectly for the screen to operate correctly. Even a tiny defect can create noticeable flickering.
Unlike conventional smartphones, the Galaxy Z Flip 6 repeatedly folds and unfolds throughout the day. This constant motion places mechanical stress on the flexible display assembly. Although Samsung has engineered the phone for durability, years of folding—or unexpected accidents—can eventually affect internal components.
Another important point is that not every flickering issue requires an expensive display replacement. Professional technicians first eliminate software causes before moving on to hardware diagnostics. This approach saves both time and money.
Users should also avoid assuming that a flickering screen automatically means permanent damage. Many cases result from corrupted firmware, outdated software, loose connectors after an impact, or temporary system instability. Correct diagnosis is the key to successful repair.
Understanding how the foldable display functions is the first step toward solving the issue. In the following sections, we’ll explore every major cause behind Galaxy Z Flip 6 screen flickering and explain why accurate diagnosis is essential before replacing any parts.
Understanding the reasons behind fixing flickering issues on Samsung Galaxy Z Flip 6 screen begins with identifying the root cause. While the symptom may appear identical—a blinking or flashing display—the underlying reasons can vary significantly.
Professional repair technicians typically divide these causes into two categories:
Software-related issues
Hardware-related issues
Knowing the difference prevents unnecessary repairs and ensures the correct solution is applied.
Software Problems
Software faults are among the easiest issues to resolve. They usually occur after:
Android updates
One UI upgrades
Corrupted applications
Graphics driver conflicts
System cache corruption
Firmware installation failures
Common software symptoms include:
Flickering only during startup
Display flashing after installing updates
Brightness instability
Temporary black screen
Random app crashes alongside display problems
Fortunately, these issues can often be corrected by:
Restarting the device
Updating firmware
Clearing the cache partition
Booting into Safe Mode
Performing a factory reset (after backing up data)
If the flickering disappears in Safe Mode, a third-party application may be responsible.
Hardware Problems
Hardware failures are generally more serious and require specialist equipment.
Professional repair centers inspect:
Flexible OLED display
Hinge assembly
Display flex cable
Connector sockets
Display Driver IC
Power management circuits
Motherboard components
Hardware-related flickering usually becomes worse over time rather than improving.
Signs include:
Flickering when opening the phone
Display flashing after minor drops
Green vertical lines
White flashing at maximum brightness
Screen blackout when folding
Permanent image distortion
One of the most common hardware failures involves the display flex cable. Because this cable bends every time the phone opens and closes, it experiences continuous mechanical stress. Even microscopic cracks in the cable can interrupt signal transmission, causing intermittent flickering.
Physical Impact Damage
A surprising number of flickering issues begin after seemingly harmless accidents.
Examples include:
Dropping the phone onto hard flooring
Sitting on the device
Pressure inside a backpack
Twisting the phone while folded
Hitting the hinge against a table
Even when the outer glass remains intact, internal layers may suffer damage.
Technicians frequently discover:
Partially disconnected display connectors
Damaged flex cables
Micro-fractures in OLED panels
Bent internal brackets
Hinge alignment issues
These problems often require professional disassembly because the Galaxy Z Flip 6 uses precision adhesives, delicate ribbon cables, and tightly integrated components.
Water and Moisture Exposure
Although the Galaxy Z Flip 6 offers water resistance, no device is completely waterproof. Over time, seals naturally age, and accidental exposure to liquids can affect internal electronics.
Moisture intrusion may lead to:
Corrosion on display connectors
Oxidation of motherboard contacts
Short circuits
Voltage instability
Random screen flickering
Interestingly, moisture damage doesn’t always appear immediately. Corrosion can develop gradually over days or weeks, making diagnosis more challenging.
Professional technicians use specialized microscopes to inspect connector pins and solder joints for corrosion that may not be visible to the naked eye.
Manufacturing Defects
While relatively uncommon, manufacturing defects can occasionally contribute to display problems. These defects may involve:
Faulty OLED panels
Weak solder joints
Defective display driver chips
Connector manufacturing inconsistencies
Such issues often emerge early in the device’s lifespan and may be covered under the manufacturer’s warranty, depending on the cause and the phone’s condition.
Heat and Environmental Stress
Excessive heat is another factor that can contribute to display instability. Leaving the phone in direct sunlight, using it during heavy gaming sessions for extended periods, or charging in high-temperature environments may stress sensitive electronic components.
High temperatures can affect:
OLED performance
Adhesive integrity
Internal connectors
Display driver circuits
Although heat alone rarely causes permanent flickering, it can expose an underlying weakness that later develops into a persistent problem.
Professional Diagnostic Process for a Flickering Galaxy Z Flip 6 Screen
Successfully fixing flickering issues on Samsung Galaxy Z Flip 6 screen starts with an accurate diagnosis. Replacing the display without identifying the real cause can lead to unnecessary costs and repeated repairs. Professional repair technicians follow a structured process to determine whether the issue originates from software, hardware, or both.
Step 1: Gather Device History
Before opening the phone, technicians ask several important questions:
Has the phone been dropped recently?
Did the flickering begin after a software update?
Has the device been exposed to water?
Does the screen flicker only when folded or unfolded?
Has the phone been repaired before?
These answers help narrow down the possible causes before any disassembly begins.
Step 2: External Inspection
A careful visual inspection often reveals clues that users may overlook.
Technicians examine:
The foldable OLED display
The cover screen
The hinge mechanism
The frame
The USB-C charging port
SIM tray indicators
Water damage indicators
Signs of impact or bending
Even tiny dents around the hinge can suggest internal stress affecting the display cable.
Step 3: Functional Testing
Before opening the device, several diagnostic tests are performed.
Typical tests include:
Brightness adjustment
Touchscreen responsiveness
Adaptive refresh rate
Always-On Display
Camera operation
Wireless charging
Fingerprint sensor
Flex mode functionality
If flickering only occurs at certain brightness levels or fold angles, this information becomes extremely valuable.
Step 4: Software Diagnostics
Professional technicians verify that the issue isn’t software-related by checking:
Android version
Samsung One UI version
Display driver updates
Safe Mode operation
Diagnostic logs
Error reports
Many intermittent display problems disappear after software corrections, saving customers from unnecessary hardware replacement.
Step 5: Internal Inspection
If software is ruled out, the phone is carefully disassembled using specialized tools.
The technician inspects:
Display flex cables
Internal connectors
Battery condition
Hinge routing
Motherboard connectors
Protective shields
Grounding contacts
Foldable phones require significantly more care than traditional smartphones because the flexible display assembly can be damaged during improper disassembly.
Step 6: Electrical Testing
Advanced repair centers use precision instruments to measure electrical performance.
These include:
Diagnostic Tool
Purpose
Digital Multimeter
Voltage testing
Microscope
Connector inspection
Thermal Camera
Detect overheating
DC Power Supply
Current monitoring
Display Tester
OLED verification
USB Analyzer
Charging diagnostics
These tools help identify faulty circuits without replacing working components.
Professional Repair Options
After identifying the root cause, technicians determine the most effective repair strategy.
OLED Display Replacement
If the OLED panel itself has failed, replacing the complete display assembly is often the best solution.
Benefits include:
Restored image quality
Eliminated flickering
Factory-like performance
Reliable touch response
Improved durability
Using genuine replacement parts helps preserve display brightness, color accuracy, and fold performance.
Display Flex Cable Repair
Sometimes the OLED panel remains functional while the flexible ribbon cable develops damage.
Symptoms include:
Flickering only while folding
Temporary black screen
Image returning after movement
Random flashing
Depending on the extent of the damage, technicians may replace the cable or install a complete display assembly.
Connector Reseating
A loose connector may interrupt communication between the motherboard and display.
Technicians carefully:
Disconnect the battery.
Remove protective shields.
Clean connector contacts.
Inspect for corrosion.
Reconnect and test.
This relatively simple repair can resolve intermittent flickering if no permanent damage exists.
Motherboard-Level Repair
In more complex cases, the issue originates from the motherboard rather than the display.
Potential faults include:
Display driver IC failure
Damaged power management circuits
Broken solder joints
Liquid-damaged components
Burned display filters
These repairs require advanced microsoldering skills and specialized equipment.
When Is a Full Display Replacement Necessary?
A complete screen replacement is typically recommended if:
The OLED panel has visible damage.
Colored lines appear permanently.
The screen stays black despite power.
Touch response is lost.
The display has internal cracks.
Flickering worsens rapidly over time.
Replacing only part of the assembly in these situations may lead to recurring issues.
Genuine vs. Aftermarket Displays
One of the biggest decisions during fixing flickering issues on Samsung Galaxy Z Flip 6 screen is selecting the replacement display.
While aftermarket parts may reduce upfront costs, they can vary significantly in quality.
Feature
Genuine Display
Aftermarket Display
Color Accuracy
Excellent
Varies
Brightness
Factory Standard
Often Lower
Fold Durability
Excellent
May Differ
Touch Sensitivity
Excellent
Can Vary
Refresh Rate Support
Full
May Be Limited
Long-Term Reliability
High
Depends on Manufacturer
Warranty Support
Better
Varies
For premium foldable devices like the Galaxy Z Flip 6, genuine parts generally provide the best overall experience.
Preventing Future Screen Flickering
Although not every failure can be prevented, good habits can significantly reduce the likelihood of display problems.
Protect the Hinge
The hinge is the heart of the foldable design.
Avoid:
Forcing the phone open.
Folding it with debris inside.
Carrying it in overstuffed pockets.
Twisting the device.
Use a Protective Case
A quality case helps absorb impacts that could otherwise damage internal components.
Look for:
Hinge protection
Shock absorption
Raised bezels
Secure grip
Precision fit
Avoid Extreme Temperatures
Very high or very low temperatures can affect OLED performance and internal electronics.
Best practices include:
Don’t leave the phone in a hot car.
Avoid prolonged direct sunlight.
Allow the phone to cool during intensive tasks.
Charge in moderate temperatures.
Keep Software Updated
Samsung regularly releases updates that improve stability, performance, and compatibility.
Updating the device can:
Fix graphics bugs.
Improve display drivers.
Enhance battery management.
Resolve known software issues.
Charge with Certified Accessories
Poor-quality chargers may produce unstable voltage that affects sensitive components.
Choose:
Samsung-certified chargers
High-quality USB-C cables
Reputable charging accessories
Consistent power delivery contributes to overall device reliability.
Repair Costs and Factors That Affect Pricing
When it comes to fixing flickering issues on Samsung Galaxy Z Flip 6 screen, repair costs can vary considerably depending on the underlying fault. A simple software issue may be resolved at little or no cost, while a damaged foldable OLED display or motherboard component requires a more involved repair.
Several factors influence the final repair price:
Extent of the damage
Whether the OLED panel or only the flex cable is affected
Availability of genuine replacement parts
Labor required to safely disassemble and reassemble the foldable phone
Whether additional components, such as the hinge or motherboard, require repair
Because every Galaxy Z Flip 6 is different, professional diagnostics should always be completed before approving a repair. This prevents unnecessary part replacements and ensures customers receive the most cost-effective solution.
Why Professional Repairs Matter
Foldable smartphones are engineered differently from traditional slab-style phones. The Galaxy Z Flip 6 contains a flexible AMOLED display, ultra-thin glass, precision adhesives, delicate flex cables, and a sophisticated hinge assembly.
Professional technicians understand these complexities and follow repair procedures designed to preserve the integrity of the device.
Benefits of choosing an experienced repair centre include:
Accurate fault diagnosis
Professional-grade repair equipment
Proper battery disconnection before servicing
Genuine or premium-quality replacement parts
Careful adhesive application
Functional testing before device return
Repair warranty for added peace of mind
Attempting a repair without the proper tools or expertise can result in additional damage, including torn flex cables, damaged connectors, broken internal components, or compromised water resistance.
Common Mistakes to Avoid
Many Galaxy Z Flip 6 owners unintentionally make the problem worse while trying to troubleshoot a flickering screen.
Avoid these common mistakes:
Ignoring Early Symptoms
Minor flickering can indicate the beginning of a larger hardware issue. Seeking professional diagnosis early may prevent further damage.
Applying Excessive Pressure
Pressing firmly on the display or hinge can damage the flexible OLED layers.
Continuing to Fold the Phone Excessively
If flickering appears only while folding or unfolding, repeated movement may worsen a damaged display cable.
Using Low-Quality Chargers
Cheap charging accessories can contribute to unstable power delivery and should be avoided.
Attempting DIY Screen Replacement
Foldable displays require specialized tools and techniques. Improper removal may permanently damage the screen or hinge assembly.
Best Practices for Long-Term Display Health
Keeping your Galaxy Z Flip 6 in excellent condition involves regular care and responsible usage.
Follow these recommendations:
Clean the screen using a microfiber cloth.
Avoid exposing the phone to sand, dust, or debris around the hinge.
Install software updates promptly.
Use protective cases designed specifically for foldable devices.
Avoid dropping the phone or placing heavy objects on it.
Charge using certified accessories.
Have unusual display behavior inspected early.
Small preventative measures can greatly extend the lifespan of your foldable smartphone.
Frequently Asked Questions
1. Why is my Samsung Galaxy Z Flip 6 screen flickering?
Screen flickering may be caused by software bugs, display cable damage, OLED panel failure, impact damage, water exposure, or motherboard faults. A professional diagnosis is the best way to identify the exact cause.
2. Can software updates fix screen flickering?
Yes. If the issue is related to firmware or graphics drivers, updating the operating system or installing the latest Samsung One UI update may resolve the problem without hardware repairs.
3. Does a flickering screen always mean the display must be replaced?
No. Some cases are caused by loose connectors, software conflicts, or damaged flex cables. Only a proper inspection can determine whether a full display replacement is necessary.
4. Is it safe to continue using a flickering Galaxy Z Flip 6?
While the phone may still function, continued use could worsen an underlying hardware problem. It is advisable to have the device inspected as soon as possible.
5. Can water cause intermittent screen flickering?
Yes. Moisture can corrode internal connectors or damage sensitive electronic components, resulting in intermittent or persistent display issues.
6. How can I reduce the risk of future screen problems?
Use a protective case, avoid unnecessary stress on the hinge, keep software updated, charge with certified accessories, and seek professional repairs whenever problems appear.
Additional Resources
For official Samsung device support, software updates, and troubleshooting guides, visit the Samsung Support website:
The Samsung Galaxy Z Flip 6 is an impressive example of modern foldable smartphone engineering, combining cutting-edge display technology with a compact, stylish design. However, its advanced construction also means that display issues require careful diagnosis and professional attention.
Throughout this guide, we’ve explored the most common causes of fixing flickering issues on Samsung Galaxy Z Flip 6 screen, from software glitches and firmware conflicts to damaged OLED panels, worn flex cables, loose connectors, and motherboard faults. Understanding these potential causes is the first step toward choosing the correct repair solution.
The most important takeaway is that not every flickering display requires a complete screen replacement. A systematic diagnostic process can identify whether the issue is software-related, connector-related, or caused by a more serious hardware failure. Early intervention often prevents minor problems from developing into expensive repairs.
If your Galaxy Z Flip 6 begins flashing, dimming, or displaying intermittent flickering, avoid applying pressure to the screen or attempting complex DIY repairs. Instead, back up your data, perform basic software troubleshooting, and consult experienced technicians who specialize in foldable devices.
With genuine parts, professional repair techniques, and proper preventative care, your Galaxy Z Flip 6 can continue delivering the premium foldable experience it was designed to provide for years to come.
David from Sydney CBD Repair Centre
David from Sydney CBD Repair Centre – The Best place to fix mobile phones as 7 Years In A Row! Top Mobile Phone Repair In Sydney. More than 2000 Positive Reviews on Google and Same Day Repairs.
We take pride in delivering exceptional repair services for all major phone brands including Apple, Samsung, Google, and more. Our expert technicians use only genuine parts and offer 90 days warranty on repairs. Located in the heart of Sydney CBD, we’re your one-stop solution for all mobile device repairs.
Our commitment to excellence has earned us the trust of thousands of satisfied customers. Whether it’s a cracked screen, battery replacement, or water damage repair, we handle it all with professional care and expertise. Walk in today and experience why we’re Sydney’s #1 choice for mobile phone repairs.
Visit us for:
✓ Same Day Express Repairs
✓ Genuine Parts Guarantee
✓ Professional Technicians
✓ Competitive Pricing
✓ 2000+ 5-Star Google Reviews
✓ 7-Time Award Winner for Best Phone Repairs
Sydney CBD Repair Centre – Where Quality Meets Reliability.
FLIP IT RIGHT! Samsung Galaxy Z Flip 7 Inner Screen Professional Restoration Process – Ultimate 12-Step Expert Guide
Introduction
Foldable smartphones have transformed the mobile industry, and the Samsung Galaxy Z Flip 7 continues this evolution with a slimmer design, stronger hinge, brighter display, and improved durability. Despite these advancements, the inner foldable screen remains one of the most sophisticated—and delicate—components inside any smartphone.
The Samsung Galaxy Z Flip 7 Inner Screen Professional Restoration Process is far more complex than replacing the display on a conventional smartphone. Every layer of the folding display is engineered to flex thousands of times while maintaining brilliant image quality and responsive touch performance. Even a tiny mistake during repair can permanently damage the OLED panel, hinge mechanism, flexible display cable, or protective layers.
That’s why professional restoration matters.
Experienced repair technicians follow carefully controlled procedures using specialized tools, genuine replacement parts, precision adhesives, and extensive diagnostic testing. Every stage is designed to restore the device as closely as possible to its original factory condition while minimizing risks.
In this guide, you’ll learn exactly how professionals restore the Galaxy Z Flip 7 inner display, why each repair step is important, and how expert workmanship helps maximize the lifespan of your foldable smartphone.
The Galaxy Z Flip 7 features one of Samsung’s most advanced flexible OLED displays. Unlike traditional smartphones, its screen bends repeatedly along a precisely engineered hinge while maintaining exceptional image quality.
Several advanced technologies work together to make this possible:
Dynamic AMOLED display technology
Ultra Thin Glass (UTG)
Flexible OLED panel
Protective polymer layers
Precision hinge assembly
Fold-resistant display adhesive
Integrated touch digitizer
Under-display components
Unlike a flat smartphone display, every layer inside the Z Flip 7 must move together perfectly every time the phone opens or closes.
The Role of Ultra Thin Glass
Ultra Thin Glass provides a balance between flexibility and durability. Although it is called “glass,” it behaves differently from the glass used on conventional smartphones.
Its benefits include:
Improved scratch resistance
Better display clarity
Enhanced touch sensitivity
More natural folding characteristics
Reduced crease visibility
However, UTG remains vulnerable to:
Sharp impacts
Excessive pressure
Twisting forces
Improper repair techniques
This is one reason the Samsung Galaxy Z Flip 7 Inner Screen Professional Restoration Process should always be handled by trained technicians.
Flexible OLED Technology
Samsung’s flexible OLED panels deliver:
Feature
Benefit
Deep blacks
Higher contrast
Bright colors
Better viewing experience
High refresh rate
Smooth scrolling
Low power consumption
Longer battery life
Thin construction
Enables folding design
The OLED layer is exceptionally fragile. During professional repair, technicians avoid direct pressure on the display because even slight deformation can permanently damage the pixels.
Why the Hinge Matters
Many people assume the display alone causes problems. In reality, the hinge and display function as one integrated system.
The hinge controls:
Folding angle
Opening resistance
Display cable movement
Internal cable protection
Stress distribution
If the hinge becomes bent or contaminated with debris, it can place uneven stress on the flexible display, eventually leading to cracks or display failure.
Professional technicians always inspect the hinge before installing a replacement screen.
Integrated Flexible Cables
Unlike standard smartphones, the Galaxy Z Flip 7 uses flexible ribbon cables that constantly move as the phone opens and closes.
These cables connect:
Main OLED panel
Touch digitizer
Display controller
Internal sensors
Repeated bending makes these cables one of the most sensitive parts of the device.
During restoration, technicians carefully route replacement cables through the hinge area while ensuring they maintain the correct bending radius. Improper positioning can dramatically shorten the lifespan of the repair.
Why Foldable Displays Require Specialized Repairs
Repairing a foldable phone is very different from replacing a standard smartphone screen.
Professional repair shops use specialized equipment, including:
Temperature-controlled heating plates
Precision opening tools
Anti-static workstations
Display alignment fixtures
High-strength flexible adhesives
Microscope inspection systems
OLED testing equipment
These tools help prevent accidental damage while ensuring every replacement component is installed accurately.
Common Causes of Inner Screen Failure
Although Samsung has significantly improved durability, several issues can still affect foldable displays:
Accidental Drops
Even a minor drop can:
Crack the OLED panel
Damage Ultra Thin Glass
Shift hinge alignment
Loosen internal display layers
Pressure Damage
Placing heavy objects on the folded phone can create excessive stress at the crease, leading to:
Dead pixels
Touch failure
Internal display fractures
Dust and Debris
Tiny particles entering the hinge may:
Increase friction
Affect smooth folding
Place uneven pressure on the display
Accelerate internal wear
Liquid Exposure
Although water resistance has improved, moisture can still affect:
Display connectors
OLED circuitry
Touch controller
Internal adhesive strength
Natural Wear
Every fold creates microscopic stress within the flexible display. Over years of use, this repetitive movement can contribute to:
Crease deepening
Reduced touch responsiveness
Pixel degradation
Ribbon cable fatigue
Understanding these failure mechanisms helps explain why the Samsung Galaxy Z Flip 7 Inner Screen Professional Restoration Process requires much more than simply swapping one display for another.
Professional Diagnostic Process Before Restoration
Before any technician removes a single screw, a complete diagnostic inspection is performed. This ensures that the problem truly lies with the inner display and not another component, such as the motherboard, battery, display cable, or hinge assembly.
Professional diagnostics reduce unnecessary repairs and help identify hidden damage caused by drops, impacts, or liquid exposure.
Typical inspections include:
Visual inspection of the OLED panel
Checking the folding hinge for smooth movement
Testing touch responsiveness across the entire screen
Inspecting for dead pixels or color distortion
Examining the crease for abnormal wear
Verifying brightness consistency
Testing cameras and sensors
Checking wireless charging and NFC
Battery health evaluation
Internal moisture indicator inspection
Identifying Hidden Damage
Not every damaged screen shows obvious cracks.
Technicians often encounter problems such as:
Hidden Issue
Possible Cause
Green or pink display lines
OLED layer damage
Black spots
Internal pixel failure
Flickering display
Ribbon cable damage
Partial touch response
Digitizer malfunction
Random shutdowns
Internal impact damage
Screen flashing
Display controller fault
Professional diagnostic equipment helps determine whether only the display requires replacement or if additional components need servicing.
Any debris left behind may create pressure points that affect the new OLED panel.
Step 9 – Installing the Replacement Inner Screen
The new flexible display is aligned using precision fixtures.
Proper alignment ensures:
Uniform bezels
Smooth folding
Correct hinge clearance
Accurate cable routing
Reliable adhesive bonding
This stage requires exceptional attention to detail because even a slight misalignment can impact long-term durability.
Step 10 – Applying Professional Adhesive
Foldable displays rely on flexible, high-strength adhesives designed to withstand repeated opening and closing.
Professional adhesives provide:
Strong bonding
Controlled flexibility
Temperature resistance
Long-term durability
Improved structural integrity
Improper adhesive application can lead to lifting edges, display movement, or premature repair failure.
Step 11 – Reconnecting Components
After the new display is secured, technicians reconnect:
Display ribbon cables
Battery connector
Wireless charging assembly
Cameras
Antennas
Internal sensors
Every connection is inspected under magnification to ensure it is fully seated.
Step 12 – Reassembly
The smartphone is carefully reassembled in the reverse order.
Key tasks include:
Reinstalling internal shields
Tightening screws to appropriate torque
Replacing waterproof adhesive seals
Reattaching the rear housing
Cleaning fingerprints and residue
A meticulous reassembly helps restore both functionality and structural integrity.
Quality Control and Functional Testing
A professional restoration is not complete once the phone is reassembled. Extensive testing confirms that every major feature works correctly before the device is returned to the customer.
Technicians typically verify:
Test
Purpose
Inner display brightness
Uniform illumination
Touch responsiveness
Accurate multi-touch input
Fold and unfold operation
Smooth hinge movement
Fingerprint sensor
Reliable biometric recognition
Cameras
Proper image capture
Speakers and microphones
Clear audio performance
Charging
Stable wired and wireless charging
Connectivity
Wi-Fi, Bluetooth, and cellular performance
Proximity and ambient light sensors
Correct automatic behavior
These quality control procedures help ensure the Samsung Galaxy Z Flip 7 Inner Screen Professional Restoration Process delivers a dependable repair that performs as expected in everyday use.
Display Calibration After the Samsung Galaxy Z Flip 7 Inner Screen Professional Restoration Process
Installing a new display is only part of a successful repair. The final stage is calibration and functional optimization to ensure the replacement screen performs as intended.
Professional technicians carry out several checks to verify that the phone delivers a premium user experience.
Touch Sensitivity Testing
The Galaxy Z Flip 7 relies on a highly responsive touch digitizer. After installation, technicians test the entire surface of the display, paying particular attention to the folding crease.
Testing includes:
Multi-touch response
Swipe accuracy
Gesture recognition
Edge sensitivity
Keyboard responsiveness
Pressure consistency
Any irregularities are investigated before the repair is considered complete.
Display Quality Inspection
The OLED display is examined under different brightness levels to confirm:
Uniform brightness
Accurate color reproduction
No dead pixels
No flickering
Proper refresh rate
Smooth animations
Professionals also inspect the display from multiple viewing angles to ensure image consistency.
Fingerprint Sensor Verification
If the Galaxy Z Flip 7 uses an integrated biometric system associated with the display assembly, technicians verify that fingerprint recognition remains fast and reliable after the repair.
Checks include:
Fingerprint enrollment
Unlock speed
Authentication accuracy
Multiple-user support
Waterproofing and Adhesive Replacement
Although professional repairs aim to restore the phone’s sealing, it’s important to understand that once a device has been opened, its original factory waterproof certification cannot always be guaranteed.
Professional technicians replace all removed adhesive seals with high-quality equivalents and carefully reseal the device.
The sealing process includes:
Removing old adhesive
Cleaning all contact surfaces
Applying precision-cut replacement adhesive
Even pressure during bonding
Appropriate curing time
Proper sealing helps improve resistance to dust and accidental moisture exposure.
Genuine vs. Aftermarket Inner Displays
One of the most important decisions during the Samsung Galaxy Z Flip 7 Inner Screen Professional Restoration Process is selecting the replacement display.
Comparison Table
Feature
Genuine Display
Quality Aftermarket Display
Color Accuracy
Excellent
Good to Very Good
Brightness
Factory Specification
May vary
Refresh Rate
Full specification
Depends on supplier
Fold Durability
Designed for repeated folding
Varies by manufacturer
Touch Response
Excellent
Usually good
Compatibility
Full
May require adjustments
Longevity
Typically longer
Depends on quality
Manufacturer Support
Yes
Limited
Professional repair centers often recommend genuine parts whenever available because they provide the closest match to the original performance and durability.
Common DIY Mistakes to Avoid
Foldable smartphones are significantly more difficult to repair than conventional devices. Attempting a DIY repair without the proper tools or experience can lead to additional damage.
Common mistakes include:
Using Excessive Heat
Too much heat can damage:
Flexible OLED layers
Plastic display components
Battery
Internal adhesives
Pulling the Screen Too Quickly
Removing the screen without controlled separation may tear:
Ribbon cables
Touch digitizer layers
Flexible OLED panel
Damaging the Hinge
Applying force in the wrong direction can affect hinge alignment, causing uneven folding or additional stress on the new display.
Incorrect Adhesive Application
Poor adhesive installation may result in:
Lifting edges
Dust entering the device
Uneven screen pressure
Reduced durability
Forgetting Battery Isolation
Working on an energized phone increases the risk of electrical shorts and accidental component damage.
Benefits of Choosing Professional Restoration
Professional repairs provide advantages that extend beyond simply replacing a damaged screen.
These include:
Experienced technicians
Specialized equipment
Proper diagnostic testing
High-quality replacement parts
Safe handling of delicate components
Thorough post-repair quality control
Repair warranty
Reduced risk of repeat failures
An experienced technician also identifies hidden issues that may not be visible during a basic inspection, helping prevent future problems.
Tips to Protect Your Galaxy Z Flip 7 Inner Screen
Preventive care can significantly extend the life of your foldable device.
Keep the Hinge Clean
Dust and debris can accumulate around the hinge. Wipe the exterior regularly with a soft microfiber cloth and avoid exposing the phone to sandy or dusty environments whenever possible.
Avoid Excessive Pressure
Do not place heavy objects on the folded phone or keep it in a tightly packed pocket where it may be compressed.
Open and Close the Phone Gently
The hinge is engineered for repeated use, but smooth, controlled opening and closing reduces unnecessary stress on the flexible display.
Use a Protective Case
A case designed specifically for the Galaxy Z Flip 7 can help absorb impacts and protect the frame from accidental drops.
Avoid Extreme Temperatures
Very high or very low temperatures can affect battery performance, adhesives, and display materials. Store and use the phone within the manufacturer’s recommended temperature range.
Address Minor Issues Early
If you notice flickering, touch delays, unusual noises from the hinge, or visible lines on the display, have the device inspected promptly. Early intervention may prevent more extensive damage.
Frequently Asked Questions
1. How long does a Galaxy Z Flip 7 inner screen replacement usually take?
Most professional repair centers can complete the repair on the same day if replacement parts are in stock. More complex cases involving hinge or motherboard damage may require additional time.
2. Can the inner screen be repaired without replacing the entire display?
In most cases, damage to the flexible OLED panel requires replacement of the complete display assembly because the layers are permanently bonded together.
3. Will the phone fold normally after a professional repair?
Yes. When the repair is performed correctly with proper alignment and quality components, the phone should open and close smoothly.
4. Is it safe to keep using a phone with a cracked inner screen?
No. Continued use may allow cracks to spread, reduce touch responsiveness, and expose internal components to dust or moisture.
5. Does replacing the inner screen improve touch performance?
If the original display suffered from touch issues caused by physical damage, a professionally installed replacement should restore normal responsiveness.
6. How can I make my foldable display last longer?
Use a protective case, avoid excessive pressure, keep the hinge clean, and have any developing issues inspected by qualified technicians before they worsen.
Conclusion
The Samsung Galaxy Z Flip 7 Inner Screen Professional Restoration Process is a precise procedure that combines advanced diagnostic techniques, specialized tools, skilled workmanship, and rigorous quality control. Unlike traditional smartphone repairs, restoring a foldable display requires careful attention to the flexible OLED panel, Ultra Thin Glass, hinge mechanism, ribbon cables, and adhesive system.
Choosing a professional repair service helps ensure the new display is installed accurately, calibrated correctly, and thoroughly tested before the device is returned. With high-quality replacement parts and experienced technicians, your Galaxy Z Flip 7 can regain its smooth folding action, vibrant display quality, and dependable touch performance.
By following good maintenance practices and addressing problems early, you can maximize the lifespan of your foldable smartphone and continue enjoying its innovative design for years to come.
Learn More
For additional information about caring for Samsung Galaxy devices and foldable technology, visit the official Samsung Support website: https://www.samsung.com/support/
David from Sydney CBD Repair Centre – The Best place to fix mobile phones as 7 Years In A Row! Top Mobile Phone Repair In Sydney. More than 2000 Positive Reviews on Google and Same Day Repairs.
We take pride in delivering exceptional repair services for all major phone brands including Apple, Samsung, Google, and more. Our expert technicians use only genuine parts and offer 90 days warranty on repairs. Located in the heart of Sydney CBD, we’re your one-stop solution for all mobile device repairs.
Our commitment to excellence has earned us the trust of thousands of satisfied customers. Whether it’s a cracked screen, battery replacement, or water damage repair, we handle it all with professional care and expertise. Walk in today and experience why we’re Sydney’s #1 choice for mobile phone repairs.
Visit us for:
✓ Same Day Express Repairs
✓ Genuine Parts Guarantee
✓ Professional Technicians
✓ Competitive Pricing
✓ 2000+ 5-Star Google Reviews
✓ 7-Time Award Winner for Best Phone Repairs
Sydney CBD Repair Centre – Where Quality Meets Reliability.
The Myth or The Reality: Can Rice Really Save Your Water Damaged Phone? Shocking Truth + 7 Expert Facts
Introduction: Why This Phone Repair Myth Won’t Die
If you’ve ever dropped your phone in water, chances are someone confidently told you to “put it in rice.” It sounds simple, cheap, and comforting. But here’s the thing—when it comes to a water damaged phone, advice needs to be accurate, not just popular.
So, is rice a miracle fix, or is it just another tech myth that refuses to go away? In this article, we’ll separate fact from fiction using real repair experience, science, and expert insight. By the end, you’ll know exactly what to do—and what not to do—when water strikes your device.
When a phone comes into contact with water, damage begins immediately. Water seeps through speaker grills, charging ports, and tiny gaps around the screen. Once inside, it reaches the motherboard, battery connectors, and delicate microchips.
Even worse, water conducts electricity. If your phone is powered on, short circuits can occur in seconds. That’s why a water damaged phone may appear fine at first, only to fail days later.
Why Water Damage Is More Than Just Moisture
Water isn’t just water. Tap water, seawater, and even rain contain minerals and impurities. These residues stay behind after drying and slowly corrode internal components. Over time, corrosion eats away at circuits, leading to permanent failure.
The rice trick likely started as a household workaround. Rice absorbs moisture from the air, so people assumed it could pull water out of electronics. Early mobile phones were also less complex, making survival more likely by sheer luck.
Over time, the advice spread online, becoming the go-to solution for a water damaged phone.
Why People Still Believe in Rice
Let’s be honest—it’s easy. Rice is cheap, available, and feels proactive. Plus, sometimes phones do turn back on after sitting in rice. That coincidence reinforces the belief, even when rice had little to do with the recovery.
Myth or Reality: Does Rice Really Work?
Scientific View on Rice and Moisture
Here’s the reality: rice absorbs moisture slowly and only from the surrounding air. It does not actively pull liquid out of enclosed phone components. Professional desiccants used in repair labs are far more effective and controlled.
According to corrosion studies referenced by electronics experts at iFixit, passive drying methods like rice do little to prevent internal oxidation.
Real-World Repair Data from Technicians
From years of hands-on repair experience, technicians consistently see phones that sat in rice still suffering corrosion. In fact, many arrive too late—beyond economical repair—because rice delayed proper treatment.
So, verdict time: Myth. Rice does not reliably fix a water damaged phone.
Risks of Using Rice on a Water Damaged Phone
Dust, Starch, and Long-Term Corrosion
Rice grains shed dust and starch. These particles can lodge in charging ports and speakers, creating new problems. Worse, rice does nothing to remove mineral residue already left by water.
While you’re waiting, corrosion continues quietly.
What Actually Works for Water Damaged Phones
Immediate Steps You Should Take
If your phone gets wet:
Turn it off immediately.
Do not charge it.
Remove the SIM tray if possible.
Gently dry the exterior with a cloth.
These steps reduce short-circuit risk while you prepare for professional help.
Professional Drying and Diagnostics
Professional repair centers use ultrasonic cleaning, controlled heat chambers, and microscopic inspection. These methods remove corrosion and moisture safely.
For a water damaged phone, speed matters. The sooner it’s cleaned internally, the higher the survival rate.
Rice vs Professional Repair: A Comparison
Method
Effectiveness
Risk Level
Long-Term Reliability
Rice
Very Low
Medium
Poor
Air Drying
Low
Medium
Poor
Professional Repair
High
Low
Excellent
Common Mistakes After Water Damage
Turning the phone back on too soon
Charging it “to test”
Using a hairdryer (heat pushes moisture deeper)
Trusting rice instead of diagnostics
Each mistake increases the chance of permanent failure.
FAQs About Rice and Water Damaged Phones
1. Can rice fix a water damaged phone overnight?
No. Rice cannot remove internal moisture or corrosion effectively.
2. Is silica gel better than rice?
Yes, slightly—but it’s still not a replacement for professional cleaning.
3. Why did my phone work after rice once?
Likely coincidence. Damage may still appear later.
4. How long before corrosion starts?
Corrosion can begin within hours.
5. Should I charge my phone after drying it?
No. Charging can short internal circuits.
6. Is professional repair worth it for water damage?
Absolutely, especially for newer or high-value devices.
Conclusion: Final Verdict on Rice and Water Damage
So, myth or reality? It’s a myth—plain and simple. Rice might feel helpful, but it’s unreliable and often delays proper treatment. When dealing with a water damaged phone, informed action beats folk remedies every time.
If your phone matters to you, skip the rice and seek expert care fast. Your device—and your data—will thank you.
David from Sydney CBD Repair Centre – The Best place to fix mobile phones as 7 Years In A Row! Top Mobile Phone Repair In Sydney. More than 2000 Positive Reviews on Google and Same Day Repairs.
We take pride in delivering exceptional repair services for all major phone brands including Apple, Samsung, Google, and more. Our expert technicians use only genuine parts and offer 90days warranty on repairs. Located in the heart of Sydney CBD, we’re your one-stop solution for all mobile device repairs.
Our commitment to excellence has earned us the trust of thousands of satisfied customers. Whether it’s a cracked screen, battery replacement, or water damage repair, we handle it all with professional care and expertise. Walk in today and experience why we’re Sydney’s #1 choice for mobile phone repairs.
Visit us for:
✓ Same Day Express Repairs
✓ Genuine Parts Guarantee
✓ Professional Technicians
✓ Competitive Pricing
✓ 2000+ 5-Star Google Reviews
✓ 7-Time Award Winner for Best Phone Repairs